Pastel Tools & Techniques
If you like working with color, you’ll love pastel! It’s easy to use, and you don’t have to worry about drying times, toxicity, or odors. And pastel is very versatile—it is both a painting and a drawing medium! Although you won’t need many supplies to work in pastel, you will want a large assortment of colors. You can’t mix pastel colors on a palette (as you would with paint) before applying them to the support—you must layer and blend them directly on the paper itself. But pastels are available in thousands of colors, and since they never “expire,” you can buy as many colors as you like and keep them indefinitely. If you’re a beginner, buying sets is a good way to start building your collection; you can always purchase additional individual pastels later.
PASTELS
There are two styles of pastel available: chalk-based pastel and oil pastel. The lessons in this book use all three types of chalk-based pastel—hard, clay-based sticks; soft pastel sticks; and pastel pencils. Hard pastel is good for underpainting and filling in large areas, whereas the buttery consistency of soft pastel makes it ideal for soft blends and smooth textures. Pastel pencils provide control and brilliant color, making them a good choice for detail work. Artist’s grade pastel contains more pigment and less binder than the inexpensive student’s grade, making artist’s grade more vibrant and less likely to crumble.

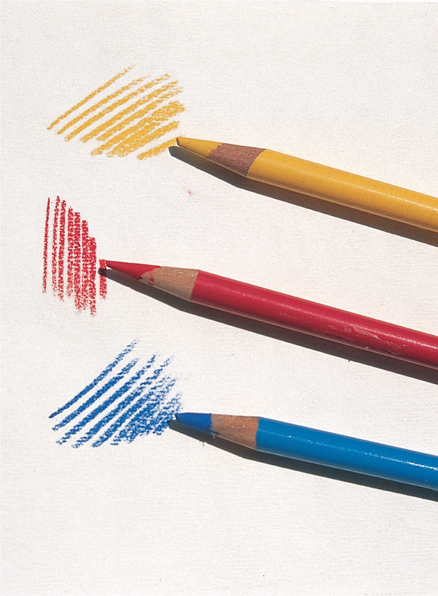
CHOOSING PASTELS Pictured from left to right are a soft pastel, a pastel pencil, and a hard pastel.
PAINTING SURFACES
The paper you work on (your support) contributes greatly to the effects you achieve. There are three important aspects to consider when you’re choosing a support: The tooth (or the grain), the tone, and the color. The tooth can be rough or smooth; the tone can be dark or light; and the color can be cool, warm, or neutral. (For more on color, see William F. Powell’s Color and How to Use It [AL05] in Walter Foster’s Artist’s Library series.) Rough papers are best for thick layers of pigment, whereas smooth papers have less tooth, so they are better for soft blends and detail work. The tone and the color of the support you choose will affect the mood of your subject; cool, dark papers can evoke a dramatic feeling, whereas lighter, warmer papers may create a more light-hearted feeling.

CHOOSING A SUPPORT Don’t let the staggering array of available supports overwhelm you; you can limit your selection somewhat by sticking to archival-quality papers, which are specially treated to retain the brilliance of the pigment you apply. This way your work will remain as vibrant as when you first created it.
PREPARING TO PAINT

ORGANIZING PASTELS Pictured above is a plywood tray for storing and organizing pastels. Each section is lined with foam to help keep the pastel sticks clean and prevent them from rolling around and breaking. There’s room on the tray for other tools and space for new colors.
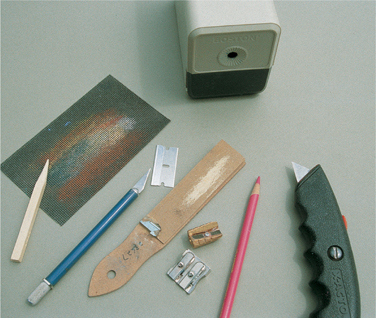
SHARPENING TOOLS To sharpen soft pastel sticks, you can use a sandpaper pad or a drywall screen. When sharpening hard pastel sticks, you may prefer to use a utility knife. Most pastel pencils can be sharpened with a small handheld pencil sharpener or an electric sharpener.
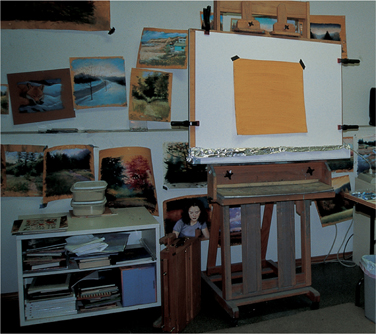
SETTING UP A WORKSPACE Arrange your workspace so that everything you need is nearby and easily accessible. If you are using an easel, you may want to create a “trap” underneath your easel to collect any excess pastel dust. If you position your support vertically, the pastel dust will fall into the trap instead of onto the floor. For health and safety reasons, keep your workspace well ventilated so you don’t breathe in the pastel dust.
PASTEL TECHNIQUES
Unlike painting with a brush, working with pastel allows you to make direct contact with the support. Therefore, you have much more control over the strokes you make, the way you blend the pigment, and the final effects. Once you learn and practice the techniques shown here, you’ll know which ones will give you the results you desire.

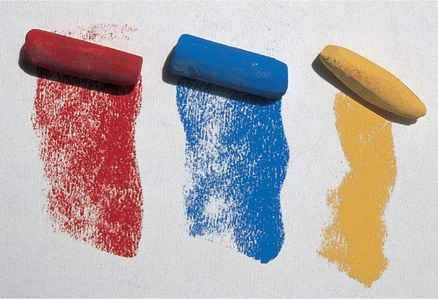
FIRM STROKES Use the ends of pastel sticks to create thick, bold strokes. The more pressure you apply, the thicker the stroke will be. These strokes are ideal for rendering large textured areas, such as fields of grass.
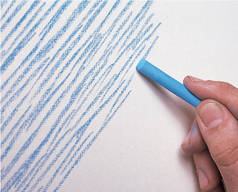
SIDE STROKES To quickly fill in broad areas of color, drag the side of a pastel stick across the support. This technique is great for skies and water.
PENCIL LINES Pastel pencils offer the most line control, as they are less likely to crumble or break than other types of pastel. If sharp, they can produce a very fine line, which is ideal for creating details or textures, such as fur or hair.
HANDLING PASTEL
The way you hold and manipulate the pastel stick or pencil will affect the resulting stroke. Some grips will give you more control than others, making them better for detail work, and some will allow you to apply more pigment to the support to create broad coverage. And the pressure you exert will affect the intensity of the color and the weight of the line you create. Experiment with each of the grips described below to discover which are most comfortable and effective for you.
LINEAR STROKES For linear strokes, grip a pastel stick toward the back end, and use your thumb and index finger to control the strokes. This grip is ideal for creating fine lines and details.
BROAD STROKES Place a pastel flat on the paper and slide it back and forth to create broad linear strokes. This grip is perfect for covering large areas and quickly creating backgrounds.
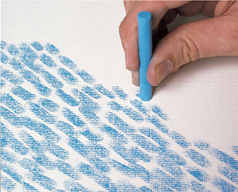
ROUND STROKES Turn a pastel stick on its end and grip it toward the front to create short, rounded strokes. This grip is perfect for creating texture quickly in large areas.
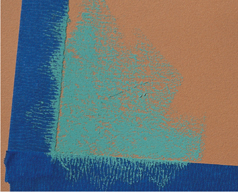
USING TAPE Use artist’s tape to create straight, even edges. Secure the tape to your support, and apply the pastel as you desire. Then peel off the tape to reveal perfectly straight edges.
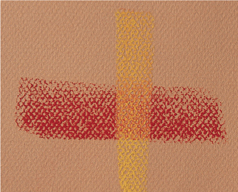
GLAZING Create a glaze by layering one color over another. Use the length of a pastel stick with minimal pressure to skim over the paper lightly. The result is a new hue—a smooth blend of the two colors.
PATTERNS To create textures or patterns for fabric or clothing, first lay down a solid layer of color using the side of a pastel stick or pencil. Then use the point of a pastel pencil to draw a pattern.

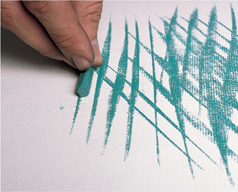
CROSSHATCHING To crosshatch, layer parallel lines over one another in opposite directions. Try crosshatching strokes of the same color for texture; use several different colors for interest.

POINTILLISM By using a series of different colored dots, called “pointillism,” you can create a rougher, more textured blend. When viewed from a distance, the dots seem to merge, creating one color.
REMOVING PIGMENT When you need to remove color from a given area, use a kneaded eraser to pick up the pigment. The more pressure you apply, the more pigment will be removed. Keep stretching and kneading the eraser to expose clean surfaces.
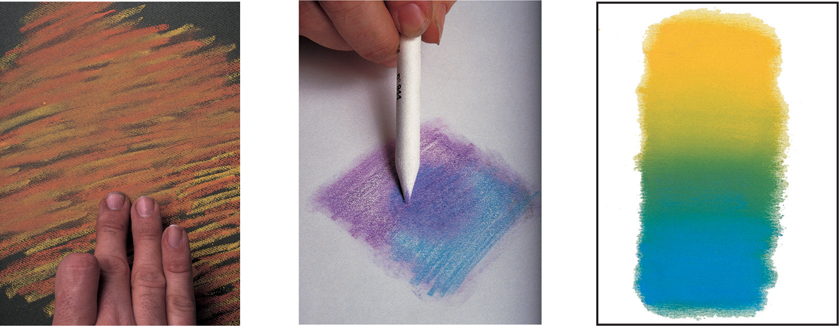
BLENDING PASTEL
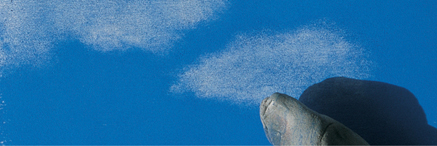
There are many ways to blend pastel. Smooth, even blends are easy to achieve with a brush, rag, or your finger. As shown below left, using your fingers gives you the softest blend and the most control. You also can use a blending stump or tortillon to soften fine lines and details (below center). Another method is to place two or more soft pastel colors next to each other on the support, blending the area where they meet to create a gradation (below right).