Oil Painting Techniques
There are three basic approaches to creating an oil painting. One method is to tone the entire canvas with a layer of transparent color (an imprimatur), and then build up the painting with a series of thin layers of color (glazes) on top of the initial color. Another approach involves building up the layers of the painting from dark to light or light to dark; for example, starting by blocking in all the darkest values, then adding the midvalues, and finishing with the lightest values. A third approach is called alla prima (Italian for “at once”), wherein all the paint is applied in a single painting session; the opaque colors are laid in essentially the same way they will appear in the final painting.
BASIC TECHNIQUES FOR ANY METHOD
Because oil paint is such a versatile medium, you’ll find that you can use an array of painting techniques with any of the three methods described above. Below are examples of the most frequently applied techniques. Your brush and technique selections will influence the effects you can achieve, so try using different brushes as you begin to experiment with these techniques.
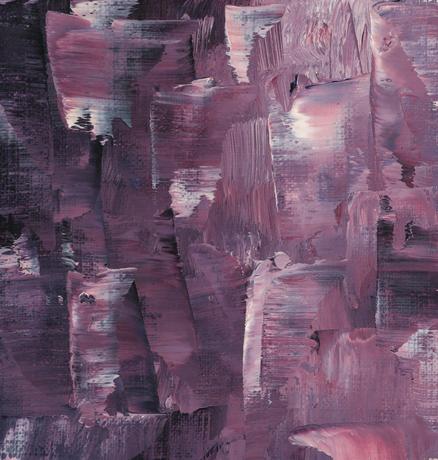
PAINTING THICKLY Load a brush or a painting knife with thick, opaque paint and liberally apply the color to your canvas. Use this technique to build heavy, buttery layers of paint that stand up in peaks on the canvas, creating physical texture.
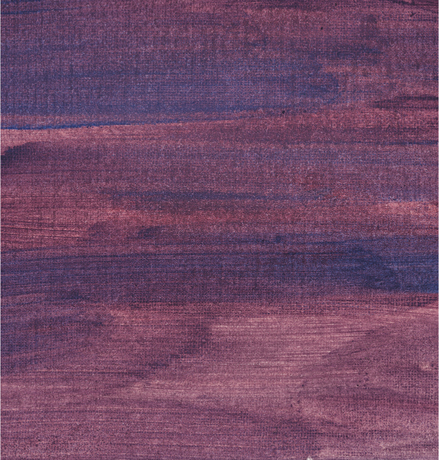
THIN PAINT Dilute your color with thinner, such as turpentine or a turpentine substitute, and apply the paint in soft, even, transparent strokes. This technique is similar to painting with watercolor; but rather than thinning the paint with water, you thin it with a solvent.

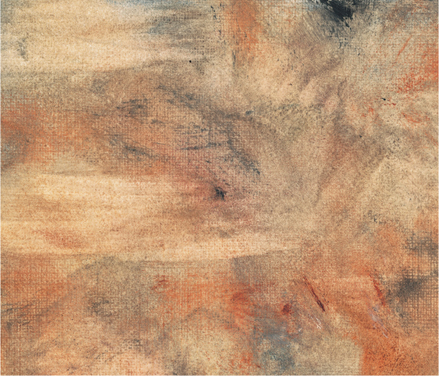
DRYBRUSH Load a brush, wipe off the excess paint, and lightly drag the brush over the painting surface to make irregular, broken brushstrokes. This technique is ideal for creating rough textures, like that of tree bark or slats of wood, as shown in the example above.

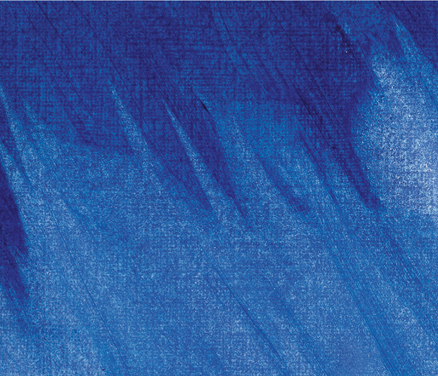
BLENDING Use a clean, dry brush to lightly stroke over wet colors. You also can use a paper towel or a lint-free cloth to softly blend colors on your painting surface. This technique results in soft, gradual blends that are perfect for rendering skies and water.
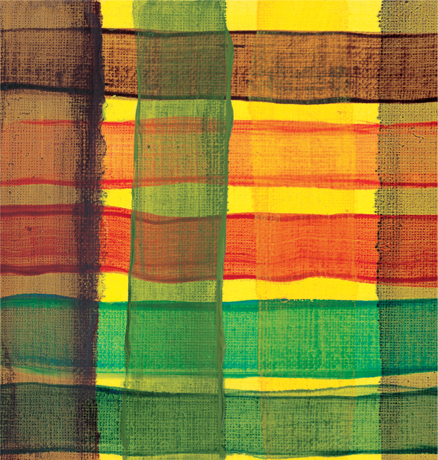
GLAZING Apply a thin layer of transparent color over an existing dry color. Let the paint dry before applying another layer. Note that a new shade is created where two colors overlap in the example above. This layering method produces an interesting visual effect that lets the undercolor show through, creating more depth.

PULLING AND DRAGGING Pull a brush lightly over the canvas to leave patterns of broken color over another, previously applied color. Allowing the undercolor to show through the top layer creates visual interest. Use this technique for a sunset sky or glistening water.

STIPPLING Using the tip of a brush or knife, apply thick paint in irregular masses of small dots to build color.
SCUMBLING Lightly brush semi-opaque color over dry paint, allowing the underlying colors to show through.

SCRAPING Use the tip of a knife to remove wet paint from your support and reveal the underlying color.
WIPING AWAY Wipe away paint with a paper towel or blot with newspaper to create subtle highlights.

SPONGING Apply paint with a natural sponge to create mottled textures for subjects such as rocks or foliage.

SPATTERING Randomly apply specks of color on your canvas by flicking thin paint off the tip of your brush.
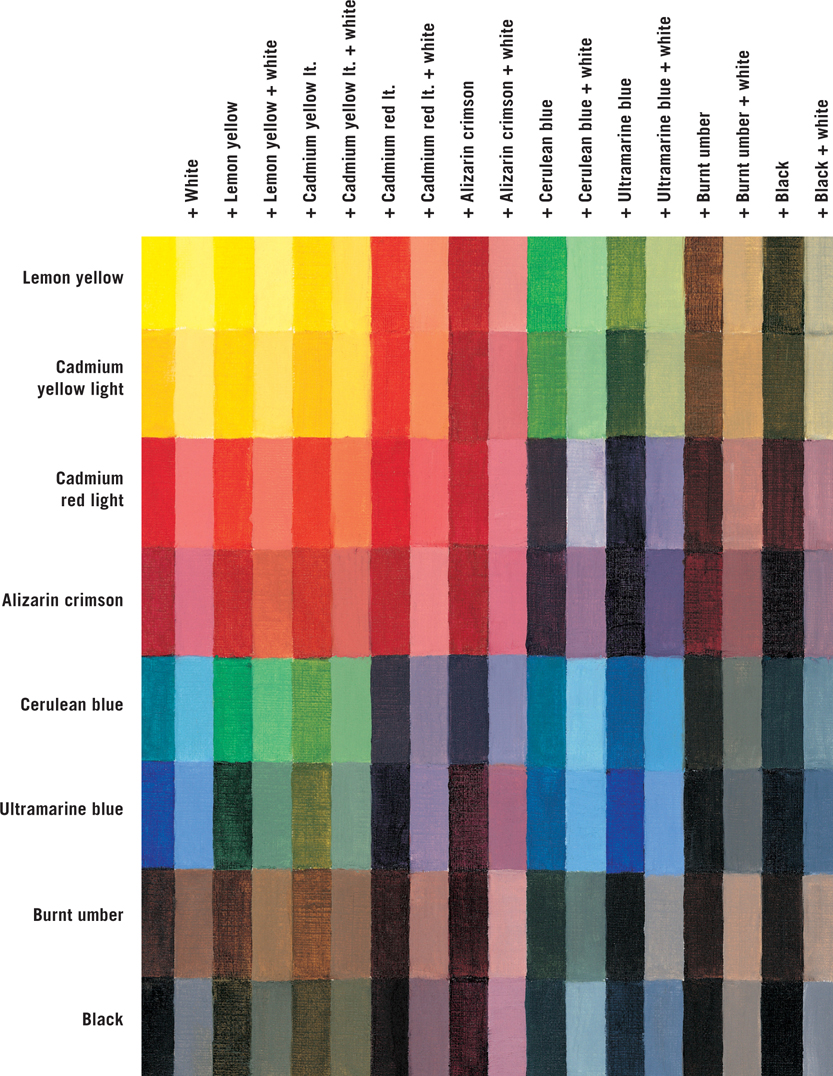
COLOR MIXING BASICS
You can mix just about any color from a few basic tubes of oil paint. By learning a few simple mixing “strategies,” you can mix your own fresh, lively colors. Keep the number of colors on your palette to a minimum to avoid overblending, which makes colors muddy looking. The chart below demonstrates the wide variety of colors, tints (colors plus white), and shades (colors plus black) you can mix from the nine colors in the basic palette on page 2. Again, although the lessons in this book use different palettes, you can refer to this chart to create comparable colors using the beginner’s set. Knowing how to mix your own colors is a liberating and economical skill that you will use again and again!