
Oil Painting Tools & Materials
A very adaptable medium, oil lends itself to a variety of painting styles—from precise, realistic strokes to free-flowing, expressionistic forms. And oil paint is an ideal medium for beginners: the paints dry slowly, allowing you to take your time and correct any mistakes. Oil paints must be thinned with turpentine or another mineral spirit, which makes cleanup more difficult than with water-soluble media, but the wonderful qualities of oil make it worth the extra effort.
OIL PAINTS
Oil paints are available in two distinctive qualities: artist’s grade and student’s grade. Artist’s grade paints contain better-quality pigments and fewer additives, so they last longer and produce more intense color. You don’t need to purchase every color you see; you can mix almost any color from just a few, such as the colors suggested in the beginner’s palette shown below. You can always add to your basic palette later as your skills develop—and your budget allows! Colors vary slightly from brand to brand, so experiment with a few different manufacturers to find which ones you like best.

Cadmium yellow light

Ultramarine blue

Black

Cadmium red light
Titanium white

Cerulean blue
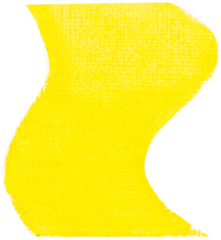
Lemon yellow
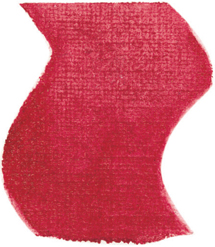
Alizarin crimson
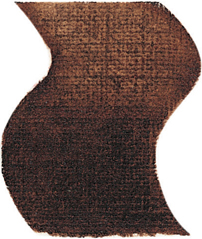
Burnt umber
BASIC PALETTE The nine colors above make a great starter set. The lessons in this book call for additional colors, as every artist has a preferred palette, but with this set, you can mix almost any color you might need. (See “Color Mixing Basics” on page 5.)
PAINTBRUSHES
Oil paintbrushes are made with either natural hair or synthetic bristles, though many oil artists avoid synthetic bristles because they can be affected by the corrosive nature of oil solvents. You’ll find several different brush styles to choose from, but a good starter set for beginning oil painters includes only a few brushes: two flat brushes (one large, one small), two round brushes (one large, one small), one filbert brush, and one liner (or rigger) brush. You always have the option of expanding your brush collection as your skills develop.

FLATS Flat brushes have square corners and are great for applying large amounts of paint. You can use them to make long, soft strokes.
![]()
ROUNDS round brushes come to a point, allowing you to paint fine details and vary the width of your brushstrokes.

FILBERTS Flat with a rounded tip, these brushes combine properties of both a flat and a round brush.
![]()
LINERS Also called “riggers,” these fine brushes are ideal for painting very small details and signing your work.
BRUSH CARE
If you take care of your brushes, they can last for several years. Never allow paint to dry in the hair or bristles; oil is destructive and tends to cling in the bristles next to the ferrule (the metal band). Wash your brushes thoroughly after each painting session, first with thinner (such as turpentine or mineral spirits), then with soap and warm (but not hot!) water. Then reshape the bristles and lay the brushes flat to dry.
PALETTE KNIVES
Palette knives are ideal for mixing colors on the palette, but they also can be used to apply paint to the support (see page 3 for more on supports). Ranging in shapes from diamond to pear, knives are useful for scraping off paint, creating textures, and blending large areas on the canvas. Use smooth, gentle strokes rather than a heavy stirring motion.
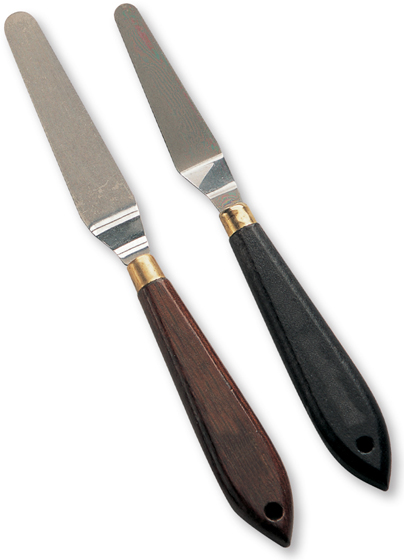
KNIVES The steep angle in the neck of painting knives keeps your hand from getting in the paint.
PAINTING SURFACES
The surface you paint on is called the “support.” You can apply oils to just about any kind of support, as long as it has been primed and sealed so the paints have something to stick to. For beginners, it’s best to purchase either pre-primed canvas board or cotton canvas that has already been stretched and primed. This way, your support is ready to use! Canvases are available in a variety of sizes and textures. A fine, dense weave (which is smooth) has very little texture, or tooth; a coarse, loose weave (which is rough) has more tooth.

CANVAS Oil painting surfaces can include canvas, glass, wood, cardboard, paper, and even metal.
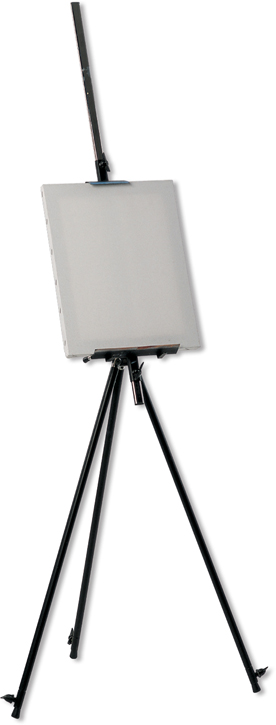
EASEL An easel holds your support in place and allows you to angle the painting surface from flat to vertical. If you have limited space in which to paint, choose a collapsible easel like this. Or try a portable easel, ideal for painting outdoors.
ADDITIVES
Oil painters must use mediums (such as mineral spirits or turpentine) both to thin their paint and to clean their brushes. But additional mediums can be mixed with the paint to alter its qualities—some make the paint softer or thinner, others speed up or slow down the drying time of the paint, and still others add gloss or create a matte appearance.
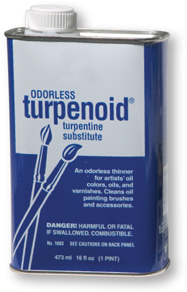
MINERAL SPIRITS Similar to turpentine, this solvent is used to thin paint and also remove it from brushes or from the support. It is much less expensive than turpentine and is almost odorless.
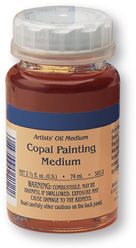
COPAL A resin exuded from tropical trees, copal also acts as a paint thinner, making the oil paint more transparent. It dries faster than linseed oil, but it can darken and crack paints.

LINSEED OIL This additive comes from the seed of the flax plant. Mix a few drops into your oil paint to give it a buttery, glossy quality. Linseed oil also will make the paint more transparent.

FAST-DRYING MEDIUM This medium not only speeds up the drying time of the paint, it also increases gloss and transparency, making it an excellent choice for glazing (see page 4).
MIXING PALETTES
You’ll need a mixing palette for laying out and mixing your oil paints. Your palette should be non-porous so it doesn’t absorb the oil from the paints. Glass or ceramic are ideal—but when you’re just starting out, you might want to try a disposable palette, a pad of waxed-paper sheets that is available at art and craft stores. With this type of palette, you simply tear off the top sheet and throw it away at the end of a painting session—so there is no messy cleanup! It’s also a good idea to always place your colors in the same order on your palette. This way, you won’t waste time searching for the color you want.
PALETTES Mixing palettes come in a variety of materials, from plastic to glass to wood. When selecting a palette, make sure it’s large enough for mixing all the colors you want to use during a painting session.
ADDITIONAL MATERIALS
In addition to the essentials, there are several extra items that you may want to purchase to make your painting experience more convenient. Paper towels or lint-free rags are invaluable; you can use them to clean your tools and brushes or as painting tools to scrub in paint or soften edges. Glass or metal cups are helpful for holding your mediums, and a paint box with several compartments is ideal for organizing your tools.
SETTING UP A WORK STATION
You don’t need a studio like the one shown here or even an easel when you’re just starting out—you can paint at your kitchen table, if you’d like. But be sure you have plenty of space so you can comfortably spread out your materials, and make certain you have good ventilation! Oil paints and solvents (such as turpentine) have strong fumes (some are toxic), so be sure to open a few windows or use a fan if you’re painting indoors. Many artists prefer working under natural light from a window, but artificial light is necessary for painting at night. (Most lamps can be fitted with blue “daylight simulation” bulbs.) And don’t forget a comfortable chair!
