
Organize Your Voice Memos
It’s an easy app to overlook, but Voice Memos is a powerful and indispensable app for making recordings and taking quick voice notes. Apple has detailed instructions on taking and editing voice memos. Here, we’ll focus on the new features.
Voice Memos Basics
Voice Memos is a built-in app that lets you record audio and sync it through iCloud to your other Apple devices. Here are some quick tips on how to use it:
Make a recording: Tap the red record
 button to start recording audio and tap the stop
  button to stop recording (Figure 56).
Figure 56: Recording a voice memo. Play a recording: Recordings are presented in a chronological list, auto-named with the location of the recording, if Voice Memos can ascertain your location when the recording is made. Tap a recording and press the Play
 button.
Share or Edit a recording: Tap a recording in the list and tap the More
 icon to reveal a menu with options to share or edit a recording.
There aren’t many complex edits you can do here, pretty much just trim the beginning and end of the recording by dragging the yellow arrows on each end and tapping Trim (Figure 57).
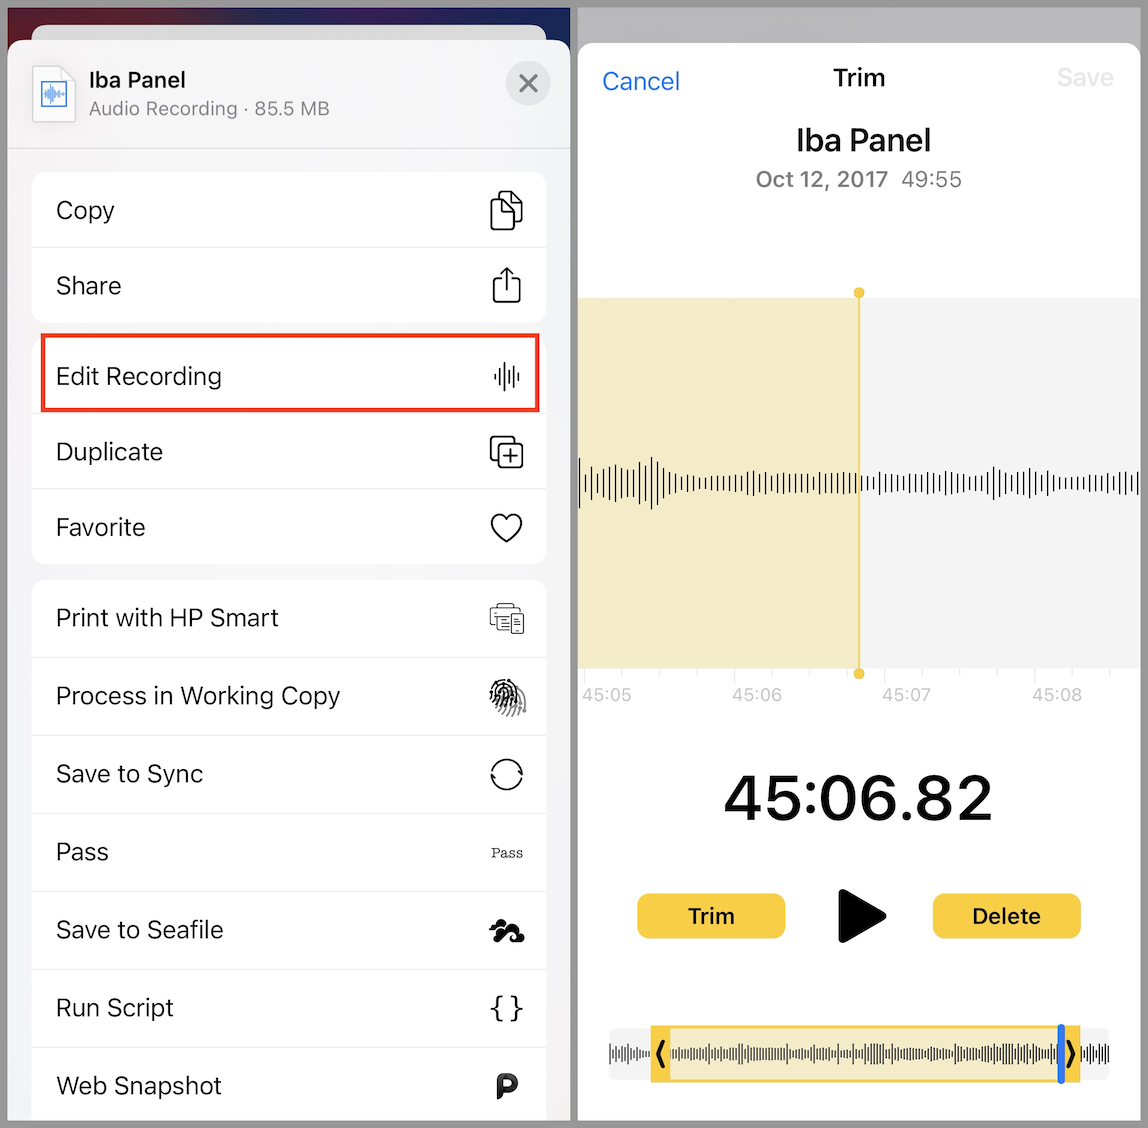
Figure 57: You can make basic edits in the Voice Memos app. Delete a recording: Tap a recording and tap the Trash
 icon.
icon.
Enhance Recordings
Just as you can auto-enhance photos in the Photos app, you can now auto-enhance voice recordings to automatically reduce room noise and room reverberation. Here’s how to do so:
Tap a recording in the list.
Tap the More
icon to bring up the share sheet.Choose Edit Recording.
Tap the magic wand
 icon.
icon.Tap Done.
Organize with Favorites and Folders
Until now, your voice memos were just presented as a big list. iOS 14 and iPadOS 14 add new tools to organize them. The first is setting a recording as a favorite:
Tap a recording in the list.
Tap the More
icon to bring up the Share sheet.- Choose Favorite from the Share sheet.
- The favorited recording will appear in a smart folder. On the iPad, you can see your folders in the sidebar when in landscape mode if you tap the sidebar
 icon (Figure 58). On the iPhone, tap the back
  icon to see your folders.

Smart folders are created automatically, such as for Favorites, Recently Deleted, and Apple Watch recordings. But you can also make your own folder by tapping the New Folder ![]() icon, entering a name, and tapping Save.
icon, entering a name, and tapping Save.
There are two ways to move a voice recording into a folder:
Tap the folder in the list and tap the record
button to create a new recording in that folder.From the All Recordings list, tap Edit, select the recordings to move, tap Move, and choose the destination folder.