|
Life Hacks: Applying Skills to Projects |

Now that you have the core building blocks of your life hack skills, you can move on to applying these skills to life hack projects to create real-world change.
Be the Change
Use your skills to be the change you want to see in the world around you.
Engage Your Community
Get you and your community involved in taking action and making changes to the spaces you live in.
Generation Zone
Research and design skills to create meaningful memories and dialogues between generations.
Support Causes
Focus on the causes that are important to you, and learn how you can use your creativity and Minecraft play to help support them.
Build Cultural Understanding
Explore cultural connections and look at how this understanding can break down barriers, build bridges, and bring communities together.
Create Your Own World
Learn how to apply your skills as a real-world Minecraft creator.
Be the Change
There are lots of really creative ways to build a better world to live in, be that in your community or globally. The important thing to remember is that change always starts with one person—you! Even though it might feel like you can’t do much alone, by taking action about the things that matter to you, you can make a difference in the world around you.

Becoming a Change-Maker
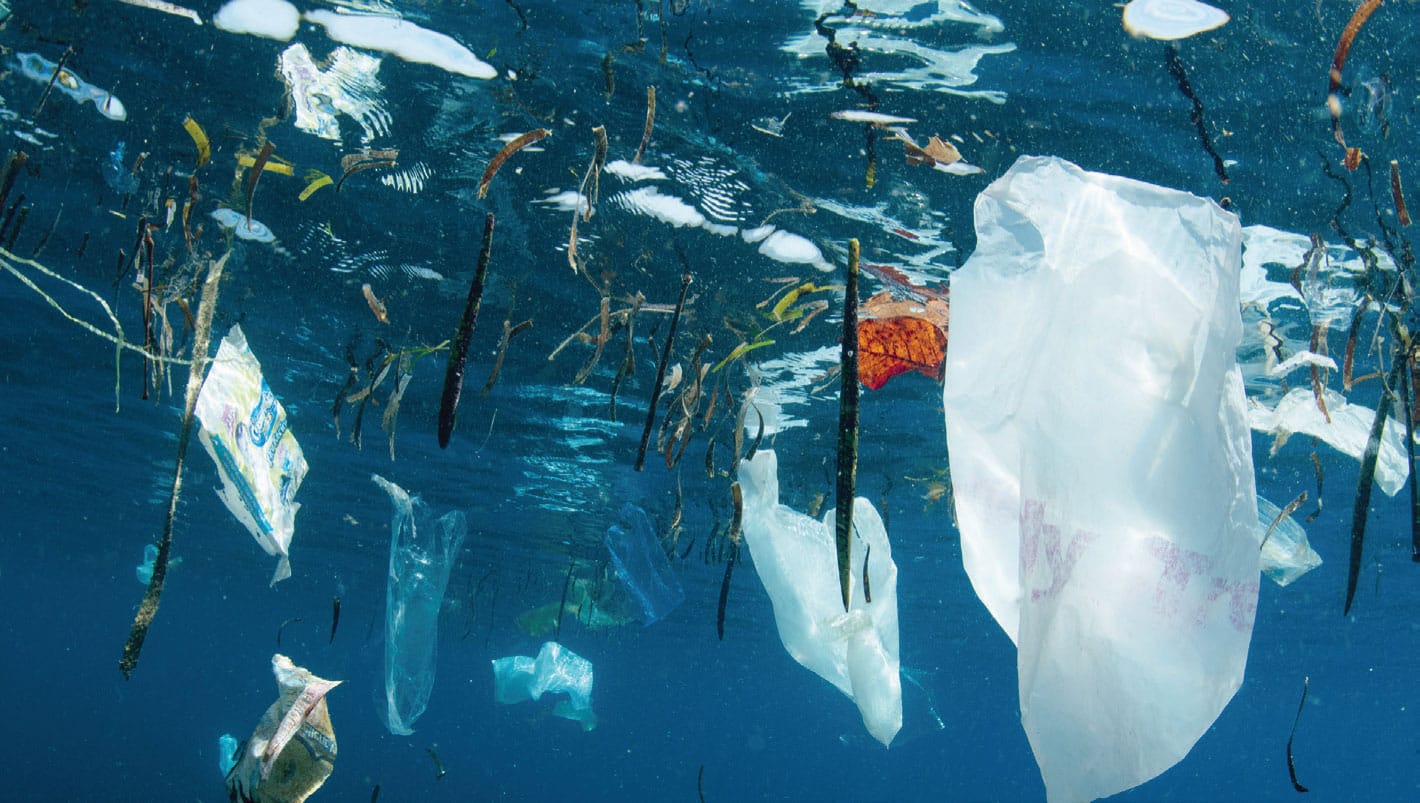
In these labs, you’ll get creative about one of the biggest threats to our planet: plastic pollution.
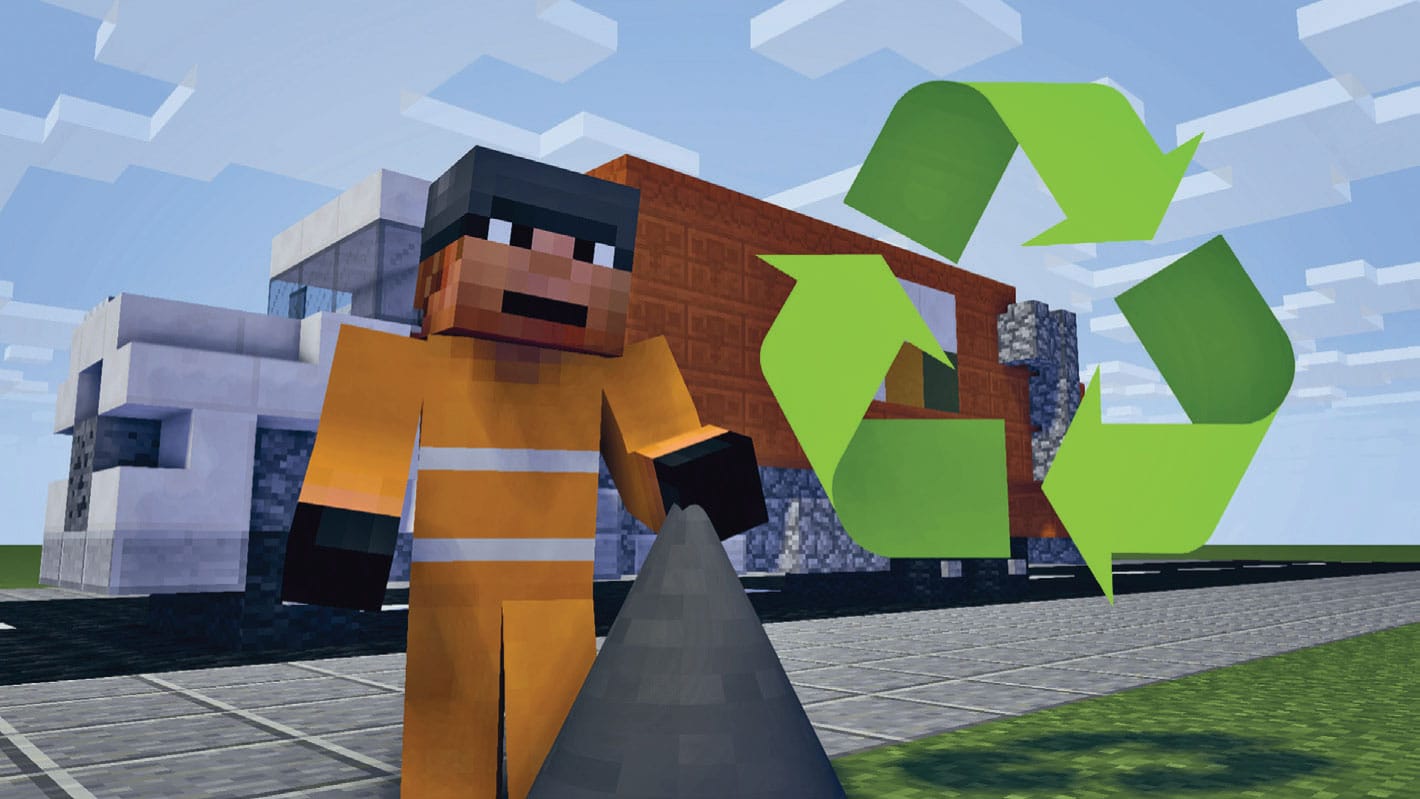
Lab 13: Reduce, Reuse, Recycle: In the activities for this lab, you’ll find out more about the issue of plastic pollution, find ways that you can be a solution seeker, and use Minecraft to raise awareness of the problem.
Lab 14: Global Detective: Through these activities, you’ll explore the impact of plastic pollution on our rivers and oceans and the creatures that live in them.
All this might seem bigger than you. You might think that you can’t possibly make a difference, but remember, all change begins with you, and a positive change-maker is part of the solution, not part of the problem.
LAB 13 |
Reduce, Reuse, Recycle |
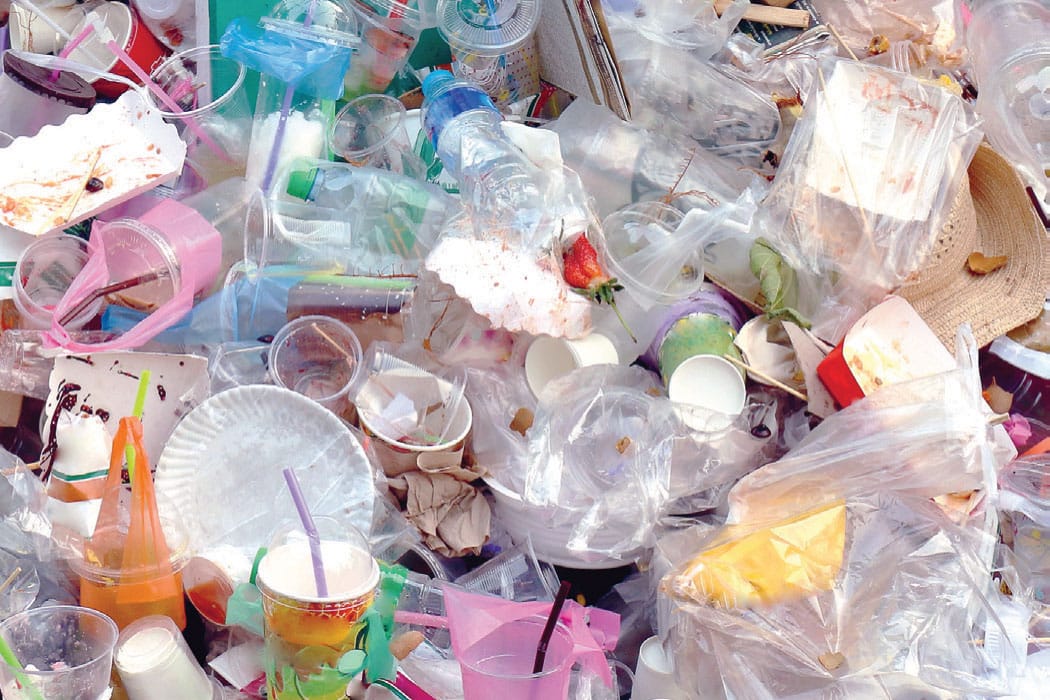
Plastic is in lots of things we use, from the clothes we wear to the money we use to pay for it. Plastics are made from materials like coal and oil. They’re not biodegradable, which means they do not go back into the earth. Around 400 million tons of plastic are made each year, and about 40 percent of that is single use, which means it gets used once and thrown away. More than 8 million tons of plastic enters the world’s oceans each year. All animals, on land and in the sea, can be hurt by plastic. We all contribute to the problem, but we can all be part of the solution, too!
HANDS ON: Gathering Data
Because it’s always best to be part of the change you want to see, you’re going to start with yourself. In this lab, you’ll create a plastic patrol system and find out how much plastic waste you create, then make a Minecraft build to show your findings.
![]() APPROXIMATE TIME TO COMPLETE
APPROXIMATE TIME TO COMPLETE
30 minutes to 1 hour
![]() MATERIALS
MATERIALS
Paper
Colored pens
Notebook or journal
1. Choose a room for your plastic patrol. For our project, we chose the bathroom, but you could use a different room if you want to.
2. Create a mind map and write down all the things you can find that contain plastic (fig. 1). Some of these will be obvious, like plastic bottles, but some might be harder to spot, such as scissor handles.
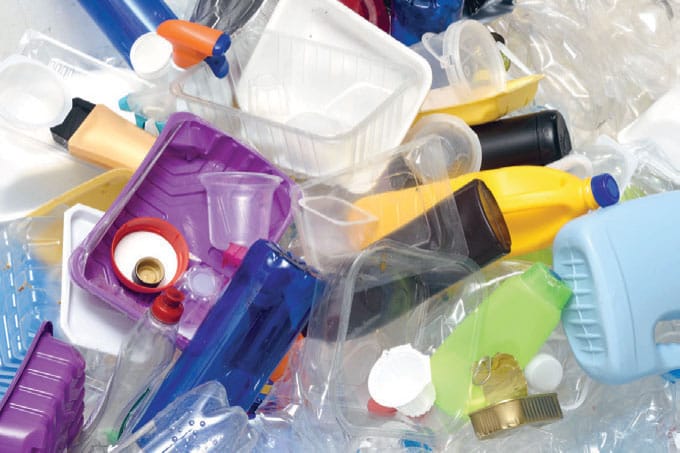
Fig. 1: Different types of plastic items that you’ll find around the house.
3. In green pen, circle the things that can be recycled. In yellow pen, circle the things that can be replaced by a nonplastic sustainable material. In red pen, circle the things that can't be replaced or recycled. These are the things that are used only once and then thrown away. These are called “single use,” and can include things like candy wrappers or toothpaste tubes. In blue pen, circle the things that must use plastic (such as medical devices).
4. Note how many items you have in total. This is your total plastic use. Count how many items are in each color category and write this down.
5. Sometimes the easy solutions aren’t the answer. Go back to your green items. These are plastics that can be recycled—but did you know that only 9 percent of the world’s plastic waste is actually recycled?
6. You’ll need to use your math for the next bit. Work out the same percentage from your own recycled waste pile and remove it. You can make this a bit simpler by rounding it up to 10 percent so that for every ten pieces of plastic waste, only one is recycled. Take this 10 percent out of your green items.
7. You’re now left with 90 percent of your single-use plastic waste from your green recycled items. Can any of these be replaced with a sustainable or renewable material or be reused? If so, move them across to your yellow items.
8. What are you left with? Are any of these items essential plastic? If so, move them over to your blue items.
9. You should now have four complete categories. Green contains items that can be recycled. Yellow contains items that can be replaced with something else. Red contains items that can’t be replaced or recycled. Blue contains items that cannot be replaced or recycled but are essential.
10. Now that you’ve found out what the problem is, it’s time to be a solution seeker. Look at what you’ve listed in your categories.
• Green: Find out what you need to do to recycle these items and make a commitment to do so.
• Yellow: Find out what alternatives are available and keep a note of how many plastics you manage to replace. Remember, when you’re buying something new, ask yourself, “Does this need to be plastic?” If not, then find an alternative and use that (fig. 2). If yes, ask yourself, “Do I really need this at all?”

Fig. 2: Some products that are typically made from plastic—toothbrushes, for example—are also available in alternative materials, such as sustainable bamboo.
• Red: What can you do without? Do you need your soap wrapped in plastic, or can you buy it from a seller who uses paper to wrap their soap? Or how about learning how to make your own? Aim to reduce your plastic use.
• Blue: Always look for solutions to the problem. For example, can you find a company that only uses recycled plastics in their materials? Or perhaps you can find medicine packaging that uses less plastic or recycled plastic?
11. Finally, if you can’t recycle it or reduce it, try to think of different ways of repurposing it—finding another use for it.
12. Now you should have a clearer idea of what the problem is and some of the changes that you and your community can make right now.
MINECRAFT PLAY: Build It Yourself
In this lab, you’ll use Minecraft to build a visual representation of your research findings to demonstrate some of the problems with plastic pollution. You can use this to help raise awareness in your community.
![]() APPROXIMATE TIME TO COMPLETE
APPROXIMATE TIME TO COMPLETE
30 minutes
![]() GAME MODE
GAME MODE
Creative
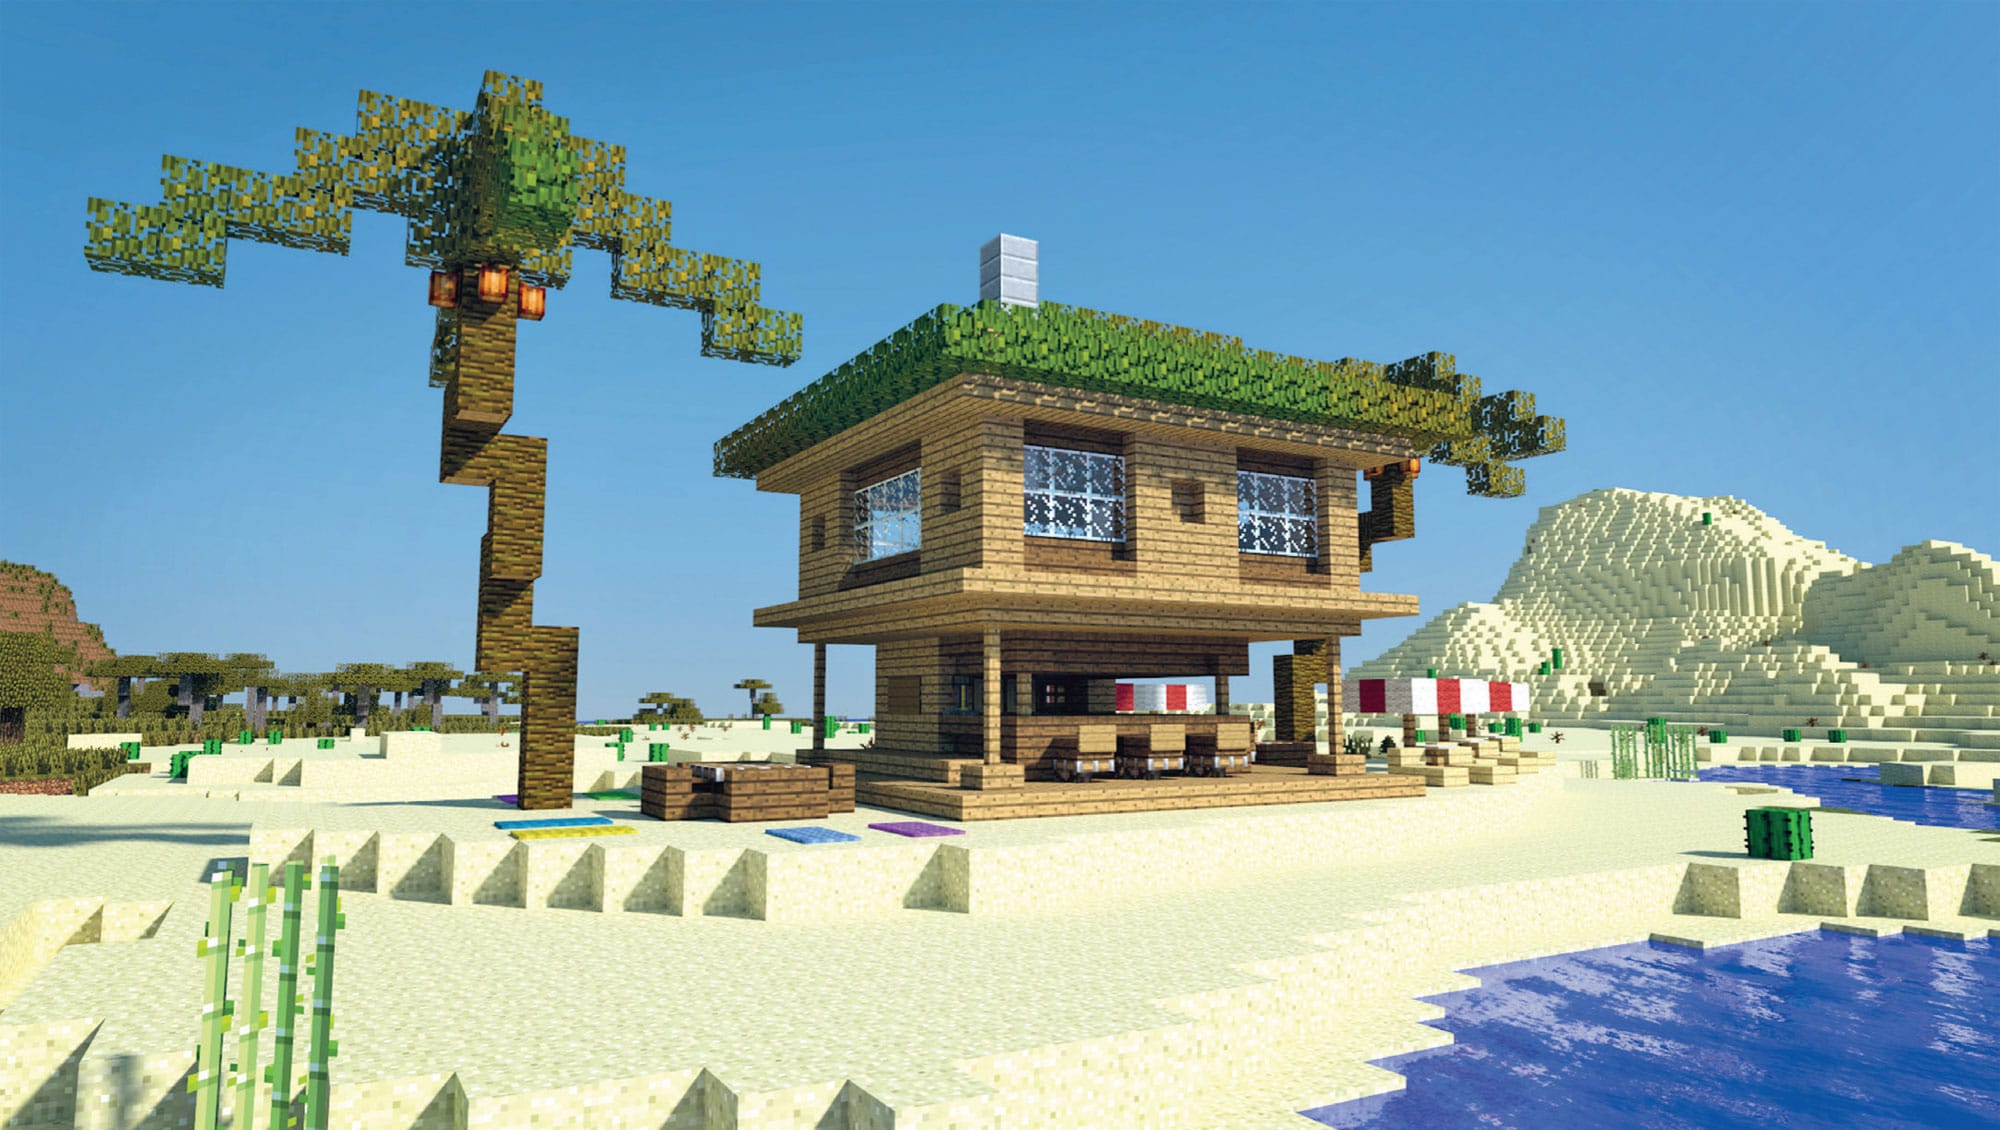
1. Start with a brand new Minecraft normal world with rivers, oceans, and deserts. Choose somewhere with a great-looking environment—hills, trees, perhaps a beach.
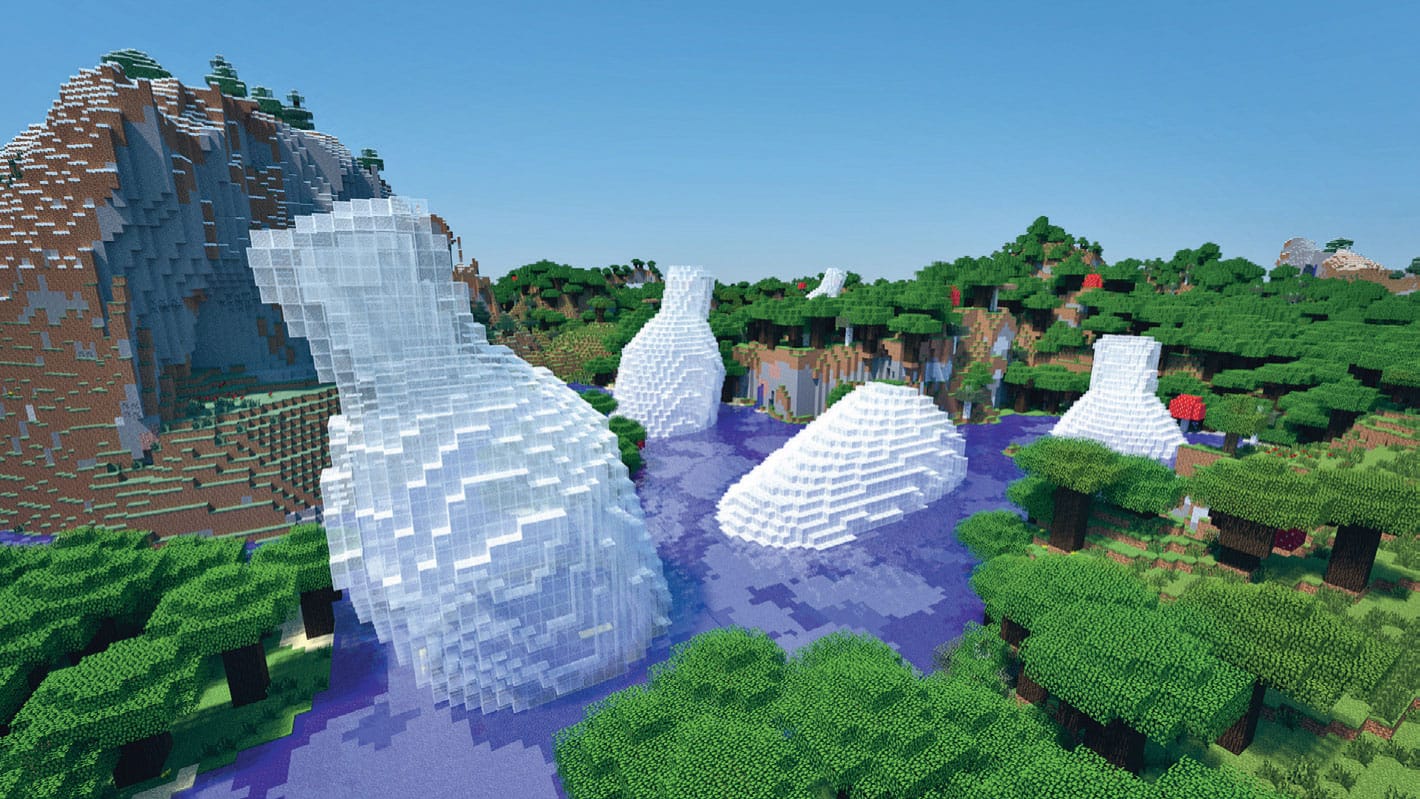
2. Now build your “plastic problem.” Use gray_terracotta_block to represent your first set of data (the total plastic waste calculated for your home community). We’re building a cube shape out of this plastic, but you could build a big pile in whatever shape you want. Count the blocks that you use (our data had 84 units of plastic). Take a screenshot of your avatar standing next to the pile of plastic (fig. 1).
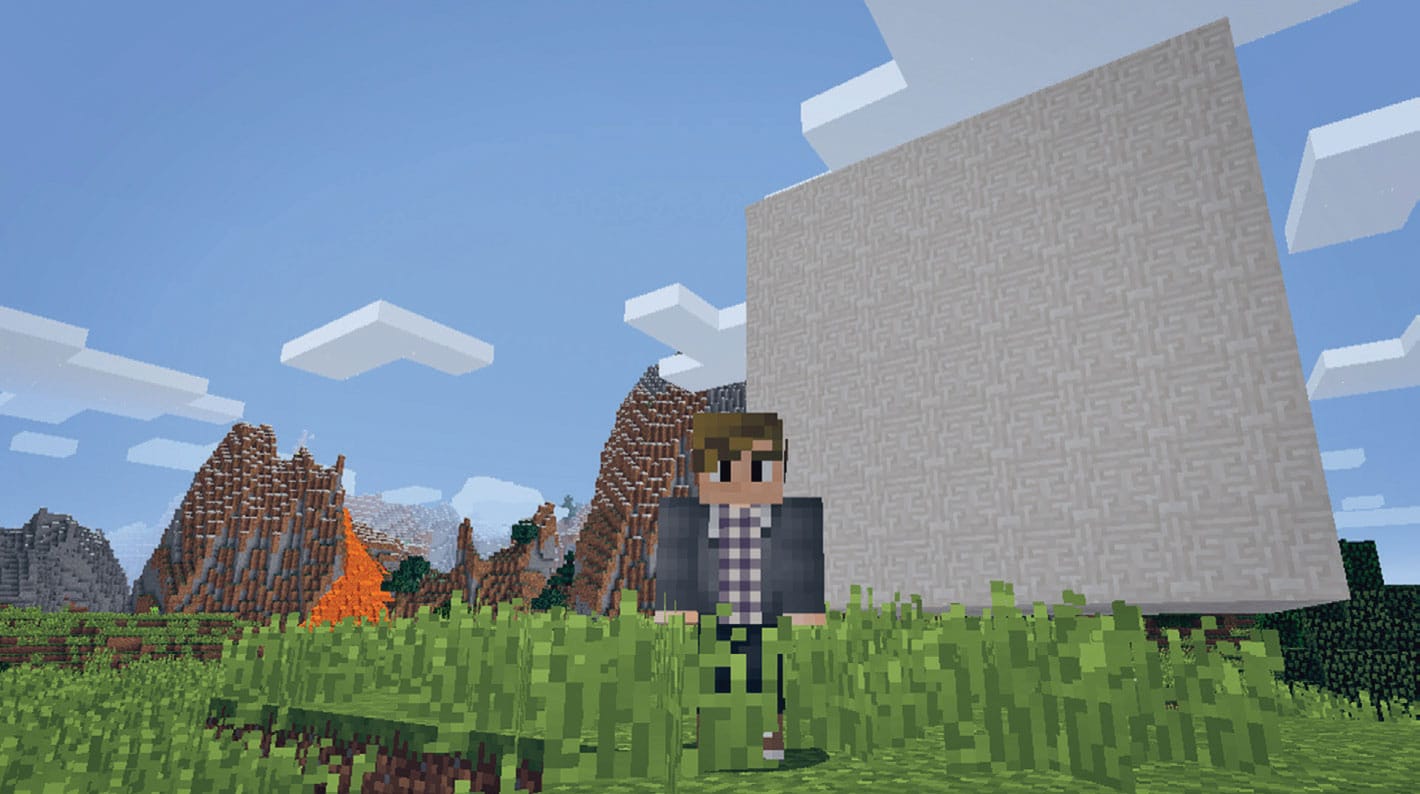
Fig. 1: Our avatar with our total amount of plastic represented by a pile of gray terracotta blocks.
3. Repeat this for all the different types of plastic from the data that you’ve collected. By the end, you should have five piles of plastics each using different terracotta blocks to represent them (fig. 2):
• Pile 1 = all the plastic = gray_glazed_terracotta
• Pile 2 = plastic that can be recycled or reused = green_glazed_terracotta
• Pile 3 = plastic that can be replaced = yellow_glazed_terracotta
• Pile 4 = plastic that can’t be replaced or recycled = black_glazed_terracotta
• Pile 5 = plastic is essential = light_gray_glazed_terracotta
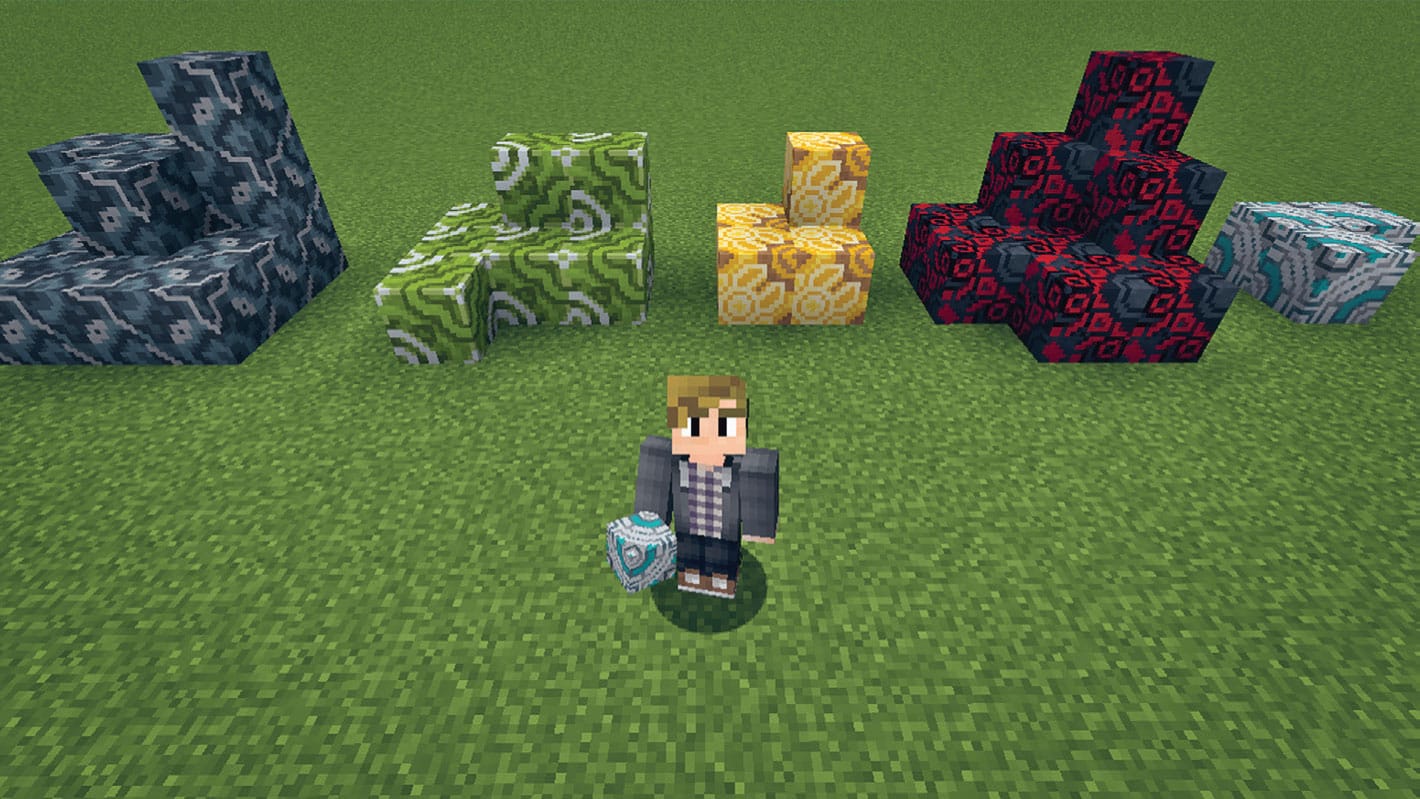
Fig. 2: Our avatar next to our plastic sorted into piles by type, represented by terracotta blocks in different colors.
4. Add a sign explaining what each pile is, to help people understand what they’re seeing.
5. Create a heading that will get people thinking about what they can do to be change-makers. This could be something like: “Big Pile, Big Problem,” or a Minecraft-themed slogan, such as “Block by block, it’s got to stop!” Have fun coming up with your own slogan.
6. Take screenshots of your builds and add them to your research material. You can use www.pixlr.com, a free online editor, to add text to your images if you don’t have one on your PC or tablet.
LAB 14 |
Global Detective |
The amount of plastic pollution that enters the world’s oceans from rivers is around 2.75 million metric tons per year. Experts think that by 2050, all the plastic in the ocean will weigh more than the fish! One in three sea turtles, and around 90 percent of seabirds, have eaten plastic. Because plastic can’t be digested, it fills the stomach up, so they can’t eat real food; it also weighs a lot more, so the birds find it difficult to fly, especially when they’re fledglings (young). Each year, 100,000 animals in the sea are killed by plastic. There’s so much plastic in the seas that there are now floating trash-islands! They’re created by the currents gathering up and pushing all the plastics into certain areas. One of the largest is between Hawaii and California and is called the Pacific Garbage Patch.
HANDS ON: Gathering Data
In this activity, you’ll make your own “Campaign Against Plastic Pollution” poster to get your community involved as change-makers against pollution.
![]() APPROXIMATE TIME TO COMPLETE
APPROXIMATE TIME TO COMPLETE
1 hour
![]() MATERIALS
MATERIALS
Notebook
Colored pens
Magazines
Glue
Poster board
1. To create your poster, you’re going to have to think about the following:
• The purpose of your campaign: This is WHY it’s important—why should we be concerned about plastic pollution in the oceans? Think about how you can get this across using words and pictures.
• The action you’re asking people to do: This is WHAT you want people to do—the action they need to take to be part of the change. Make sure you’re clear about this.
• The way people can get involved: This is the HOW of your campaign. If you ask people to campaign to stop stores from using plastic bags and give them the address to write to for your local store, then they’re more likely to do it.
2. Noodle in your notebook to come up with catchy words and statements, and sketch out ideas for the visuals. This includes the typeface (the shape and style of lettering) that you want to use. Make sure it’s readable. You might want to print out or cut out pictures from magazines to use or to give you visual ideas.
3. Once you have all the images and information you want to include in your poster, it’s time to block it out. Blocking is a design method to help you plan the layout of something. You’ll need to decide what size you want to make your poster. Make more sketches in your notebook to help you. You can also use cut-out words and pictures, arrange them on a blank sheet of paper, and then take photos of the different layouts until you have the one you want (fig. 1).
Fig. 1: After you’ve noodled in your notebook to come up with some poster ideas and designs, block out the one you like best before creating the final version.
4. To make your final poster, use cut-out pictures and words and glue them to poster board, draw and write it out yourself, or use a combination of the two. Have fun and use your notes to help.
5. Decide where you’re going to put it up to get the most attention. You could put it in your school, at your club or community hall, or even in your own house. Make sure you ask permission first before putting up a poster if it’s in a public place. Congratulations! You’re now an official change-maker! You might even inspire others to create their own posters (fig. 2).
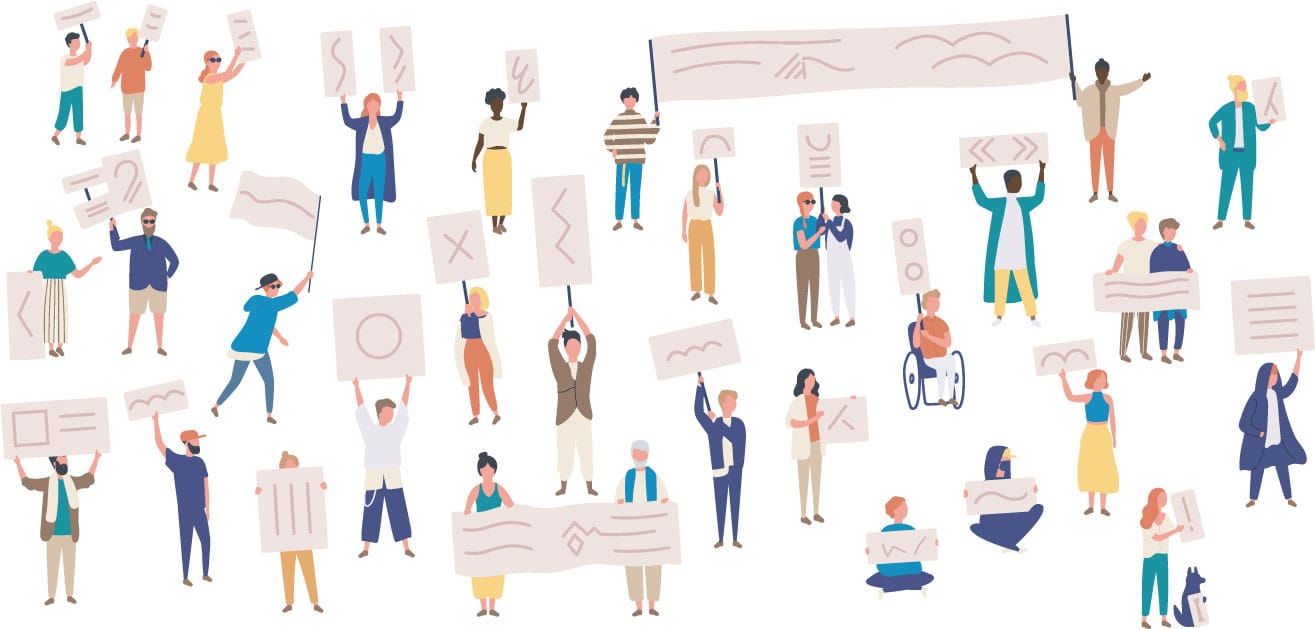
Fig. 2: Your poster might inspire others to create their own!
MINECRAFT PLAY: Build It Yourself
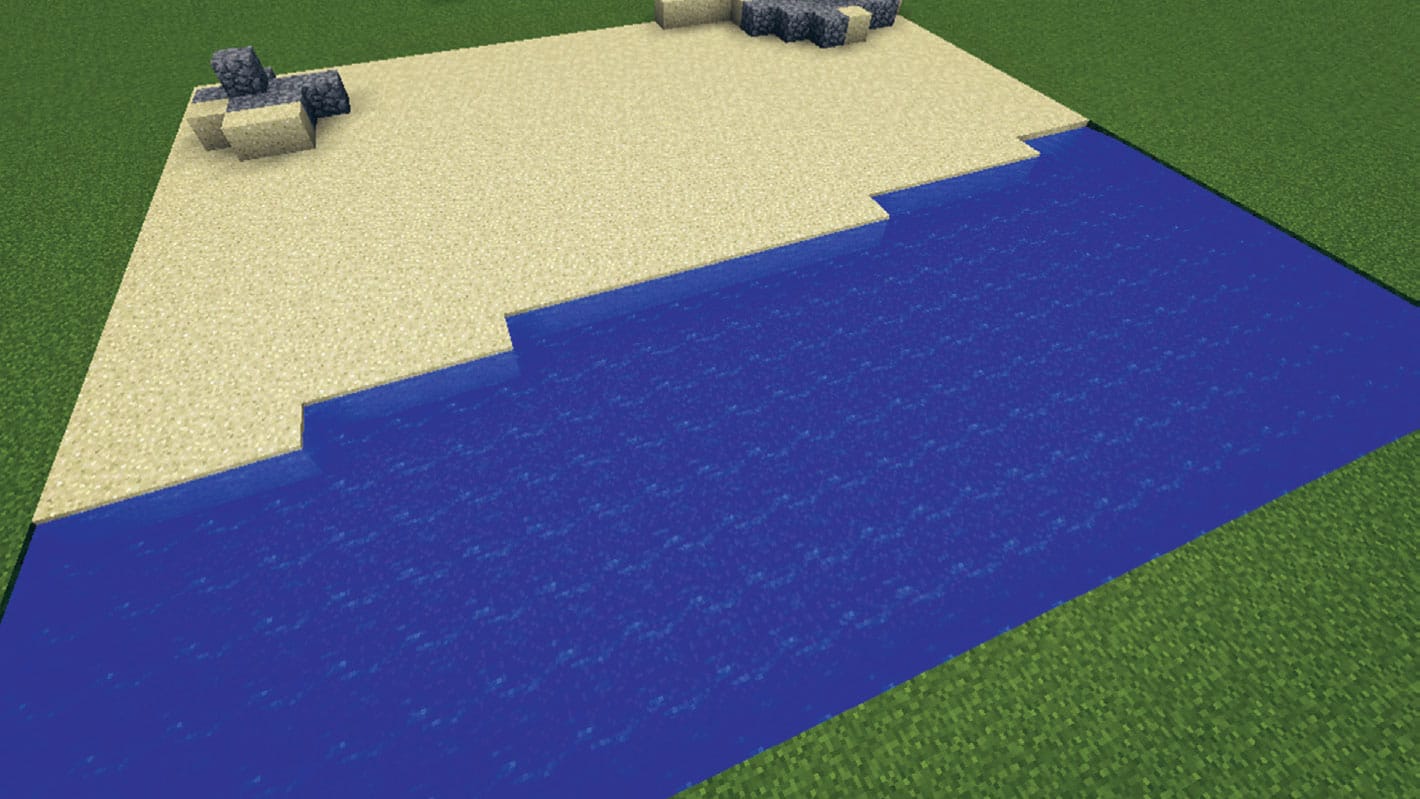
In this activity, you’ll create a Plastics Pollution Beach Simulator to show the impact of plastic pollution on our beaches. You’ll use command blocks to move an armor stand randomly around a beach area. When the armor stand lands, it will drop some plastic litter. For this map, just as in Lab 13 (see here), we’ll use a block of terracotta to represent plastic waste. You can use a flat world, like ours, or you can make it work in any Minecraft environment.
![]() APPROXIMATE TIME TO COMPLETE
APPROXIMATE TIME TO COMPLETE
1 hour
![]() GAME MODE
GAME MODE
Creative
1. Choose a beach area. Give yourself a command block (fig. 1). They’re not in the creative inventory, so you’ll need to use the following special command to “give” one to yourself: /give @p command_block. Place the command block down.
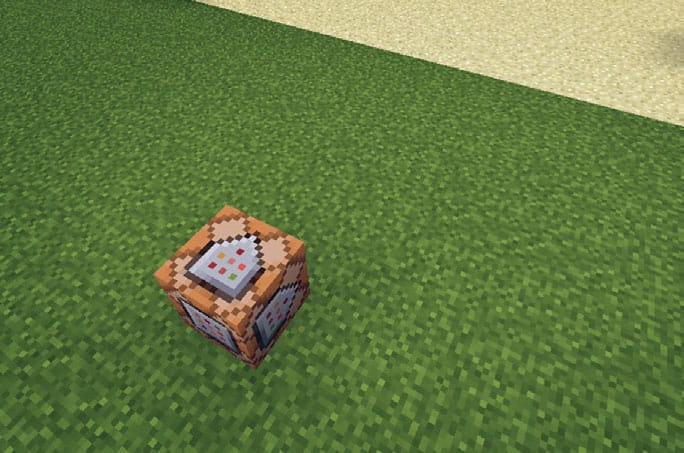
Fig. 1: Use the special command to give yourself a command block.
2. We’re going to use a timer to send a pulse signal to the command block to make it run the commands every 10 seconds. To build your timer, place a square of redstone dust and redstone repeaters. The repeaters need to be facing in the same direction all the way around the square. Once you’ve done this, place a redstone torch next to the redstone dust and then quickly break the torch. This will send a pulse around the square in the direction of the repeaters (fig. 2). Do not connect the command block to the pulse just yet!
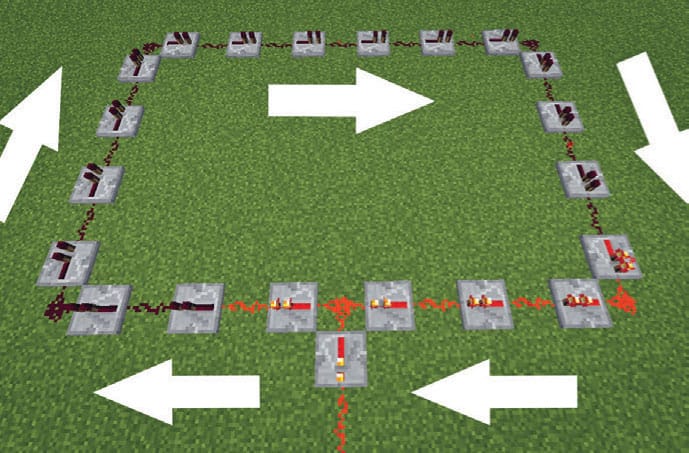
Fig. 2: Build a timer by creating a square of redstone dust and redstone repeaters.
3. You’re going to use a special command called Spreadplayers to teleport a player or an entity (like an armor stand) randomly around any area we define. Coordinates are the x, y, z position of every block and player in Minecraft. The center of our beach was -818 3 -125, but we only need the X and Z numbers -818 -125 for our command. To find the center of your beach, go to Java Minecraft = press f3. Bedrock Minecraft coordinates can be toggled on from the World Settings after enabling cheats or by using the command /gamerule showcoordinates true. When you find the center of your beach, write it down on a piece of paper.
4. Once you have the first command block, right-click the command block and open the input box, then type in spreadplayers -818 -125 0 9 false @e[type=minecraft:armor_stand]. This tells the command to spread the player from the center of the beach. Note that 0 is the distance from other players and 9 is the distance the command can teleport the player, or in this case @e[type=minecraft:armor_stand] is the armor stand.
5. Next tell the armor stand to place down a block of terracotta (fig. 3). To do this, you need another command block. Place this down next to the first one and enter this command: execute @e[type=minecraft:armor_stand] ~ ~ ~ setblock ~ ~ ~ minecraft:gray_glazed_terracotta.
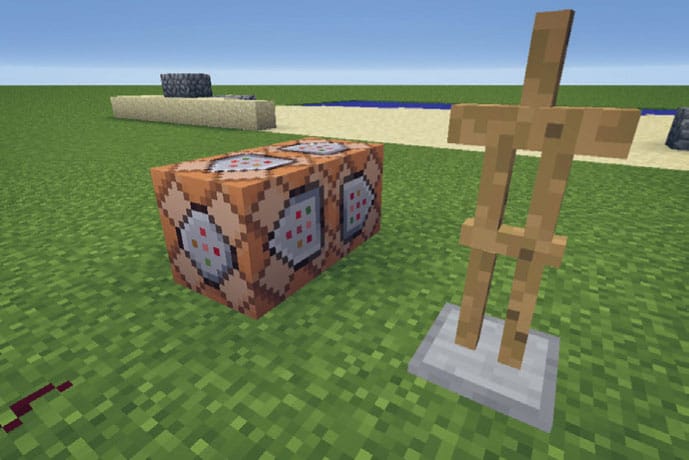
Fig. 3: Tell your armor stand to place more command blocks.
6. This command is cool. It’s called execute, and it allows you to execute a new command wherever the armor stand is. The command that’s going to run is called setblock. Setblock places a block into the world wherever the armor stand is. In this case, the block is gray-glazed terracotta.
7. Now you’ll test it out. Grab an armor stand from your creative inventory and place it nearby. Then connect the pulse timer to the command blocks (fig. 4). You can use a repeater for this.
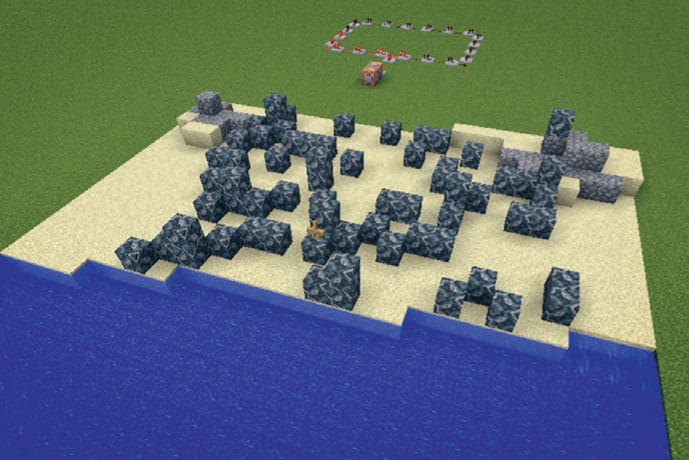
Fig. 4: Use the setblock command and a repeater to place a command block wherever it teleports around the beach.
8. The armor stand will now be teleporting around the area and placing a block of terracotta wherever it stands. Take some screenshots of the beach area at the beginning and then leave it for 5 minutes. Come back and see how much trash the program has created and take another screenshot. Do this again as many times as you like. We suggest over 30 minutes. This will give you seven screenshots and simulates the constant pollution that our planet is facing. Every piece of plastic on the beach ends up in the ocean. Imagine what that would be like!
9. Use your Plastics Pollution Beach Simulator to get others involved in your campaign and be change-makers in the cause!
Engage Your Community
Community means living in the same space or sharing the same set of values or beliefs. Communal spaces are really important in helping us nurture friendships and connections with other people, whether these are online or in the real world. When we’re part of building that community, we invest our shared time and energy into helping it grow, and we can all be part of building a better world for us to live, work, and play in.
Connecting with Others to Make the World a Better Place
These labs will get you focused on ways we can work together as a community.
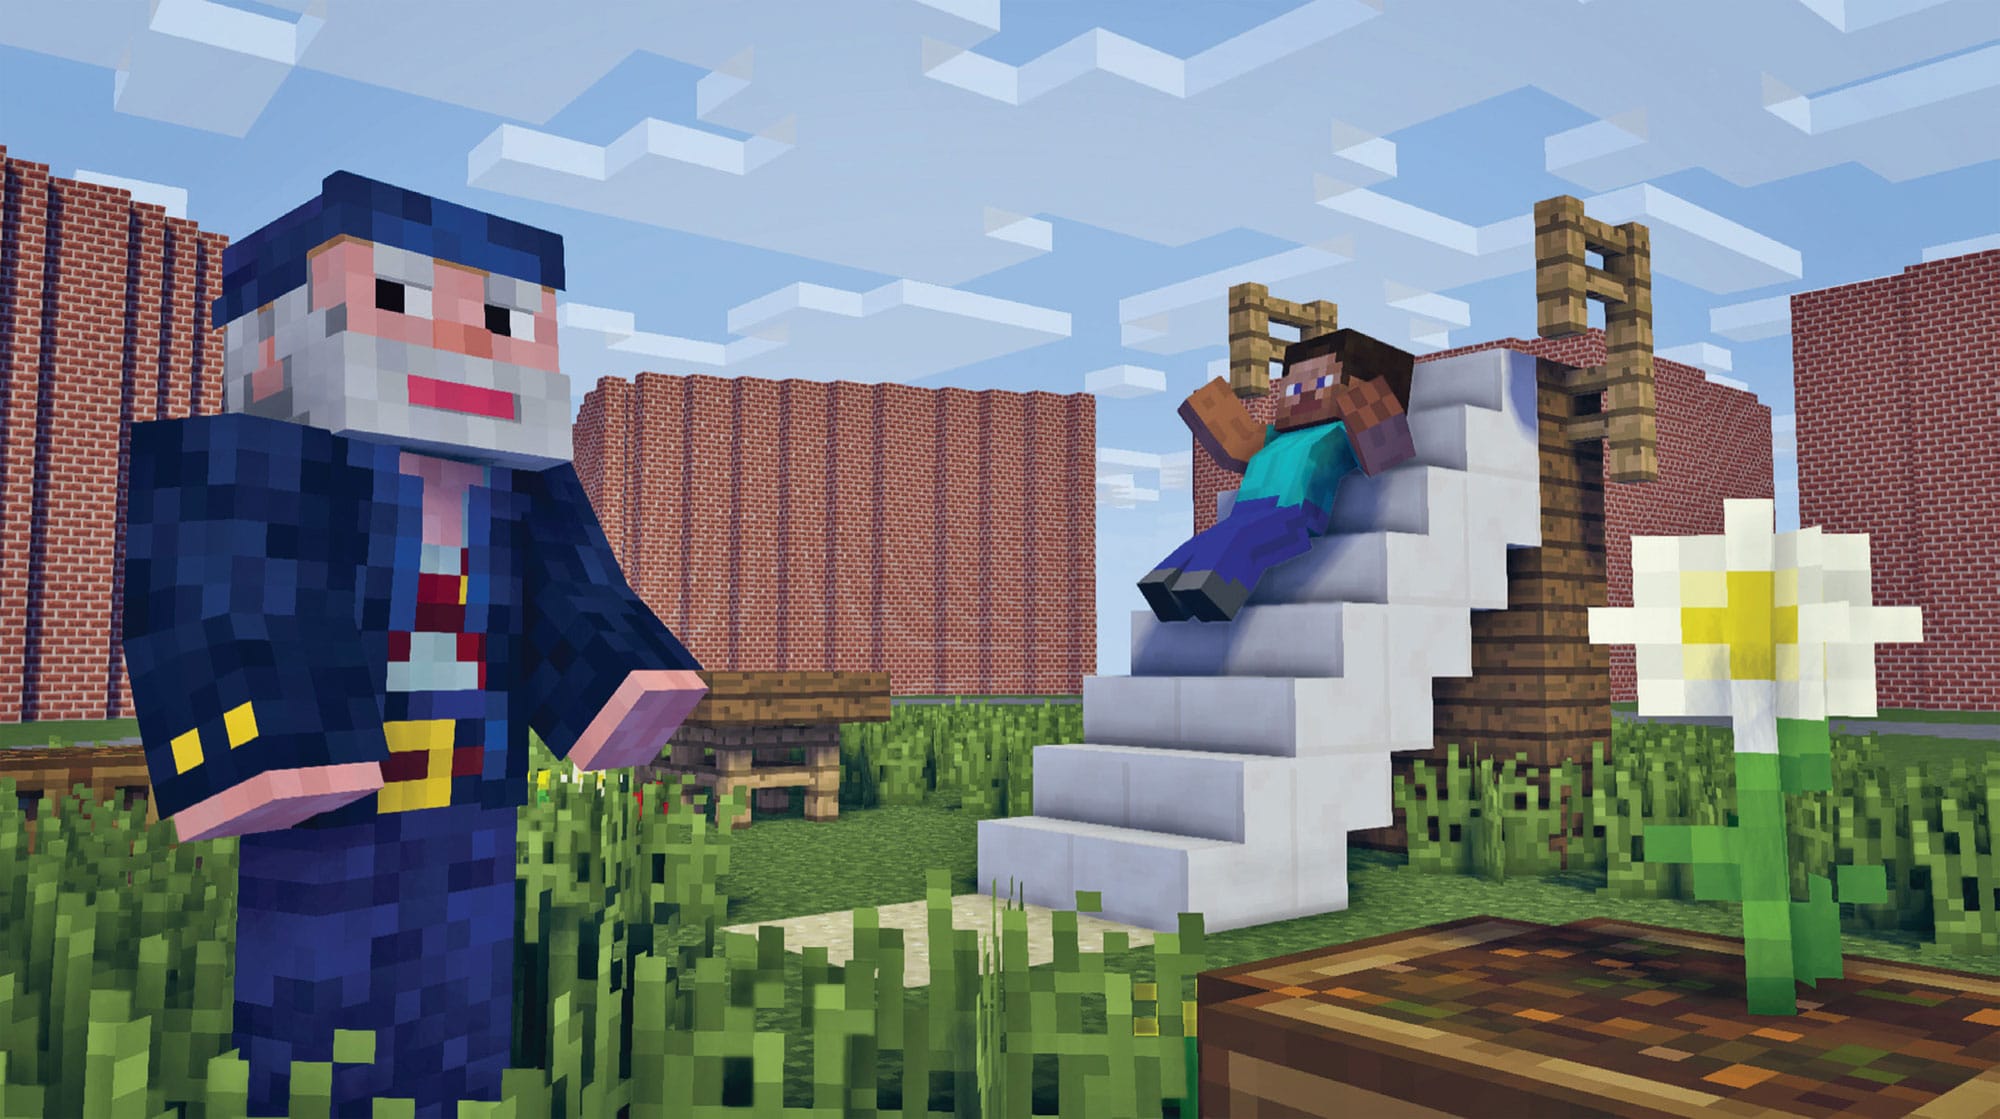
Lab 15: A Perfect Place: First, sketch, design, and build a den space that reflects your interests—your own special “hideout” that you can share with your friends. In Minecraft, you’ll create am awesome clubhouse as an in-game hangout.
Lab 16: Better Together: Start by interviewing community members to find out what they think makes a “perfect place,” then use their feedback to design and build a community play space in Minecraft.
LAB 15 |
A Perfect Place |
In this lab, you’ll explore creating a perfect place, first for yourself, out of game; then for your community, in game.
HANDS ON: A Space of Your Own
In this activity, you’ll design and build your own a “den space for a day.” You can do this on your own or with others.
![]() APPROXIMATE TIME TO COMPLETE
APPROXIMATE TIME TO COMPLETE
1 hour or more, but enjoy all day!
![]() MATERIALS
MATERIALS
Paper
Pens and pencils
Magazines
Den building materials
Device to film and record on
1. Choose a theme for your den. What do you love doing? Maybe you love reading, fishing, or playing video games.
2. Think about what you could include in your den to make it special. What about a neat bookshelf and some really comfy big cushions to sit on, posters of your favorite stories, or a den inspired by Minecraft blocks? Sketch out your plans. Magazines can be a great resource for design ideas, and you can rip out pictures, patterns, and colors for inspiration.
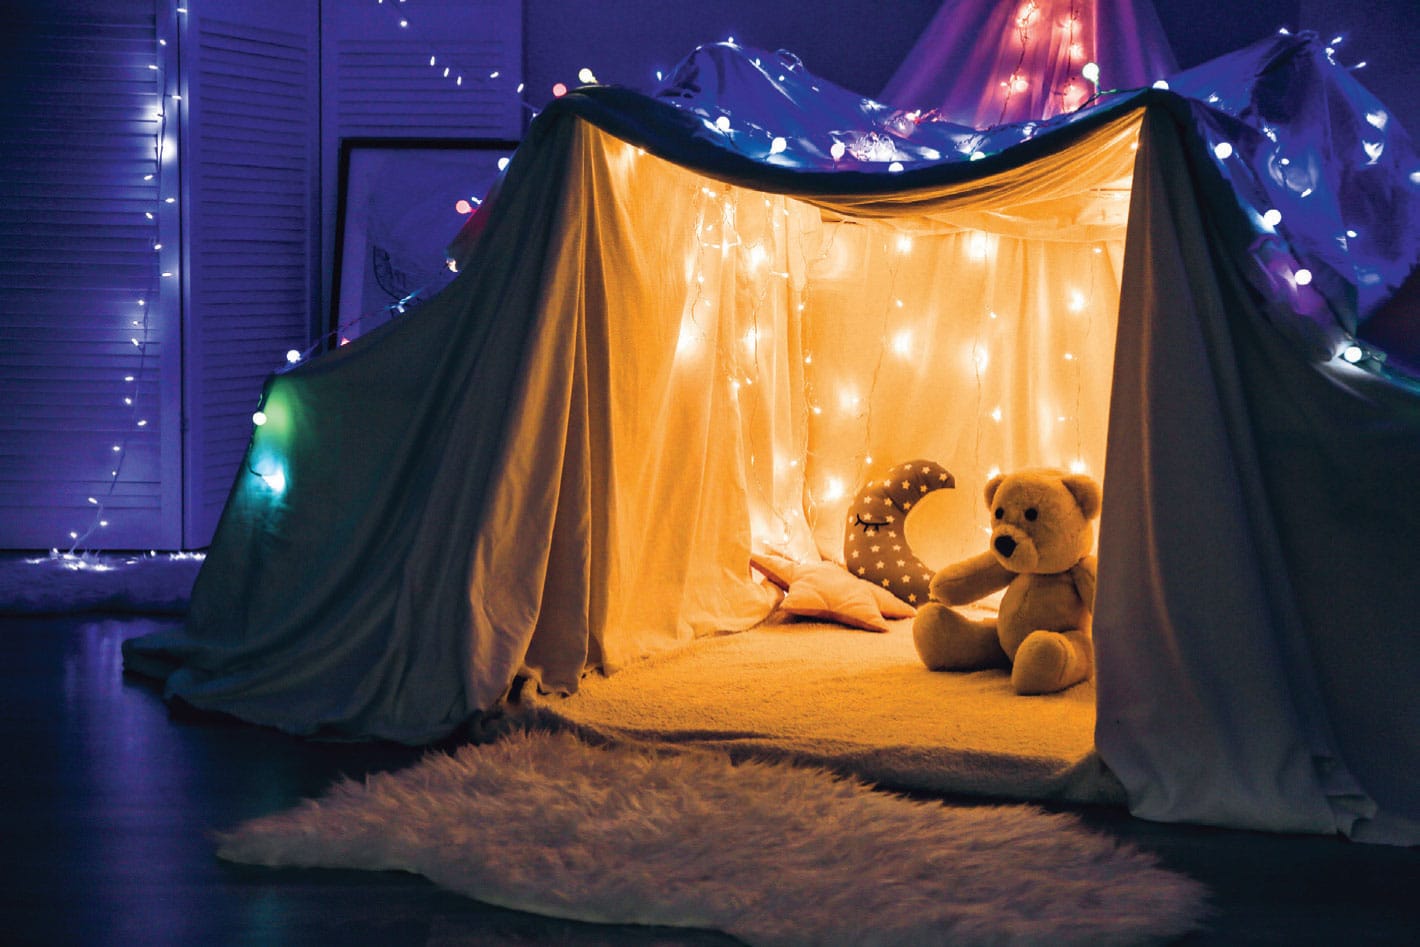
3. Now design the structure of your den. Is it inside (fig. 1) or outside (fig. 2)? What kind of weather does it need to cope with? Does it need to be waterproof? Because your den is just for a day, it doesn’t need to be as strong as a den you want to last all year. Do you need electricity? If so, remember to check with an adult about how to safely do this, especially if your den is outside!
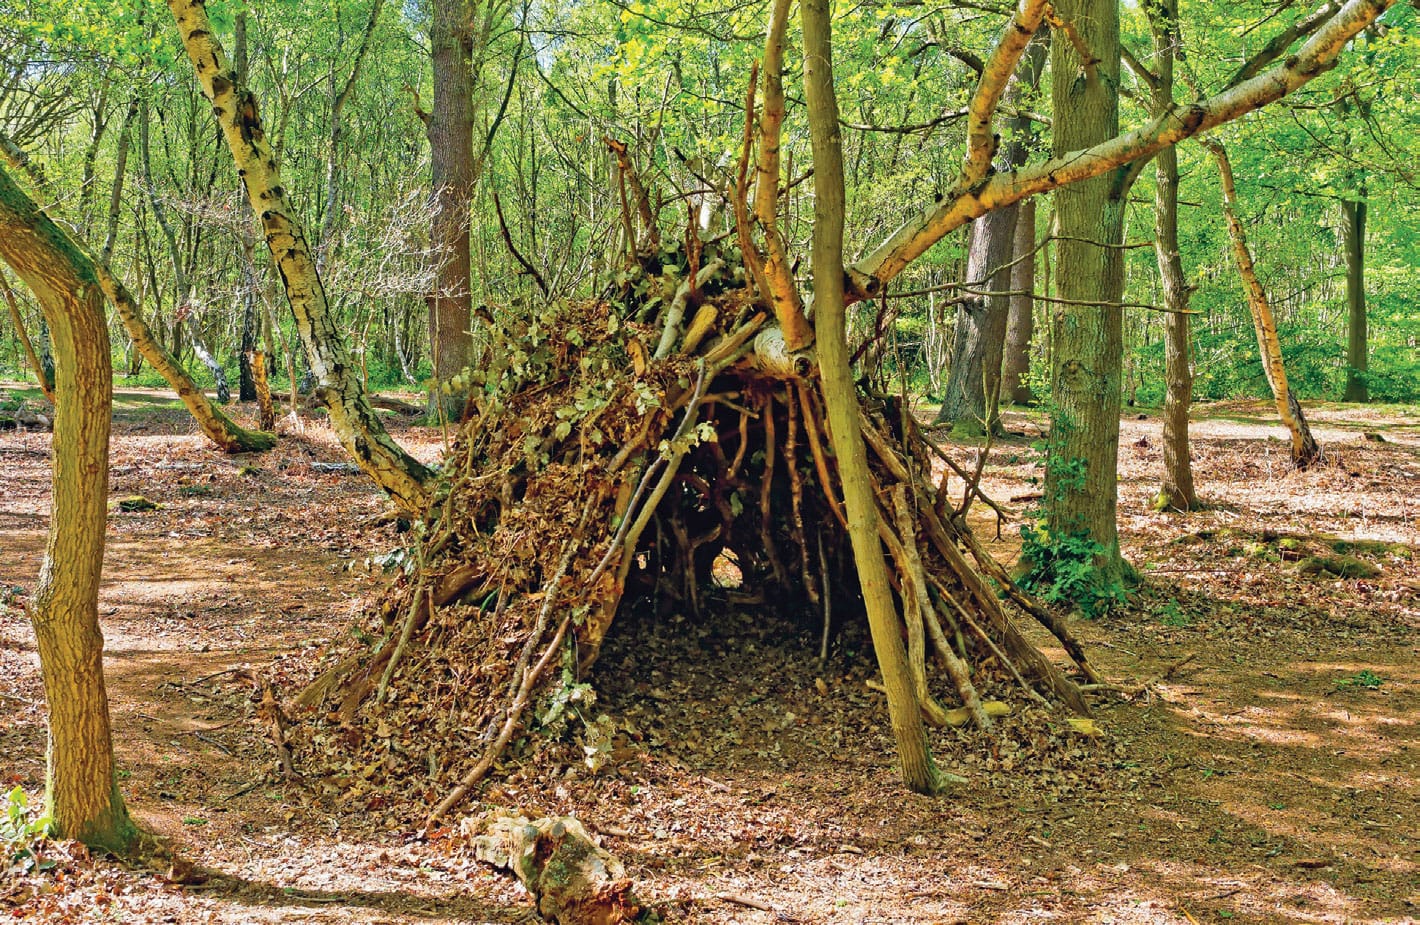
Figs. 1 and 2: Design your den to reflect your special interests. You can create your den indoors or outdoors.
4. What materials will you need to build your den? Remember to ask if you’re taking anything that isn’t yours!
5. Now it’s time to get building!
6. You can enjoy your den by inviting buddies over (fig. 3), or just enjoy it on your own.
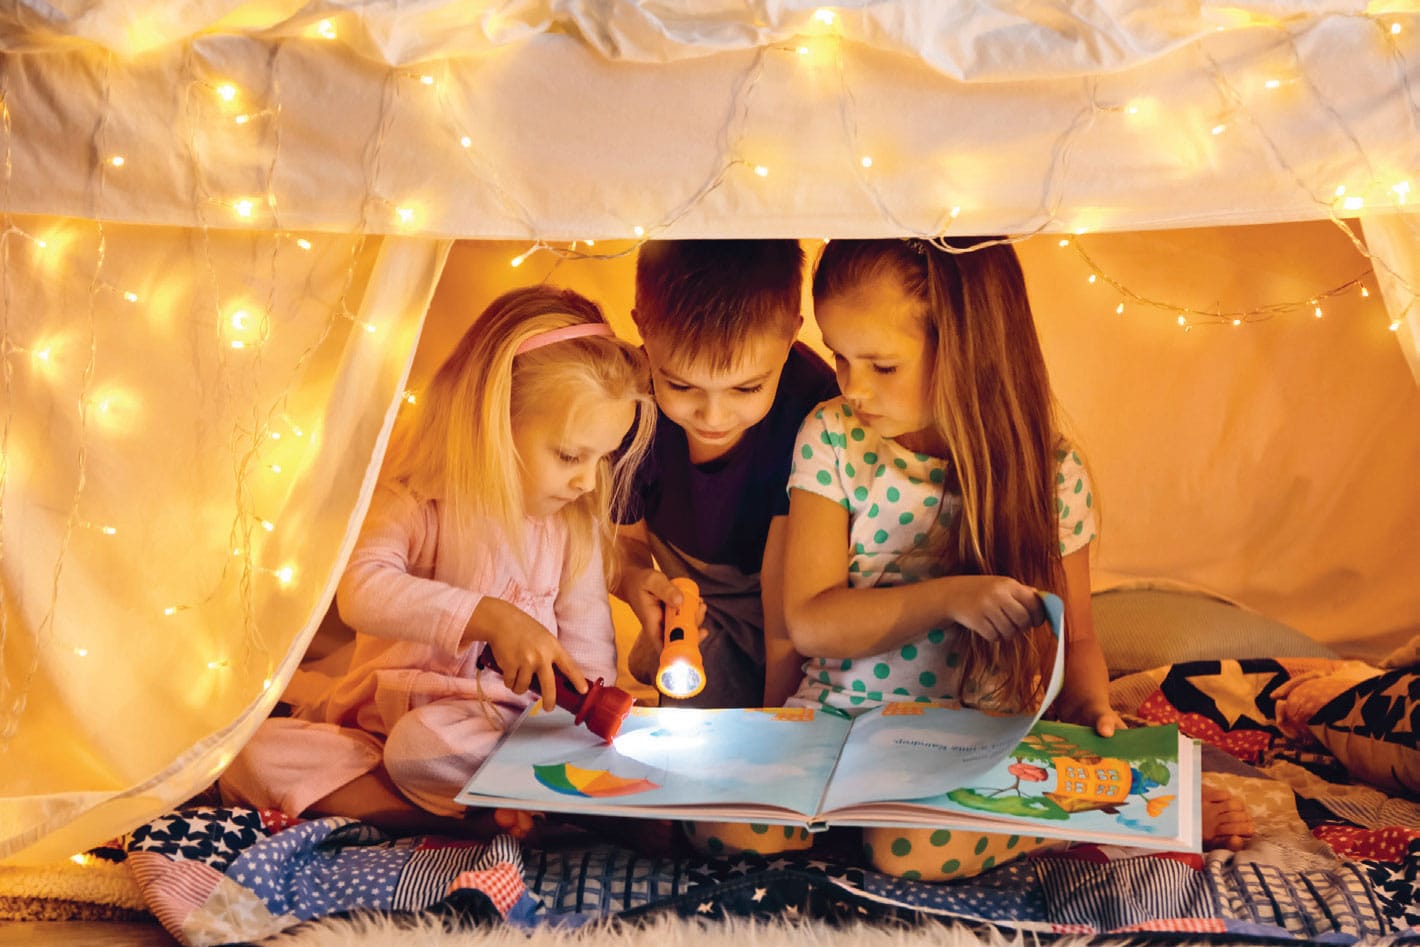
Fig. 3: Once you’ve finished your den, invite your friends to enjoy it with you.
MINECRAFT PLAY: Build It Yourself
In this activity, you’ll design and build a clubhouse in Minecraft, where you can hang out with your friends in game. Just as you did with building your den, spend time thinking about the kind of space you want to create and the community you’re building it for.
![]() APPROXIMATE TIME TO COMPLETE
APPROXIMATE TIME TO COMPLETE
1 hour
![]() GAME MODE
GAME MODE
Creative
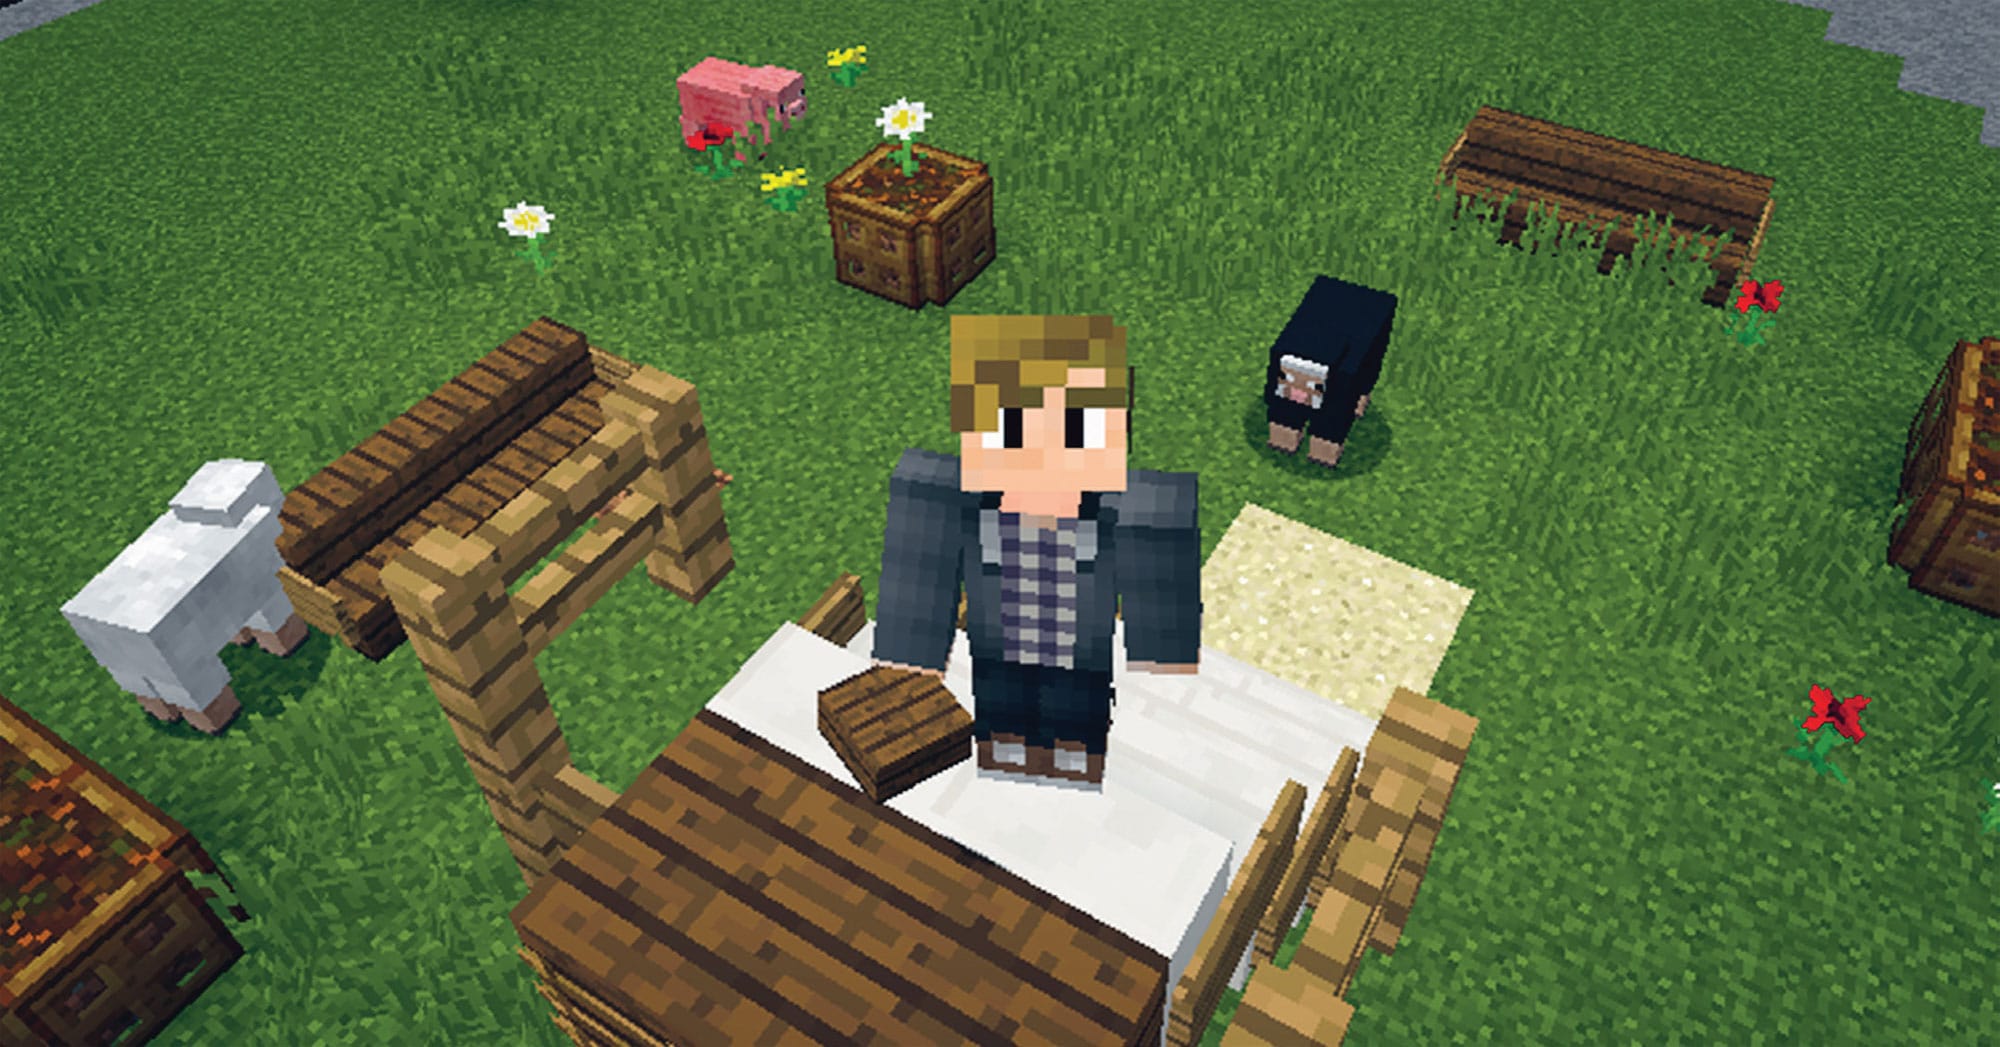
1. All Minecraft worlds have a World Spawn point. This is where you always start in a world. This makes a great place to build a clubhouse to meet and hang out in! You can use your World Spawn point or, if you enable cheats, you can wander around to find the perfect location and then reset it to your chosen location by typing into chat: /setworldspawn (fig. 1).
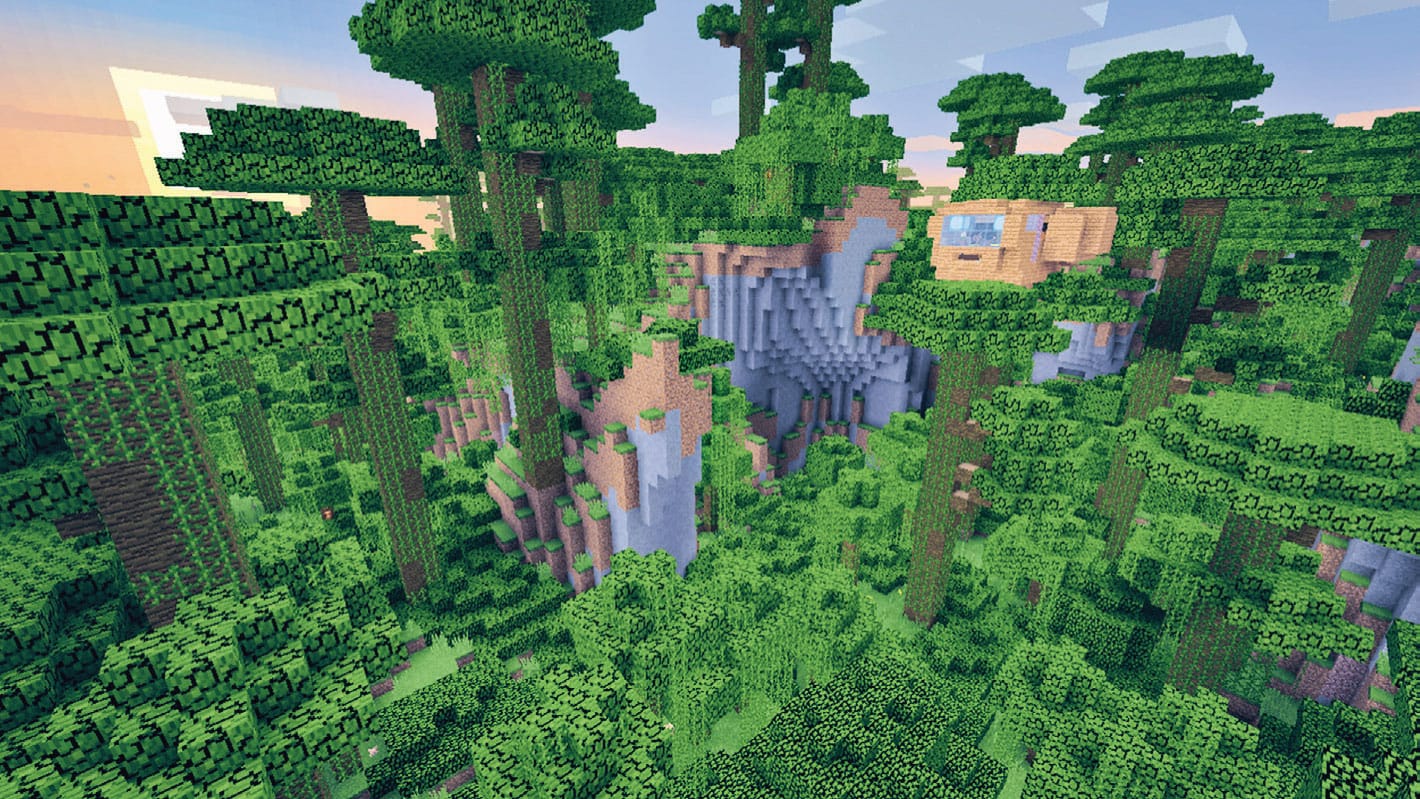
Fig. 1: Choose your Minecraft den location
2. Come up with ideas for your clubhouse. If you’re working as a group, remember to use your leadership and collaboration skills to encourage everyone to get involved. What does your clubhouse need? A game room, a kitchen, a sleeping area, a lounge for hanging out in … the list goes on!
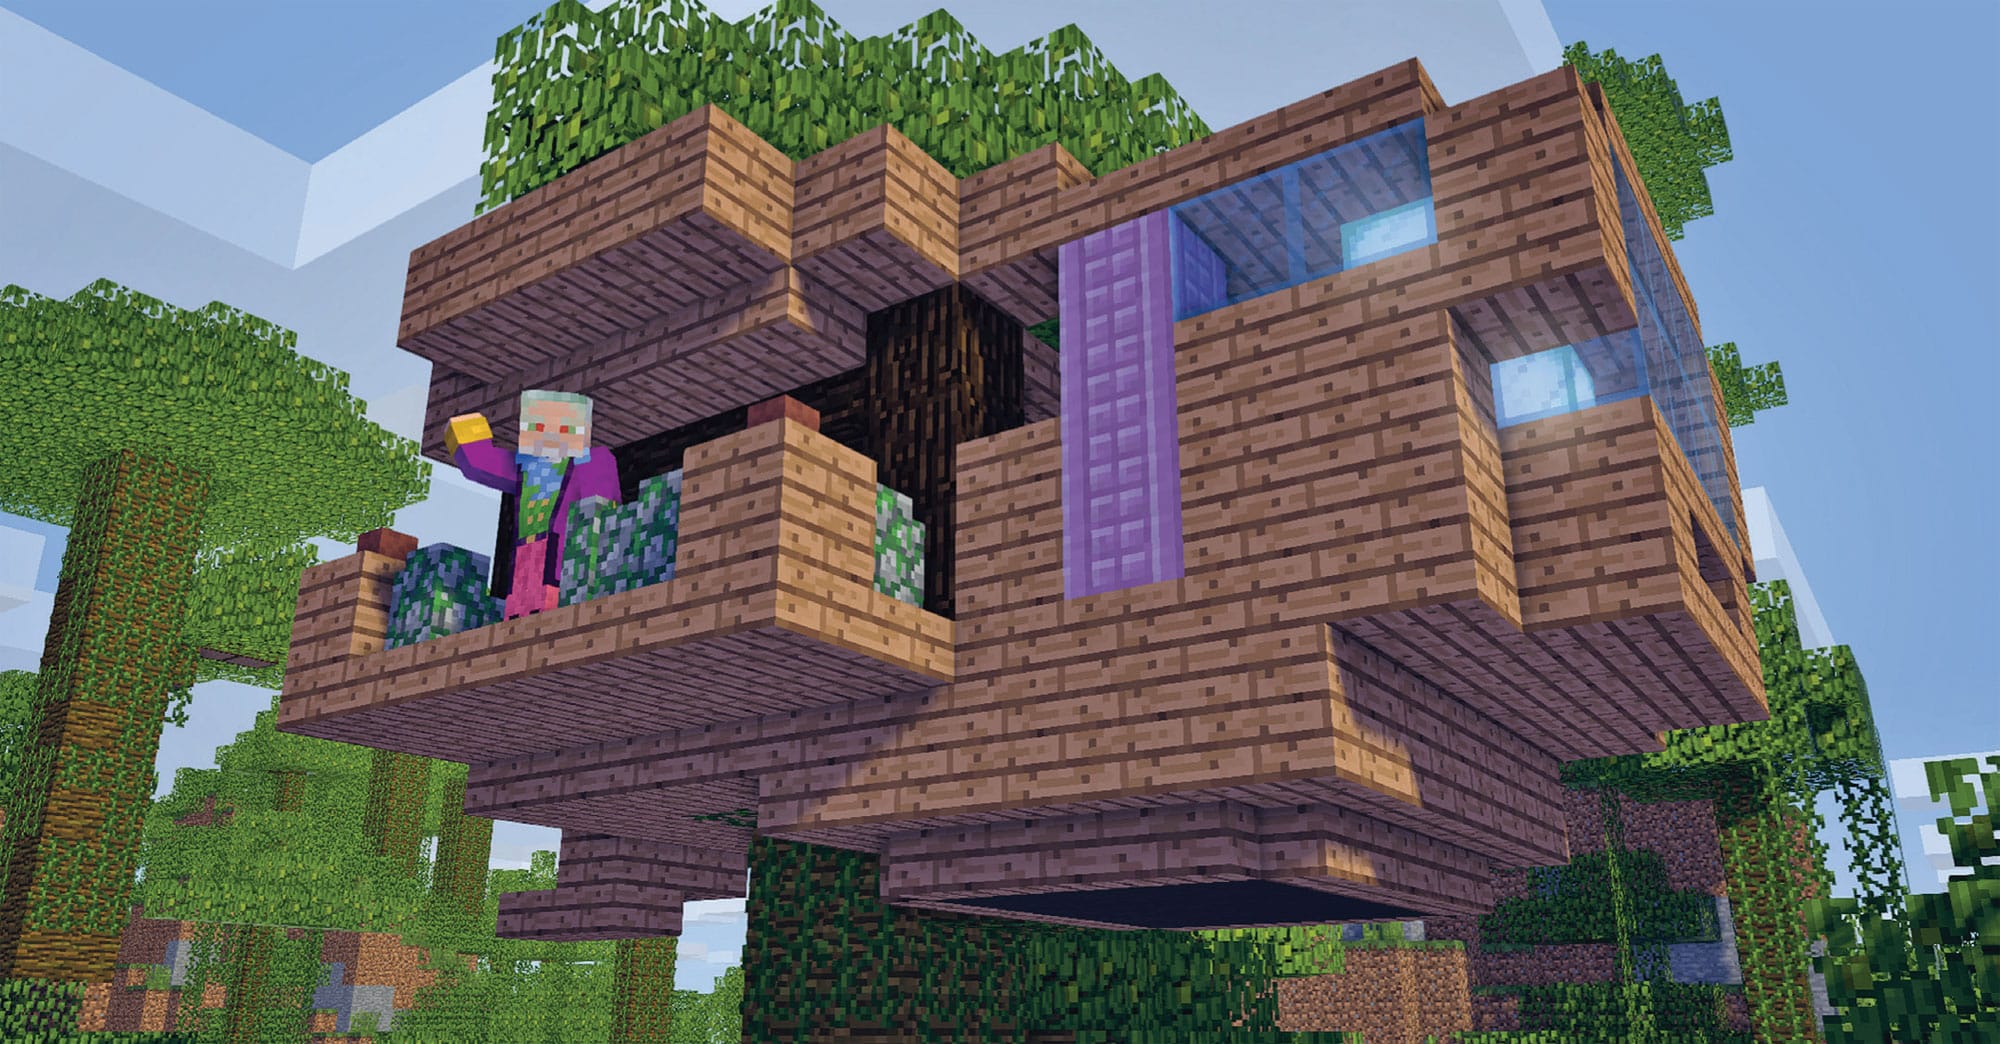
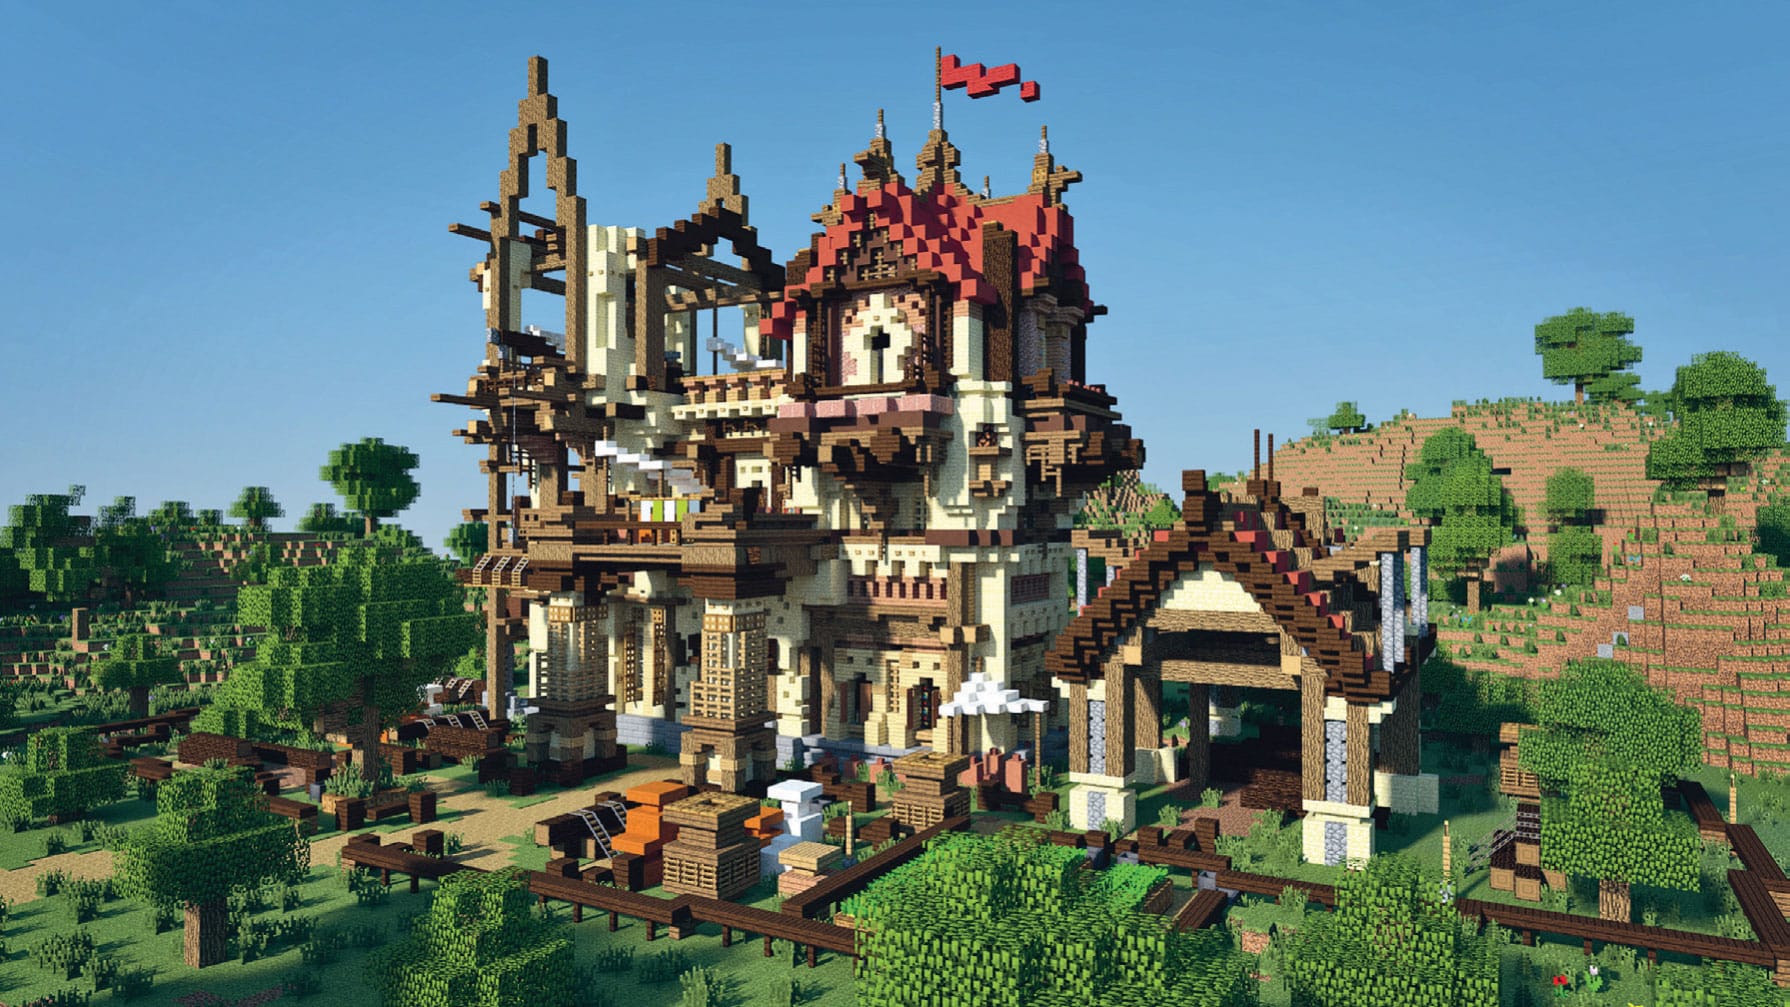
3. What does your clubhouse look like? Because you’re building in Minecraft, it can literally look like anything. A giant teapot? Why not! A race car? Fantastic! To help you nail down some ideas, ask your group about their favorite books, movies, or biomes, and design a clubhouse that would fit in one of these. What about a jungle tree house or an ice-sculpted den? Look online at real-life dens to see how other people have created special spaces. (fig. 2).
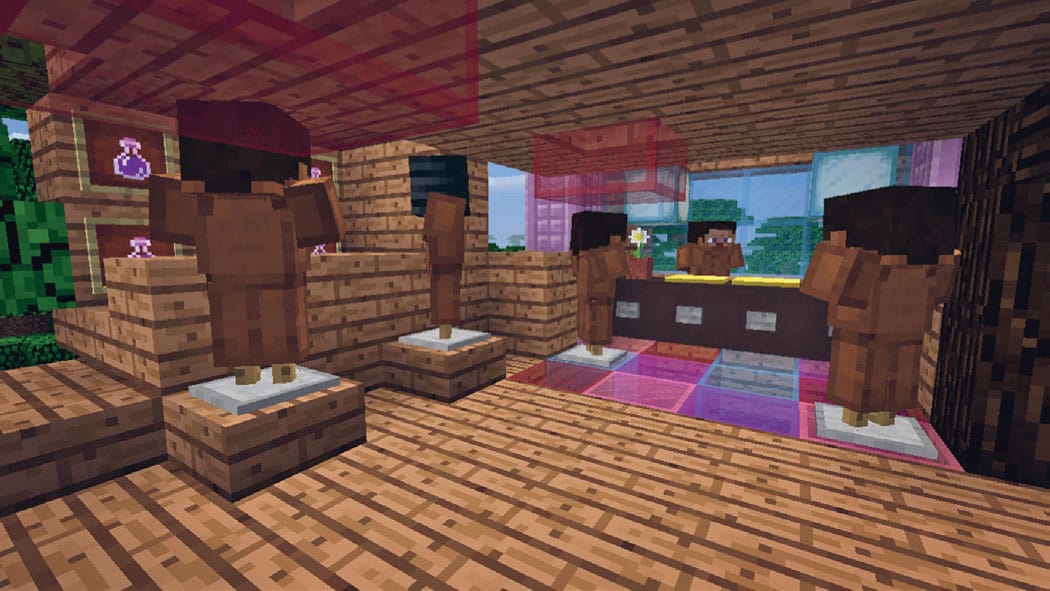
Fig. 2: Decide on your clubhouse interior
4. Doing these steps as a group helps everyone feel involved and also gets your building off to a great start.
5. You can build your clubhouse in Creative Mode, which will give you unlimited materials and resources, or Vanilla Survival, which will make it fun to find what you need as a group.
6. Building as a group is fun but it can be a little disorganized, so set some boundaries, first. In this case, literally! Build the outline of the clubhouse first and then invite the members of your group to choose an area to complete themselves. That way, the whole clubhouse gets done and everyone can put their own creative stamp on it.
7. Let go of any expectations and just enjoy what everyone contributes, no matter how big or small. It might not come out exactly as you’d planned, but it’ll be a great space for you all to enjoy together!
LAB 16 |
Better Together |
In this lab, you’ll use your research and building skills to find out what “perfect place” your community wants and then use Minecraft to design and build it.
HANDS ON: Gathering Data
You’ll devise and shoot a series of vox pop videos to find out what ideas your community has about their “perfect place.” Vox pops (“voice of the people”) are short filmed interviews with members of the public. They’re a great way to do research and include different viewpoints in your project.
![]() APPROXIMATE TIME TO COMPLETE
APPROXIMATE TIME TO COMPLETE
1 hour
![]() MATERIALS
MATERIALS
Paper and pen
Video-recording equipment (e.g., phone, tablet)
1. Get a clear sense of the questions you’re asking (fig. 1). You’re trying to find out what people think of their community space now, what they like, what they would like to change, and what is important to them. Remember to keep the questions simple and open ended. You can ask things like “What size should it be?” or “What color should it be?” or “What would you want included?” Make sure you ask everyone the same questions.

Fig. 1: For your vox pop interviews, you’ll need a recording device (which may need a separate microphone), a list of questions, and a pen for jotting down notes.
2. Choose your interview location. It isn’t helpful if there’s lots of background noise. You could ask if you can attend a community meeting that is already organized, such as a club night.

Fig. 2: Before you start recording, be sure to test your device to make sure the recording will be clear.
3. Be clear about what you’re doing and why. Let people know how you’ll be using the vox pops and make sure that they give you permission to use their interview in this way.
4. Set your device to record and make sure the quality of the recording is good enough to hear (fig. 2). It’s really frustrating if you film a great vox pop but when you go back to listen, all you can hear is the sound of a dog barking next door!
5. Once you’ve collected at least five interviews, listen back and make notes to help you in the next in-game activity. Write down the things that people said they liked, or didn’t like, as well as the things they would like to change and what ideas they had for their “perfect space” (fig. 3).
Fig. 3: Listen to your interviews to gather ideas for this lab’s in-game activity (shown here).
MINECRAFT PLAY: Build It Yourself
In this activity, you’ll use your vox pop interviews to help you build your community’s “perfect space” in Minecraft. We designed and built a community play space on the village green, but your “perfect space” might be something completely different! We used vox pop to see if the community wanted to build climbing structures for children, or benches for elderly residents, or a bit of both. Minecraft is a great space to try out ideas, and then you can add, change, or even start again. Then we showed it to the community to get their feedback.

![]() APPROXIMATE TIME TO COMPLETE
APPROXIMATE TIME TO COMPLETE
1 day+
![]() GAME MODE
GAME MODE
Creative
1. Sketch out the area using simple, strong lines. You can use a Google Maps image to help with this, and you can trace over the map to get the shape of a building or park area (fig. 1).
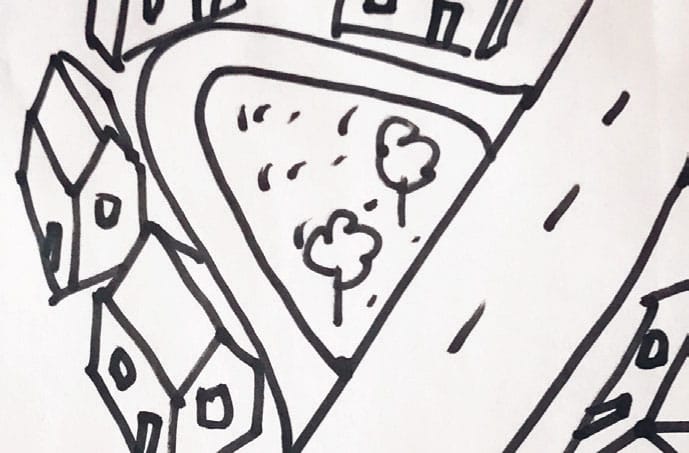
Fig. 1: Start your design by sketching a map of the site.
2. Next create a flat Minecraft world and map out your area. It doesn’t have to be to perfect scale, just recognizable as the general shape of the area where you want to build. In our village green area (fig. 2), we haven’t built the houses with roofs or windows because they’re not important to the plan. What is important is the grassy area where we’ll build our play space.
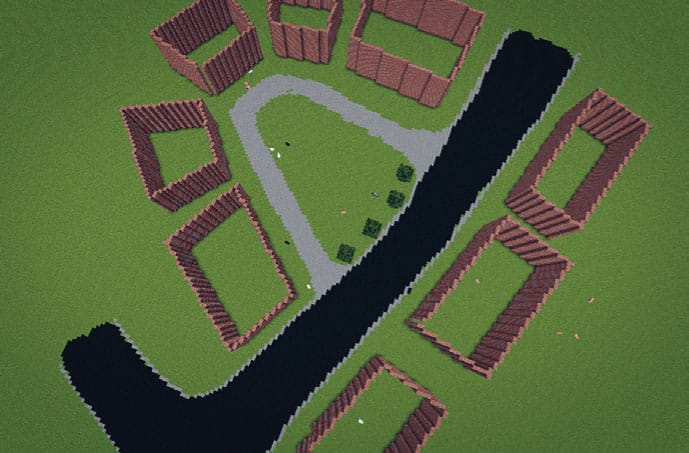
Fig. 2: Map out your area in a flat Minecraft world.
3. Invite friends and family to help with ideas, either in person or online.
4. In our perfect place, we built a climbing structure in the center (fig. 3). What does your perfect community place contain? Remember to refer back to your vox pop interviews to help you here.
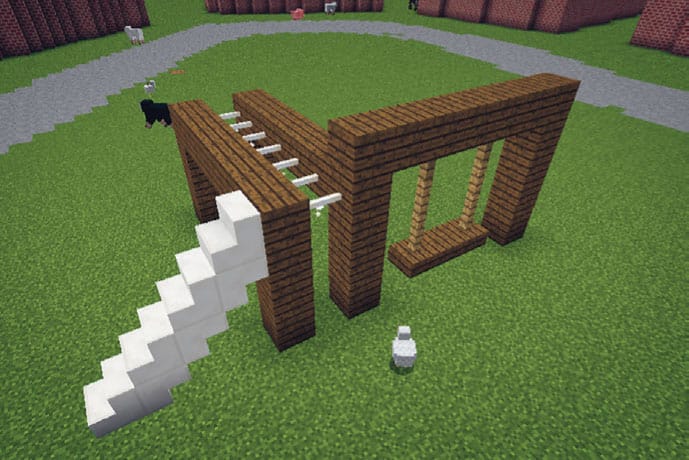
Fig. 3: Add special elements, as we did with our climbing structure.
5. Now gather feedback and make modifications. Our feedback told us that community members wanted a small structure with a slide, a flower bed, more seating, and a picnic bench (fig. 4). We added these and returned to the community to see what they thought. This process of making changes and returning to the group to gather feedback can refine an idea and make your proposal stronger. Listening to others and adding their ideas is a great skill to have and can help you gain local support for making your community a better place.
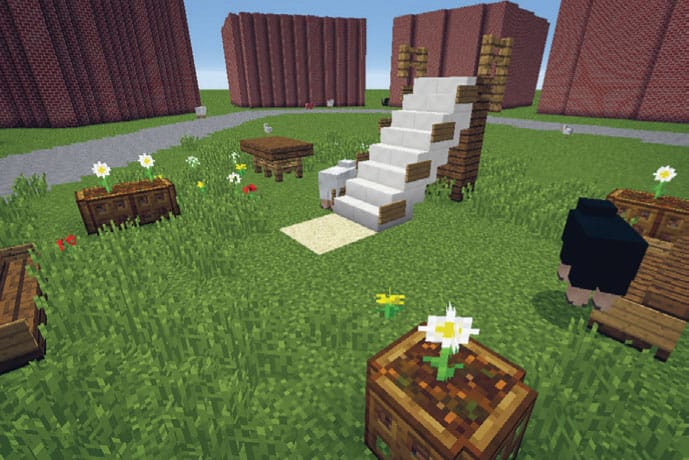
Fig. 4: In our final build, we included many ideas inspired by our vox pop interviews.
6. Once you feel that your build is complete, invite your community to a meeting where you can share what you’ve found out and show them around the Minecraft build. You can do this in game, take screenshots and print them out, or do a slide show presentation. If people can see that your build includes their ideas and visions, they’ll probably be more willing to help make it happen. By using your life hack skills to involve others, you can play an active part in building a better space for yourself and your community.
Generation Zone
 KEEP IT SAFE
Always make sure that whomever looks after you is aware of what you’re doing, where you are, who you’re talking to, and who you’re with!
Exploring Intergenerational Dialogues
Using your life hack skills, you’ll dialogue with a Project Partner, someone from an older generation, to learn about their childhood home.
Lab 17: Starting with You. In the first Generation Zone Lab, you’ll research and build your own home in Minecraft, then share it with your Project Partner as a way to introduce them to Minecraft.
Lab 18: Building on Memories. In the second lab in this section, you’ll interview your Project Partner about their childhood home when they were your age, use that information to help you build their home in Minecraft as accurately as possible, and share your work with your Project Partner.
To do these projects, you’ll first need permission from an older person to interview them and use their answers to help with your Minecraft build. He or she will be your Project Partner. You can work with a parent or grandparent, an educator, caregiver, or other trusted older member of your community. You can do this face to face, by email, on the telephone, or online. You’ll also need to take notes, have access to Minecraft, and a way to share your final builds.
If you have more than one day for this project, you can take your time with your interviewing and planning. This will give you a much better resource of information when it comes to building in Minecraft, and will make the project a richer experience.
LAB 17 |
Starting with You |
In this lab, you’ll collect data on your own home, and then turn that into a Minecraft build to share with your Project Partner as an introduction to Minecraft.
HANDS ON: Gathering Data
The best place to start in a project is with your own experience. To do this, you’re going to research your own childhood home and then make a detailed build plan on paper, using all the data you have collected.
![]() APPROXIMATE TIME TO COMPLETE
APPROXIMATE TIME TO COMPLETE
1 day or more
![]() MATERIALS
MATERIALS
Paper and pen
Audio-recording equipment (e.g., phone, tablet, Dictaphone)
Printer (optional)
1. Think about and sketch the different colors, shapes, textures and other details of your house. These might include the colors of your walls or doors, how many windows there are, the colors of your curtains or blinds, or whether you have a fireplace (fig. 1).
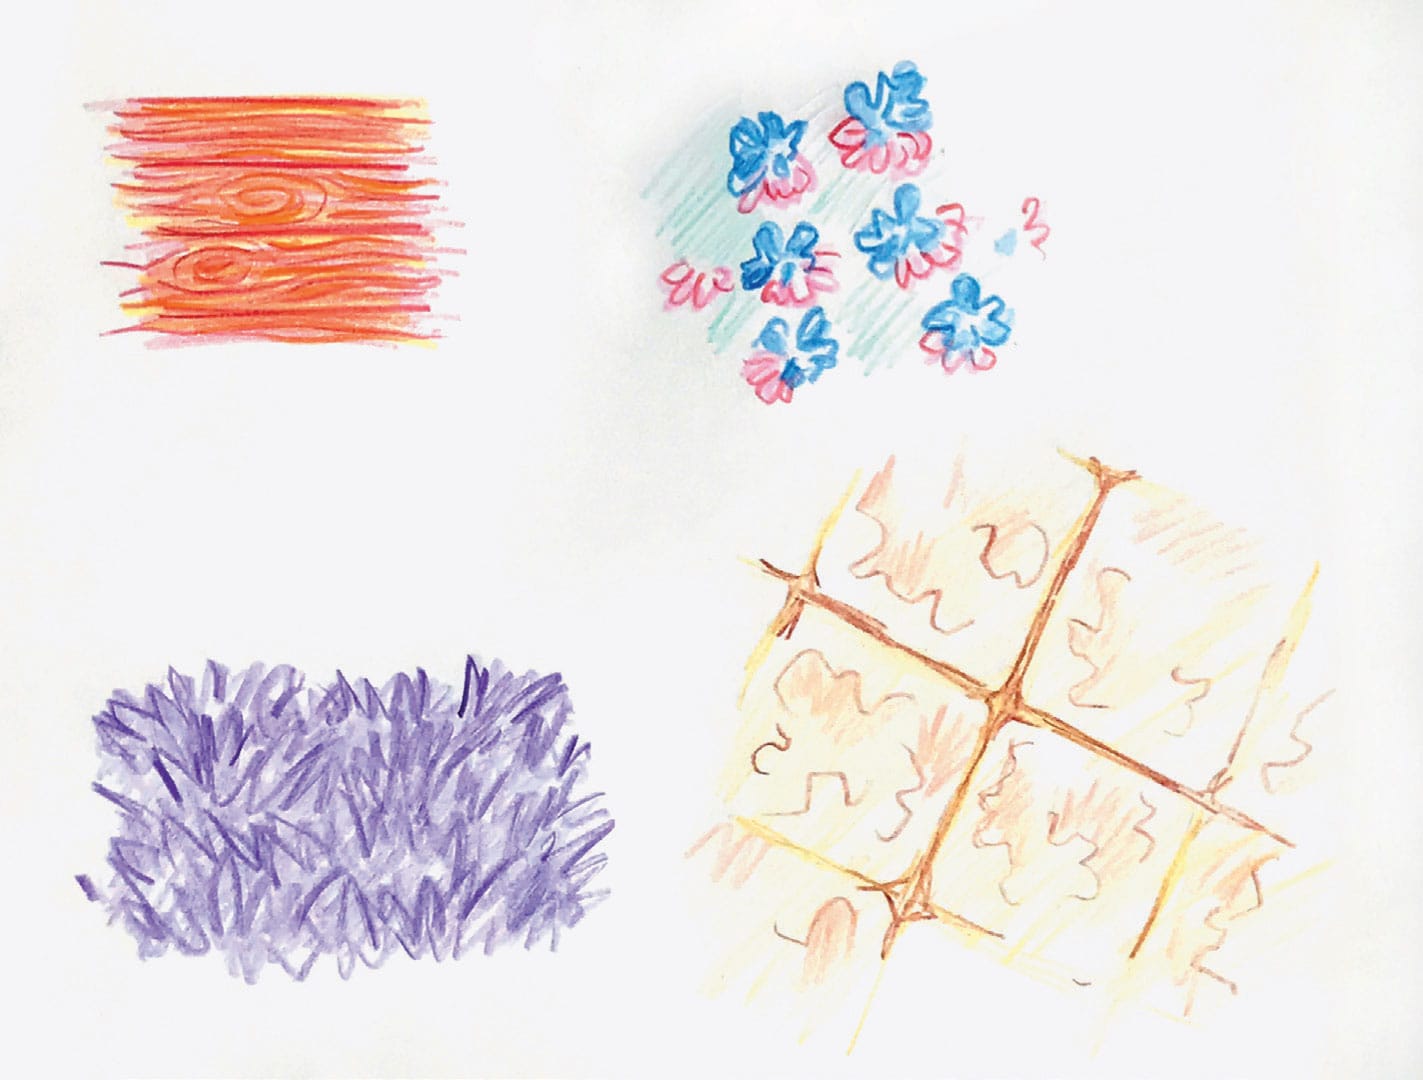
Fig. 1: Sketch the colors, textures, and other details of your house.
2. Measure the dimensions of your rooms. You can use a yardstick or a tape measure (fig. 2), or you can pace the rooms out by walking and counting your own footsteps. As you do this, be sure to draw the shapes of your rooms and mark down their measurements.
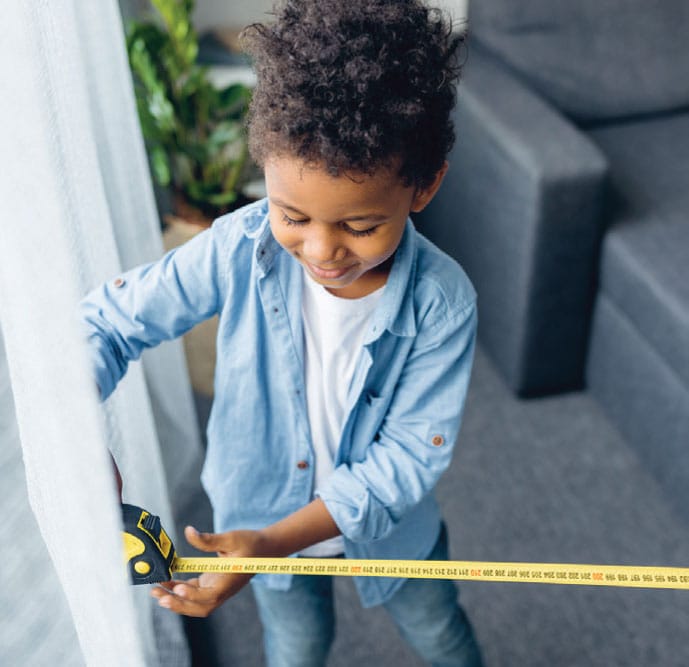
Fig. 2: Measure your rooms.
3. Using this data, make a plan on paper of your home and the details you want to include in your build (fig. 3). Remember, this will be your blueprint for your Minecraft build, so be sure to include as much detail and make it as accurate as possible.
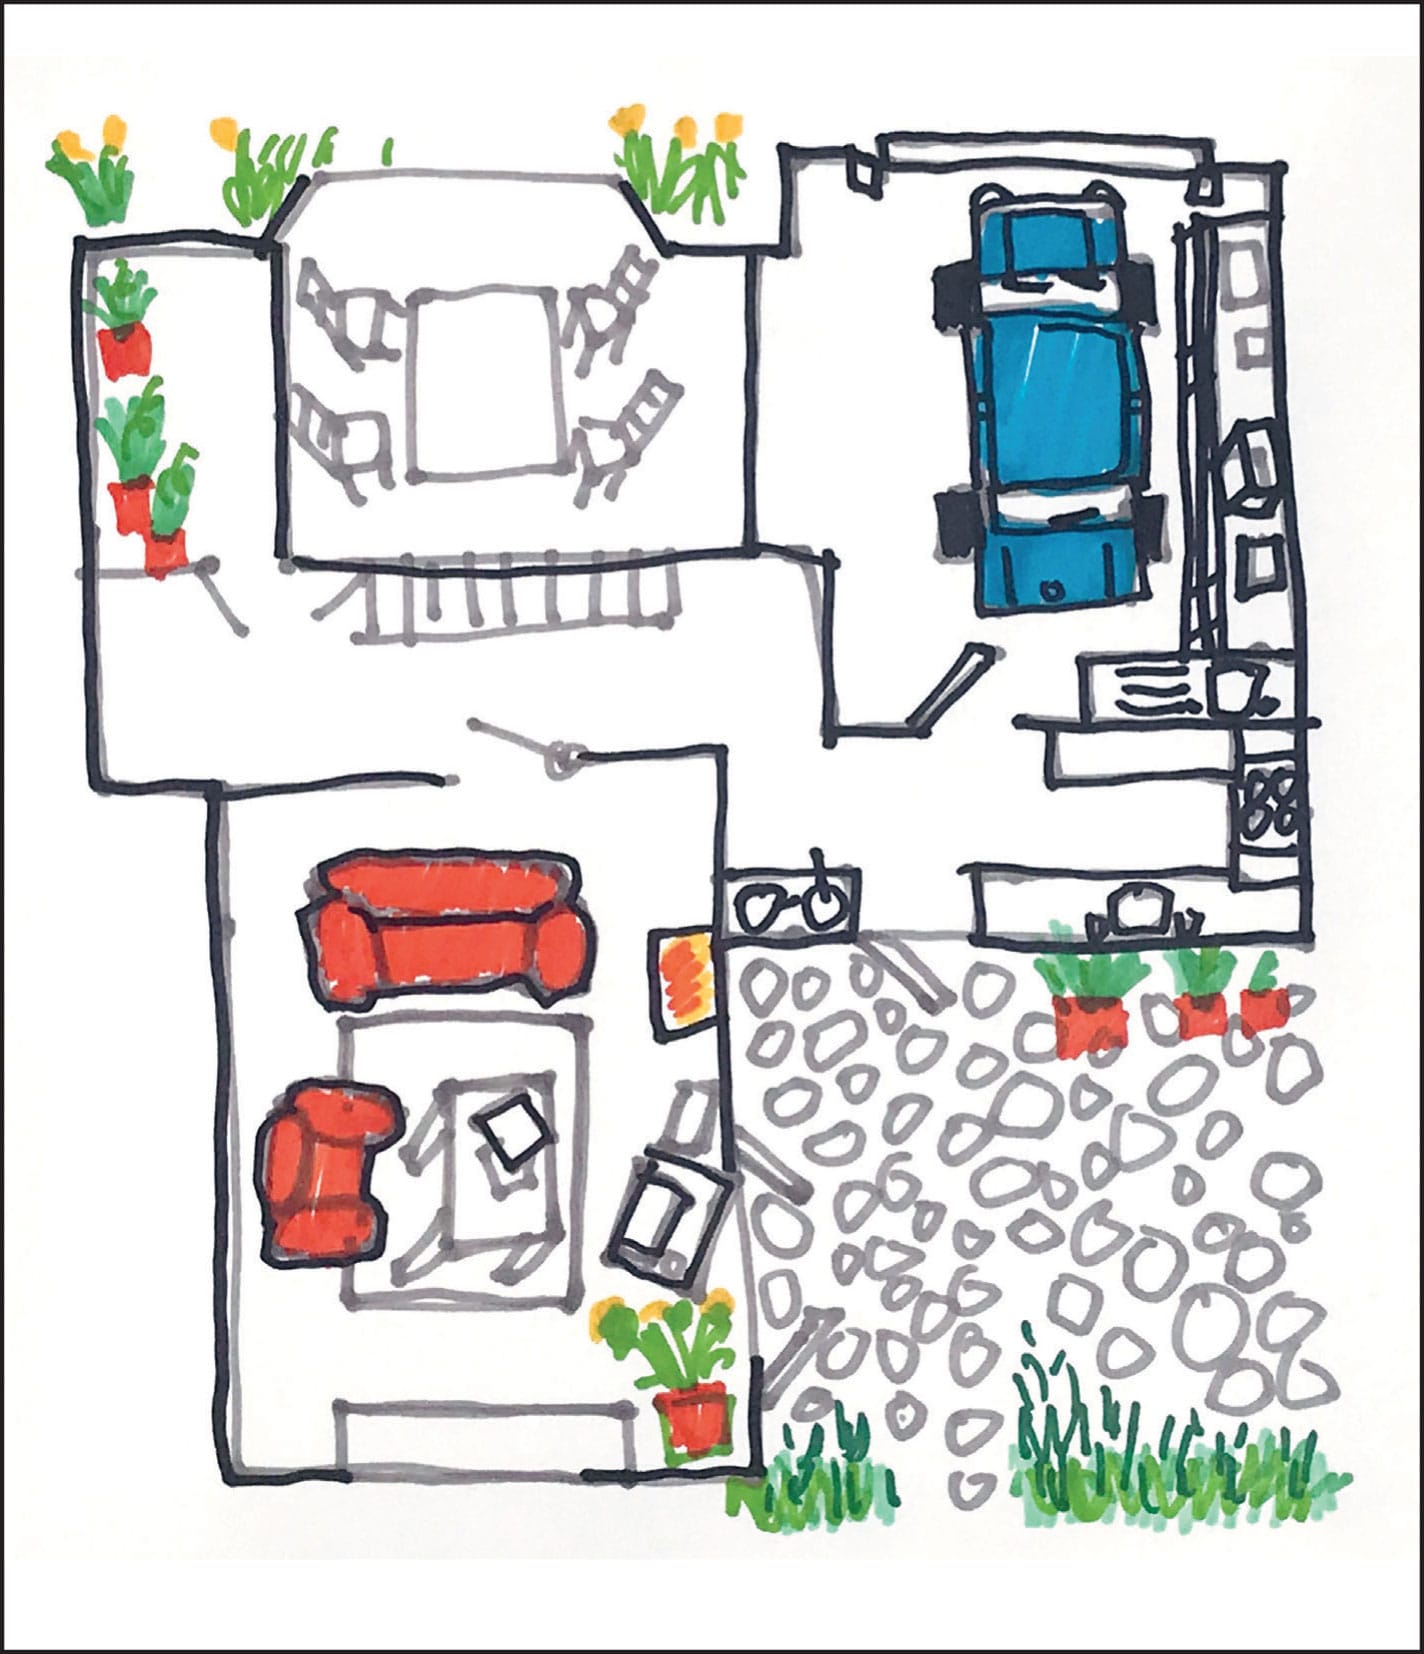
Fig.3: Make a paper plan of your layout.
MINECRAFT PLAY: Build It Yourself
In this activity, you’ll use hard data—all the information you gathered and turned into your blueprint in the hands-on activity—to build your own home in Minecraft. This is a representational build, which means you need to keep it as accurate as possible.
![]() GAME MODE
GAME MODE
Creative
![]() APPROXIMATE TIME TO COMPLETE
APPROXIMATE TIME TO COMPLETE
1–2 hours + Project Partner interaction time
![]() PLATFORMS
PLATFORMS
Any version or device; works especially well with Minecraft Pocket Edition because it’s easy to share your work with your Project Partner.
![]() OTHER SUPPLIES (Optional)
OTHER SUPPLIES (Optional)
Printer (for printing out screenshots or other drawings from your build to share)
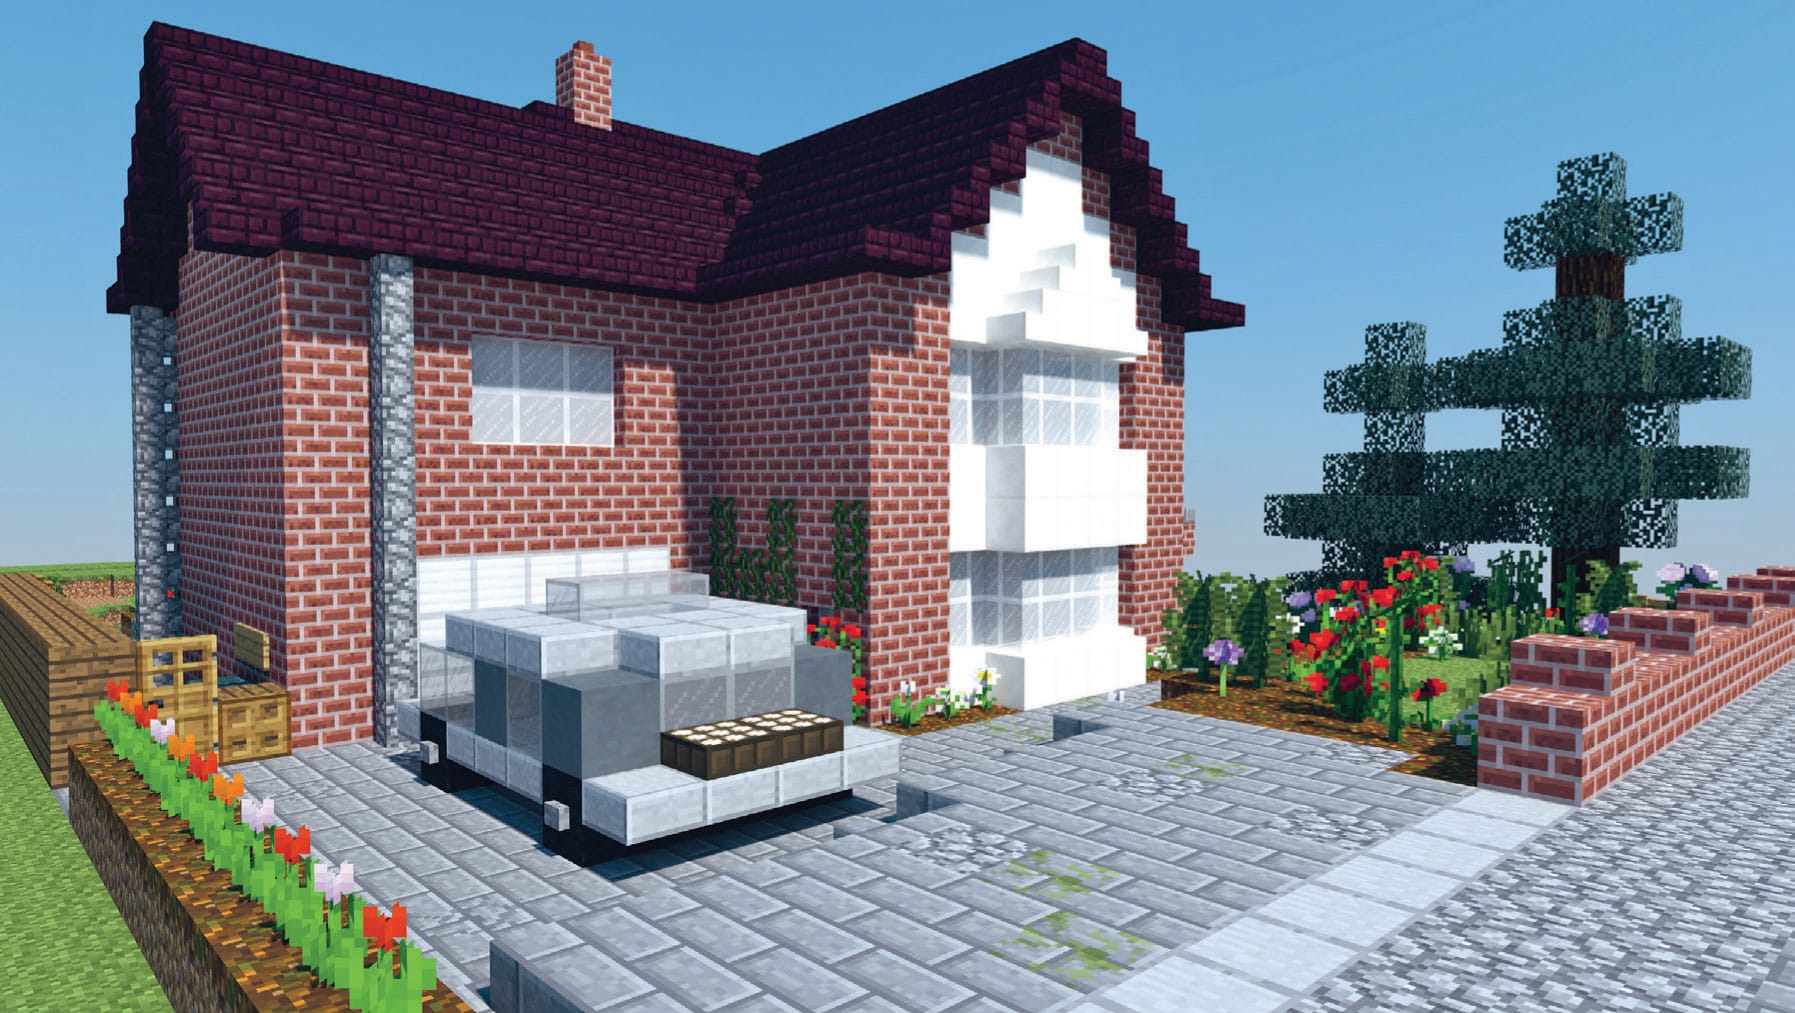
1. Using your data and paper plan, build your home in Minecraft (fig. 1).
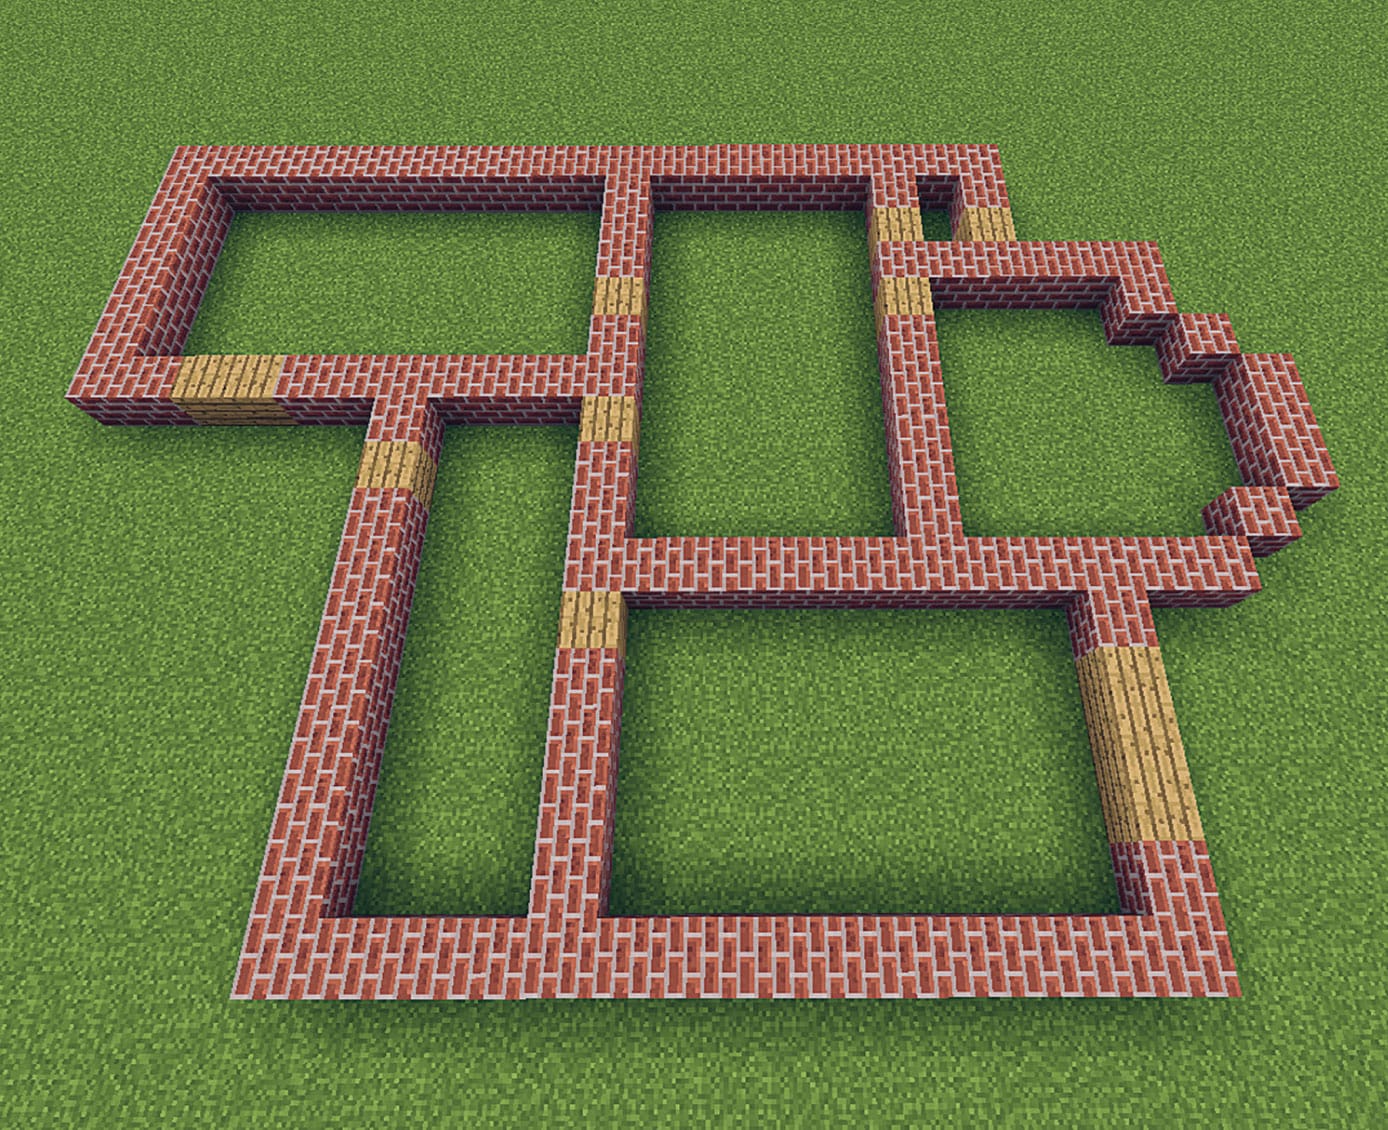
Fig. 1: Using your paper plan from the hands-on activity as your guide, start your Minecraft build.
2. Look at blocks and Minecraft building techniques. There are the usual blocks you can use when building a house, such as brick, wood, and stone, but in Minecraft we have hundreds of blocks to choose from (fig. 2). What other blocks could you use? Think about color and texture and find ones that have similar qualities. You could use polished granite, concrete powder, andesite, snow, pistons to make tables, and soul sand that can look really good as a wall hanging.
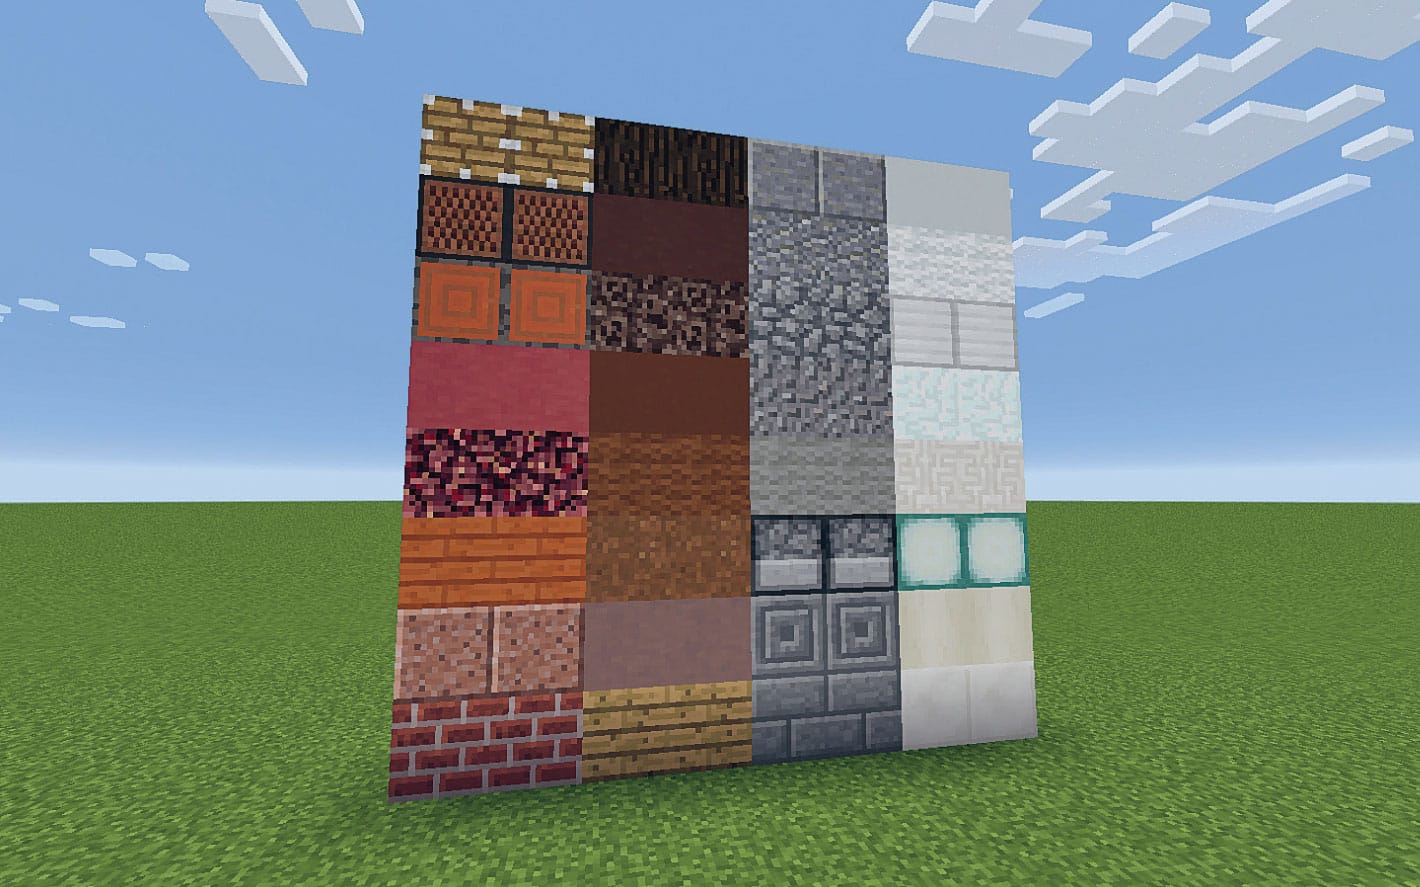
Fig. 2: Consider many different kinds of blocks as you construct and decorate each room.
3. Share your build with your project partner. Remember, this may be the first time they have seen Minecraft, so help them understand what they’re seeing and take time to explain how you’ve gone about creating your build (fig. 3). If you can’t share your build on a device, then you could print out screenshots and make a scrapbook journal.

Fig. 3: Share your build with your project partner.
LAB 18 |
Building Memories |
In this lab, you’ll interview a project partner to find out more about their childhood home and then build it in Minecraft. Sharing a project like this encourages communication between different generations and helps us understand more about the things we have in common.
HANDS ON: Gathering Data
You can do this part of the lab in a single interview or have several sessions to learn even more about their memories of their childhood home.
![]() APPROXIMATE TIME TO COMPLETE
APPROXIMATE TIME TO COMPLETE
20 minutes per interview
![]() MATERIALS
MATERIALS
Pen and paper
Audio-recording device (optional)
1. Prepare your questions before you interview your partner. What information do you want to find out? Are your questions open or closed?
2. Set up your interview space. What can you do to help your project partner feel at ease to share their memories? Do you need to explain the project in more detail? What else do you need to conduct your interview? Remember, asking questions is only half of it. You must also use listening skills (fig. 1).
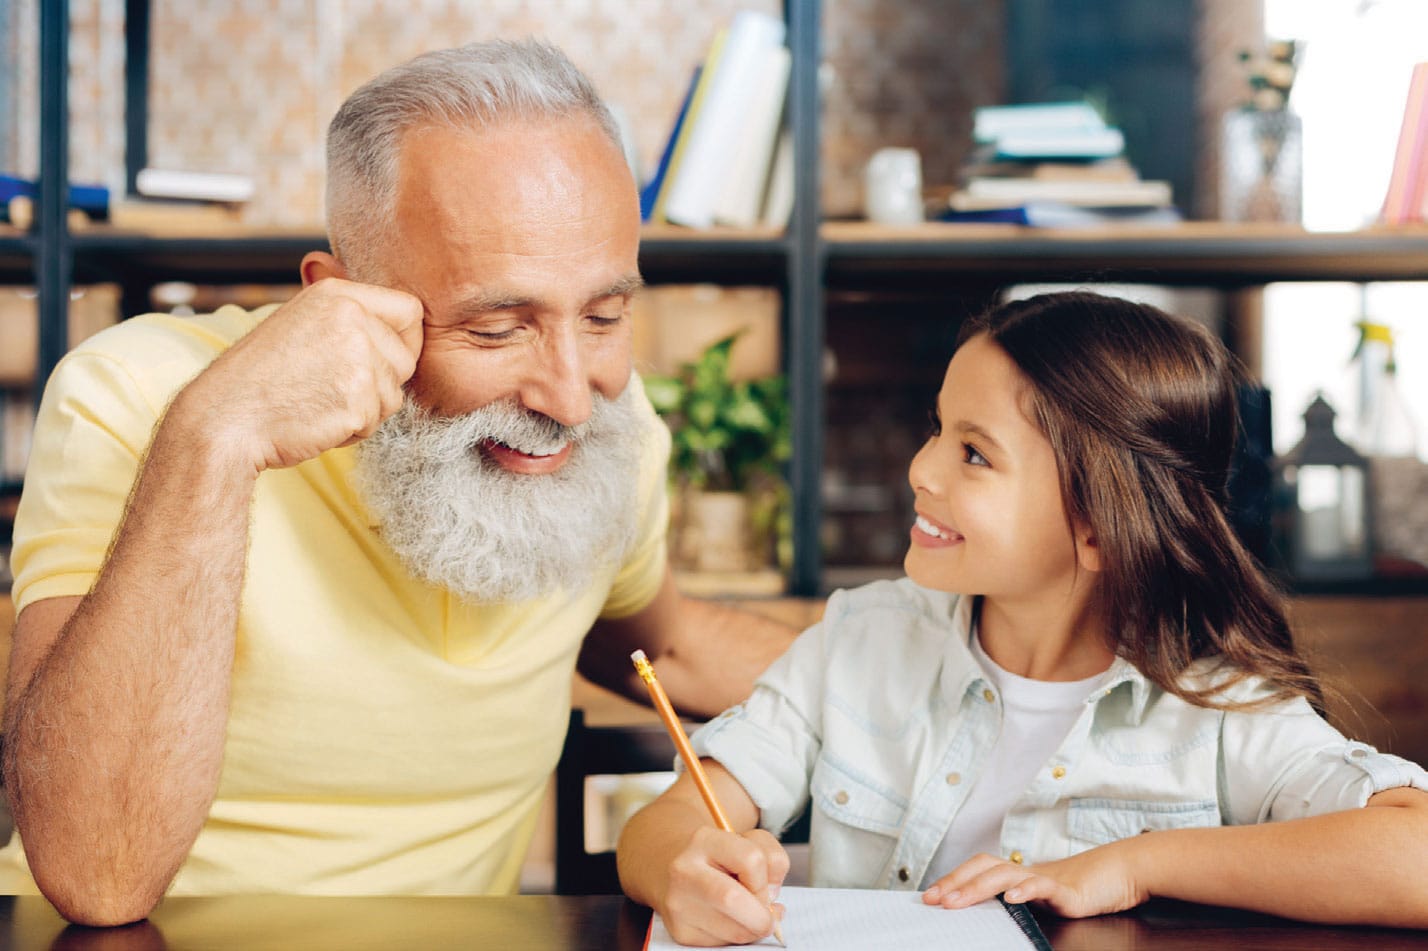
Fig. 1: Make a list of questions and use your listening skills while interviewing your project partner.
3. How are you going to record your interview? You can use pen and paper or a recording device. If you’re recording, make sure your interview space is quiet (fig. 2).

Fig. 2: You can use either pen and paper or a recording device to document your interview of your project partner.
4. You can also invite your project partner to show photographs or other items from their childhood to help them share their memories (fig. 3).
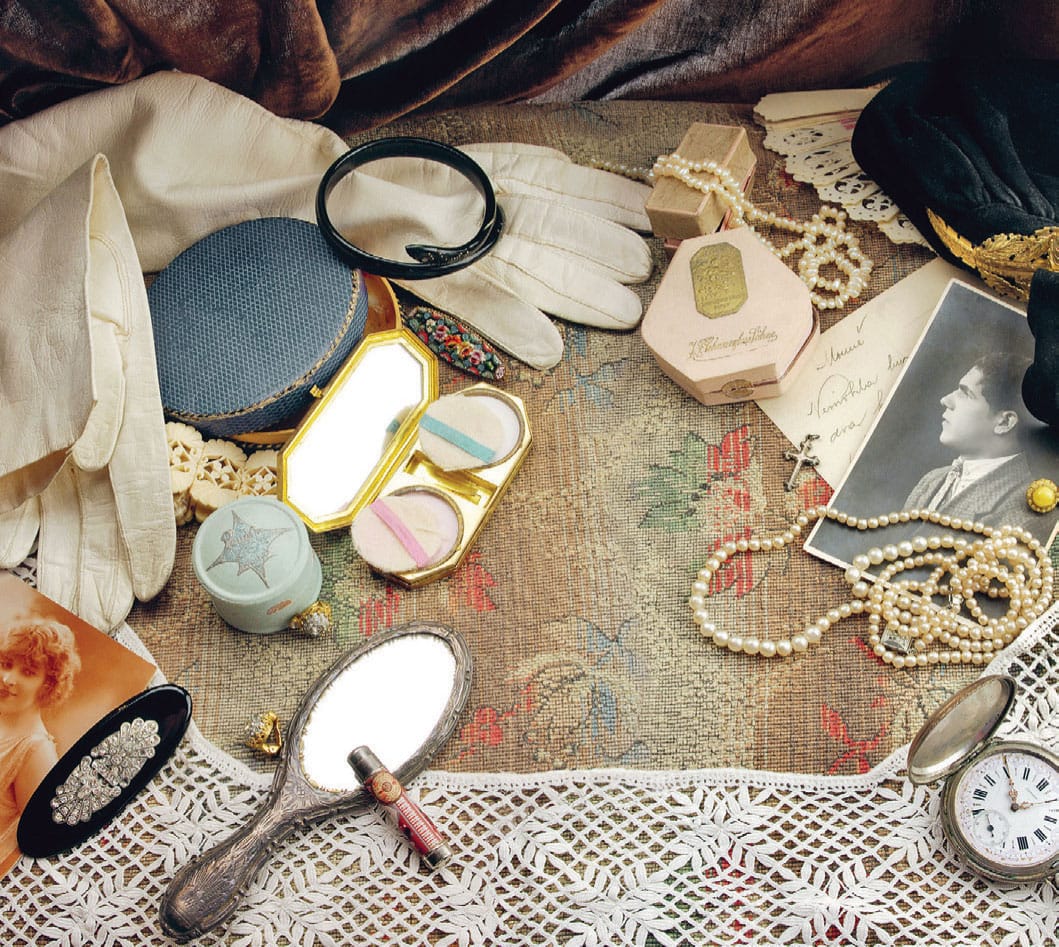
Fig. 3: Invite your project partner to share memories through photos and childhood items.
5. Using the data you’ve collected about the childhood home of your project partner, you’re now ready to make a paper plan. When you’re drawing up your plan, think about the measurements your project partner was using—were they old measurements (imperial) or new measurements (metric)?
MINECRAFT PLAY: Build It Yourself
Now you’ll turn the information you gathered in the interview into an authentic version of your partner’s childhood home. Think about the factual data you have: how big the rooms are, how many floors the home had, what colors were in it, what key styles and objects it had, what it was it built of, and more.
![]() APPROXIMATE TIME TO COMPLETE
APPROXIMATE TIME TO COMPLETE
2 hours
![]() GAME MODE
GAME MODE
Creative
1. Using a block scale of 1:1 (1 meter = 1 block is easy to use), measure out the home. How many floors does it have? How many rooms? Doors? Windows? Make sure you plan out the whole house, and remember to think about the blocks you can use (fig. 1).
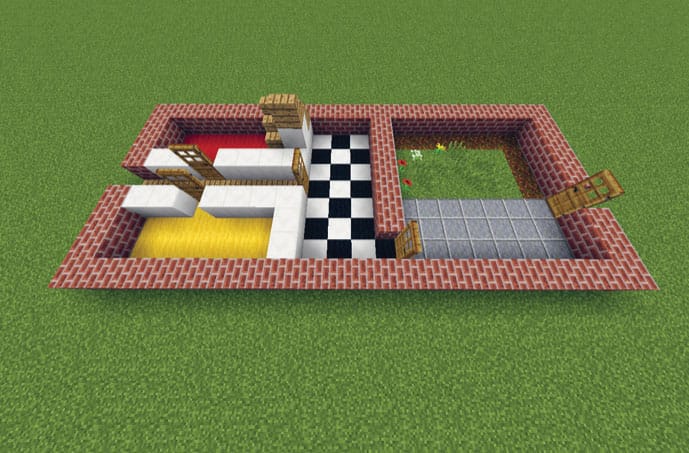
Fig. 1: Measure out your house.
2. Invite your project partner to offer feedback on your work in progress (fig. 2). Feedback has three parts:
• Opinion: Someone else’s opinion that you value.
• Understanding: Do they understand what your work is about? Minecraft can be quite baffling to someone who has never experienced it.
• Knowledge: What special knowledge can you use to improve your work?
This is called iteration and is an important back-and-forth part of the design process. The challenge is to be able to adapt and change your work based on other people’s opinion, understanding, and knowledge.
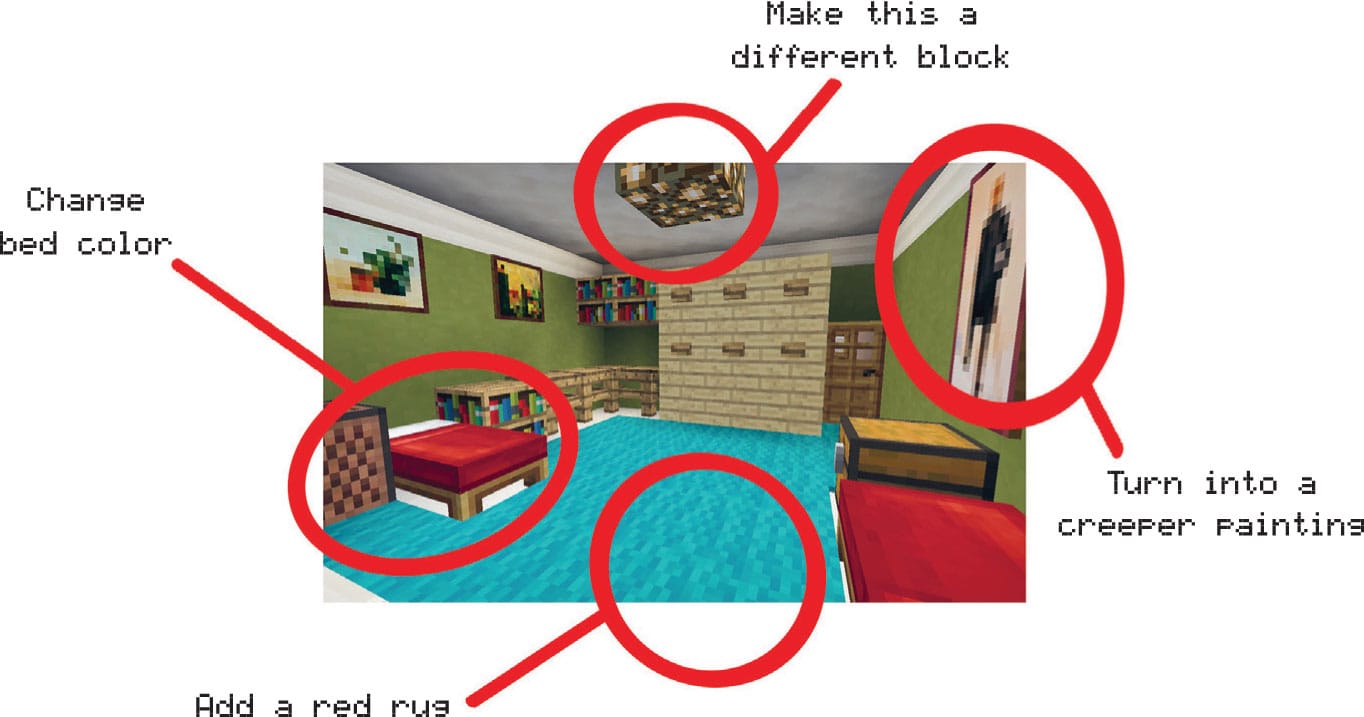
Fig. 2: Get feedback from your project partner on your work in progress.
3. Now you’ll share your build with your project partner. How do you engage someone? You’ll need to use your empathy skills to help them feel at ease and make the build accessible. Your audience may have little experience with using computer games or seeing Minecraft. This may be the first time they’re seeing their “childhood memories” and it may bring up feelings for them. Here are a few ideas of how to share your build:
• You could share one on one, where you do a slow walk-through in person with your partner and they can ask questions and get involved (fig. 3). Can you do this in their home, or do they have to come to you?
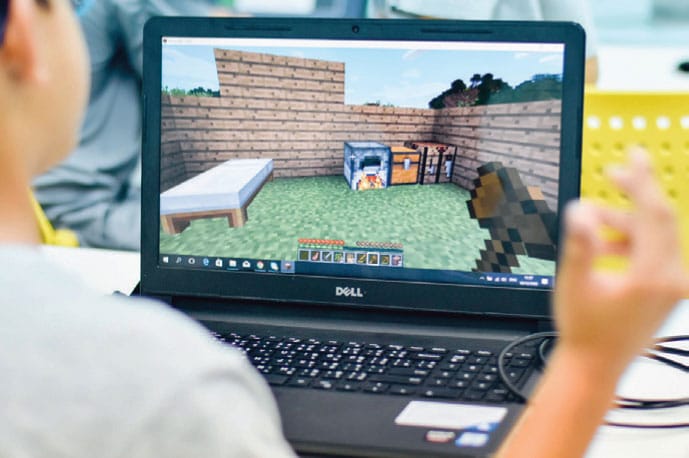
Fig. 3: You can share your final project build with your project partner in person.
Think about speed. How fast are you going through the build? Do they need a larger screen to be able to see the build? Remember to ask yourself: Can my project partner see what I’m seeing, or do they need me to go slower or explain more? Check in with them.
• But what if you can’t or don’t want to share your build in person? It can feel scary to share your work. Or maybe your project partner lives a long way from you. How can you share your project meaningfully with them? Here are some other ways you can share:
1. Printed images can be a good way to share details of your build, particularly if your project partner finds it difficult to see the screen or follow something moving.
2. You could create a memory box or journal with printed images, notes, sketches, and other data that you can send to your project partner (fig. 4).
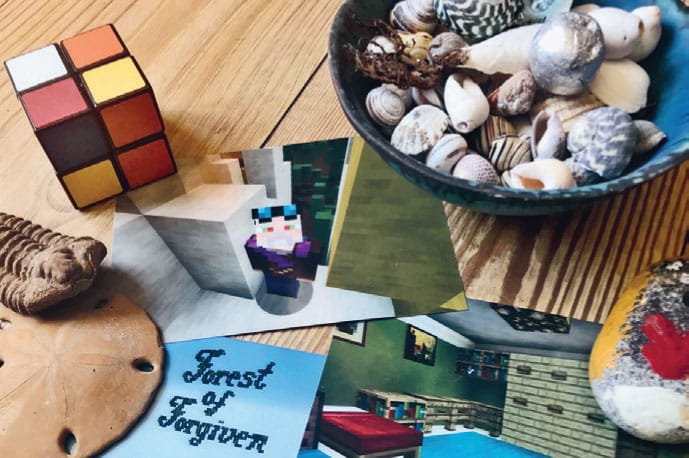
Fig. 4: If you live far away from your project partner, you can send them printouts of screengrabs from Minecraft and a memory box of inspirational items.
3. You can create a fly-through video with music, text, and audio and share it via YouTube or another file-sharing platform.
4. You can create a slide show that you digitally send to your project partner.
Support Causes
These projects will get you thinking about how you can support the causes you believe in, and put the fun into fund-raising. You can get some great ideas from other charities. Perhaps you can do a sponsored read or walk, have a bake sale, run an auction, or organize an online charity live stream.
Working to Raise Awareness and Funds
Lab 19: Ad It Up. In the first lab, you’ll choose a cause to support and strategize about how to motivate people’s interest and enthusiasm by designing a billboard that advertises your cause, then build and share a Minecraft Charity Hub.
Lab 20: Go for the Goal. In the second lab in this section, you’ll investigate ideas for raising money for your cause. In game, you’ll create a counter that lets your supporters view the progress of your fund-raising campaign.
For these projects, you’ll need guidance from a responsible adult to make sure you’re reaching out to people safely, as well as to set up a way to collect funds and help you contact someone who represents your cause who handles donations.
LAB 19 |
Ad It Up |
In this lab, you’ll design and create a billboard for your cause. Then you’ll create a Minecraft Charity Hub build inspired by your cause.
HANDS ON: Gathering Data
Charities use billboard advertising to reach large audiences to get support and raise money. When designing a billboard ad for a cause, three things almost always apply.
![]() APPROXIMATE TIME TO COMPLETE
APPROXIMATE TIME TO COMPLETE
1 day+
![]() GAME MODE
GAME MODE
Creative
1. You have to create an emotional response and connect with your audience. They have to care about your cause, too!
2. You have to be clear about your call to action. Do you want people to get involved with a cause or donate money or materials?
3. You have to reach the target audience. If you’re trying to recruit Minecraft players to take part in a sponsored build, making a billboard on a Minecraft server might work really well. If you want to get your local community to come to a sponsored bake sale, then having a billboard online probably won’t reach as many people as one by the local store. Whatever your cause is, be creative!
![]() APPROXIMATE TIME TO COMPLETE
APPROXIMATE TIME TO COMPLETE
1–2 hours
![]() MATERIALS
MATERIALS
Pen and paper
Notebook
Sketchbook
Magazines
Scissors
Glue
Information about your cause
Camera
1. Choose a cause that’s important to you. It can be a local cause or a global one Ask yourself WHY the cause matters, WHO it helps, and HOW it does this.
2. Now think about how you’re going make your connection with people. We’re all human, so use your empathy skills here. Note down three connecting points about your cause (fig. 1).
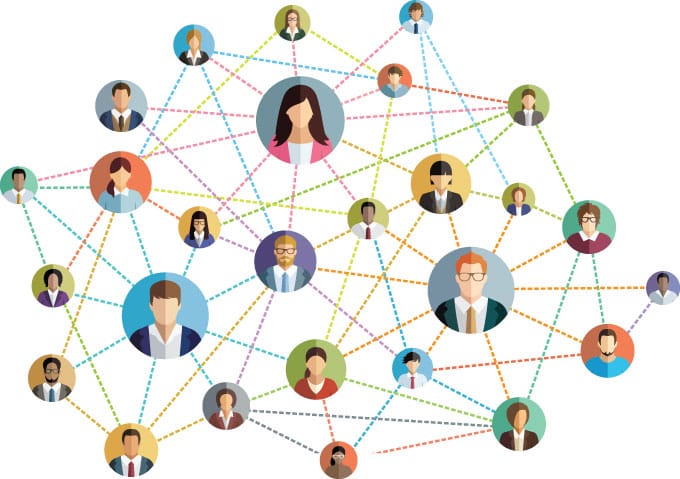
Fig. 1: Think about how you can connect with people about your cause and consider how you want people to participate and help.
3. What are you asking people to do (your call to action)? If you want them to sponsor you or sign up to do something make sure they know how to do that.
4. The saying goes that “a picture is worth a thousand words.” You probably don’t have that much space on your billboard, so get your message across in pictures. Use your sketchbook to noodle some ideas and cut out images and styles from magazines (fig. 2).
Fig. 2: Gather some ideas for a billboard that supports your call to action.
5. Billboards are often designed in landscape format (the length is longer than the height). Choose your billboard size, then think about where you want it to go. Remember, you’re not actually going to have to make this billboard. This is a graphic design exercise to make the template for your ad, so if you think it needs to be 20 feet (6.09 m) long and 10 feet (3.05 m) high, you can do that, as long as your measurements are clear in your design (fig. 3).
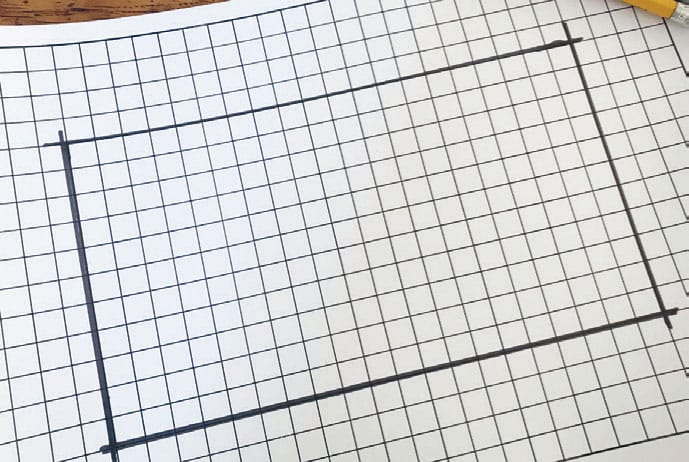
Fig. 3: Consider the shape and dimensions of your billboard.
6. Use your notes and design sheets to mock up your billboard ad. Try out two or three complete ideas to see which works best. Use a test group of friends or family to see which is most successful (fig. 4). This is often how advertising departments work out which ad to go with.
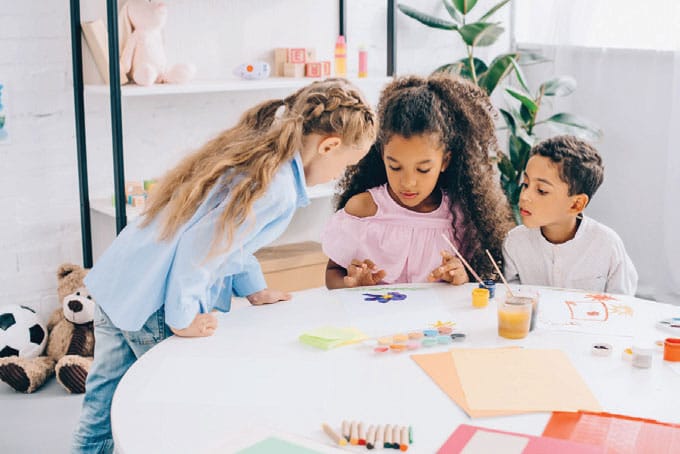
Fig. 4: Use your notes to create a mockup ad, then get feedback from family and friends.
7. Once you have your design, take a photo—you’re going to use it in your next activity!
MINECRAFT PLAY: Build It Yourself
In this activity, you’ll share the build via a live stream three times during the week to gather support and interest, and then open a server on the weekend to invite people along. Don’t worry if you don’t have a server—you can share it with your family, friends, class, or after-school club by just taking pictures of your build and letting people know about them. There are lots of different ways you can do a Minecraft hub build. The key elements are to keep it safe, fun, and accessible. A good way to start is to create a vision of your build and work from there.
![]() APPROXIMATE TIME TO COMPLETE
APPROXIMATE TIME TO COMPLETE
1 week
![]() GAME MODE
GAME MODE
Creative
1. What is the central visual idea? This could be the name of the event or charity, such as Cory Schevik’s “Love Tropics.” In our example, we are building a “Type 1 Diabetes” information hub to raise awareness and help visitors understand the WHY and WHAT of our cause, and then suggest HOW they can help (fig. 1).
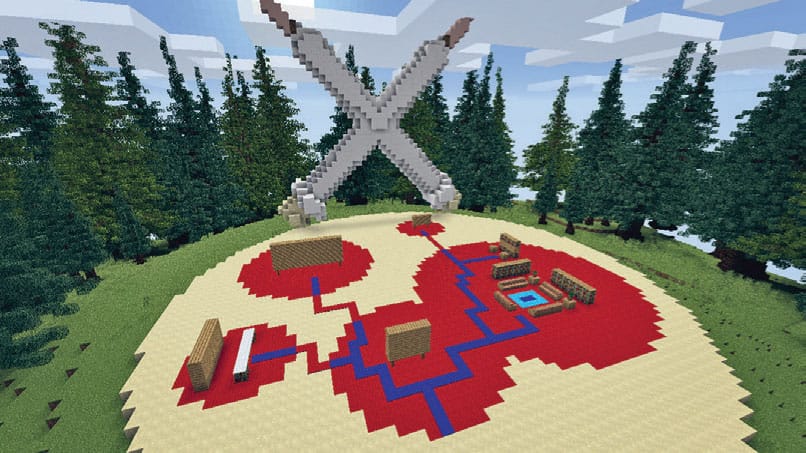
Fig. 1: Think about the how to communicate the central visual idea. The inspiration for our dimension information hub build is type 1 diabetes.
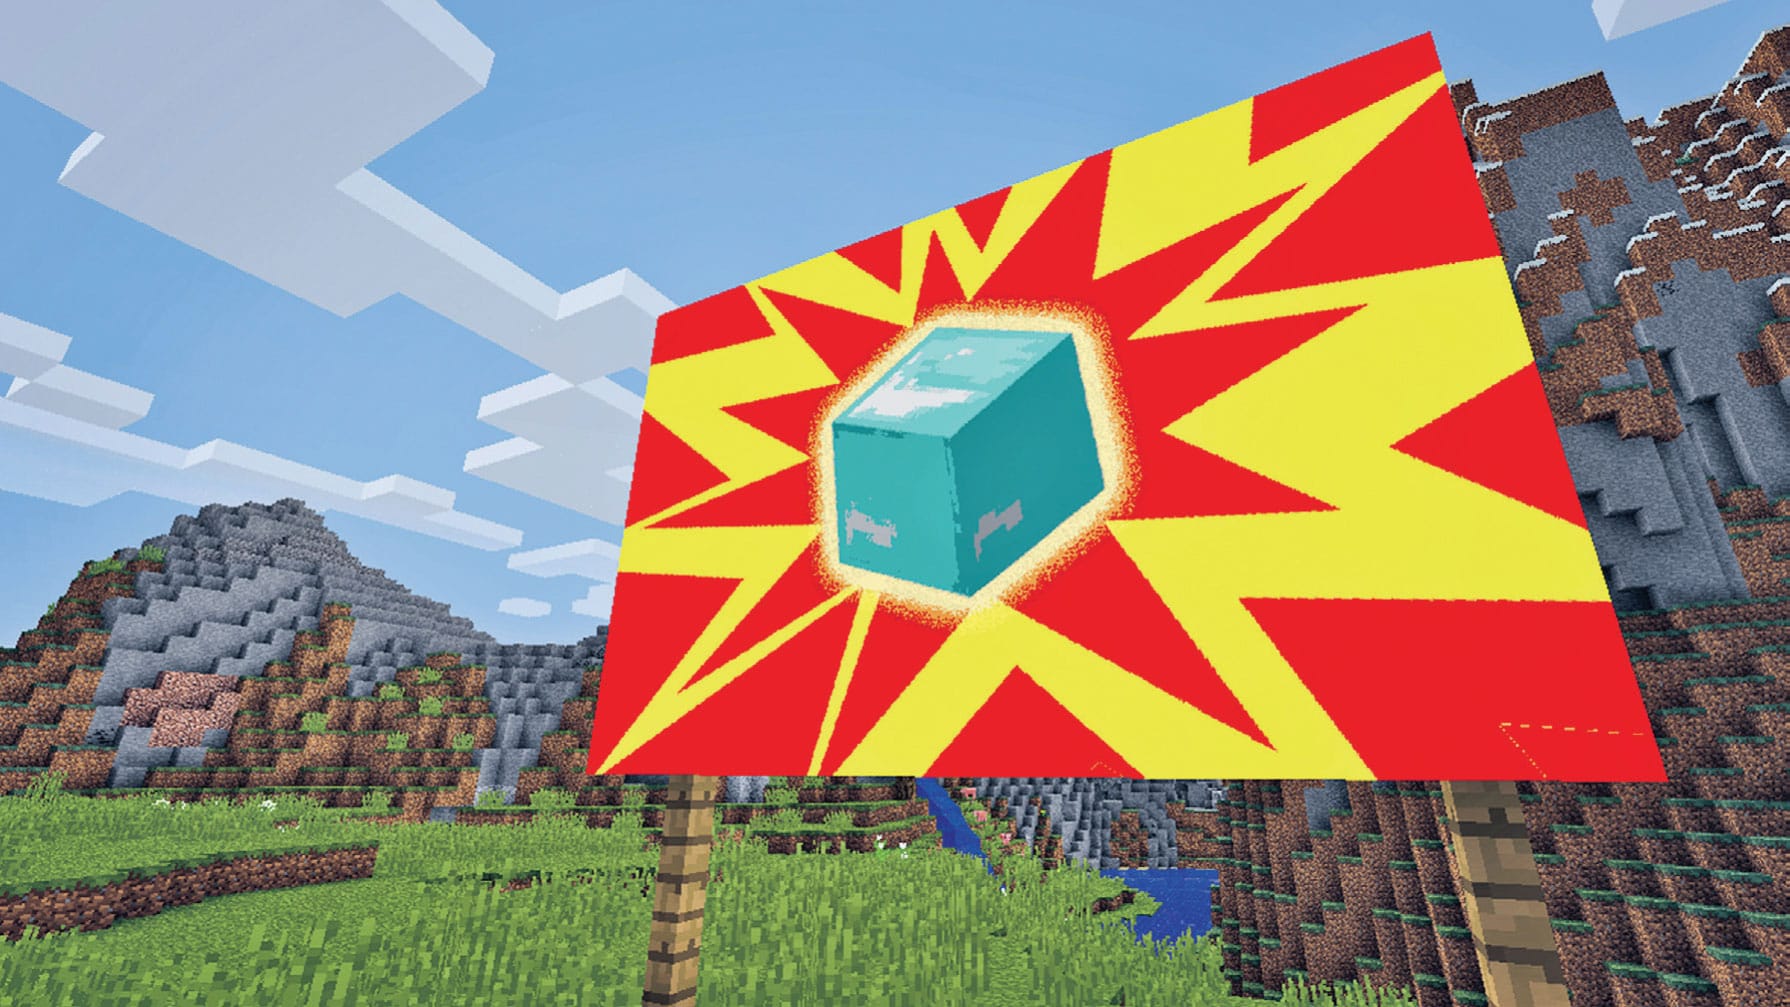
2. If you want, you can put your billboard ad into your Minecraft build (fig. 2). You’ll need an internet connection and permission to download MCC Tool Chest for Bedrock Minecraft or use a website for Java Minecraft. If you want to find out how to do this, you can watch an instructional video.
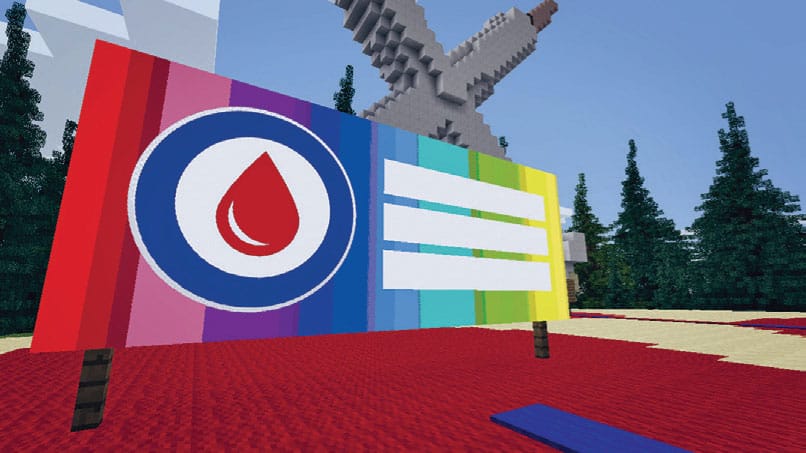
Fig. 2: You can also create and display a more traditional billboard in Minecraft.
3. You’ll work on your build and share its progress with others over a week. You can share your build via live stream, if you have the facility to do so. This will allow you to share your build with your audience in real time and has the advantage of letting you chat directly to them about what you’re doing and why. You could also share it via Instagram or another online platform, if you’re allowed to. To do this, you’ll need to take photos of your build throughout the week and share these. You can post with reminders of the event and some information about why and what you’re doing. Remember to make sure you stay safe and get permission from a parent, educator, or other care provider before you do anything online.
4. If you don’t have online access, you can still share your build and get people involved by taking photos and sharing these in class, on a notice board, or with your family at mealtimes. The important thing is that you share the build with other people in the week leading up to the event, and you make sure that they know the WHAT, WHY, and HOW of what you’re doing.
5. Once the week is up, invite people to come and see the final build. If you have access to a server, you can do this in game and invite people along at a set time to look around the build. If you’re sharing with your class or family and friends, set a time where you’ll share pictures and talk about your build, and show them around on your own device. There are lots of ways to share your build, but make sure whichever way you decide, you get permission to do so beforehand.
6. An important part of any event is the ability to reflect. At the end of your build and public event, take a bit of time to think about what has worked and how you could do it differently next time. Did you have enough help? Did you manage to let people know about your build? Don’t be afraid to ask for feedback from others. Doing so will help you grow your ideas and get inspiration!
LAB 20 |
Go for the Goal |
In this lab, you’ll come up with your own FUNd-raising idea and set a fundraising target, then you’ll build a Minecraft counter system to help your supporters track how you’re doing. Time to get FUNd-raising!
HANDS ON: Gathering Data
Before you start raising money for a cause, there are some important legal things to be sure of. First of all, you’ll need to set up some way of collecting the donations. This might be through going door to door, at an event, or by making an online fund-raising page. Contact the charity and ask them for their fund-raising pack. This will have clear instructions about how to donate money, and usually have lots of useful extra information to help with your fund-raising challenge. If it’s a local cause, find out who’s responsible for the money side of things, and ask them what you need to do to collect funds. Make sure you also check in with a responsible adult before you start planning your event.
![]() APPROXIMATE TIME TO COMPLETE
APPROXIMATE TIME TO COMPLETE
1–2 hours to prepare plus fund-raising time
![]() MATERIALS
MATERIALS
Your cause’s fund-raising pack (if it has one)
Supplies to make a poster (optional)
A way to collect money
1. Your idea needs to be easy to understand, not too long to complete, and most importantly, fun to take part in. It might just be you doing it, but you still want to have fun, don’t you? If you want others to take part, it usually helps if the thing you’re asking them to do is enjoyable, too! We’ve got a few ideas you could choose from (see sidebar below, right), or come up with your own.
2. Now you need to plan your event. Ask yourself:
Where will it take place?
When will it happen?
Who will be doing it?
How will you raise funds?
3. Use your billboard-making skills to design a poster or an ad to let people know. Make sure it includes what you’re doing, why, when, and how people can get involved (fig. 1).
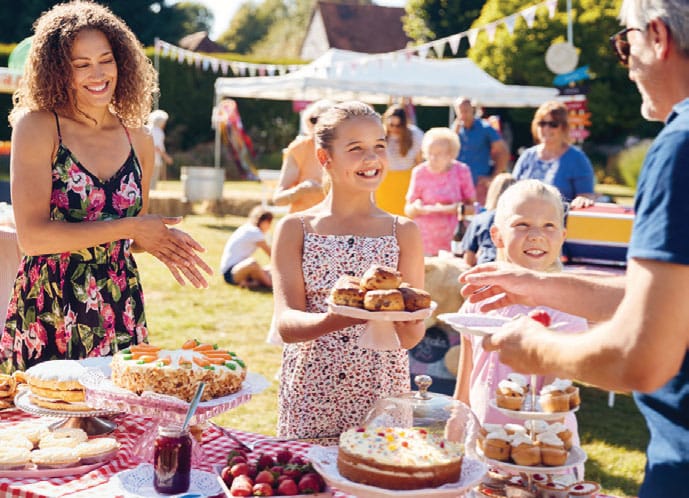
Fig. 1: Ask family, friends, and neighbors to help you plan fund-raising activities. They’re more fun when you do them together.
4. Now set a fund-raising goal. Collect the donations (fig. 2), then count and distribute the funds to your cause.

Fig. 2: The money you collect from each activity will help you reach your fund-raising goal.
MINECRAFT PLAY: Build It Yourself
For this activity, you’ll create a counter system in Minecraft to let your supporters follow your fund-raising goal in real time.
![]() APPROXIMATE TIME TO COMPLETE
APPROXIMATE TIME TO COMPLETE
30 minutes to build, then however long your fund-raising lasts
![]() GAME MODE
GAME MODE
Creative
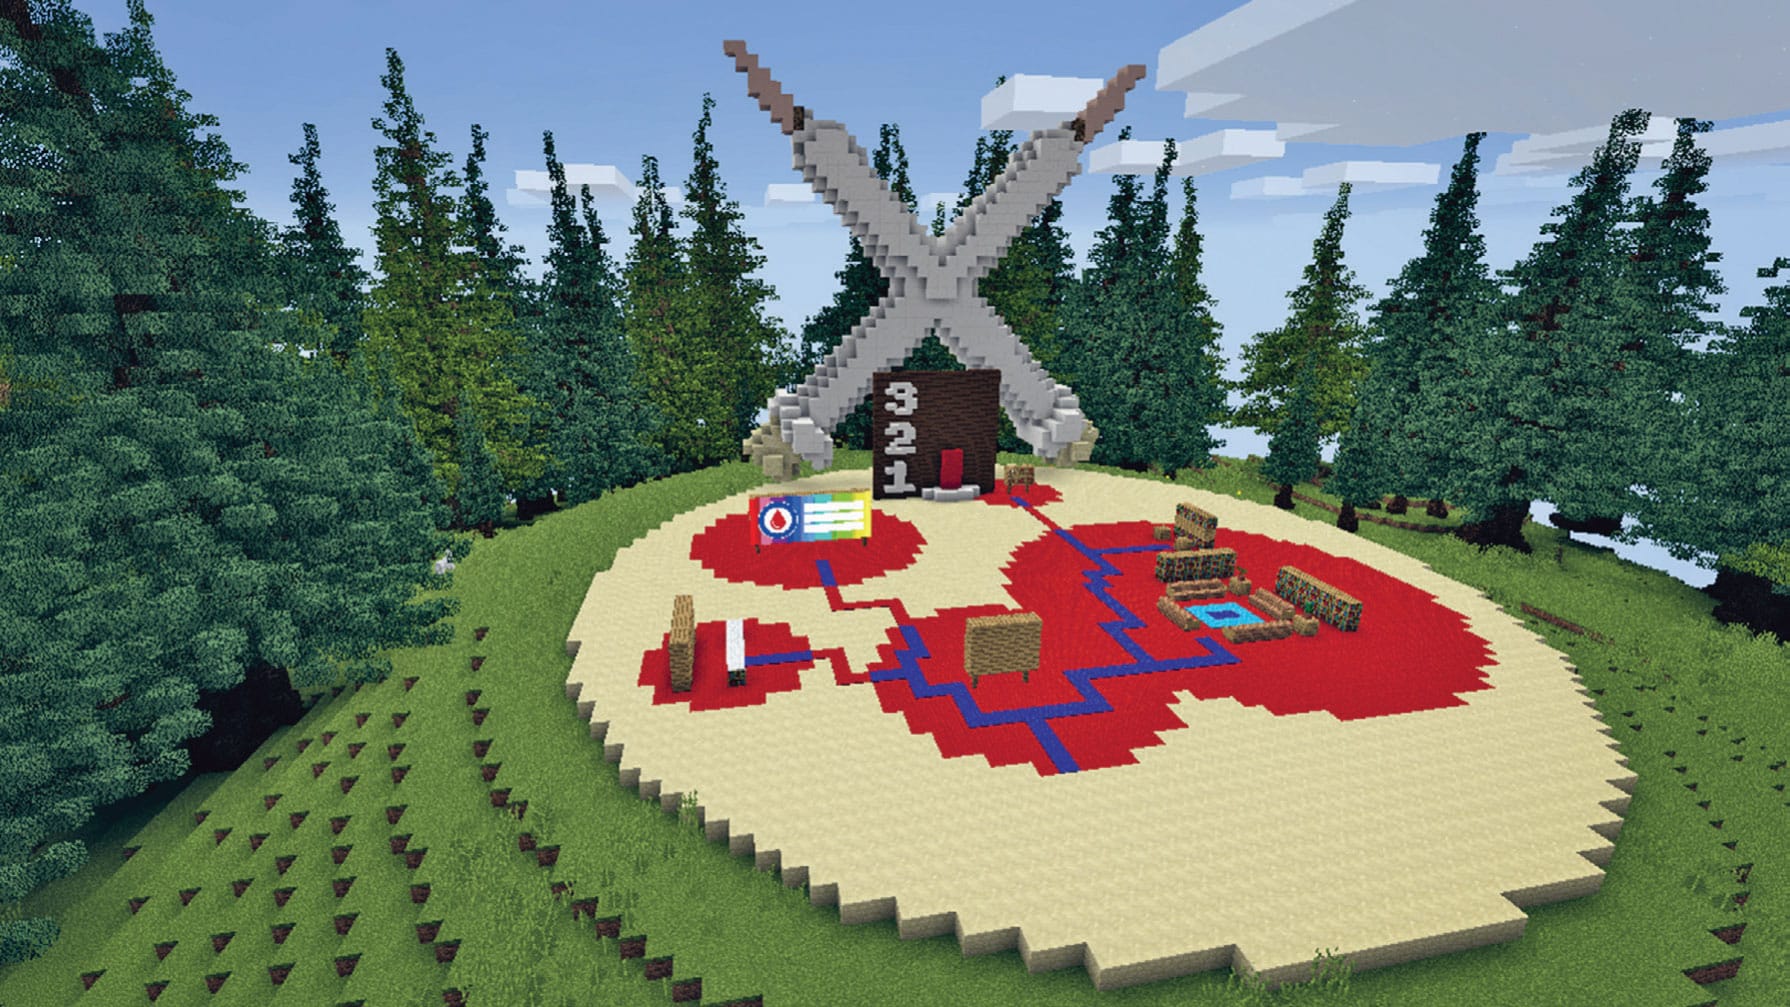
1. Go back to your Charity Hub that you built in Lab 19. This will be the online focus of your fund-raising event.
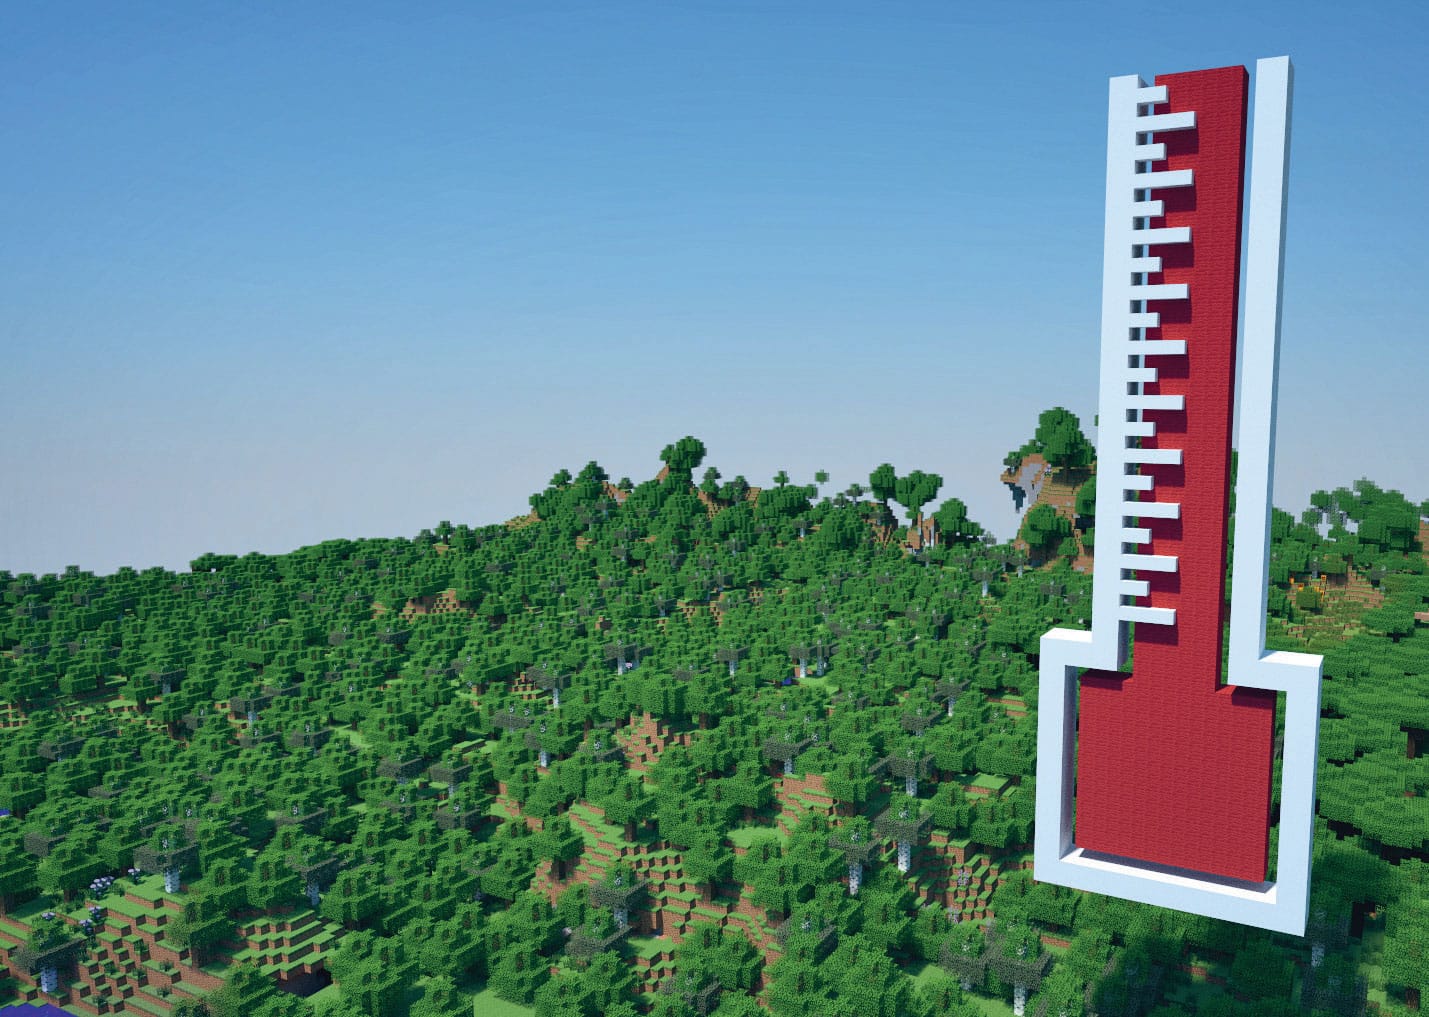
2. Next you’ll build a funding counter using a simple column. You’ve already set yourself a fund-raising goal. It’s simple, really: the more funds you raise, the higher your column will grow. This means that your supporters can see how you’re doing and celebrate with you when you reach your goal.
3. You need to build a back for the counter. This will show when you’ve reached the stages or targets of your fundraising along the way. By showing people how you’re doing, you’re encouraging them to help you reach your goal. You might count these in ones, tens, hundreds, or even thousands! Use the 3 × 3 letterform to build the alphabet and numbers using slabs, stairs, and blocks (fig. 1). Get creative and see what color combinations you want to use. A dark background often works well.
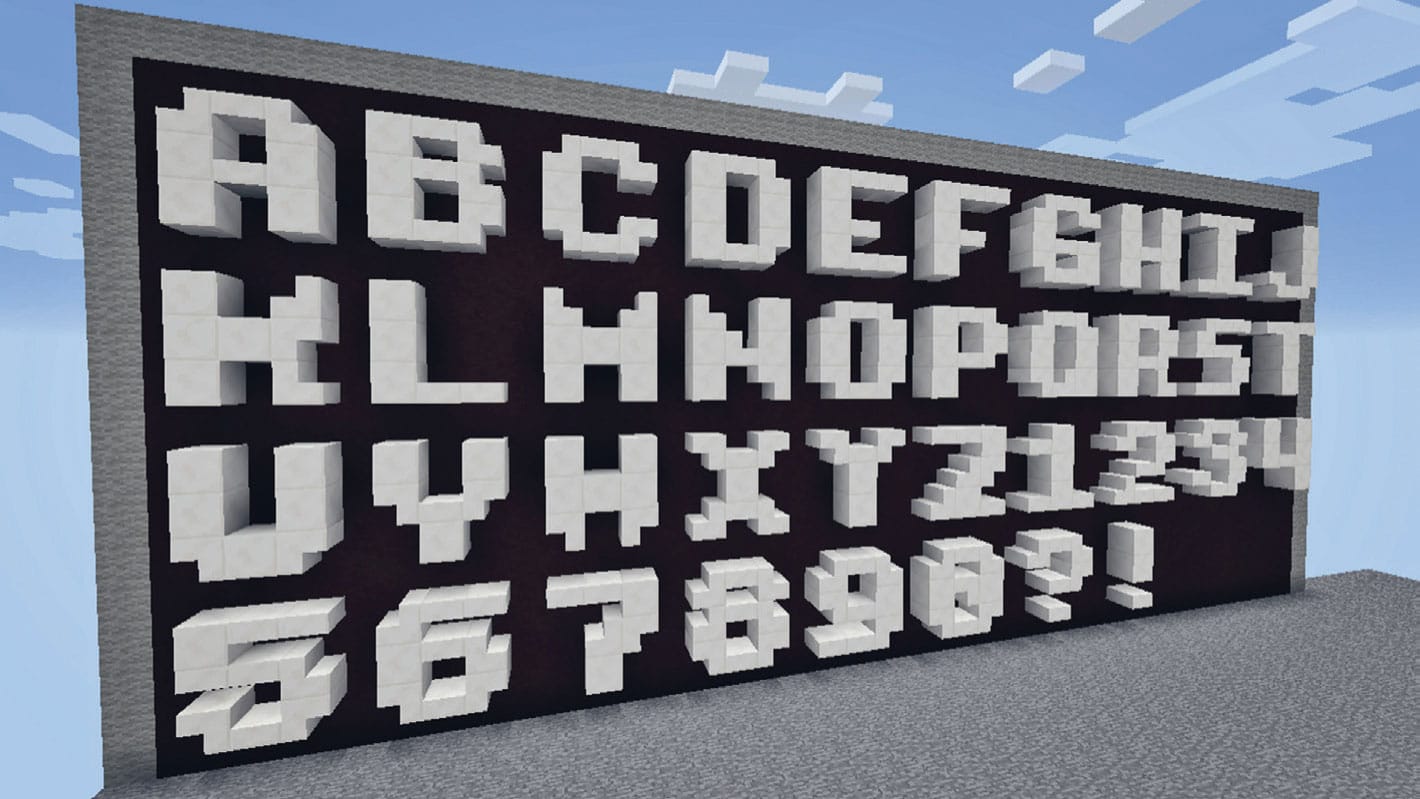
Fig. 1: Use the 3 × 3 letterform to build an alphabet and numbers for your counter.
4. Create the column with a command block and fill it using the /fill command. To do this, you’ll need to see the coordinates and be able to write them down, so grab a pen and paper for the next bit. Coordinates numerically represent your location in a Minecraft world. They’re based on a grid where three lines, or axes, intersect at the origin point (fig. 2).
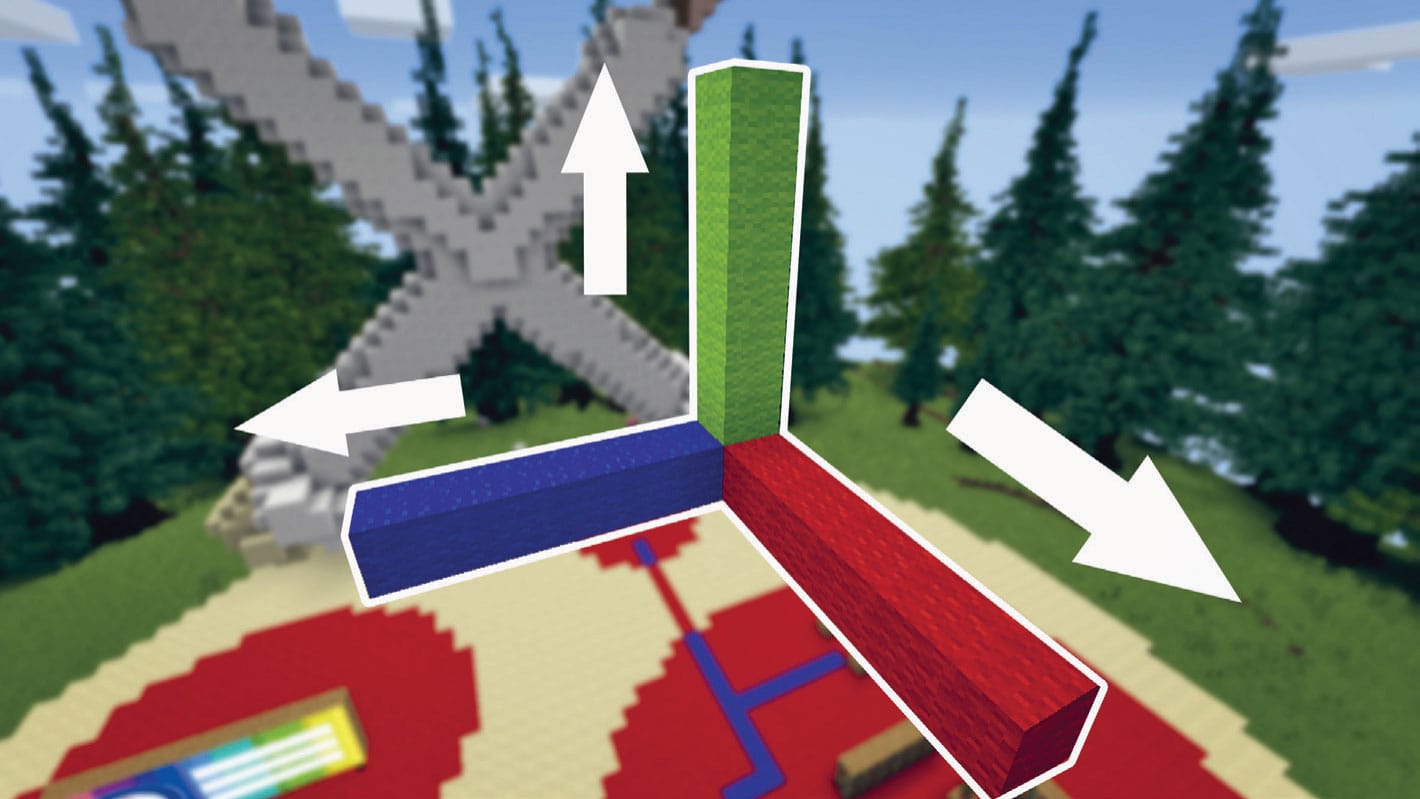
Fig. 2: Find out the x-y-z coordinates of where you want to place your column. The coordinates are based on a grid where three lines or axes intersect.
5. If you’re using Java Minecraft, you can press f3 and see the debug screen. It has the x-y-z coordinates of the block you’re looking at, which is really handy. If you’re using Bedrock Minecraft, you’ll need to enable show coordinates in the map settings so you can see the block coordinates of your characters’ positions in the top left-hand side of the screen.
6. The fill command takes the coordinates of one corner of a cuboid and then another set of coordinates of the cuboid, and then fills it with the block you tell it to. The command can look like this: /fill x y x x y z stone.
7. To find the x and z coordinates of your counter, go to the center of the counter and write down the three numbers you see: x = the first number, y = the second number, and z = the third number. We use our world’s unique coordinates in our example, but since each world is different, you’ll need to find your own world’s coordinates for yourself—using ours won’t work for you!
8. Place one block down using the command /fill 214 53 715 214 53 715 minecraft:stone. You’ll notice that the two sets of coordinates are the same; this will fill just one block.
9. Now make the column a little bit higher using the command /fill 214 53 715 214 63 715. You should now have a column 10 blocks high. This is because we added 10 to the second y coordinate.
10. Using this method, you can make a set of command blocks that fill the column when you press the buttons. For example, if you want to increase the charity goals by 5 blocks at a time, each command block will have to have the x and z coordinates that are the same, and the y coordinate increased by 5. For example:
/fill 214 53 715 214 53 715 = 1 block
/fill 214 53 715 214 58 715 = 5 blocks
/fill 214 53 715 214 63 715 = 10 blocks
/fill 214 53 715 214 68 715 = 15 blocks
11. Make sure you don’t place your command blocks together. If you do this, the button’s power will travel to both command blocks, triggering them at the same time.
12. You can set off fireworks to celebrate when you reach your goal. Add a dispenser to the back of your command block and fill it with fireworks. For a quick cheat, type in the chat /give @p firework.
13. Be creative to make your counter exciting and fun to watch, but be careful—if you fill too many blocks at the same time, it can destroy all your work (fig. 3).
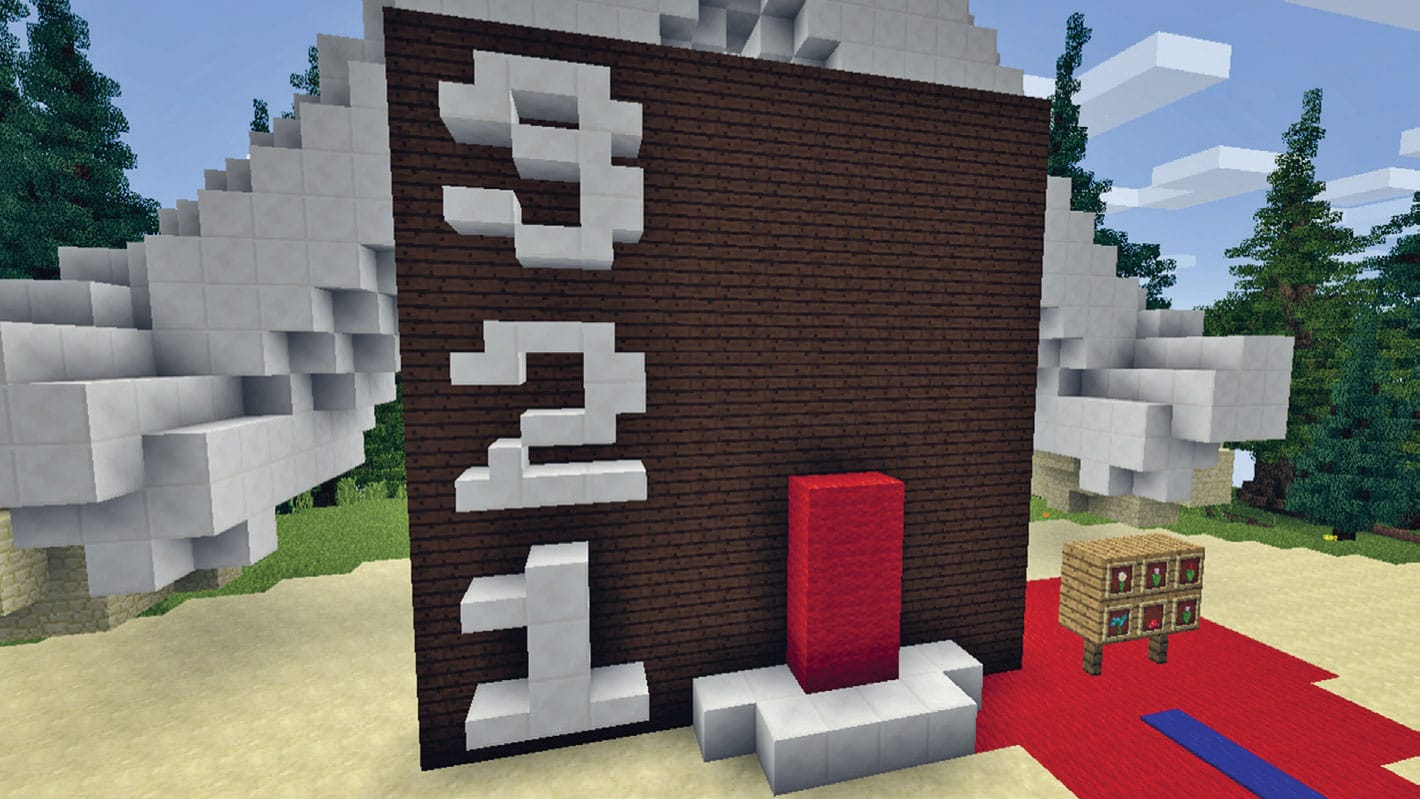
Fig. 3: Set up your completed fund-raising counter with fireworks so you can set them off when you reach your fund-raising goal.
14. Once you’ve created your counter, use it to show how you’re doing in your fund-raising efforts and celebrate with fireworks when you reach your goal. Don’t forget to thank your supporters!
Build Cultural Understanding
These labs will help you understand how we are all different and similar. When we understand and accept difference, and build bridges of understanding between ourselves and others, we become part of creating a more inclusive and peaceful world. We start to see that we are all equal and worthy of respect and love.
Sharing Stories and Food
The activities in these labs will help us have fun learning about and sharing our cultural backgrounds, first by exploring our names, then by researching the connections between farming and food traditions.
Lab 21: The Story of My Name. Out of game, you’ll work on your own or with family or friends to write a story about the origin of your name. In game, you’ll use that information to design and create a Minecraft roller coaster ride inspired by your name that tells its story visually.
Lab 22: Same, Difference. Start by researching farming methods and foods for your family’s country of origin—either where you live now, or where your family or their ancestors originally came from—then cook and share a traditional dish. In Minecraft, create a World Farm that features those methods and foods.
Taking time to learn about our traditions will inspire us to listen to and appreciate others’ traditions, too!
LAB 21 |
The Story of My Name |
Our names are important. We are given our names at the start of our lives. A name has the power to signal belonging, and it tells people what family we are part of. A name can also say something about our religion, culture, or gender. What do you know about your name and where it comes from?
HANDS ON: A Space of Your Own
In this lab, you’ll create a story about your name and where it comes from. You can do this on your own, with your lab buddy or friends, or with your family. You can also do this online if you want.
![]() APPROXIMATE TIME TO COMPLETE
APPROXIMATE TIME TO COMPLETE
1 day to 1 week
![]() MATERIALS
MATERIALS
Paper
Pens
Magazines
Scissors
Glue
1. Using paper and pen, create a mind map of your name (your first, middle, and last names). Do you know where your name comes from? Does it have a special meaning? Is it from a certain part of the world or a certain religion? Is it a family name? Do you have a family crest or emblem (fig. 1)? Who chose your name and why? Do you share your name with someone else you know or someone important from history or literature? You’ll need to do some research to get the answers. Ask your family, or look it up online or in the library. There are lots of books and websites that explain the meanings and origins of names.
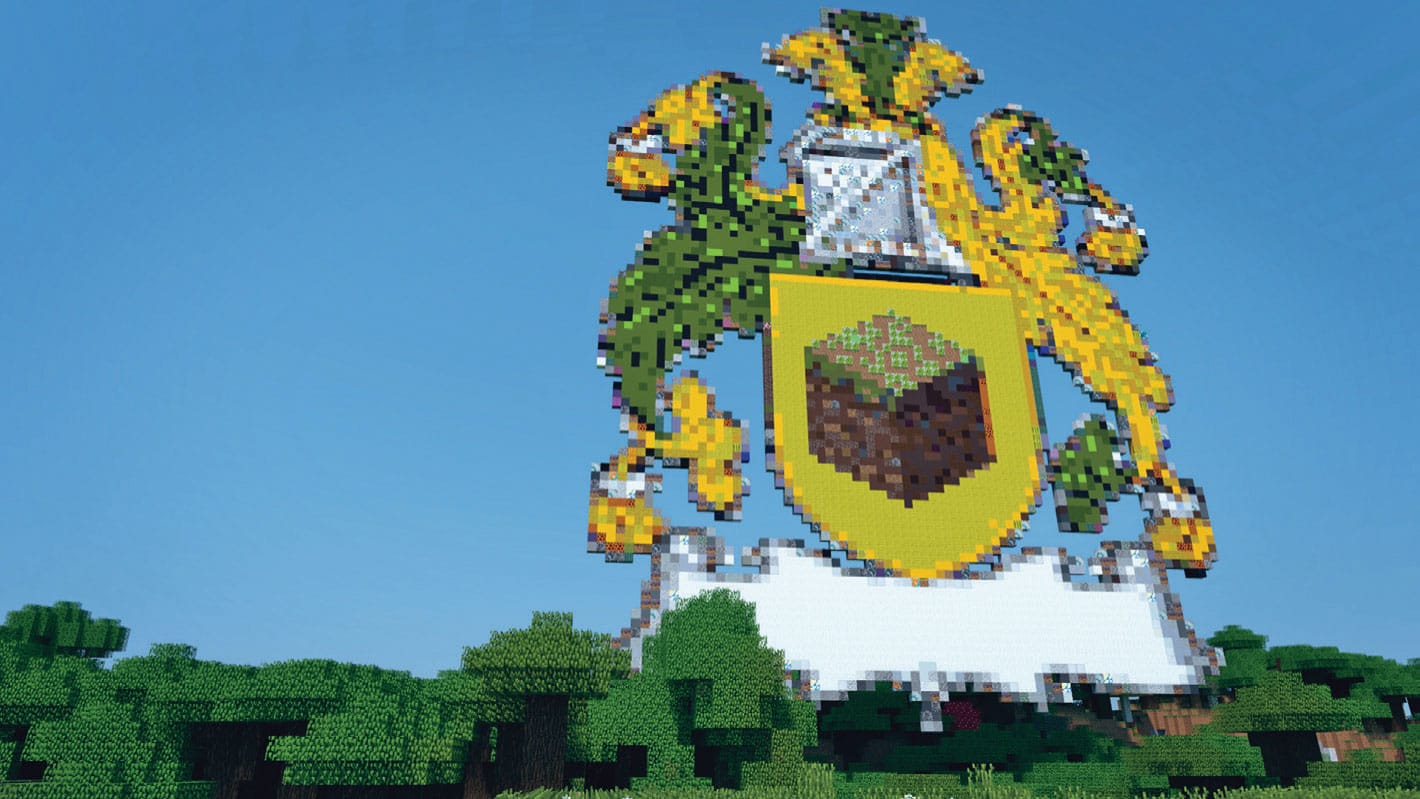
Fig. 1: Create a mind map of your name to explore its origins and meanings. If your family has a crest, it may hold clues to its meaning.
2. Does your name reflect something special about you? Maybe the meaning of your name fits who you are, or maybe it’s the very opposite. Add these things to your mind map.
3. What does your name sound like? Is it easy or hard to pronounce? Do people get it wrong a lot? How does it feel when people say your name? Do different people call you different things?
4. Does your name make you think of other things? Maybe it makes you think of the sea, or mountains, or storms, or a bright fire? How does your name make you feel?
5. Using the information on your mind map, write a short list. Begin each line with “I am … ,” then describe something about your name. So, for example, if we take the name Adam Clarke, we might write, “I am red earth. I am man. I am made of clay. I am an apple. I am the first. I am ancient. I am in the Bible. I am the oldest son. I am my mother’s favorite singer. I am the keeper of books. I am the same as my father. I am from the middle of England,” and so on (fig. 2).
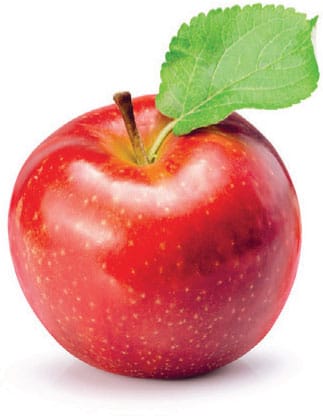
Fig. 2: Create a poem and collage for the story of your name. The name Adam can be represented by an apple. What objects or ideas represent your name?
6. When you’ve written all you can think of about your name, end with the last line “I am [your name]”.
7. If you’re working on your own, write out your piece and create a collage around “The Story of My Name” using pens or magazine cutouts, and put it up where you can see it. Read it to yourself. Think about how you feel about your name now. What was it like to read and speak your name? Did you learn anything new? Did it change anything about how you understand your origins?
8. If you’re working with your lab buddy or a group, you can share your name stories with each other. Remember to listen with care and consideration (fig. 3).
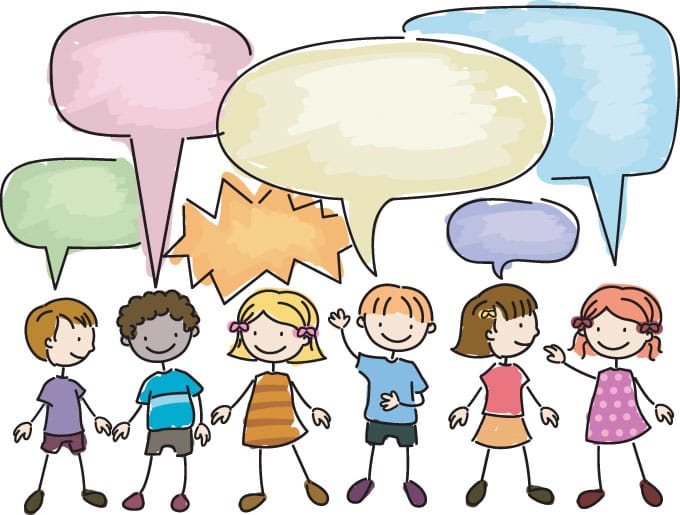
Fig. 3: Share your name story with a friend, partner, or group, then listen carefully to theirs.
9. Once you’ve listened to each other, take time to reflect on what you’ve shared. What was it like to share your name? What was it like to hear other people share their names? Did you learn anything new? Did it change anything about how you understand each other?
MINECRAFT PLAY: Build It Yourself
In this lab, you’ll create a Minecraft roller coaster ride based on your name. Roller coasters are fun and fairly easy to build in Minecraft. They create a visual story as they travel through the landscape, and this one is all about you!
![]() APPROXIMATE TIME TO COMPLETE
APPROXIMATE TIME TO COMPLETE
1–2 hours
![]() GAME MODE
GAME MODE
Creative
1. Using your mind map, write down the general themes of your name. Pick at least ten themes for your roller coaster.
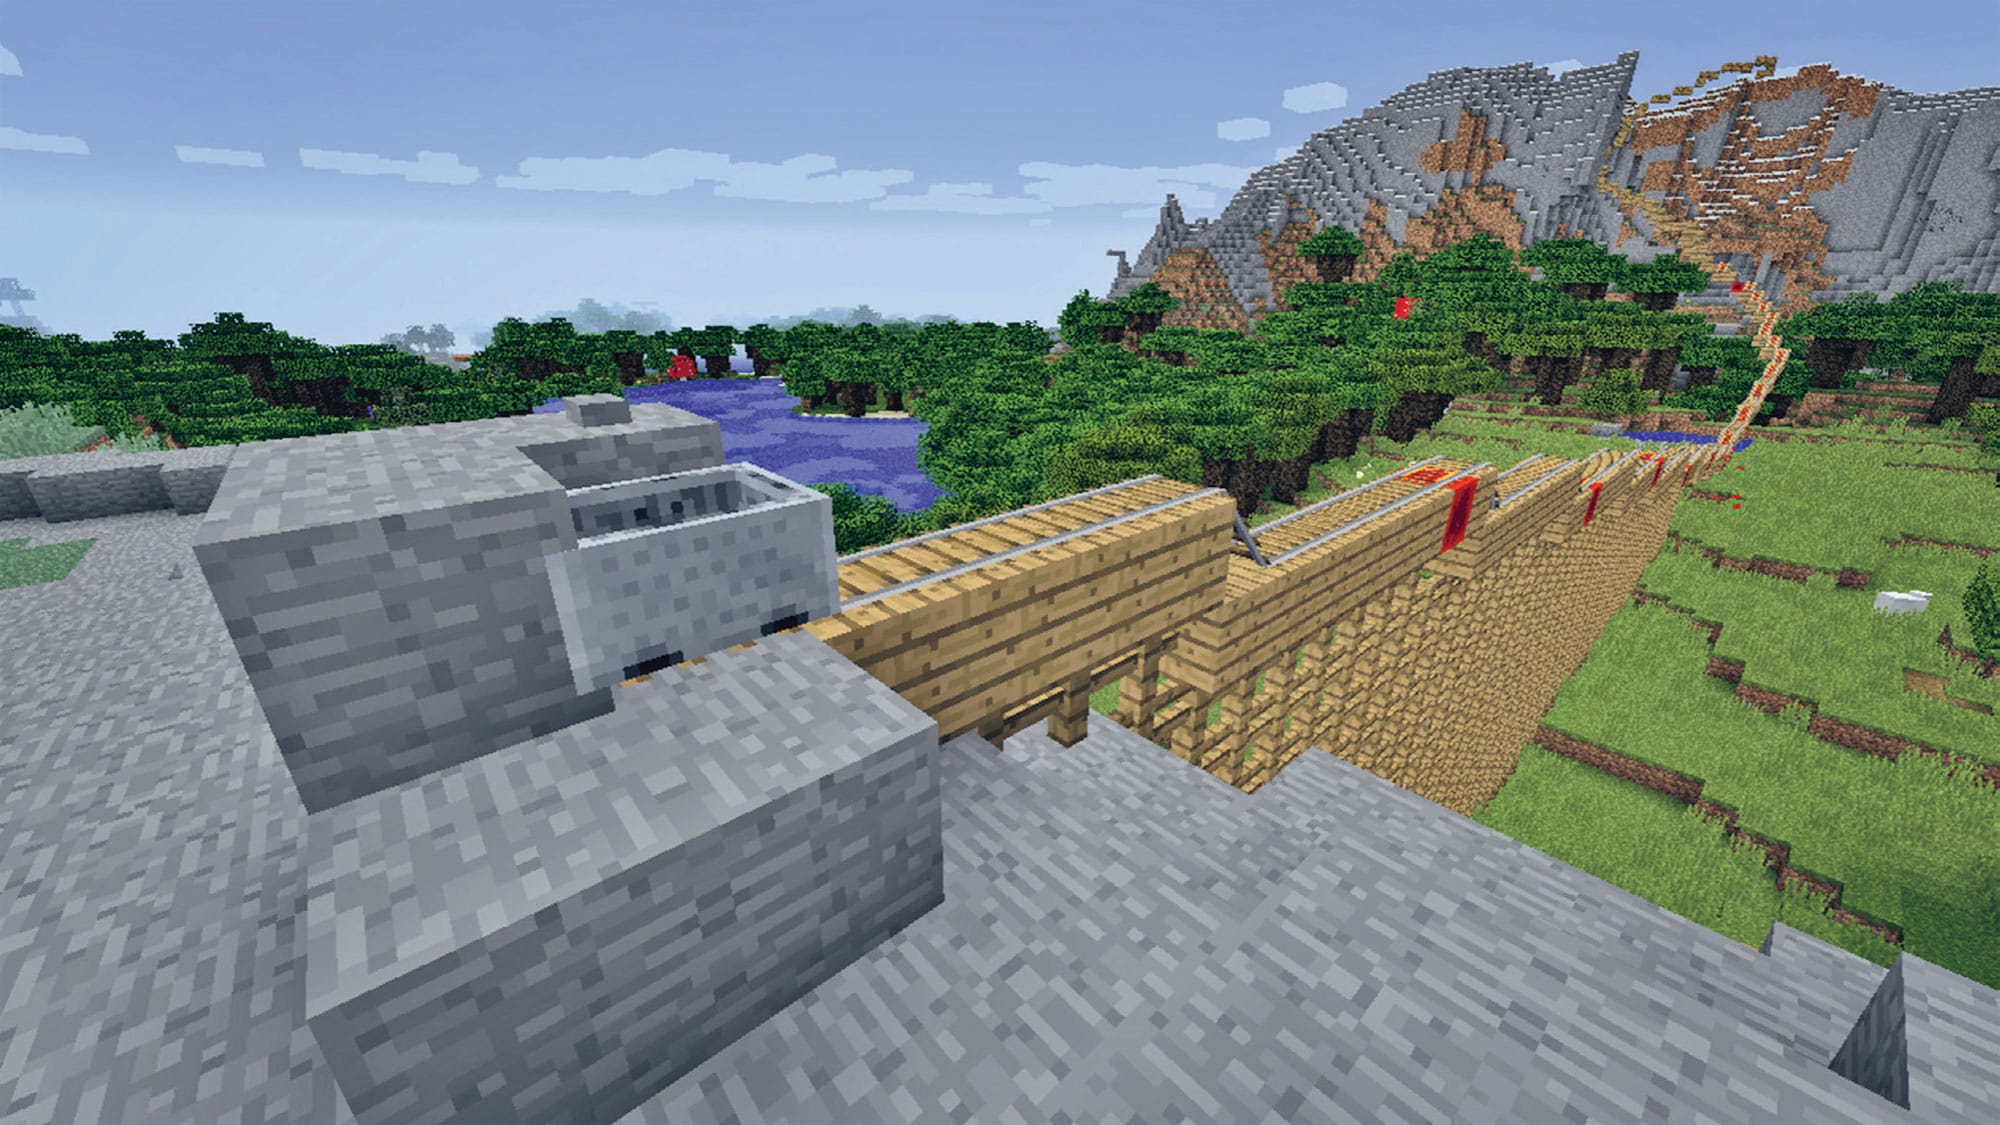
2. Using a flat world or a vanilla landscape, lay down your minecart track (fig. 1). Test it out. You want it to last at least one minute, but don’t make it so long that your traveler has fallen asleep before the end!
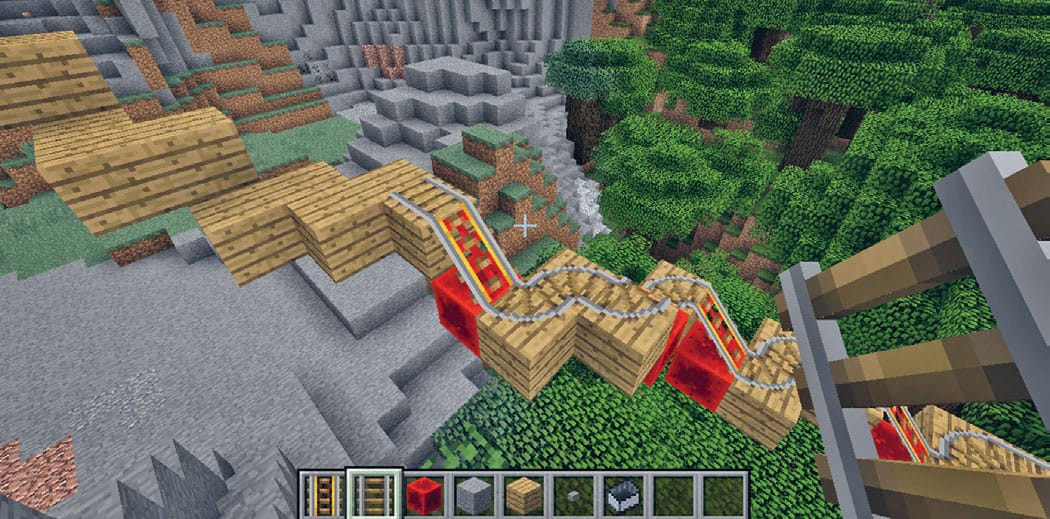
Fig. 1: Start your roller coaster by laying down a Minecart track.
3. You need powered rails every ten blocks or so, to push the Minecart along a flat surface. You also need either a redstone lamp next to it or a block of redstone to turn the powered rail on.
4. Remember, when going up hills, every block needs to be powered—you don’t want to fall backward!
5. This step is a bit like Build Battle game with your friends online. Build your themes, but don’t think too hard about it—just build them quickly and move on to the next one. Spread the builds out along the length of your minecart track.
6. For additional fun, add fireworks at the top of hills. To do this, simply add a detector rail and a dispenser full of fireworks (fig. 2). When the minecart passes the detector rail, it’ll trigger the dispenser and launch the fireworks high into the sky! To do this, use the command /give @p minecraft:fireworks 64 (fig. 3).
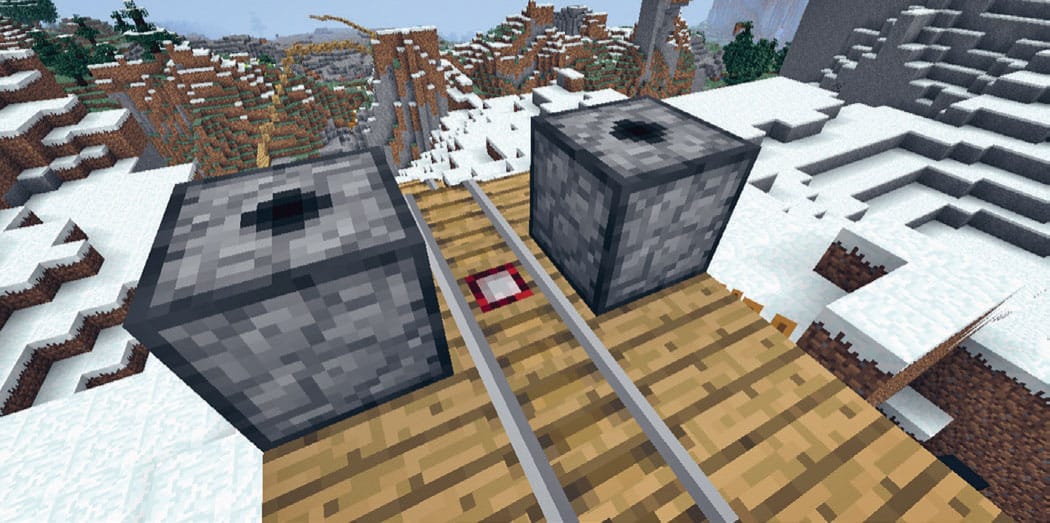
Fig. 2: Place fireworks along the coaster’s route by adding a detector rail and a dispenser full of fireworks at each point. (We placed them at the tops of the hills.)
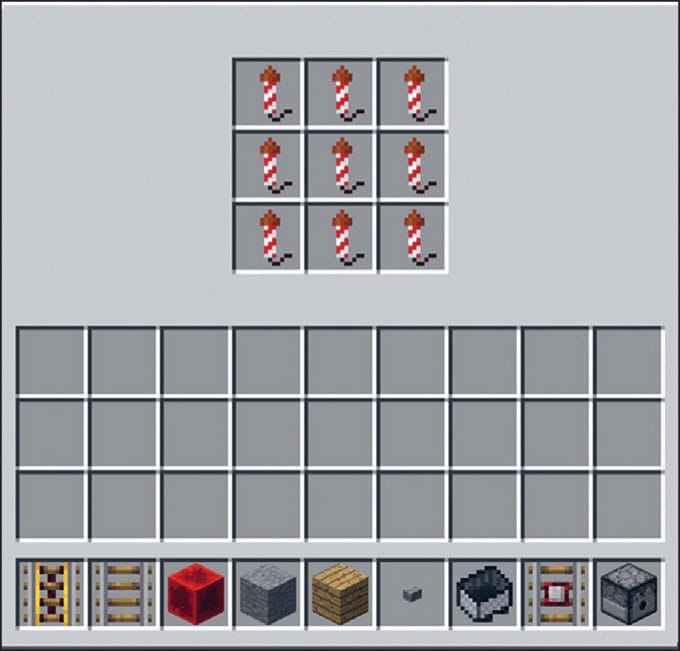
Fig.3: : Use the command /give @p minecraft:fireworks 64 to trigger each explosion as the coaster passes the detector rail.
7. Now invite friends to come and play! Or build lots of roller coasters as a group and try each other’s rides out.
LAB 22 |
Same, Difference |
Food is a very important part of our cultural traditions. By understanding where our food comes from, and the history of our farming traditions, we can understand more about how we are connected to the land we live in and the foods we eat, and we can understand more about the differences and similarities between different cultures and places. Different countries have different farming methods and foods, as well as different ways of preparing and cooking traditional foods.
HANDS ON: A Space of Your Own
In this lab, you’ll research traditional farming methods for your area and country, discover which foods were farmed, and then cook a traditional dish to share.
![]() APPROXIMATE TIME TO COMPLETE
APPROXIMATE TIME TO COMPLETE
1–2 hours research + time to cook
![]() MATERIALS
MATERIALS
Notebook and pen
Ingredients and utensils
1. Where do you live? Is it in the city or countryside? If you want, you can choose the place your family originated from a long time ago.
2. What food is farmed there now? Find out everything you can about how food from your area is grown? If you can, visit a farm to see how things are done now. Even if you live in a city, you can still find out about your local food producers. Try and find out how food was farmed in the past? (fig. 1) Museums and libraries are a great research resource. Or maybe ask some of the older residents in your community? Remember, always get permission for any research you are doing.
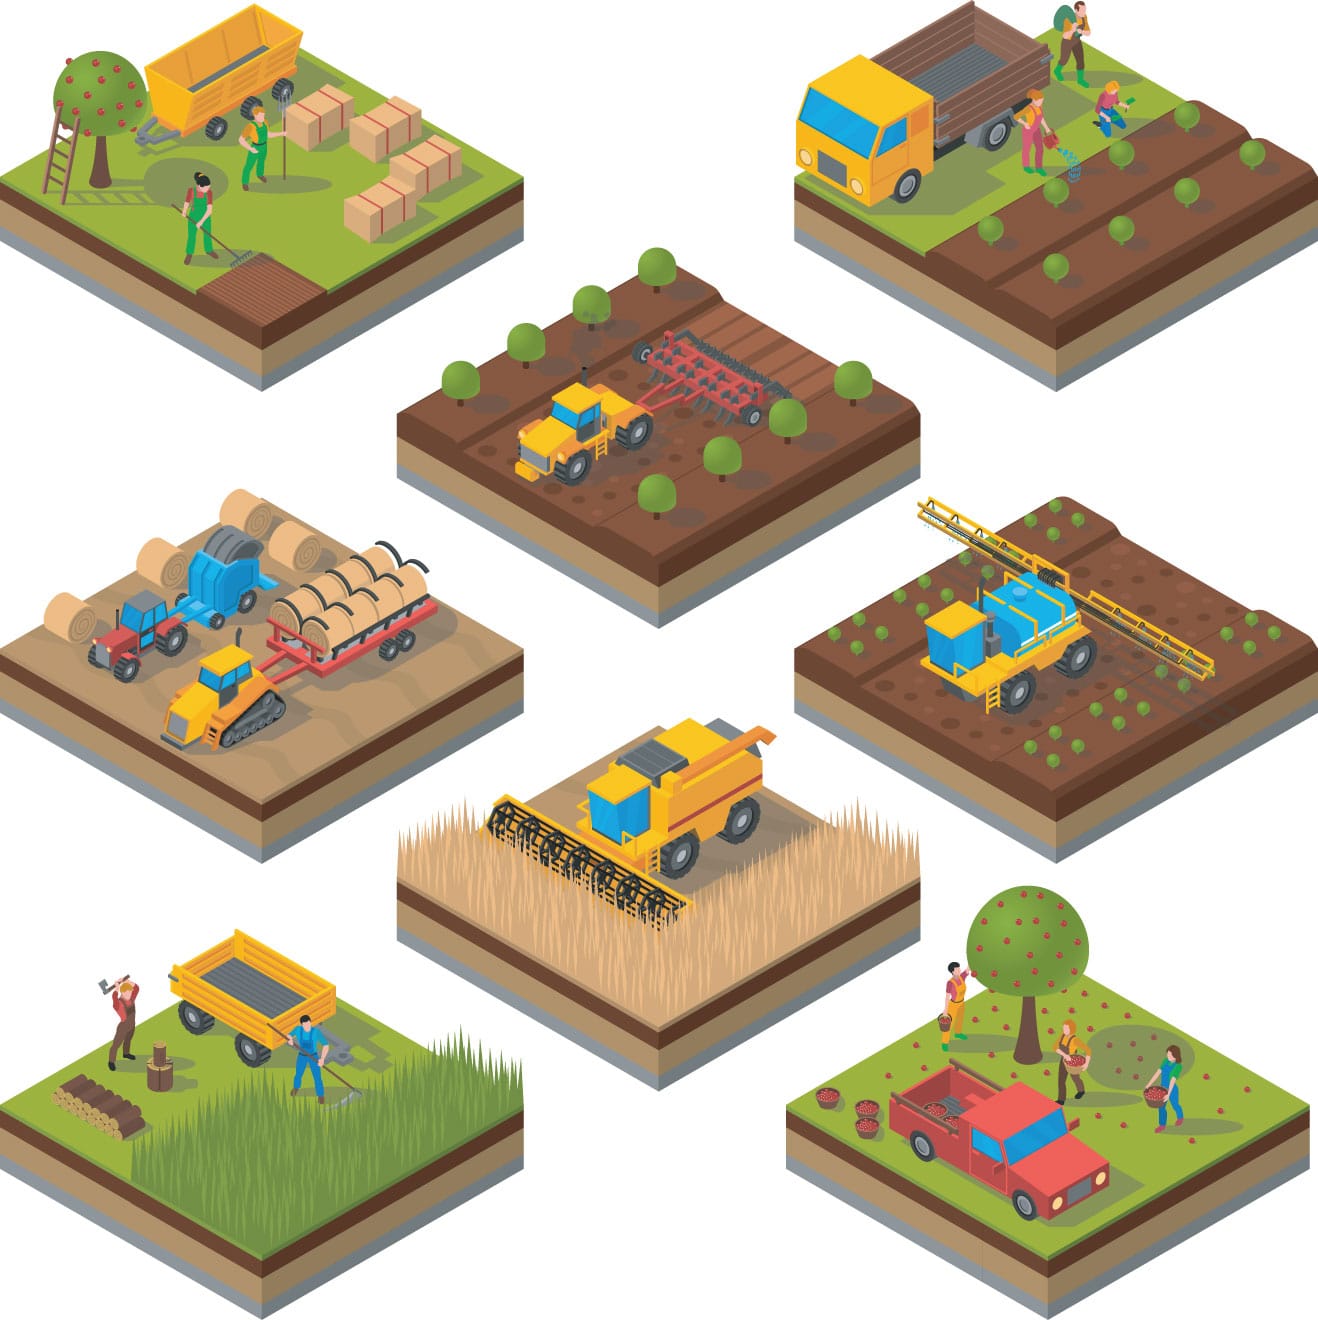
Fig. 1: Do some research to find out which kinds of farms are in your area or place of origin.
3. What machinery was used? What food was produced and how? Where did the farmers sell their food? What has changed about the foods that are farmed? Find out everything you can. Use your notebook to write down what you find out and draw sketches or diagrams to help you. You may want to find old photographs or pictures to photocopy and stick in your notebook (fig. 2).
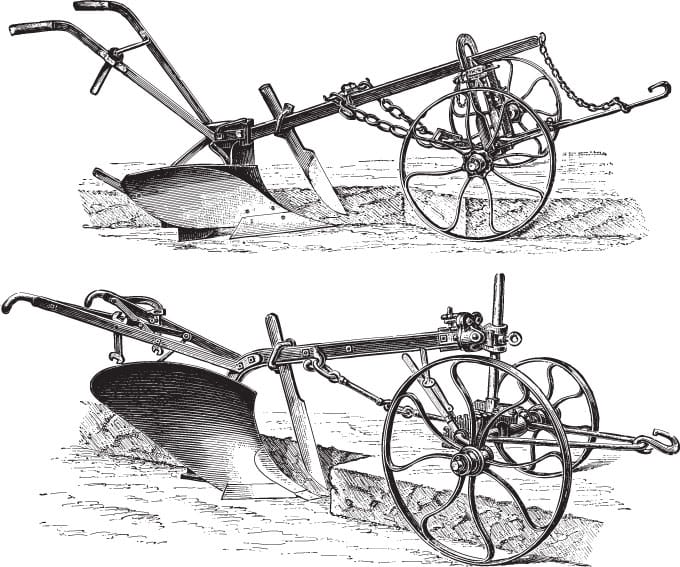
Fig. 2: Explore the types of equipment used for farming, both today and long ago. These plows were used in Europe in the late nineteenth century.
4. Now find out about traditional cooking from your chosen area. How did people prepare foods? Did they use certain techniques or tools? Maybe there were special ways to present food? Again, use your notebook to record your findings, and use primary and secondary research by asking people, visiting places, reading books, listening, watching programs, and looking online.
5. Choose a traditional dish to make. This doesn’t have to be a hot dish; it could be a traditional drink made from local produce. Find a recipe to follow. You could get this from a book, or maybe an older person in your family or community would be willing to show you how (fig. 3). If you’re too young to use the stove or sharp kitchen tools, make sure you get an adult to help you and always get permission before you start.
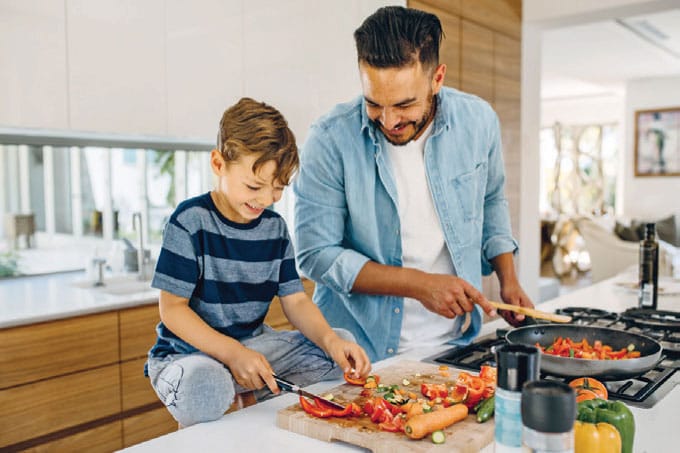
Fig. 3: Use foods from the area you’re researching to make a traditional dish.
6. Prepare a shopping list of the ingredients you’ll need. Some of these might be hard to find or expensive, so think about this when you’re choosing your recipe. Carefully follow your recipe instructions, remembering to be aware of any kitchen hazards such as burns, cuts, or spills, and always wash your hands properly before handling food.
7. Share your dish with guests, such as friends, family, or your lab partner. Reflect on what you’ve prepared. Is it very different than what you usually eat? Is it still eaten today? If you’re working on your own, use your notebook to write down your responses, and keep these with the recipe.
8. You can also share this lab with a group of friends, an after-school club, or your extended family, where each person brings a dish prepared from traditional foods. As you share your meal, you can talk about what you’ve learned about where the food comes from and how it’s prepared and served.
MINECRAFT PLAY: Build It Yourself
In this lab, you’ll build a World Farm in Minecraft, looking at the farming methods and foods produced from your chosen country. You can do this on your own or get a group together and each choose a different country. Farming in Minecraft has wheat, carrots, beetroots, melons, and pumpkins. If we use our imagination, and some Minecraft signs, we can change theses to barley, rice, turnips, or other foods. You can also make fruit trees with blocks or stock lakes with fish. Time to get growing!
![]() APPROXIMATE TIME TO COMPLETE
APPROXIMATE TIME TO COMPLETE
2+ hours
![]() GAME MODE
GAME MODE
Creative
1. Choose one of the following countries: USA, Australia, China, Brazil, France, or Spain.
2. Research the farming methods and produce from your chosen country.
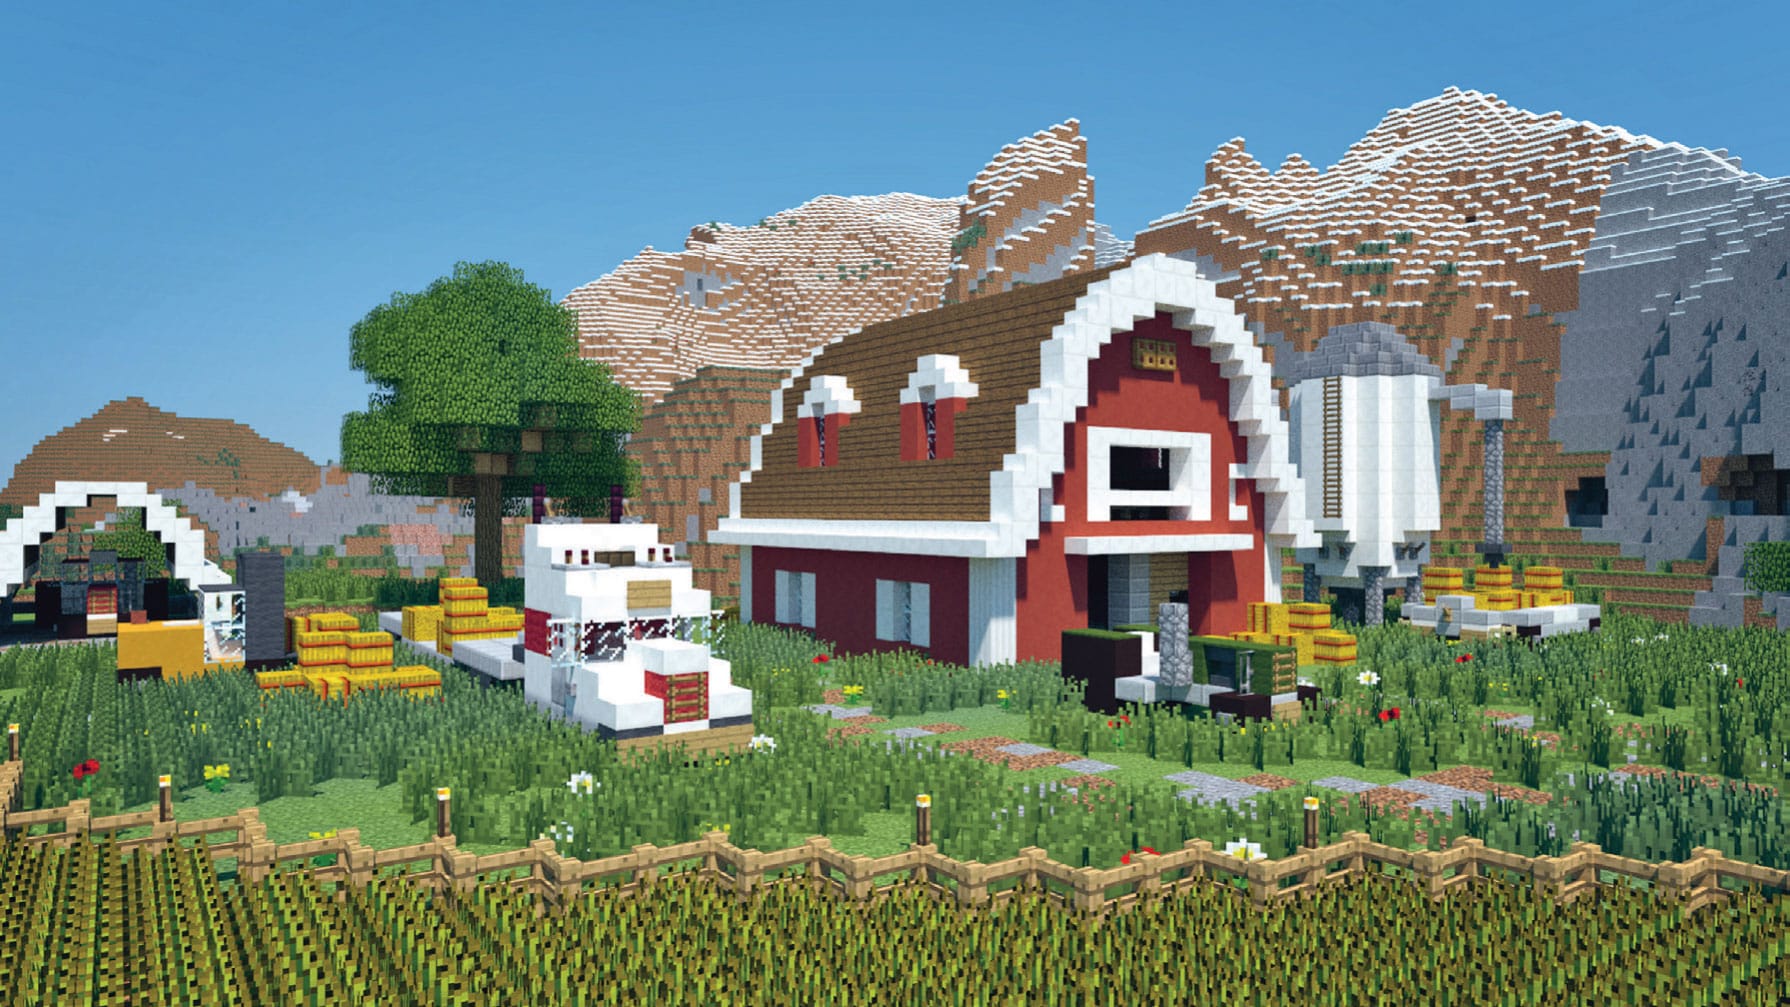
3. Make a farm in Minecraft that reflects the farming, food, and culture of your chosen country (fig. 1).
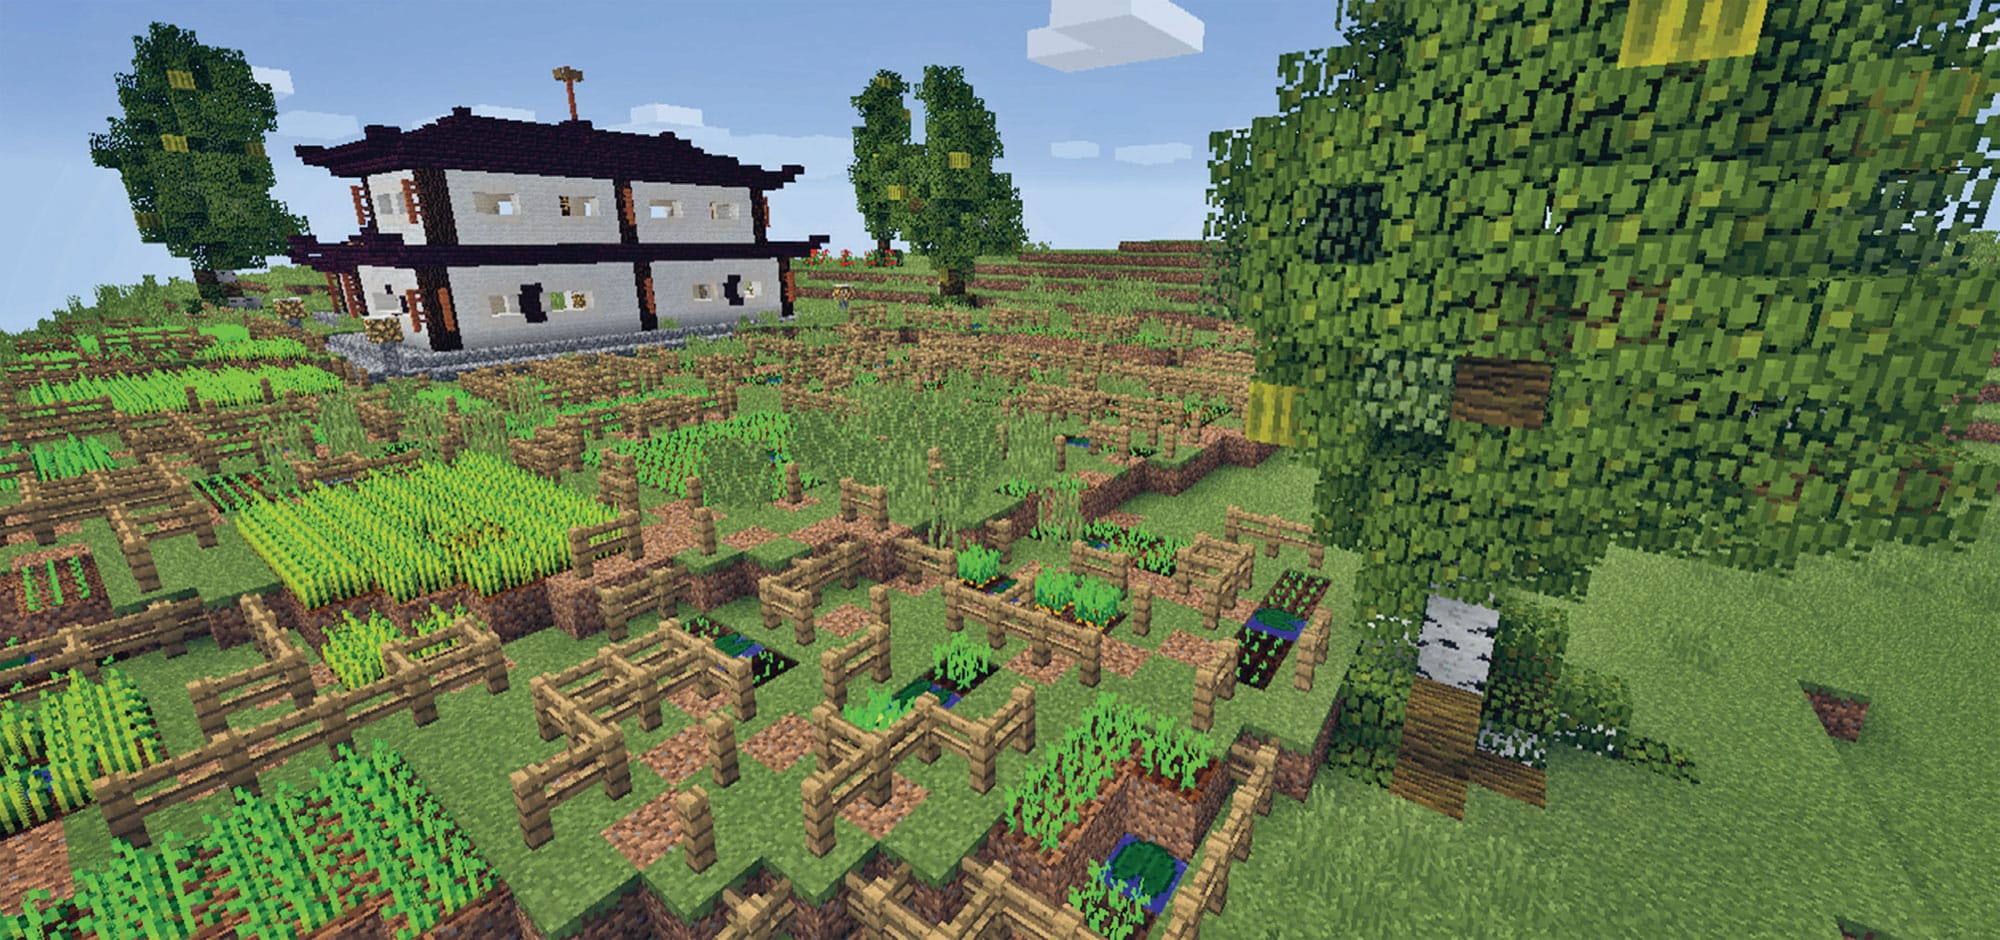
Fig. 1: This Minecraft farm is inspired by China.
4. You can also build a farmhouse. Get as much detail as possible into your farm and the buildings.
5. Once you’ve built one farm, choose another country and repeat the activity. You could build a modern farm with modern foods and methods, and then a traditional one, showing how the foods and methods have changed.
6. Share your builds and use them to start a discussion about what you’ve discovered.
Create Your Own World
Being creative can help us express things in different ways and understand more about ourselves and others, as well as develop self-confidence and communication skills. It’s important to spend time being creative, whatever we’re interested in. We can create anything—poetry, music, film, sculpture, plays, stories, drawings, buildings. Minecraft is a great space for being creative, too. However, it can feel difficult to know where to begin, or we might feel like we aren’t good enough, or not a real artist. The thing is, we’re all artists, and when we get creative, we can literally create our own worlds!
Create Your Own World
In these labs, you’ll build your own movie set, make a movie, and create your own self-portraits, in and out of Minecraft. As you follow these labs, remember to reflect on your experiences.
Lab 23: Movie Maker!
Create your own real-world mini movie set Direct and shoot your own short Minecraft Movie
Lab 24: Eye Spy
Create a Shelf-Portrait, using sculpture and found objects Discover and design amazing pixel art using Minecraft
LAB 23 |
Movie Maker |
Minecraft films and real-world films both need sets. A film set is the scenery that surrounds the action and plays an important role in the story. There are outside locations and inside locations, and these require two very different types of builds. Sometimes set builders create small models of buildings for the outside shots, and then create life-size sets of the rooms inside. A good example of this is the very well-known School of Wizardry, Hogwarts.

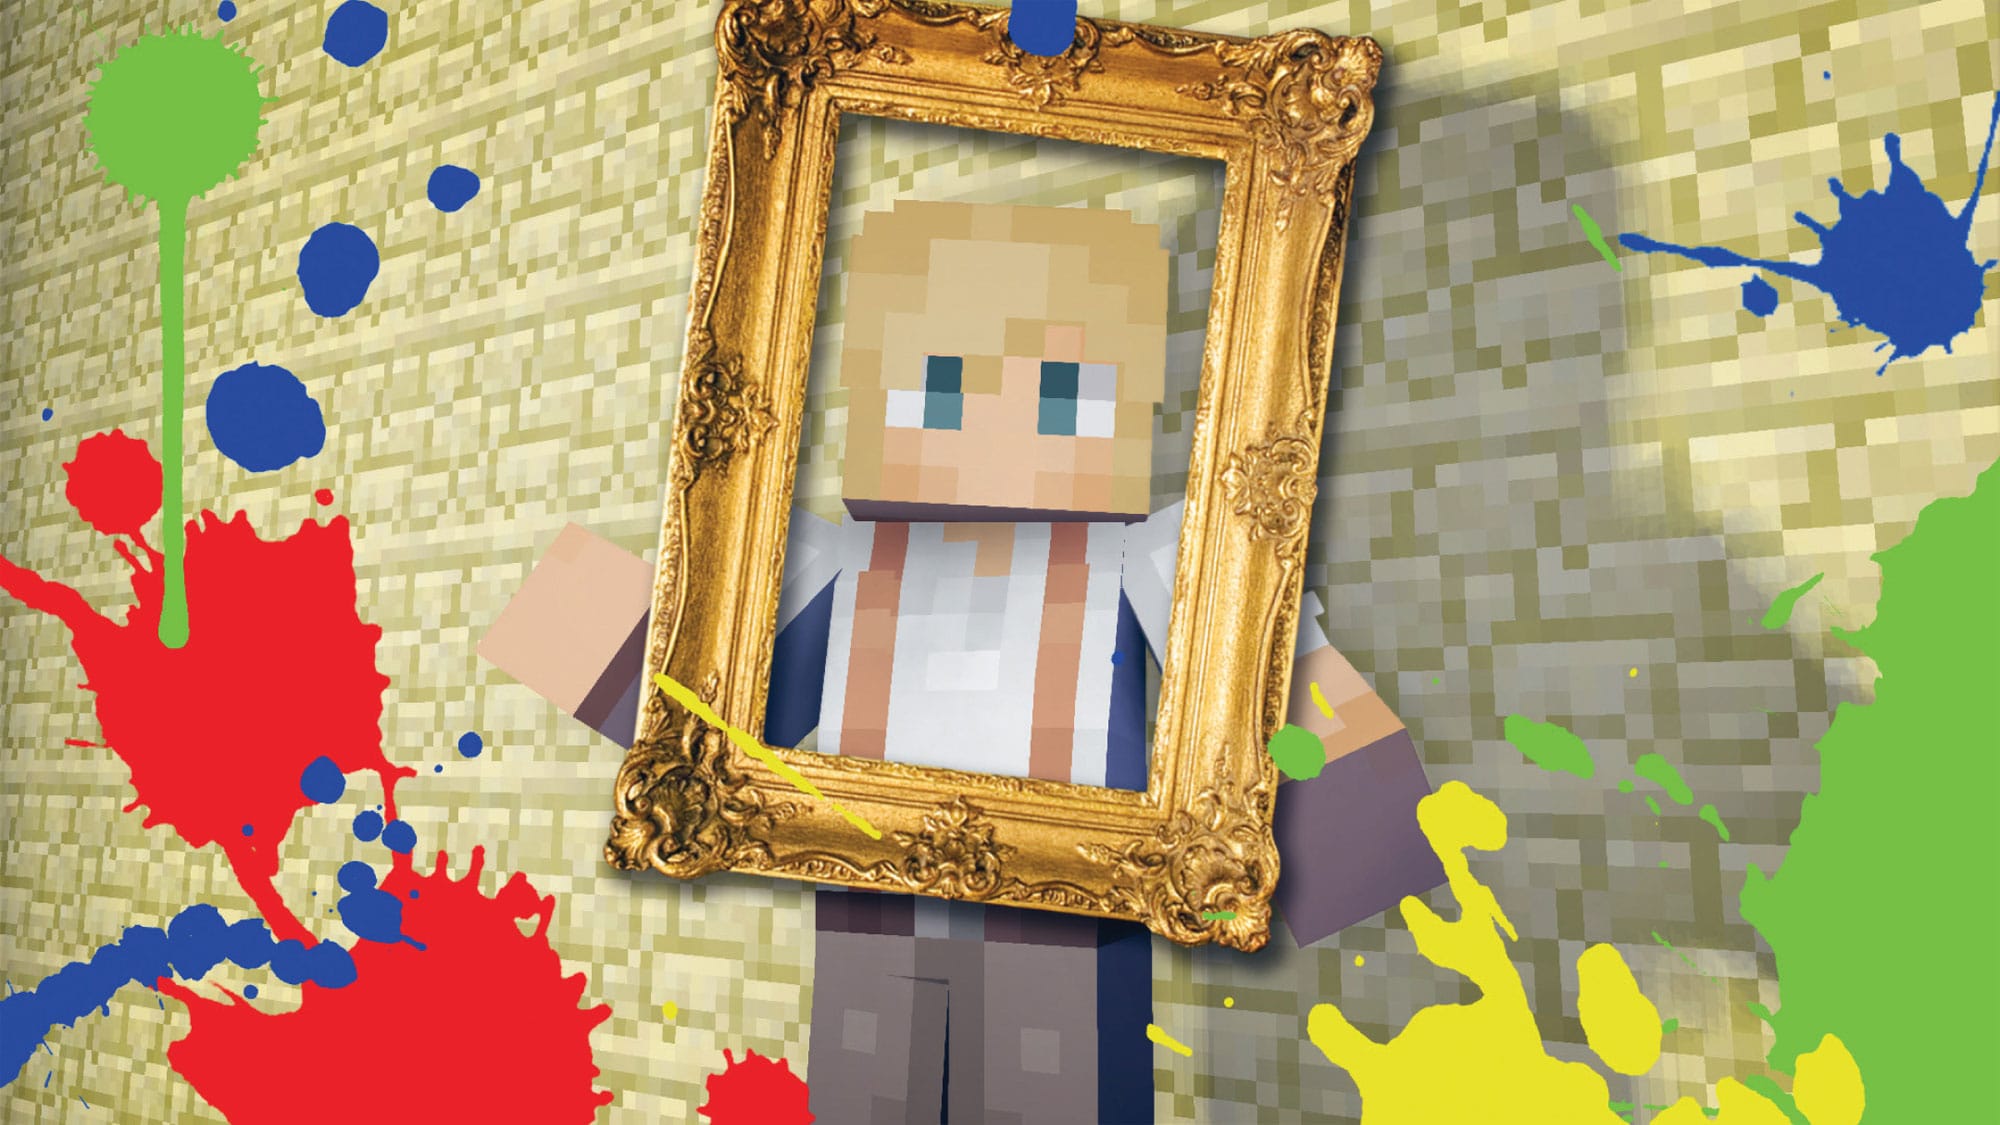
ADAM CLARKE (BUILD) INSPIRED BY THE NOVEL BOY MADE OF BLOCKS BY KEITH STUART
A Minecraft set built by Adam Clarke (Wizard Keen) from the YouTube video “Open the Door,” inspired by the novel Boy Made of Blocks by Keith Stuart.
HANDS ON: Gathering Data
In this lab, you’re going to build your own mini movie set. We’ve used Legos to build ours, but any click-together building blocks will do. If you want, you can pick one of your favorite films and watch it again. This time, pay attention to the scenery, not the action. How are the sets (locations) used to help tell the story? This can be done on your own or with friends—the choice is yours!
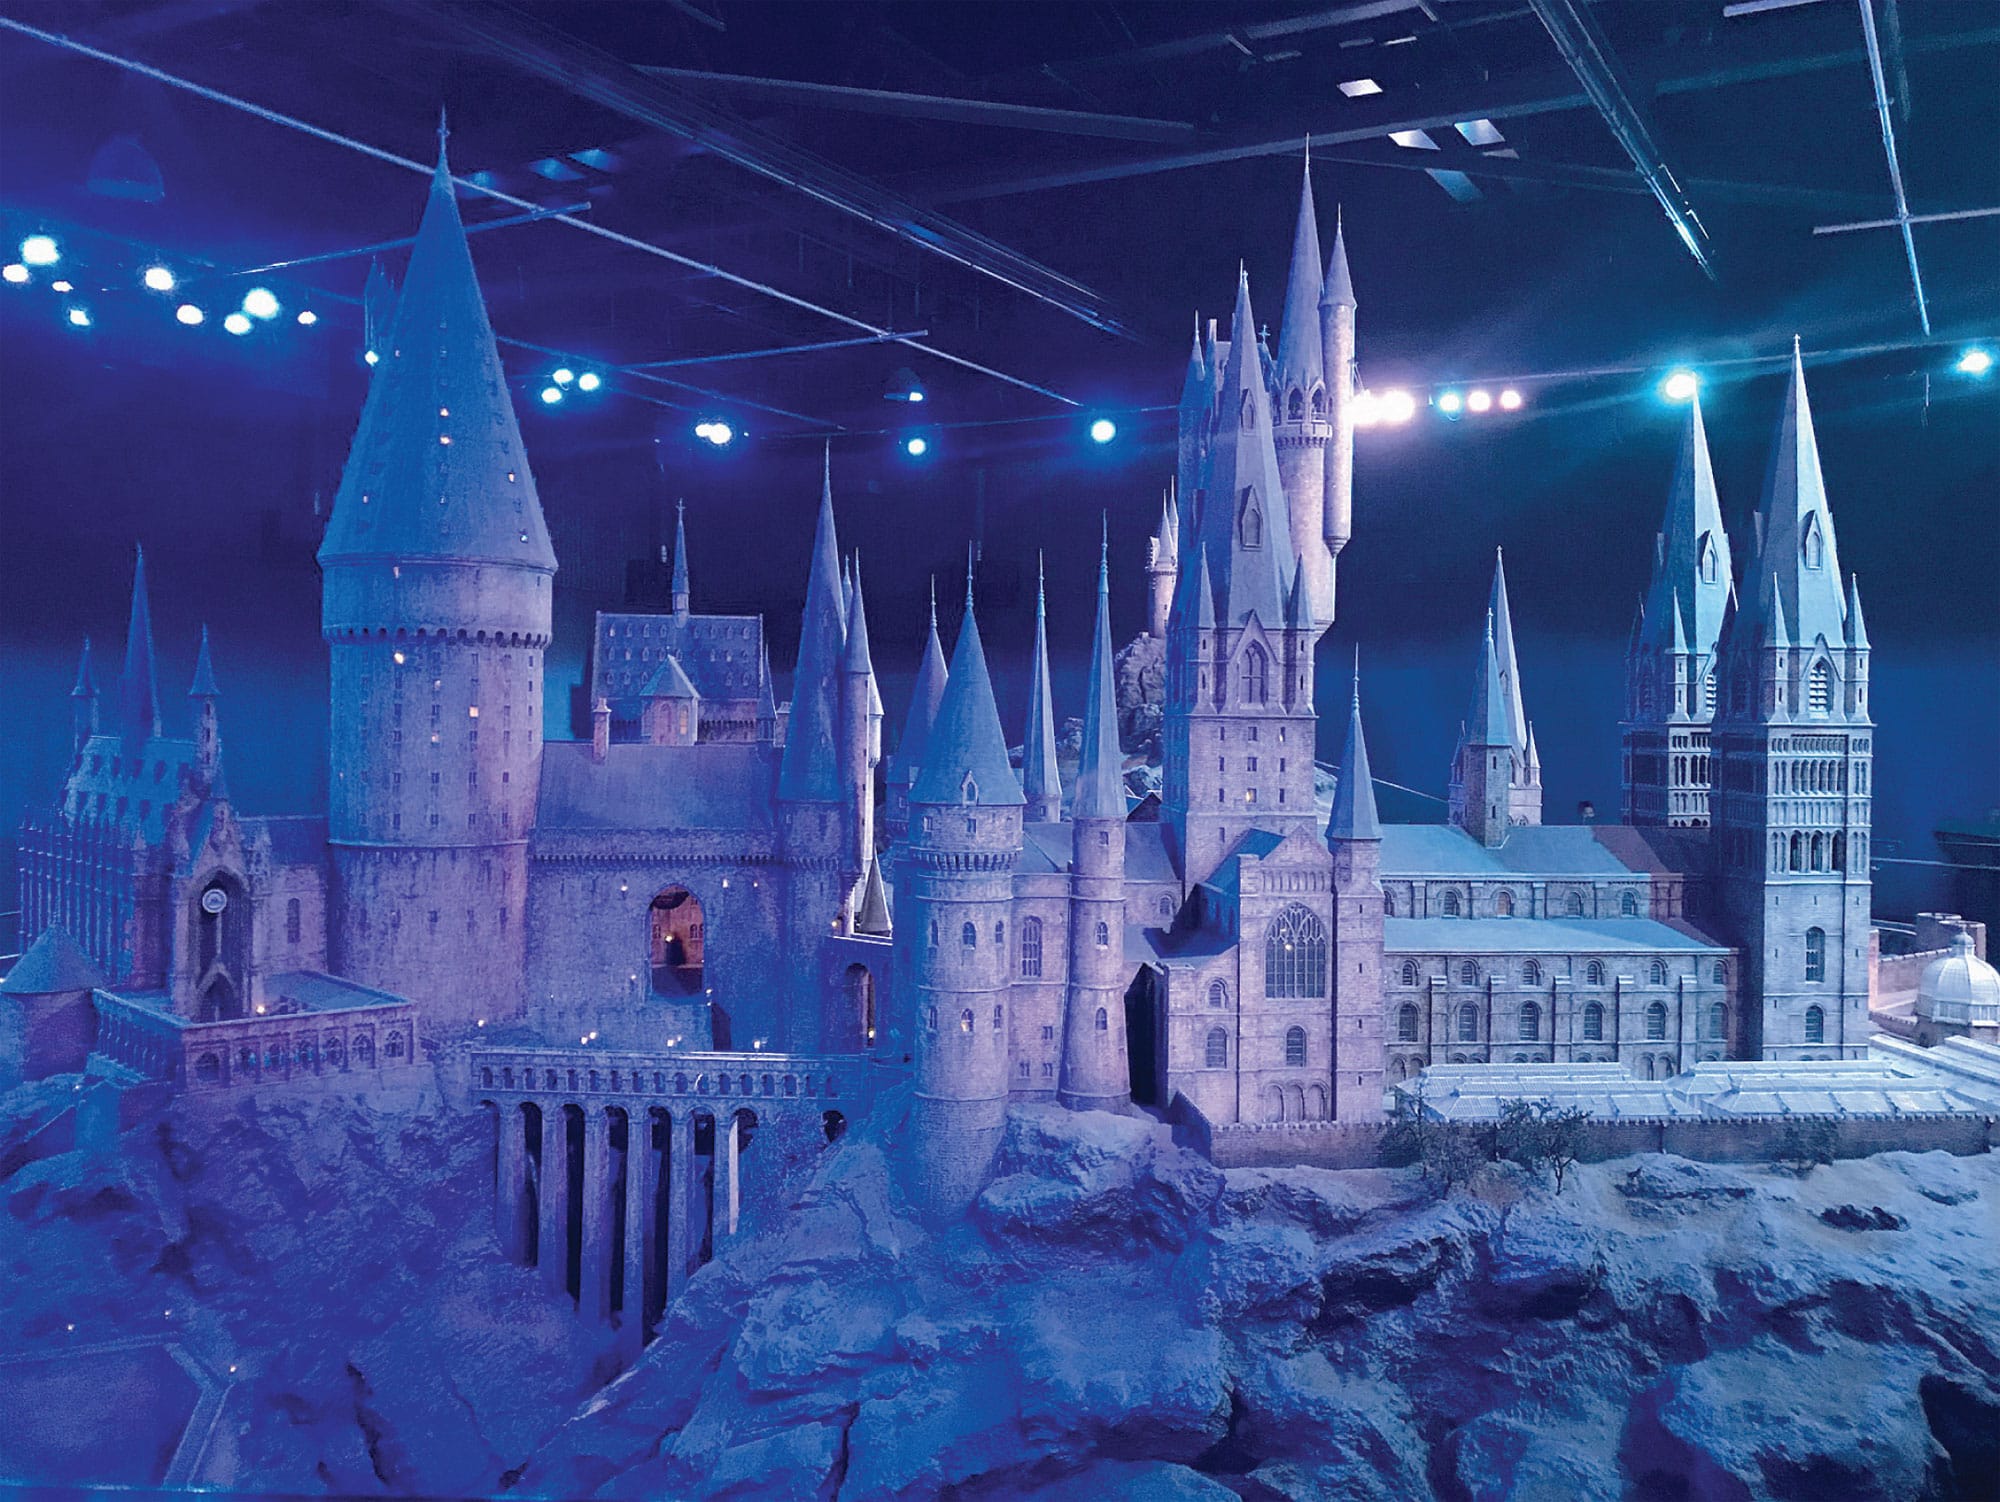
A film-set model of Hogwarts featured in The Making of Harry Potter, Warner Bros. Studio Tour, London. (Photo by Adam Clarke)
![]() APPROXIMATE TIME TO COMPLETE
APPROXIMATE TIME TO COMPLETE
1–2 hours
![]() MATERIALS
MATERIALS
Paper and pens/pencils
Legos or other stick-together building blocks
A phone or camera to take pictures of your finished set
Mini-figures (optional)
Flashlight (optional)
1. Every movie begins with a story. Before you start to build, think about who your characters are. For example, if your character is a poor farmer living in a rundown farmhouse, with very little furniture, the set needs to show this. Noodle as many details about the set and character to tell your story (fig. 1).
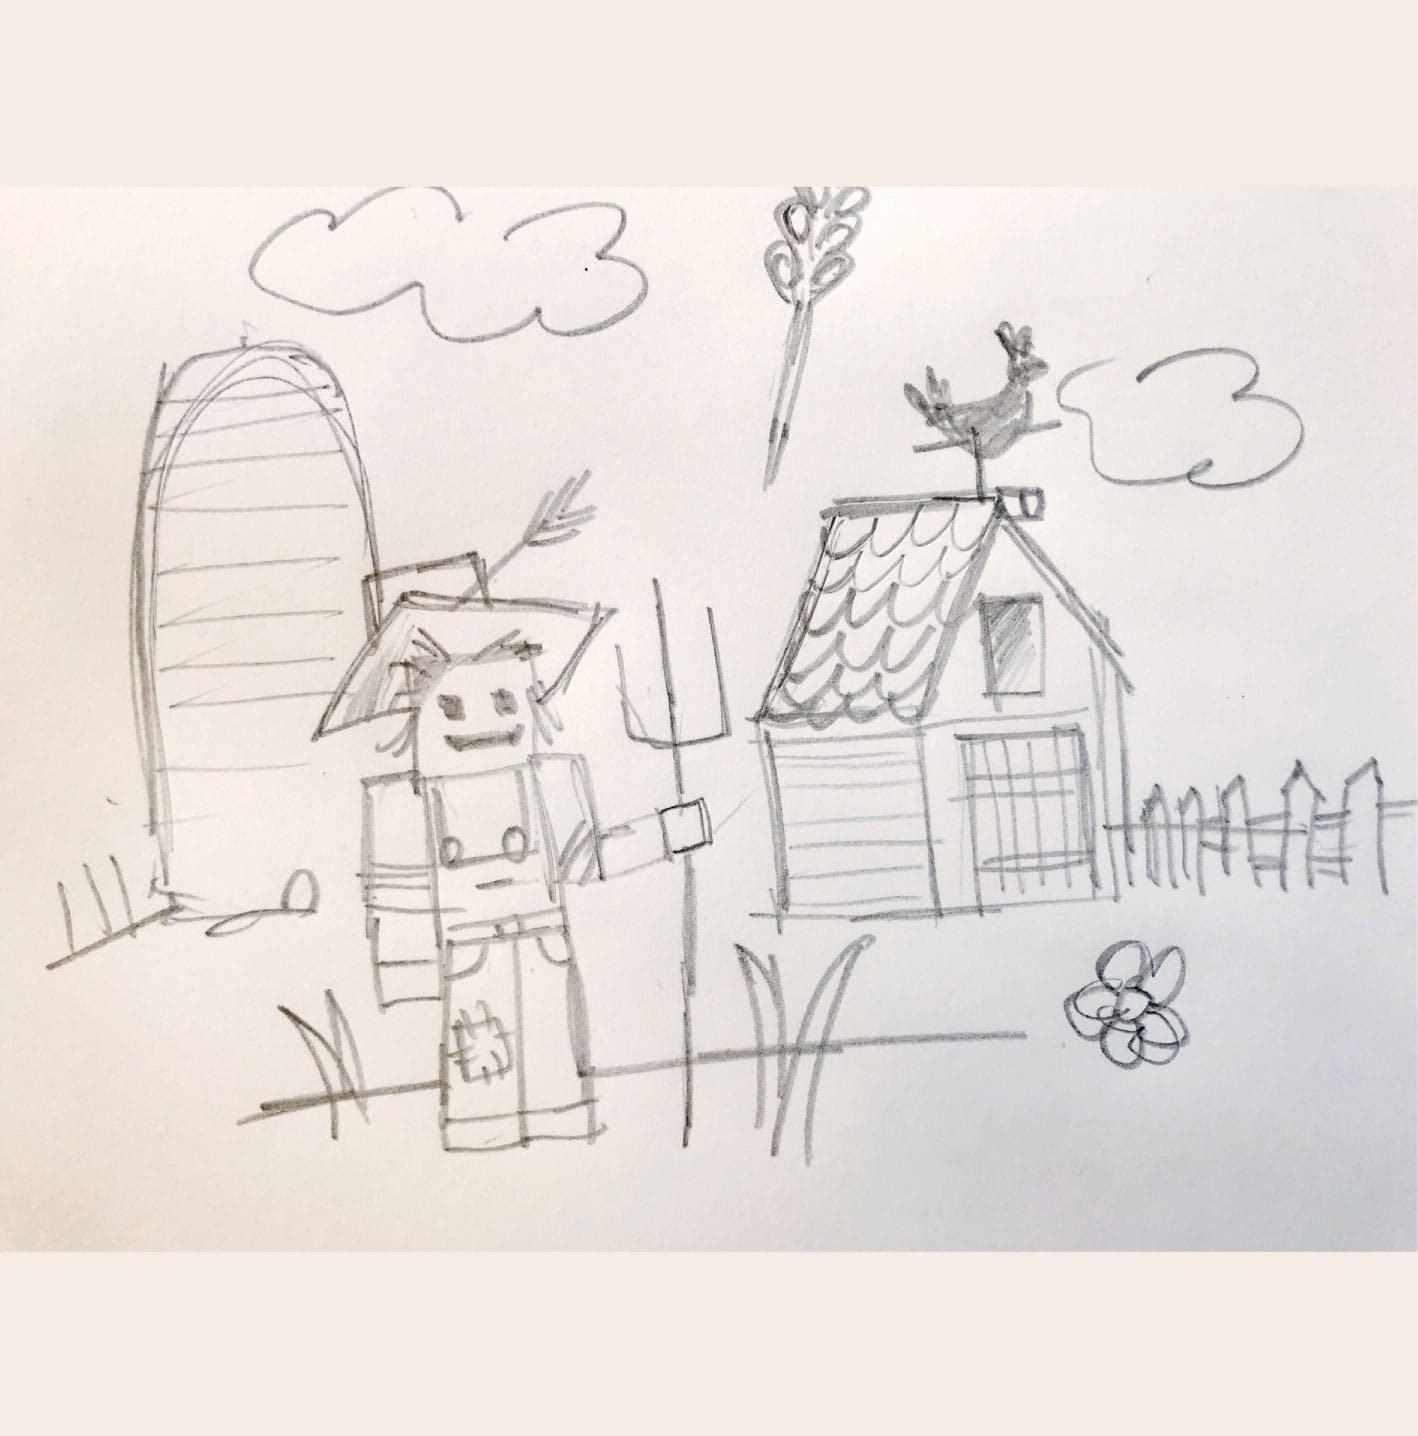
Fig. 1: Noodling is a great way to develop character ideas.
2. Using a range of different building bricks, construct the perimeter (outline)—just like you do when you build a base in Minecraft. Remember to leave one side open for the camera (fig. 2).
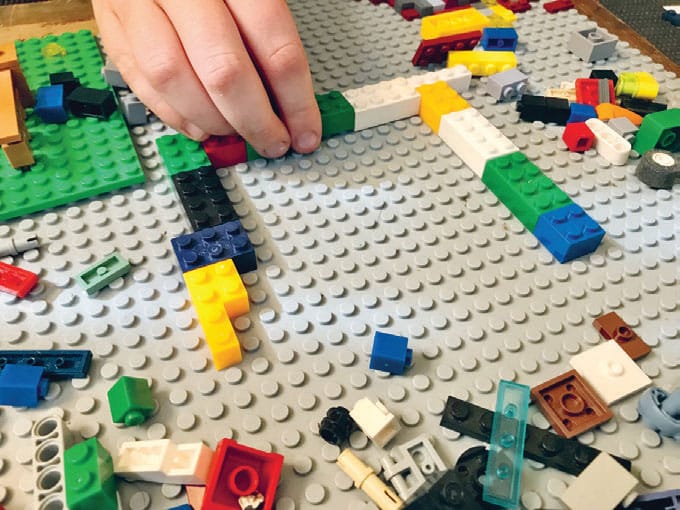
Fig. 2: Using a range of bricks, build your set, starting with the outline first.
3. Build the other elements you need in your set. Use your sketches to help you focus on what is needed. It’s easy to get carried away when you’re having fun! Remember, your set is there to tell the story.
4. Use mini-figures to add actors if you want (fig. 3).
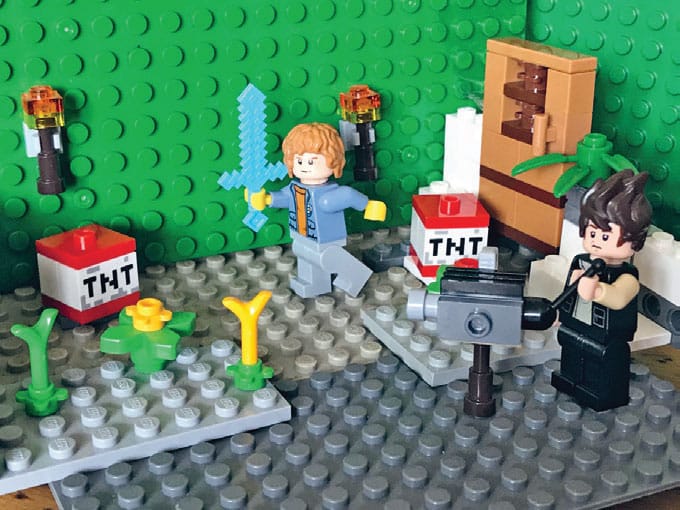
Fig. 3: Once you’ve built your set, you can add actors!
5. You’re now ready to see what your set looks like through a camera lens. This is when you can add lighting. Lighting can change the meaning of the story. You can move your build from place to place to try out different lighting. Some spaces will have direct sunlight through the windows, some will have artificial lights, or you can even go into a dark room and use a flashlight to light your set from the side (fig. 4).
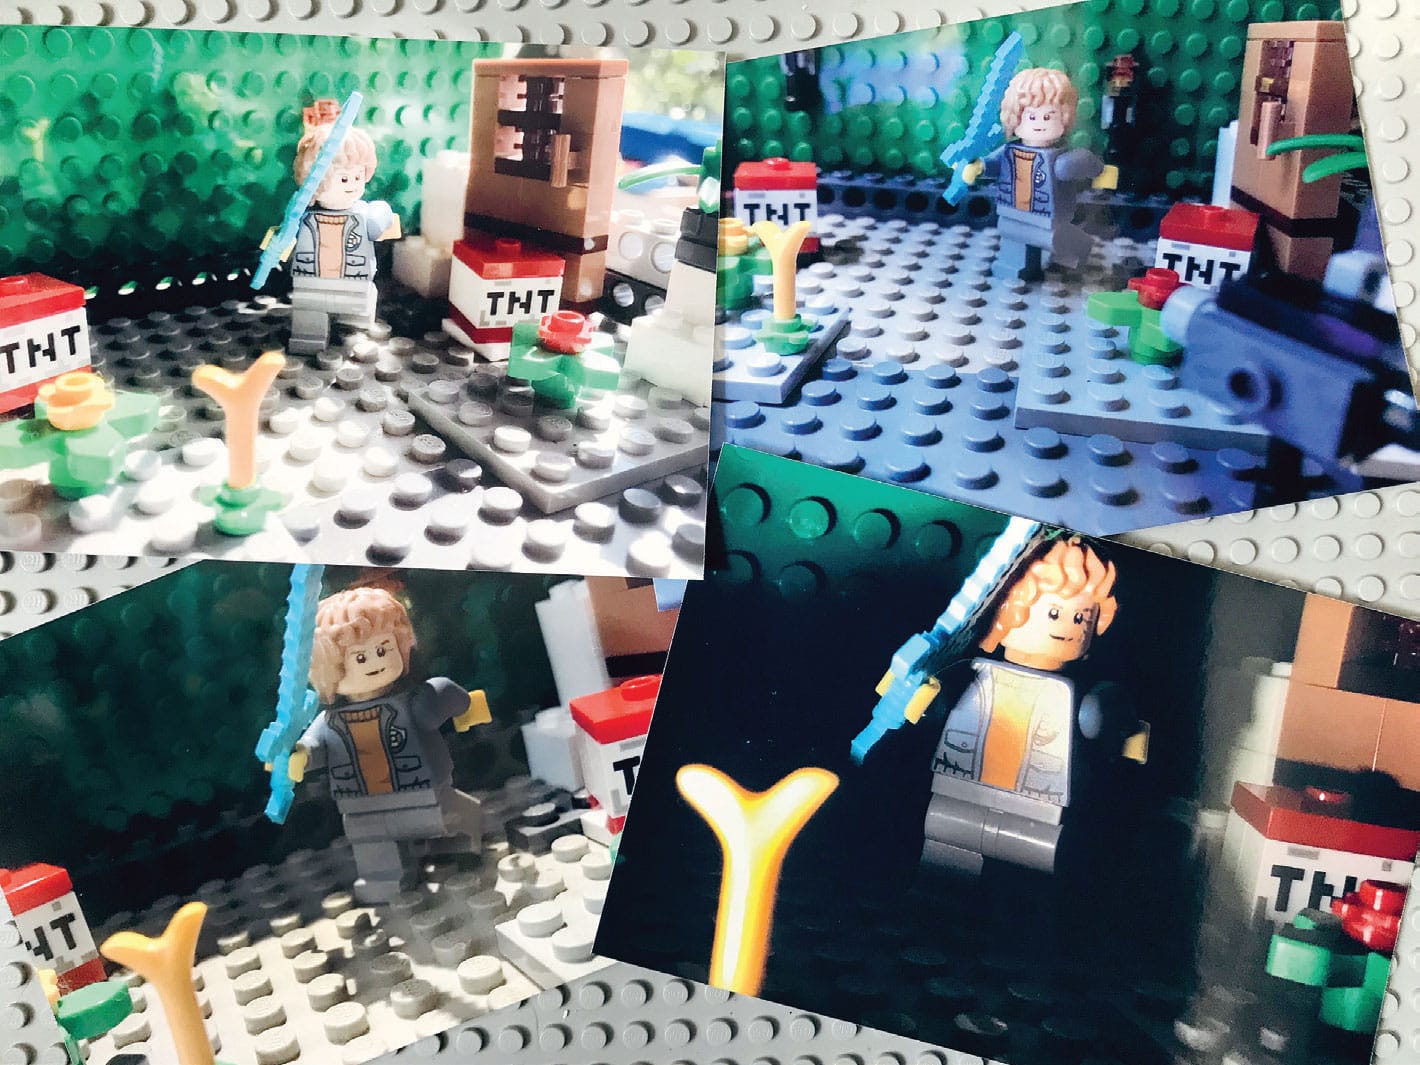
Fig. 4: Each time you light your build, take a photo of it from a different angle: top, front, side, or low down.
6. Trying different outcomes gives you permission to experiment with ways of working. This can result in fresh, new ideas to help you tell your story. Take a bunch of photos, then choose one or more that tell your story best. If you can, print these out and put them up where you can see them, or add them to your Minecraft Movie Production Folder in the next activity.
MINECRAFT PLAY: Build It Yourself
Minecraft is a great visual space for telling stories. In this lab, you’ll create a short silent movie that tells the story of taking a journey from one place to another. This might be as simple as getting up in the morning and going out to chop some trees, or it might be about a bigger journey in life. By doing this, you’ll learn the basic filmmaking skills you need to make movies, in Minecraft and in real life! For ideas, see Stampy’s Wonder Quest (www.youtube.com/user/Wonderquest) and PlayCraft Live, the world’s first live-streamed, live-action stage play in Minecraft (https://youtu.be/Shp71F2gcdM).

![]() APPROXIMATE TIME TO COMPLETE
APPROXIMATE TIME TO COMPLETE
1 day or more
![]() GAME MODE
GAME MODE
Creative
1. What story are you telling, and who’s in it? For this movie, there’s no dialogue, but you can still create a script for the plot and characters. Write a short, simple outline of your story.
2. Think about your sets (the locations where the action happens). Where does the story take place? In a castle? Down a well? In a forest? Write a list or draw a sketch of all the different sets you’ll need.
3. Now think about your scenes (the individual situations in a play). How do you make your scenes more interesting? For example, you can change the time of day or weather. A dark and stormy night tells a very different story than a cozy family gathering around a fire.
4. Using all this information, create your shot list, using six key shots. The shot list includes the characters, the time of day, and the type of shot, such as a close-up shot (fig. 1), medium shot (fig. 2), or wide shot (fig. 3).
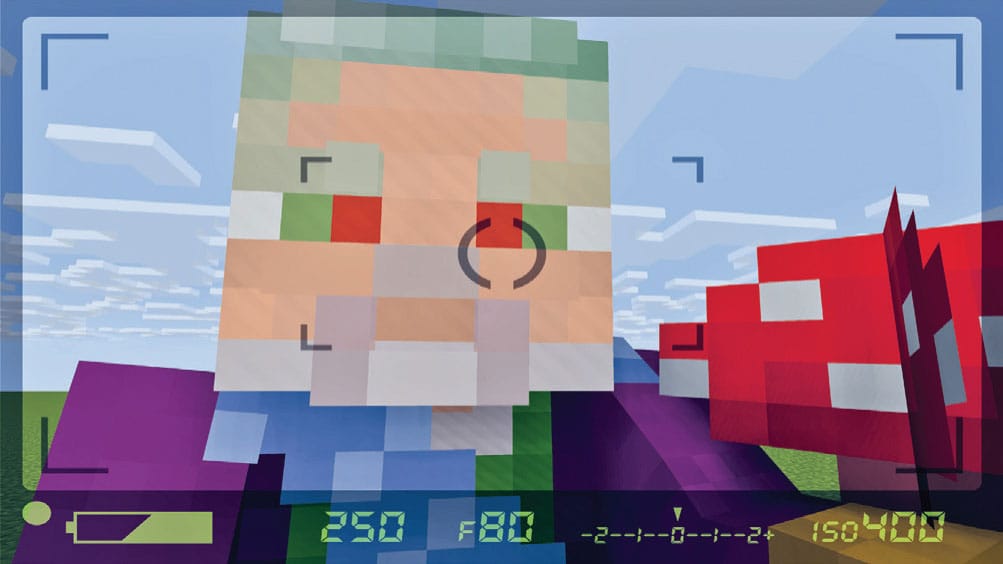
Fig. 1: A close-up shot.
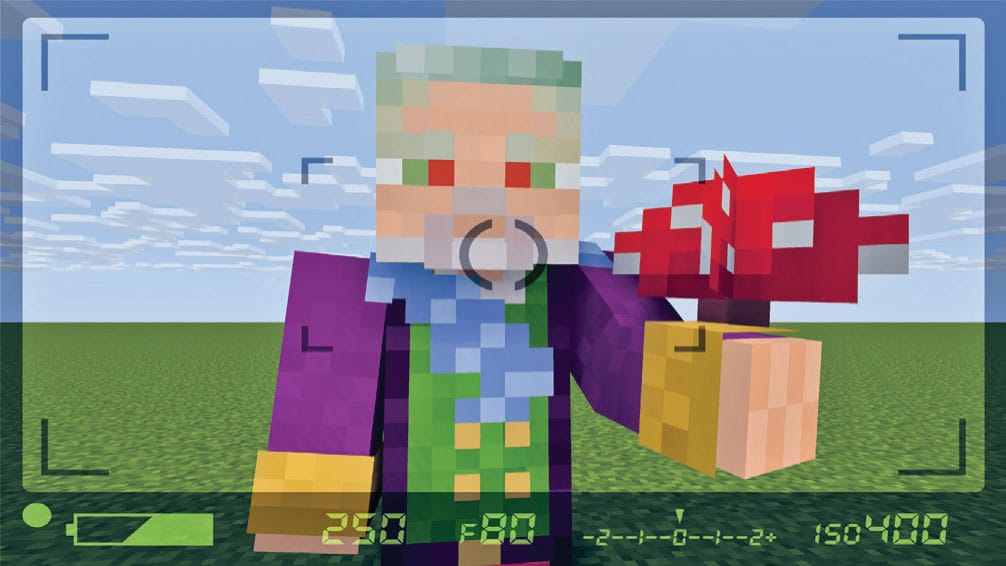
Fig. 2: A medium shot.
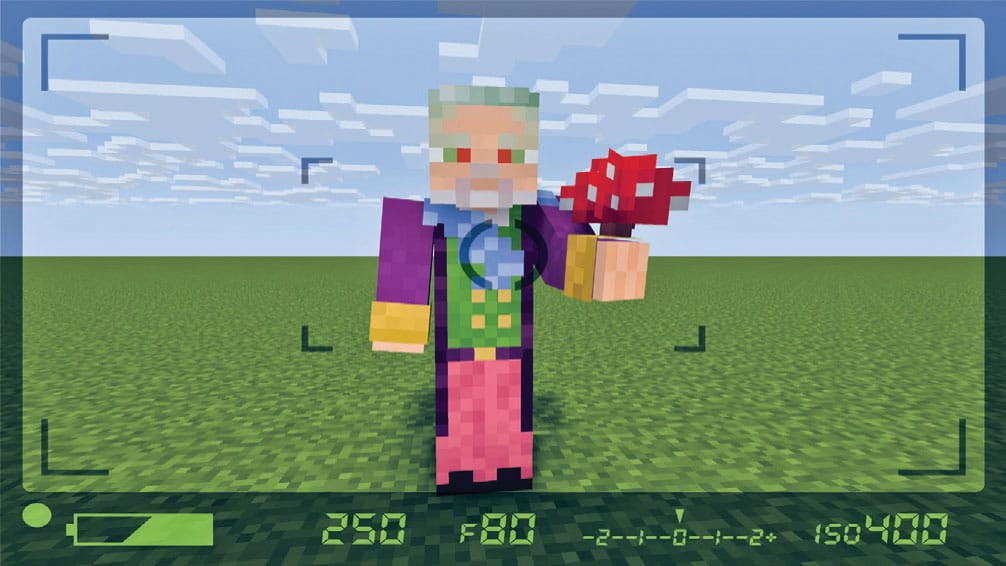
Fig. 3: A wide shot.
5. A storyboard is a way of telling a story in pictures. To make your storyboard, divide a page of 81/2 × 11-inch paper into six equal sections. This will give you six camera shots per page (fig. 4). Remember, you don’t have to be able to draw to do a storyboard; the important thing is to show the story as it will be filmed. Keep your action simple and let the camera tell the story. In filmmaking, even the simplest action, like opening a door, can be broken up into several different camera angles and shots.

Fig. 4: Use your storyboard to show how your film needs to be shot.
6. We can learn a lot about characters through costume and makeup. Use your character list to build a portfolio (sketches) of character costumes or skins.
7. Gather all the work you’ve done so far—script, set list, scenes, shot list, storyboard, and costume designs—and put it in a production folder.
8. Use the production folder to help you build your sets. You can either start with a plain flat world, where you build everything that you need, or you can build in a naturally generated Minecraft world set to Creative Mode. Remember, sets don’t need to include everything. Some of the most believable movie sets are just the fronts of buildings, with scaffolds and wires behind the scenes.
9. Create your costumes (Minecraft skins). This gives your characters an immediate sense of who they are and what their story is all about (fig. 5). A useful tool for this is Novaskin, but there are several free online tools that you could use. We’ve listed some suggestions for you to use in the Resources section (see here). Always check with a parent or guardian before you download anything.
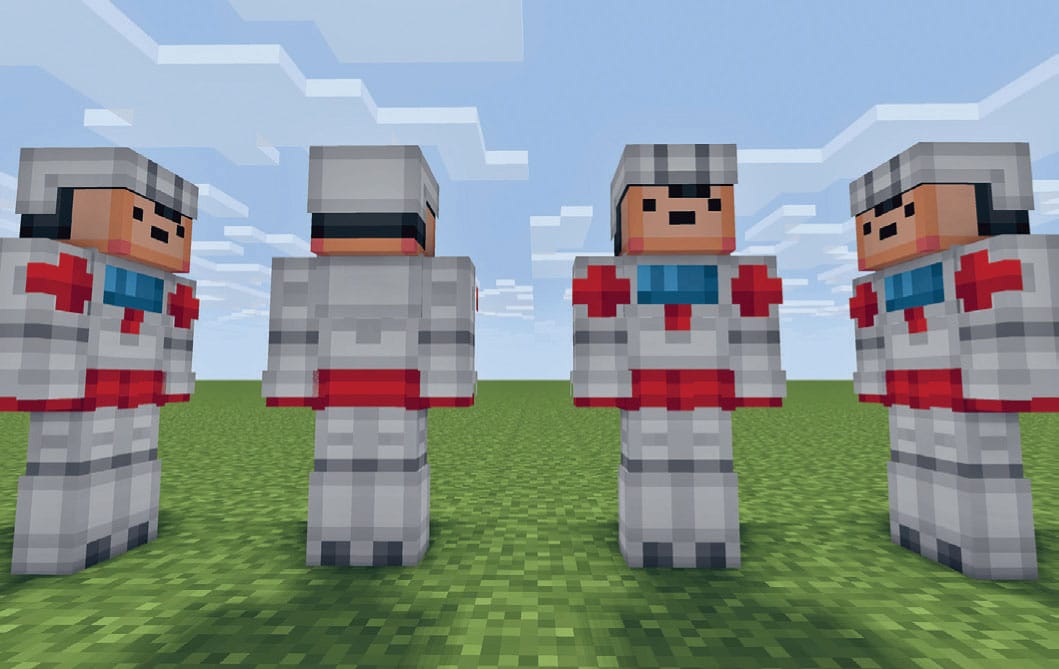
Fig. 5: Creating Minecraft costumes for your characters helps tell their story.
10. Now you need your actors. If you want to film in the third person (outside of your own view), then you’ll need both an actor and a cameraperson.
11. Give all your film crew/actors the shot list (fig. 6). You’re the director of the movie, so it’s your job to show and tell everyone what you want them to do. Sometimes this can be difficult, especially when everyone has their own ideas. Remember to use your life hack skills!
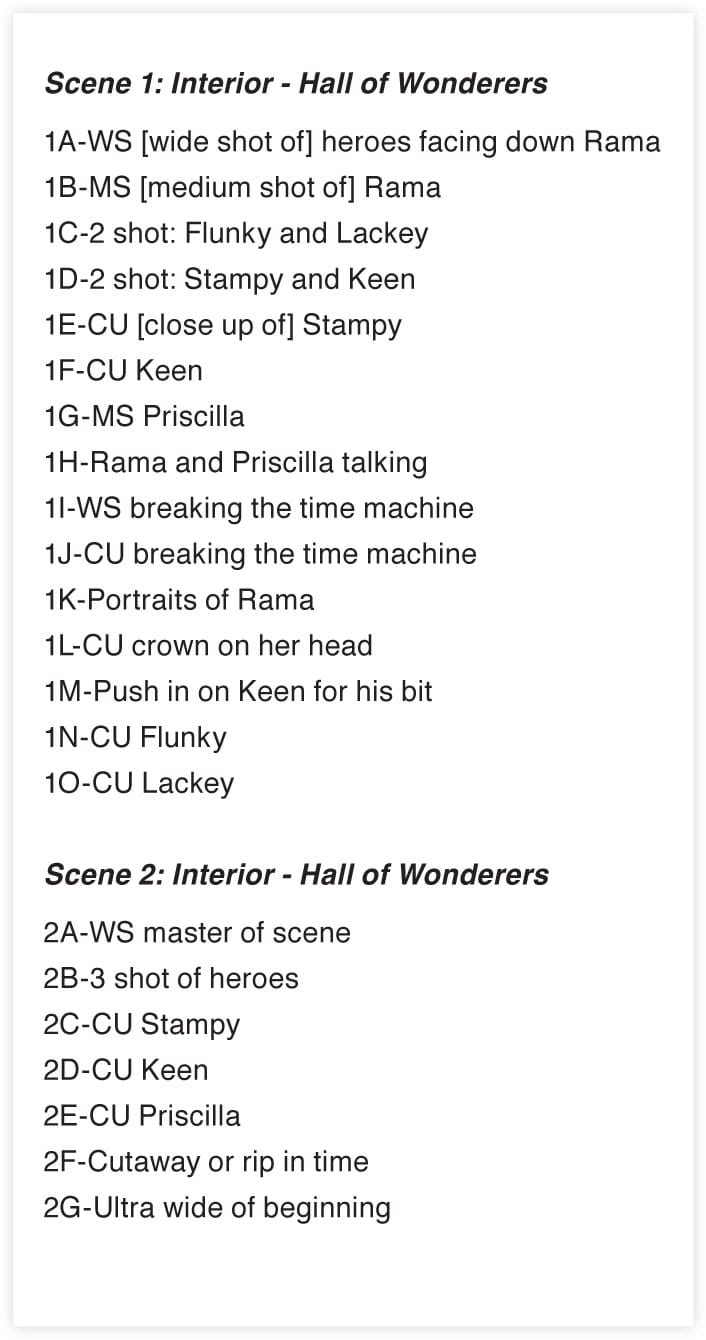
Fig. 6: A sample shot list from a Wonderquest production.
12. Agree on a time and place to shoot your movie and stick to your plan. It’s very, very easy to get sidetracked at this stage, but your movie-making experience will be better if you try to avoid this.
13. Choose which device you’re using. PC? PlayStation 4? Tablet? Xbox One? Each one has a different way of recording live action. How you record your movie will depend on what device you’re playing on.
14. Once you’ve shot your film, you must edit it. Use your shot list to help you choose your clips. Think about how one clip moves on to the next. This is called transition. The three common types of transition used in film are the hard cut (great if you’re changing scenes or from one character to another), the cross fade (creates a soft flow between clips and is great for scenes with groups of people in both shots), and the fade to black (most commonly used at the beginning and end of your movie, but can also be used to show very different scenes, such as the villains in one camp, and the heroes in another. (Note: Keep the shots you don’t want and make a funny blooper reel at the end!)
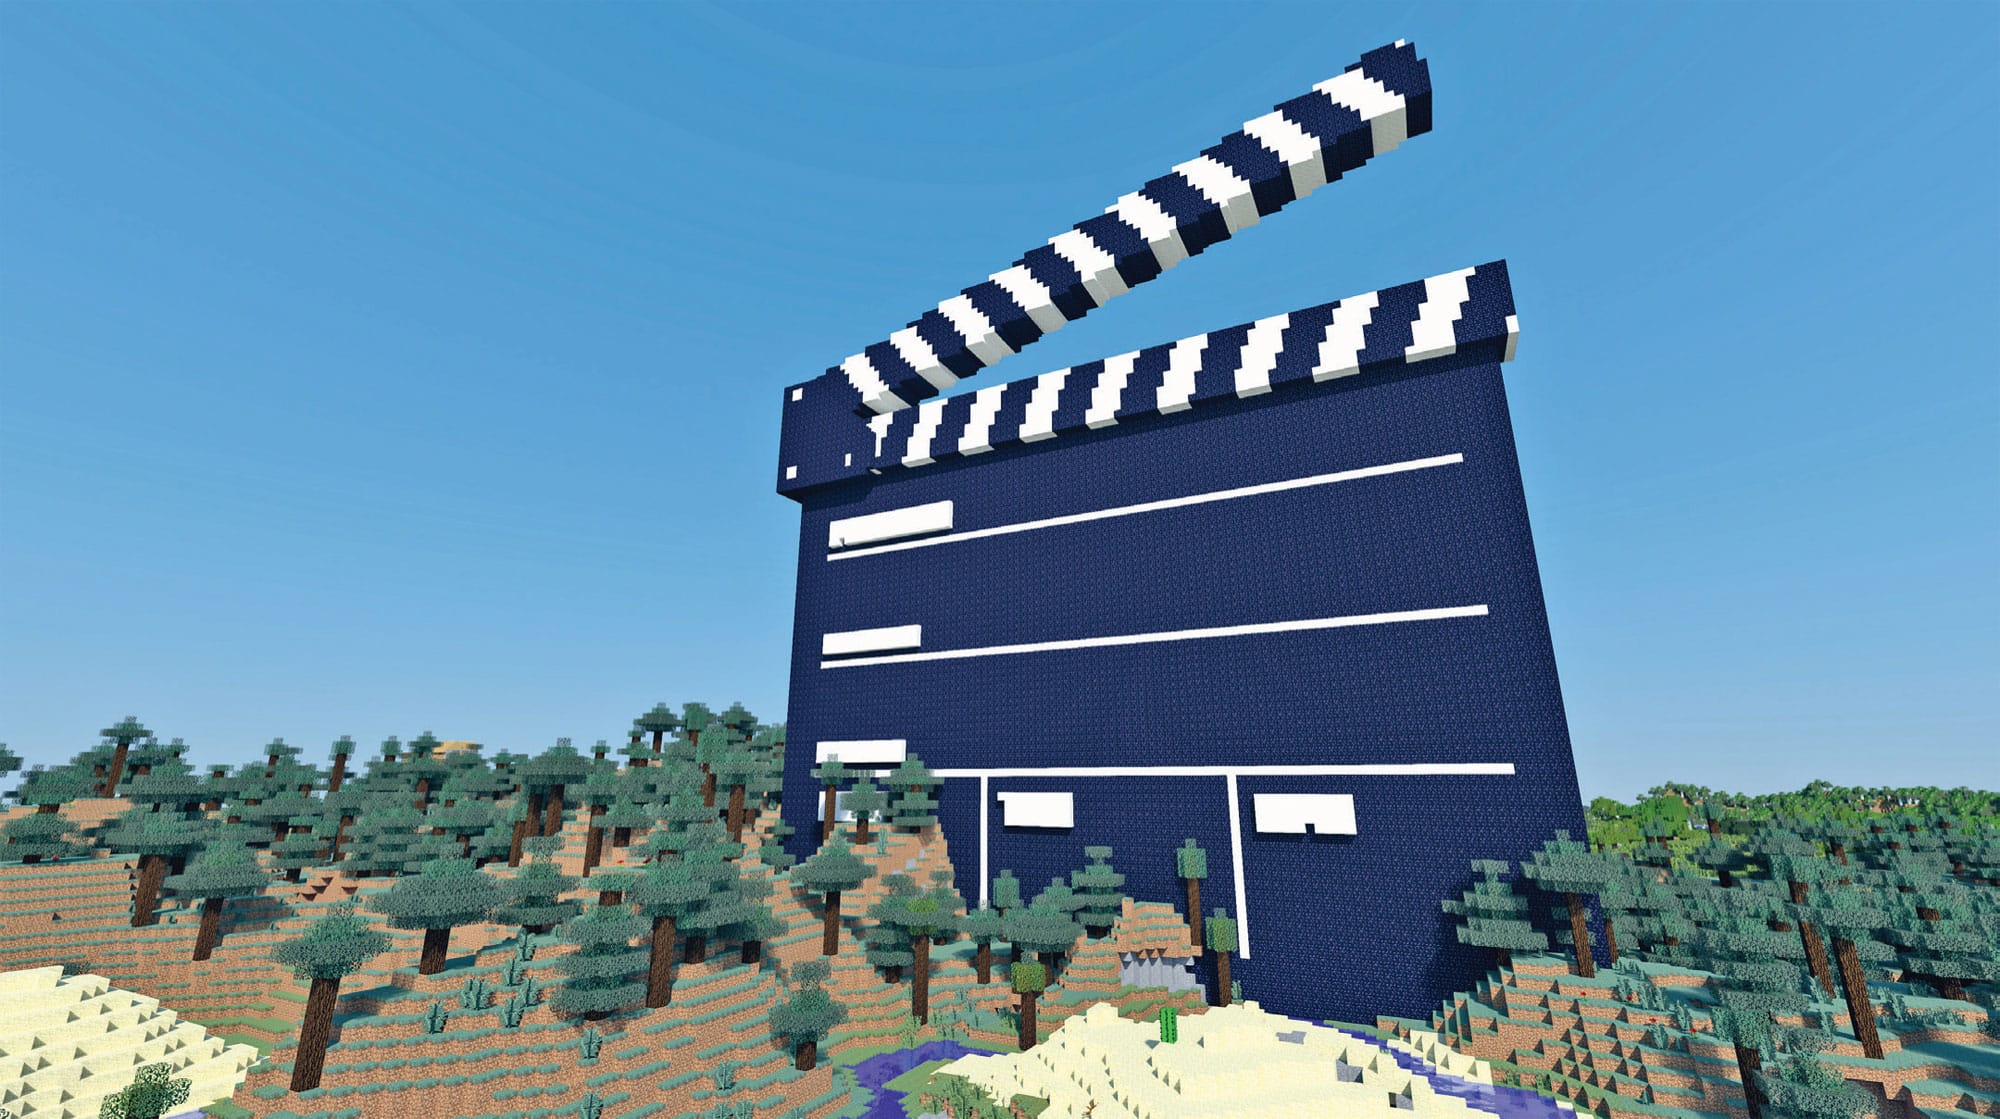
15. Now you can add the title (fig. 7) and credits, a list of the people who helped make the movie. Use the credits function in your software, or build and film them in Minecraft.
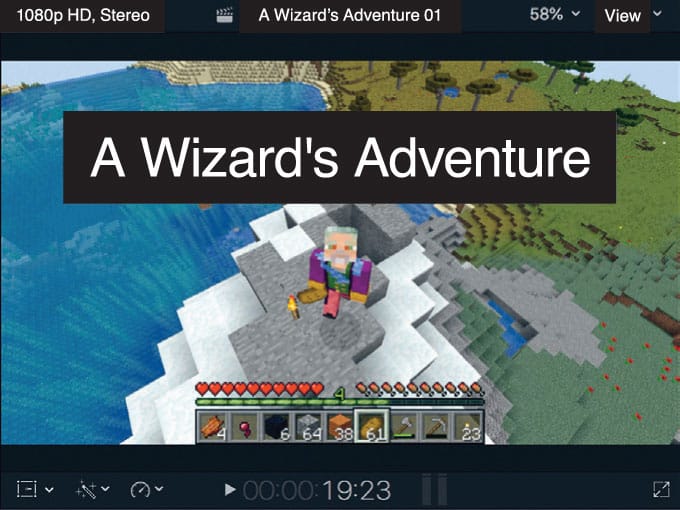
Fig. 7: A sample title in Minecraft.
16. Music can help tell a story as well. Lots of free music is available on the internet to download. Be careful to only choose music that says “Creative Commons” on it. We’ve included some suggestions in the Resources section. Remember to always check with a parent or guardian before you download anything.
17. Now your film is ready to share. You can do this from the device you made it on, or you can export to your phone to share with family and friends. If you want to share it online, remember to ask a parent or guardian first before you upload anything.
18. Congratulations! You’ve just made your directing debut!
LAB 24 |
Eye Spy |
In this lab, you’ll learn more about the art of portraiture and create your own “Shelf-Portrait” sculpture using found objects. Then, using pixel art, you’ll create your own fantastic portrait in Minecraft. Remember, a mistake is never wrong—it’s just a doorway to discovery!
HANDS ON: Gathering Data
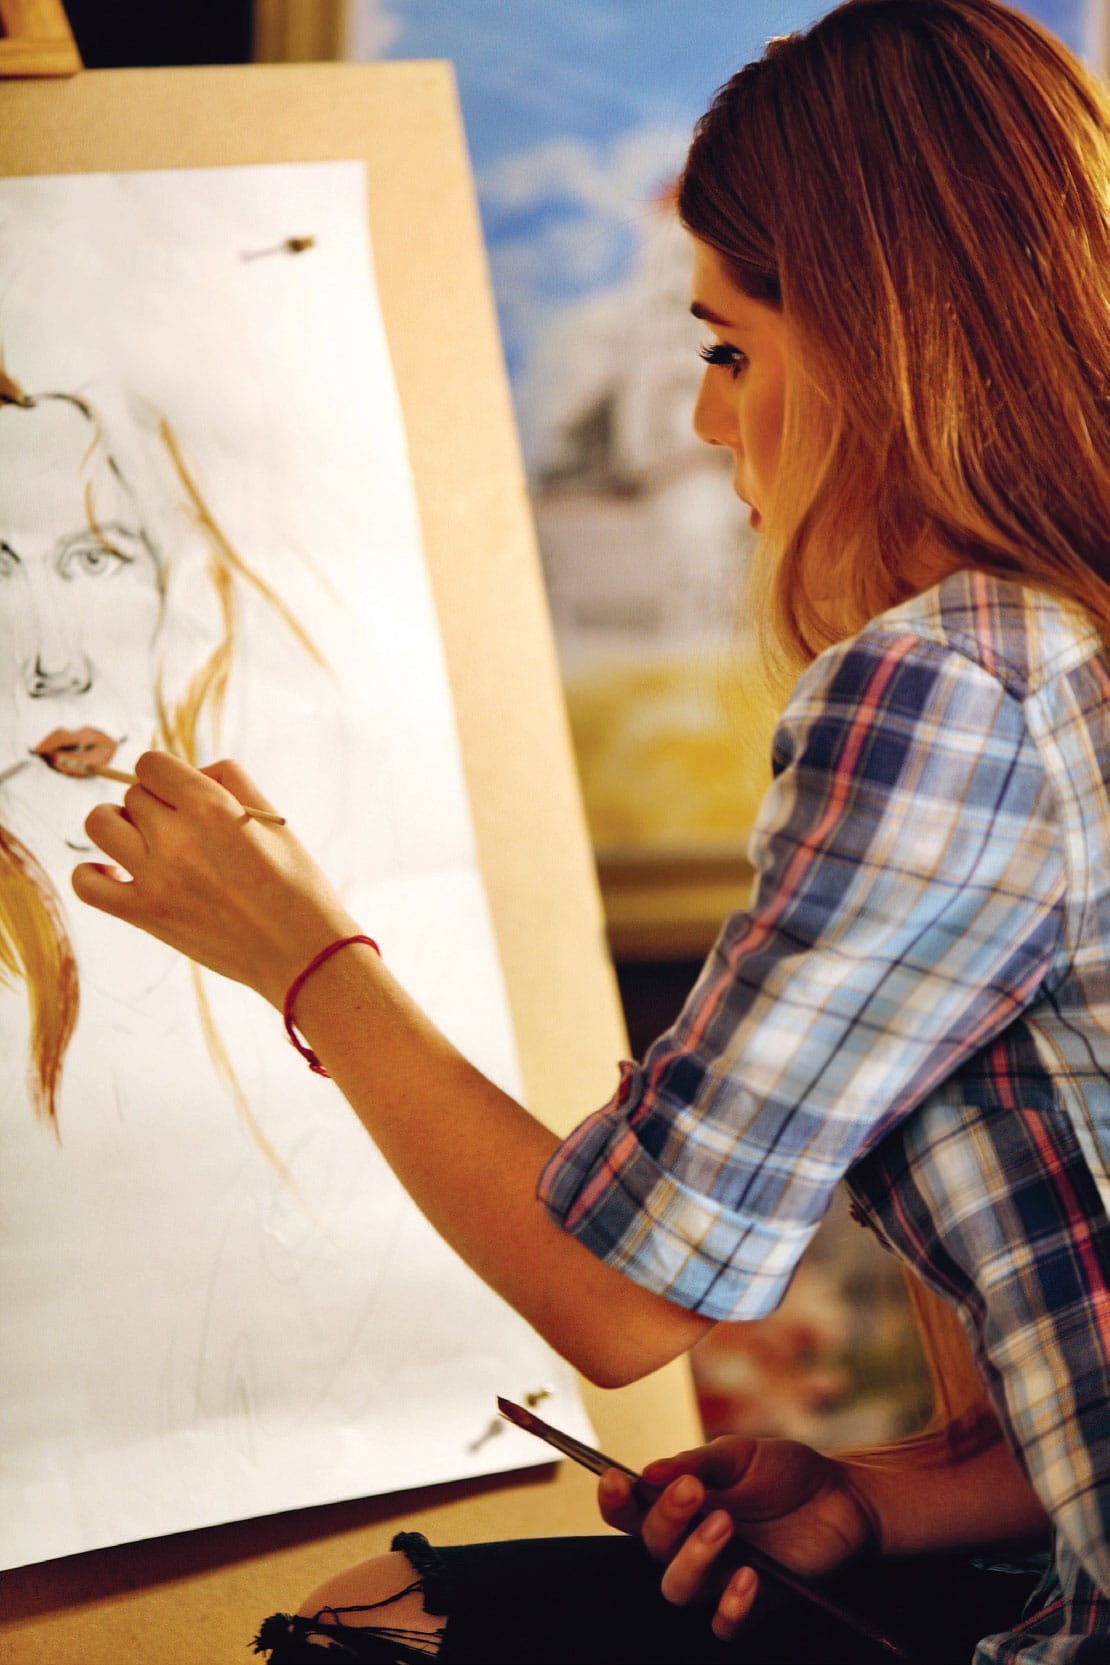
In this lab, you’ll create a narrative self-portrait, which uses past experiences, personal stories, and memories to create a picture of the artist from their own viewpoint. But instead of painting a picture or shooting a selfie, you’re going to use found objects and mementos from your own life to create a three-dimensional self-portrait and display it on a shelf. You’re going to create your own Shelf-Portrait!
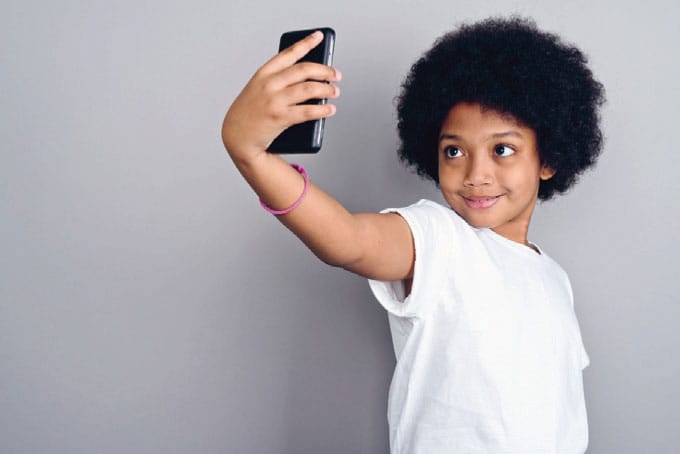
Instead of a taking a selfie or painting a self-portrait, you can create a Shelf-Portrait! See opposite for an example.
![]() APPROXIMATE TIME TO COMPLETE
APPROXIMATE TIME TO COMPLETE
30 minutes
![]() MATERIALS
MATERIALS
A shelf
Paper and pen
Items from your home and life
Camera
1. Choose a shelf in a room. This is going to be the basis of your Shelf-Portrait.
2. Think about the story of your life so far. The following questions can help get you started: Who is important to you? What memories are special to you? What experiences, challenges, and achievement have helped make you who you are? What things do you love to do? Do you have any hobbies? What are your hopes for the future? What is your earliest memory?
3. These are just some of the things you can ask. The aim is to really think about your life and which parts you want to include in the story of you. Write them down in your journal, or use a sheet of paper to do a mind map of ideas.
4. Collect objects and images that tell these parts of your story. You might want to include a photograph of someone very special to you, or a trophy, or your first shoes, or a favorite toy. You could include a stone or a flower from a garden, an old letter, or a favorite food. The objects you choose should tell the story of you, so that if someone who saw it had never met you, they would be able to know something about who you are.
5. Arrange the objects on your shelf. Think about how their arrangement tells your story. What happens when you put objects close together, far apart, in front, or behind? How does this change the “reading” of your story?
6. Once your Shelf-Portrait is finished, take a photo of it. You can even frame the picture and display it—just like an old-fashioned portrait!
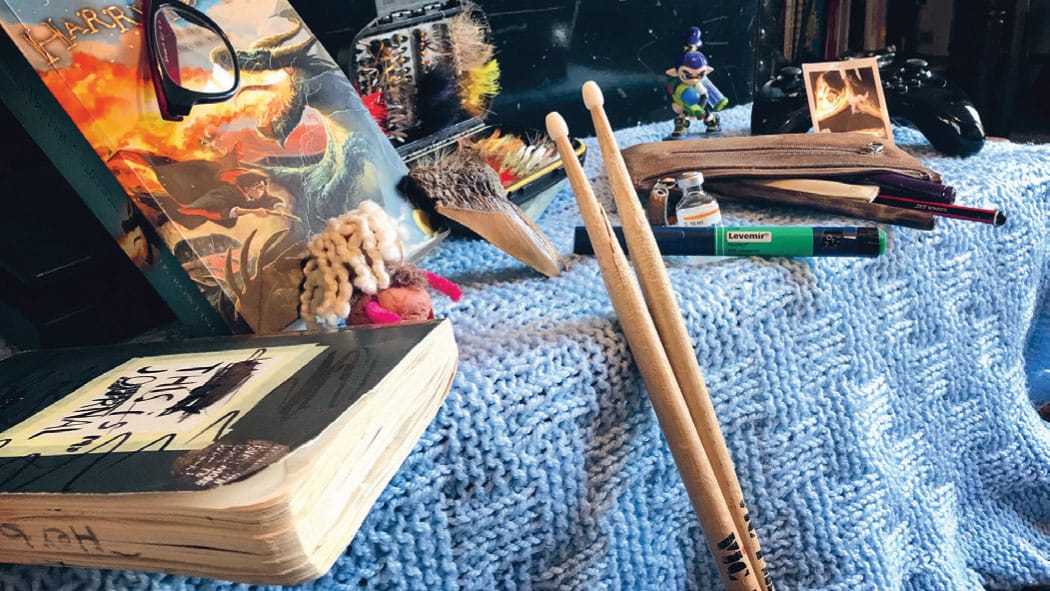
Fig. 1: A finished Shelf-Portrait by Django Clarke.
MINECRAFT PLAY: Build It Yourself
In this activity, you’ll use Minecraft to create a portrait of someone else, using blocks to build pixel art. You can create a portrait of someone you know, such as a friend or family member, someone famous, or someone that you admire.
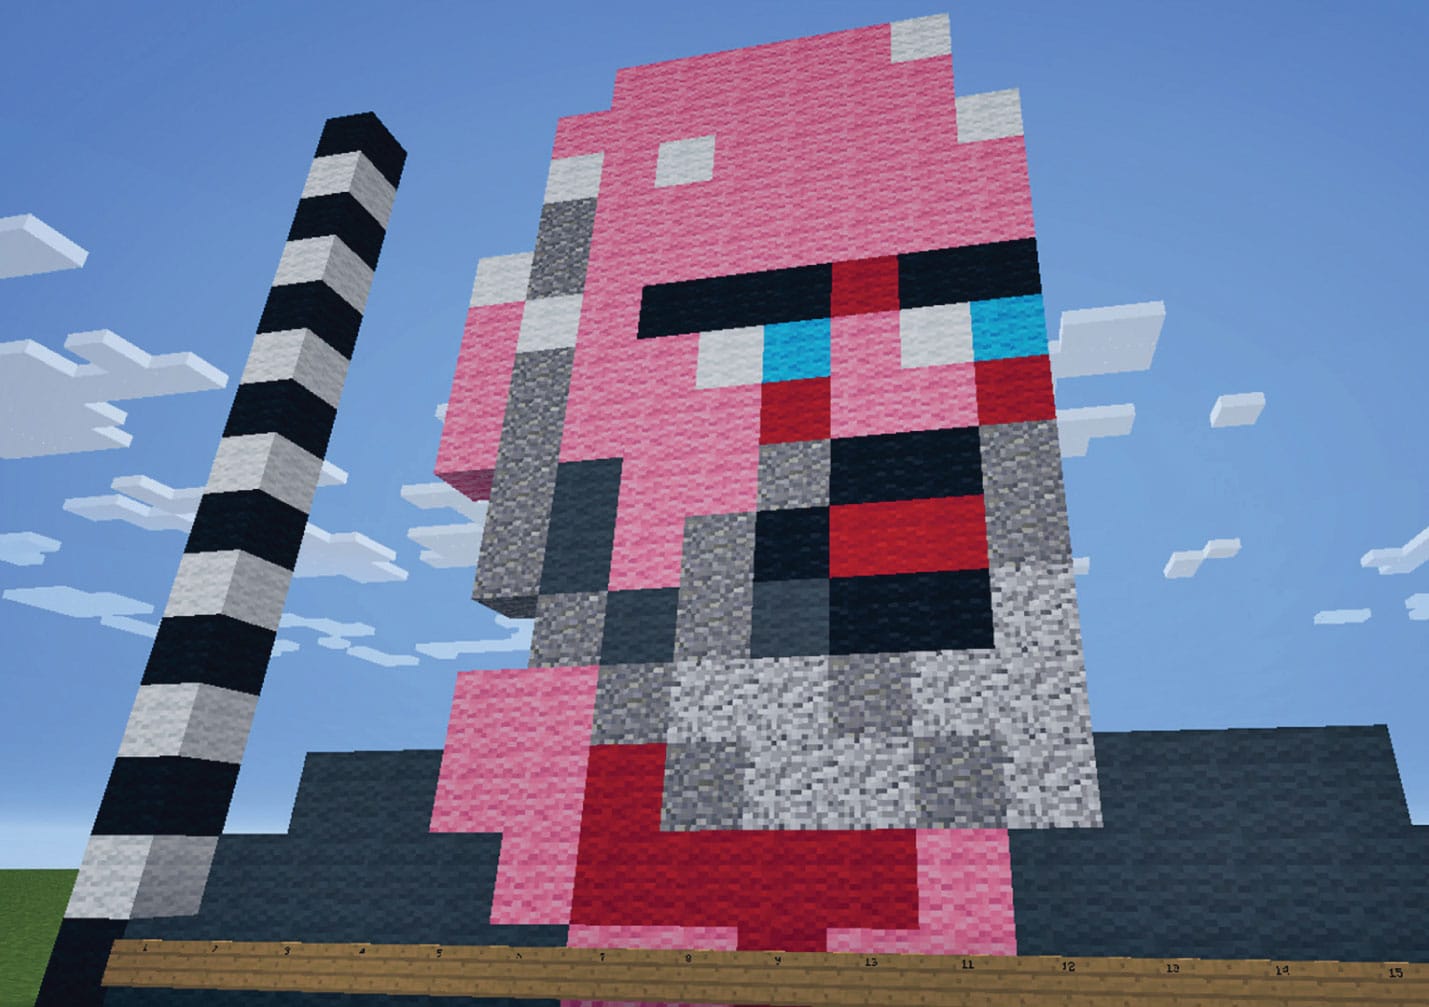
![]() APPROXIMATE TIME TO COMPLETE
APPROXIMATE TIME TO COMPLETE
2 hours
![]() MATERIALS
MATERIALS
Graph paper (see Resources for download link)
Removable tape
Window or lightbox
Dark-colored felt-tip pen
Colored pencils
![]() GAME MODE
GAME MODE
Creative
1. Get a picture of your subject (the person you’re making a portrait of). You can take a photo or find a picture in a book, online, or in a magazine. This image should include only the head and shoulders and be a close-up. Upload your chosen image onto the computer and print it out as an 81/2 × 11-inch (A4) picture (fig. 1).
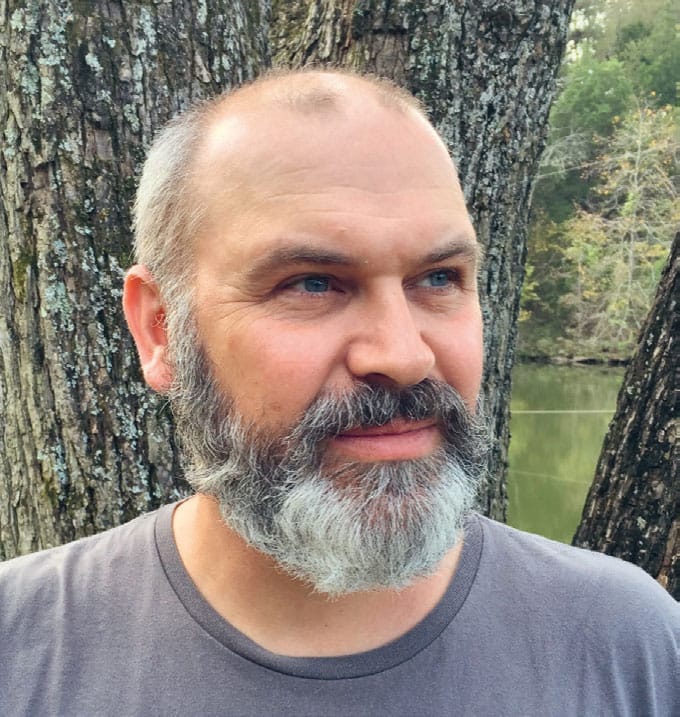
Fig. 1: Start with a color photo of your subject.
2. Trace the image onto graph paper. You can find a link to download graph paper in the Resources section. Tape your image to a window (this has to be done during the day, because you need light shining through the window for it to work) or use a lightbox if you have one. You should be able to see your picture through the graph paper. Using a dark-colored felt-tip pen, trace around the different features—face, head, eyes, hair, nose, mouth, and eyebrows. Using a different color pen, trace around any color changes, such as hair color, dark eyebrows, shadow under the eyes or chin, a beard, or eye color (fig. 2).
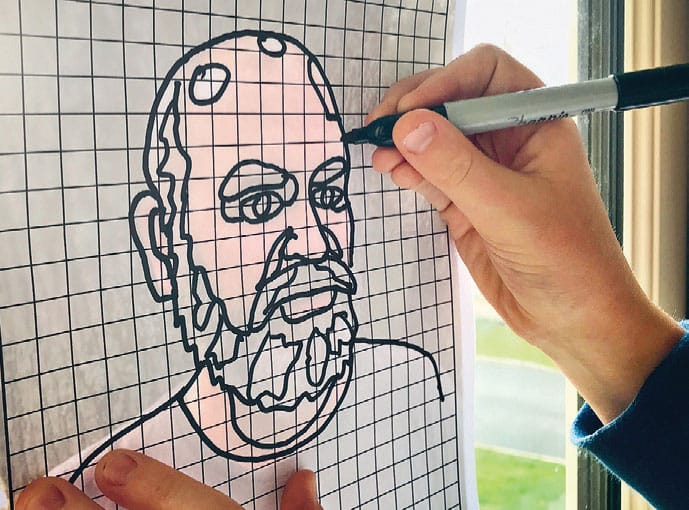
Fig. 2: Tape the photo to a window or a light box, then use a dark marker to trace its outlines onto a piece of graph paper.
3. Using colored pencils, shade in the blocks to represent the different colors (fig. 3). You can use your original picture as reference for this part. You don’t have to stick to the real colors if you don’t want to!
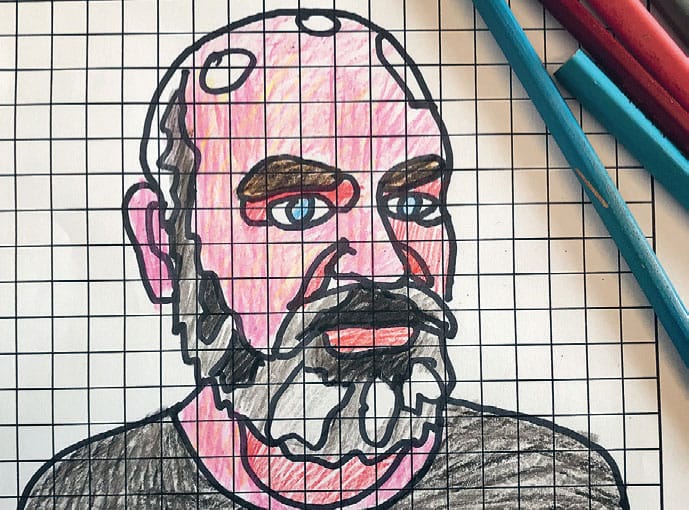
Fig. 3: Fill in the blocks with colored pencils.
4. Now, go into Minecraft in your flat sketchbook world. Look at your picture. What colors have you used? Choose blocks for these colors and create your artist’s palette—just as a traditional artist would have their paint palette, you have a block palette!
5. Number the blocks along the bottom of your image from left to right. Now number the blocks upward, from the bottom left corner to the highest block on your portrait. This will give you a grid reference to work out how many blocks to use in each section.
6. Using the grid reference on the graph paper, count out the number of blocks that you need for each detail, and start to build your portrait.
7. When you’ve finished your build, stand back and take a look at what you’ve created.
8. Take a screenshot and print this out on paper. How does it compare to your original image? You could frame it and put it on the wall or give it as a gift to the person whose portrait you’ve created. If you want to, invite friends to see it in game or to build their own portraits in your world and then create an in-game sculpture gallery to show people around. You could even print out screenshots of each portrait and make your own art exhibition, in game and in the real world!
A Final Word from the Authors
As you can see, there are lots of ways you can use Minecraft to be creative, have fun, and build a better world. We’ve shown you a few, but we know you’ll have loads more ideas, so keep creating and keep imagining. Along the way, remember to use your life hack skills of communication, empathy, leadership and collaboration, self-confidence, and self-control so you can stay sharp, have fun, avoid bullies, and be the creative ruler of your own universe!
Thanks for joining us in these labs. We’ve really enjoyed sharing some of our world with you, and we hope you’ve enjoyed it, too!
Happy building!