
Lesson 4: Fundamentals of HTML, XHTML, and CSS
In this lesson, you’ll discover the fundamentals of HTML, XHTML, and CSS.Together, these form the structure and style of your web pages.
What you’ll learn in this lesson:
• The structure of HTML
• The difference between HTML and XHTML
• The fundamentals of CSS
Starting up
You will work with several files from the web04lessons folder in this lesson. Make sure you have loaded the weblessons folder onto your hard-drive from www.digitalclassroombooks.com/webdesign. See “Loading lesson files” in the Starting Up section of this book.
 |
|
|
We used the text editor Coda to create the markup in this lesson, but you can use any of the text editors covered in Lesson 3 to achieve the same results. |
Web languages
In this lesson you will discover two languages: HTML and CSS. Although they have different syntax and rules, they are highly dependent on each other. By the end of this lesson, you will understand how to create simple HTML pages, add images, create hyperlinks from one page to another, and add simple styling to pages using CSS.
This lesson covers a lot of ground, and many of the core principles introduced in this lesson are reinforced throughout the remaining chapters.
Web page structure is based on HTML
Hypertext Markup Language (HTML) documents use the .html or .htm extension. This extension allows a web browser or device such as a smartphone to understand that HTML content is on the page, and the content of the page is then rendered by the browser or device according to the rules of HTML.
Markup tags are used to define the content on an HTML page. Markup tags are contained between greater than (<) and less than (>) symbols, and they are placed at the start and end of an object or text that is used in an HTML page. Here is an example of two heading 1 tags for text. The tags are not seen by the viewer of the web page, but every web browser knows that the text between the tags is a heading 1.
<h1>New Smoothie Recipe!</h1>
In this example, the <h1> is the opening tag and the </h1> is the closing tag. So this entire line of code is an element. More specifically, it is referred to as the heading 1 element.
HTML and XHTML are closely related. There is a list of rules defined by the World Wide Web Consortium, or W3C that specify the perimeters of HTML and XHTML.
|

The details of XHTML syntax
There is little fundamental difference between HTML 4.0 and XHTML 1.0 — the two standards previously released by the W3C (World Wide Web Consortium). As XHTML was defined, it was created so that pages written in XHTML also work in browsers that render current HTML. The tags and attributes of XHTML and HTML remained the same, but the syntax of XHTML code is more strict.The most significant differences between XHTML and HTML are as follows:
• In XHTML, all tags must be lowercase.
• XHTML requires all tags to be closed — meaning that there must be a tag at the start and end of the element being tagged — such as a headline, paragraph, or image.
|
|
All tags in XHTML must close, even special tags that technically don’t require an open and close tag. For example the <br> tag which creates a line break, uses a special self-closing syntax. A tag that self-closes looks like this (with a space and a forward slash): <br /> |
• XHTML requires proper nesting of tags. In the following example, the <em> tag to emphasize text opens within the <h1> headline tag. As such, it must be closed before the <h1> is closed.
<h1>Smoothies are <em>great!</em></h1>
We’ve used XHTML-compliant code throughout this book as we provide HTML5 examples, which helps make your designs compatible with modern browsers and mobile devices.
Doctype lets the web browser know what to expect
The start of every web page should include a Doctype declaration, telling the Doctype declaration tells the web browser a little bit of information about what it is going to see on the page. Because there are different specifications for XHTML and HTML the web browser knows which language it’s about to see and render. Because a browser renders the page starting at the top line and then moves down, placing your doctype on the first line makes a lot of sense. While it’s not required, it’s good form to always use Doctype at the start of your HTML pages. The doctype for HTML 4.0.1 looks like this:
<!DOCTYPE HTML PUBLIC "-//W3C//DTD HTML 4.01 Transitional//EN" "http://www.w3.org/TR/html4/loose.dtd">
When a web browser sees a doctype declaration, the browser expects that everything on the page that follows will use that language. If the page adheres to the specifications perfectly, it is considered valid.
The W3C and page validation
You may recall from Lesson 2 that the W3C is the World Wide Web consortium — a non-profit group that helps guide the evolution of the web. The W3C provides guidelines and rules for specifications including HTML and XHTML. One way to determine the validity of the HTML or XHTML code you generate is to use W3C’s free online validation service.
|
|
You will need access to the Internet for this exercise. If you do not have Internet access, you may read through the exercise to understand the validation process. |
1 Open your web browser and navigate to http://validator.w3.org.
2 Click the Validate by File Upload tab.
 |
|
The W3C validator allows you to check your HTML code for errors. |
3 Click Browse (depending on your browser, this may also read “Choose File”), and navigate to your web04lessons folder, and select the w3_noncompliant.html file. Click the Check button to validate the code.
4 The W3C site returns several errors. Scroll down the page and you can see in-depth information on the errors. Don’t worry about the errors at this point. You will now upload a nearly identical file without errors.
5 Click the Browse button, navigate to your web04lessons folder, and select the w3_compliant.html file.
6 Click the Revalidate button. You now see a Congratulations message that the page has been checked and found to be compliant as XHTML 1.0 Strict.
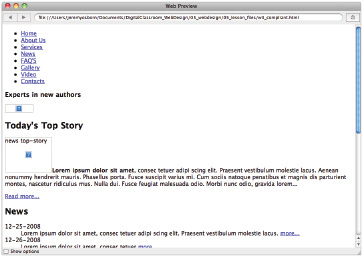
Although the page is valid it may not look good to a viewer. This example uses a page that has missing styles and missing images to emphasize this point. It’s important to understand that having valid code is only one step in a series to make certain your web pages can be viewed by the widest possible audience.
|
|
You can validate web pages that you’ve already placed online. Do this by using the Validate by URL option. You can also paste HTML code directly into the validator by choosing the Validate by Direct Input option. |
7 In your web browser, choose File > Open, navigate to the web04lessons folder, and select the same w3c_compliant.html document that you just confirmed was valid. If you are using Internet Explorer, navigate to the web04lessons folder on your computer and drag and drop w3c_compliant.html into it.
 |
|
A “valid” page can have links to images that don’t exist and may have a poor visual design. |
Because we know that the page uses valid XHTML, we know that whatever problems there are with the page, they are not due to improper XHTML code. We know that there are no missing tags or misspelled tags. This can be useful for troubleshooting, allowing you to quickly identify any syntax problems.
HTML structure
One of the most important concepts to understand when designing web content is the nested structure of HTML documents. Elements are often nested within each other. You will often start with the HTML structure first and then begin to style it with CSS.
As an example, let’s look at the basic elements that are in virtually every web page:
<html>
<body>
</body>
</html>
In this example, the <body> element is nested within the <html> element. In other words, <body> is placed between the opening <html> tag and the closing </html> tag, so nested tags are those that are placed between other opening and closing tags. These two elements <body> and <html> form the structure of all web pages; when a browser opens an HTML document, it looks for this structure.
Content within the body tag is visible on the page as it is displayed within the web browser.
<html>
<body>
Nobody knows who invented smoothies, but the world wouldn’t be the same without them!
</body>
</html>
In HTML documents, some of the content is displayed to the viewer in their browser, but there is also other code on the page that is hidden from view, but useful for the browser, search engine, or site developer. Examples of this hidden code include scripts to add interactivity, code to help search engines categorize the document, and the styles that define the appearance of the page. This code is often found inside of the <head> element, and the <head> element is nested within the <html> tags. An example of this is:
<html>
<head>
</head>
<body>
Nobody knows who invented smoothies, but the world wouldn’t be the same without them!
</body>
</html>
In the above example, there is no content in the <head> element just yet. Notice that the <head> element is nested within <html> but is not nested within <body>. The <head> element opens and closes before the <body> element starts.
The <body> element contains text but it is lacking context so neither you nor a search engine can determine if it is a heading, list, quotation, or some other type of content. To define the text as a paragraph the <p> tag is used:
<html>
<head>
</head>
<body>
<p>Nobody knows who invented smoothies, but the world wouldn’t be the same without them!</p>
</body>
</html>
The paragraph element is now nested within the <body> element, which, in turn, is now nested within the <html> element. You will now open this document in a text editor and add to the file:
1 Choose File > Open and navigate to your web04lessons folder. Depending on which text editor you are using, you may need to select “All Files” instead of “Text Documents” in order to see the file. Choose the index.html file and then click Open.
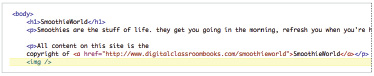
To get a better understanding of the structure of HTML and nesting of tags, you will add a hyperlink to this document linking the word SmoothieWorld to an external website.
2 In the last paragraph that reads “All content on this site is the copyright of SmoothieWorld,” click once before the word SmoothieWorld and then type the following code: <a>. This <a> is the opening for the anchor element, which you use to link to other pages in your site or elsewhere on the Internet.
3 Click to the right of the word SmoothieWorld and type </a>. This is the closing tag for the anchor tag and is required in XHTML.
|
|
If you are using Dreamweaver, it may be set to automatically complete closing tags. To change this preset, choose Edit > Preferences (Windows), or Dreamweaver > Preferences (Mac). Under Category, click Code Hints and select Never under Code Hints, and choose OK. |
To finish the job of creating a link, you need to add the destination of the link with the href attribute.
4 Click between the letter a and the closing bracket (>) in the opening tag. Press the spacebar once to add a space and type href="". The complete code should now read <a href="">.
You now have an anchor tag and the href attribute. To finish the job of creating a hyperlink, you need to add the value of the attribute. In this case the value will be a URL — a web address.
5 Click inside the quotation marks and type http://www.digitalclassroombooks.com/smoothieworld. This completes the destination and with all the pieces in place, you now have a complete hyperlink.
 |
|
Creating a hyperlink using the <a> tag and href attribute. |
6 Choose File > Save and then preview the page in your web browser by either opening your browser and choosing File > Open and navigating to the file you just saved, or by Ctrl + clicking (Mac OS) or right-clicking (Windows) the file and directing your operating system to open the file with a web browser. The link has the standard blue underlined appearance of a hyperlink that you have not yet visited.
7 Close your browser and return to your text editor.
Placing images in HTML
To add images to an HTML document, use the <img> tag. Like the anchor tag, the image tag does nothing by itself. The image tag relies on attributes and values that specify the image to display. Here you will insert an image into the HTML code.
1 Click once after the closing paragraph line </p> that follows the text indicating the site content is copyrighted. Press Return to go to the next line. Type <img />.
The image tag is in a special category of HTML tags that are self-closing. You do not need a pair of tags with the image tag; one tag is sufficient. However, it is important that you type this tag correctly. There is a space between the img and the /. This satisfies the requirements of XHTML syntax, and you will specify the exact image to use in the space between the img and /.
 |
|
Adding an image to to your page with the <img> tag. |
2 Click once to the right of the text img, press the spacebar, and then type src="".
src is the source attribute, and you will specify a value, which is the location (URL) of an image which will display on the page.
3 Click between the quotation marks that follow the src= code and type images/blueberry_smoothie.jpg.
Your img code should now look like this:
<img src="images/blueberry_smoothie.jpg" />
This code tells a web browser to look inside the images folder and display the file blueberry_smoothie.jpg. In the next few steps, be sure to maintain the extra space between the last quotation mark and the closing tag. You will be adding an alt tag.
This alt attribute represents the text equivalent for the image and is required if you want your page to be valid. Alt attributes help those who use screen readers to navigate the web. They also appear in browsers if the image is broken or missing for some reason.
4 Click to the right of the last quotation mark that follows the blueberry_smoothie.jpg file name and press the spacebar. Type alt="".
5 Click inside the quotation marks you added in step 4 and type Blueberry smoothie.
Both the src attribute and the alt attribute are required for fully valid XHTML. There are also optional attributes that you should consider. We’ll look at two of these options attributes: height and width.
6 Click to the right of the last quotation mark following the alt attribute, press the spacebar, then type width="180" height="320". These attributes tell the web browser how large the image should be displayed on the page. The values used are pixels. Keep this document open as you will be working with it in the next exercise of this lesson.
|
Adding Width and Height values to your image is not required but is a good idea. |
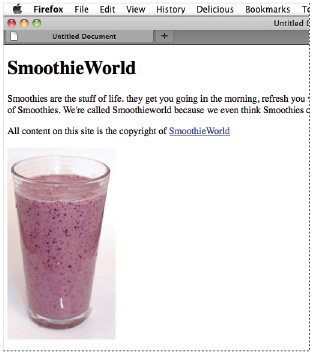
7 Choose File > Save and then preview your page in the browser to see your image.
 |
|
The result of an embedded image as displayed in the browser. |
The role of CSS
Cascading Style Sheets (CSS) use a separate language from HTML. CSS allows you to apply consistent styling of elements across all pages on your site, so that all headings, lists, and paragraphs look and act the same on every page of a site.
|
h1 { color:blue; margin-top:1em; }
|

Styling a heading
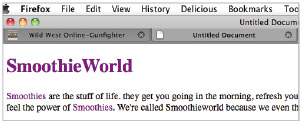
To get a sense of how CSS works, you’ll create a simple CSS rule that changes the style of a heading in your page. In your index.html page, you already have the content “SmoothieWorld” nested inside an <h1> tag. Perhaps one of the best ways to begin thinking about how CSS works is to consider how the default style of this heading is rendered in the browser.
1 Examine the heading of the file you previewed in the last step of the previous exercise. The style and formatting instructions are being provided by the browser. The size, color, and font are provided by the browser because exact formatting instructions are not specified. The browser only knows that this is a headline. You will redefine this style with a CSS rule.
2 In your code, locate the <title> tag on line 5, click once at the end of the line, following the closing tag, then press return to add a new line of code. Type the following:
<style type="text/css">
3 Press Return three times and then type </style>, This is a style element which you will use to place your rule for the style of the <h1> element.
 |
|
The <style> element is nested within the head section of the page, and is where the CSS rules will be placed. |
The <style> element is nested within the <head> tags of your page. In HTML, everything nested inside the <head> section is not rendered by the browser on the page. For example, there is also a <title> element inside this section; this title appears at the top of the web browser, not on the actual page.
4 In the empty line below the opening <style> tag, type the following:
h1 {
This is your selector. The selector is the HTML element you want to style, in this case the Heading 1 element.
5 Press Return and then press Tab to place your cursor below the curley bracket. The tab is optional but it helps make your CSS more readable. As you will soon see, the number of lines in this rule will grow and it’s worthwhile keeping the code easy to read.
6 Type the following code below the h1 {:
color:purple;
The word color is referred to as a property in CSS syntax and the word purple is a value. The combined pair of a property and a value is called a declaration.
 |
|
The combination of the property (color) and the value (purple) is often referred to as style rule. |
7 Press Return again and on the next line, type } which is the right curley bracket character.
This closes the curley bracket you added in step 4.
You now have three lines in this rule:
h1 {
color:purple;
}
8 Choose File > Save and then preview your page in the browser. The head is now a light purple color and you have successfully created your first CSS rule. Close your browser and return to your text editor.
 |
|
Your H1 color is now being styled by a CSS rule. |
9 In the HTML file, select the word purple and type the following for the color value: #800080. This hexadecimal color is the equivalent of purple. You can use either named colors or hexadecimal colors when defining colors using CSS.
Save your file and then preview it in the browser. The color remains the same. Hexadecimal colors are a more common method for describing colors.
The rule you just created uses what is officially known as a “type selector” since it targets every instance of the h1 element type in your document. Type selectors assign CSS properties to an existing HTML tag. In this case the <h1> tag. All <h1> tags on this page will be displayed as purple. Type selectors are more commonly known as tag selectors. It is rare that you will actually hear someone use the phrase “type selector” but that is the official name for it, so we mention it here.
You will now get an introduction to another category of CSS styles known as a class. You will also work with the <span> element which separates and controls inline content, such as a sentence within a paragraph, or an individual word within a sentence.
Understanding class styles and <span>s
Tag selectors are frequently used, but they can only be applied to HTML elements. When you want to style something that does not map directly to a tag, for example, change the color of a single word within a paragraph, standard HTML tags are not a good option. In this case, you can use a class selector, which is a CSS rule that you can apply to any number of items on a page. Class selectors have flexible naming options, but you should choose names that describe what they do. For example, you may wish to name class selectors as caption, imageborder, or redtext. In this exercise, you will create a class style that applies the color purple to the word Smoothies in your paragraph.
1 Place your cursor on the line immediately below the closing curley bracket for the h1 rule, then type the following:
.purple {
color:purple;
}
Note the period at the beginning of the class selector. The text following the period is the class name. You can use any name you wish, but the period is required at the start to identify it as a class.The rule is the same as in the last exercise, only here the selector is not the h1 element. The class name can be anything you want, but it must have the period at the beginning to identify it as a class. Next you’ll apply this class to the word Smoothie in order to style it purple. To do this, you will use an HTML tag <span>.
2 In the paragraph within the <body> tag, locate the word Smoothies, click once to the left of it, and then type:
<span>
 |
|
The <span> tag allows you to define the portion of a paragraph you’d like to style. |
3 Click to the right of the word Smoothies and add a closing span tag </span>.
Your code should look like this:
<p><span> Smoothies</span> are the ...
Save your file. If you were to preview the page in the browser you would see no change. The <span> tag in HTML is an empty tag; it does nothing on its own and needs to be paired with a style. The <span> tag defines the beginning and end of where the style will be applied within the paragraph, but it does not apply the style on its own, and does not define the style.
4 Close the browser and return to your text editor. Locate the opening <span> tag you inserted before the word Smoothies. Click once after the word span but before the > bracket, then type the following:
class="purple"
The code should now read
<span class="purple">Smoothies </span>
5 Locate the word Smoothies in the second sentence
<span class="purple"> and after the word Smoothies type: </span>.
6 Save your page and preview it in your browser. The text is now styled purple. Keep the document open in the text editor, as you will be working with it in the next exercise.
 |
|
The word Smoothies is styled using an HTML span tag and a CSS class style. |
Three ways to use styles
In this exercise, your styles were located within the head section of the page. This type of style is called an internal style sheet. In addition to internal (or embedded) style sheets, there are external style sheets and inline styles.
An external style sheet is a separate document with the file extension .css. When using an external style sheet, all styles reside inside the style sheet document and you link it to your HTML pages. While internal style sheets affect only the page on which they exist, external styles can be applied to multiple pages.
Inline styles are used infrequently. With inline styles, the style rules are nested inside the HTML tags. An example of an inline style that colors a heading purple would look like this:
<h1 style="color:purple">Smoothies</h1>
Inline styles are powerful because they override both internal and external styles, although they only apply to a single tag at a time. This embedded nature of inline styles means they are not easily re-used. In the simple example illustrated above you can see the style for the color purple is nested inside the <h1> tag. If you had 50 <h1> elements throughout your website and were using inline styles, you would add this style code 50 times. If you decided to change the color to green, you would need to locate and modify all 50 uses of the style. Inline styles are useful for single overrides or when an internal or external style sheet may not be available; a good example of this is HTML-based e-mail.
You will not be using inline styles very often in this book, which is a reflection of the current state of web design. Working with a combination of internal and external styles is the most common practice of web designers today.
Internal versus external style sheets
Internal style sheets are CSS rules contained directly within a document, using the <style> tag. The entire style sheet is contained within the opening and closing <style> tags.
External style sheets are CSS rules saved in a separate document with the file extension .css. With internal style sheets, CSS rules apply only to the HTML in the current document. For example, if you had a 20 page website and were using internal style sheets, you would need to create a separate style sheet in each of the pages. A change to the style would require you to update the internal styles in each of the 20 separate pages.
External style sheets place all the CSS rules for a site in a single document. You can attach the .css file to an unlimited number of HTML pages. This provides more flexibility. If a style rule is changed in the external style sheet, all paragraphs across the site are modified with a single step. You will make an external style sheet and then attach it to a new HTML page.
Creating an external style sheet
An HTML page does not have to be limited to just one style sheet, and many large websites will break-up their styles into separate pages, making them easier to organize and maintain. You can even use style sheets for specific functions such as printing a page or for displaying a site on mobile devices. In Lesson 9, you will see that specific style sheets can even be used to make sites compatible with older web browsers when they are used to visit sites you create.
In this exercise, you will create a new external style sheet, move the style rules from your current document to the external style sheet, and then attach the style sheet to a new HTML page.
1 Choose File > New Text Document.
|
|
The text editor you are using may have a different menu command. You may need to choose the equivalent command. |
2 Choose File > Save. Name the document styles.css and save the styles.css file into the same folder as the HTML document you worked on in the previous exercise. An external cascading style sheet has a specific .css file extension but it is simply a text file.
3 Switch to the HTML document from the last exercise, but keep the style sheet open as well.
4 In the HTML document locate the rules you created within the <style> tags and then select them. Do not select the style tags themselves, just the rules that start with h1 and end with the closing bracket }.
 |
|
Select just the style rules, not the <style> tag. |
5 Choose Edit > Cut, then switch to the styles.css file and choose Edit > Paste to paste the rules into the external style sheet document. Choose File > Save to save your style sheet.
The entire external style sheet acts as a substitute for the <style> tags in the HTML document. Now that you have moved the rules to this document you need to link it to your HTML page so that a web browser knows where to find the style rules that apply to the HTML.
6 Switch back to the index.html page and choose File > Save. You will add the <link> tag, pointing to the styles.css document. If you do not link to the external styles, the HTML page will have no styles.
7 Place your cursor after the closing style tag </ style> then press return to start a new line. Now type the following:
<link rel="stylesheet" type="text/css" href="styles.css" />
You have added the rel, type, and href attributes. You may recall the href attribute from when you added the hyperlink in an earlier exercise. In order for your external style sheet to work properly, the name of the file, and the path to where it is located must both be accurate.
8 Choose File > Save and then preview the HTML page in your browser. The page should not change, as the same style is being used; it is simply being applied from outside the document.
9 Close the browser and return to your text editor. You’ll now create a new HTML document, and add the same link to the external CSS file, seeing how the rules are applied.
10 Choose File > Open and locate the file test.html in the web04lessons folder. This is an empty HTML document.
11 Continuing to work in your text editor, switch back to the index.html file and select the entire <link> element you typed in step 7:
<link rel="stylesheet" type="text/css" href="styles.css" /> and then choose Edit > Copy.
12 Switch back to the test.html document and then click below the <title> element and Choose Edit > Paste to place the <link> element, then save the the file by choosing File > Save.
 |
|
Attaching an external style sheet using the <link> element. |
The external style sheet is now attached to this HTML document. Any HTML tags you add to this new document will be styled if there is a corresponding rule in the CSS file. For example, the <h1> tag has a style of the color purple.
13 Click inside the <body> element and type:
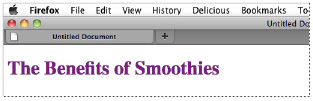
<h1>The Benefits of Smoothies </h1>
Save the file and preview it in your web browser.
 |
|
The <h1> tag gets its style from the external CSS style sheet you created. |
The heading is purple because the style rule for the <h1> element is color:purple and because this rule is located in an external sheet and linked in two places: the index.html and test.html pages. Because of this, you can control the style from of both HTML documents a central location.
What makes styles cascading
You’ve seen three different places where CSS rules are found: inline, internally, and externally. If there are conflicting definitions of styles between inline, internal, and external styles, the inline style will be used because it is closer to the HTML source. The internal style sheet takes precedence over an external style sheet, and definitions used in an external style sheet are used only if they don’t conflict with either inline or internal styles.
|
|
In this lesson, you’ve discovered many ways to format text. When you want to style text, it is almost always best to use actual text rather than an image of text. Using actual text rather than a picture of text created in programs like Photoshop or Illustrator makes your sites more accessible to the widest audience of users, devices, and search engines. |
Self study
1 In this lesson, you discovered three categories of styles: internal, external and inline. You also created an element style, and a class style and then move them into an external style sheet. Additionally, you explored how to link an external style sheet to a new HTML page.
Review
Questions
1 What is a doctype and how does it relate to page validation?
2 In the following XHTML code what is the attribute and what is the attribute value? What other attributes would you often find in an img element such as this?
<img src="images/blueberry_smoothie.jpg"/>
3 Define the purpose of an external style sheet and one of the benefits of using an external style sheet.
Answers
1 A doctype is a declaration at the start of your HTML document. It is used by a web browser to determine what markup language and version is used on the page. Page validation tests the syntax of your code against the specifications of your doctype. Page validation is a good way to check your page for problems such as missing tags or typographical errors in your code.
2 In this line of code src is the attribute and the attribute value is images/blueberry_smoothie.jpg. Nested inside the <img> tag is the src attribute and its value. It links to an image that is then rendered on the page. Other examples of image attributes are the alt attribute, which provides a text version of an image to devices such as screen readers and the width and height attributes which define the size of the image on the page.
3 An external style sheet is a text document with the extension .css. This document contains CSS rules that define the appearance of HTML elements. Because external style sheets can be linked to multiple HTML pages, they provide one central location for your styles. One benefit to this is the ability to update the style of an entire site with a single change to a CSS rule. Other benefits include the ability to use multiple style sheets for organizational purposes, and to specify specific style sheets for printing or optimize the display for mobile devices.