Chapter 3. Building a Blog
Blogs are one of the most popular type of sites on the internet. In fact, WordPress, an open source blogging engine, is currently used by over 60 million bloggers.
At its heart, a blog is fairly simple. Like a diary, each entry in the blog is an individual story and typically presented to the user in reverse chronological order. Blogs will also usually have categories to organize entries. Visitors can then read more entries in a particular category to focus on things that may interest them more.
In this chapter, we’re going to build a simple blog. The static site generator we’ll be using in this chapter actually builds a blog out of the box, so not much time will be spent on building a specific blog per se. But we will demonstrate how to find a real blog template, implement it, and then create some temporary content so we can see the blog in action.
Last-Minute Change
Jekyll released a major update right before the publication of this book. While basic operations are the same, some screenshots may look slightly different on your installation. Any serious issues will be reported in the book’s errata.
Blogging with Jekyll
Jekyll is a static site generator focused on creating blogs (Figure 3-1). While it certainly can be used to build non-blog sites, out of the box its primary use is creating blogs. It also integrates natively with GitHub Pages, which provides you a free hosting option for your site as well. (Since the site has to run on a GitHub project itself, naturally the blog then has to be about the project itself, although GitHub also lets you run one personal site for your account as a whole.)
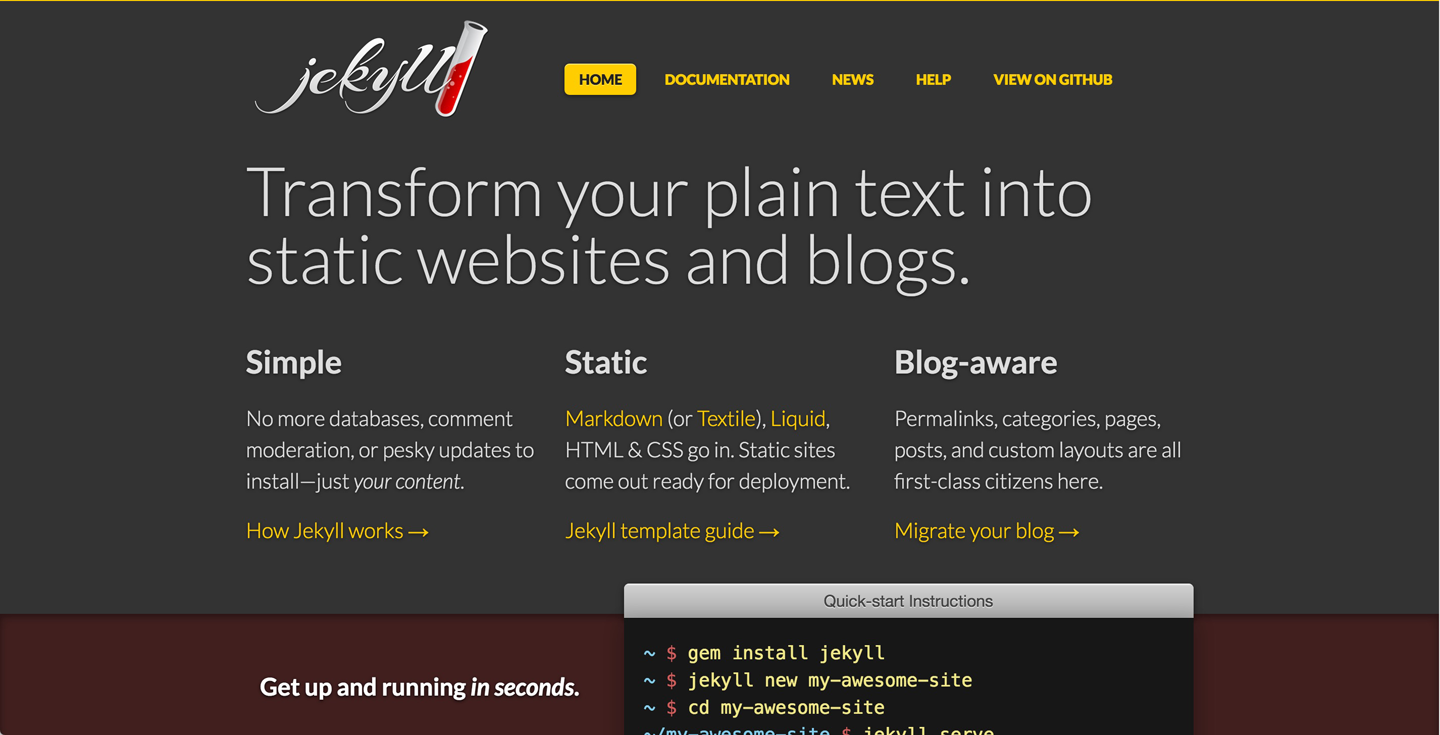
Figure 3-1. The Jekyll website
Installation of Jekyll is a bit more complex than other static site generators. Right away, be aware that Jekyll is not officially supported on Windows. You can find documentation for “making it work” on Windows, and that should be good enough to follow along with this chapter, but if your primary OS is Windows, you may want to triple-check how well it works before committing to Jekyll.
Before installing Jekyll, you need to install Ruby and RubyGems. You won’t need to know anything about Ruby to use Jekyll (although it helps when building custom plugins), so don’t worry if you’ve never worked with the programming language before.
Once you have RubyGems installed, you can use the command line to install Jekyll:
gem install jekyll
Once installed, open up your terminal and type jekyll to ensure it’s been installed correctly. Figure 3-2 shows what you should see.

Figure 3-2. Testing for Jekyll at the prompt
Jekyll supports creating content in either regular HTML or Markdown files. HTML files are served as is, but Markdown files will be converted to HTML first. On top of this, it supports a template language called Liquid. Liquid is incredibly powerful and you’ll see multiple examples of that in this chapter, but it integrates well with your existing HTML. This is where you’ll create dynamic content locally that ends up being static when done. Adding another layer to the mix is front matter. Front matter is metadata on top of the page that tells Jekyll how to parse the page. All of this will make a lot more sense once you see a few examples.
Plugins
You can also use plugins with Jekyll to add support for other templating languages.
Your First Jekyll Project
Now that you have Jekyll installed, it is time to create your first site. Out of the box, Jekyll creates a “complete” but mostly empty blog. You’ll have a layout, a home page showing your blog posts, and one written post. Creating a new Jekyll site is as easy as typing jekyll new foo, where foo represents the path to the new site (Figure 3-3).

Figure 3-3. Creating a new Jekyll site
Jekyll will install various dependencies necessary for the site and default theme, and then complete the installation. Next, change directories into the new directory the CLI created and start the server by running jekyll serve, as shown in Figure 3-4. (Jekyll provides a few alternatives to that command as well, like jekyll s.)

Figure 3-4. Starting up the Jekyll server
You can now open up your browser to the address reported by the command line and you’ll see something like Figure 3-5.

Figure 3-5. The default site created by Jekyll
There are a few things to note here. First off, the simplistic UI you see is just a default. It is absolutely not something you have to use. Later in the chapter, you’ll see an example that has its own custom UI. You also have two content examples. The About link on top shows a simple page, while the Welcome to Jekyll! link shows a sample blog post, as shown in Figure 3-6. You should definitely click that link because the page provides some good explanatory text along with a sample of how code snippets are rendered.
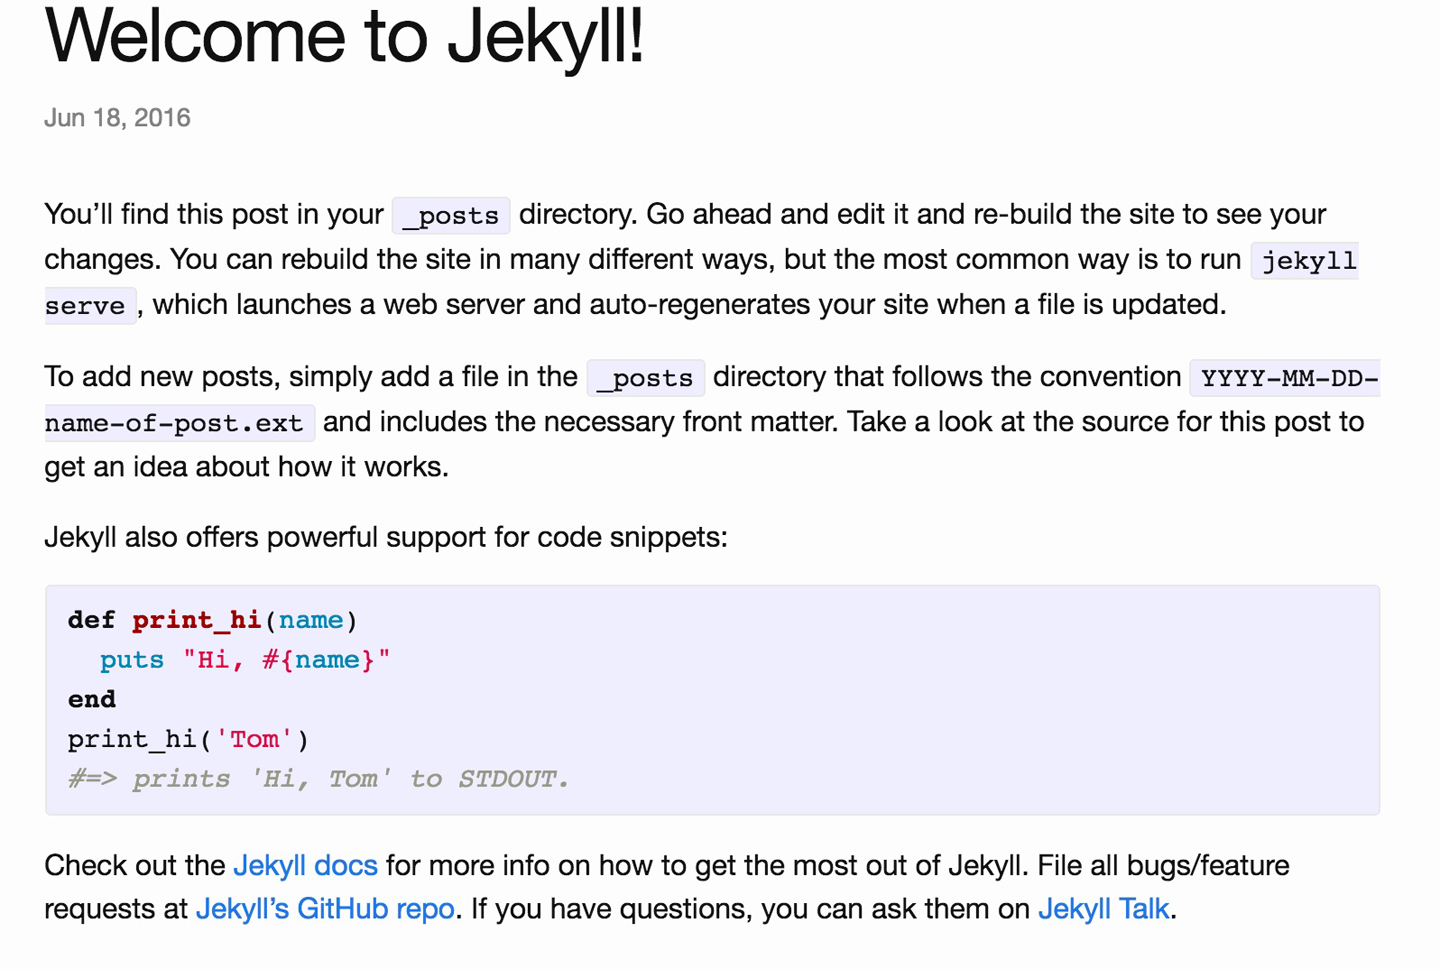
Figure 3-6. A sample post from the Jekyll server
Now let’s take a look at the directory structure of your Jekyll project.
Another Last-Minute Change
The very latest version of Jekyll uses a theme that runs from a special directory on your machine used by RubyGems. This means you will not see the theme files in your site. This is a cool change in that it keeps themes in one central location, but on the other hand, it makes it a bit difficult to play around and tweak a theme to your liking. In order to correct this, you can ask for the location of the theme by doing this:
bundle show minima
minima is the name of the theme. This will return a path like this:
/Library/Ruby/Gems/2.0.0/gems/minima-2.1.0
Given that you’re in the directory of the Jekyll site you just created, you can copy the files like so:
cp -r /Library/Ruby/Gems/2.0.0/gems/minima-2.1.0/ .
Note that the examples provided in the book’s GitHub repository already have their theme files in place (Figure 3-7).

Figure 3-7. Folders and files created by Jekyll
Let’s discuss these files and folders left to right, top to bottom:
_config.ymlThis is a configuration file that helps drive how Jekyll operates. You can provide configuration values here as well as in the command line, but it is easier to set things in the file so you don’t have to repeat yourself at the command prompt.
_includesThis is a folder specifically for items you will include in your templates. For example, a boilerplate legal agreement used in multiple locations throughout your site could be written as an include. Jekyll refers to these files as partials.
_layoutsThis is where you put files that handle the layout of your site. You may have one layout or multiple. Jekyll supports creating as many as you like.
_postsThis is where you create new files for blog content.
_sassThis is for Sass CSS files. They will automatically be converted into CSS by Jekyll and copied to the
cssfolder when creating your static site. Using Sass is optional and you can skip this if you want to write plain CSS._siteThis is the static version of your site. This is created as you work. In a brand-new created project, this folder may not exist yet, but will be made as soon as you run the Jekyll server or specifically use the CLI to generate static output.
- about.md and index.html
These are files created by Jekyll by default. They represent a simple About page and a home page. You can remove any of these (although you should keep a home page) and add whatever makes sense. For example, if you want a Contact page, you could add it here. Note that using Markdown is optional, and you can pick and choose which files you want to use Markdown with, as the default files demonstrate.
- Any other folders created that Jekyll doesn’t recognize or work with
These will be copied as is into your static site. For example, if you added a
jsfolder for your JavaScripts, these would be copied as is. The exception to this is folders preceded by underscores. These will be ignored, and thus could be used for site assets you don’t want copied to the output.
Writing a Post
Now that we’ve got a blog up and running, let’s create a new post. When you write a new post, Jekyll expects you to follow a particular naming scheme for the file. The format is: YEAR-MONTH-DAY-title.extension. Create a new file called 2016-06-25-new-post.html. By using html as the extension, we’re specifically saying we don’t want to use Markdown. Feel free to use md (or markdown) if you want. Also feel free to change the date values to the current date.
Every post you write must begin with front matter, which is simply metadata about the post that lives on top of the page in a format called YAML. It may help to take a look at the YAML in the existing page created by Jekyll, shown in Example 3-1. (Note that your YAML may be slightly different depending on the date you created the demo.)
Example 3-1. YAML format in Jekyll
---
layout: post
title:  "Welcome to Jekyll!"
date:   2016-06-18 09:18:33 -0500
categories: jekyll update
---
YAML formats data in a simple key/value system. You can see four keys and four values in Example 3-1. You can get more complex if you need to. The Wikipedia YAML page is a good resource for learning more about the YAML format, but you won’t (typically) need to get too complex in your Jekyll files.
Dates in Front Matter and Filesystem
You may have noticed that both the filename itself and the front matter include date information. The date in the front matter will take precendence over the filename. If you don’t need to specify a time and you’re happy with the date in the filename, simply remove the date from the front matter.
Go ahead and open the new file and create the front matter and content:
--- layout: post title: "Hello World!" date: 2016-06-25 09:51:33 -0500 categories: general ---<p>This is a test!</p>
The first item, layout, tells Jekyll what layout file to use for rendering content. We’ll look at layouts in the next section. The title value is—obviously—what will be the title for the post. The date value represents when you created the content. You can specify any value you want here, but if you specify a time in the future, Jekyll will assume this is content for publication at a later time. (You can tell Jekyll to display posts in the future by using --future at the command line or by editing your configuration file.)
The final value, categories, represents the categories this blog entry should go in. These categories are completely arbitrary. You can look at the values used in the initial post as an example, and going forward, pick ones that make sense for your site. So if you’re creating a pet blog, categories could include dog, cat, and dragon. Finally, the actual content of the post is just one paragraph. Save the file, and then reload your Jekyll blog. As you can see in Figure 3-8, Jekyll automatically includes the post.

Figure 3-8. Your new post shows up automatically
Notice how it appears above the previous post; that’s because you used a date that follows the initial post. If you modify the date and set an earlier value for the year, it will automatically move down below the first post. Click the link and you’ll end up on the following URL (again, the actual date values may differ):
http://localhost:4000/general/2016/06/25/new-post.html
There are a few things to note here. First, the category of the blog entry is included in the URL. Personally, I don’t think that’s good, and you’ll see how to modify this when we get to the configuration of Jekyll later. The next three items represent the date of the post. This is not based on the filename of the post, but on the date in the YAML. Generally you want these to agree just to make things easier to understand, but they don’t need to. The final part of the URL, new-post, comes from the filename. Generally, this value is based on the title of the post. For example, if my post was titled “My new cat is named Sinatra!”, you would use a filename of YEAR-MONTH-DAY-my-new-cat-is-named-sinatra. Essentially, this is a file-safe version of the title by the fact that it’s lowercase and missing the punctuation from the title.
Go ahead and click on the link to open the post. You’ll see an example in Figure 3-9.

Figure 3-9. Your new post
The layout of the post was handled by Jekyll. If you modify the front matter to tweak the title and modify the HTML, you can then reload the page and see your changes. If you used Markdown for your extension, then you’ll notice that Jekyll automatically converted it into HTML as well.
A Quick Introduction to Liquid
So how exactly did Jekyll create that list of blog entries on the home page? Jekyll includes a dynamic template language called Liquid. Liquid is a powerful templating language that includes the ability to output simple variables, loop over lists, conditionally show content, and include other templates. A full explanation of the language is beyond the scope of this book, but luckily you won’t need to be an expert at it to use it with Jekyll. Liquid has its own home page for documentation on GitHub, which you should bookmark for easy reference while you work. You can also bookmark Jekyll Cheat Sheet for Liquid tags that are specifically used in Jekyll.
Let’s take a look at the home page as an example of Liquid at work. You can find the home page in _layouts/home.htmls.
--- layout: default ---<divclass="home"><h1class="page-heading">Posts</h1><ulclass="post-list">{% for post in site.posts %}<li><spanclass="post-meta">{{ post.date | date: "%b %-d, %Y" }}</span><h2><aclass="post-link"href="{{ post.url | relative_url }}">{ { post.title | escape }}</a></h2></li>{% endfor %}</ul><pclass="rss-subscribe">subscribe<ahref="{{ "/feed.xml"|relative_url}}">via RSS</a></p></div>
I want you to notice two things in particular. First, take a look at the loop block that begins with {% for ... %}. Liquid uses {% ... %} as a marker for logic (looping and conditionals).
Next, notice how the date is displayed: {{ post.date | date: "%b %-d, %Y" }}. Liquid uses {{ ... }} when doing simple variable replacements. You can see multiple examples of this in the template. Sometimes the values are just displayed as they are: {{ post.title }}, and sometimes they are modified: {{ post.date | date: "%b %-d, %Y" }}. In the previous example, the pipe character acts like a filter—in this case doing date formatting. Later examples show a relative_url filter that—as you can probably guess—modifies a value into a relative URL for the site. (You can find all the supported Liquid filters here: http://shopify.github.io/liquid/filters/abs/. The additional filters Jekyll supports are documented here: http://jekyllrb.com/docs/templates/.)
The variables, like site.posts, aren’t a Liquid feature but come from Jekyll giving your template access to your site’s content. If you open up feed.xml, you’ll see a similar loop used to generate the RSS feed for the site. There are a whole set of variables Jekyll provides to your templates and you can find the complete list at the Jekyll Variables documentation page. Let’s modify the home page to include one of the values: the post excerpt.
Within home.html, add the following line before the closing <li> tag:
{{ post.excerpt }}
Reload the home page and you’ll notice that a portion of the blog entry now shows up on the home page, shown in Figure 3-10.

Figure 3-10. Post excerpts
So how did Jekyll create this excerpt? By default, Jekyll grabs the first paragraph of content from your post. There are multiple ways to change this, though. First, in your front matter, you can simply write your own excerpt. Or, you can define a “marker” in your post for where an excerpt should be created. For example, many blogging engines will let you write <!--more--> to define where the excerpt should end.
Working with Layouts and Includes
Now that you’ve seen how to write a post and had a quick introduction to the Liquid templating language, let’s look at how Jekyll renders the content around your posts—the layout.
As you’ve already noticed, the default Jekyll site has a rather simple layout. The expectation is that you’ll replace it with your own custom theme. But while the layout is simple, the actual support for working with layouts is quite involved and well-executed. Let’s go over the basics.
With Jekyll, layouts are defined in the front matter of every page. If you open up any of your posts, you’ll see a layout value defined in the YAML on top of the page. If you do not specify a layout value, then no layout is used.
The value specified in the front matter should not include an extension. So while your layout file may be called profile.html, you would only use the value profile when specifying it as your layout.
A layout file includes the contents of the file that uses it by outputting a variable called content. Here is an incredibly simple and short example of a layout:
<html><head></head><body>{{ content }}</body></html>
Any file using this layout would be “wrapped” with the HTML that precedes {{ content }} as well as the HTML that follows it.
Layout files themselves can also call other layout files. This means you can define a core, site-wide layout and then a specific layout for your blog posts. You can see an example of this in the default site produced by the Jekyll command line. Open up post.html in the _layouts folder and you’ll see that it specifies default as the layout for itself. That means a post specifying post for its layout would first be wrapped by post.html and then default.html.
Finally, all of your layout files should be included in the _layouts folder. You get this folder by default when you create a new Jekyll site.
Of course, sometimes you may want to reuse content across a site in a “non-wrapped” format. You may simply have some text or boilerplate HTML that you need to use in multiple locations. To support this feature, Jekyll comes with an include command that will simply insert the contents of another file into the one currently being rendered. You can see an example of this in the default layout shown here in Example 3-2:
Example 3-2. Jekyll include default layout
<!DOCTYPE html><html>{% include head.html %}<body>{% include header.html %}<divclass="page-content"><divclass="wrapper">{{ content }}</div></div>{% include footer.html %}</body></html>
In this layout file, you can see two includes being used: one for header.html and one for footer.html. Notice that you do need to specify a file extension but you do not need to specify a folder. Jekyll will automatically look for these in the _includes folder. These includes can be dynamic and make use of Liquid. This comes in handy especially for things like your page title.
If you view the About page, notice that the title in your browser tab is “About”. If you view source, you’ll see it in the code as well: <title>About</title>. Where did this come from? Two places actually. First, notice the front matter for about.md includes a title value: title: About. This gets picked up by Jekyll and becomes a variable that can be used by Liquid. If you open _includes/head.html, you’ll see this in action:
<title>{% if page.title %}{{ page.title | escape }}{% else
%}{{ site.title | escape }}{% endif %}</title>
The site.title variable is also something that can be tweaked. We’ll discuss it later in the section “Configuring Your Jekyll Site”.
Finally, you can also call includes and pass arguments to them. Here’s an example:
{% include youtube-video.html id="4nx7g60Ldig"}
In your include file, the variable id is referenced via the include scope, as demonstrated here:
<a href="https://www.youtube.com/watch?v={{ include.id }}">Watch video</a>
I hope that the benefits of layouts and includes are evident to you, but in case they aren’t, it’s helpful to remind ourselves of why these are such powerful features. In most sites, the layout consists of a particular set of tags that drives the look and feel for what you see. Everything from the structure (menu on the top, or menu on the right) to the design (dark green header with blue text) is consistent across the site, giving every page a uniform look and feel. Moving to static websites without an engine like Jekyll means having to repeat this code in every file, greatly increasing the amount of work required to update the design or make changes across the site. By using layouts, and includes, you’re saving time (and money) implementing your site.
Adding Additional Files
While Jekyll is generally focused on creating blogs and blog posts, your site will most likely have additional pages that aren’t posts. When you created your initial Jekyll site, you saw an example of this—the About page. There is nothing special about this file besides the fact that it isn’t within the _posts folder. By simply including any HTML or Markdown file in the root of the Jekyll folder, they will automatically be parsed for their Liquid tags, wrapped in layouts, and available in the final static version of your site.
Though you have an example of this already, go ahead and create a new file in the root of the demo1 folder called cats.html. Example 3-3 shows the contents of this file.
Example 3-3. cats.html file contents
--- layout: default title: Cats ---<divclass="home"><h1class="page-heading">Cats</h1><p>If my blog were a collection of cats instead of posts, I'd have {{ site.posts.size }} cats.</p></div>
Although this is a rather trivial example, it shows how you can create content that is totally unrelated to the blog itself (Figure 3-11). This isn’t a post; it’s just supporting content. And as you can see, it can contain Liquid tags. In this case, we’ve asked for the total number of posts. Because the file is in the root of the Jekyll folder, it will be found in the root of the domain—in this case, http://localhost:4000/cat.html. You’re free to create any subdirectories you want of course, but obviously you want to avoid folders Jekyll uses for special purposes, like _layouts.

Figure 3-11. The new cat page
Did you notice how the header automatically added a link to the new page? You can actually find the code behind that logic in the include header.html. It is included via this logic:
{% for my_page in site.pages %}
	{% if my_page.title %}
	<a class="page-link"
	href="{{ my_page.url | relative_url }}">{{ my_page.title | escape }}</a>
	{% endif %}
{% endfor %}
This just shows again an example of the type of data Jekyll provides to your templates. In this case, you can actually ask Jekyll for a list of known pages. Since you just created a new page, Jekyll knows about it and your code can work with it.
Finally, if you don’t like the URL Jekyll used for the new page and you don’t want to rename the file itself, you can specify the link to use in your front matter by adding a permalink value. This will override the URL that’s based on the filesystem.
Working with Data
Now you know the basics of creating a Jekyll site, creating content and pages, and how layouts work. It’s time to kick it up a notch and work with some more powerful features. The first one we’ll tackle is data files. Data files are a way to provide data to a Jekyll site in an abstract fashion. So what exactly does that mean?
Imagine for a moment that you have a simple page representing your board of directors. Now imagine that board of directors is all cats. Because—why not? Though you could build this out manually, you realize that you may want to be able to get this list of directors and use it elsewhere. Or you may want to provide multiple versions of this, such as a list of left-handed members. Jekyll provides a way for you to define a generic data set. This data can consist of anything you can possibly imagine. Once defined, and you’ll see how that’s done in a minute, you can then access this data in your blog posts, pages, layouts, and includes and use it as you see fit.
To begin, your data files should live in a folder called _data. This folder is not created by Jekyll by default, so simply create it yourself. (If you’ve downloaded the GitHub version of the code samples, everything in this section can be found in the demo2 folder.)
Inside that folder, you’ll then create a file that represents your data. Jekyll will use the filename as a way to reference the data, so you want to ensure that you use a sensible name. If your data is a list of cats, then your filename should be cats.something, where the extension defines how the data is represented. Jekyll’s data feature supports YAML, JSON, and CSV files.
For this first demo, create a file called cats.json. This will represent a data set of cats. You can either use the code downloaded from the GitHub repo for the book or copy the content of Example 3-4. Feel free to edit the names and other properties to your liking. (In fact, we’ve trimmed the data set a bit in this example!)
Example 3-4. Code for cats.json file
[{"name":"Elvis","age":4,"gender":"male","picture":"http://placekitten.com/200/300"},{"name":"Sinatra","age":8,"gender":"male","picture":"http://placekitten.com/400/330"}]
In Example 3-4, you can see two cats with four properties. Just to be clear, this is 100% arbitrary. Jekyll doesn’t care what kind of data you store and how you store it. It simply makes it available to your site. The nature of the data (and what defines a cat, for example) is completely up to you.
Now that this data is defined, you can start using it in your templates. One simple example would be to list all the cats:
---layout:pagetitle:TheBoardofCats---<ul>{%forcatinsite.data.cats%}<li>{{cat.name}}</li>{%endfor%}</ul>
At the top, you see the normal YAML front matter for a Jekyll page. Under this is an unordered list. To iterate over the cats, we “address” it using site.data.cats. Again, Jekyll uses the filename to create the handle you use in your code. If the filename was furrycreaturesofevil.json, then the reference in our pages would be site.data.furrycreaturesofevil. For each cat, we simply output the name. Much like how Jekyll doesn’t care what data you create, it doesn’t care how you use it either. You’re welcome to include data you may not need, or may use in the future. The result is pretty much as you expect: a list of cats (Figure 3-12).

Figure 3-12. The list of cats—a cat list
Of course, you can mix it up a bit as well. Example 3-5, male_cats.html, shows basic filtering of the data set.
Example 3-5. Filtering the data set
---layout:pagetitle:MaleCats---<ul>{%forcatinsite.data.cats%}{%ifcat.gender=='male'%}<li>{{cat.name}}</li>{%endif%}{%endfor%}</ul>
And Example 3-6 shows a slightly more complex (cats_with_pics.html) example showing the entire data set being used:
Example 3-6. The entire data set
---
layout: page
title: Cats with Pictures
---

{% for cat in site.data.cats  %}
	<p>
	<img src="{{cat.picture}}"><br/>
	{{cat.name}} is a {{cat.gender}} cat and is {{cat.age}} years old.
	</p>
{% endfor %}
The result is absolutely lovely, as you can see in Figure 3-13. In case you’re curious, those pictures come from Placekitten.com, a placeholder image service comprised completely of cat pictures.

Figure 3-13. This is an even better list of cats
Configuring Your Jekyll Site
One aspect we haven’t dealt with yet is configuring your Jekyll site. Jekyll can be configured at the command line via flags and by editing the _config.yml file. Which one you use is up to you and what your particular site needs. If you simply want to test a particular change, it makes sense to use a command line flag. If you are sure you want Jekyll to act a particular way going forward, then use the config file.
There are quite a few different options for configuration, so developers should check the documentation, but let’s consider a few simple examples of things you may want to tweak right away.
Updates to Configuration
Note that if you decide to play with a local Jekyll site while reading—and you’re highly encouraged to do so—Jekyll will not notice changes to your configuration automatically. You will need to stop and restart the server to see them reflected.
title: Your awesome titleUsed not by Jekyll but by the default layout. If you open the include header.html, you’ll notice this:
<a class="site-title" href="{{ site.baseurl }}/">{{ site.title }}</a>. The variablesite.titlecomes directly from the configuration file. You can add your own variable to the configuration file and then access it via the site object. This is an example of a configuration value that doesn’t necessarily drive how Jekyll operates but is used within your layouts as a sort of global variable. You can see the same thing with theemail,twitter_username, andgithub_usernamevalues. You can add or remove these as you see fit.portUsed locally when testing your Jekyll server. You won’t see this in your default _config.yml. If you don’t like the default port (4000), or perhaps you want to run multiple Jekyll servers at once, you can tweak the port. You can either specify it in your config file or pass it via the command line:
jekyll server --port=4001.permalinkUsed by Jekyll to determine how URLs are created for posts. While you can configure this on a per-post basis, most likely you’ll want to set this up one time for the entire site. By default, Jekyll uses a permalink that includes the category of the post itself. Looking at the site used in the demo1 folder, the URLs for a post look like this:
http://localhost:4000/general/2016/06/25/new-post.html
http://localhost:4000/jekyll/update/2016/06/18/welcome-to-jekyll.html
In the first URL, only one category was specified (general) and in the second post, two were used (jekyll and update).
While this may be fine, most sites use a URL that includes the dates only and not the categories. Jekyll lets you change this by using the permalink setting. Jekyll supports defining permalinks by using various tokens. The default looks like this:
/:categories/:year/:month/:day/:title.html
Each token is prefixed with a colon and represents data from the information about the post. Notice that the last token, :title, will be automatically formatted, so it is safe for a URL. To remove the category values from the links, you can simply edit your _config.yml file to include the new permalink value:
permalink: /:year/:month/:day/:title
You can see the complete list of tokens at Jekyll’s Permalink documentation. While this is easy to tweak, you’ll probably want to decide which style you prefer before you launch your site.
Generating a Site
You may have noticed that Jekyll constantly rebuilds your site as you work on it. It stores the static version in the subdirectory _site. If you want to generate a static version manually, simply run jekyll build. By default, it will use the current directory as the source and _site as the destination, but both can be changed via command-line arguments. Here’s an example: jekyll --source ../blog --destination ../output.
Figure 3-14 shows an example of the output from the demo3 site. Note that the posts each end up in a unique folder based on the date. This is because of the changes made to the _config.yml file in the permalink value. If you compare this to the output from demo1, the folder structure is different.

Figure 3-14. Static output from Jekyll
Building a Blog
Since Jekyll caters heavily to blogs, just creating a new Jekyll site gives you a blog out of the box. In theory, you’re done and we can wrap the chapter up right here. Obviously, though, you probably won’t go live with Jekyll’s default look and feel for your site, so let’s discuss how you can find a theme, customize it, and make it your own.
There are quite a few open source and commercial blog templates out there. It turns out that many of them come with Jekyll versions as well. One such theme, Clean Blog, looks great and includes both a “regular” version and a Jekyll template. Go ahead and download the Jekyll version (from the GitHub repository), unzip it, and try running it from the command line. Remember to stop any other Jekyll server you have up.
The first time you try to run the Jekyll site, you might encounter an error like the one shown in Figure 3-15:

Figure 3-15. An error from the template
What you’re seeing here is the fact that the Jekyll template makes use of a gem, a Ruby package, as part of its plugin functionality. This is described in more detail in the docs, but for now all you need to know is how to install the code necessary for the template. Luckily this is pretty simple: bundle install (Figure 3-16).

Figure 3-16. Adding the Gem required for the template
If you get an error that bundle isn’t a valid command, then first install it using gem install bundler.
Once done, the blog should start up fine. But there’s another hitch you may not even notice. If you try to view the blog at http://localhost:4000, where you viewed all the previous examples, you’ll notice that you get an error instead. If you go back to your command-line prompt, you’ll see why (Figure 3-17):

Figure 3-17. See the nonstandard path?
This template uses a feature of Jekyll that lets you define a particular subdirectory for a blog. This comes in handy when a blog is a subset of your entire site. While handy, this is something we’ll tweak. When you enter the correct URL, you’ll see your new blog in all its glory (Figure 3-18).

Figure 3-18. The blog template in action
At this point, we have one main job: we need to modify this blog so it matches our design requirements. For example, we can replace that header image with something more appropriate. The title, too, should be changed. If you scroll to the bottom, you’ll also notice various social media icons that have to change as well.
What you change, of course, depends on what you feel is necessary for your blog. You may find a template that perfect right out of the box. For now, let’s focus on changing a few things to make the blog more appropriate for our subject matter, cats.
Let’s begin by looking at _config.yml, shown in Example 3-7.
Example 3-7. Checking _config.yml file
# Site settings
title: Clean Blog
header-img: img/home-bg.jpg
email: [email protected]
copyright_name: Your/Project/Corporate Name
description: "Write your site description here.
It will be used as your sites meta description as well!"
baseurl: "/startbootstrap-clean-blog-jekyll"
url: "http://yourdomain.com"
twitter_username: SBootstrap
github_username:  davidtmiller
facebook_username:  IronSummitMedia
email_username:  [email protected]

# Google Analytics
# To enable google analytics, uncomment below line with a valid Google Tracking ID
# google_tracking_id:

# Build settings
markdown: kramdown
highlighter: rouge
permalink: pretty
paginate: 5
exclude: ["less","node_modules","Gruntfile.js","package.json","README.md"]

gems: [jekyll-paginate, jekyll-feed]
From top to bottom, let’s make these changes:
- Change the
titleto "The Cat Blog.” - Leave
header-imgalone. We will be changing it, but in this case the configuration is specifying a filename. We can replace it later. - Change
emailto your own email. - Change
descriptionto “A blog about cats!” - Completely remove
baseurl. - Change
urlif you want, but it need not be a real site. - Change
twitter_usernameto your own, or keep it, but we’ll keep this social link. - Remove
github_usernameandfacebook_username. Again, we’re kind of making some arbitrary decisions here. Feel free not to remove them and change them to new values if you want. - Finally, set
email_usernameto the same value you used foremail.
You can find the final version of _config.yml in the code repository for the book, but go ahead and kill your Jekyll server, restart it, and see your changes (Figure 3-19).

Figure 3-19. Our cat blog is getting there!
Now let’s fix that header image. While you can find any image you want, we’ll make use of Placekitten.com. The config file specified the header file as img/home-bg.jpg. If you open that up and check the size, you’ll see it is 1900 pixels wide and 872 pixels high. Using Placekitten, you can generate an image of the same size by going to this URL: https://placekitten.com/1900/872. On that page, simply download the graphic and save it over the existing filename. Now when you reload, you’ll see your new header, shown in Figure 3-20.

Figure 3-20. That’s a beautiful cat header!
Now let’s change the text on the home page. You can see that the title loaded from configuration, but what about the tagline beneath it, “A Clean Blog Theme by Start Bootstrap”? If you open up index.html, you’ll see that this is actually defined in the front matter:
---
layout: page
description: "A Clean Blog Theme by Start Bootstrap"
---
Go ahead and change that description to “A Blog about Cats”, reload, and you’ll see the change. Now let’s do a few more tweaks. You may have noticed two links in the top of the site: About and Contact. We can’t support Contact forms yet (we will learn how to do that later in the book, though), so just delete the file (contact.html) from the folder. Reload, and it’s gone from the header. Like you saw earlier, Jekyll is actually driving this based on the files in the folder. Just removing the file is enough to remove it from the navigation.
Now open about.html and modify the “Lorem ipsum” text. It doesn’t matter what you type, so just go ahead and change it so you can see it in action. Like the home page, this file has a description field you can change as well. Notice that this page also points to a header file (img/about-bg.jpg). If you want, you can change this as well. The image I used was from Placekitten again. Figure 3-21 shows the final version of the About page from the book repository.

Figure 3-21. The cat-flavored About page
And with that, we’re done with the site layout and related pages. Once again, “done” is a relative term here. You can continue to tweak the layout to your heart’s content. Now let’s handle the blog content. Right now there are six files in the _posts directory. Go ahead and delete all but one file. Take that last file, and rename it to match the current date and a name that’s more appropriate. For example: 2016-07-23-welcome-to-my-blog.markdown. You’ll notice that the template used Markdown files for its posts. If you want to change the post to HTML, simply rename the extension as well. Open up the file, and update the front matter and text as shown in Example 3-8:
Example 3-8. Changing post to HTML from Markdown
---
layout:     post
title:      "Welcome to my blog!"
subtitle:   "Cats are worth blogging about!"
date:       2016-07-23 12:00:00
author:     "Raymond Camden"
header-img: "img/post-bg-06.jpg"
---
Everything here should be pretty standard, but note that the time isn’t being used by the template, so it doesn’t matter what value you set there. For the text, just type what you want. I used text from Cat Ipsum, a “Lorem Ipsum” generator with a cat flavor. Lastly, I generated another custom cat picture, shown in Figure 3-22, from Placekitten with this URL: https://placekitten.com/888/400.

Figure 3-22. Our first blog post
And that’s it! You could easily customize this even more, but now you’re ready to launch your own cat blog. (And to be clear, this is highly recommended.)
Going Further with Jekyll
Liked what you saw in Jekyll? Here’s a quick tour of some of the things we didn’t cover but which may excite you even more:
- Probably one of the most powerful features is automatic pagination. Jekyll can handle correctly “sizing” the page as well as creating all of the additional files to handle showing each page of content. You also get an easy way to support adding the Previous and Next links in whatever fashion you want. You can see this in action if you add five more posts to the cat blog project created earlier. It’s set to show five posts per page.
- Jekyll also has a powerful plugin system for adding additional functionality to your site. This can include generators (which make new files), new tokens you can use in your templates, and even extensions to the CLI. It’s very diverse and powerful. Speaking from experience, I once had to build a plugin and even though I didn’t know Ruby, it wasn’t difficult to do.
- Jekyll has a concept called collections, which lets you define your own set of content that can act like posts and pages. This is a powerful feature that might be too much for a simple blog, but it’s great that Jekyll includes this functionality.
- Finally, while we’re going to talk about deploying your static sites later in the book, Jekyll is used by GitHub and their GitHub Pages feature. GitHub Pages provides a way to publish static sites simply by committing files to your repository. If you want to host static content for your GitHub project, you can easily use Jekyll along with it. If your Jekyll site uses plugins, be sure to check GitHub’s docs as they only support a subset of plugins.
For more information, see the Jekyll documentation. You can also find support at the official Jekyll forums.