
Chapter 2. Device features and functions
Chapter points:
• Apple Device Overview
• Operating Modes
• Security
• iTunes Interaction
This chapter introduces many of the popular Apple devices running iOS as well as the features unique to these devices. Software updates, device security, and understanding the various operating modes are among these topics. Also covered are some practical applications, describing how to perform system upgrades, downgrades, and boot the devices into different operating modes. Additionally, the significance of iTunes is covered, as well as the functions it provides as an effort to support these iOS devices.
Keywords: iPhone, Apple devices, iPhone operating modes, iPhone downgrade, MobileMe, iTunes synchronization
Introduction
In order to forensically examine a mobile device, it is important to understand the inner workings of that device. There are various Apple devices capable of storing an individual's personal data. On top of that, each of these models contains unique features, which are important to understand prior to investigating the data within.
Being aware of the available devices running iOS as well as the settings and options within them can be a key aspect in an iPhone investigation. The configuration of the iPhone or iPad settings can affect the manner in which the data is acquired. In addition to understanding the physical device, iTunes also plays an important role in an iPhone investigation. This chapter will cover the functions of an iOS device as well as how these devices interact with iTunes to send, receive, and store user data.
Apple device overview
While this book focuses mainly on the iPhone and forensic techniques associated with it, it is also important to note that most of these forensic methods may be applied to other Apple devices as well. For this reason, a brief overview of some of the more popular iOS devices will be covered.
In April 2010, Apple released the iPad, its version of a tablet computer. Used mainly for audio and video capabilities, the iPad originally arrived running iOS version 3.2.2. In November 2010, version 4.2.1 of the operating system was released. Similar to the iPhone, the iPad offers touch-screen functionality as well as many of the same applications. Apps on the iPad are downloaded in a similar fashion through the iTunes App Store. The iPad can also be synced with iTunes and even has the capability of placing and receiving phone calls using voice over IP through Wi-Fi or the 3G network.
Apple TV was originally released on January 9, 2007. The original model contained a 40 GB hard disk drive, which was replaced months later with a newer model storing 160 GB. This device connects with the user's high-definition (HD) television using an HDMI (High-Definition Multimedia Interface) cable and provides the capability to stream audio and video from YouTube, Netflix – a computer running iTunes – or any iOS device. A second version of Apple TV was released in October 2010, which was much less expensive but lacked the hard drive storage. Instead of downloading videos and other files to be stored on the device, with the second-generation Apple TV, everything is streamed over wireless using an A4 processing chip, decreasing the overall size and cost. In addition, 8 GB of Flash storage is also available for caching, to allow seamless play.
The iPod, a portable media player, is another popular Apple product that is synchronized with iTunes in order to store music, videos, photos, and more, depending on the model. There are various flavors of the iPod, including the iPod Classic, iPod Shuffle, iPod Nano, and iPod Touch. Each has varying storage space and functions.
•
iPod Classic: The original iPod was first released in 2001. There have since been six generations of this device, ranging from 5 to 160 GB. The iPod Classic most commonly supports music, videos, TV shows, games, and photos.
•
iPod Shuffle: This member of the iPod family is much smaller in size and does not have a display. It was originally intended to be a simple, cost-effective way of allowing the user to listen to songs at random or on “shuffle.” The first-generation iPod Shuffle arrived in early 2005, and as of December 2010 the fourth-generation model was available. Without a display screen, the shuffle strictly supports audio files, including music, podcasts, or even audio books. Also incorporated is the “Voiceover” feature, which announces the name of an artist or play list (Apple Inc., n.d.).
•
iPod Nano: Since 2005, six generations of the iPod Nano have been in development. A slim version of the iPod Classic, the nano supports several audio types and has a small display in which the user can navigate through play lists, albums, and songs. The more recent models have added extra features such as the ability to “shake” the device to shuffle to the next song, an on-board video camera, FM radio, and as of the sixth generation, a touch-screen display (Apple Inc., n.d.).
•
iPod Touch: The iPod Touch is a combination of a personal data assistant (PDA) and portable media player. There are four generations of this device, with the first released in 2007. The iPod Touch offers greater functionality than the other iPod models, including a camera, HD video recorder, FaceTime, voice control, gaming, and more. It can be compared with the iPhone, but lacking cellular network access (Apple Inc., n.d.).
With the release of the Mac OS X Lion in summer 2011, the Mac is even now becoming more “iOS-like” than ever before. A Mac App Store has been released, which will allow easy browsing and downloading of apps, similar to the App Store for the iPhone or iPad. Apps will also be displayed on the desktop, and referred to as the “Launchpad.” Click an app on the Launchpad, and it is opened full screen, minimizing any other open applications or tools. Finally, “Mission Control” takes all the applications running on your Mac and consolidates them into one area for the user to view. This includes any open programs, various Spaces, the Dashboard, and more. Selecting one of these items will minimize Mission Control and launch that particular program (Apple Inc., 2010).
Operating modes
The above devices are capable of running in various operating modes, including Normal, Recovery, or Device Failsafe Utility (DFU) modes. These will be referenced often throughout the remaining chapters since certain modes are required in order to perform a particular function on the device. For example, to perform an upgrade or system recovery, the device must be placed in Recovery mode.
Normal mode
When the device is powered on in a typical fashion, this is known as normal mode. Most activities performed on an iPhone will be run in normal mode, unless otherwise specified.
Recovery mode
For Recovery mode, the user or examiner will boot the device into iBoot, bypassing the loading of the operating system. iBoot is Apple's stage 2 bootloader, and is where Recovery mode resides. This operating mode is required to perform certain functions such as activating a device, upgrading or downgrading the iPhone, or sometimes to perform a forensic physical acquisition.
To enter Recovery mode, power off the device (by holding down the button on the top of the phone until you see “slide to power off” appear on the device). Next, hold down the “Home” button, and then connect the device to a computer via a USB connector while continuing to press the “Home” button. Continue to hold until “Connect to iTunes” appears (as shown in Figure 2.1), and then release.

By connecting the cable, you are giving power to the device. An alternative option would be to first connect the device to a computer, power off the device, and then hold the “Home” button down while at the same time pressing the power button.
DFU mode
DFU mode is also required to initiate various actions on the iPhone, most commonly to perform a physical acquisition. It is referred to by some as “Device Firmware Upgrade.”
To enter DFU mode, make sure the iPhone is connected to the computer. iTunes should
not be running at this time. If iTunes starts when the device is connected, be sure to exit by selecting “iTunes > Quit iTunes” at the top left corner of the Mac (or on Windows, simply “X” out of the program). With the device either powered on or off, hold down the “Home” button and the “Power” button together for 10 seconds, then release the power button (while continuing to press “Home”) for 10 more seconds. It is important to hold for exactly 10 seconds. When successfully in DFU mode, the screen will be black. If you see the Apple logo or other signs that the device is booting, the process was done incorrectly.
To verify whether the device is in DFU mode on a Mac, System Profiler can be run. Once launched, select the “USB” option, and you should see a device similar to what is shown in Figure 2.2. A “USB DFU Device” will be displayed if done correctly, otherwise just an Apple iPhone device will appear.

System Profiler can also be searched using a Terminal window. First, enter the following command to launch System Profiler:
$ system_profiler | less
From there, enter the following command to search for a device in DFU mode (the results for this command are shown in Figure 2.3):

/DFU
Some of the newer tools used to get a physical image on an iPhone require Linux. To verify the device is in DFU mode on a Linux workstation, a similar process can be used. Connect the device to the Linux box, and enter the “lsusb” command in a Terminal window to display information about all USB devices connected to that particular machine. When an iPhone running in normal mode is connected to a workstation and the “lsusb” command is run, the output will show an Apple device, including the model number, serial number, and other details about that particular device:
kstrzempka@linux-wks-001:~$ lsusb -v | less
Bus 002 Device 015: ID 05ac:1294 Apple, Inc. iPhone 3GS
Device Descriptor:
bLength
18
bDescriptorType
1
bcdUSB
2.00
bDeviceClass
0 (Defined at Interface level)
bDeviceSubClass
0
bDeviceProtocol
0
bMaxPacketSize0
64
idVendor
0x05ac Apple, Inc.
idProduct
0x1294 iPhone 3GS
bcdDevice
0.01
iManufacturer
1 Apple Inc.
iProduct
2 iPhone
iSerial
3 036b901d79efd9f7894baf444dca4e08ab9f8008
bNumConfigurations
4
Configuration Descriptor:
bLength
9
bDescriptorType
2
wTotalLength
39
bNumInterfaces
1
bConfigurationValue
1
When an iPhone running in DFU mode is connected to a workstation and the “lsusb” command is run, the output will be similar, but will also show that the iPhone is a “DFU” device.
kstrzempka@linux-wks-001:~$ lsusb -v | less
Bus 002 Device 016: ID 05ac:1227 Apple, Inc.
Device Descriptor:
bLength
18
bDescriptorType
1
bcdUSB
2.00
bDeviceClass
0 (Defined at Interface level)
bDeviceSubClass
0
bDeviceProtocol
0
bMaxPacketSize0
64
idVendor
0x05ac Apple, Inc.
idProduct
0x1227
bcdDevice
0.00
iManufacturer
1 Apple Inc.
iProduct
2 Apple Mobile Device (DFU Mode)
iSerial
3
bNumConfigurations
1
Configuration Descriptor:
Notice that both the Product ID and the serial number are different depending on the operating mode. When a firmware upgrade is performed, it is necessary to modify the “idProduct” field to ensure that only the DFU driver is loaded (Microcontroller Division Applications, 2003). It can also help an examiner determine whether a device is in DFU mode (i.e., if the serial number is displayed, it is most likely in “Normal” mode).
Exiting Recovery/DFU mode
Whether in Recovery or DFU mode, the same process can be used to return back to Normal mode. Press the power and home buttons at the same time until the Apple logo appears, and the device will reboot. More often than not, this key sequence will successfully load the phone back into normal operating mode.
There is the possibility of the device entering what is referred to as a “Recovery Mode Loop,” where the iPhone will constantly reboot into recovery mode. This can occur during the jailbreaking or unlocking process. If this occurs, there are several open source tools available to assist the user in exiting out of a Recovery Mode Loop, such as RecBoot or iRecovery. Both tools are free and available for download on Windows and Mac environments, with iRecovery also available on Linux. These tools communicate with the stage 2 bootloader (iBoot/iBSS) over a USB connection in order to exit Recovery Mode Loop.
Installing iRecovery on Linux and Mac involves one easy step of downloading the source files. Windows users must also install libusb to allow access to USB devices. To use iRecovery, the user runs the program by entering the following in a Terminal window:
$ ./iRecovery -s
Next, the following commands are executed:
$ setenv auto-boot true
$ saveenv
$ /exit
Finally, the user can initiate a reboot, and the device should start up in normal mode. The process is a bit more complex using iRecovery since this tool offers other functions as well, such as uploading files (iRecovery, 2009). Jonathan Zdziarski's physical acquisition tool utilizes iRecovery to automatically reboot the iPhone when necessary. This tool will also be discussed later as it can play an important role in the acquisition process.
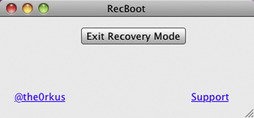
RecBoot is much more straightforward for the purposes of exiting a Recovery Mode Loop. It has two purposes: enter recovery mode or exit recovery mode (refer to Figure 2.4 for RecBoot user interface). For this reason, the interface is much more user friendly. The user simply clicks the button and the device is automatically rebooted into normal operating mode.
The various operating modes are most often used during the forensic imaging process and are discussed further in Chapter 5.
Security
Various iPhone settings allow the user to protect unauthorized access to their device and data. Some of these configurations are not set by default. Additionally, certain functions or custom applications are not as secure as they might appear, leading the user to have a false sense of security.
Device settings
An iPhone user has the option to set a PIN on their device in order to prevent unauthorized access. By default, the PIN is a four-digit, numeric code, but by modifying the “Simple Passcode,” setting can be set to a variable length. Upon entering the passcode incorrectly 10 times, the user also has the option to set the device to automatically erase all content. Another unique option that is offered involves Apple's MobileMe membership. Among other elements, MobileMe allows the user to remotely set a passcode in the event that a device is stolen.
On certain devices running iOS version 4.0 or higher, hardware encryption is also possible through a feature referred to as “Data Protection.” When a passcode is set, the device settings will show “Data Protection is Enabled” (see Figure 2.5). Enabling this feature creates an encryption key, activating an added layer of security for e-mail messages and attachments. This encryption makes forensic recovery of these devices much more complex. The iOS devices that contain hardware encryption, and therefore offer Data Protection, include the iPhone 4, iPhone 3G(s), iPod Touch, and iPads (Apple Inc., December 2010).

Another optional configuration is to set the device to automatically lock after a set amount of time. A user might consider this option as an effort to increase battery life or prevent unauthorized access to the device if it is left unattended. Upon seizing an iOS device, if it is not already “locked,” a best practice might be to immediately go into the device settings and set the auto-lock to “Never.” This will prevent the device from locking out and require the examiner to enter a passcode to access the device. If the device model and operating system supports a physical acquisition, then the passcode will not be an issue; however, in the event that only a logical acquisition can be performed, this step of removing the auto-lock is crucial. Of course, this also drains the battery much more quickly, so be sure to get that device to a charger as soon as possible.
Finally, restrictions on various applications can be enabled, which allows the user to control access to particular apps. A passcode can be set to prevent unauthorized access to Safari, YouTube, iTunes, and other applications on the phone. This feature is ideal for parents who may want to restrict their child's access to certain functions on the iPhone.
Secure erase
There are several ways in which an iPhone can be wiped. Within the device itself is the option to either “Reset All Settings” or “Erase All Content and Settings.” The latter is a full secure erase and, depending on the amount of data on the phone, can take anywhere from a few minutes to over an hour to complete. Internal testing has proven that this method truly does wipe the device, leaving no valuable data to be recovered (refer to Chapter 4– “iPhone and iPad Data Security” for details on the methods used for testing).
Another option is to perform a remote wipe. This method can be completed through an e-mail account synced with the device, a MobileMe account, or through a downloaded application. A remote wipe would come in handy in the event that the device was lost or stolen and the owner wanted to prevent access to their data. Chapter 4 covers some of the research and testing performed on these devices to determine whether a remote wipe does a thorough job. In some cases, data can still be recovered through forensic techniques.
While both the previous methods have been forensically tested to ensure they are effective, the “erase data after ten failed passcode attempts” technique has not.
App security
iPhone users have a high expectation that their personal information is secure. But mobile phones are drastically different from traditional computers and represent a new and unique threat to customer data. It is assumed that customized mobile applications are secure and avoid exposure of confidential user data and credentials, but that is not always the case.
Various internal testing procedures have been performed to evaluate the data exposure and security of multiple mobile applications by using forensic techniques. To test the app, it is installed and used the way a typical user would. The data is then examined to determine whether sensitive information is left on the device or transmitted over the network unencrypted. The findings resulted in many of these apps storing user names, passwords, or other related application data on the device or even confidential data in transit across a wireless network.
It is important for consumers to understand the risks involved in using these applications, especially when sensitive data is involved, such as with financial applications. The overview, methodology, and results of these findings can be found at http://viaforensics.com/appwatchdog/. Many of the forensic techniques used to perform app analysis on these devices are discussed in later chapters, and application security is specifically covered in Chapter 4.
iTunes interaction
iTunes offers various functions, allowing the user to manage files, apps, software versions, and more on their iPhone device. The following sections discuss the main features.
Device synchronization
Once an iPhone is connected to iTunes, the user can initiate synchronization between the software and the device. This process will load all the applications, music, videos, pictures, etc. that are stored in iTunes onto the device, based on user-defined settings. When a sync is performed, the data within iTunes takes precedence and any differences will be removed from the device. iTunes can be configured to perform an automatic sync each time the device is connected, or a manual sync which must be initiated by the user. Custom apps, such as those developed by corporations, can be installed onto the device using this synchronization method; however, they must first be approved by Apple. MobileMe can also be used in conjunction with iTunes to sync calendar, contacts, mail accounts, and more.
iPhone backups
The user also has the option to create a backup of the iPhone once connected to the computer. An automated backup is initiated during the sync process or when an update or restore is performed. The backup files are stored in a certain location, depending on the type of operating system running on the user's machine.
• Windows XP: C:Documents and Settings<user name>Application DataApple ComputerMobileSyncBackup
• Windows Vista/Windows 7: C:Users<user name>AppDataRoamingApple ComputerMobileSyncBackup
• Macintosh: Users/<user name>/Library/Application Support/MobileSync/Backup/
Each backup folder contains several files. Status.plist provides the status of the last sync/backup. Info.plist contains information about the device in general, including device name, build version, IMEI (International Mobile Equipment Identity), phone number, etc. Manifest.plist includes a list of all the backed up files, their modification time, and hash value. The remainder of the files will include several *.mddata and *.mdinfo files (for iTunes versions prior to 8.x, these will appear as *.mdbackup files). For all of these backup files, the file name is SHA1 hash value of that particular file. These are the actual backup files of the iPhone's applications and settings. Opening these files as is will not be legible, as they are what Apple refers to as Binary plists. In order to view the content of the backups, these files need to be either viewed using specialized software or converted in another manner.
iTunes also allows the user to initiate an encrypted backup by entering in a password prior to syncing the backup files. Encrypted backups add a significant level of difficulty to the data recovery process – even to the point of impossibility with a complex enough password. However, it is important to note that this option is not required, prompted, or set as the default, and as a result it is reasonable to assume that few users would choose this option.
The analysis of both encrypted and unencrypted backups will be covered in later chapters.
With the release of iOS version 4, if a backup is not passcode protected, the keychain file (containing user name and password data) is encrypted using hardware keys stored on the iPhone. If the keychain database file is opened, certain information can be viewed, but passwords are encrypted.
If a backup is password-protected, the keychain file is now encrypted using software keys generated from the backup password. What this means is that, as long as the backup passcode is known, it is possible to get to the keychain file's encrypted data.
iPhone restore
There are two different restore options: to restore the iPhone from a pre-existing backup file or to restore a device back to factory settings. Restoring from a backup will pull all settings and application data from that backup and sync that data to the device. Performing a full software restore removes the active file system from the device and restores it back to the default factory settings. Both restore methods can be performed in iTunes, and it is important to understand the difference between the two in order to prevent loss of data.
Once a factory restore is performed, the user will have to re-activate the device by connecting it to iTunes (as prompted on the display). Once the iPhone is activated, data can then be restored from a backup file or setup as a brand new device.
iPhone iOS updates
Apple will occasionally release iPhone iOS version updates which may introduce new features, fix bugs from previous versions, or increase security. The user has the option to remain on the current operating system or upgrade to the most recent. Upgrades are done through iTunes and are fairly simple to do.
Upgrade
Once the phone is connected to a computer running iTunes, the user simply clicks the “Update” button (see Figure 2.6) and the latest software is updated onto the device.

The iPhone contains two disk partitions, which will later be discussed in more detail. The partition containing the user data is separate from that containing the firmware. When a firmware upgrade is initiated, the latest operating system software is installed within that firmware partition. This process is forensically sound since the user data is in a separate container and, therefore, not modified by the update.
Downgrade
For one reason or another, a user may wish to go back to a previous iOS version. Perhaps after upgrading, it was determined that additional security holes were revealed. Also, some 3G users found that updating their device to iOS v4.x caused their devices to decrease in speed and efficiency. From a forensic examiner's standpoint, downgrading a device could be crucial in recovering data from a device. The available forensic tools will run only on certain supported versions. If the model and/or firmware version are not supported, the device may need to be downgraded in order to be acquired. Regardless of the reason, there is the option to downgrade to a previous iOS version. This process varies per device, and is also not supported for certain devices and operating systems.
To downgrade, a similar process is used. The first step, however, is to download a copy of the old .ipsw (iPhone software) file that the user wishes to downgrade. These .ipsw files can be found on various websites, such as www.iclarified.com. Apple does not provide these files, as their goal is to ensure all users are running the latest firmware updates. Once the iPhone software file is downloaded and saved onto the user's workstation, the phone should then be connected to the workstation running iTunes. To update to a firmware version other than the latest available, the user would right-click on update and navigate to that particular .ipsw file. This process is typically successful for the earlier models, prior to 3G(s). The downgrade only effects the firmware partition, so the user data slice should not be affected. This has been the case with the phones that have been internally tested by the authors; however, downgrading or modifying the phone in any way is still a risky process to perform on a piece of evidence.
For later models, this downgrade process is not possible without performing advanced technical steps. Some of these models, including iPhone 4 and certain 3GS models depending on when they were shipped, contain the new bootrom. Apple decided to start signing the firmware versions, requiring iTunes to “get permission” before upgrading/downgrading to a different firmware version. Presumably, the reason for this is that Apple wants to keep its customers running the latest software versions. In any case, if an attempt is made to downgrade on one of these devices, iTunes will display an error and prevent the update.
In order for Apple to sign-off on a restore file, it first checks the SHSH blobs against its servers. SHSH blobs, also known as ECID SHSHs, are unique signatures on a device. This signature is checked against Apple's servers, and if that particular signature does not correspond with the most recent iOS firmware, Apple will not verify that file, preventing iTunes from performing a restore (Asad, April 2010). The hacking community has come up with workarounds for each version to get past this obstacle, but it can be a complex process if you are not accustomed to it.
The basis behind this downgrade process is to trick iTunes into thinking that the SHSH signature has been verified. Depending on the iOS version and model, the exact steps may vary slightly; however, the overall process remains the same. The following steps provide a high-level overview of this process:
1. Save SHSH blobs from current device and iOS version.
2. Modify the “hosts” file to communicate with an alternative server other than Apple's.
3. Perform an iTunes Restore and select an old .ipsw file.
4. Use iRecovery, RecBoot, or another tool to exit out of Recovery mode if needed.
These steps will now be covered in greater detail; however, we will be using a specific model and version for this example. To view a complete step-by-step guide on this and other versions, refer to www.redmondpie.com (Asad, July 2010).
Save SHSH blobs
The key to performing a successful downgrade is to first save the SHSH blobs that are unique to your device and iOS version. The signature for an iPhone 3GS running iOS 3.1.2 will be different from the signature of the same device running iOS 3.1.3. So prior to upgrading, be sure to always save the SHSH blobs on your workstation or a remote server. They can later be used to downgrade back to that version. If the files are not saved and the device is upgraded, there is no way to revert back to a previous firmware version.
There are various open source tools available that can be used for this purpose, including AutoSSH and Tiny Umbrella. For this scenario, we will be using Tiny Umbrella on a Macintosh to save the SHSH files from a 3GS running firmware version 4.0 (this particular software is also available for Windows or Linux).
Once the software is downloaded and running, the iPhone should be connected to the workstation in normal mode. For this particular device model and iOS version, an iTunes version later than 9.0 should be running. Make sure you are using the iTunes version that supports your device. If, after connecting your device to the computer, the “Save My SHSH” button in Tiny Umbrella is grayed out, you are most likely running the wrong version of iTunes. Once the device is successfully connected, you should see the name, model, and firmware version of your device displayed in the drop-down box. After verifying that it is the correct device, select the “Save My SHSH” button (see Figure 2.7).

To verify that the correct files were saved, select the “Display SHSHs” button within the application. You should see your device model, firmware version, and serial number displayed as shown in Figure 2.8.

Modify hosts file
In this step, we are going to modify the hosts file on our workstation by changing the IP address for Apple's verification servers to the IP address for Cydia's server.
On a Mac, the hosts file can be found by selecting “Go” then “Go to Folder” from the Finder (refer to Figure 2.9). Type in “/etc/” (full path is /private/etc and is a hidden folder), and once that folder opens, the hosts file should be viewable.

In Windows, the hosts file is located at C:WindowsSystem32driversetchosts.
On a Linux workstation, the hosts file is located in the root directory under the /etc folder.
Depending on the privileges of the user running on your machine, you may not have access to directly modify this file. A best practice is to make a copy of it on your desktop, modify, then save it back to its original location. Open the hosts file using a text editor, and add the following line (see Figure 2.10): 74.208.105.171 gs.apple.com

On Linux, this update can be done via command line by entering the following in a Terminal:
$ cd /etc
$ nano hosts
Then edit the file as shown in the previous step (see Figure 2.11). To save the changes, press Ctrl+O. To exit nano, type Ctrl+X.

It is this line that is going to make iTunes think it is contacting Apple's server to verify the device signature when in fact it is being verified by the Cydia server. Once this verification process is complete, iTunes will allow us to complete the downgrade process.
Restore .ipsw file
At this point, you should have saved the SHSH blobs, modified the “hosts” file, and downloaded the .ipsw file for the firmware version that you wish to downgrade to. Start iTunes, making sure that you are running the supported version, and connect the device to your workstation. Right-click “Restore” (on a Mac, hold down alt/option then click) and browse to the .ipsw file that was downloaded to your machine to initiate the downgrade.
Exit Recovery mode
Once the process is complete, the device will be in Recovery mode. To exit, you should be able to use the standard process of holding down the “Home” and “Power” buttons simultaneously until the Apple logo appears. If by chance the device became stuck in the Recovery Mode Loop, RecBoot or iRecovery will do the trick.
The App Store
By default, the iPhone arrives with certain applications. These include the most common apps, such as Messages, Calendar, Photos, Weather, and more. A user can customize the applications on their phone by downloading new apps through the iTunes App Store (which arrives on the iPhone by default).
The App Store contains iPhone applications including categories such as Games, Music, Productivity, and Travel. In order to login to the App Store, the user has to first create a login or use their existing iTunes user ID and password. Apps are easily installed on the device, and notifications are even sent to the user when new versions of those apps are available.
MobileMe
MobileMe is a service provided by Apple which offers its members various functions. Mentioned above was the ability to sync e-mail, contacts, and calendar with Apple devices. MobileMe stores all of the user's data, and automatically pushes it out to sync with multiple devices. Users can also store photos, videos, and other files using both the “Gallery” and “iDisk” features. iDisk provides up to 20 GB of remote data storage, allowing access from any computer, iPhone, iPad, or iPod Touch.
Another tool available through MobileMe is the ability for a user to locate a lost or stolen iPhone. Using the “Find My iPhone” feature, a user can sign-in to their MobileMe account and display the approximate global positioning system (GPS) location of the missing device. This option works as long as “Find My iPhone” has been enabled in the device settings. In addition to GPS location, a message can also be sent to the device to let someone know how to get in contact with the owner. Additionally, a user can remotely set a passcode or initiate a remote wipe in the event the device has been stolen.
All of these features can be accessed in one location at me.com.
Summary
In order to forensically examine an iPhone, it is important to understand the options available on the device. This chapter covered various iOS devices and some of their most common features. The numerous security functions should be considered prior to performing a forensic analysis. If the device supports Data Protection and the passcode is enabled, there is the possibility that some or all of the data will be encrypted.
The correlation between the iPhone and iTunes was also discussed in detail. This software plays an important role in what data is loaded on the iPhone. In addition, backups of the device are also pulled down when the device is synced, providing the examiner with an alternative method of acquiring data. Firmware upgrades, downgrades, and device restores are also performed through iTunes.
Many of these functions will play a significant role in the acquisition and analysis of the iPhone.
References
(n.d.). Apple Inc,
Apple – Play music and more on iPod.. Apple,
Retrieved December 17, 2010, fromhttp://www.apple.com/ipod/.
Apple Inc,
iOS 4: Understanding data protection. Apple – Support,
Retrieved December 17, 2010, fromhttp://support.apple.com/kb/HT4175 (
2010, December 1).
Apple Inc,
Mac OS X Lion Sneak Peek. Mac OS X Lion,
Retrieved December 17, 2010, fromwww.apple.com/macosx/lion (
2010).
Asad, T.,
Save SHSH Blobs (ECID SHSH) of iPhone 3.1.3 and iPad 3.2 | Redmond Pie. Redmond Pie,
Retrieved December 17, 2010, fromhttp://www.redmondpie.com/save-shsh-blobs-ecid-shsh-iphone-3.1.3-ipad-3.2-9140709/ (
2010, April 30).
Asad, T.,
Downgrade iOS 4.1 to iOS 4.0/3.1.3/3.1.2 iPhone 4, 3GS, 3G and iPod Touch [How to Guide] | Redmond Pie. Redmond Pie,
Retrieved December 17, 2010, fromhttp://www.redmondpie.com/downgrade-ios-4.1-to-ios-4-3.1.3-3.1.2-how-to-guide/ (
2010, July 15).
Microcontroller Division Applications,
Device Firmware Upgrade (DFU) implementation in ST7 USB devices. STMicroelectronics,
Retrieved March 7, 2011, fromwww.st.com/internet/com/search/search.jsp?q=device%20firmware%20upgrade&entqr=3&entsp=a&output=xml_no_dtd&sort=date:D:L:d1&client=ST_COM_PlanA_frontend&ud=1&oe=UTF-8&ie=UTF-8&proxystylesheet=ST_COM_PlanA_frontend&site=ST_COM (
2003).
iRecovery: Get Out iPhone from Recovery Mode Loop on Restart | iPhone,
iHackintosh | iPhone Jailbreak, Unlock and Mods,
Retrieved December 17, 2010, fromhttp://www.ihackintosh.com/2009/07/irecovery-iphone-recovery-mode-loop-restart/ (
2009, July 18).
..................Content has been hidden....................
You can't read the all page of ebook, please click here login for view all page.