
8. Getting Interactive with Multimedia Blogging
Videos are a fun way to enhance your posts. And as with images, you can create a blog post that consists of an embedded video only. Should your company have a new commercial or informative video, blog text can introduce the piece that can be embedded in the post.
All of these methods help give your readers more ways to interact with you on your site. They can click through and comment on photos or video and also be introduced to your other online presences, should you have a video or photo network account. In this chapter, you find even more ways to connect and interact with your audience using all of these multimedia tools.
Offering Multiple Forms of Content
Being an online medium, blogging can be enhanced with multimedia, such as videos, photos, and audio. Bringing these elements into your blog page or blog posts can offer your audience a wide range of information, education, and entertainment. When this multimedia is available for them to share with their own audiences (for example, through an embeddable YouTube video), your message instantly has a wider reach.
Content for All
Content on your blog should always be available to everyone, either on your blog posts, through subscribing, or through a social network that you are tying into your blog. This can include Twitter updates, Flickr photos, audio interviews, podcasts, or videos on a video-sharing network.
As previously mentioned, these forms of content can complement your work, but it is also important to allow others to use them in their works (with attribution/a credit link back to your source).
The benefit of having content that others can share is that your readers or audience can take your information and share it across their networks. For example, Flickr has licenses, and podcasts are available on iTunes via subscription.
Your blog is also a gateway to all of your company’s other online presences, such as a Facebook page or a Twitter account. You may have some readers who do not look at blogs often, but they are active on YouTube. By having a YouTube channel, you can reach out to those readers. By promoting your YouTube channel on your blog or including embedded videos, you can let readers know they can also follow you on that network.
By making your videos available and embeddable to the public, your content can get blogged on someone else’s site, and your audience may then increase exponentially. The value of this public content on your blog and on multimedia networks is that what you create becomes shareable by others.
Images
Flickr is an online photo-sharing network that enables users to upload photos (or short video clips), use tags to sort them, share them through embeddable links, or group them with other users’ photos. You can sign up for a free Flickr account, which has a monthly limit on the number of photos you can upload, or you can go with a Flickr Pro option. Flickr Pro accounts have an affordable annual fee ($24.95 as of November 2009) that gives you unlimited access and resources.
On Flickr, you can sort your photos into sets, which are like online albums. A set can include images from a specific event, about a specific product, or about a particular aspect of a company. Sorting and tagging your images enables other users on the network, and even public users, to find your photos when doing a search on Flickr or on the Web. All Flickr images marked as public also get picked up by search engines, provided the titles include appropriate keywords.
Businesses can also set up groups on Flickr, and thus enable other Flickr users to add or submit images. Lululemon Athletica Inc., an athletic apparel company, has its own Flickr account.
The company posts photos that are filed away in sets. Their sets include photos featuring their latest garments (see Figure 8.1) and events such as a warehouse sale in Hamilton, Ontario, or group yoga in Bryant Park.
Lululemon also created a public group on Flickr (http://www.flickr.com/groups/883166@N20/) that encourages “Lululemon Lovers” to submit their own yoga-wear photos. Flickr users who join the group can submit their photos, which will then appear in the group’s image pool. This group image pool can then be embedded into a blog post using the “slideshow” feature on Flickr.
Keywords and Titles
You also want to make sure your images benefit your blog posts by not only looking great but also by providing extra content behind the scenes. This means that in the code that makes up your blog post, you can include special text that will help with your search engine optimization. For example, when you add an image to a blog post, you can include an alt or title tag. These are just extra bits of code that search engines look for when adding your site to their directory listings. Most blogging platforms ask you for the image’s title when you are uploading; these can also be added using HTML code.
Figure 8.1 Lululemon on Flickr: Fit & Function: Embark Softshell II photo set.

If you are using an HTML composer, add alt=“keyword text” within the image code so that the image code will appear as follows:
<img src=http://yoursite.com/image.jpg alt=“eating ice cream in the park”>.
The result of this code is an embedded view of image.jpg. However, when you hover your cursor over the image, you’ll be able to read “eating ice cream in the park.” This extra bit of information is also useful for the visually impaired who are browsing the Web. Audio reading tools can provide them with the text of the post, but when an image is included, that doesn’t translate well into audio. Title tags included with your image allow them to hear the image in your post as “eating ice cream in the park” rather than “image123.jpg.”
Having the alt or title text allows search engines to pick up on your extra content through the text code. When they scour your site for content, the code for these images also gets noticed.
Tagging Public Images
Tagging your photos, along with appropriate titles, makes your images searchable and helps them get picked up by search engines. This can be for your own reference, or for public searches. Should you upload a photo of a mop in a kitchen, the tags on the image should be mop and kitchen, along with any other items of note that you can see in the image. Then, Flickr users who want to find a photo that corresponds to what you’ve posted to view or use in their own blog post can easily locate your image.
Private Images
Should you wish to upload images that are only to be shared within a select group, you can do so with Flickr. The reason for posting these images to the online service (and then marking them as private) would be perhaps to share them only with a select group of users or employees. You can determine the levels of privacy on each image, and who might have access to view them, such as those you have added as “Friends,” “Family,” or “Contacts” on the service. The privacy feature can be applied to an entire set or applied on a per-photo basis.
Protecting Public Content: Creative Commons Licensing
When making your content public, you do not have to give up all rights to your images, video, or even your text. Online content can be protected using a Creative Commons license (http://creativecommons.org; see Figure 8.2).
Figure 8.2 The Creative Commons licenses.

Creative Commons offers several levels of licenses, which have the following names:
• Attribution:
This means that your images may be used (embedded) by others in their blog posts as long as they link to your blog, state your company’s name (or photographer’s name), or link back to your Flickr account. You can publicly state what “attribution” levels you would like for your company on your Flickr account profile.
• Attribution - No Derivative Works:
With the No Derivative Works license you are giving the public freedom to use your images (with Attribution as outlined above) but you are also limiting them by requesting the images not be altered or used to create other works (such as a collage or another image).
• Attribution - Noncommercial, No Derivative Works:
Adding the Noncommercial license to the mix means that users may use your works but not in a commercial capacity, whereas they stand to profit from using your images in advertising, for example.
• Attribution - Noncommercial, Share Alike:
With Share Alike added to your license, you are giving users the permission to create derivative works, but only if they in turn use the same Creative Commons license on that work as you have placed on the original.
• Attribution - Share Alike
Creative Commons outlines each level of license by explaining whether you are allowing users to share, remix, or reuse your content and to what extent commercially.
Flickr, for example, offers several levels of Creative Commons licenses that can be preset for your entire account or modified on a per-photo basis. These licenses tell other users that your content is unavailable for sharing or republishing, or that it is free to be shared but under certain conditions. These conditions allow the reader to use or repurpose the image if it’s for noncommercial use, or they may be free to share it simply by giving attribution to the original source. Creative Commons licenses exist for audio, video, images, and text content online.
YouTube is currently the king of online video. Uploading company videos, presentations, or interviews can help you reach out to this vast audience that has recently passed more than a billion views. If the goal of your blog is to find readers and build an audience, making your content publicly available on other networks such as YouTube is a great way to achieve that.
Using appropriate tags and titles is key with YouTube; according to recent studies, it is now the second largest search engine in the world. Using tags and keywords when providing details of your video on the network is also important to having it come up in applicable search results among all the others. Although it has a huge audience, YouTube is not the only video player or video-sharing network on the block. There are also services such as Viddler.com that enable you to watermark your logo on your videos (as shown in Figure 8.3).
Figure 8.3 Videos from Powermat on Viddler video-sharing network.

Vimeo.com is another video service that caters to top-quality, high-definition videos. All of these services enable you to title, tag, sort, subscribe, and embed your videos elsewhere. Clips up to 90 seconds in length can also be added to Flickr, which can also handle HD videos.
Audio
Adding audio to a blog post can bring life to an interview, event, or allow you to publish weekly podcast updates. As with writing blog posts, the length of the audio clip or podcast should be taken into consideration. Podcast episodes should be about 10 to 20 minutes in length and the same applies for an interview. Bear in mind your listeners will be spending that length of time on your site as the audio plays or if they have downloaded the audio podcast, they may be listening during their commute. Keeping their attention while not making them commit to an extremely long sound bite is key.
Attaching audio to a blog post can add a lot to the content if you can find the appropriate service to help you get set up. When putting audio in your blog post or when uploading it to a service, be sure to always add tags and keyword descriptions so that it can get picked up by search engines looking for text.
Following are two online services to which you can upload audio files or record and share audio:
• Utterli is an audio service where you can record directly from their site, or they can give you a phone number to call and it will record voice memos directly from your phone. These voice memos or direct phone calls to Utterli are then posted on your online account for you to share or save.
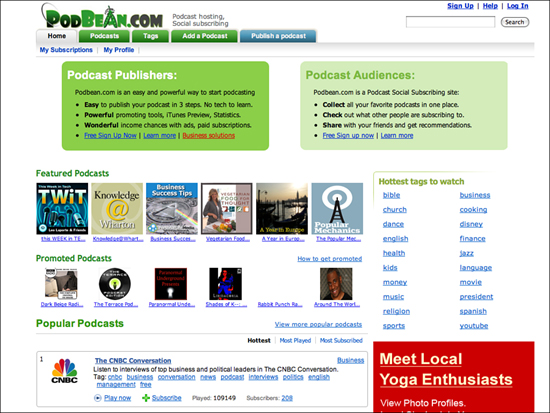
• PodBean.com is an online service that allows you to upload or record and share audio clips of any length (see Figure 8.4). Once your audio is recorded or if you upload an audio file you recorded on your computer, you can then copy and paste the provided embedding code into your blog post. This will then launch an audio player that will play your audio.
Figure 8.4 PodBean.com audio and podcasting service.
With PodBean, you can also convert your audio files or playlists into a podcast. Podcasts are audio files or shows to which users can subscribe. By subscribing using RSS feeds, users can be notified of new uploads or episodes through iTunes. iTunes will let you know if there are new episodes from a podcast and ask whether you want to download them. This way your readers or listeners automatically get notified when you have produced new content. Promoting your blog or including your blog’s Web address on these services and in the details of each audio clip will help drive that audience to your site, where they can get more information from your company.
Other
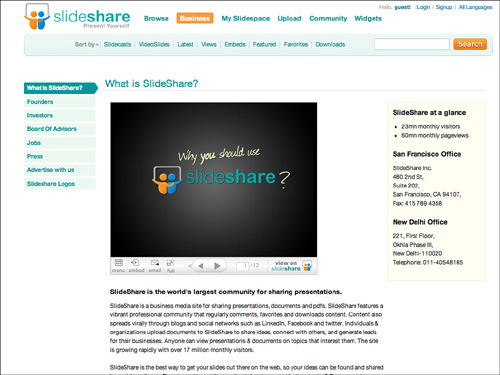
Another unique tool for sharing content online is Slideshare (http://slideshare.net). It enables you to upload your slideshow presentations online, where they can be tagged, commented on, and put into an embeddable player (see Figure 8.5).
Figure 8.5 Slideshare.net online slide-sharing social network.
After you present a slideshow at a conference or meeting, audience members might want to reference your slides later or gather information they couldn’t catch the first time around. If you make your slides available online, members of the audience have a reason to reach out to you after the conference has ended.
Slideshare works with PowerPoint or other slideshow application files, and you can also add audio notes or text to explain the slides on the site. Slideshows can be embedded in your blog, just like a regular video, so you can direct people to your blog as a follow-up. Slides can be viewed individually, as a show, or in full-screen mode.
Private or Members-Only Content
Including public content in a blog is ideal, but there is something to be said for rewarding your loyal fans or readers with special members-only deals or exclusive access to your content. Businesses offer loyalty or points cards with special offers, and sports fans or fans of radio or TV shows can sign up to receive exclusive content online. You can offer the same type of exclusive content to registered members, or perhaps those who have signed up for your e-mail newsletters.
Locking down your entire site or all of your images is not recommended. After all, your goal is to drive traffic to your blog. However, creating a special hidden page that is publicized to a select group only is one way to offer unique content to loyal followers. You can also make this exclusive content available for a limited time, which may help you run campaigns and track statistics. For example, if you have a special new logo or image that others might want to see, you could send the private Web link to your fan base or e-mail subscribers. Let them know the content is up for only a limited time, and then you can pull the content after a week or two and collect data for that period of time, such as number of clickthroughs from the e-mail, the number of visitors to the private site link, and so on.
Keep in mind that whatever content you supply to this special section should also be content you wouldn’t mind having in the public realm. Always assume that anything uploaded or posted online (if even behind a password) will show up in the public space at some point.
Another example is a recording artist who is releasing a new album. He or she can preview a new song on a blog by streaming the audio. The artist could send out an e-mail or simply publish a blog post about the exclusive sneak peak that will take place for a certain amount of time. When fans receive the e-mail or notice the blog post, they can come check it out. Those who miss out on the offer will pay close attention next time, and those who were lucky enough to catch it will be that much more faithful to the site.
Podcasting
As noted earlier, podcasts are audio files that are made available by subscription. Just as a reader would subscribe to a blog, the reader can also subscribe to a podcast by RSS feed. The podcaster sets up the feed so that when they upload and publish a new episode, subscribers are alerted through services such as iTunes. Listeners can then download the episode on their computers or put it directly on their portable audio players.
Contrary to what the name of the medium suggests, you do not need an iPod specifically to listen to a podcast. Some argue the word pod could stand for “portable on demand,” which is exactly how listeners access the audio.
As mentioned in the “Audio” section earlier in this chapter, you can use online services such as PodBean to record, upload, and manage your audio files, but you can also do this through blog posts. Embedding this audio in your blog posts still allows your main blog readers to see this content on your site and to get it automatically if they are subscribed to your main blog RSS feed.
Creating and Promoting Podcasts
When deciding to publish a podcast or a series of audio clips/episodes, it is just as important to determine the subject matter of the audio as it is when you are thinking about content for your blog posts.
If you can record audio onto your computer, you can create a podcast. Popular programs include Audacity for Windows users (http://audacity.sourceforge.net) or Übercaster (http://www.ubercaster.com) for those using a Mac (see Figure 8.6). Apple’s Garage Band (http://www.apple.com/ilife/garageband/) can also be used for podcast production on Mac computers.
Figure 8.6 Audio recording with Übercaster.

Show Notes
Should you decide to turn your audio clips into episodes or a series, you can create show notes to help you stay on track.
Show notes are items of information in the order in which you will be talking about them on your audio file. For example, if your goal is to talk about a new product and then interview its creator, you can use the following show notes for guidance:
• Product overview
• Introduce guest/interviewee
• Summary
After you have recorded your audio and uploaded it to a service such as PodBean or through your blog platform, you can then embed the audio in a blog post, much like how you would embed a YouTube video. In the blog post, you can include your show notes and also put in links, such as a Web link to the product or to the interviewee.
Music
If you want to add more to your audio podcast, you can enhance your clips with music. Adding full songs or background music that plays while you speak can spruce up the audio, making it sound more robust to the audience. These pieces of audio or introduction music in your podcast can break up and enhance the speaking portion, just as images break up text on a screen.
Commercial music contains strict usage licenses, but you can look to “pod-safe” music to include in your episodes. Music with this distinction is licensed to specifically permit use in podcast production.
MusicAlley (formerly the Podsafe Music Network) is a great resource that provides a list of artists and songs that can be safely used in podcasting (http://www.musicalley.com). You can search by artist, genre, or see what others have been listening to in the Most Listens section.
Editing and Publishing
You can add music to your audio using the podcasting programs and services previously listed. With programs such as Übercaster, you can control the volume levels on each audio track. Your voice would be track one, and the music track two. For background music, simply fade down the volume level on track two so that your voice in track one stands out.
After your audio is recorded and background music is added in as you see fit, use the features in your audio recording program to add album art, titles, and tags. You can then export your audio MP3 file, or with a program such as Übercaster you can upload it directly to a server online.
From there, you can go to Podblaze (http://www.podblaze.com) to create your RSS feed. However, if you will be using your blog to publish the audio, you might only need to add the audio to a blog post and then submit your blog feed as a podcast feed. With WordPress, for example, a plug-in called PodPress enables you to upload and add your audio to blog posts. They are then displayed in custom players in your posts. You can then go to a service such as Feed2Podcast (http://feed2podcast.com) to identify that there will be a podcast or audio included in your regular blog feed.
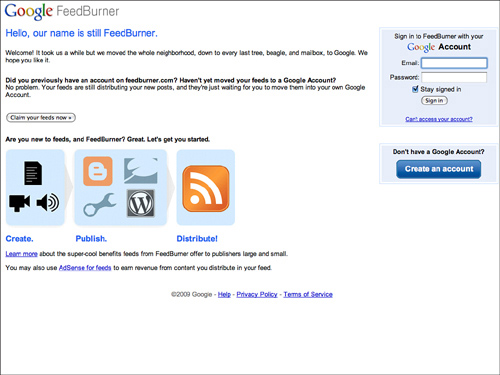
The same can be done with FeedBurner (http://www.feedburner.com), by Google, to create your podcast feed (see Figure 8.7). They have a specific button for you to check that reads “I Am a Podcaster!” after you enter your blog URL or existing feed.
Figure 8.7 Creating your podcast feed with FeedBurner.
After everything has been verified, you should be able to publish a blog post that includes your audio file, and your feed will then display the audio button.
Be sure to promote your podcast feed on your blog so that users can subscribe to it separately, or alongside the blog feed.
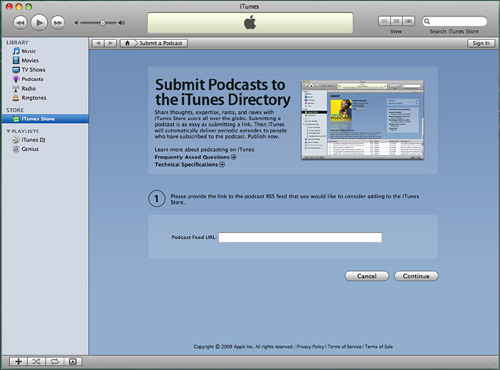
To build your audience outside of your blog, you can bring in more readers through podcasting networks. You can add your podcast to a wide variety of directories, including the most popular, iTunes. Through a simple step-by-step process, you can submit your podcast feed to be listed in the global iTunes directory, as shown in Figure 8.8.
Figure 8.8 Submitting your podcast feed to the iTunes directory.
By submitting your podcast feed to iTunes, you not only make it easier for listeners to get your audio (and in turn come back to your blog for more information), you also open up your blog to the entire iTunes audience. Podcasts are sorted into directories on iTunes, so you can gain a new blog reader if someone comes across your podcast and wants to find out more about your company online. By putting more content out to more services, sites, and directories, you can expect to see more of an audience come back to your blog.
Screencasts
Screencasts are videos that capture what’s happening on your computer’s screen. These are ideal for product demos and tutorials because screencast-capturing programs enable you to use microphone audio to walk your audience through the workflow on your screen. After you have recorded your screen and saved the video file, you can then upload it to YouTube or other sharing services as a fully embeddable video.
On a Mac, you can use an application such as ScreenFlow to record video of whatever you have on your computer screen. For Windows computers, you can use Camtasia, which also enables you to highlight and zoom in on certain parts of your screen. Providing these guided tours in video format can lead to an entire blog series of “how to” video screencasts or demos that your customers may find useful.
Creating and Promoting Screencasts
To create a screencast demo, you can write up a formal script or just do a walkthrough of what you would like to capture. Programs for recording on your screen include Camtasia (http://www.techsmith.com/camtasia.asp) for Windows users, and ScreenFlow, which comes with Macs that are running Leopard (or later). Snapz Prox (http://www.ambrosiasw.com/utilities/snapzprox) is also available for Mac users.
These programs enable you to record your computer screen and the actions you make, such as browsing Web sites or using other applications. They can record your computer’s audio or audio from a microphone. You can also include your cursor movements in the screencast, which may prove handy for demos, or you can remove the cursor.
Applications such as OmniDazzle (http://www.omnigroup.com/applications/omnidazzle) can add graphic elements to your screencasts by attaching animations, such as a spotlight or color-coding, to your cursor onscreen.
After you have recorded your screencast, it can be treated like any other video. You can upload it through your blogging platform or publish it on video-sharing Web sites. Be sure to include appropriate titles and tags for your screencast, including the tag screencast.
Uploading your screencast to a video-sharing network is just as valuable as sharing other forms of multimedia or video, as there is an audience for that type of content online. Since August 2009, for example, there have been 12,500 videos tagged as screencast on YouTube, and 17,300 tagged as screencasting. If a user wants more information, a demo, or a tutorial video, he will most likely head to YouTube and find your screencast demo when it shows up in the search listings that direct users to your content.
When you are recording your screencast, be sure to begin and end the video with your company’s name and how people can find out more, including a visual of your blog or blog URL. Putting content out on other networks reaches broader audiences but you still want to let them know how to come back to your official home base (that is, your blog).
Case Study: Blendtec
In 2006, Blendtec, a manufacturer of blenders that has been in operation since 1975, took to the YouTube airwaves with a video demonstrating the powerful blending capabilities of its product.
As they put a bag of 50 marbles into the Blendtec Total Blender and turned it on, the question that was asked on the video was this: Will it blend? The response to the video online was overwhelming, and since that time, they have created 90 videos, and the original marble video currently has almost four million views on YouTube.
At first, the series looked like a prank, tossing items into a blender to see how badly they could get chopped up. But the audience quickly realized that in this safe, controlled environment, Tom Dickson, the company’s founder, was simply selling his product in an original way.
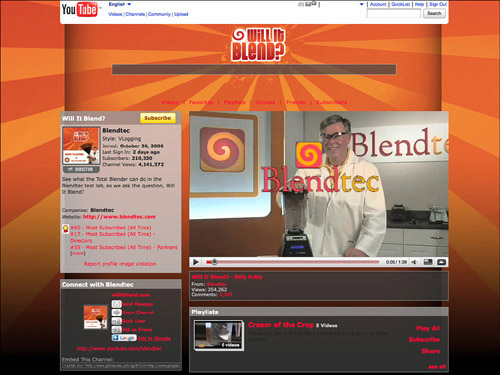
Dickson has since been featured in his lab coat in all 90 videos by Blendtec produced over the years. They were the first to “blend” an iPhone upon its release in 2007, and that video is their most popular, with more than seven million YouTube views to date (see Figure 8.9).
Figure 8.9 Blentec’s Will it Blend? YouTube channel: http://www.youtube.com/blendtec.
Some simply enjoy watching the product being tested, whereas others like to see if it can truly blend something like Silly Putty, pens, or a crowbar.
Will it Blend? went viral, meaning that it was shared and passed along through social networks like Digg and that videos have been embedded on countless blogs. The official WillItBlend.com website prominently features the Total Blender and shows you how to go about making a purchase (see Figure 8.10). It also sells Will It Blend? merchandise, making it an official Internet pop-culture hit. Tom Dickson has also been asked to make national broadcast appearances to demonstrate the Total Blender’s capabilities.
Figure 8.10 Blentec’s Will it Blend? Web site.

The videos were uploaded to the video-sharing service Revver, which allows its users to earn revenue by posting their content. According to USA Today (http://www.usatoday.com/tech/webguide/internetlife/2007-09-13-revver_N.htm) in September 2007, the Will It Blend? series earned the second highest annual payout from Revver (about $15,000).
Will It Blend? doesn’t stop with video. They also have a blog (Will It Blog?). This blog features the video series, and it provides general information about their products. On the blog, they open up the Total Blender and deconstruct it to show how it all works and how it has the power to blend even a set of skis. They also feature other blenders, ways to clean your product, and company or product updates.
According to Blendtec.com, in 1975 Tom Dickson “revolutionized the way homemakers would forever mill wheat into flour.” The Will It Blend? video series reached out to an entire audience it may not have had prior to 2006.
Since then, Blendtec blenders have been used for baking, smoothies, and now… golf balls. Appealing to the YouTube audience introduced the product to a whole new generation of customers.
Before the video series, most of the younger generation never gave any thought to the brand of blender they would purchase or recommend. But thanks to these clever and entertaining marketing efforts, the company is thriving, most likely in part because of the combined 83 million views on its Will It Blend? videos.
Summary
By adding multimedia, you can further promote and publicize your blog’s great content to audiences of millions around the globe. Your blog might not have many visitors when you first start writing, but by adding photos and video to online networks with millions, if not billions of views, you tap into a whole new audience pool.
Encouraging others to embed your multimedia helps your readers and followers spread your message, and in turn, you can promote their contributions by featuring their Creative Commons licensed photos on your blog or Flickr group.
Each reader and audience member is unique and will come to your blog for the writing, the photos, or for the videos you embed within your posts. Some like to get their information visually, and others audibly. You can cater to these different preferences by using multimedia on your blog and by sharing it on other networks. Your goal is to get those viewers, listeners, and readers to return to your blog. That’s your priority. By driving them back to your blog, which is your number one online source, you will not only nurture your current audience, you’ll also watch it grow.