DRAWING AND SHADING TECHNIQUES
To make something look convincing and three-dimensional on two-dimensional paper, you need to give the object form by adding highlights and shadows. If you aren’t familiar with shading methods, here are some techniques to get you started. It’s a good idea to practice some of these techniques to get the hang of them before you apply them to a drawing. Don’t be afraid to experiment and be adventurous, though; these are just a few ideas to get you started. You might want to line up some household items (such as fruit, bowls, and bottles) on a tabletop and try to sketch them as they are. This is good practice for helping you learn how highlights and shadows fall on items of different shapes and sizes.
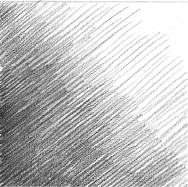
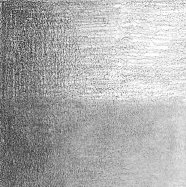
Hatching This shading technique involves placing several lines parallel to one another. Lighter, widely spaced lines create lighter areas; darker, more dense lines create dark areas. Note that the lines in this example do not form identifiable rows. You can achieve a smoother look by mixing up where each line starts and stops.
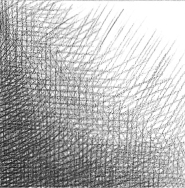
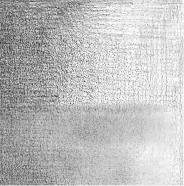
Crosshatching The addition of another layer of hatching, placed at an angle, is called “crosshatching.” As with hatching, lighter, widely spaced lines create light areas, whereas denser areas create darks. An advantage of crosshatching is that the direction of your lines can be used to define the shape of an object.

Gradating This technique creates smooth, graduated values (from dark to light). Start with a soft pencil to lay down darker layers; then use harder pencils and less pressure for progressively lighter tones. Going back over the edges of your dark areas with a slightly harder pencil can help blend the shadows into the lighter areas.
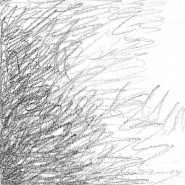
Scribbling This is a fast, effective way to shade when sketching. When applied with patience and diligence, it can also work effectively in finished drawings. Loose, light scribble lines create lighter areas, whereas thicker, darker lines define darker areas. Switch between hard and soft pencils to keep your lights light and your darks darker.
Blending with a Stump The bottom half of this gradated example has been blended using a blending stump (see page 4). By rubbing the blending stump over the shaded areas, you can smooth the shading and create various looks.
Blending with a Chamois The bottom half of this example has been blended using a small piece of chamois leather, which is very soft and can be purchased in different sizes. Chamois squares can come in handy for blending very large areas, such as expansive skies, or other background elements that will be built up with other marks and eraser techniques.

Erasing Erasers can be used for more than just correcting mistakes. I use a stick eraser to draw the hatchmarks at the top of this example, and a kneaded eraser to lift out blotches of graphite from the bottom. Try using erasers to bring out details in shaded areas, or to draw lighter shapes into dark areas. Just be mindful as to how much graphite the eraser can lift.

Stippling This technique of using small dots to define shape and shadows can be very time consuming. It is best done with softer pencils that aren’t quite sharpened to a point, and without using a great deal of pressure. A point that is too sharp or applied with too much pressure can leave pockmarks in your paper.

Shading Exercise Shading a sphere is a simple yet useful exercise for developing shading skills and techniques, and for locating the different types of highlights and shadows on an object. Variations of this exercise can be used to shade just about anything, allowing you to give your drawings form and volume. In this example, I use a combination of gradating and hatching with lines that follow the curve of the sphere to achieve a smooth texture that also shows the shape of the object. First shade the sphere with a very light tone, leaving the white of the paper at a spot near the top of the sphere (though not quite at the edge). This white spot is the highlight—the area where the light shines brightest on the object. Next build up layers of darker tones as you reach the bottom of the sphere. Even though you are building up the shading in layers, it is important to try to blend each layer smoothly into the previous layer. Eventually, the darkest shadows should be in a thin band around the base of the object, leaving a range of midtones (middle values) between the highlight and the darkest area, which is the core shadow. Note that the core shadow does not extend all the way to the base of the object. Rather, there is a lighter band just below the core shadow—This is the reflected light. Even if a surface is not shiny, it will still reflect a small amount of light back onto the object resting on it. Below the sphere is the cast shadow—this is the shadow cast by the object itself. Notice that the cast shadow is not a solid tone; rather, it gets lighter as it moves away from the object.

Using Atmospheric Perspective Once you have mastered the basics of shading, there are other techniques you can use to make objects look closer or farther away. Notice that in this example, the tail of the dragon on the left gets lighter as it extends from its body (just like the cast shadow in the sphere example above). This is called “atmospheric perspective”—the tendency of objects that are farther away to become lighter as they recede into the distance. This is easily observed if you live in an area with mountains—the farther away the mountains are, the lighter they get, until they almost blend into the sky. Note that this rule applies only to daytime drawings. If your drawing is a nighttime scene, the opposite is true—objects that are farther away are darker, and objects that are closer are lighter and more clearly defined. Diminishing levels of detail also help show distance. Notice that the tail and the spikes of the dragon on the right get smaller and less distinct as they get farther away. You can still tell that the spikes extend all the way down the dragon’s tail, but they become less and less defined, showing the distance and making the drawing more convincing.