Chapter 8
Exploring Apple Pay and Other Apps
QuickSteps to…
We have covered many of the iPhone’s apps in other chapters of this book, but there are still three others that deserve exploring: Passbook with Apple Pay, Health, and Notes. In this chapter we’ll look at each and see how they are set up and used.
PAY WITH PASSBOOK
Passbook allows you to store airline boarding passes, movie and concert tickets, coupons, and loyalty cards. It is also where you set up Apple Pay.
 Set Up Passbook and Apple Pay
Setting up Passbook with an iPhone 6 or 6 Plus is primarily about adding and managing credit cards. Your credit card information is encrypted and kept very securely on your phone—so secure, in fact, that the U.S. government complains they can’t get into it! You can set up Passbook and Apple Pay either in the initial Passbook app or in Settings.
Set Up Apple Pay from Passbook
Start by setting up Apple Pay from Passbook.

1. From the iPhone’s Home page, tap Passbook and in the upper half of the screen tap Set Up Apple Pay.
2. Tap Allow to allow Passbook and Apple Pay to use your current location for relevant passes, card setup, and store locations.
3. Enter your Apple ID password and tap OK. If you have a credit or debit card on file with iTunes and want to use it with Apple Pay, tap that option and go to step 4. Otherwise, tap Use A Different Credit Or Debit Card and go to step 5.

4. For your card on file with iTunes, tap in the Security Code field and enter the number; then tap Next | Agree | Agree. Your card will be activated. When the activation process is complete, you will be told it is ready for Apple Pay. Go to step 6.
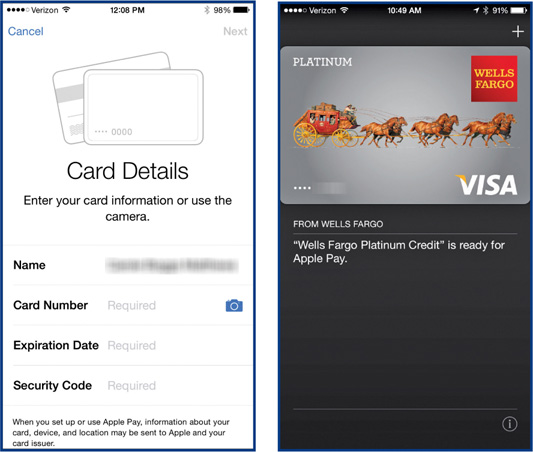
5. For a new card, tap in the Name field and then correct or enter the name on the card, as needed. Tap in the Card Number field and enter the card number (alternatively, tap the camera icon and position the card in the frame; the name, card number, and expiration date will automatically be captured). Finally, tap in the Security Code field, enter the number, and then tap Next | Agree | Agree. Your card will be activated. When the activation process is complete, you will be told it is ready for Apple Pay.
6. To add more cards (you can store up to eight cards), tap the plus sign in the top-right corner of your list of cards or tap Add Another Card on the initial Passbook screen and return to step 5.
Set Up Passbook and Apple Pay from Settings
Settings provides a similar setup for credit and debit cards, plus allows you to make several other settings.

1. From the iPhone’s Home screen, tap Settings | Passbook & Apple Pay | Add Credit Or Debit Card.
2. In the Card Details screen that appears, enter your information or use the camera, as described in step 5 under “Set Up Apple Pay from Passbook,” earlier in this chapter.
3. Tap Default Card, tap the card you want to be your default, and tap Back.
4. Tap Billing Address | Enter New Billing Address, enter your name and address, and tap Done. Alternatively, you can tap Add From Existing Contact and select the address you want from your contact list (for example, yourself if you have entered yourself). Unfortunately, the automatic entry in your contacts labeled “Home” is not available to be selected.
5. Tap Shipping Address | Enter New Shipping Address, enter your name and address, and tap Done.
6. Tap Email and enter the necessary information if it is not already there. Do the same thing for Phone.
7. To remove a card from your iPhone, tap the card to be removed, scroll down, and tap Remove Card.
8. When you are ready, return to the iPhone Home screen.

Use Apple Pay
With an iPhone 6 or 6 Plus, Apple Pay will allow you to pay for purchases, either while you are online or while you are in a store. This payment is very secure; your credit card information is never seen by the vendor.
Pay at a Store
You can use the iPhone to pay for a purchase in establishments that have contactless reader devices that work with your iPhone. Look for one of the following symbols:
![]()
Many stores already (as of fall 2014) support Apple Pay—and the list is growing. A few examples of current stores include Aéropostale, Bloomingdales, Chevron, Macy’s, McDonalds, Office Depot, Panera, RadioShack, Staples, Subway, Texaco, and Whole Foods. To use Apple Pay while in one of these establishments, follow these steps:
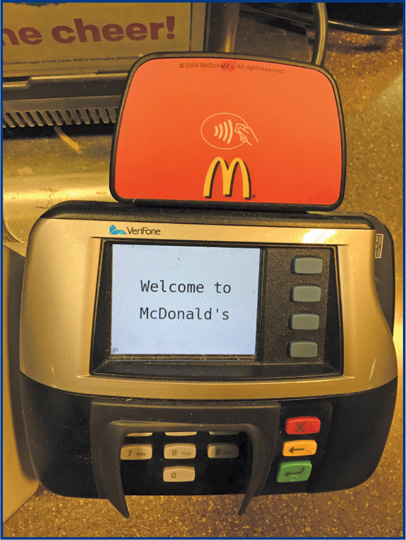
1. When you are ready to pay, hold your iPhone about an inch away from a contactless reader; there is no need to wake your phone or start an app, and your default credit or debit card will be displayed with “Pay with Touch ID” on the screen).
2. If you want to pay with a different card, tap the default card; your credit and debit cards should appear on the screen.
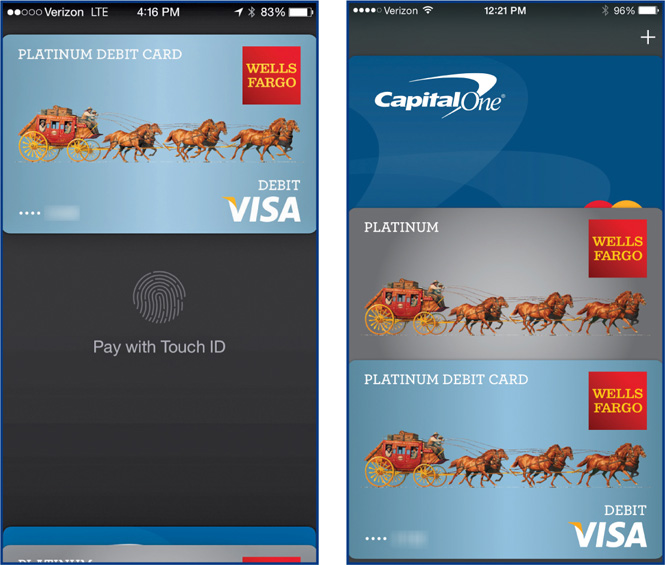
3. Tap the card you want to use, place your Touch ID finger on the Home button, and continue to hold the iPhone about an inch away from the reader until the iPhone vibrates. If you don’t have your finger correctly on the Home button, you will see a message asking you to authenticate with your Touch ID or your passcode. Keep the iPhone in front of the reader until the transaction has been completed, and you will see a check mark and the word “Done.” After a moment, the details of the transaction will appear.
Pay Online
Using Apple Pay online simply involves getting the store’s Apple Pay app and choosing to use it to pay for a purchase.
1. From the iPhone’s Home screen, tap App Store | Search, type Apple Pay, and tap Browse Now. Scroll down to review the list of establishments with apps that allow you to buy online with Apple Pay.
2. Tap Get | Get | Install | Open for the establishment where you want to shop. Browse and use the search features to locate what you want to buy. Select it and then tap the Apple Pay logo.

3. In the bill that appears, tap the credit card to select a different one and tap the shipping address and/or contact information to change either one.
4. When you are ready, press the Home button with your Touch ID finger to conclude the sale. If you don’t want to go ahead, tap Cancel.
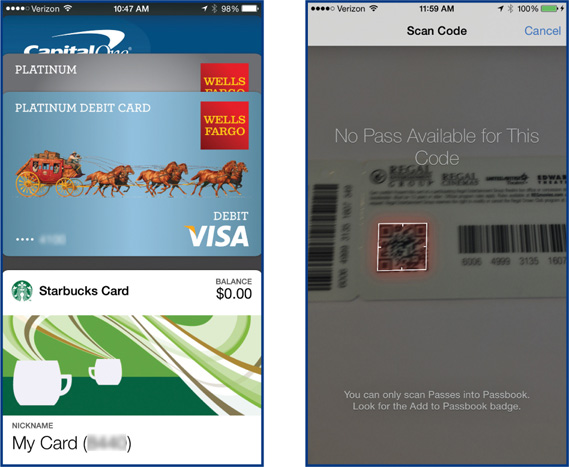
If you open Passbook, you will see your last transaction and the card it was made with.

Use Passbook
To use Passbook, you need to download or scan in boarding passes, movie and concert tickets, coupons, and gift and reward cards. You can get these in many places, but a good place to start is to download apps that support Passbook. You can open Passbook and tap Find Apps For Passbook on the Welcome screen, or you can open itunes.com/passbookapps in Safari or in a browser on your computer.
1. From the iPhone Home screen, tap Passbook. If you don’t still have the Passbook Welcome screen displayed, tap the plus sign in the upper-right corner to display it.
2. Tap Find Apps For Passbook and tap Get for several apps that might be useful to you.
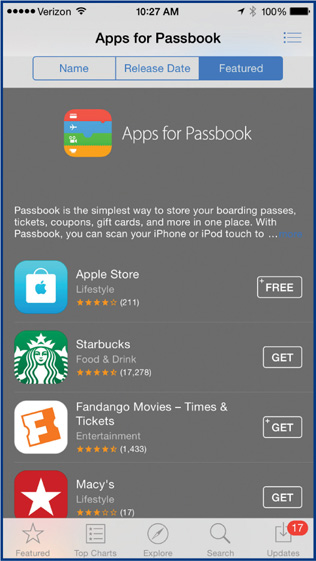
3. Use the app to locate coupons and discount and reward cards. For example, tap Get | Install | Open With Starbucks. Tap Sign Up and enter your name, email, a password, the month and day of your birthday (for a free coffee), and your postal code. Tap Continue, tap Add Starbucks Card | Get A New Digital Card, and then tap Continue to add the card to Passbook. Identify several Starbucks locations near you, and tap Add as the final step to place it in your Passbook. Open Passbook to see the card.
4. You can also scan several types of documents, including retail loyalty and reward cards. Place the document on a flat, nondistracting surface. From the Passbook Welcome screen, tap Scan Code, aim the iPhone at the code, and the camera will lock onto it. Unfortunately, not all codes produce a pass.
TRACK YOUR HEALTH
The iPhone’s Health app helps you keep track of your fitness and health information so you can track how you are doing in both areas. You can directly enter information, and you can have external devices that use Bluetooth to manually or automatically transfer information to Health.
Set Up the Health App
There are three ways to use Health: by directly entering and viewing data (see “Use the Health App,” later in this chapter), with separate external devices (follow the instructions for the device), and by using apps that interface with Health, which we’ll look at next.
Set Up Health Apps
There are a large number of health- and fitness-related apps, only some of which interface with the iPhone’s Health app. Here is how to find and set up the ones that do:
1. From the iPhone’s Home screen, tap App Store | Search, type health apps, and tap Search.
2. Under Apps For Health, tap Browse Now. In the screen that opens are three categories of apps: Fitness & Wellness, Food & Nutrition, and Healthcare. Drag each category from right to left to see additional apps.
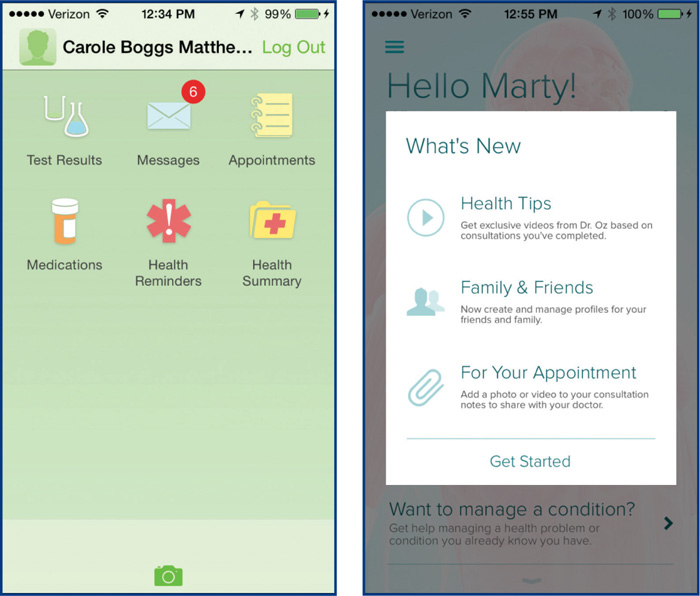
3. Select several apps that are correct for you. Here, I’ll get and set up Health Mate, Calorie Counter (by MyFitnessPal), MyChart, and AskMD as examples, not as recommendations (only AskMD interfaces with the Health app).
4. Tap Health Mate | Get | Install, sign in to the App Store if necessary, and tap Open. If you wish, review their data-gathering devices and then tap No Devices Yet.

5. Enter the requested information, tap Next as needed, and then tap Create. Tap the Welcome tour and read how to use the app (and get invited to buy their devices). Without their devices, you can still measure your heart rate using your camera, track the number of steps you take if you keep your iPhone in your pocket, and enter your weight and blood pressure that you get from some other devices.
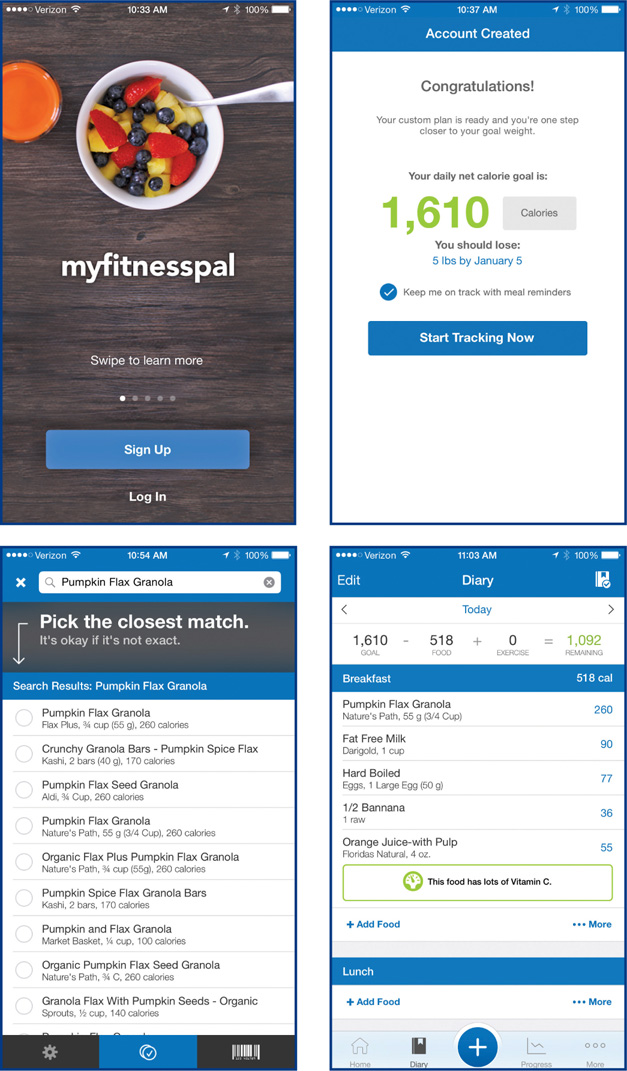
6. From the App Store Apps for Health, tap Calorie Counter | Get | Install, sign in to the App Store if necessary, and tap Open | Sign Up. Choose to sign up with your email address or your Facebook account and select your weight goal and related information, tapping the right arrow in the upper-right corner as needed.
7. When you have entered all the information, you will be told what your daily calorie goal is. Tap Start Tracking Now. Pick a meal, enter a type of food to search for, select a match, and tap Add (1). Repeat for all the items you eat and for the meals in a day. Tap the day complete icon in the upper-right corner and tap Complete Entry. Explore the many aspects of Calorie Counter.
8. From the App Store Apps for Health, tap MyChart | Get | Install, sign in to the App Store if necessary, and tap Open | Accept. Choose your state and medical provider, sign in, and accept the terms and conditions. This provides some access to the medical records of your medical provider. If your provider is not listed, this app will not work for you.
9. From the App Store Apps for Health, tap AskMD | Get | Install, sign in to the App Store if necessary, and tap Open | Sign Up. Enter the requested information, tap Yes to share information to the Health app, and select the elements you want to share. Browse through the app and use the features that interest you.
Set Up Emergency Information
The iPhone’s Health app provides for the entering of emergency medical information that can be viewed on the lock screen. Here is how to set it up:
1. From the iPhone Home page, tap Health | Medical ID in the bottom-right corner and then tap Create Medical ID.
2. Choose whether to show this information when the iPhone is locked; then go down through the categories of information and enter what you think is pertinent. Tap Done when you are finished. You can always come back and tap Edit to make any changes you want.
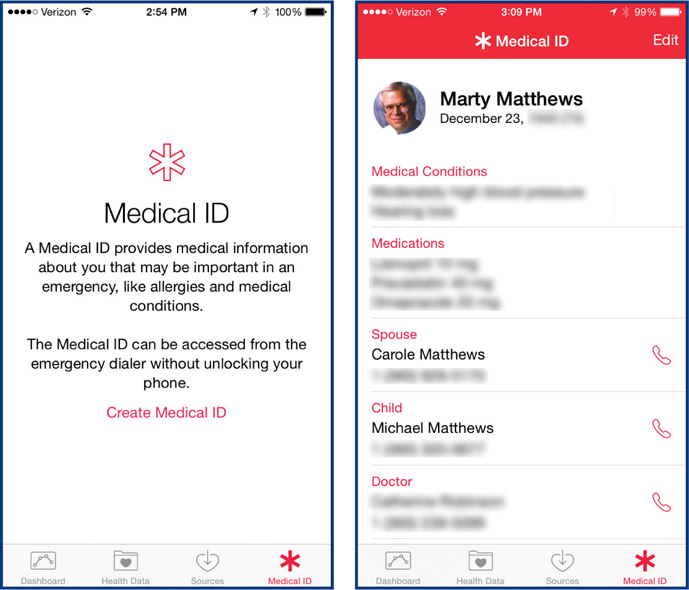
3. To access this information when the phone is locked, press the Home button, swipe the screen from left to right, and tap Emergency | Medical ID. The information appears.

Use the Health App
As stated earlier, the primary use of the Health app is the entering and tracking of fitness and health information. Some of the information can be entered by devices and other apps, and some is generated by the iPhone itself, but much of the information must be entered by you. Once this is entered, Health provides a number of ways to track the information.
Get Information into Health
Here are some examples of what the iPhone can collect and what you need to enter:
1. From the iPhone Home screen, tap Health | Health Data in the bottom left. Here there are seven categories of health and fitness information, plus one that combines all the others.
2. Tap Body Measurements | Height | Add Data Point. Enter your height in inches and tap Add | Back in the upper-left corner.

3. Tap Weight | Add Data Point. Enter your weight in pounds and tap Add | Back | Health Data in the upper-left corner.
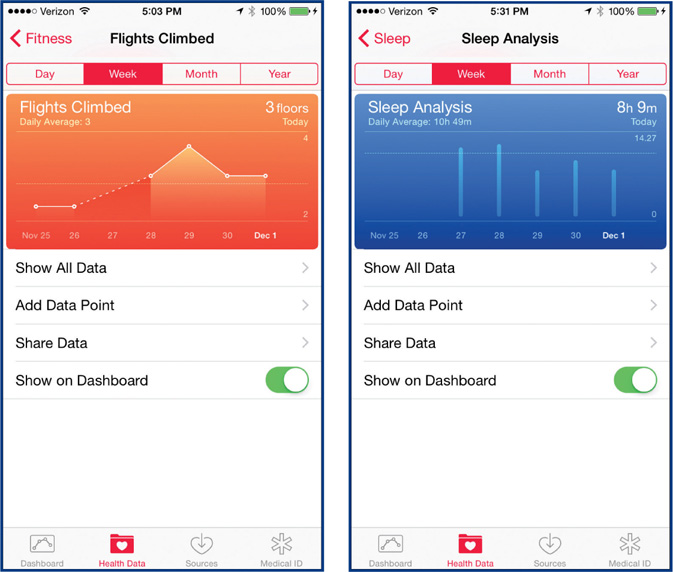
4. Tap Fitness | Flights Climbed. This information is automatically collected by the iPhone, as is Steps and Walking + Running Distance. You can add more data points if you wish. Return to Health Data when you are ready.
5. Tap Nutrition. Tap a nutritional element you want to track, tap Add Data Point, and enter the amount of that element. Return to Nutrition and repeat this step for other elements. When you are done, return to Health Data.
6. Tap Sleep | Sleep Analysis | Add Data Point, enter the start and end dates and times, and tap Add. Return to Health Data.
7. Tap Vitals | Blood Pressure | Add Data Point, enter the systolic and diastolic figures, and tap Add. Return to Vitals.
8. Tap Heart Rate | Add Data Point, enter the beats per minute, and tap Add. Return to Health Data.
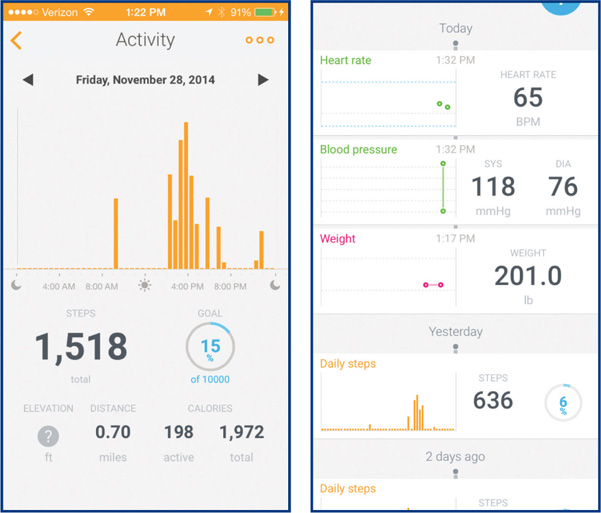
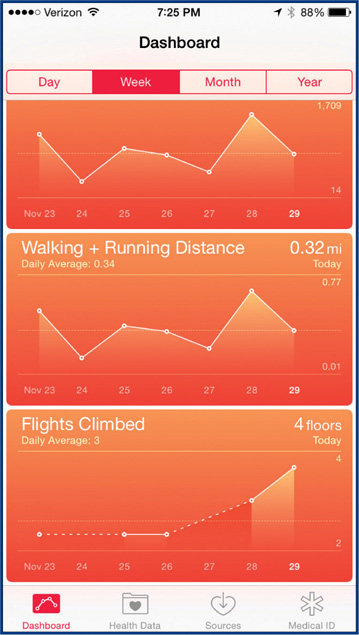
Track Health Information
Once you enter information, you want to see the results and your progress in achieving goals. This is accomplished in two ways: the dashboard, where you can see a selected set of charts, and in the charts for each element. When you enter a particular element, you can see and analyze the chart for that element. Also, you can choose whether you want to show the element on the dashboard by tapping that option.

TAKE NOTES
Notes is very handy, allowing you to record brief ideas, reminders, and lists and to organize those in limited ways. Notes can be shared through iCloud with other Apple devices and through the mail accounts you have. You can also share notes with others and print them.
Use Notes
Using Notes is simplicity itself:
1. From the iPhone’s Home screen, tap Notes | New and begin typing the note. The first line you type will be used as the title of the note.
2. When you are finished, tap Done | Back to return to the list of your notes. That’s all there is to it. Here are two examples of notes:

3. As you create notes, a list is built on the opening page that allows you to quickly select and return to any note.

![]()
TIP You can dictate a note by tapping the microphone key in the onscreen keyboard, dictating the text you want, including punctuation (for example, by saying “period,” “colon,” or “new paragraph”), and tapping Done when you are finished. You may need to do some editing, but dictating should still be faster. Here are screenshots of before and after editing a to do list:

Edit Notes
Notes can be edited like any other text that has been entered into the iPhone.
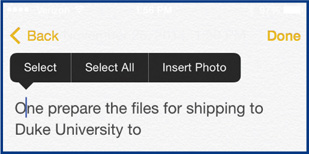
1. From your list of notes, tap the one you want to edit and then tap anywhere in the note to place the insertion point. You are then asked if you want to select the word or select all of the text.
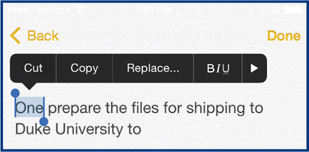
2. If you tap Select, you can drag the selection handles on either end of the selection to select the text you want to work on.
3. When you have the desired selection, you will be asked if you want to cut, copy, replace, or format it. Based on the choice you make, complete the process.
4. Repeat steps 1 through 3, as needed, to complete editing the text. When you are finished, tap Done | Back.
5. To delete a note, tap it in the list of notes, tap Delete (the trash can) in the lower-left corner, and tap Delete Note. Alternatively, in the list of notes, you can swipe a note from right to left and tap Delete.

6. To create a new note while you are in a note, tap the New Note icon in the lower-right corner.
7. To search notes from the list of notes, drag the top down, tap in the Search box that appears, type what you want to search for, tap Search in the keyboard, and then tap the appropriate note. The word or phrase you are searching for will be highlighted.
![]()
NOTE You cannot sort notes alphabetically, though that would be a great addition. Instead, they show according to the last one opened.
Share and Print Notes
You can share notes with others and print them on a wireless printer.
1. From the list of notes, tap the one you want to share and then tap the Share icon in the bottom middle of the screen.
2. In the Share menu that opens, tap the means of sharing you want to use, fill out the sending document, and tap Send.
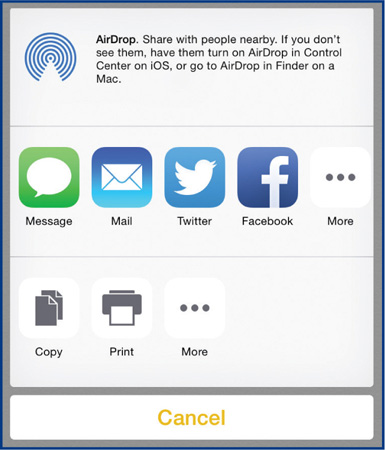
3. To print, tap Print in the Share menu, select the number of copies, select the appropriate printer, and tap Print.
Set Up Notes
You can attach notes to iCloud or to any of your mail accounts that accept notes, such as Gmail and Yahoo! To do that, you must turn on Notes in iCloud and mail accounts and then select the primary account in Notes with these steps:
![]()
NOTE You do not need to enable Notes in iCloud and your mail accounts if you do not foresee a need for their use. If you just want to use Notes on your iPhone and don’t have other devices or needs for notes, you can ignore the Notes settings discussed here.
1. From the iPhone’s Home page, tap Settings | iCloud | Notes to allow iCloud to receive and pass on to other Apple devices the notes you create. Tap Settings to return there.
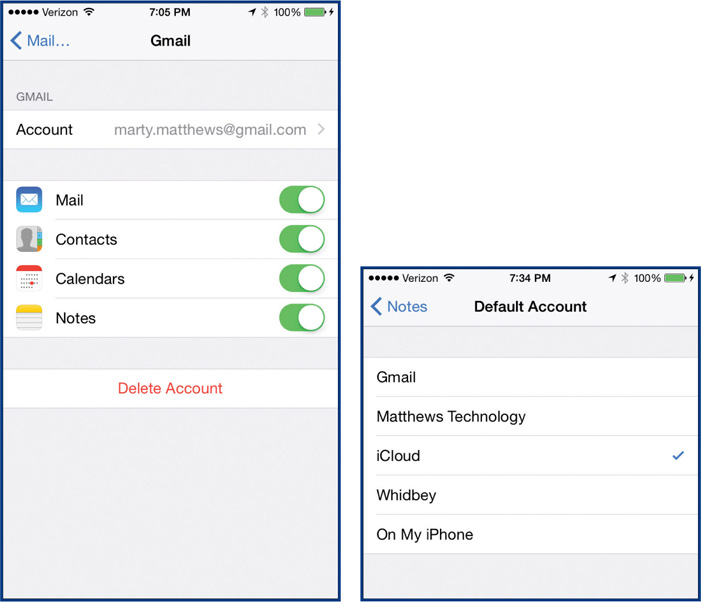
2. From Settings, tap Mail Contacts Calendar and tap the mail account you want to reflect Notes. For example, tap Gmail and tap Notes to turn it on if it is currently off. Tap Mail in the upper-left corner when you are ready.
3. Repeat step 2 for as many mail accounts as you want to reflect Notes. Tap Settings in the upper-left corner when you are ready.
4. From Settings, tap Notes | Default Account and tap the account that you want to reflect your notes. If you want them only on your iPhone, tap that choice. Tap Notes | Settings in the upper-left corner when you are ready.