Chapter Eight. Working with Flash Professional
Adobe Flash CS5 Professional continues to be the most advanced environment for interactive authoring on the Web. According to Adobe, Flash Player is the most ubiquitous plug-in on Earth, with a penetration rate of nearly 98 percent of all Internet browsers. Despite the ongoing controversy surrounding Flash on the Apple iPhone and iPad, there’s currently no better product for creating interactive experiences than Adobe Flash Professional.
More than simply a program for creating vector animation, Flash Professional has evolved into its own platform. Today when we talk about Flash we’re really talking about a Rich Internet Application, or RIA, that supports audio, video, and both vector- and pixel-based interactivity.
Although content can be created inside of Flash Professional, most designers take advantage of the application’s ability to smoothly import content created in standard design environments like Photoshop or Illustrator. In our first tip, we’ll explore that initial process.
#73. Importing Your Illustrator and Photoshop Files
In the past, one of the knocks against Flash Professional was due to its nonstandard (some would say “crude”) drawing and image editing tools. Today, that’s no longer a problem because the application can now import files originally created in other programs. If you preferred working in Illustrator or Photoshop prior to animating in Flash, you’re going to love this improvement.
With Flash Professional CS5, artwork created in Photoshop or Illustrator CS5 can be brought into Flash through the Clipboard, dragged and dropped from the Mac OS Finder or Windows Explorer, or imported via the Import dialog box (File > Import) shown in Figure 73a. When you’re importing native Photoshop and Illustrator files, Flash Professional converts your artwork and populates the library with elements that match the original file. Other points to keep in mind:
Figure 73a. The Import dialog box contains several options for handling incoming text, layers, and compression from Photoshop—plus the ability to convert layers to movie clips.

• Text can come in as text or outlines or even bitmaps.
• Vector art is converted to Flash’s own vector format.
• Bitmaps are converted to PNG-24, including all transparency.
If you have applied effects in Photoshop or Illustrator that Flash does not support—such as Photoshop lighting effects or opacity masks in Illustrator—the artwork is converted to a PNG-24 to maintain the appearance and transparency. In Figure 73b, we see those incompatible objects flagged by yellow warning triangles.
Figure 73b. In this figure we’re about to import an Illustrator file into Flash Professional. Notice how Flash flags incompatible items with yellow warning triangles.

Imported artwork can also be assigned symbol properties, such as Buttons or Movie Clips. What’s more, symbols created in Illustrator are automatically added to the Flash document, including any settings for 9-slice scaling.
Once the import is complete, Flash Professional creates layers in the Timeline panel and place elements on the stage to match the layout of the original Photoshop and Illustrator files, as shown in Figure 73c.
Figure 73c. This is how Flash Professional looks after importing layered Illustrator artwork. Now we’re ready to begin!

Importing Photoshop Layers to Flash Professional
Flash Professional CS5 handles Photoshop layers and layer groups with aplomb. When you’re importing a Photoshop PSD with a layer group, avoid the temptation to flatten the group into a single layer. Instead, select the layers and select the “Create movie clip for this layer” check box (Figure 73d).
Figure 73d. Flash Professional provides an easy path for importing layer groups.

#74. Round-trip Image Editing with Flash and Photoshop
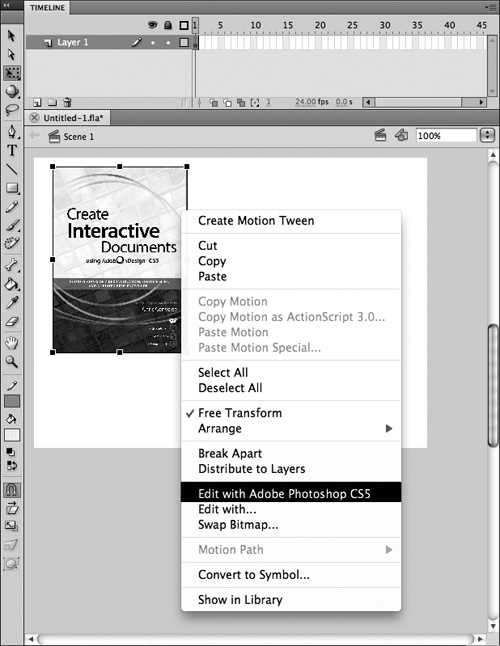
New to Flash Professional CS5 is the ability to directly edit imported bitmap images in Photoshop CS5. The process is quite simple, despite an important caveat (see the sidebar). The process is as follows:
- Control-click (right-click) the object either on the stage or in the Library panel. Choose Edit in Photoshop CS5 (Figure 74a).
Figure 74a. Select the object to edit either on the stage or from the Library panel. Control-click (right–click) and you’ll be presented with this context menu, which is your direct connection to Photoshop CS5 or other original parent application.
- Make your Photoshop edit and save.
- Return to Flash to see your file modification applied.
#75. Importing and Exporting FXG Files
FXG is a cross-platform interchange format that allows files to be moved from Flash Professional to other programs such as Illustrator or Flash Catalyst. Based on a subset of MXML, the XML-based programming language used by the Flex framework, the FXG format helps designers and developers collaborate more efficiently by enabling them to exchange graphic content with high fidelity. When importing FXG files, Flash Professional CS5 needn’t do any file conversion to bring in artwork.
The following Adobe applications support FXG:
• Fireworks (export)
• Photoshop (export)
• Illustrator (export)
• Flash Professional (import and export)
• Flash Catalyst (import and export)
• Flash Builder (import and export)
In Flash Professional, you can export content in FXG format in either of two ways:
• To export objects on the Stage as FXG, select the objects and choose Export > Export Selection. Then select FXG format from the File Type menu.
• To save the entire Stage as FXG, choose Export > Export Image and select Adobe FXG from the Format drop-down menu.
When you export a file containing vector and bitmap images using FXG export, a separate folder is created along with the FXG file. This folder has the name <filename.assets> and contains the bitmap images associated with the FXG file (Figure 75a).
Figure 75a. Expect to see an FXG file and a similarly named folder when exporting files from Flash Professional that contain both vector and bitmap images.

#76. Getting Better-Looking Type in Flash
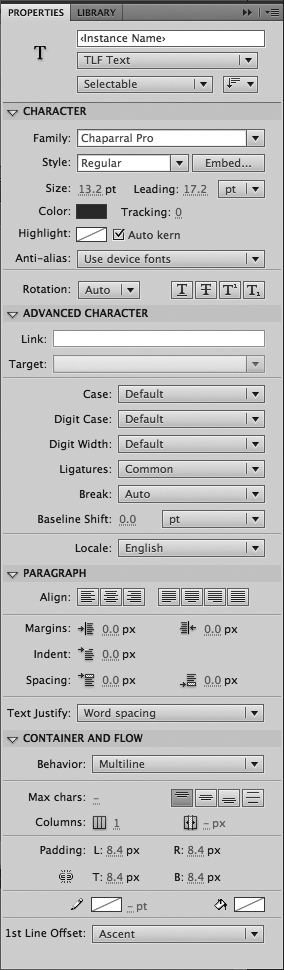
Achieving better-looking type in Flash is no longer question of TLC, but rather TLF. TLF, which stands for Text Layout Framework, is a rewritten type engine that supports advanced typesetting features like ligatures, baseline shifting, tracking, and more. Multiple columns of text can now be set in one text frame, as in InDesign, and text can flow continuously from container to container (Figure 76a).
Figure 76a. TLF offers a wide range of typesetting possibilities, as the options found in this collection of panels shows. No longer does type on the Web have to take a back seat to type in print.
Embedding Fonts in Flash
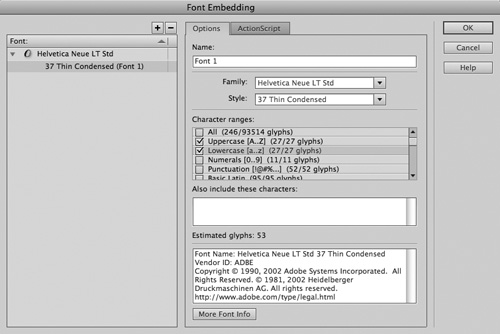
Flash Professional automatically embeds the fonts used in your project when you publish your project. In cases where your SWF file may receive external data, such as a person’s name, or stock prices, you will need to embed a full set of characters in order to ensure the SWF file has all the characters it may need.
To embed fonts in Flash Professional CS5, choose Text > Font Embedding. Select the fonts you’d like to embed in the document and click the (+) above the left Font column. Select the sets of characters you’d like to embed from each font family you are embedding. To conserve file size, character sets are broken into commonly used groups, such as numbers only, or Basic Latin (Figure 76b).
Figure 76b. Font embedding in Flash Professional CS5 is no longer a “yes or no” question. Developers now have much greater control over the glyphs they embed. With this degree of control, Flash developers can limit the file size.
#77. Using the Improved Type Composition Options
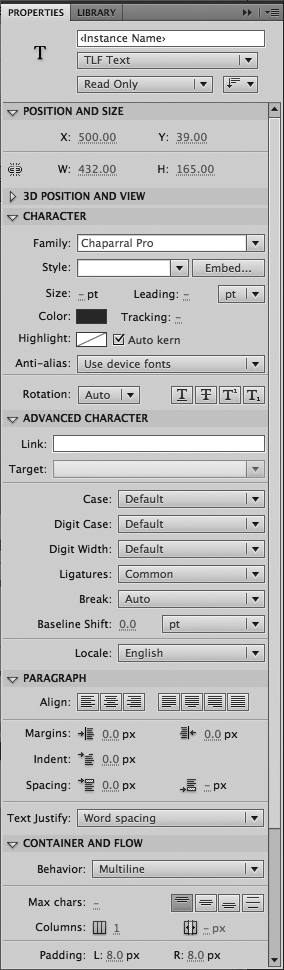
If you’re comfortable formatting type in page layout apps like InDesign, you’re in for a pleasant surprise with Flash Professional CS5. Now, for the first time, text frames in Flash can have properties such as insets, borders, background colors, and other professional attributes. A look at the Properties panel reveals a level of control over type previously unattainable in Flash (Figure 77a).
Figure 77a. If you didn’t know you were in Flash Professional, you might think you’re setting type in InDesign. Professional-level typographic attributes such as kerning, tracking, ligatures, frame insets, space before and after paragraphs, and even first baseline offsets are now controllable in Flash Professional.
In addition, text frame linking similar to InDesign improves and simplifies working with type. In Figure 77b, we see how text is linked from a two-column frame to other frames in the thread.
Figure 77b. Creating multiple text columns no longer means creating multiple text frames, as shown in this single text frame.

#78. Exploring the Deco Tool
The Decorative, or Deco, drawing tool turns graphic shapes into complex, geometric patterns. In a process known as procedural drawing, the Decorative drawing tool uses calculations that are applied to a movie clip or any graphic symbol you create.
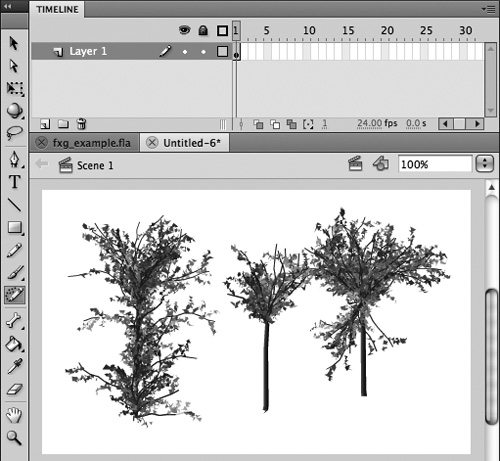
After you select a drawing effect, you can customize the way your artwork will be generated. Some options include brushes such as the Flower Brush, Vine Fill, and Lightning Brush. In the case of Vine Fill, Flash Professional generates artwork in an allotted area and fits vector artwork together based on built-in symbols, or custom symbols you create (Figure 78a).
Figure 78a. Vine Fill is only one of thirteen drawing effects available for the Deco Tool.

Selecting the Tree Brush effect, for example, gives you a choice of 20 different trees and allows you to specify tree scale, branch color, leaf color, and flower or fruit color, as seen in Figures 78b and 78c.
Figure 78b. The Deco Tool’s Advanced options control overall scaling as well as the color of branches, leaves, and flower or fruit.

Figure 78c. The Deco Tool makes drawing and animating trees almost too easy.
#79. Adding Spring to Animations (Inverse Kinematics)
The Bone Tool allows you to add joints to artwork or join together movie clips (referred to as armatures) so that movements in one affect the other in a naturalistic way. Using inverse kinematics, Flash Professional will figure out the various angles for all the joints and animate from the first pose to the next (Figure 79a).
Figure 79a. Thanks to Inverse Kinematics, here we see how the cape armature reacts naturally by swaying to the opposite side of the body armature.

New Inverse Kinematics settings now allow you to add Spring and Dampening settings to your bones (Figure 79b). (Spring is the bounce of objects and Dampening is the force that counters such motion.) Flash Professional applies physics to your motion to create realistic animations with the help of a few simple keyframes.
Figure 79b. The Properties panel controls settings like Joint Rotation, Spring Strength, and Dampening.

By combining various Inverse Kinematic settings, Flash is able to convincingly animate the toy seen in Figure 79c.
Figure 79c. Controls over spring and dampening add an extra degree of realism to the body and cape of this toy.

#80. Using Motion Presets
Motion Presets give you a fast way to add animations to your symbols. By applying presets, you can achieve commonly used animation techniques, even with realistic physics properties, such as bouncing (Figure 80a). Motion Presets also serve as a solid foundation for learning and studying the principles of Flash for those new to Flash Professional.
Figure 80a. In this basic example, a motion preset turns a static basketball into one that appears to bounce.

Note that motion presets can be applied to motion tweens only. Motion presets can not be applied to classic tweens.
To apply a motion preset, select a tweenable object (text or a symbol instance) on the stage and click the Apply button. Only one preset can be applied per object. In the event a second preset is applied to an object, the second preset will overwrite the previous preset (Figure 80b).
Figure 80b. Motion Presets display a helpful preview in the topmost section of its panel.

Motion presets also contain a specific number of frames. When you apply a preset, the tween span in the timeline contains this number of frames. If the target object already had a tween of a different length applied to it, the tween span adjusts to match the length of the motion preset.
Before clicking Apply to a Motion Preset, right-click the animation option you want and choose from either “start at current location” or “end at current location” as seen in Figure 80c.
Figure 80c. Motion presets have the added advantage of allowing you to specify whether the effect is applied to the start or end of the animation. You can hold down the Shift key when clicking the Apply motion preset button to end the preset at the current location.

Creating Your Own Motion Presets
Creating your own Motion preset is simple. Follow these steps:
- Place your object on the stage.
- Convert the object into a Symbol (Modify > Convert to Symbol).
- Apply a motion tween (Insert > Motion Tween).
- Right-click (Windows) or Control-click (Mac OS) on either the object itself on the stage or the frames in the timeline and choose Save as Motion Preset (Figure 80d).
Figure 80d. The Save as Motion Preset context menu.

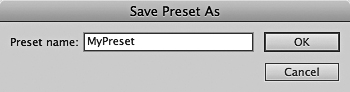
- Give the Motion Preset a unique name and click OK (Figure 80e).
Figure 80e. Give your preset a more descriptive name than the one shown here.
#81. Using Code Snippets
The Code Snippets panel (accessed by selecting Window > Code Snippets) provides a fast way to add the necessary ActionScript code to your Flash movie. Simply double-click on a code snippet in the panel and Flash Professional writes and inserts the proper code.
With the Code Snippets panel (Figure 81a) you can:
Figure 81a. The Code Snippets panel provides a long list of ActionScript 3.0 code that you can easily apply to any object or frame in Flash Professional CS5.
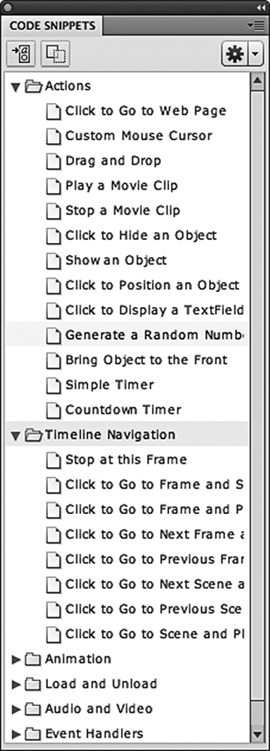
• Affect the behavior of objects on the Stage.
• Control the playhead in the Timeline.
• Add new code snippets that you create to the panel.
If you have an object selected, such as a button (Figure 81b), the code snippet will include the button’s name (if it is entered in the Properties panel). If you do not name your object, Flash Professional picks a name, then applies the code.
Figure 81b. With the button selected, Flash Professional writes the ActionScript using the button name. Notice how the Actions layer is automatically inserted above Layer 1.
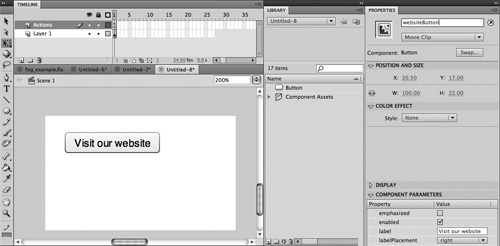
Figure 81c. Here we see how the Actions panel displays the applied action, which includes the button named “websiteButton.”

Once the code snippet is applied, an Actions layer is created in the Timeline and an ActionScript is applied to the same frame as the button. Opening the Actions panel will reveal the code written by the snippet.
#82. Working with Video
One of the most common uses for Flash is for playing video. You can add video to your project by simply importing a video file, or by dragging a video to the stage.
Before you start working with video, it’s important to understand the following:
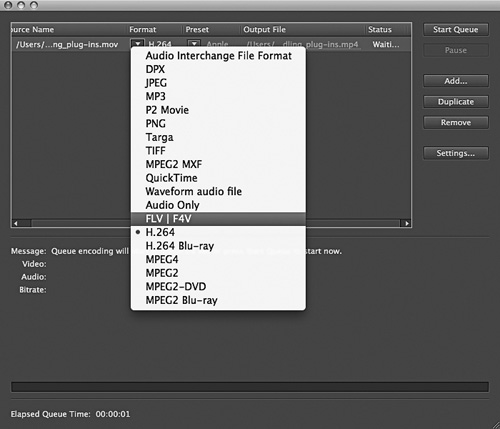
• Flash Professional can support only the FLV, F4V, and MPEG video formats.
• The Adobe Media Encoder (included with Flash Professional) converts other video formats to FLV and F4V (Figure 82a).
Figure 82a. Adobe Media Encoder converts multiple formats to FLV or F4V.
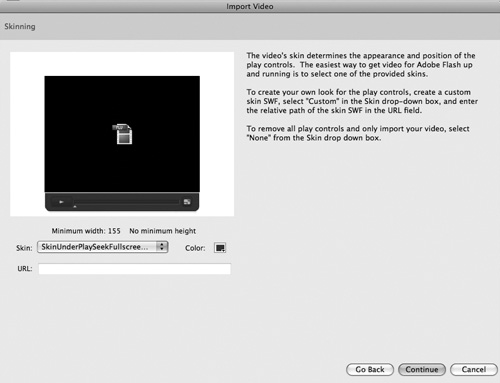
• Flash Professional includes the Video Import Wizard (Figure 82b), which opens when you choose File > Import > Import Video. This walks you through the steps for setting up video playback controls.
Figure 82b. The Flash Video Import Wizard provides a simple way to select your encoded video. Clicking the Continue button brings up another screen where you can give your video player a custom skin or interface.
• The FLVPlayback component lets you easily add video playback to a Flash file.
You can use Flash video in different ways:
• As a progressive download from a Web server.
• By streaming video using Adobe Flash Media Server.
• Via embedding video information inside a Flash file.
In addition, you can use the FLVPlayback component in conjunction with the Component Inspector (Figure 82c), and bypass the Video Import Wizard altogether.
Figure 82c. Using the Component Inspector together with the Property inspector allows you to make many direct changes to how your video is played and displayed in Flash Professional.

#83. Publishing Your Flash Projects
The most common format to publish to from Flash Professional is the Shockwave-Flash format, or SWF. This format requires the Flash Player to read and play a SWF file. Typically, Flash Player is found as a Web browser plug-in. Figure 83a shows how the Publish Settings dialog box lets you check all possible publish settings prior to proceeding.
Figure 83a. Prior to publishing a Flash project, double-check your settings by choosing File > Publish Settings to ensure everything is ready to go.
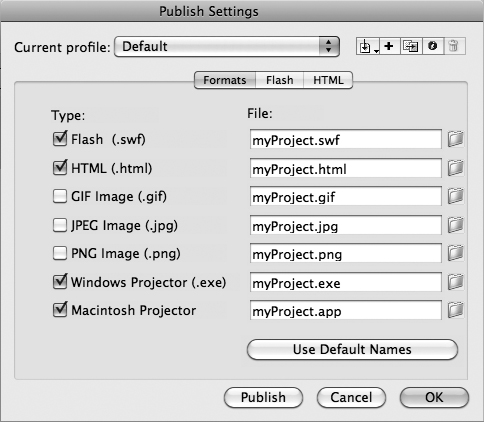
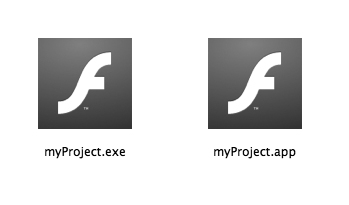
In addition to SWF, Flash Professional can also publish to executable projectors (applications) for both Mac OS and Windows (see Figure 83b). This format is most commonly used for CD-ROM and kiosk systems. These applications can run on their respective operating systems without the Flash Player being present; its playback capabilities are contained within the projectors themselves.
Figure 83b. These identical icons represent the Windows (left) and Mac OS (right) versions of the self-contained Flash projectors. Only their three-letter file name extensions differentiate the two.
Using Publishing Profiles
In the same way you might create a PDF export preset in InDesign, using Publishing Profiles in Flash Professional can save you a lot of time when faced with repetitive work.
To create a Publishing Profile, choose File > Publish Settings. In the dialog box, take a moment to set everything correctly before clicking the small plus (+) sign in the upper-right area of the dialog box to add your setting. A small dialog will appear (Figure 83c) where you can name your new profile. Click the button to the left of the plus (+) sign to import or export existing publishing profiles.
Figure 83c. Taking a moment to create publishing profiles can save you lots of valuable production time down the road.

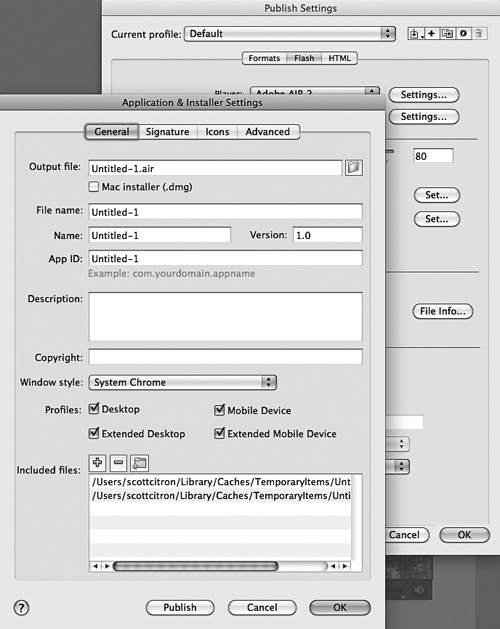
#84. Publishing AIR Applications
In addition to publishing formats targeted at Flash Player, Flash Professional also publishes to Adobe’s AIR format (Adobe Integrated Runtime). A cross-platform format that takes advantage of Flash, Flex, HTML, JavaScript, and Ajax technologies, Adobe AIR allows you to build and deploy Rich Internet Applications to the desktop. Users interact with AIR applications in the same way as they would with native apps.
From the Flash Professional publishing options, choose Adobe AIR 2, then Settings and set the properties of your AIR application (Figure 84a).
Figure 84a. Click the Flash tab in the Publish Settings dialog box to enable this view. Clicking the Player pop-up menu displays the Adobe AIR 2 setting seen here.

Settings for your AIR application include the window style, operating system environment options, custom icons, and finally, the ability to digitally sign your Adobe AIR application before distributing it. After you choose Adobe AIR 2, click the Settings button to the right to invoke the dialog box shown in Figure 84b.
Figure 84b. The Application & Installer Settings dialog box offers you a variety of additional settings for your AIR application.