
1. Getting to Know Microsoft Word
If you have never worked with Microsoft Word before, you are in for a treat; and if you have worked with the program before, you’ll be happy to know that this new version is better than ever. Microsoft Word is an amazingly powerful program and there’s seemingly no end to the types of documents you can create with it. Oh, sure, you can type up a simple letter in a jiffy, but did you know you can use it for this:
• All kinds of reports, from year-end budget reports to company prospects and beyond
• Research papers, term papers, essays, and the like
• Résumés, business cards, and all manner of promotional materials
• Brochures, flyers, and newsletters
• Organized lists, menus, to-do sheets, and so on
• Personalized calendars for home, office, and school
• Greeting cards, postcards, and notecards
• Photo albums for every occasion
• Faxes, labels, and coordinated mailing materials
• Web pages—yes, even web pages!
That’s just the tip of the proverbial iceberg! As you can see from this small list of typical projects, you can use Word to create a wide variety of documents for a multitude of purposes, even those that rely more on visuals than on text. Are you ready to see what you can do?
Introducing Word
Let’s start with basic introductions, shall we? Meet Microsoft Word, the most popular word processing program in the known universe. Seriously. Some estimate a half a billion people use Word—500,000,001 counting you. Why is it so popular, you might wonder? Because it’s intuitive, easy to use, loaded with features to make great-looking documents, and extremely reliable. As you are about to find out, Word is the powerhouse of the Microsoft Office suite of programs, and with it, you can rule the world—or at least present yourself through polished, professional-looking documents.
In case you are interested in its origins story, Microsoft Word traces its roots back to 1983 when it was launched as software called Multi-Tool Word for Xenix and MS-DOS. The name was soon shortened to Word, and thus began its climb to the top of the software charts. Today’s Word—version 2013—has come a long way and through numerous version numbers, interface tweaks, and platforms, both Windows and Mac, to become the software it is now.
Word has reigned as the go-to program for businesses and organizations both large and small, allowing users to create all sorts of documents for professional use. As you can imagine, a versatile tool like Word is a great way to maintain efficiency in the workplace. You can easily share documents between people, and Word even offers reviewing tools to help you manage edits to the same document from several users.
However, Word is equally valuable to home users as well. For every office use, there is a home use for creating documents ranging from household budgets to school reports. If your work happens to span both office and home time, Word handily transitions your work between environments. You can easily email files, store them in the cloud (online storage services) to access them from any computer, and transport files on portable storage devices (such as USB flash drives and so forth).
Just about every form of Word through the years has shared the same fundamental layout, consisting of a big, empty area in the middle where you can type in text, and other less-intrusive areas along the edges of the program window to access commands to help you work with the text. As you can see in Figure 1.1, the same fundamental layout is true for Word 2013.
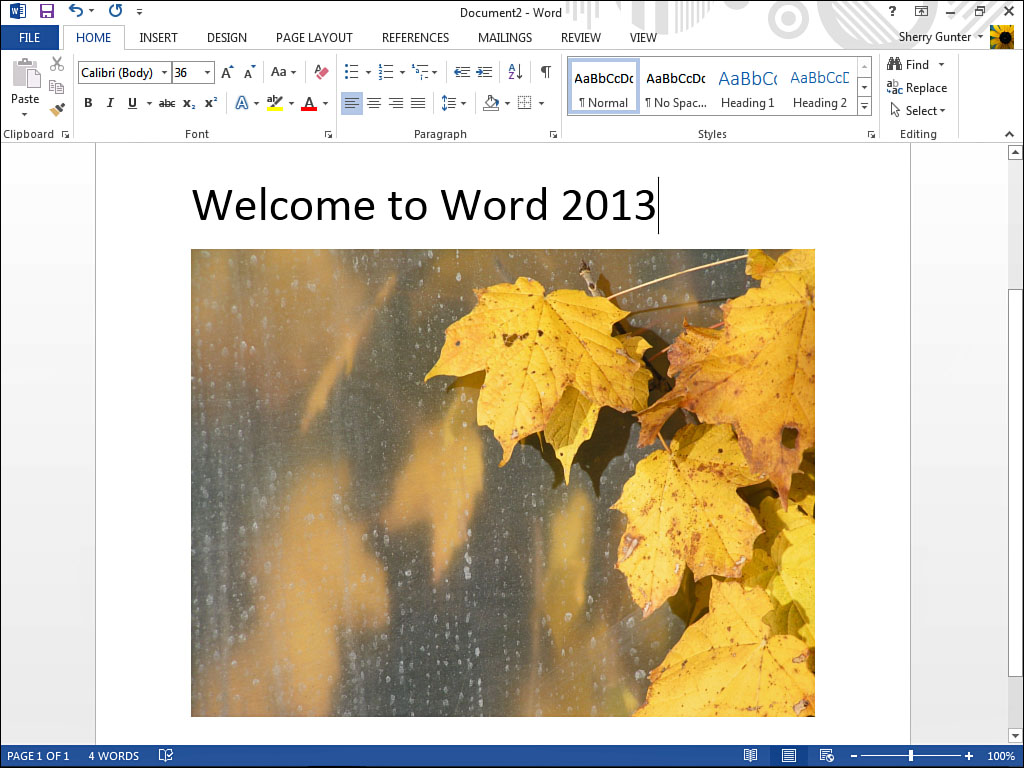
FIGURE 1.1 The new and improved Microsoft Word 2013.
![]() Note
Note
If you’re trying to figure out whether you want to purchase Word 2013 or not, here’s what you need to know to help you make an informed decision. Microsoft Word 2013—and the entire Office 2013 suite of programs—can run on Windows 7 or Windows 8. It will not run on Windows XP or Vista. You can run Word on laptops, desktop computers, or tablets (with sufficient drive space and RAM). Word requires at least 1GB of RAM and 3GB of hard disk space. Word is available as a standalone program or as part of the Microsoft Office suite of productivity software. Word is also a part of the new Office 365, as cloud-based subscription software you can access on the Internet, for a monthly fee.
What’s New in Word 2013?
Microsoft has made quite a few improvements to Word since its last rendition. For starters, it is retooled a bit to work with the new Windows 8 operating system. If your computer is one of the newer touchscreen models, you can utilize touchscreen techniques to interact with the program, such as selecting text using your finger to drag across the screen or tapping on the screen to activate a command. If your computer doesn’t utilize touchscreen technologies, don’t worry about it; you can use the traditional mouse, keyboard, or mousepad (on a laptop) methods to work in Word.
Here’s a rundown of what else you can expect in the new Word 2013:
• A new, modern interface with a customizable watermark design in the upper-right corner.
• A new Start screen, also called a landing page, with quick access to recently used files, templates, and stored content.
• Speaking of templates, Word 2013 offers more than ever before. You can search for templates for every kind of document imaginable.
• New cloud connectivity—with an online connection and a Microsoft account, you can store documents online and access them from anywhere or any computer. Cloud connectivity includes Office 365 (a subscription-based software service) and SkyDrive (online file-hosting service).
• An improved Ribbon at the top of the program window that organizes commands.
• You can now add apps for Word and other Microsoft Office programs, such as dictionaries.
• The new Reading mode, which works great on a tablet, lets you browse a document like you’re reading a book.
• Bookmarks let you pick up reading right where you left off in a document.
• You can now open PDF file formats and edit their content just like any other Word document.
• Improved markup tracking to help multiple users keep track of changes in a shared document.
• Improved graphics features to help you work with artwork and pictures you add to a document, including alignment guides to help you position graphics with your text.
• You can now insert online videos into your documents, such as content from YouTube.
There’s more, but that’s much of the big stuff. Let’s get started by launching your own Word program.
Starting Word
You can start Word just like you start any other program on your computer. If you are using Windows 7, for example, you can apply any of these techniques:
• Click the Start button, type Word, and then click Word 2013 at the top of the Start menu.
• Double-click the Word shortcut icon on the desktop (if there is one).
• Click the Start button, click All Programs, click Microsoft Office 2013, and then click Word 2013.
• Double-click any Word document file in Windows Explorer.
Figure 1.2 shows the Windows 7 Start menu with Word 2013 listed at top.

FIGURE 1.2 You can start Word using the Start menu in Windows 7.
If you are using Windows 8, try one of these methods:
• From the Windows 8 Start screen, type Word, and then from the Apps search screen, click Word.
• Click the tile for Word on the Start screen, and Word opens on the Desktop.
• In Desktop view, you can click Word’s shortcut icon on the desktop, if available.
In Windows 8, Word launches over on the Desktop, which means you can minimize and maximize the program window, and the taskbar shows the open Word program icon.
![]() Note
Note
If you’re new to Windows 8, try Windows 8 Absolute Beginner’s Guide, available in fine bookstores online and off. It’s sure to get you up and running fast with the latest Microsoft operating system.
After you open Word, the first thing you see is a landing page, also called a Start screen, shown in Figure 1.3. The Start screen is new to Word 2013. The screen lists any recent Word files you worked with, as well as templates to help you get started with making new documents. You can also access the Open Other Documents feature to look for other documents.

FIGURE 1.3 Word’s new Start screen is a jumping-off point for starting new documents or opening previously saved documents.
When presented with the Start screen, you can go a lot of different directions based on what you’re trying to accomplish.
• If you want to open a document you’ve previously saved, you can look through the Recent list and click a document to open it.
• To open a file, click the Open Other Documents link to summon the Open screen where you can choose to open a document stored on your computer, SkyDrive, or other location.
• To create a new document based on a template, you can scroll through the selections and pick one that closely matches what you would like to make. If you can’t find one you like, you can conduct an online search.
To help get things rolling, let’s start by clicking the Blank document option on the Start screen. Doing so opens a new, blank document in the Word program window.
![]() Note
Note
I know you’re not ready to close the program yet, but you’ll learn the differences between closing the program window and simply closing a single document later in this chapter, just in case you were thinking about it already.
![]() Tip
Tip
Tired of the Start screen? You can turn it off so that Word automatically starts a new, blank document every time you launch the program, thus skipping the extra window to jump through to start working in Word. To turn off the Start screen, click the File tab on the Ribbon, click the General options, and then deselect the Show the Start screen when this application starts check box. Click OK to apply the change. The next time you launch Word, you go right to a blank document. You can always turn the Start screen on again, if you want.
Exploring the Program Window
Microsoft Word shares a similar look and feel with all the Microsoft Office programs, including Excel, PowerPoint, and Outlook. The bonus in this news is that if you learn your way around one program, you can use the same techniques in another. Even if you don’t plan on using any other Microsoft programs, the skills you learn in Word 2013 carry over into other non-Microsoft programs, too. Lots of other software manufacturers, for example, adopted the Microsoft Ribbon approach to organize and present commands and features.
If you’re new to using Word, take a few moments and familiarize yourself with the program window’s many nuances. Take a look at the blank document you opened, shown in Figure 1.4.

FIGURE 1.4 Here’s an example of a blank document open in the Word program window.
Let’s go over the various elements you see onscreen and what they’re used for in Word:
• Word icon Click this icon to display a drop-down menu of program window controls, such as Minimize (reducing the window to an icon on the taskbar), Maximize (enlarging the window to optimize workspace), and Close (exiting the program).
• Quick Access toolbar Use this toolbar to quickly perform a common Word task, including saving a file, undoing or redoing an action. You can add other common tasks to the toolbar, too, such as the command for opening a file or printing.
• Title bar Look for the name of your document on the title bar. If you haven’t named it yet, a default name appears, such as Document1 or Document2.
• Ribbon The collapsible bar across the top of the document area houses most of the commands you need to work in Word. Related commands are grouped into tabs, and you click a tab to view its various commands.
• Document work area The middle of the program window is where you do all your actual work, typing in text, formatting it to look nice, and so forth.
• Scroll bar Use the scroll bar on the right side of the window to move around in your document. A horizontal scroll bar also appears if there’s more to view in the window width.
• Status bar The status bar displays information such as the number of pages in a document or the word count, and the right side of the status bar offers shortcuts to view modes and zooming tools.
• Program window controls Use these controls to minimize, maximize, and close the program window. These same controls are also available through the Word icon. In addition to window controls, you’ll find icons for accessing Help and collapsing/expanding the Ribbon.
• Account name As part of the new cloud integration (online storage) Word lists your Microsoft account name and photo, which you can click to adjust account settings or switch user accounts.
Program windows are resizable and collapsible. You can resize the window by clicking the Restore Down icon (see Figure 1.5). This reduces the size of the window, as shown in Figure 1.6, and you can then drag it around by its title bar to move it. You can also click and drag a window corner to resize the Word window. To make it full-screen size again, click the Maximize button, which appears in place of the Restore Down button when the window is smaller in size. To minimize the window and hide it completely, click the Minimize button; click the Word document on the taskbar to view the Word window again.

FIGURE 1.5 You can use the program window controls to control the actual window.
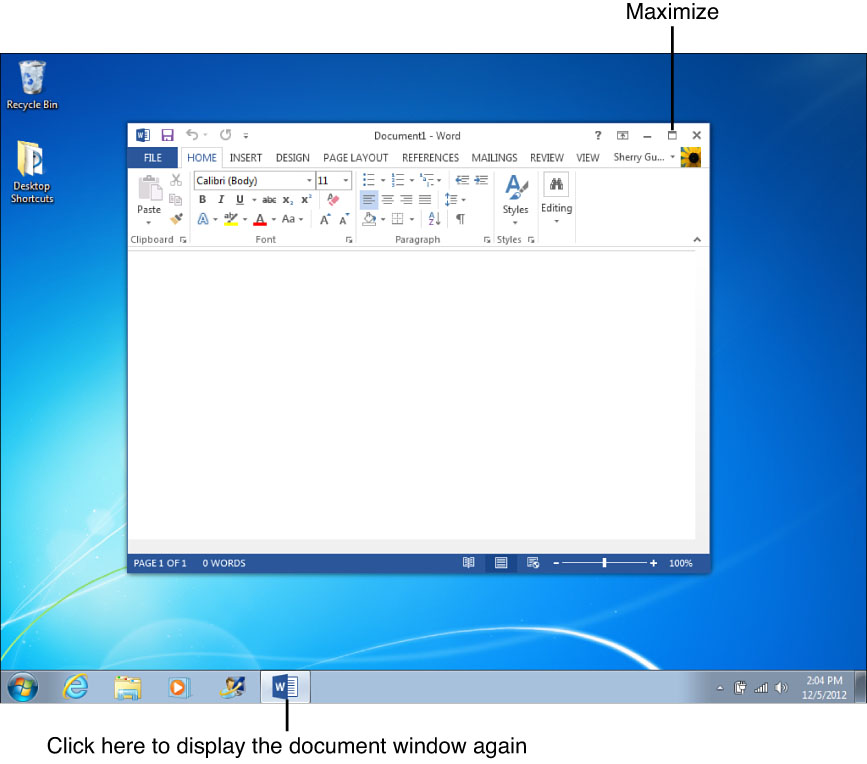
FIGURE 1.6 You can resize and move the Word window around the computer screen, as needed.
![]() Tip
Tip
You can utilize window controls on all kinds of windows and dialog boxes you encounter while working with Word. For example, the Close button—displayed with an X—is handy for closing dialog boxes, tool palettes, panes, and more.
Finding Help with Word Issues and Topics
If you ever find yourself in a jam regarding a word-processing task, you can seek help through the Word Help feature. When activated, Help opens a special window you can use to look up topics, search online for additional resources, and generally learn more about the program or the feature you are working with at the time. With an online connection, Help taps into resources from the Microsoft Office website. Help offers tutorials, links to related topics, and a table of contents you can peruse.
To utilize Help, simply click the Help icon in the upper-right corner of the program window. As soon as you do, a Word Help window opens, as shown in Figure 1.7. You can scroll through the featured topics, if you like. You can click a link to learn more about a subject; Help displays additional information in another window, as shown in Figure 1.8.

FIGURE 1.7 Help is always a click away, if you need it.

FIGURE 1.8 You can peruse the Help topics and use the navigation buttons at the top of the window to move around the Help.
After you open a Help window, here’s what you can do:
• Use the navigation buttons (Back and Forward) at the top of the Help window to move back and forth between topics.
• Click the little icon that looks like a house, aptly named Home, to return to the main Help window you started in.
• If you’re having trouble viewing the window’s type size, you can click the Text button to toggle back and forth between regular and large type.
• Need to print out a help topic? Click the Print button.
• Use the Search box to search for keywords and topics.
• To close the Help window, click its Close button (the X in the upper-right corner of the window).
![]() Note
Note
Although the Help window offers lots of assistance in learning new commands and features, you might also open your browser window (such as Internet Explorer) and look around the Microsoft Office website (office.microsoft.com) for additional resources, forums, and other support help.
Exiting and Closing in Word
As it turns out, exiting and closing are two different things in some software programs, including Word. When you finish using Word, you can exit the program. When you finish a document, you can close it, but keep the program window open to work on more documents. One action completely closes a program, whereas the other keeps it open and simply closes the current file.
Closing the Word program window when you’re done using it is actually a good idea. Keeping it running in the background does tend to use up some of your computer’s processing power.
Regardless of whether you’re exiting or closing, if you haven’t saved your work yet, Word prompts you to do so, as shown in Figure 1.9. You can choose Save or Don’t Save, or you can back out of the whole question by selecting Cancel.
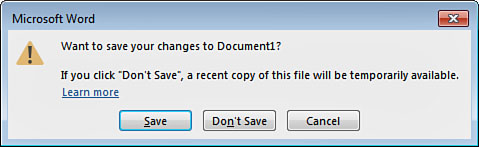
FIGURE 1.9 If you haven’t saved your work, Word prompts you to do so before exiting.
To close the current document, yet keep the program window open, follow these steps:
1. Click File on the Ribbon.
2. Click Close (see Figure 1.10).

FIGURE 1.10 The File tab opens this screen where you can find the Close command to close a document, but not the entire program.
To close the entire program window, use any of these methods:
• Click the Close icon in the upper-right corner of the program window.
• Click the Word icon in the upper-left corner and click Close.
• Right-click the Word document on the taskbar and click Close window.
As soon as you activate the Close command, Word closes entirely.
If you would rather just get the program window out of the way for a bit while you tackle other computer tasks, you can minimize the window. Minimizing the Word window reduces it to a button icon on the Desktop taskbar. To open it again, just click the icon.