
20. Collaborating on and Reviewing Documents
Word processing doesn’t have to be a lonely activity. You can share your documents with other users. Word has lots of tools that let you track and check revisions, insert comments for others, compare documents, and go over each edit with a fine-toothed comb. Well, maybe not a comb, really, more like a digital brush, but you get the general idea. You can easily collaborate with others, and I show you how in this chapter.
Tracking and Reviewing Documents
If you share your documents with other users in an editorial-like environment—and by that I mean swapping files for feedback in which everyone adds their own two cents to a document—you can turn on Word’s Track Changes feature and keep track of who makes what changes to the text. For example, if your department is working on a project that involves everyone’s input on the team, you can pass the document around and collect everyone’s changes, then review the changes, accepting or discarding each one as needed. The Track Changes tool allows you to track comments, insertions, deletions, formatting changes, and more. Sounds like fun, right? Or are you just having flashbacks to the fourth grade when the teacher marked up your essay on why badgers make good pets and put a giant F at the top in bright red marker? It’s just me, isn’t it?
Figure 20.1 shows an example of a document being edited by several users. The Ribbon’s Review tab has a group of tools for noting everyone’s edits under the group name Tracking. If you have a document ready for sharing, you can turn on tracking and send it forth. When you get the document back with everyone’s input, you can review it change by change using the tools found in the Changes group (also located on the Review tab, right next door to the Tracking group).

FIGURE 20.1 Here’s an example of a document with changes being tracked.
You can also control how the changes appear in the document as you add your input. You can choose to view changes in full as you make them, or hide them so you can concentrate on the text and not all the editing marks. Hiding the edits doesn’t mean they’re not still there and being saved with the document, because they are. The only way to remove the tracked changes is to accept or reject them.
Turning on Tracking
The Track Changes tool toggles on and off. You’ll know it’s on when the button appears highlighted on the View tab. You can also lock it so it’s sure to stay on for the next person who uses the file.
To turn on Word’s tracking feature, follow these steps:
1. Click the Track Changes drop-down arrow (see Figure 20.2).
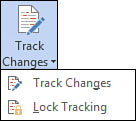
FIGURE 20.2 The Track Changes button.
2. Click Track Changes.
The button now appears activated on the tab, shown in Figure 20.3.
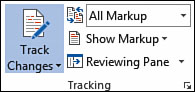
FIGURE 20.3 The Track Changes button now appears active.
If you want to make sure the tracking feature stays on at all times, or at least until it’s review time, you can assign a password. This way, no one can accidentally (or on purpose) turn the feature off, thus ensuring all the edits stay put. To lock tracking, follow these steps:
1. Click the Track Changes drop-down arrow.
2. Click Lock Tracking.
3. The Lock Tracking dialog box opens, as shown in Figure 20.4. Type in a password.

FIGURE 20.4 The Lock Tracking dialog box.
4. Retype the password to confirm.
5. Click OK.
To unlock it, repeat steps 1 and 2 again, this time opening the Unlock Tracking dialog box. Type in the changes you want to see while they happen. For example, you might want to see every deleted line or every formatting change that occurs. Or maybe you’re the exact opposite and don’t want to see crossed-out lines while you concentrate on your work. You might prefer to see everything organized in the Reviewing pane, or all the comments off to the side. It’s your view, so it’s your choice. Let me tell you more about your choices, though, so you can find the different options when you want them.
Use the Display for Review drop-down menu, shown in Figure 20.5, to choose a display mode. Here are your choices:
• Simple Markup—Changes are noted only with a vertical line in the left margin next to the line of text containing the change. Comments are indicated by an icon in the right margin.
• All Markup—This view shows all the changes to a document, including red lines through deleted text, underlining for inserted text, and color coding for each different user’s input comments.
• No Markup—This view shows the changes incorporated into the document without any markup details or notes.
• Original—This view displays the document in its original state, before any edits.
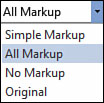
FIGURE 20.5 The Display for Review menu.
In addition to your display of revisions, you can also customize which types of revisions appear onscreen. Click the Show Markup drop-down arrow, shown in Figure 20.6, to turn the display of individual types of revisions on or off, such as comments people add, insertions and deletions, and formatting changes. Many of these markup items are displayed already, but you can turn each one on or off as needed—a check mark next to the name means the item is displayed, no check mark means the item is not displayed.
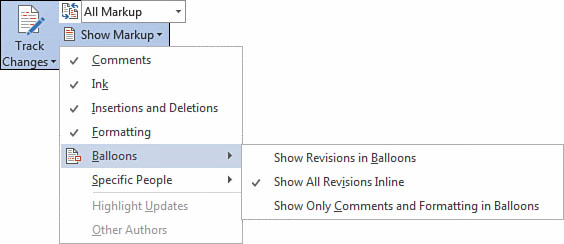
FIGURE 20.6 Control which revisions appear using the Show Markup menu.
Depending on the settings you have turned on, you can view revisions in balloons or inline. The inline choice shows edits in the document only, whereas the balloon choice lets you see not only the revisions in the text, but also the details about who made the changes. It does this by displaying the user’s name or initials along with the revision off to the right side of the document, as shown in Figure 20.7. In previous versions of Word, the revision details appeared in actual comic book balloon-like boxes. Those balloon boxes are gone now, but the concept remains. To change the view of balloons, click the Balloons command in the Show Markup menu and make your selection.
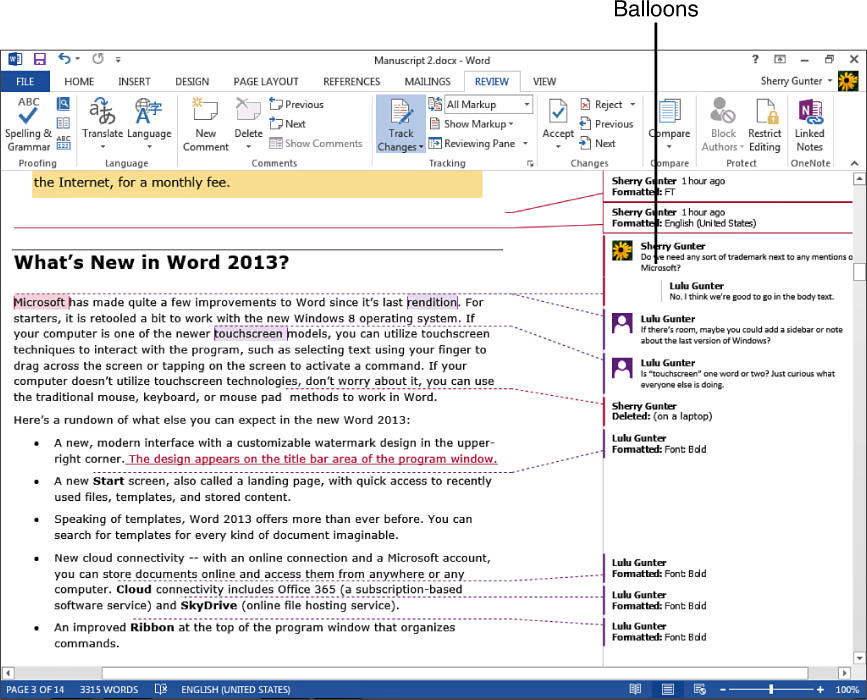
FIGURE 20.7 Balloons display details about the revision and the initials of who made the revision.
There’s one more way you can review revisions—use the Revisions pane, shown in Figure 20.8. This pane lists all the revisions in order. To display the pane, click the Reviewing Pane button on the Review bar. You can choose to view the pane vertically (as shown in Figure 20.8) or horizontally. To jump to an edit in the actual document, click the revision in the list.

FIGURE 20.8 You can use the Revisions pane to view each revision in a document.
To turn the pane off, click the pane’s Close button or click the Reviewing Pane button on the Review tab again.
![]() Tip
Tip
You can open the Track Changes Options dialog box to control which revisions appear in the document, too. Click the Change Tracking Options icon located in the lower-right corner of the Tracking group of tools to display the dialog box.
Working with Comments
You can use Word’s commenting feature to add comments to documents as part of your reviewing tasks. For example, you might want to add a note that everyone else sees, querying a sentence or word choice. Other reviewers can respond to the comment. For example, if you are viewing revision marks using balloons (see the previous section to learn more), comments appear off to the right. To respond to someone’s comment, look for a comment icon, as shown in Figure 20.9. Click the icon to add your own reply, as shown in Figure 20.10.
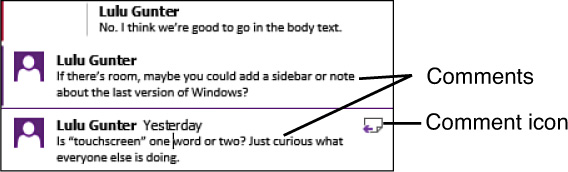
FIGURE 20.9 Find Word’s commenting tools among the Comments group on the Review tab.

FIGURE 20.10 Type in a response to a comment, and it appears below the original comment.
To add a new comment, click in the document where the comment applies or select the text. Click the New Comment button on the Review tab (see Figure 20.11). Word adds a new comment balloon off to the right if you’re using the markup balloons, similar to what you see in Figure 20.11.
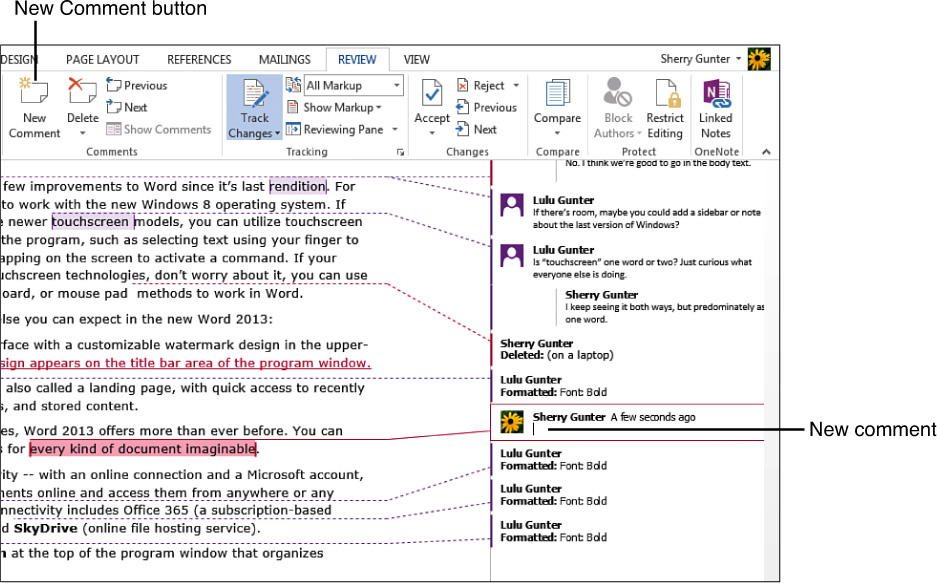
FIGURE 20.11 You can use the New Comment button to insert a new comment.
If you’re using the Revisions pane, it appears there, as demonstrated in Figure 20.12. In either case, you can start typing in your comment text immediately. Click outside the comment area when finished.
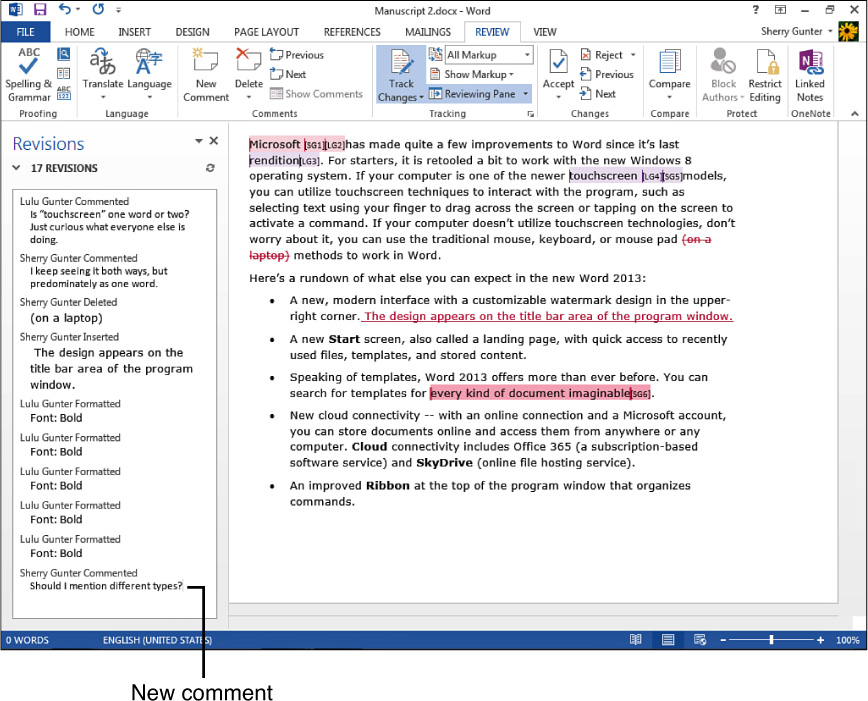
FIGURE 20.12 You can also use the Revisions pane to insert comments.
To remove a comment, click the comment tag in the text (see Figure 20.13), click the Delete button on the Review tab, and click Delete. The drop-down menu also has commands for removing all the comments.
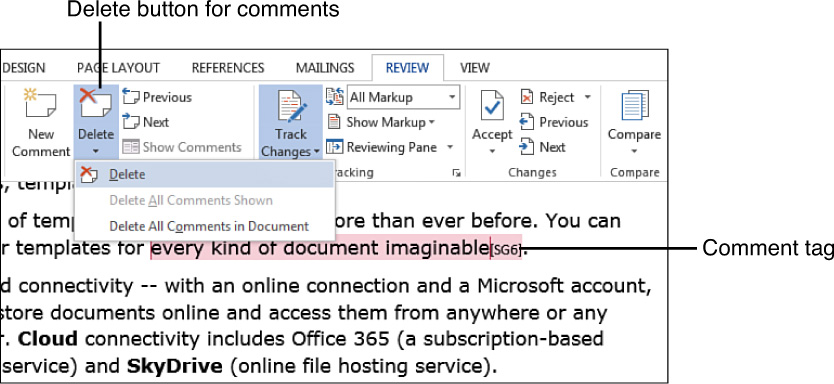
FIGURE 20.13 One way to remove a comment is to click its tag and click the Delete button.
I’ve saved the best for last—the shortcut menu is a super-fast way to work with comments. Right-click a comment to view the pop-up menu shown in Figure 20.14, which now includes a set of commands for comments (because you right-clicked a comment, the comment commands appear; right-click menus are always task-related). You can edit a comment, reply to it, delete it, or mark it as done. When you mark a comment as completed, it appears grayed out if you’re viewing comment balloons.
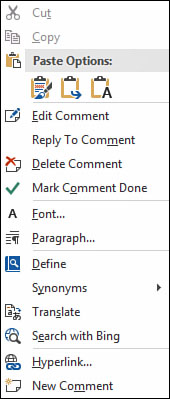
FIGURE 20.14 Right-click a comment to reveal a shortcut menu of commands.
![]() Tip
Tip
You can use the Previous and Next buttons in the Comments group of tools to navigate your document comment by comment for review.
Reviewing Changes
When you get your document back, you can start reviewing it and deciding which changes to keep and which to dismiss. You’ll find tools for doing all of this located in the Changes group on the Review tab, as shown in Figure 20.15. Starting at the top of the document, you can progress from one revision to another. You might prefer to turn on the revision balloons to see who made what change, or display the Revisions pane (see the previous section to learn more about each).
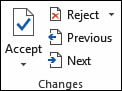
FIGURE 20.15 Look for the reviewing tools right next door to the tracking tools on the Review tab.
Here’s how to utilize the reviewing tools:
• Click the Next button to move to the next revision in the document.
• Click the Previous button to move back to the previous revision.
• Click the Accept button’s drop-down arrow to display a menu of choices for accepting the change.
• To accept the change and move to the next revision directly, click the Accept button (not the drop-down arrow).
• Click the Reject button’s drop-down arrow to display a menu of choices for rejecting the change.
• To reject the change and move to the next revision directly, click the Reject button (not the drop-down arrow).
• To accept all the changes in the document, click the Accept button’s drop-down arrow and click Accept All Changes.
• To reject all the changes in the document, click the Reject button’s drop-down arrow and click Reject All Changes.
• To accept or reject all and turn off the tracking feature, opt for the last choice listed in the Accept or Reject drop-down menus.
To turn off the Track Changes tool when finished with the document review, click the Track Changes button on the Review tab. Be sure to save your cleaned-up version of the document, or you’ll have to repeat the process of reviewing and accepting/deleting everyone’s changes.
Comparing Documents
If a Word document wasn’t reviewed with change tracking turned on, you still can compare the edited version with the original version automatically to see what changes were made. You compare an original document with an updated version by creating a third document that displays all the differences between the two documents. Changes are marked in the same way that tracked changes are marked with multiple authors, and you use the same reviewing principles to check each change in the comparison document.
To compare documents, open the original document in Word and follow these steps:
1. Click the Review tab.
2. Click the Compare button (see Figure 20.16).
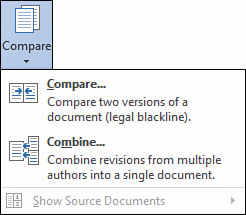
FIGURE 20.16 Use the Compare button to launch Word’s document-comparing feature.
3. Click Compare.
4. In the Compare Documents dialog box, shown in Figure 20.17, click the Original document drop-down arrow and choose the original document file. (You can also navigate to the file using Browse option.)
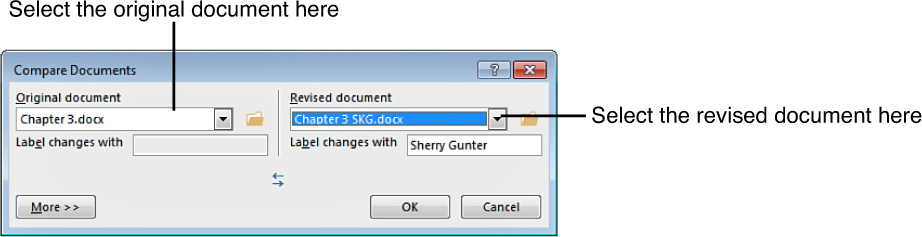
FIGURE 20.17 Specify which two documents you want to compare.
5. Click the Revised document drop-down arrow and choose the revised version of the file (or click the Browse option to navigate to the file).
6. Click OK.
Word opens a new document comparing both versions, along with the original and revised documents and the Revisions pane (see Figure 20.18). Just like the tracking changes feature, Word shows revisions in the document as well as in the Revisions pane. You can use the tools on the Review tab to change how markup is displayed, and review the document, accepting and rejecting changes as needed. When you’re finished, remember to save your revised document!
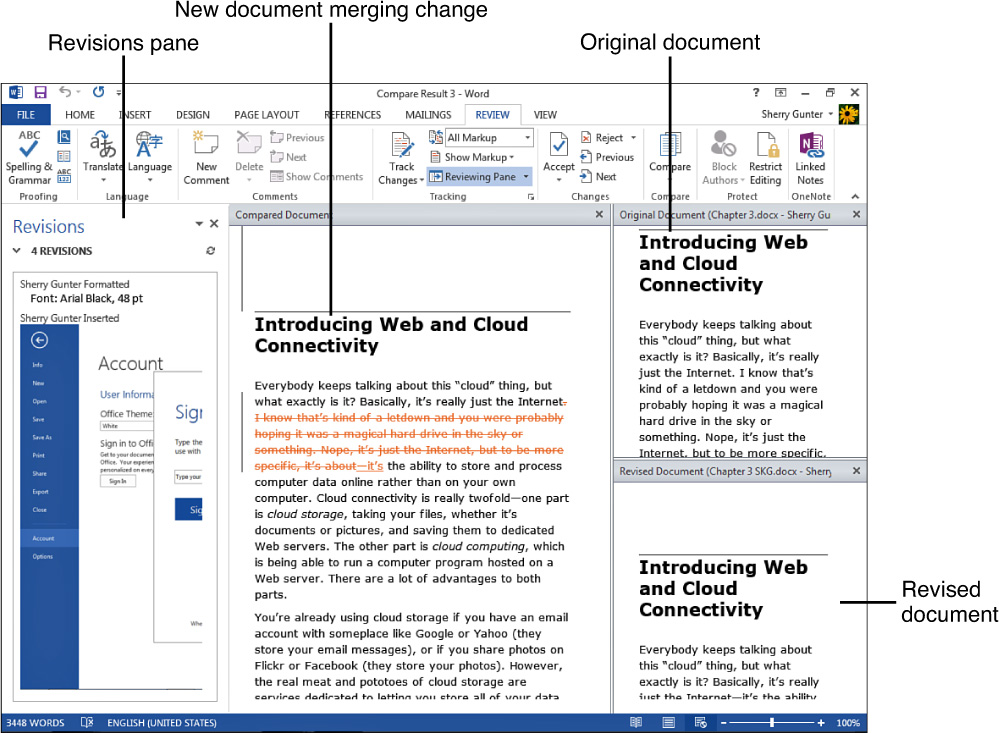
FIGURE 20.18 The screen is filled with the two documents you’re comparing, a third showing the differences, and the Revisions pane.
![]() Tip
Tip
You can click the More button in the Compare Documents dialog box and choose what elements you want to compare, such as comments and formatting.
Editing Portable Document Format (PDF) Files
New to Word 2013, you can now edit PDF files as documents. Although you could certainly view PDFs in Word in previous versions of the program, and save documents to the PDF file format, you could not edit a PDF file directly. Instead, you had to rely on a separate PDF editor to make changes to a PDF file. The PDF format, which stands for Portable Document Format, is an open document format that allows users with differing programs to read the file. PDF files are quite common these days, and now you can open and edit them within Word, after doing a little conversion first.
When you attempt to open a PDF file, a prompt box appears, like the one shown in Figure 20.19, warning you you’re about to convert the file. Click OK, and it’s off and running. Within seconds (usually), the file is converted and the document opens onscreen just like any other text file. You can now work with the document, making changes as needed. You can even save it back to its PDF file format (click the File tab, choose Save As, and choose the PDF file format when naming the file).
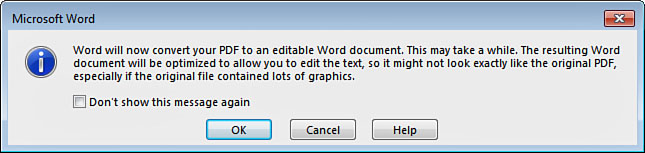
FIGURE 20.19 This prompt box appears when you attempt to open a PDF file.
You can also open a PDF file from the Explorer window and designate Word as the program to edit PDFs. Right-click the PDF file, click Open with, and click Word (desktop), as shown in Figure 20.20. The prompt box appears (see Figure 20.19) and you can convert the file.
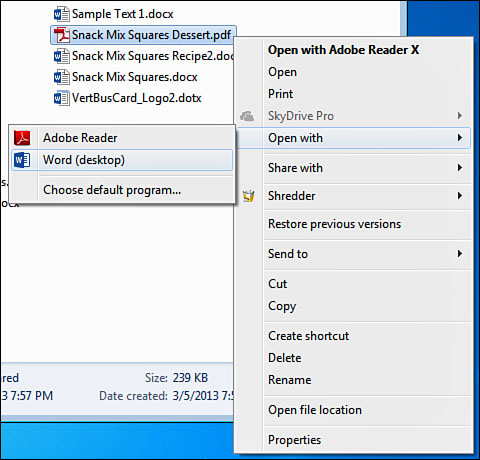
FIGURE 20.20 You can also open a PDF file in Word via the Explorer window.
Sharing Documents with Others
There are lots of ways you can share your documents with other users, especially for collaborating and reviewing. Let’s go over the obvious options:
• You can save a document to a USB flash drive (those portable stick things that plug into your laptop or computer’s USB port) and share it that way.
• You can send your document as a file attachment in an email message (more on that option in the next chapter).
• You can save your document on your SkyDrive account and invite people to access the file.
That’s right—the last suggestion is all about cloud storage, making the document available online. If you have a SkyDrive account, you can share your files online. SkyDrive is part of your Microsoft account, which you created when you installed Word. (Revisit Chapter 3, “Setting Up Accounts and Services,” if you need a refresher course regarding your Microsoft account.)
![]() Note
Note
If you haven’t set up your SkyDrive account, click the File tab in Word, and then click Save As, Add a Place. Click the service you want to add; in this case, SkyDrive. Sign in to the account using your user name and password. After doing this, the new location now appears listed as a choice for places to save files to in Word.
Let me show you how sharing is done. Open the file you want to share and follow these steps:
1. Click the File tab.
2. Click Share to open the Share screen, shown in Figure 20.21.
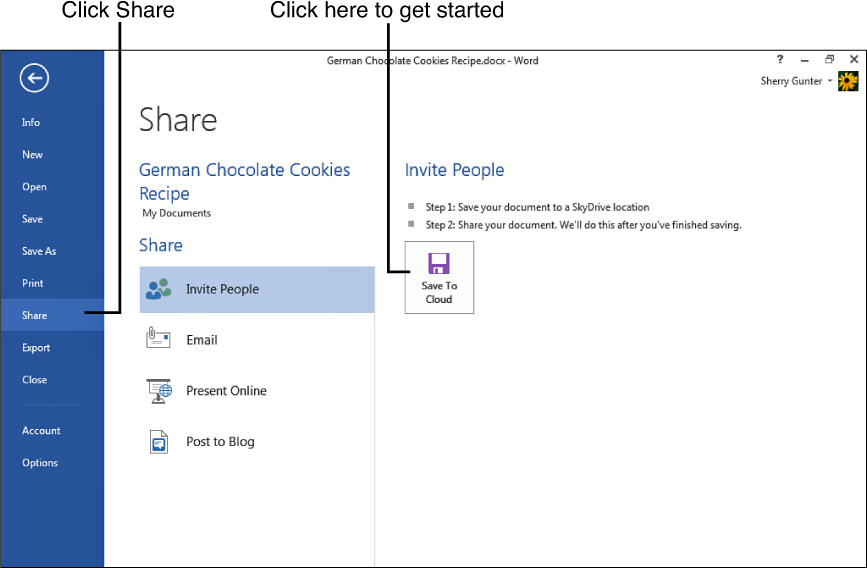
FIGURE 20.21 Start with sharing the document to the cloud.
3. Click the Save to Cloud button.
4. The Save As screen opens. Click the SkyDrive location, shown in Figure 20.22.
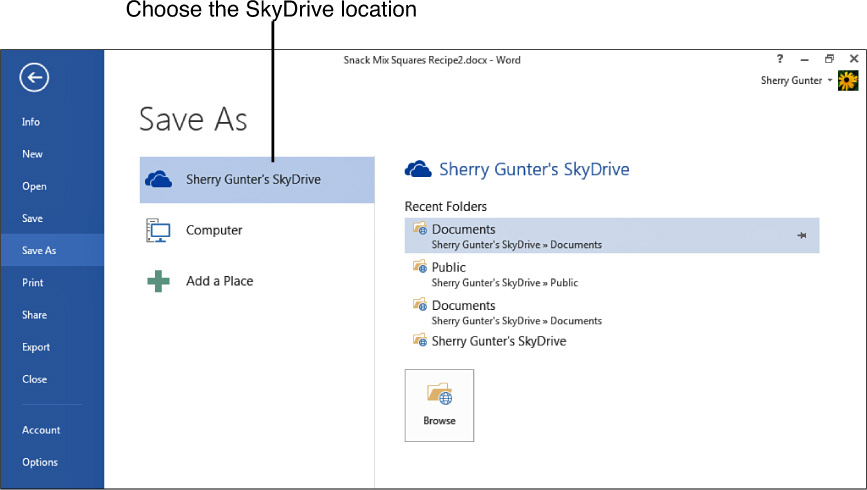
FIGURE 20.22 Tell Word which online service you want to use; in this case, SkyDrive.
5. Click Browse or click a recent folder accessed on SkyDrive.
6. The Save As dialog box opens, similar to Figure 20.23. Type a name for the file, if needed, and click Save.
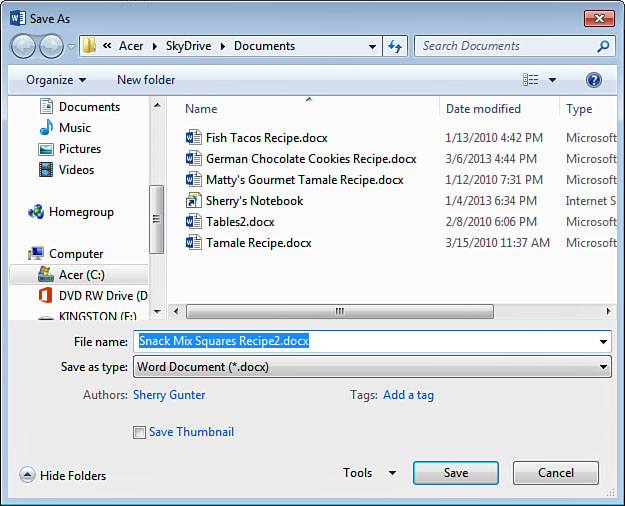
FIGURE 20.23 Save the file to the SkyDrive folder.
7. Now you’re back at the Share screen again, as shown in Figure 20.24. In the Invite People area, type in the email address of the person you want to share with (use a semicolon to separate multiple addresses).
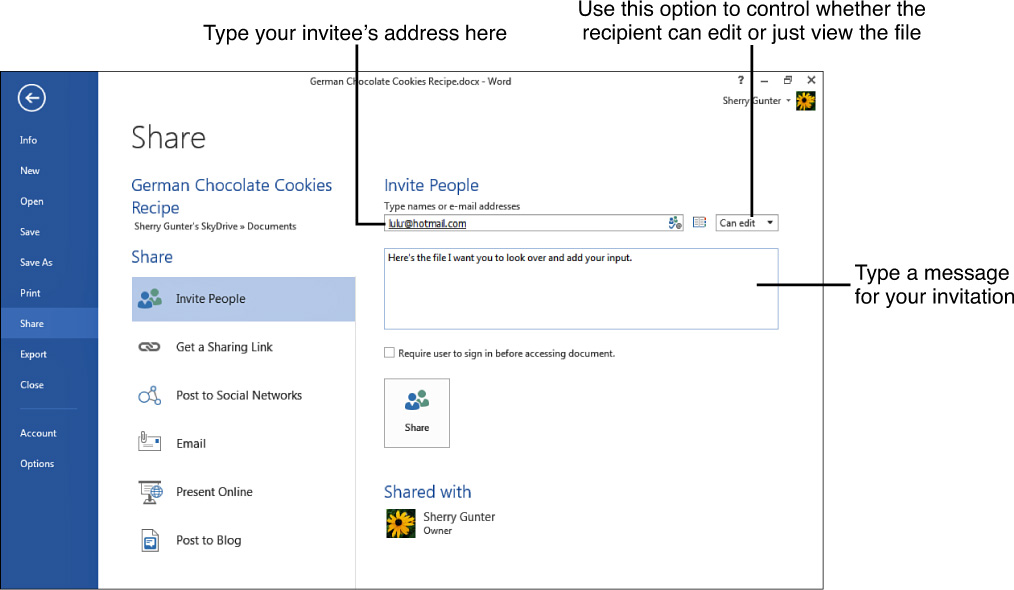
FIGURE 20.24 Type in the email addresses of the people you want to share the document with.
8. Set an editing or viewing option. Make sure it’s set to Can edit if you want the person to be able to edit the file.
9. Type in a message for the recipient.
10. Click Share.
The Share screen now shows the other person as someone you’re sharing the file with, as shown in Figure 20.25.
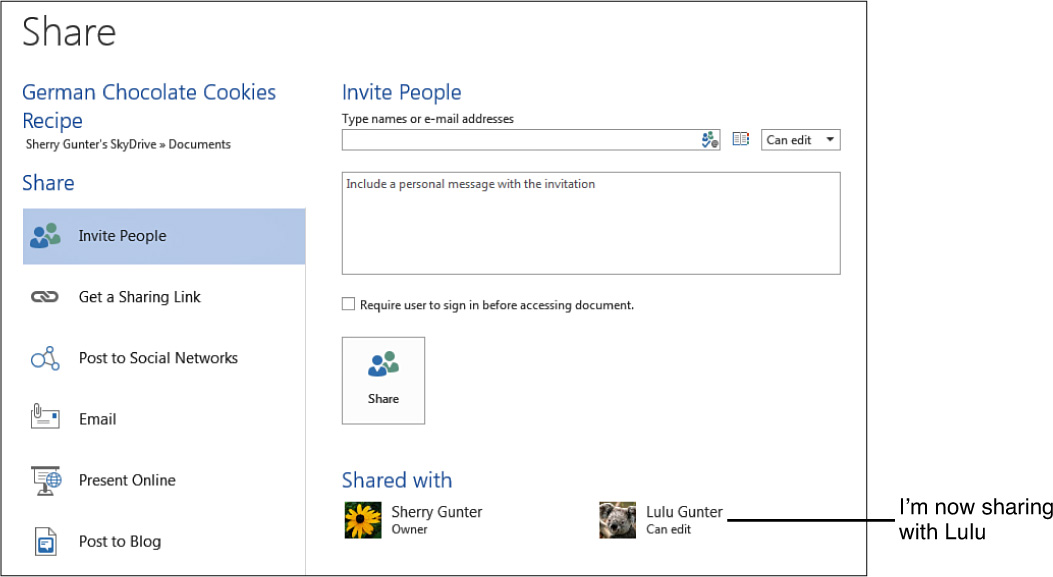
FIGURE 20.25 The person is officially signed up to use the file.
You can check in to your SkyDrive account and retrieve a file after it’s been passed around to colleagues and review the changes.
![]() Note
Note
You can also share files using a Microsoft SharePoint or Microsoft Office 365 account. SharePoint is Microsoft’s web-based collaboration portal for businesses, allowing team members to view and share documents.
![]() Tip
Tip
If you ever need to stop sharing a file with someone, open the Share screen and right-click over a person’s name, then choose Remove User.