6. Flowing Text
Lesson overview
In this lesson, you’ll learn how to do the following:
Import and flow text into existing text frames.
Resize text frames automatically.
Link text frames to flow text across columns and pages.
Create linked frames automatically.
Add pages and linked frames automatically while flowing text.
Clean up text by deleting extra paragraph returns.
Apply paragraph styles to text.
Control column breaks.
Align text to the baseline grid.
Make a jump line to indicate where an article continues.

This lesson will take about 60 minutes to complete. To get the lesson files used in this chapter, download them from the web page for this book at adobepress.com/InDesignCIB2023. For more information, see “Accessing the lesson files and Web Edition” in the Getting Started section at the beginning of this book.

Adobe InDesign provides methods for flowing text into existing text frames, creating frames while flowing text, and adding frames and pages while flowing text. This makes it easy to flow copy for anything from a catalog to a magazine article to an ebook.
Getting started
In this lesson, you’ll work on a booklet in progress. The design of the opening spread of the article is almost finished, and several pages are ready for text. While working on this article, you will experiment with various text-flow methods and create a “jump line” to indicate the page on which an article continues.
To ensure that the preferences and default settings of your InDesign program match those used in this lesson, move the InDesign Defaults file to a different folder following the procedure in “Saving and restoring the InDesign Defaults file” on pages 3–4.
 Note
NoteIf you have not already down-loaded the project files for this lesson to your computer from your Account page, make sure to do so now. See “Getting Started” at the beginning of the book.
Start InDesign.
The InDesign Home screen displays. Click Open at the left. (If the Home screen does not display, choose File > Open from the InDesign menu bar.)
Open the 06_Start.indd file in the Lesson06 folder, located inside the Lessons folder within the InDesignCIB folder on your hard drive.
If an alert informs you that the document contains links to sources that have been modified, click Update Modified Links.
Choose File > Save As, rename the file 06_FlowText.indd, and save it in the Lesson06 folder.
To ensure that the panels and menu commands match those used in this lesson, choose Window > Workspace > [Essentials], and then choose Window > Workspace > Reset Essentials.
NoteTo better view the interface onscreen or in print, the screen captures in this book reflect the Medium Light interface rather than the default setting of Medium Dark. In addition, some screen captures illustrate User Interface Scaling for a closer look at interface elements. You can modify interface settings in Preferences.
If you want to see what the finished document looks like, open the 06_End.indd file in the same folder. You can leave this document open to act as a guide as you work.

When you’re ready to resume working on the lesson document, display it by clicking its tab in the upper-left corner of the document window.
Flowing text into an existing frame
When you import text, you can flow it into a new frame or an existing frame. If the frame is empty, you can click the loaded text icon in the frame to flow the text. On the left page of the opening spread of this booklet, an empty sidebar box is ready for text to be inserted. You will import a Microsoft Word document into this frame, apply a paragraph style, and automatically adjust the height of the text frame.
Importing text into an existing text frame
Choose Type > Show Hidden Characters to see paragraph returns, spaces, tabs, and other hidden characters onscreen. This helps you place and format text.
Zoom in to comfortably view the sidebar text frame on the left page of the opening spread. The frame is about 1 inch wide and has a stroke.
Choose Edit > Deselect All to make sure no objects are selected.
Choose File > Place. At the bottom of the Place dialog, make sure the three options are deselected: Show Import Options, Replace Selected Item, and Create Static Captions. (If necessary, click Options in macOS to see the options.)
 Tip
TipYou edit text with the Type tool and thread (link) text frames with the Selection tool, but it does not matter what tool is selected when you import text.
Locate 06_Highlights.docx, in the Lesson06 folder, and then double-click it.
The pointer becomes a loaded text icon (
 ), previewing the first few lines of text in the article you are placing. When you move the loaded text icon over an empty text frame, parentheses enclose the icon (
 ).
).Position the loaded text icon over the placeholder text frame.

Click to place the text.
Choose File > Save.
The text does not fit in the text frame and is considered “overset.” Overset text is indicated by a red plus sign (+) in the out port, which is in the lower-right corner of the text frame. You will resolve the overset text later in this exercise.
Applying a paragraph style
Now you will apply a paragraph style to the sidebar text. The paragraph style includes a nested style that automatically applies bold to the beginning of a paragraph until InDesign encounters the first colon.
![]() Tip
Tip
As you work, you can tear off panels, resize them, and move them to suit your needs. The configuration of your panels is largely dependent on the amount of screen space available. Some InDesign users have a second monitor for managing panels.
Using the Type tool (
 ), click in the sidebar text frame so that you can format the text.
Choose Edit > Select All to select all the text in the frame (even the text you cannot see).
In the Text Styles area of the Properties panel, click the Paragraph Styles tab and then click the menu to see the styles.
Click the triangle to the left of the Body Text style group to open it.
Click the paragraph style Sidebar Text.

Click in the pasteboard to deselect the text. Choose File > Save.
Resizing text frames automatically
While adding, deleting, and editing text, you often end up resizing text frames. With the Auto-Size feature, you can specify that a text frame resize itself automatically according to your specifications. You will now use the Auto-Size feature to automatically adjust the height of the sidebar text frame based on the length of the text.
Using the Type tool (
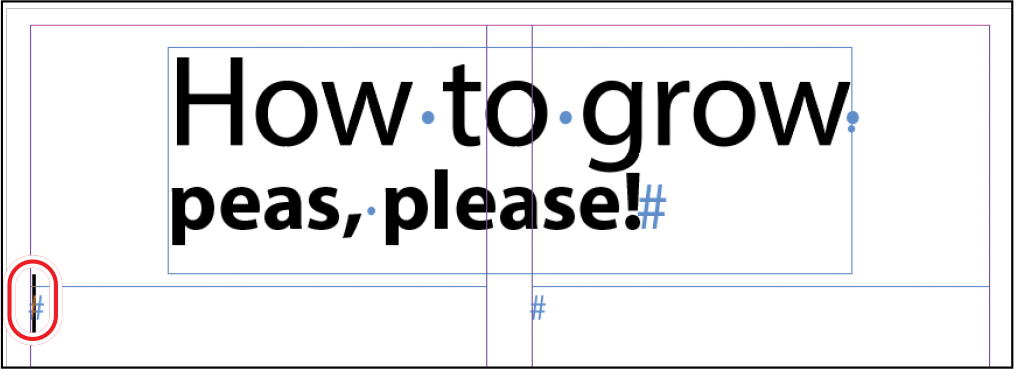
), click in the sidebar immediately before the word “Plant.”Press the Caps Lock key on your keyboard, and then type the headline PEAS, PLEASE. (The headline does not include the period.)
Press Enter (Windows) or Return (macOS), and then press Caps Lock again to turn it off.
After adding the heading, the sidebar text no longer fits in the text frame. This overset text is indicated by the red plus sign (+) in the lower-right corner of the text frame.
With the sidebar text frame still selected, choose Object > Text Frame Options. In the Text Frame Options dialog, click Auto-Size in the list at the left.
TipThe Auto-Size feature is ideal for text frames with a stroke and/or fill providing a boundary for the text (for example, a sidebar or coupon). If the text is shortened, the frame becomes smaller as well. If the text is lengthened, the frame becomes bigger so that text is not overset. Note that Auto-Size works only on an individual text frame or on the last frame in a series of threaded text frames.
Select Preview in the lower-left corner to see changes as you make them.
Choose Height Only from the Auto-Sizing menu.
If necessary, click the center icon in the top row (
 ) to indicate that you want the text frame to “grow down” as if you were manually dragging down the bottom handle of the text frame.
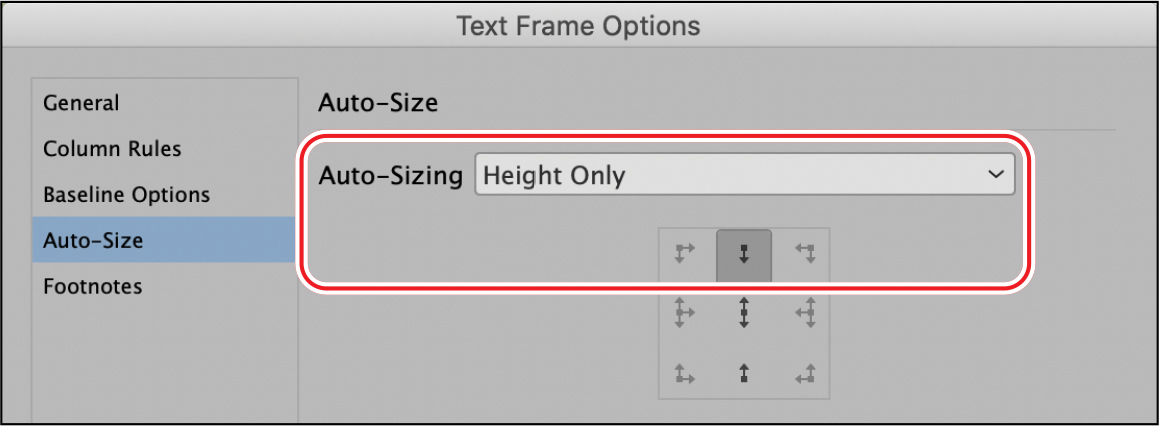
Click OK.
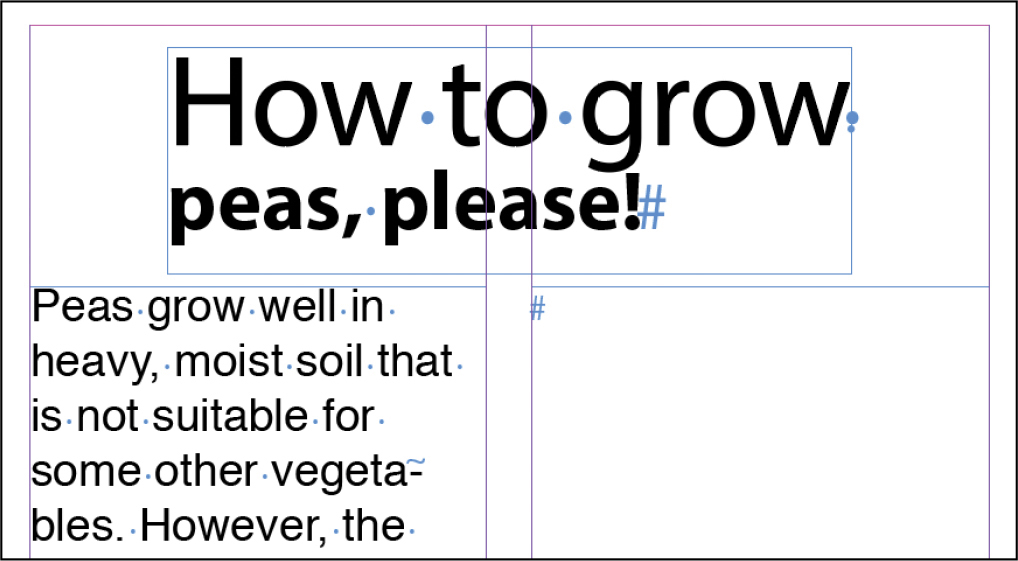
Click the pasteboard to deselect objects on the page, and then choose View > Screen Mode > Preview to see how the sidebar looks.

Choose View > Screen Mode > Normal to restore the layout aids, such as guides and hidden characters.
Choose File > Save.
Flowing text manually
The process of taking an imported text file and flowing it across several connected text frames is called “threading text.” InDesign lets you flow text manually for greater control, flow text automatically to save time, and flow text while automatically adding enough pages to hold all the text.
In this exercise, you will flow the feature article text into the two columns on the right-hand page. First, you will select a Word file to import into the existing text frame in the first column. Second, you will thread the first text frame to the second text frame. Finally, you will create new text frames on the third page of the document to contain more text.
Choose View > Fit Spread In Window to locate the two text frames at the right under the “How to grow peas, please!” headline.
Zoom in as necessary to view these text frames.
Using the Type tool (
), click in the text frame at the left, as shown here. TipTo prepare to import text, you can pre-thread empty text frames. Using the Selection tool, click a frame’s out port, and then click anywhere in the next frame. Repeat this process until all the frames are threaded.
Choose File > Place.
Locate and select 06_Peas.docx in the Lesson06 folder.
Select Replace Selected Item at the bottom of the Place dialog. (If necessary, click Options in macOS to see this option.) Click Open.
The text flows into the existing frame in the left column. Notice that the text frame includes an out port in the lower-right corner. The red plus sign (+) indicates that some of the text you imported is overset, meaning that not all of the text fits into the existing text frame. You will now flow the additional text into another text frame in the second column.
Using the Selection tool (
 ), click in the text frame’s out port to load the text icon. (If necessary, first click the frame to select it, and then click the out port.) Tip
As you flow text, the Selection tool’s cursor changes to various loaded text icons.

Move the loaded cursor over the text frame to the right, and click once in the frame, as shown.

The text flows into the second column. The out port in the text frame at the right contains a red plus sign (+), indicating that there is still overset text.
TipIf you change your mind and decide you don’t want to flow overset text, you can press Esc or click any tool in the Tools panel to cancel the loaded text icon. No text will be deleted.
Choose File > Save. Leave the page in this position for the next exercise.
Loading the Type tool with multiple text files
In the Place dialog, you can “load” the Type tool with multiple text files and then place them individually. Loading the Type tool works as follows:
![]() Tip
Tip
You can “load” the Type tool with graphic files and text files at the same time.
First, choose File > Place or click Import File on the Properties panel.
In the Place dialog, Ctrl-click (Windows) or Command-click (macOS) to select multiple noncontiguous files. Shift-click to select a contiguous range of files.
When you click Open, the loaded text icon shows in parentheses how many files are loaded, such as (4).
Press the arrow keys on the keyboard to change which text file is loaded for placement, and press Esc to remove a text file from the loaded text icon.
Click to place the text files one at a time.
Creating text frames while flowing text
Now, you will try two different text flow methods. First, you will use semi-autoflow to place text into a column. Semi-autoflow lets you create threaded text frames one at a time. The pointer becomes a loaded text icon that automatically reloads after each column of text is placed. After that, you will use the loaded text icon to manually create a text frame.
![]() Tip
Tip
The loaded text icon changes slightly in appearance, depending on whether you are threading text manually or using semi-autoflow or autoflow.
Note that the success of these exercises relies on holding the correct modifier keys on the keyboard and clicking in the correct place. Therefore, it may help to read all the steps in each exercise before you perform them. If anything goes wrong, be sure to choose Edit > Undo, and then repeat the step.
Using the Selection tool (
), click the out port of the text frame in the second column on the right page (page 1). This loads the text icon with the overset text.
You will create new text frames on page 2 to contain more of the text. Guides indicate where to place the text frames.
Choose Layout > Next Spread to display pages 2 and 3, and then choose View > Fit Spread In Window.
When the loaded text icon is active, you can still navigate to different document pages or add new pages.
On the page at the left, position the loaded text icon (
) in the upper-left corner where the guides intersect. For proper placement, watch for the black arrow in the loaded text icon to turn white.Hold down the Alt (Windows) or Option (macOS) key and click.
TipWhen the loaded text icon is over an empty text frame, a chain icon indicates that you can thread to that frame. You can also flow overset text into an empty graphics frame; the graphics frame is automatically converted to a text frame.

The text flows into the first column. Because you held down Alt or Option, the pointer is still a loaded text icon, ready for you to flow text into another frame.
Release the Alt or Option key, and position the loaded text icon (
) in the second column indicated by the guides.Click to create a frame within the column guides in the right column.
TipWhen you create a text frame by clicking with the loaded text icon, InDesign creates the new text frame as wide as the column where you click. Although these frames are placed within the column guides, you can move, resize, and reshape these text frames as necessary.

Clicking the loaded text icon creates text frames within the column guides and flows the text.

Text remains overset, as indicated by the red plus sign (+) in the lower-right corner of the second text frame. You will fix this later.
Choose File > Save. Leave the page in this position for the next exercise.
Creating threaded frames automatically
To speed up the creation of column-width linked text frames, InDesign provides a shortcut. If you press the right arrow key as you drag the Type tool to create a new text frame, InDesign automatically divides the text frame into multiple threaded frames. For example, if you press the right arrow key once while creating a text frame, the text frame is divided into two text frames of equal width. If you press the right arrow key five times, the text frame is divided five times, resulting in six columns of equal width.
![]() Tip
Tip
You can create columns by threading individual text frames or by dividing text frames into multiple columns using the General tab of the Text Frame Options dialog (Object menu). Some designers prefer separate text frames for more layout flexibility.
You will now create a two-column text frame on page 3. You can then thread the text frames to help contain the overset text.
Choose View > Fit Spread In Window to center pages 2 and 3 in the window.
Select the Type tool (
), and position it in the first column on the page at the right, where the column guide (purple) and margin guide (pink) intersect.Drag the Type tool down and to the right to create a text frame that spans the width of both columns. As you drag, tap the right arrow key once.
NoteIf you accidentally press the right arrow key more than once—producing more than two threaded text frames—choose Edit > Undo, and then try again. You can also remove text frames by pressing the left arrow key as you drag.
InDesign automatically subdivides the text frame into two threaded text frames of equal width.
Continue to drag down and to the right to position the text frame within the column and margin guides. If necessary, use the Selection tool (
) to adjust the text frames to fit within the guides, as shown.
Using the Selection tool, click the text frame in the second column on page 2. Click the frame’s out port in the lower-right corner to load the text icon with overset text.
TipA thin vertical rule (line) between columns can add style and enhance readability. You can add rules between columns automatically in the Column Rules tab of the Text Frame Options dialog (Object menu).
Click the loaded text icon (
) in the new text frame on page 3.The text flows through the two columns.


Choose File > Save. Leave the page in this position for the next exercise.
Flowing text automatically
You will now autoflow the remaining text into the booklet. When you autoflow text, InDesign automatically creates new text frames within column guides on subsequent pages until all of the overset text is placed. This feature is ideal for longer projects, such as books. For this sample project, it will end up obscuring some of the images that are already placed. You can fix that easily by deleting the text frames; the text flow is automatically rerouted through the remaining frames in the thread.
Using the Selection tool (
), click the out port in the lower-right corner of the text frame in the second column on page 3.This loads the text icon with the overset text. (If necessary, first click the frame to select it, and then click the out port.)
Choose Layout > Next Spread to display pages 4 and 5.
Position the loaded text icon (
) in the first column on page 4, precisely where the column and margin guides intersect.Hold down the Shift key and click.
TipShift-clicking the loaded text icon creates and flows text into automatically created text frames, adding pages as necessary to flow all the text into the document.
Notice that new text frames are added to the remaining pages in the document, even on top of the photos. This is because you held down the Shift key to autoflow text.

Using the Selection tool, Shift-click to select the two new text frames added to page 5 (the frame on top of the image of the gardening tools).
Choose Edit > Clear to delete the text frames.
Choose Layout > Next Spread to display pages 6 and 7. As you can see, the text is flowing from page 4 to page 6 to page 7.
NoteBecause the new text frames are placed within the page margins, the text partially obscures existing sidebar boxes on the pages. You will resolve this later in the lesson.
Using the Selection tool, Shift-click the two new text frames added to page 7 (the frames on top of the image of peas).
Choose Edit > Clear to delete the text frames.

Text is still overset, but you will resolve that in two ways. First, you will delete extra paragraph returns in the text, and then you will format the text so that it fits within the frames.
Choose File > Save.
Adding pages while flowing text
In addition to threading text frames on existing pages, you can add pages while flowing text. This feature, called Smart Text Reflow, is ideal for flowing long passages of text such as book chapters. With Smart Text Reflow, flowing text or typing into a primary text frame automatically adds pages and threaded text frames to contain all the text. If text becomes shorter through editing or reformatting, any extra pages can be automatically deleted as well. To experiment with Smart Text Reflow in a new document, follow these steps:
![]() Tip
Tip
Experiment with text-flowing options to find out which threading methods work best for you and your projects. For example, if you are creating a template for a catalog, you might thread several small text frames for item descriptions and then manually flow the text later.
Choose File > New > Document. On the New Document screen:
Click Print across the top.
Click the Letter - Half icon.
Click the Landscape icon for Orientation.
Select Primary Text Frame.

Click Create.
Choose Edit > Preferences > Type (Windows) or InDesign > Preferences > Type (macOS) to open the Type preferences. The Smart Text Reflow controls are at the bottom of the Type preferences. The options let you specify how pages are handled when you use Smart Text Reflow. Options include:
Where pages are added (to the end of a story, section, or document)
Whether Smart Text Reflow applies only to primary text frames or to other text frames in a document
How pages are inserted into facing-page spreads
Whether empty pages are deleted as text becomes shorter
Smart Text Reflow is selected by default, but confirm that it is selected. Click OK.

Choose File > Place. In the Place dialog, locate and select 06_Peas.docx in the Lesson06 folder, and click Open.
On the first page of the new document, click the loaded text icon within the page margins to flow all the text into the primary text frame, adding pages as necessary. Note the number of pages in the Pages panel (Window menu).
Close the file without saving it.
Using Find/Change to delete extra paragraph returns
When writers and editors type in Microsoft Word, they often press the Enter or Return key every time they want space between paragraphs. This helps them read onscreen, but it is not helpful to graphic designers. Many publications indicate a new paragraph with an indent rather than space between paragraphs. Even if a publication does use space to indicate a new paragraph, an entire paragraph return is generally too much space. As a result, graphic designers are in the habit of stripping documents of extra paragraph returns. Fortunately, you can search for two paragraph returns and replace them with one fairly quickly. You will now delete extra paragraph returns in the imported story.
![]() Tip
Tip
To add space between paragraphs, whether in Microsoft Word or InDesign, use the paragraph formatting controls to specify the amount of space before and after paragraphs. This provides space for comfortable writing and editing without leaving extra paragraph returns.
Double-click the page 1 icon on the Pages panel to center page 1 in the document window.
Be sure that Type > Show Hidden Characters is selected so that you can see the extra paragraph returns.
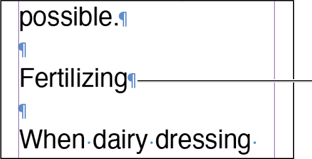
“Fertilizing” is a heading in this story. If you look at 06_End.innd, you can see in the final formatting that there is no space after headings. The extra paragraph returns (¶) will be removed with Find/Change.
Using the Type tool (
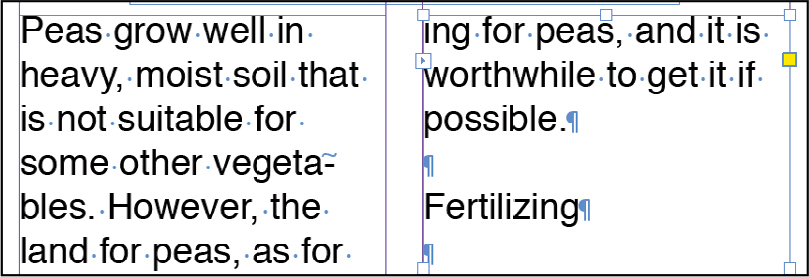
), click at the beginning of the story before “Peas grow well” (on the right-facing page in the far-left column).Choose Edit > Find/Change, and click the Text tab across the top.
Click Forward for the search direction.
Select Story from the Search menu, which defines the scope of the search.
Using the Search menu in the Find/Change dialog, you can choose the scope of the search such as Story or All Documents.
In the Find What area, click the Special Characters For Search (@) menu. Select End Of Paragraph from the menu. This places the code for a paragraph return (^p) in the Find What field.
With the text insertion bar still in the Find What field, select End Of Paragraph from the Special Characters For Search (@) menu again.
You have set up the Find What field to locate two paragraph returns in a row within text as you see in the above image. Now, you will set up Change To to replace the two paragraph returns with one.
Press Tab to navigate to the Change To field. Select End Of Paragraph from the Special Characters For Replace (@) menu.
TipFind/Change is helpful for replacing two spaces after a period with one space. In professional publishing, two spaces after a period results in too much space. Writers and editors who learned to type on typewriters may still submit stories with extra spaces, and these spaces need to be removed.
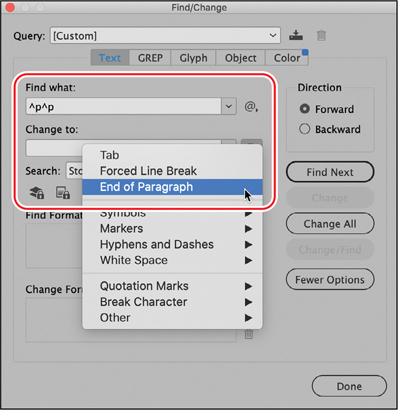
The Find/Change query will appear as Find What: ^p^p and Change To: ^p.
Click Find Next. When the first instance of two paragraph returns is highlighted, click Change All.
NoteIf something goes wrong in the text, select Edit > Undo. Then recheck the query setup.
When the alert indicates that 18 replacements were made, click OK.

Click Done to close the Find/Change dialog.
Choose Layout > Next Spread to look through the pages and notice the lack of space between paragraphs. You will resolve this by applying paragraph styles.
Choose File > Save.
Applying paragraph styles to text
Now that all the threaded text frames are in place and the text is flowing through them, you can format the text. This formatting gives you a clear view of how the text fits and how it looks with the layout. Here, you will format the entire article with the Body Paragraphs style, and then you will format the opening paragraph and subheads.
Double-click the page 1 icon on the Pages panel.
Using the Type tool (
), click anywhere in the text frame containing the main article you just imported. Zoom as necessary to see the text during the exercise.Choose Edit > Select All to select all the text in the story (the text in the series of threaded frames).
In the Text Styles area of the Properties panel, click Paragraph Styles, and then click the menu to see the styles.
If necessary, click the triangle to the left of the Body Text style group to open it.
TipStyle groups help you organize styles in panels such as the Paragraph Styles and Swatches panels. When the group is expanded, you can select options in the group.
Click the paragraph style Body Paragraphs; this applies the paragraph style to the entire story. Scroll through the pages to see the formatted text.

Choose Layout > Go To Page. Enter 1 in the Page field, and click OK. If it’s helpful for your screen size, choose View > Fit Page In Window.
On page 1, click in the first paragraph of the article, starting with “Peas grow well in heavy.” Click the Drop Cap paragraph style in the Paragraph Styles panel.

Now you will format the six subheads in the article.
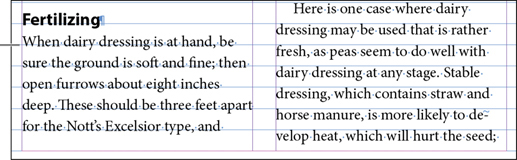
Using the Type tool, click in the subhead that reads “Fertilizing” in the left column of page 1. This targets the paragraph for paragraph formatting.
Click the Body Head paragraph style in the Paragraph Styles panel.
Click in the next paragraph, starting with “When dairy dressing,” and then click the Body Paragraphs No Indent paragraph style in the Paragraph Styles panel.

Follow steps 9–11 to apply the Body Head paragraph style to the remaining subheads in the story. Apply Body Paragraphs No Indent to the paragraph following each subhead as well.
Page 2, left column: “Sowing”
Page 3, left column: “Thinning Out”
Page 3, right column: “Protection from Birds”
Page 3, right column: “Caring for the Vines”
Page 4, left column: “Picking Peas”
Page 4, right column: “Follow Crops”
Choose File > Save. Remain on this page for the next exercise.
Adjusting columns
InDesign provides many methods for adjusting the length of columns of text. You might do this to suit the layout or to keep specific topics together. One way to do this is to resize the text frame with the Selection tool. Another method is to manually “bump” text to the next column with the Column Break character. Here, you will adjust the size of the text frames to suit the layout.
Double-click the page 4 icon on the Pages panel to center page 4 in the document window.
Using the Selection tool (
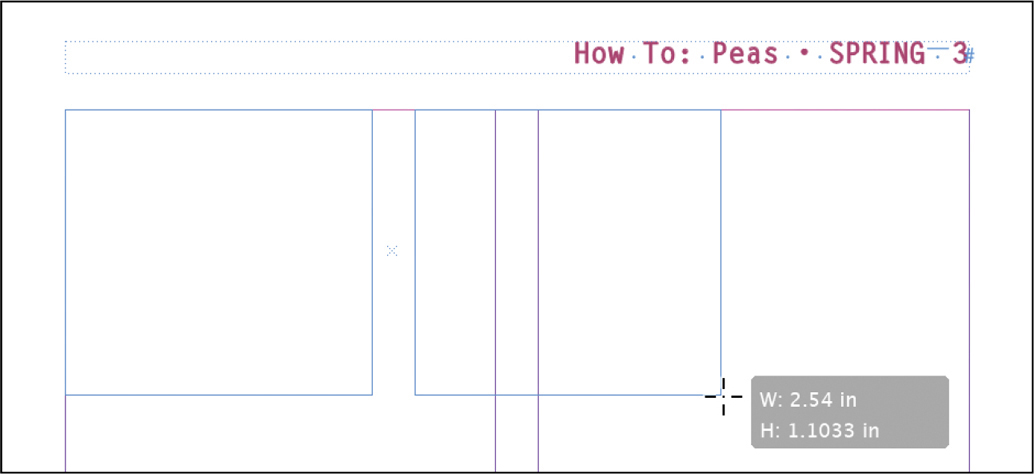
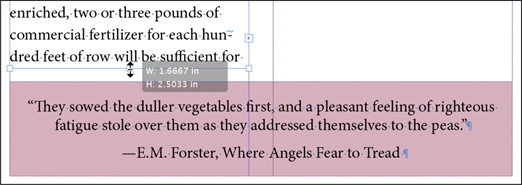
), click the text frame on the left containing the main article.Drag the bottom of the text frame up so that the height of the frame shows approximately 2.1 in.
NoteIf necessary, type 2.1 in in the Height field on the Control panel and press Enter or Return to resize the frame.
Select the text frame at the right, which contains the second column of text. Drag the bottom of the frame up to match the height of the text frame at the left.
Resizing these text frames keeps the article text from obscuring the shaded sidebar box.

Choose Layout > Next Spread to see pages 6 and 7. The bottom of page 6 contains a box with a quote from E.M. Forster.
TipTo adjust how text flows within frames, you can enter break characters such as Column Break and Frame Break (Type > Insert Break Character).
Using the Selection tool, click the text frame at the left on page 6. Drag the bottom of the text frame up so that the height of the frame shows 2.5 in.
Select the text frame at the right, which contains the second column of text. Drag the bottom of the frame up to match the height of the text frame at the left.
Click the pasteboard to deselect all objects on the page, and choose File > Save.
Using the baseline grid to align text
An aspect of vertical spacing is aligning lines of text horizontally across columns. You can do this using a baseline grid (also called a “leading grid”) for the entire document. The baseline grid represents the leading (line spacing) for your document’s body text and is used to align the baseline of type in one column of text with the baseline of type in neighboring columns and pages. First, you set up the grid, and then you set a paragraph format that aligns paragraphs to the grid.
![]() Tip
Tip
You can set up a baseline grid at the text frame level, which is ideal for situations in which different stories have different leading values. Choose Object > Text Frame Options, and then click the Baseline Options tab.

When paragraphs are aligned with the baseline grid, lines of type are aligned across columns.
Before you set up the baseline grid, you need to check the leading value for the body text.
Choose Layout > Go To Page, enter 1 in the field, and click OK.
Select the Type tool (
) in the Tools panel.Click to place an insertion point in the first full paragraph of the story, which starts with “Peas grow well.” Look at the leading value (
 ) in the Properties panel. The leading is set to 11 pt (11 points).
Choose Edit > Preferences > Grids (Windows) or InDesign > Preferences > Grids (macOS) to set the baseline grid options.
In the Baseline Grid section, type 0 in the Start field and select Top Of Page from the Relative To menu.

This option sets the location of the first grid line for the document. If you use the default value of 0.5 in, the first grid line would appear above the top margin.
Confirm the Increment Every field is set to 11 pt to match the leading. Leave the View Threshold value at 75%.
TipThe View Threshold menu sets the minimum zoom level at which you can see the grid onscreen. When this setting is 100%, the grid appears in the document window only at magnifications of 100% or higher.
Click OK.
Choose Edit > Deselect All, and choose File > Save.
Viewing the baseline grid
Now you’ll make the new grid visible onscreen.
To view the baseline grid in the document window, choose View > Grids & Guides > Show Baseline Grid, and then choose View > Actual Size.
Notice how the text does not align horizontally across the columns.
You can align one paragraph, selected paragraphs, or all the paragraphs in a story to the baseline grid. (A story is all the text in a series of threaded text frames.) In the following steps, you will use the Paragraph panel to align the main story to the baseline grid.
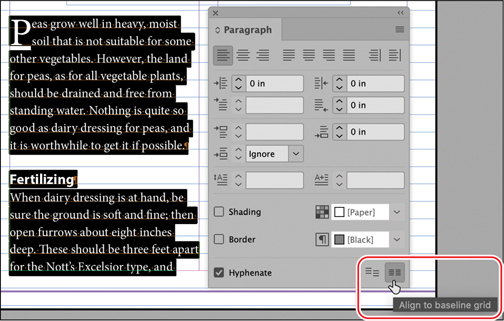
Using the Type tool (
), click to place an insertion point anywhere in the first paragraph on the spread, and then choose Edit > Select All to select all the text in the main story.Choose Type > Paragraph to open the Paragraph panel.
If necessary, choose Show Options from the Paragraph panel menu (
 ) to see all the options.
In the Paragraph panel, click Align To Baseline Grid (
 ). The text shifts so that the baselines of the characters rest on the grid lines. Tip
As with most other paragraph-formatting controls, the baseline grid controls are available in the Control panel as well.
Click the Paragraph panel close box, and then click the pasteboard to deselect the text. Choose View > Grids & Guides > Hide Baseline Grid.
Scroll through the entire document to see how the text flows now.
Choose File > Save.
Updating paragraph styles to align to the baseline grid
The formatting in the story no longer matches the formatting specified in the paragraph styles applied to the various paragraphs. This occurs when you apply additional formatting after applying styles. Continuing to fine-tune formatting is common and is fine for single-purpose documents. However, many times styles are used throughout an entire project, such as a book or magazine. To ensure that the styles match any agreed-upon formatting, you will quickly update the styles.
Choose Layout > Go To Page, enter 1 in the field, and click OK.
Choose Type > Paragraph Styles to open the Paragraph Styles panel. Drag the panel off the dock so that you can reposition it as necessary.
Using the Type tool (
), click in the first paragraph of the story, starting with “Peas grow well.” (Choose View > Fit Page In Window if you need help finding the story.)The Drop Cap style is highlighted in the Paragraph Styles panel because it is applied to the paragraph. The plus sign (+) next to the style name indicates that the paragraph formatting no longer matches the style.
Choose Redefine Style from the Paragraph Styles panel menu (
). TipThe Paragraph Styles panel provides two options for finding out how the selected text differs from the style (the overrides). You can click Override Highlighter (
 ) at the top of the Paragraph styles panel or point at Clear Overrides (
 ) at the bottom.
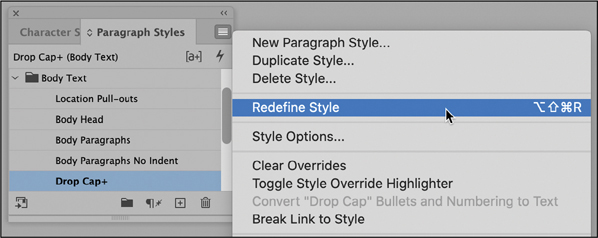
The Drop Cap paragraph style now reflects the change you made (to align text to the baseline grid). The plus sign will no longer display next to the style name.
To update the remaining paragraph styles, click in one paragraph with the style applied and select Redefine Style. The paragraph styles used to format the text are Body Head, Body Paragraphs, and Body Paragraphs No Indent.
Choose Type > Paragraph Styles to close the Paragraph Styles panel, and choose File > Save.
Adding a jump line page number
When an article continues onto other pages, forcing readers to turn pages, it helps to add a jump line, such as “(Continued on page x).” You can create jump lines in InDesign that automatically reflect the number of the page where the story continues.
Double-click the page 1 icon in the Pages panel to center the page in the document window. Scroll down to view a portion of the pasteboard. Zoom in as necessary to see the text.
Using the Type tool (
) and working on the pasteboard, drag to create a text frame approximately 1.7 inches by 0.25 inches.Using the Selection tool (
), drag the new text frame to the bottom of the second column on page 1. Be sure the top of the new text frame touches the bottom of the existing text frame; the frames must touch for the feature to work.
Using the Type tool, click to place an insertion point in the new frame. Type Peas continued on followed by a space. Do not worry if the text is overlapping the story right now.
Right-click to display a context menu, and then choose Insert Special Character > Markers > Next Page Number. The jump line now reads “Peas continued on 2.”
NoteFor the Next Page Number character to work properly, the text frame containing the jump line must touch or overlap the threaded frame.

Choose Type > Paragraph Styles to open the Paragraph Styles panel. If necessary, click the arrow next to the Folios style group to open it.
With the text insertion point still in the jump line, click the Continued From/To Line paragraph style (in the Folios style group) to format the text according to the template.

Choose Type > Paragraph Styles to close the Paragraph Styles panel, and choose File > Save.
Choose View > Fit Spread In Window.
Choose View > Screen Mode > Preview. Scroll through the document to see all the pages.

Congratulations, you have finished the lesson.
Exploring on your own
In this lesson, you learned how to create a jump line that indicates the page number on which an article continues. You can also create a jump line that indicates the page number from which a continued article originated.
Choose View > Screen Mode > Normal to see the frame edges. Double-click the page 1 icon in the Pages panel.
Using the Selection tool (
), select the text frame containing the jump line on page 1. Choose Edit > Copy.Choose Layout > Next Spread, and then choose Edit > Paste to paste the jump line’s text frame on page 2.
Drag the jump line’s text frame so that it touches the top of the text frame in the first column at the left. (Drag the top of the main text frame down as necessary so that the jump line isn’t touching the page header.)
Using the Type tool (
), change the words in the text frame from “Peas continued on” to “Peas continued from” and delete the number 2.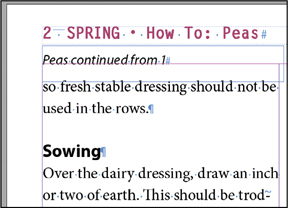
At this point, you need to replace the Next Page Number character with the Previous Page Number character.
Choose Type > Insert Special Character > Markers > Previous Page Number.
The jump line now reads “Peas continued from 1.”
Choose File > Save.
Review questions
1 Which tool lets you thread text frames?
2 How do you load the text icon?
3 What happens when you click the loaded text icon between column guides?
4 Which key do you press to automatically divide a text frame into multiple threaded frames?
5 What is the name of the feature that automatically adds pages and threaded text frames to contain all the text in an imported text file?
6 What feature automatically adjusts the size of a text frame based on the length of the text?
7 What do you need to do to ensure that the Next Page Number and Previous Page Number characters work in a jump line?
8 How do you update a paragraph style to match formatted text?
Review answers
1 The Selection tool.
2 Choose File > Place and select a text file, or click in an out port that contains overset text. You can also drag text files from the desktop onto a page.
3 InDesign creates a text frame where you click; the frame fits within the vertical column guides.
4 Press the right arrow key as you drag with the Type tool. (You can also press the left arrow key to decrease the number of threaded text frames.)
5 Smart Text Reflow.
6 The Auto-Size feature, found in the Text Frame Options dialog (Object menu).
7 The text frame containing the jump line must touch or overlap the threaded text frame containing the story.
8 Click in the formatted text and then choose Redefine Style from the Paragraph Styles panel menu.