Building a Slide

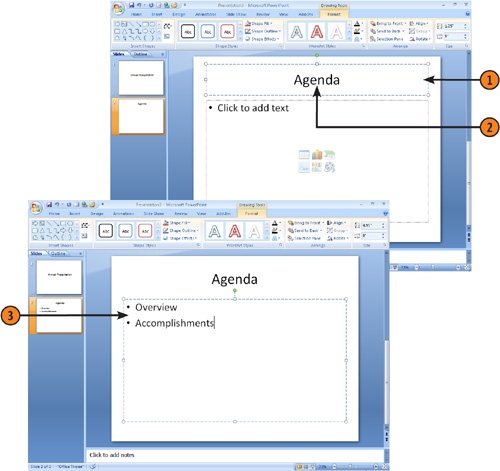
When you open a blank presentation, PowerPoint provides you with one blank title slide. A title slide contains two placeholders, a title and a subtitle. When you insert a slide, a title and content slide is inserted by default. This contains a title placeholder where you enter the topic for the slide and a placeholder for inserting bulleted points for that topic. There are other slide layouts that use text placeholders, but for building presentation contents, these are the two types of slides you will use most often. (See Chapter 9 for information about working with slide layouts that include graphic elements).

Insert a New Slide

  1. Click the Home tab.

  2. Click the New Slide button to insert a new title and content slide.

  3. Click the arrow on the New Slide button and click another option from the Office Theme drop-down box to insert a slide with a different layout.

    Insert a New Slide

Try This!

Try This!

There are other text-only slide layouts as well as a blank slide. Try inserting a Section Header or a Two Content slide layout from the Layout drop-down list. You can add text to a blank slide by using a text box (see "Add a Text Box"), although text in a text box is not reflected in the presentation outline.

See Also

See Also

Although this section deals with the basics of inserting slides with a few different layouts, I deal with different slide layouts in more detail in Chapter 7.

Tip

Tip

The Comparison slide layout includes a title placeholder, two subtitle placeholders, and two content placeholders. If you want to display two lists side by side with a heading to describe the contents of each, this is a useful layout to use.

Enter Text on Slides

  1. Click a Title placeholder.

  2. Type your text and then click anywhere outside the placeholder.

  3. Click a Content placeholder and type one line of text, then press Enter and type the next line of text. Bullet points are added automatically.

    Enter Text on Slides

Tip

Tip

You can modify bullet point styles that are inserted in content placeholders. Click the arrow on the Bullets button in the Paragraph group of the Home tab and choose a different style or click Bullets and Numbering at the bottom of the list to customize bullet styles.

See Also

See Also

For information about formatting text you type into placeholders, see "Formatting Text".

Insert a Symbol

  1. Click in a placeholder where you want to insert a symbol.

  2. Click the Insert tab.

  3. Click the Symbol button.

  4. Click the arrow on the Font field to choose a font set.

  5. Scroll to locate the symbol you want to insert and click on it.

  6. Click Insert. The symbol is inserted on the slide.

  7. Continue to locate and insert symbols you need and click Close when you’re done.

    Insert a Symbol

Tip

Tip

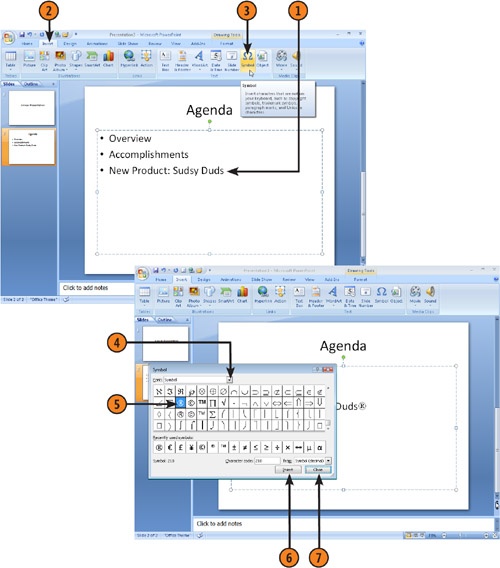
All fonts have some symbols such as percent and dollar signs, but if you’re looking for little pictures or design elements rather than text, your best bet is to choose from these font sets: Symbol, Wingding, Wingding 2 or 3, or Webdings.

Try This!

Try This!

For some Font sets you can narrow down your available symbols in the Symbols dialog box by choosing a category from the Subset drop-down list. For example, if you only want symbols for international currencies, choose the Currency Symbols category, and if you only want arrow symbols choose Arrows.

Insert the Date and Time

  1. Click the placeholder where you want to insert the date and time.

  2. Click the Insert tab.

  3. Click the Date and Time button.

  4. Click a date and time format.

  5. Click OK.

    Insert the Date and Time

Try This!

Try This!

If you want the date and time to update every time you print or show your presentation, click the Update Automatically checkbox in the Date and Time dialog box before you click OK.

Tip

Tip

You can also place the date and time in a footer on a slide master so it will appear on every slide in your presentation. See Chapter 10 for more about working with masters.

..................Content has been hidden....................

You can't read the all page of ebook, please click here login for view all page.
Reset