
Chapter 10
Continuous Integration
WHAT'S IN THIS CHAPTER?
- Installing Jenkins
- Configuring Jenkins plugins
- Integrating Android projects with Jenkins
- Release management
The previous chapters covered how to manage dependencies, testing, and the Gradle build system, which are crucial pieces of the development life cycle. Those pieces are manually used and triggered. In this chapter, we cover continuous integration (CI) servers, which act as the cement between all other processes and convert them into an automated life cycle.
In this chapter you will learn more about CI and why you need it. You will also download and install your own CI server. Finally you learn how to set up a build job from a Git repository, how to trigger a build cycle on every commit, and how to publish your app automatically to Google Play.
WHAT IS CONTINUOUS INTEGRATION?
An important part of any software development process is getting reliable builds of the software. Despite its importance, we are often surprised when this isn't done. We stress a fully automated and reproducible build, including testing, that runs many times a day. This allows each developer to integrate daily thus reducing integration problems.
—Martin Fowler and Matthew Foemmel, “Continuous Integration” (
http://martinfowler.com/articles/originalContinuousIntegration.html)
Every software project consists of libraries, modules, and classes that need to integrate with each other. Keeping the integration stable while each piece of integration is subject to change can become a very expensive and time-consuming task. Each introduced change may break another piece of coding integrated with the changed component. Having proper test coverage technically helps to detect such problems. If tests are not consistently and automatically run, the stability of the code depends on how frequently tests are manually executed by developers.
The cost of fixing defects increases proportionally with the length of time it takes to discover them because other modules or systems may also start using the buggy code. Having few and late commit and manual build processes increases the impact of each defect. To have stable projects and builds, you need to minimize human interaction and error as much as possible and automate every eligible piece, including tests and builds.
In a CI system, builds can be broken for several reasons: Tests fail, a component works with some part of the project but fails with the rest, compilation fails, or code quality metrics do not match standards.
When a continuous build system is in action, email(s) with the error log details will be sent to anyone involved in a broken build. Because builds fail almost instantly after commits, CI systems immediately reveal problems and make them visible to everyone.
INTEGRATING ANDROID PROJECTS WITH A CONTINUOUS INTEGRATION SERVER
CI servers are very flexible and easy to integrate and can handle Android projects that use make files, Maven, or Gradle. You need to choose one of those to fully integrate your project with a CI server. This chapter focuses on Gradle, but you may prefer to choose make files or Maven.
Version control systems are another crucial part of the CI process. Each code commit triggers a build process that results in compilation, running tests, and packaging the app on the CI server. We covered the Git version control system in Chapter 9; in this chapter, we focus on integrating a Git project with your CI server.
You need a CI server to do the heavy lifting. Available CI alternatives include Hudson, Jenkins, and Bamboo. Bamboo is a commercial CI server from Atlassian. Hudson and Jenkins are open source, free CI servers used widely in open source and corporate projects and are derived from the same code base.
Throughout this chapter, we focus on Jenkins; however, as we mentioned before, you may prefer to use Hudson, which is similar. The Jenkins distribution can be downloaded from https://jenkins.io/index.html. At the time of this writing, the latest stable version of Jenkins is 1.654 and Jenkins 2.0 is not yet available.
INSTALLING JENKINS
Jenkins can be downloaded either as a plain WAR file or as an application installer that bundles a web server to run Jenkins. If you already have a Java web server available and running on the target computer, you may prefer to download the WAR file. This section focuses on installing the bundle, which is very straightforward, and the bundle installs with no configuration.
- Download the Jenkins installer from
https://jenkins.io/index.html, as shown in Figure 10.1.
Figure 10.1 Jenkins download page
- If you are running Debian/Ubuntu, open the terminal and type the following commands:
wget -q -O - http://pkg.jenkins-ci.org/debian-stable/jenkins-ci.org.key |
sudo apt-key add -
deb http://pkg.jenkins-ci.org/debian-stable binary/
sudo apt-get update
sudo apt-get install Jenkins
If you are using Mac OS X or Windows 10, just click on the installer.
The following steps are identical for each operating system.
- Click Continue at the Introduction step, as shown in Figure 10.2.

Figure 10.2 Jenkins installation window
Jenkins comes with the MIT license.
- Click Continue to proceed, as in Figure 10.3.

Figure 10.3 Jenkins license agreement
- Select the destination folder where you want to install Jenkins, as shown in Figure 10.4.

Figure 10.4 Jenkins installation directory selection
An information window like the one shown in Figure 10.5 displays when the installation is complete.

Figure 10.5 Jenkins installation final window
After you click Close, the installer will open a browser window pointing to localhost:8080, as shown in Figure 10.6. If you have other applications or servers already using 8080, Jenkins might use another port.

Figure 10.6 Jenkins server URL
You have installed Jenkins and it is up and running.
Jenkins relies on plugins to integrate with different setups, project types, and properties. Because you will be using Jenkins for Android projects, you need to install several plugins that differentiate an Android project from a standard Maven-based Java project.
- Click Manage Jenkins in the left pane, as shown in Figure 10.7.
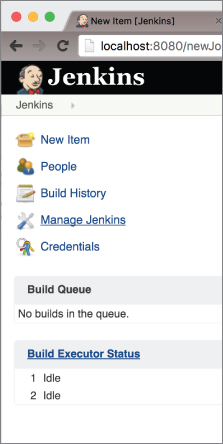
Figure 10.7 Accessing Jenkins from a browser
- Click Manage Plugins to see the list of available and installed plugins for Jenkins, as shown in Figure 10.8.

Figure 10.8 Jenkins plugins
- Select the Available tab, as shown in Figure 10.9, and select Gradle plugin, Git plugin, and GitHub plugin from the search results, as shown in Figure 10.10.

Figure 10.9 Searching Jenkins plugins

Figure 10.10 Plugin search results
- When you are done with the selections, click the Download now and install after restart link to start downloading, as shown in Figure 10.11. The process will continue when you restart Jenkins, as shown in Figure 10.12.

Figure 10.11 Jenkins plugin download

Figure 10.12 Jenkins plugin download progress
Now that you have finished installing Gradle and Git plugins, you can set up a build job to start continuous integration.
CREATING BUILD JOBS
Because you have a fresh Jenkins installation with no build jobs yet, Jenkins displays a “create new jobs” option just below the welcome message, as shown in Figure 10.13.

Figure 10.13 Creating build jobs
To demonstrate a full build by running tests, generating reports, and building APKs, we need a full project to integrate with our CI server. For this purpose, we will fork the Google I/O 2014 schedule app.
- Visit the repository at
https://github.com/kevinmcdonagh/ioschedand click Fork, as shown in Figure 10.14.
Figure 10.14 Sample application fork
GitHub will clone the repository into your GitHub account. Now you are ready to create your first build job.
- Click create new jobs (refer to Figure 10.13) and type a build name, as shown in Figure 10.15.

Figure 10.15 Build job for the application fork sample
- Next, select the GitHub project option and paste your GitHub project URL. Selecting this option is not mandatory because Jenkins can integrate into any Git repository. GitHub acts as a standard GitHub repository, but it lets Jenkins access GitHub-specific metadata and properties, as shown in Figure 10.16.

Figure 10.16 Jenkins access to GitHub
- Select a source code management option (Git in our case). Type in your repository URL, as shown in Figure 10.17.

Figure 10.17 Repository initialization
-
Click the Add button next to Credentials and add your username and password, as shown in Figure 10.18.

Figure 10.18 Credentials for Jenkins
Below the repository properties (refer to Figure 10.17), you can choose which branches to build. Jenkins allows you to build any branch and helps to oversee any integration and stability problems from the outset. For our purposes, we will continue with the master branch.
Build Triggers is another useful setting to control builds. The first option, Build after other projects are built, is used to create a build dependency to another project's build cycle. This is a very useful setting when your build system relies on another library or API that is subject to change. The second option, Build periodically, determines the frequency of periodic builds, as shown in Figure 10.19.

Figure 10.19 Build frequency selection
Any desired frequency can be declared in years, months, days, hours, and minutes. Because nightly builds are strongly encouraged in a CI cycle, add a daily build, which would happen between 12 p.m. and 7 a.m. For more information on custom schedules, click the blue question mark next to schedule box.
As a general rule, you want a build to be triggered immediately after every commit to see if the change has broken the build, so select the Build when a change is pushed to the GitHub option.
If your repository does not support Jenkins but publishes changes, you have to select the Poll SCM option to make Jenkins continuously check your source control system.
- Scroll down to the Add post build action combo box and select Email notification from the list, as shown in Figure 10.20.

Figure 10.20 Email notification initialization
- Check the options in Figure 10.21 to allow Jenkins to send an email on every unstable build. The second option makes Jenkins send individual emails to anyone who broke the build.

Figure 10.21 Email notification to user
- Click Apply and go back to the Project View. Click the Build Now option in the left pane, as shown in Figure 10.22.

Figure 10.22 Building the project
Jenkins will schedule a build and will execute the build process when it is idle, as shown in Figure 10.23.

Figure 10.23 Schedule for the build
- Click the build number to display build properties, as shown in Figure 10.24.

Figure 10.24 Build properties by build number
-
Click the Console Output option to view the build messages and log shown in Figure 10.25.

Figure 10.25 Console output of the build process
Congratulations, you have just completed your first successful build! Go back to the Jenkins dashboard to view your project status, which should look like Figure 10.26.

Figure 10.26 Jenkins dashboard
The sun icon shown in the W column in Figure 10.27 represents the status of the project. Because the build is successful and you don't have a failed build, everything is sunny. You may see cloudy or even stormy icons depending on the stability of your build.

Figure 10.27 Status of the build in Jenkins
RELEASE MANAGEMENT
You have integrated your project into Jenkins, created a build schedule, and even had a successful build. However, you are still not utilizing Jenkins's Android-specific capabilities.
- Go to the Plugin Manager page, select the Available tab, and search for “android,” as shown in Figure 10.28.

Figure 10.28 Plugin search
- Add the following plugins from search results. These help you to fully utilize your builds.
- Android Emulator Plugin—Launches an Android emulator in order to run tests.
- Android Lint Plugin—Generates and displays Lint reports for Android.
- Google Play Android Publisher Plugin (Optional)—Lets you publish your signed APK after a successful build.
- Google Cloud Messaging Notification Plugin (Optional)—Helps test GCM code.
- Click Download now and install after restart. Jenkins should start downloading the selected plugins and display a screen similar to Figure 10.29.

Figure 10.29 Download selected plugins
Once the download is finished and Jenkins restarts itself, you can start configuring the new plugins.
- Select the build job and click Configure, as in Figure 10.30.

Figure 10.30 Configuring a Jenkins build job
- Scroll down to the Build Environment group and select the Run an Android emulator during build option, as shown in Figure 10.31.

Figure 10.31 Running on Android emulator
The emulator has the following properties as shown in Figure 10.32:
- Android OS version—Version of Android operating system.
- Screen density—Screen density of the emulator device, such as mdpi, hdpi, and so on.
- Screen resolution—Resolution of screen in width and height or name, such as WVGA.
- Device Locale—Locale for the device. The en_US locale will be used if left empty.
- SD card size—Size of the SD card in megabytes or gigabytes.
- Target ABI—Target architecture such as armeabi, x68, and so on.
- Custom Hardware Property—Specific hardware properties, such as hw.gps, hw.touchScreen, and so on.
- Reset Emulator State at startup—Starts a clean emulator without any leftover information from previous runs.
- Show emulator window—Displays the emulator window.
- Use emulator snapshots—Uses snapshots for faster startup and initialization of the emulator.
- Startup delay—Waits a specific time before starting the emulator.

Figure 10.32 Emulator configuration
- If you have downloaded the optional Google Play Android Publisher plugin, scroll down to Build, click Add Build Step, and select Move Android APKs to a different release track. This option will enable Jenkins to publish new builds to the Play store on your behalf. As you can see in Figure 10.33, the Google Play account is not yet configured if you have a fresh Jenkins install.

Figure 10.33 Google Play account configuration for Jenkins
- To configure your Google Play account credentials, click Credentials from the left pane, as shown in Figure 10.34.

Figure 10.34 Google Play account credentials configuration
- Select the Google Service Account from private key option from the options shown in Figure 10.35.

Figure 10.35 Google Service Account private key
- Add your project name and JSON key, which you can download from the Google Developer Console, as shown in Figure 10.36.

Figure 10.36 Getting your JSON key from the Google Developer Console
Now you can go back to build job settings to complete the Move Android APKs to a different release track option.
- Select the Google Play account you have just created. Enter the Application ID and Version code(s). Choose a release track (alpha, beta, or production) and finally the rollout percentage, as shown in Figure 10.37.

Figure 10.37 Release configuration
You have configured your build, so now you can go back and trigger a build and start watching the console output. Because you haven't previously used the Android-specific capabilities of Jenkins, the first build will automatically download and install Android SDK, Android tools, the emulator, and the emulator images, as shown in Figures 10.38 and 10.39.

Figure 10.38 Build progress to install Android SDK and tools

Figure 10.39 Build progress to install the emulator
Finally, when the SDK, tools, emulator, and emulator images are ready, the Android emulator plugin will create an emulator, as shown in Figure 10.40, and will continue with launching, as shown in Figure 10.41.

Figure 10.40 Jenkins creating the emulator

Figure 10.41 Jenkins launching the emulator
If the Play account credentials are correct, the Google Play plugin will publish your APK after a successful build and test process.
SUMMARY
This chapter discussed the importance of stable and reliable software development. Continuous integration can greatly help minimize bugs and make them visible even in very early stages of application development. CI will also automate the building process, letting developers focus on development tasks.
We covered Jenkins, a widely used and accepted continuous integration server. We focused on how to make Jenkins work with Gradle and Android by making use of the plugins. We covered how to build, test, and publish Android projects by pulling the source from version control and publishing the APK to the Play Store.
Continuous integration servers are the integration point where Gradle and proper test coverage start to shine and where software projects can succeed.