
5
Music Part C: Transitional Forms
Summary: Crossfading tracks, transitioning between musical chunks, transitioning on bar lines, transitioning to musically aligned positions, transition matrices
Project: DemoCh05Offices01 Level: Offices01
Introduction
We’ve seen how parallel forms of interactive music can be effective in supplying information to the player while maintaining the integrity of the music’s form. Sometimes, however, we want to make more substantial changes to create more radical shifts in the music that have a greater impact on the player. For this we need to transition from one piece of music to another, preferably at a musical juncture.

You can skip between locations in game by using the keys 1–8.
Clunky Transitions
Summary: Unmusical transitions
Nasty
Once you start listening for it, you’ll be amazed at how much music in games is simply a clunky crossfade from one piece to another. The problem with transitional forms is of course that we don’t know when a particular event is going to take place. Any of the following relationships between the two pieces of music are possible.

By choosing to use transitional music, we’re hoping to take advantage of the potentially greater emotional impact that can be produced by moving from one piece to another (rather than simply changing the mix between layers), but if we don’t do this right (i.e., musically), then this impact is at best lost and at worst becomes jarring and unpleasant, defeating the purpose of choosing a transitional form in the first place.
Open the Offices01 level and play through the first couple of rooms from *Offices Room 01* (Bookmark 1). You’ve been tasked with stealing blueprints of the latest innovation from the shadowy Nagasony Corporation, whose hi-tech offices overlook 2050 Tokyo. Stealth is key. The transition from *Offices Room 01* to *Offices Room 02* is an example of simple location-based switching, where different pieces of music are associated with specific locations.

When the levels starts, the {Room_01} looping wave starts, then a [TriggerBox] on entry to *Room 02* <Stops> this and plays {Room_02} (an only slightly nicer <Fade Out> finishes this second piece as you get to the top of the stairs).

<Play>, <Stop>, <Fade In>, and <Fade Out> can of course be used to control music for any event in the game, but there are better, more musical ways, and more musical means more satisfying for the player (having said this, sometimes bad music transitions can work for shock value).
Crossfades (and When to Use Them)
In some circumstances a simple fade in/fade out crossfade between tracks can actually work effectively, but you need to carefully consider the musical style in order to allow for a range of very different outcomes depending on the player’s approach.


If your music is quite ambiguous, then you can crossfade between one track and another without it sounding too clumsy. People will notice if a rhythm is interrupted, they will notice if a chord sequence never gets to resolve, and they will notice if a melody is left hanging in space. If none of these things were there in the first place, then you won’t have set up these expectations. So just avoid rhythm, tonality, and melody?
There are a few genres that can suit this kind of approach, the easiest being the kind of atonal soundscape typical of horror-style music, but other drone-like ambient or even very flexible cartoon-like music can work alright. It’s all about having the system of how you’re going to implement the music in mind when you write or commission the music.
On entry to *Offices Room 03* (Bookmark 3), another cue starts {Ambiguous_03}. As you will note this is very harmonically static, with only a subtle sense of pulse. When we interrupt it by crossfading to a new piece (press E by the computer in the office on the left to switch on the lights), it feels reasonably smooth since there is not a strong musical structure there to be broken in the first place.

Exercise 05_01: Crossfades and Ambiguity
There are several different ways you can handle the selection of music tracks such as using arrays, switches within Blueprints, or switches within Sound Cues. Although it may make it initially slightly more confusing, we’re going to vary the methods between each exercise so that you get experience of several of them, then you can choose the method you’re most comfortable with for your own work.
Arrays
Before you leave the *Outer Wall Vaults* section of the game, you can explore a little more and discover a *Secret Vaults* area (clue: the draft from these rooms has blown out one of the flaming torches—use it). We are going to create some dark and spooky music to unnerve the player as they move through (there was talk in the village of treasure being kept here, so explore thoroughly!)
- Write some music that is quite atonal and rhythmically ambiguous (think horror-style music) as two looping tracks, one more intense than the other.
- Import them and set them up either as looping Sound Waves (double click to set to loop) or as Sound Cues with looping wave players. Find the “Secret Vaults” section of the [Level Blueprint]. Drag out from the <Play> that controls the movement of a “very bad thing” and create a <Sequence> node. Now drag out from the <Sequence> node’s second output to create a <Play Sound Attached> and attach the Player Component to its Attach to Component input.
- Drag out from the Return Value of the <Play Sound Attached> to create a <Fade In> node and trigger this from the Output of the <Play Sound Attached>. Drag out again to create a <Fade Out> and trigger this from the first output of the <Sequence>. Because of the order in which you are doing it, this will fade out the track that is currently playing and fade in any new track. Set the Fade In/Out Duration to 1.5 seconds.
- We’re going to set up a system that plays your first track on entry to the room, crossfades to the second when the “very bad thing” gets close (using an <OnActor Begin Overlap> from a trigger attached to it), and then crossfades back to the first track when it moves away (using the <OnActorEndOverlap>).
- Although there are only two tracks in this system, we’re going to up the complexity a little to create a system that’s reusable for crossfading multiple tracks that might be more useful to you in the future than the simple fade in/fade out already described in the demo level.
- In the
 MyBlueprint panel, click on the + icon to create a new variable. In its Details panel, name it Music Tracks, change it to Variable Type Sound Base, and click on the 3X3 squares symbol next to this to make it into an array. An array is simply a type of variable that can contain multiple elements.
 - Compile your Blueprint, then you can see under the Default Value for this variable the option to add your first music track as the first element in the array (0), then click the + sign to add a second element (1) and assign your second track.
- Drag this variable into the Event Graph to create a <Get>, then drag out from this to create an array/<Get> and connect this to the sound input of your <Play Sound Attached>.
- Create a new variable of type integer and name it Current Track, drag it into the Event Graph to create a <Get>, and link this to the Index input of the <Get>. By changing this Current Track variable, we can now choose which element of the array we want the <Play Sound Attached> to use—in other words, we can choose which music track to play.
- Drag your new variable Current Track into the Event Graph again, but this time create a <Set> and set its value to 1. Trigger this from the <OnActorBeginOverlap> from the “very bad thing,” then link its Output to trigger the <Sequence> object. When the player enters the room, the <Play Sound Attached> will play the music track in the default index of the array (0). When the “very bad thing” overlaps with the player, the index of the array will be changed to 1, triggering the sequence that will fade out the playing track and then fade in this new one.
- Now create another <Set> for your Current Track variable that will reset the index of the array back to 0 when the very bad thing moves away. Trigger a new <Set> with a value of 0 from the <OnActorEndOverlap> then use this to again trigger the <Sequence> object.
- When the player leaves the area (<OnActorBeginOverlap> exit area), trigger the <Fade Out> to end the music. (See the exercise screenshots on the website for more help if required.)
- Although this had been a little more convoluted than perhaps was necessary, you now have an extendable system that you can use to crossfade multiple music tracks between each other throughout a game level, and since it’s not based around musical time, you can probably see how you could use exactly the same system to crossfade between multiple ambiences around your level by simply adding [Trigger] s at each transition point.
Masking Transitions
Another very effective way to avoid musical clumsiness in transitions is in effect to hide them. A loud sound or a piece of dialogue that temporarily ducks the music can be a good opportunity to swap out your music without needing to resort to more complex systems since they will mask the clunky transition.

Once the lights are on in *Offices Room 03* (Bookmark 3), you can plant the explosive device on the door to enter the next area. Musically there is a simple <Fade Out> of the previous piece when the next music system starts, but this is masked by audio that builds up to a large explosion.

This masking effect can be helped by some quick ducking of the music in the mix (we’ll be looking at mix changes in Chapter 08). Like crossfades, this can work perfectly well in the right circumstances, but when the music is more exposed, we need to look at how we can better control when it changes.
Musical Transitions
Summary: Transitioning between musical chunks, transitioning on bar lines, transitioning to aligned points in a track
Although crossfades or masking can be effective, they are never going to be totally satisfactory from a musical point of view, and if it doesn’t work musically, it’s less effective emotionally. What does it mean to transition musically?
Transition Potentials
Let’s look at a typical game scenario:
- Exploring—Stealth_01
- Bored (if we’ve been exploring for a long time, we might ramp the music right down)—Bored
- Spotted by enemy or alarm—Action
- Low health—Health
- Land successful blows on enemy—Hits
- Defeat enemy—Triumph
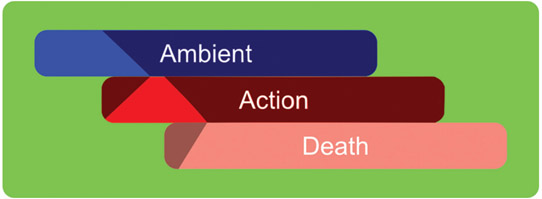
- Get killed—Death
The hits are easy since we can just play stingers over the top, so that leaves us with stealth, action, health, triumph, and death. We need to carefully consider the possible transitions that might occur between these cues, as illustrated in the following diagram.

Transition Junctures
We will also need to consider how and when we want to allow each piece to transition to each other piece. This might be a global decision or more likely a series of choices particular to the nature of the music in each track. Some tracks will suit immediate transitions (non-rhythmic subtle ambient tracks) while others will sound bad unless the transition happens on a bar line. Depending on the system you use, this will either be defined by parameters you set in the system (which is what we will be doing) or through markers that you can embed in the music tracks themselves through your DAW. Many audio editors have the ability to store extra information in the wave file, which contains a header with non-audio information known as metadata. Using metadata to hold your markers is better than chopping up the wave itself, as your programmer can call these but will still have the original file in order to enable a short volume envelope to fade the music out. The white arrow indicates when the transition is called.
At Immediate
This immediately stops (or fades out) the current cue and plays the new cue from its start (either at full volume or with a fade in).


At Measure
This starts the new cue (from its start) at the next measure (bar) boundary.

At Beat
This will play the new cue (from its start) at the next musical beat of the currently playing cue.

At Custom
You might want to transition out of the currently playing cue at a custom juncture.

At Immediate Aligned
This will transition immediately to the second track, but at a point in time that is aligned with the first.

At Measure Aligned
This transitions at the next measure, but to the same position in the new cue rather than at the start of it.

At Beat Aligned
This transitions at the next beat, but to the same position in the new cue rather than the start of the new cue.

The easiest way of keeping track of all this is to use a transition matrix like the one illustrated below. In this you can note how you want each track to be able to transition to each other track. Read along each row from the left to see how this track may (or may not) transition to each of the other tracks.

As you might appreciate, this can all get rather complicated to implement, but there are some relatively simple systems with which we can achieve most of the things we might want.
Working with Chunks: Measure-based Transitions
If we write our music in relatively short blocks (i.e., one bar) and only allow the transitions to be triggered at the start of these blocks, then we can react relatively quickly to game events while maintaining a musical continuity. The added bonus is that this is pretty simple to set up.
A looping system is set up that outputs a trigger every measure/bar (or whatever the length of your chunks). This goes into a switch. The game events will determine the index of the switch (i.e., which output to send the trigger). The events will change the index immediately, but the trigger won’t come through and play the new piece of music until the measure, meaning that the transition will be at a musical juncture.

*Offices Room 04* (Bookmark 4) is monitored by security cameras. You need to sneak past these in order to disable 4 control panels that will activate the door to the next area. If a camera detects you, the music transitions to highlight the danger (and a bot emerges to check out the situation). You can go and hide in the side office (with the opened door) until the coast is clear again (close the door ‘E’!). If for testing purposes you want to start immediately outside of this room, then B will start the music system.

Decay Tails Revisited
In our earlier discussion for the racer levels, we looked at how it’s important to keep, or embed, the decay tails in order to keep your music sounding smooth. Since this uses a retriggered system that allows the end of the file to play out while the new piece comes in over the top, we can keep the tails on when we export from our DAW. If you’re working with live recordings and you don’t have a natural decay for every chunk you want to use, then you can just leave an extra bar at the end, but give it a short fade out. This isn’t perfect but will help your music to flow much better than simply cutting them off at the bar/measure line.

Controlling a Switch
We have used a <Switch on Int> node so we can change the switch index in response to events, but nothing will output until the <Timeline> pulse (on the bar line) comes through (remember that nodes consider their first input or output to be input 0 or output 0, not input 1 or output 1).

The <Timeline> is set to be the length of our chunks (one bar/measure—1.85 seconds), is set to loop, and has an Event Track with the new track event positioned at 0.0.

We’ve created an integer variable Chunk_Switch to control the <Switch on Int> index, and this is <Set> to switch to 0 when the player enters the room, to 1 if the player is detected by the cameras, reset to 0 when the bot gives up and stands down, and set to 2 if the player manages to turn offall 4 control panels and open the door. This final <Play Sound Attached> also stops the <Timeline>, as we want the music to end after this final {Triumph_Alt_3} cue.
Don’t forget to build in some variation to your cues, as these short chunks can quickly become repetitive and loopy. For example the {Office_Low_Chunks} cue randomly chooses one of 4 possible variants.

Of course we could implement exactly the same system by operating a -Switch- inside a Sound Cue. The Sound Cue {Transition_Chunks} has a -Switch- with the parameter name Transition_Chunk_ Switch. We use a <Set Int Parameter> node to target the <Play Sound Attached>, and the same variable we used to <Set> our other switch in response to events is now used to <Set> the Chunks_ Switch_02 variable that is passed into the Sound Cue.


We will be using this system in our next example.
Exercise 05_02: Transition Chunks
In the last chapter you opened the door to the *City Courtyard* section of the level (you can also cheat by pressing C if you are starting directly from here). In the courtyard you must go around and throw the three switches (by pressing E) to open the door into the next section. If the patrolling bot in this area spots you, then they will set off an alarm and reset the switches. The good thing is that the bot is very forgetful, so if you go and hide in one of the side rooms, it will turn off the alarm and return to its patrol—which is useful.
- These systems can get quite complex, so the good news is that we have premade them for you. All you need to do is assign your music tracks and set up the <Timeline>.
- Write three short tracks one measure/bar long. Write a few variations of each so the music doesn’t get too repetitive.
- Create three Sound Cues: {Stealth_01} for when you are unnoticed, {Action_01} for when you have been spotted, and {Triumph_01} for when you unlock the door. In each cue use a -Random- node that picks between your variations.
- Assign your cues to the appropriate <Play Sound Attached> nodes in the “City Courtyard” section of the [Level Blueprint].
- Open the Timeline Editor by double-clicking on the <Timeline>, and change its length to the length of your tracks in seconds. Remember this is the length at which you want to restart the track to loop, not the length of the actual file that includes the decay tails.
- Your tracks are started by the event from the <Timeline> going through the <Switch on Int>, and the game events control the Index of this switch by changing the Int.
- Play the game and you should hear that the music changes/transitions at the start of a measure/bar.
Transitioning on Measure in Longer Pieces
Sometimes you’ll want to be able to use longer pieces of music with a more extended musical structure but still transition musically.

Rather than having the music in chunks that are retriggered, we will allow the music to play through much longer loops. We will still keep the <Timeline> events on measure but only let them through when we want to trigger a transition to a new cue. We do this by inserting a <Gate> between the <Timeline> and the <Switch>. This <Gate> will remain closed (i.e., it will not let the trigger pulse through) until a game event calls a change. This will open the <Gate> and, after the next available trigger has gone through, immediately close it again.

In *Offices Room 05* (Bookmark 5) there are a number of laser sensors that you need to avoid, carefully timing your movements around the room to make it to the exit. If you accidentally get caught by one, then you have a few seconds to make it back to the start of the room and hit the reset button before the room fills with deadly gas.

You can see below how the game events (enter room, trigger laser, reset, and reach the end) <Set> a track to play and open the <Gate>. When the next <Timeline> event comes through, the <Sequence> object on the right will apply a short fade to the currently playing track and play the new one.

This time we have used a -Switch- inside the Sound Cue. Since we are now using longer pieces of music, we don’t have the need to be picking randomly from a series of chunk variations. (Alternatively you could set up an Array of cues like you did for exercise 05_01 if you have lots to deal with.)

When the game events happen, the variable Trans_On_Measure is set and the <Gate> opened so that the next bar line event from the <Timeline> can go through. This first triggers a <Fade Out> of the track that is currently playing and then triggers the <Play Sound Attached>. This has a <Set In Parameter> attached that will take the value of the variable Trans_On_Measure and use it to set the Transition_Measure parameter that controls the -Switch- inside our Sound Cue. Using this method we can use longer pieces and then transition on the bar line to the start of a new piece in response to game events.
Pre-syncs or Ramps
The problem with transitioning on the next measure or bar line is that, although it may be musically satisfying, the music can sometimes feel like it’s not reacting quickly enough to acknowledge game events. When an event happens, particularly one significant enough to warrant a transition rather than just a stinger, we want the music to acknowledge it immediately, but of course this brings us back to the issue we highlighted at the start of this chapter—the irreconcilable differences between arbitrarily timed game events and musical events.
A good solution to this is to use a pre-sync cue. This is a music cue that we can start to fade in immediately once an event has happened and which builds towards the actual transition, thus heightening its impact even more.

For example think about a bar/measure of music with a snare drum in eighth beats (quavers) getting louder. If this was synced to the current measure, then we could start to fade it in at any time, it would still work as a build up to the transition, and because it can start to fade in immediately, we will be giving the player an immediate acknowledgment of their actions or the event. Another name for this might be a ramp track, a one-bar measure that ramps up to an oncoming transition.

Go to the “Room 05” section of the [Level Blueprint], uncheck the box on the <Gate> in the Pre-Sync section so that <Gate> now starts as open, and play this section again. Hopefully you can hear that this is more satisfying.

As you can see this is pretty simple to set up. The one measure pre-sync cue referenced by the <Play Sound Attached> is actually played at the start of every measure from the <Timeline> so that it is in sync (you might think of this as a parallel approach—and you’d be right, but we’re talking about it here because its use is in pre-empting transitions). Its volume is immediately adjusted to 0.0, only to be faded up by the other <Adjust Volume> node when the event happens (in this case the call to transition to the higher intensity track). The <Gate> is simply there so that you can switch this system on and off to hear the difference. You could also have another pre-sync or ramp track that leads into a transition down in intensity.
Exercise 05_03: Transition on Measure and Pre-sync
Once you have got past the courtyard, you enter the *City Streets*, a warren of alleyways. You must find three items in this location in order to bribe your way into the inner courtyard of the city. Unfortunately some of the alleyways have been rigged with trip wires that will bring the soldiers running! In this exercise you will create some longer tracks that transition on measure when there is a change of event together with some pre-sync cues to acknowledge them immediately.
- As before this is a complex system, so we have set most of it up for you.
- Write 4 tracks: {Stealth}, {Action}, {Triumph}, and {Death}. The {Stealth} and {Action} cues can be longer this time (but still the same tempo). The {Triumph} and {Death} should be one measure/bar long.
- Now write three pre-sync cues. One that will lead from {Stealth} to {Action}, one that will lead from {Action} to {Triumph} and one that will lead from {Action} to {Death}.
- Edit the {Streets_Music} Sound Cue and replace the 4 placeholder files with your own. Make sure that you connect the correct ones to the appropriate inputs of the -Switch-.
- Add your pre-sync tracks to the appropriately named <Play Sound Attached> nodes.
- Remember you may need to edit the length of the <Timeline> to match the length of a measure for your tracks.
Aligned Transitions
We can transition immediately, but to a time aligned position in the other track rather than the start of a new track, in order to maintain musical continuity between what might be different arrangements. To do this immediately would feel exactly the same as a parallel approach where we have the two synced cues running but then fade one in and the other out (the advantage would be that we are not actually playing the second track—thus saving that voice for something else).

What we are interested in here is transitioning to and from musical junctures. We won’t look at transitioning immediately, but instead will consider what to do if we want to move to a new track that is aligned in time but on a bar line (you can transition immediately if you wish—simply remove the <Timeline> and <Gate> from the following system).
You might use this system if you have two arrangements of the same piece of music, perhaps one full and intense, the other more lyrical and full of yearning (or something like that). When events change you want to maintain the musical and harmonic flow, but swap to the different arrangement that perhaps has different instruments. You don’t want to do this instantly (through a parallel approach), but instead want the change to happen on a bar line.

In *Room 06* (Bookmark 6) there is another laser security system, and again you must time your movement through the room to avoid the lasers or else the poisonous gas is released.

In order to transition to the same point in the new track that we are at in the currently playing track (although we are going to restrict this to happening at bar lines), we need to set up a timing system. We have done this using a <Set Timer> node. The length of this is set to when we want our tracks to restart. Remember this is not necessarily the exact length of the track since the track may include a decay tail at the end. The timer outputs a <Custom Event> called Music_Length (as defined in the Function Name) when it reaches this time. This means we have got to the end of the track, so this goes through and starts the timer (and triggers the <Play Sound Attached>) to loop the track around again. (Note that unlike the previous {Transition_Measure} cue this time the {Transition_ Aligned_Measure} does not contain -Looping Wave Players- since we are looping the cue with the <Timer> in order to better maintain the sync for the aligned changes.)

Just as before, the events in the game (getting caught by a laser and resetting the security system with the button by the door) set the variable that we are using to control the -Switch- in the Sound Cue. The difference is that now our <Play Sound Attached> does not start playing the new track from its start. Attached to its Start Time input is the current value of our timer. So the new track will start playing at exactly the same time point that the old track was at—hence we are moving to an aligned point in the new track!

However, the changes are still only initiated when the <Timeline> event comes through, so we are aligned to the same point in the track but only actually transition to it on the next bar line.
Exercise 05_04: Transition at Aligned Measure
Down a back alley you locate a hidden entrance to the *Hidden Temple*(Nearest Bookmark 9). You must locate and pickup (E) three silver candlesticks. Beware the priest! If he spots you then he will raise the alarm and this will activate the security, blocking off the candlesticks. You’ll have to exit the main temple and wait in the corridor outside until the alert is over. In this exercise you will implement some music that transitions on measure to aligned points between two tracks.
- Write two pieces of music:
- Sneaky
- Alarm_Raised
- The Sneaky and Alarm_Raised pieces should be different arrangements of the same music and you will transition between them on the bar lines, so preview this in your DAW until you find music that works. These can be longer pieces of music but must be at the same tempo.
- The system is set up so you need to add references to your pieces as follows. Open the [Level Blueprint] and find the “City Temple Music” section. The <Play Sound Attached> here references the Sound Cue {City_Temple_Placeholder_Music}. Edit this cue and swap in your pieces. Remember to edit the length of the <Timeline> to match the measure/bar timings of your pieces.
- Good luck. If you manage to get the candlesticks, then you can put them on the altar in the *Inner Sanctum* that you’ll get to later.
Putting It Together
We’ve covered several approaches to transitional forms that you can obviously combine and adapt to the particular needs of any game you’re working on. In *Room 07*(Bookmark ‘7’) we put together a system that combines some of the things we’ve been talking about. You can have a look at the system in the [Level Blueprint](“Room 07 Music” section) but we will just describe how the music works and then you can get on with the exercise.
Note that none of these systems has absolutely perfect timing given that UE4 does not yet have a sample accurate audio system- however this is promised in a future update!

This is an implementation of the system we started the chapter with.

The player needs to get around the room to use three switches to open the safe where Nagosony’s darkest secrets are held. There are some security turrets on the ceiling which are triggered by the cameras and lasers. Luckily there are some fortuitously placed dividers around the room that you can hide behind to wait until the systems stand down.
The music operates as defined in the following transition matrix:

Exercise 05_04: Putting It Together
This exercise is a little different to the others since you will be doing it in the demo level itself. Write some tracks of your own that will suit the system above and then assign them to the array in the “Room 07 Music” section of the [Level Blueprint]. The system is currently set up for 4 bar chunks at 90BPM. To change this you’d need to edit the <Timeline> in the Music Pulse System sub-graph, changing the length of the <Timeline> to your musical chunk length and defining the beat and measure events to match that of your music. You’ll also need to edit the Time value of the <Set Timer> node to the new musical chunk length.
A Musical Conclusion
Don’t forget that interactive music in games is just one of many options regarding how music is used. Using source music that plays within the environment itself, having non-reactive music that represents the larger scale narrative, or even playing against the action on screen should all be options that have their place. Also remember that it is part of your role to sometimes argue for no music. As powerful an emotional effect as music can have through its presence, it can be equally powerful through its absence.
If we are going to have music that reacts to game events, we need to do it properly to attempt to find that compromise between contextual responsiveness and musical integrity we talked about in the opening to Chapter 03. Hopefully you’ve seen that, like with sound, you can’t separate the asset creation from the implementation. For music to work at its best, it needs to be written with the interactive system that’s going to be playing it in mind. This obviously has implications for how you perform and record it as well, since we might need to ensure a fixed tempo or sync or take a different (and more expensive!) approach to recording if we are going to need separate stems.
For most games, there should likely not be a music system, but music systems. These should work in tune with the particular requirement of the circumstances of the game within different scenarios or could even adapt to different playing styles. One answer to the challenge of interactive music is certainly a deeper integration with the game design itself. This will involve producers and designers understanding what music can bring and how it operates. It should inform the design of the game, not simply be an add-on to it. Sharing this understanding and making this happen is an important part of your role, and hopefully through the skills you’ve learned here, you should be able to create effective prototypes or implementations that can put across your ideas persuasively.
The flexibility and adaptability of music in early games was lost for a long time after the introduction of the very inflexible stereo wave as the de facto method for playing back music in games. Yes, this gave us better quality (and the opportunity for all those great marketing photos of the orchestral recording sessions), but at a real price in terms of musical innovation. If we look at the basic methods for both sound and music in games, we can see that they share a lot of common ideas.

What music lacks are the modifiers that we can apply to sound. Why can’t we change key in response to a game event, or even just change the instrument? Why can’t we increase the accents on the bass line or change the note lengths to make a more legato version of the tune? If you think about it, we only really have one modifier for music in most systems—the volume of the track.
All these modifiers for music are available in our DAW, but by rendering out to waves, all this flexibility is lost. There have been some recent moves which may mark a return to MIDI and sample-based systems within games, and future technologies may open up the opportunity for these to match the quality you can get in your DAW (your massive orchestral sample libraries could be stored in the cloud, receive MIDI data from the game, then stream across a 5.1 rendering of the music in real time—which would be nice!) In the meantime take a look at the advanced chapter on music (Chapter 12) for some ideas to get you started with a more note-level, procedural, or algorithmic, approach.
Given the inherent conflict between the player’s autonomy to act at any time and musical structures that require changes to happen at predefined times, none of the approaches outlined above actually offers a perfect solution, nor can they ever do so. If we want music to be the most emotionally effective it can be, then games systems have to actually become a lot more interactive than they currently are. In other words, they need to treat the music as an input to the game system and interact with it, timing some game events to the music rather than simply treating music as something that you trigger (a reactive system). By gaining knowledge of both the music and gaming systems as you have done, you can be in a position to really innovate in this area.
For further reading please see the up-to-date list of books and links on the book website.
Recap:
After working through this chapter you should now be able to:
- Crossfade between music tracks, making use of masking where possible;
- Construct systems that switch between tracks composed in musical chunks;
- Construct systems that enable transitioning on measure/bar lines of longer pieces;
- Switch to an aligning time in a new music track on a bar line;
- Devise and implement transition matrices.