
Chapter 4
Buttons & Labels with Multiple Graphics
In this chapter, we'll tackle our fourth program together, and it's time to quicken the pace a bit. As in Chapter 3, you'll be able to simply view the screen shots and implement the code if you remember most of the details—steps that have been described repeatedly in the previous examples. You'll get fewer figures pertaining to each step, yet more procedures; we will be using the short bursts of information introduced in Chapter 3.
In addition, as in Chapter 3, once you have completed the program, we will do a code review in the “Digging the Code” section. Initially, we will cover some of the same aspects and concepts we discussed in that section in Chapter 3, and then we will zoom in on some of the new code. Not only will we go a little deeper, but we will also expand our horizons to consider other computing concepts that link up to this deeper level of analysis.
You will probably also notice a change of style in Chapter 4, for we will be moving away from the “elementary” language used in previous chapters. I will also be doing less hand-holding for you with the images. I will start weaning you off arrows—all the information is there, so if you cannot immediately find what I am referencing in the text, you will need to think a little and find it. Think of it as an exercise to force your neurons to make some associations by taking baby steps. So, let's pick up the pace—a little faster, a little more advanced, and using more of the technical nomenclature.
Most importantly, when we get to step 29, we will take twenty minutes of class time to open the hood and really get our hands dirty delving into some critical code concepts that you will need to wrap your head around in order to move on through the book. Don't worry; I make it easy.
Again, if you don't grasp every concept and technique fully, that is perfectly okay! Relax and enjoy this next example. However, before we start our fourth app, we will take a brief glance at our road map.
Roadmap Recap
Thus far, we've gone through three examples where we said “Hello world!” from inside the iPhone/iPad. You've had an opportunity to familiarize yourself with the creative process in the context of programming apps: go in with an idea and come out with a tangible, working product. Several times I asked you to ignore heavy-duty code that I judged would be distracting or daunting. You may have also noticed that when you did try to understand some of this thicker code, it made sense in a weird, wonderful, chaotic way. Well, as we progress forward, we are going to make the “chaos” of the unknown less unsettling.
Before dealing with this issue, let me also put you at ease by telling you that when it comes to Objective-C, our programming language, I have yet to meet a single advanced programmer who actually knows every symbol and command. Just as in other industries, people tend to get very knowledgeable in their specific domains and specializations (e.g., integrating Google Maps to a game or an app).
An analogy I like goes like this: Car mechanics used to be able to strip an engine down completely and then build it back up—presumably better than it was. Nowadays, car mechanics are very specialized, with only a handful knowing how to completely strip down and rebuild a specific modern-day car. We get an expert in Ford hybrid engines, or an expert in the Toyota Prius electrical circuitry, or a specialist in the drum brakes that stop big rigs, and so on. There is nothing wrong with this!
This is similar to how you are proceeding. You have just gotten your hands greasy and dirty by successfully programming three apps. Now, if all goes according to plan, you are going to delve even deeper when you get to step 29 and walk toward the future, brimming with confidence. I know from experience that the confidence of my students can be derailed if they are intimidated or blown away by too much complexity or technicality. I have found that students can handle bumps in the road if they know where they are going, and if they know that the rough stretches won't get too scary or dangerous.
helloWorld_04: A View-based Application
Right this second—feel good about yourself! You are already quite deep into the Forest of Objective-C. If you lose your way, remember that besides the information I present here in this book, including various screenshots, I also offer you screencasts, available at my website. You can use the short URL, go to rorylewis.com as indicated below where you click on the Xcode 4 icon, ![]() and then go to either video tutorial or downloads:
and then go to either video tutorial or downloads:
![]()
Figure 4–1. Create or download three .png image files: a bottom layer, a top layer, and a desktop icon. Save them all to a beautiful, clean desktop.
- As usual, let's begin with a clean desktop and only four icons: your Macintosh HD and three image files (shown as icons in Figure 4–1). As I'm sure you have gathered by now, I think it's essential to have an uncluttered desktop, and I want to encourage you to continually hone your organizational mindset. Using our familiar shortcuts, close all programs. You are welcome to download these images (from either
ow.ly/5l1w8for the downloads page or from the videos page atow.ly/5l1wS), which will become key building blocks of this project, but we really want to encourage you to find and prepare images of your own. That way, you'll have more passion about this assignment. You have two basic choices at this point: download the images from the aforementioned links or prepare your own. Assuming that you are willing to go through the effort of creating three distinct photo files of your own choosing, pay attention to the following guidelines.
Figure 4–2.
STAIR.png; this is the background image—or bottom layer. - The size of the first picture,
STAIR.png, as shown in Figure 4-2, will be the iPhone standard of 320 pixels in width by 460 pixels in height. This will be the bottom layer of two images, so we'll call it the background layer. Our background, then, is a photograph of the stairs leading out the back of the Engineering building, here at the University of Colorado at Colorado Springs. We will use this picture as a backdrop for a picture of Immanuel Kant—the greatest philosopher of all time—a man whose philosophy formed the basis of that of many of our founding forefathers who framed the Constitution. More importantly to us, he was the man who began mapping parallels between mathematical logic and words in speech. When the program is run, the background will display and, once a button is clicked, up will pop the photo of Immanuel Kant at the top of the stairs. Take a quick peek at Figure 4-39. How nice—Immanuel Kant has decided to return to University! This is our scenario then: You will find many times in programming that you will want your user to see a familiar background, and then when a button is pressed, somebody (or something) unusual or unexpected suddenly appears. ThishelloWorld_04will teach you this.
Figure 4–3. This is the modified top-layer image, which will overlay the background.
- In order to create the second image, which we'll call the top layer, copy the background layer photo, which, in my case, was
STAIR.png. Then crop this copy to create an image with these exact dimensions: 320 × 299 pixels. Yes, I know the height is a strange number—but trust me! Now you have a roughly square copy of the bottom two-thirds of your background photo. Next, paste onto this a partial image—probably a cut-out of some interesting or unusual object. This will yield something like the image in Figure 4–3: Immanuel Kant, in front of the background scene. This modified top layer will, of course, be saved as a.pngfile. Thus, you will end up with a prepared top layer that consists of the bottom section of the original background photo, with some interesting person or object pasted over it. You can probably guess that we're going to program the computer to start with the background image, and then, with some user input, insert the top layer—with bottom edges matching up flush, of course. This will give the illusion that our interesting guest, or object, suddenly materialized out of nowhere. Our top layer will not affect the space near the upper part of the background; we are reserving this region for the text that we will also direct the computer to insert. We go this route because the iPhone and iPad do not support.pngtransparency.
Figure 4–4. This is the image for the screen icon!
- The third image file is an icon of your choice. As in the previous chapter, you may want to customize your icon. In my case, I took a portion of the photograph of Immanuel Kant's face and put it into my “icon” file, as shown in Figure 4–4. Once you have all three of these images—the bottom layer, the top layer, and the icon—save them onto your desktop, which will make it look similar to that of my desktop displayed in Figure 4-1.
NOTE: Remember that icons for the iPhone have a recommended size of 57 × 57 pixels as illustrated in Figure 4-4. However, note that if your app is an iPad-only specific app, then you will want to make a cool, slightly larger icon of 72 × 72 pixels. Be sure to stay mindful of these dimensions.

Figure 4–5. Enter

 N
N - Now, just as you did in the first example, launch Xcode and open a new project by using your keyboard shortcut: N. Your screen should show the New Project Wizard as depicted in Figure 4–5. You may find that your Single View Application template was highlighted by default, because of the last example. If, however, your View-based Application template is not selected, then click on the View-based Application icon, and then click on the Next button, as indicated in Figure 4–5.
You may be thinking that a view-based application template is usually used to help us design an application with a single view, and that we should pick another option—because we've just made two views, the image of the stairs and the modified image of the stairs with Immanuel Kant in it. This reasoning would appear to be sound because navigation-based applications yield data hierarchically, using multiple screens. That choice would seem to be the right one for this project, except that this is actually not the case here.
We will be dealing with only one perspective onto which we will superimpose an image, not a view. If we were going to have portions of our code in one navigation pane, and other portions of our code in other navigation panes, then we probably would choose a navigation-based application. In this current project, though, we are going to manipulate one view in which we will superimpose images, rather than navigate from one pane to another. In essence, we'll be playing tricks with a single view.
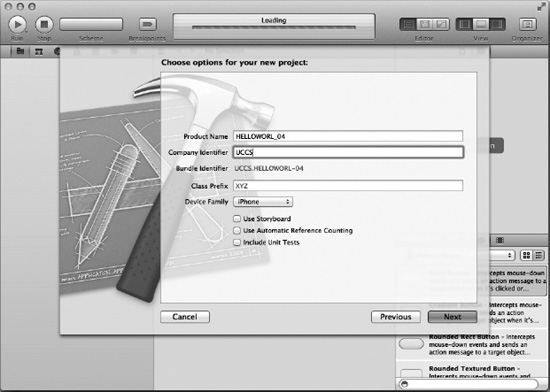
Figure 4–6. Name your project and define whether it's an iPhone or iPad project. .
- Seeing as this is the fourth
helloWorld, we will name ithelloWord_04. When making the video example, I accidently hit the caps lock key with my big fat fingers, so mine is all caps, as you can see in Figure 4-6. I purposely kept all my errors on so that the code looks exactly as it does on the video here:ow.ly/5l2rb.NOTE: For the rest of this chapter, I will continue to call this app
helloWorld_04, even though I accidently left the caps lock key on. You have named yourshelloWorld_04, so this is how we will move forward.
Figure 4–7. Save it to the desktop.
- Save your View-based Application to your desktop as
“helloWorld_04.”See Figure 4–7. This is going to be the last of our “Hello World!” apps. I'd like to suggest that, once you've completed this program, you save all of these in aHello Worldfolder inside yourCodefolder. You will probably find yourself going back to these folders at some point to review the code.Later in the book, when we go into the details of Objective-C and Cocoa, there is a good chance that you'll scratch your head and say, “Damn—that sounds complicated, but I know I did this before. I want to go back and see how I connected these files in those ‘Hello World!’ exercises I did at the beginning of this book.”

Figure 4–8. Drag your three images into the Supporting Files Folder.
- Select all three of your images and drag them into your Supporting Files folder. I hope you are now beginning to see that Xcode has instantiated a project named
helloWorld_04, as shown in Figure 4–8. As mentioned earlier, we're moving on from our elementary language and I will be throwing out some technical jargon that is more specific. Note that when the folder highlights, it means that the object is selected. Focus on where your cursor is—that is the point at which the folder will react. Once it highlights, drop the object in by releasing the mouse. Sometimes students get confused because it seems that the images should be able to drop into the folder but it will not highlight. This is because the folder opens, or highlights, only when you mouse carrying all of the pictures hovers over the folder. So remember that when you are dragging objects over to the folders, focus on where your mouse is and ignore everything else.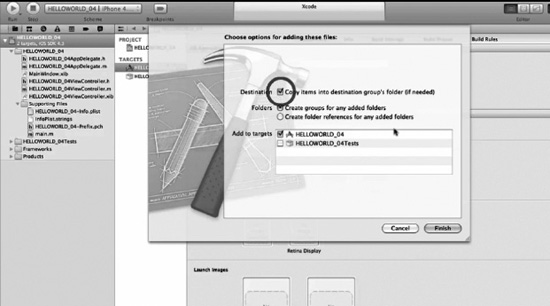
Figure 4–9. Check the “Copy items into the destination group's folder…” box.
- After dropping the image into the
Resourcesfolder, you will be prompted to define whether the image will always be associated with its position on your desktop or whether it will be embedded with the code and carried along with the application file, as shown in Figure 4–9.We want it to be embedded, of course, so click the “Create groups for any added folders” box. Also, check the “Create groups for any added folders” box. Then click “Finish” (or press Enter).

Figure 4–10. Open the plist file so that we can associate our icon picture.
- We created an icon image file called
icon.png. We want this one to show up on the iPhone/iPad, rather than the generic icon. To do this, double-click on the info.plist file in theResourcesfolder, as shown in Figure 4–10.
Figure 4–11. Select the Icon file's value cell and enter the name of the picture you want to associate as the icon for your project.
- Double-click on the Icon file's value cell. In that space, enter the name of your icon file: “
icon” as illustrated in Figure 4-11. Now, save your work. The plist (property list), by the way, is another area that we will explore later. For now, we're ready to move on to Interface Builder in order to connect and associate various pieces of our puzzle.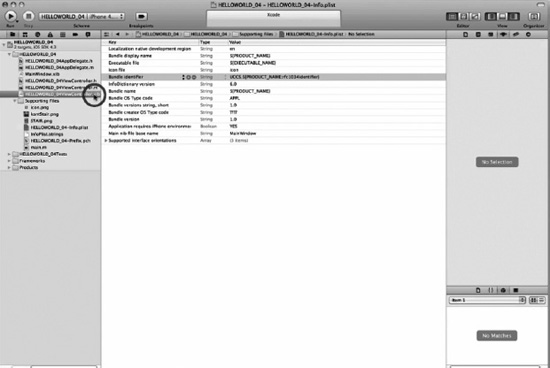
Figure 4–12. Open your nib file.
- Click on your nib file, as illustrated in Figure 4-12, because it's time to start building the objects we'll need for our project. You should be seeing a pattern now—first we dump our images into the Resources folder, then we drag our objects onto the View, and finally we link the objects up with code.
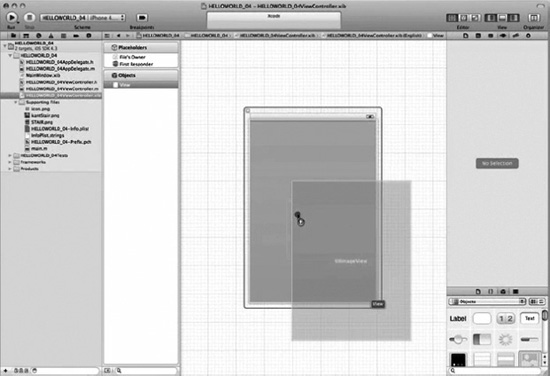
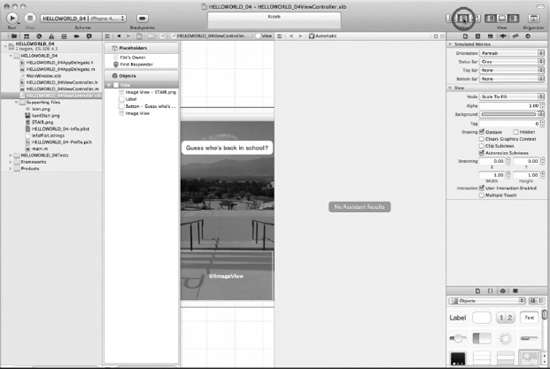
Figure 4–13. Position the
UIImageViewonto the View screen, flush with the bottom. - Your top layer image will be placed over the base layer when the user pushes the button. Therefore, we want to handle the base layer in the same manner as we have in the past. Scroll down in your library to the Cocoa Touch item folder and locate the Image View icons. Drag one onto your View frame, as illustrated in Figure 4–13.

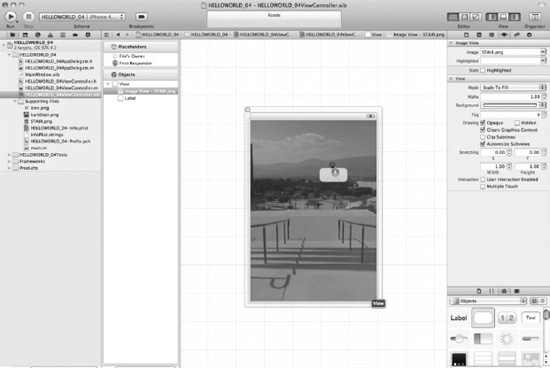
Figure 4–14. Associate an image with
UIImageView, which you've just dragged onto the View screen. - We want to connect 320 × 460
STAIR.pngto our Image View so that it will appear. Go to the Information tab of the Image View Attributes window, open the drop-down window, and select the image, as shown in Figure 4–14.
- Earlier, we decided that when the user presses the button, Immanuel Kant should appear and announce, “Hello World, I'm back!” We decided that the method we would employ would be a label instance variable—with a text property assigned with “Hello World, I'm back!” So, drag out a label that will be our instance variable, and we will assign the text “Hello World, I'm back!” onto the Base View later. When you put the label onto the View, repeat the way that you adjusted the size in the earlier assignments; i.e., widen it so it can fit this text. See Figure 4–15.

- Just as you've done before, center the text and change its color to white in the Properties frame. Refer to Figure 4–16, and look over to the right-hand side to see that the center text and white text properties have been selected.
- We want the picture and the text to appear when a button is pressed, so we need a button. Go ahead and drag one onto your base layer and in its title field enter “Guess who's on campus?” as shown in Figure 4–17. When users see a button asking this question, they will be compelled to press it. When they do, we want Immanuel Kant to appear, saying, “Hello World, I'm back!” You may want to adjust the size of the button as we've done before. If you are inclined to make your button fancier than the one I created on the video, you may want it to look pretty cool and show some of the underlying image. While still in the Image View Attributes window, scroll down and shift the Alpha slider to about 0.30. Jumping ahead, you may want to start thinking about what we're doing in terms of the code we will soon write. We're looking at two
IBOutlets:a label and the underlying base image. Each category “whispers” something to Interface Builder. One says that we want aUILabelclass to use text that the pointer*labelpoints to; the other says that theUIImageViewclass will put up an image located at a place the pointer*uiImageViewpoints to.Well, what have we done so far in Interface Builder? We've installed the background image and inserted a button that will trigger these two
IBOutlets. Now, while still taking a minute to think ahead about what happens each time we drag outlets onto our header file, let's take a high altitude view of what we will be doing here:This line, in fact, invokes our two friends, our two
IBOutletsfor the label and background image. For the label, with:label.text = @"Hello World, I'm back!";and the image, with:
UIImage *imageSource = [UIImage imageNamed: @"kantStair.png"];To make the above all work in the implementation file, we will need to perform some action on the header file. We have to set the label and the image up—we say we need to declare them.
We will declare the label with:
IBOutlet UILabel *someNameWeWillGiveTheLabeland we'll declare the image with:
IBOutlet UIImageView * someNameWeWillGiveTheImageViewThen, we will do something that we have not done yet and that I will explain at the end of the chapter in the “Digging the Code” section. We will perform something we call “Synthesis” on both of our
IBOutlets. To do this we will run two “@property” statements:@property (nonatomic, retain) IBOutlet UILabel *someNameWeWillGiveTheLabeland for the image:
@property (nonatomic, retain)IBOutlet UIImageView *someNameWeWillGiveTheImageViewAlso, we will synthesize the above in our implementation file, with:
@synthesize label, uiImageViewOK, that was a quick mental journey into the future. So, that means we're ready for action. We've created a button that will call our two friends; all we need to do now is to create the image and the label, and then associate them with the appropriate pieces of the code.

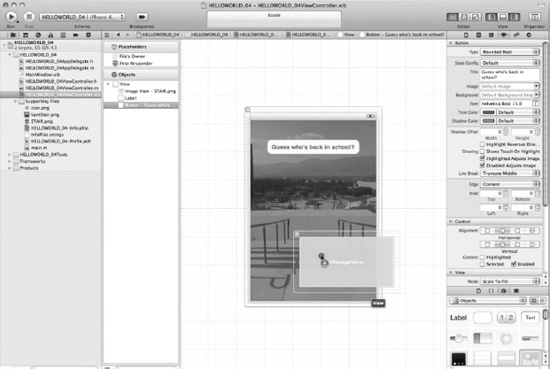
- We need the button to entice the user to press it. So we'll ask the user: “Guess who's back in school?” by double clicking on the button and writing the text in the button. You may notice that the button cleverly adjusts its size to accommodate the text width. See Figure 4–18.
- Let's think about this for a second now. When the button is pressed, we want the
kantStair.pngimage to appear on top of the background,STAIR.png. On what does it arrive? It's carried onto the screen by way of an Image View. Therefore, drag an Image View onto the screen, as shown in Figure 4–19. After you have dragged an Image View onto the screen, we want to place it flush to the bottom edge of the iPhone/iPad screen. We don't want the image floating in the middle of the screen, but instead to appear as if it's projecting from the bottom. Once you've dragged the image to the screen, just let it go. We have not yet configured the size or placement of the image. That's next!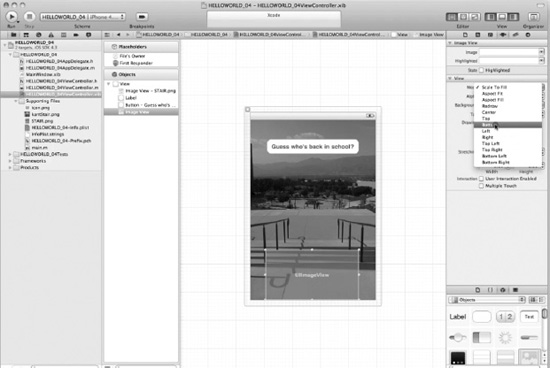
- Go to the Image View Application dialog frame and then click on the View tab. Here, you will see that the alignment option of Center is checked by default. We want to change that to Bottom, as illustrated in Figure 4–20. Before moving onto the next step, take a minute to align the label and button with each other, and in context with the center of the screen, as depicted in Figure 4–20.
You are now done with dragging items out onto the View. We have our label, a button, and two image views. Now let's save everything and start putting some code behind these items that we've dragged onto the view.
- You now want to start tweaking your screen view to accommodate code. Just as we have done in the three earlier apps, we start moving from the Interface Builder view to our coding view by clicking on the Assistant, as depicted in Figure 4–21.
- The second item we need to show after invoking the Assistant is the Navigator, as illustrated in Figure 4–22.
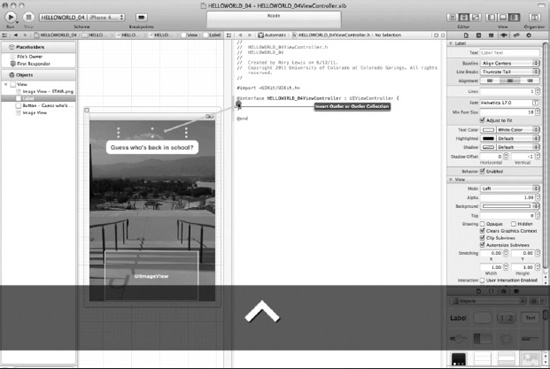
Figure 4–23. Control-drag a connection from your label in Interface Builder into your header file.
- As shown in Figure 4–23, after clicking once on the label in your Interface Builder, Control-drag it into your header file, located inside the squiggly brackets of the
@interfacedirective. Make sure that you keep on control-dragging out until you see the insertion indicator, as shown in Figure 4–23.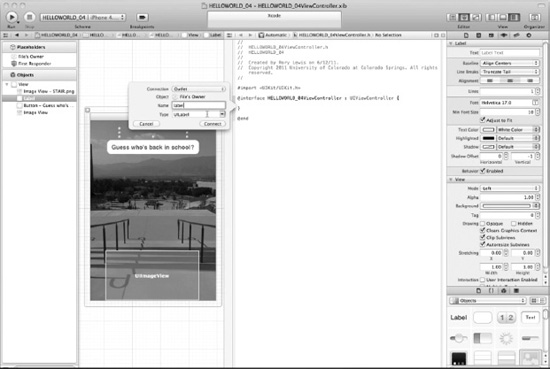
- As shown in Figure 4–24, when you've controlled-dragged your label out to the
@interfacedirective, drop it in by letting go of your mouse and then call it “label” and leave it as an “outlet.”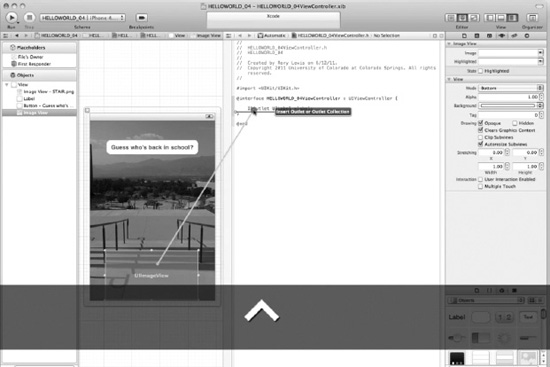
Figure 4–25. Control-drag a connection from your second
UIImageViewin Interface Builder into your header file. - After clicking once on the second
UIImageViewin your Interface Builder, control-drag it until you see the insertion indicator as shown in Figure 4–25. Make sure that when you control-drag into your header file, you go between the squiggly brackets of the@interfacedirective—directly under the label Outlet you've just created.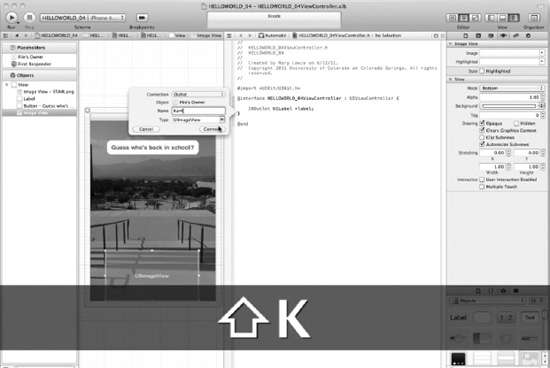
Figure 4–26. Let's name the second
UIImageViewoutlet “Kant”. - As shown in Figure 4–26, when you've control-dragged from the second
UIImageViewout to the@interfacedirective, drop it in by letting go of your mouse and then call it “Kant” and leave it as an “outlet” connection type.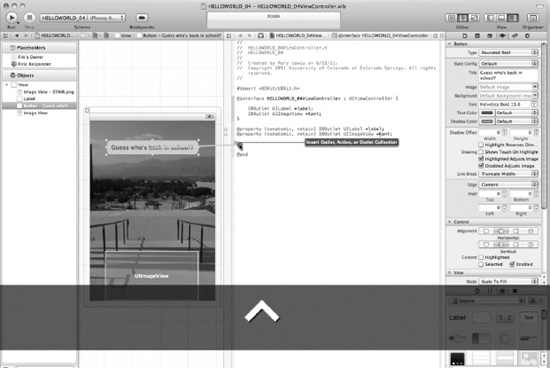
- Click once on your button and control-drag to the area below the
@interfacedirective and its squiggly brackets. This is shown in Figure 4–27.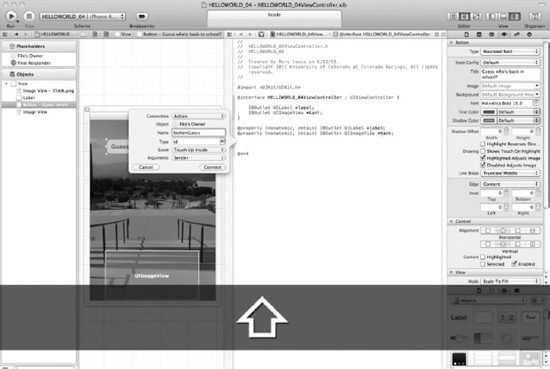
Figure 4–28. Open the drop-down menu and change the type of connection to an Action.
- Change the connection type in the top drop-down menu in the dialog box from an Outlet to an Action. This is just like we did before. See Figure 4–28.
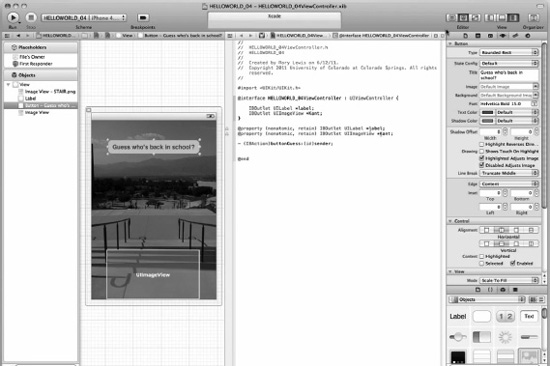
Figure 4–29. This is how your code should appear, after you've completed the Synthesize and Button actions.
- At this point, we are going to focus and think about what we're doing. In class, I make sure that the students are 100% focused on this section. I force them to rewrite this section in their own words. I also include this section on quizzes, mid-term examinations, and the final examination. For readers at home, I will ask that you read this when you have a fresh mind and that you re-read it and convert the following into your own notes. Get up, get a pen and paper, and rewrite this section in your own words—just like I make my students do in the lecture hall.
NOTE: Do not write this on your Mac because then you will start to cut and paste. Get up and grab a pen and a piece of paper. This is critical.
We are going to write statements that I've alluded to earlier that we called “synthesize” statements. However, to really grasp it, we need to dig a little deeper into outlets and actions as well, so in this section we will talk about IBOutlets, pointers, properties of management & control, and adding IBActions. However, before we get into this, let's look at what you have in your header file, what we will change, and then what we're going to focus on.
This is what your code looks like so far (Figure 4-29):
#import <UIKit/UIKit.h>


@interface helloWorld_04ViewController : UIViewController {


    IBOutlet UILabel *label;

    IBOutlet UIImageView *Kant;

}


- (IBAction)buttonGuess:(id)sender;


@end
You will type the bold text into your code right now, without thinking about what you're doing:
#import <UIKit/UIKit.h>


@interface helloWorld_04ViewController : UIViewController {


    IBOutlet UILabel *label;

    IBOutlet UIImageView *Kant;

}


@property (nonatomic, retain) IBOutlet UILabel *label;

@property (nonatomic, retain) IBOutlet UIImageView *Kant;


- (IBAction)buttonGuess:(id)sender;


@end
Understanding IBOutlets
In previous chapters, we have already discussed the .m and .h extensions in detail. We've been doing what most Cocoa and Objective-C programmers do—start off by programming the header files. In geekspeak, you'd say; “After dragging out objects onto the View, we opened the header and control-dragged our IBOutlets and IBActions into the header file.” If anybody were to ask you on the forum to explain, you may tell them to, “Click on the disclosure triangle in your Classes file and open the file with extension ViewController.h!”
You've already programmed three previous header files, so you should be accustomed to just flying over this portion of your code. However, this time we're going to put on the brakes and think about what we're doing. For all our previous examples, we've only had to use one IBOutlet, a thing that allows us to interact with the user. Let's get more technical and specific, for that statement is too elementary. Let's dig deeper into what an IBOutlet is so that, when we get to the “Digging the Code” section, you'll be able to really understand it.
Looking at the code in bold, let's see if we can find our way to a deeper understanding of these elements:
#import <UIKit/UIKit.h>


@interface helloWorld_04ViewController : UIViewController {


    IBOutlet UILabel *label;

    IBOutlet UIImageView *Kant;

}


@property (nonatomic, retain) IBOutlet UILabel *label;

@property (nonatomic, retain) IBOutlet UIImageView *Kant;


- (IBAction)buttonGuess:(id)sender;


@end
Look at the first line:
#import <UIKit/UIKit.h>
This is what permits us to use the IBOutlet keyword. We use #import to import the UIKit, which is the user interface (UI) framework inside the huge body of core chunks of code called IPhoneRuntime, which is a stripped-down version of the OS X operating system found on a Mac. Of course, IPhoneRuntime is smaller, so it can fit onto an iPhone or an iPad.
When we import the UIKit framework, it delivers to our toolbox the ability to use tons of code Apple has already written for us—called classes—one of which is the very cool and popular class that you've already used: IBOutlet. The IBOutlet keyword is a special directive called an “instance variable” that tells Interface Builder to display items that you want to appear on your user's iPhone or iPad. In turn, Interface Builder uses these “hints” to tell the compiler that you'll be connecting objects to your .xib files. Interface Builder doesn't connect these outlets to anything, but it tells the compiler that you will be adding them.
Keeping inventory of what we'll be using: 1) the background image of the stairs; 2) the top-layer image of Kant; 3) the text of what he will be “saying” upon his return to the campus. In our exercise, we'll be using two IBOutlets—one dealing with the text in our label where Kant says “Hello World, I'm Back!” and the other with our second view where Kant magically appears.
Knowing that we need two IBOutlets, we can visualize how it will look. We start by focusing inside the brackets that follow @interfacetestViewController : UIViewController. Our code will need to appear as follows:
#import <UIKit/UIKit.h>


@interface helloWorld_04ViewController : UIViewController {


IBOutlet UILabel *label;

IBOutlet UIImageView *Kant;

}


@property (nonatomic, retain) IBOutlet UILabel *label;

@property (nonatomic, retain) IBOutletUIImageView *Kant;


- (IBAction)buttonGuess:(id)sender;


@end
As you can see, by only looking at the bold code and imagining that you have not programmed anything else but the bold code, these IBOutlets are just placeholders; one will produce text for what Kant says, and the other will produce a picture that is superimposed on top of the background.
We know that when we shoot text out onto the iPhone or iPad screen we use the UILabel class. This class draws multiple lines of static text. Therefore, go ahead and type in UILabel next to your first IBOutlet, as shown in the following code. Now, consider what we will need for the second IBOutlet. We know that we want to impose the top layer image as shown in Figure 4–03. A good idea here would be to use the UIImageView class because it provides us with code written by Apple that can display either single images or a series of animated images. With this said, enter the UIImageView class next to your second IBOutlet:
#import <UIKit/UIKit.h>


@interface helloWorld_04ViewController : UIViewController {


IBOutletUILabel *label;

 IBOutletUIImageView *Kant;

}


@property (nonatomic, retain) IBOutlet UILabel *label;

@property (nonatomic, retain) IBOutlet UIImageView *Kant;


- (IBAction)buttonGuess:(id)sender;


@end
As you can see it now makes sense when we say that we have two IBOutlets:
- We let one call the
UILabelclass to control the text. - We let the other call the
UIImageViewclass to control the second image.
Pointers
Now that we have the means to push text and an image onto the screen of the iPhone/iPad, we need to specify which text and which image. We sometimes use predefined code, created by the folks at Apple, which does what it does by virtue of referencing or pointing to our resources—that is, our text and images. As you are beginning to see, this is the context in which we will be using pointers.
In previous examples, we told you not to worry about that star thing (*). Well, now it's time to take a look at it. Let's focus for a moment on how these (*) things—pointers—do what they do. We need an indirect way to get our text and picture onto the screen. We say “indirect” because you will not be writing the code to accomplish this—you will use Apple's code to retrieve these. You will call up pre-existing classes, and then these classes will call up your text and your image. That is why we say this is an indirect means of obtaining your stuff.
Consider this little analogy. Suppose you make a citizen's arrest of a burglar who breaks into your house. You call the police and, when they arrive, you point to the criminal and say, “Here's the thief!” Then the policeman, not you, takes the criminal away to be charged.
Now, you want to display text on your iPhone/iPad. You call UILabel, and when it “arrives,” you point to your words and say, “Here's the text.” Then the UILabel, not you, deals with the text.
You will do likewise when you want to display an image on your iPhone/iPad. You call UIImageView, and when it “arrives,” you point to your photograph or picture and say, “Here's the image.” Then, the UIImageView code, not you, deals with the picture.
Perhaps you're asking yourself what the names of these pointers are, or need to be. The good news is that you can give them whatever names you want. Let's point the UILabel to *label and the UIImageView to a pointer with the name of *Kant. So again, looking at the code you've just written:
#import <UIKit/UIKit.h>


@interface helloWorld_04ViewController : UIViewController {


    IBOutlet UILabel *label;

    IBOutlet UIImageView *Kant;

}


@property (nonatomic, retain) IBOutlet UILabel *label;

@property (nonatomic, retain) IBOutlet UIImageView *Kant;


- (IBAction)buttonGuess:(id)sender;


@end
Some of the clever people at Apple describe their reasoning for creating and coding IBOutlets as giving a hint to Interface Builder as to what it should “expect” to do when you tell it to lay out your interface.
- One
IBOutletwhispers into Interface Builder's ear that theUILabelclass is to use text indicated by the*labelpointer. - The other
IBOutletwhispers into Interface Builder's ear that theUIImageViewclass is to use the image referenced by the*Kantpointer.
We're not done yet. After we tell Interface Builder what to expect, we need to tell your Mac's microprocessor—through the compiler—that an important event is about to descend upon it. One of the most important things your compiler wants to know is when an object is coming its way. This is because objects are independent masses of numbers and symbols that weigh upon the microprocessor and put significant demands on it, and so the processor needs to be told by you, the programmer, when it needs to catch the object and put it into a special place in memory.
Objects can come in a wide variety of flavors—as conceptually different as bird, guru, soccer, and house. So, to allow the processor to handle its job when the time comes, we need to inform it that each object we will be using in our code has two specific and unique parameters or features: property and type.
Don't freak out! Providing this information is really easy, and it consists of two steps.
The first step is what we just covered: we give the compiler a head's up about objects we will be using by defining their two specific and unique features: property and type. The second step is this: When the microprocessor receives this data, it utilizes this information by synthesizing it.
- First, we declare that our object has a property with a specific type.
- Second, we instruct the computer to implement—or synthesize—this information.
In other words, we tell the compiler about our object by declaring it, including specific descriptive parameters of its properties. Then, we give the compiler the go-ahead to implement our object by telling it to synthesize the object.
But how do we do this declaring and implementing? We use tools in our code called directives. We signal directives by inserting @ before stating our directive. This means that to declare what property our object has we put the @ symbol in front of the word property to make it a property directive: @property.
When we see @property in our code, we know it's a property directive. Similarly, when we want to tell the compiler to process and synthesize; that is, to do its stuff on our object, we put the @ symbol in front of our synthesis statement: @synthesize.
Saying the exact same thing we said before, but translated into geekspeak, we get:
- The
@propertydirective declares that our object has a property with a specific type. - The
@synthesizedirective implements the methods we declared in the@propertydirective
Easy, huh? OK, just two more points now, and then we'll get back to our code.
Properties: Management & Control
The first elaboration I want to make is that we also need to specify whether this property will be read-only or read-write. In other words, we need to specify whether it will always stay the same or whether it can mutate into something new. In geekspeak, we call this mutability. For the most part, we will use Apple code to handle the mutability of properties with respect to our objects.
In order to instruct the Apple code to handle the mutability property, we'll designate the property as “nonatomic.” To apply this term meaningfully, try contrasting “nonatomic” with “atomic.” Recall that “atomic” means powerful, and it implies the ability to go into the microscopic world and to effect change. Therefore, “nonatomic” must mean not-so-powerful, more superficial, and unmanipulable.
If we designate a property (such as mutability) as nonatomic, we are basically saying, “Apple, please handle our mutability and related stuff—I really don't care. I'll take your word for it!” At a later date, you may want to take direct control of this property, and then you would designate it as “atomic.” At this time, though, we will use the more relaxed approach and let Apple handle the microscopic business. So, when it's time to choose one or the other designation, just use nonatomic!
The second elaboration I want to make at this point deals with memory management. We need to address the issue of how to let the iPhone/iPad know, when we store an object, whether it shall be read-only or read-write. In other words, we need to be able to communicate to the computer the nature of the memory associated with an object—in terms of who gets to change it, when, and how. Generally speaking, we will want to control this information, and keep it in our own hands—that is, to retain it. As you move through the remaining exercises in this book, we are going to keep the code in our own hands; we will retain the right to manage our memory.
We can summarize the addition of these details to the property directives, and how we would modify the code, as follows:
- The
@property (nonatomic, retain)directive says the following:- Mutability should be nonatomic. Apple, please handle this!
- Memory management is something we want to retain. We will maintain control.
- The
@synthesizedirective implements the methods we declared in the@propertydirective.
We have one more layer of complexity to add to this mix. We add those directives in two different files. We define the @property directive with a statement in the header file, and then we implement it by using the @synthesize directive in our implementation file.
- Header File:
helloWorld_04_ViewController.h
@property (nonatomic, retain) //"our stuff"
- Implementation File:
helloWorld_04_ViewController.m
@synthesize//"our stuff" we defined in @property in the header file.
We will need to write two of these for each of our two IBOutlets: one for the text, and the other for the picture. In addition, because we're still in the header file, we need to repeat this when we synthesize it in the implementation file. OK, time to go ahead and enter your code:
#import <UIKit/UIKit.h>


@interface helloWorld_04ViewController : UIViewController {


    IBOutlet UILabel *label;

    IBOutlet UIImageView *Kant;

}


@property (nonatomic, retain) IBOutlet UILabel *label;

@property (nonatomic, retain) IBOutlet UIImageView *Kant;


- (IBAction)buttonGuess:(id)sender;


@end
Yes, that seemed like a lot of explanation just to say: @property (nonatomic, retain). Remember, though, that we're deep in the trenches… we're telling the computer that we want Apple to take care of mutability, but that we want to retain control of the memory. Later, we will synthesize these commands in the implementation file, for both IBOutlets.
IBOutlets? Remember them? Oh yeah—let's return to that part of your program. The IBOutlet for the text is UILabel with pointer *label, so we entered the code to control the text for the label as follows:
#import <UIKit/UIKit.h>


@interface helloWorld_04ViewController : UIViewController {


    IBOutlet UILabel *label;

    IBOutlet UIImageView *Kant;

}


@property (nonatomic, retain)IBOutlet UILabel *label;

@property (nonatomic, retain) IBOutlet UIImageView *Kant;


- (IBAction)buttonGuess:(id)sender;


@end
The IBOutlet for the picture is UIImageView with pointer *uiImageView, so enter the code for the picture:
#import <UIKit/UIKit.h>


@interface helloWorld_04ViewController : UIViewController {


    IBOutlet UILabel *label;

    IBOutlet UIImageView *Kant;

}


@property (nonatomic, retain)IBOutlet UILabel *label;

@property (nonatomic, retain)IBOutlet UIImageView *Kant;


- (IBAction)buttonGuess:(id)sender;


@end


        IBOutlet UIImageView *uiImageView;
Are we done with the header file yet? Not quite. We need to look at our IBActions. We've analyzed our IBOutlets, both of them, but now we're going to analyze the IBAction we used for our… can you guess?
Adding IBActions
Yes, we needed a button! So we made an IBAction for our button, as shown in Figure 4–28. We could “go deep” again, into the code for the IBAction, but this has been a challenging section. Let's save the technical part of this element for “Digging the Code.” Meanwhile, just enter the new code that is highlighted here. See if you can anticipate the functions of the different pieces—or parameters—and we'll see how close you are later.
This is what we will be focusing on:
#import <UIKit/UIKit.h>


@interface helloWorld_04ViewController : UIViewController {


    IBOutlet UILabel *label;

    IBOutlet UIImageView *Kant;

}


@property (nonatomic, retain) IBOutlet UILabel *label;

@property (nonatomic, retain) IBOutlet UIImageView *Kant;


- (IBAction)buttonGuess:(id)sender;


@end
GO OUT NOW, AND TAKE A BREAK.

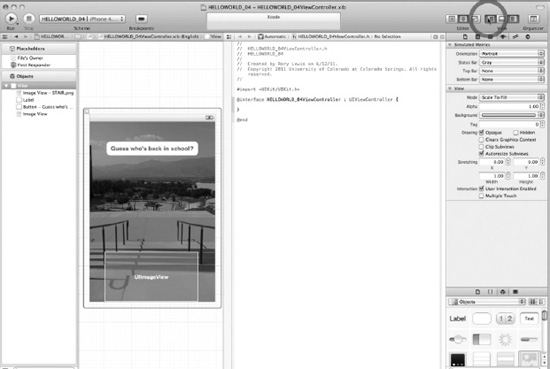
Figure 4–30. Leave the Assistant and click on the Standard editor.
30. We now need to redraw our user interface so that we can work on our implementation file. We need to leave the Assistant editor and click on the Standard editor, as shown in Figure 4–30.
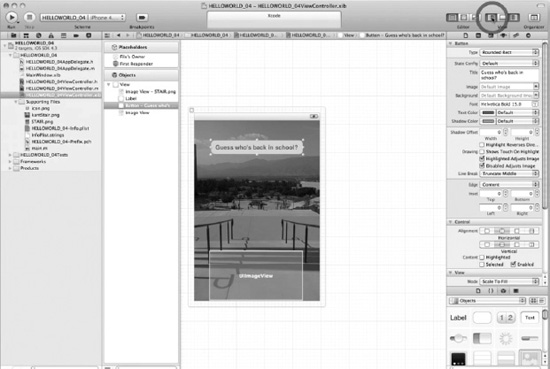
Figure 4–31. Show the Navigator.
31. We now need to show the Navigator, so we can jump from the header file into the implementation file. Of course, we have many different ways to do this, but for now just follow along, as this is the least complex means of doing this. See Figure 4–31.

Figure 4–32. Save your work and open the implementation file..
32. Right now, the Interface Builder is showing our .nib file. Save everything and then go to your Navigator and click on the implementation file (.m), as shown in Figure 4–32.

Figure 4–33. With the implementation file open we can now code.
33. Now that you have your implementation file open, let's look at Figure 4–33 and first think of a means for providing synthesis. We've gone over making the @property directives for our label text and Kant image in the header file so that we would then have code the @synthesis statements for these two IBOutlets in our implementation file—so let's do it. Type in your synthesis code as shown below:
#import "helloWorld_04ViewController.h"


@implementation helloWorld_04ViewController

@synthesize label, Kant;


- (void)dealloc

{

    [label release];

    [Kant release];

    [super dealloc];

}

...


- (IBAction)buttonGuess:(id)sender {

}

@end
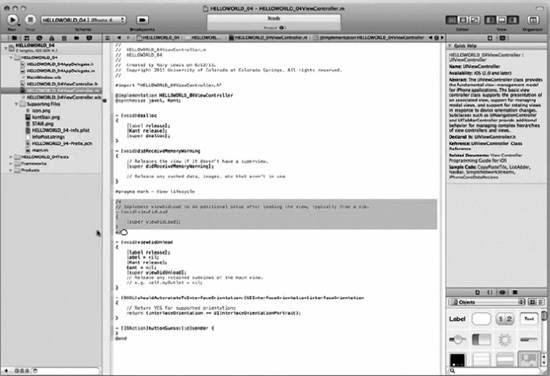
Figure 4–34. Delete the viewDidLoad code.
34. We do not need the viewDidLoad code, since we are manipulating it a little differently. Therefore, select it and then delete it, as shown in Figure 4–34.
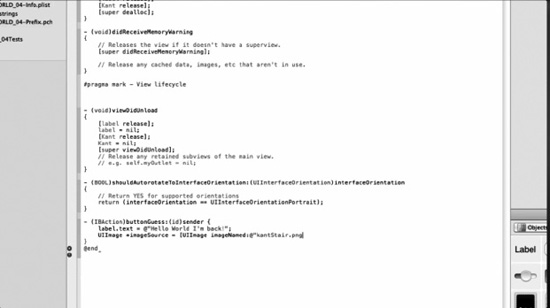
Figure 4–35. Write the first two lines of the buttonGuess method.
35. As indicated in Figure 4–35, we are now ready to program the code that will execute when the user presses the button. In other words, we are now ready to program the button's code. Scroll down until you get to the buttonGuess method that exists, but is currently empty.
#import "helloWorld_04ViewController.h"


@implementation helloWorld_04ViewController

@synthesize label, Kant;

...


- (IBAction)buttonGuess:(id)sender {


}


@end
When the user runs this app and presses the button, the image of Kant will appear instantly on top of the background staircase. He is going to “say” something via the embedded text. How about, “Hello World, I'm back!” To accomplish this, we need to associate the label instance variable with a text property assigned with our desired text as follows:
#import "helloWorld_04ViewController.h"


@implementation helloWorld_04ViewController

@synthesize label, Kant;

...


- (IBAction)buttonGuess:(id)sender {

label.text = @"Hello World I'm back!";

}


@end
Having completed the task of coding for the text, we now need to add the code that will cause the image of Kant to appear. For this, we will use a class method called imageNamed that will display the kantStair.png image, the top-layer photo we prepared at the beginning of this project. Enter the line bolded in the following code, immediately under the code you just entered for the text:
#import "helloWorld_04ViewController.h"


@implementation helloWorld_04ViewController

@synthesize label, Kant;

...


- (IBAction)buttonGuess:(id)sender {

label.text = @"Hello World I'm back!";

UIImage *imageSource = [UIImage imageNamed:@"kantStair.png"];


}


@end
Our pointer's name for the image is Kant, but right now the kant.png image file is in UIImage's assigned pointer called imageSource.
#import "helloWorld_04ViewController.h"


@implementation helloWorld_04ViewController

@synthesize label, Kant;

...


- (IBAction)buttonGuess:(id)sender {

label.text = @"Hello World I'm back!";

UIImage *imageSource = [UIImage imageNamed:@"kantStair.png"];

}


@end
We need to assign this automatically assigned pointer imageSource to the image of Kant as shown in the following code:
#import "helloWorld_04ViewController.h"


@implementation helloWorld_04ViewController

@synthesize label, Kant;

...


- (IBAction)buttonGuess:(id)sender {

label.text = @"Hello World I'm back!";

UIImage *imageSource = [UIImage imageNamed:@"kantStair.png"];

Kant.image = imageSource;

}


@end
If this doesn't quite make sense at the moment, that's OK. There sure are a lot of entities with “image” as part of their name, object, or association, and it is confusing. We'll be examining this topic more thoroughly as we move forward, so, right now, don't lose any sleep over it! Figure 4–36 illustrates how your code should appear at this point. Now save your work by entering ![]() S, and give yourself a pat on the back. You have worked through the header and implementation files at a much deeper level than in previous chapters. Even though you have walked through some of these technical functions before, you braved them again while remaining open to a deeper understanding. You also tackled a very difficult concept: synthesis.
S, and give yourself a pat on the back. You have worked through the header and implementation files at a much deeper level than in previous chapters. Even though you have walked through some of these technical functions before, you braved them again while remaining open to a deeper understanding. You also tackled a very difficult concept: synthesis.
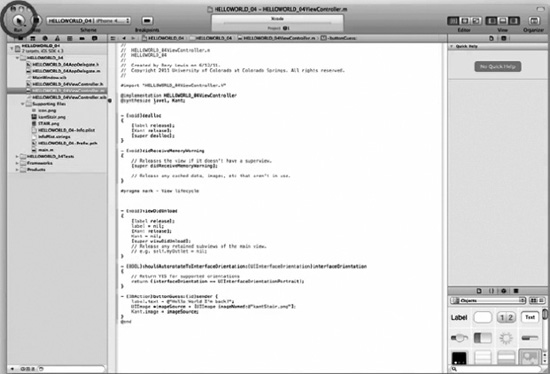
Figure 4–36. With the code all written, let's run it.
36. Now that we are through writing our code, let's run it and see if we have any errors. See Figure 4–36.
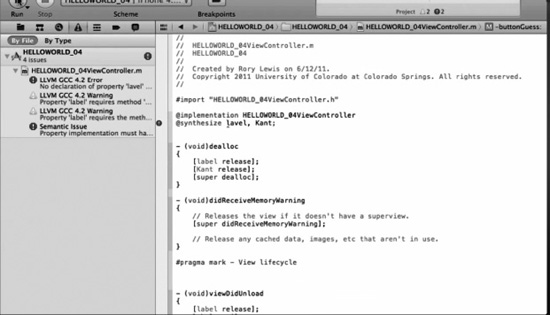
Figure 4–37. Error! Misspelled label.
37. As seen in Figure 4–37, we have errors. Clearly lavel should be label, so I changed it to label. You, of course, type very much better than I do so this means nothing to you—unless you have been diligently following each step in the video. Nonetheless, with the typo fixed, let's save it and run it again.
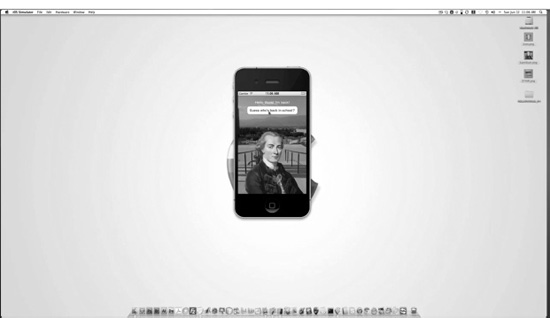
Figure 4–38. Your screen as it runs.
38. Figure 4–38 shows your screen with helloWorld_04 running with the button clicked. Notice that the icons are still on the side, with the helloWorld_04 folder below it.
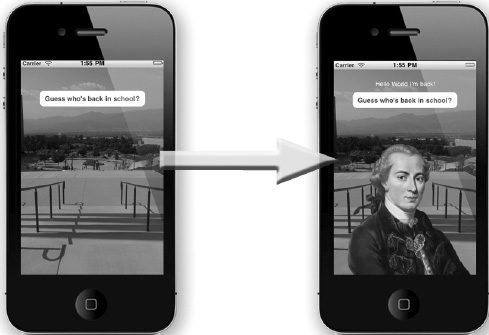
Figure 4–39. The two helloWorld_04 views.
39. Figure 4–39 illustrates the two views of helloWorld_04. The first view is what we will see when the app first opens. Your images will be different of course, if you used your own, but apart from the background image your screen should look very similar. The second image is what appears when the button is clicked. The label text appears and the second image is superimposed on top of the underlying image.
Digging the Code
In this section, let's zoom into some of the key components that we encountered earlier in this chapter. I want to talk a little more about IBOutlets and IBActions – specifically how these include keywords… and even quasi-keywords. We'll also touch on pointers and their relationship to addresses in the code.
IBOutlets and IBActions
Earlier, we worked with IBOutlet and IBAction keywords, and now we're going to talk about a couple of related concepts. Strictly speaking, these are considered by many programmers to be “quasi-keywords.”
The Appkit of Objective-C has converted original C language preprocessor directives, such as #define, into usable preprocessor directives. In geekspeak, we would pronounce this as “pound-define.”
NOTE: In the US, the “#” sign is often called the “pound” sign, especially in Objective-C and other programming contexts. In the United Kingdom, it is referred to as the “hash” character. Many iPhone/iPad developers have recently begun to refer to the #define preprocessor directive simply as the “define directive.”
The #define preprocessor directive tells the computer to substitute one thing for another. That's an easy concept, right? For example, if I were to program the computer to substitute “100” every time it sees an instance of your name, our code in C would look like this:
#define yourName 100
This would tell the computer to substitute “100” each time it processes yourName—a variable that recognizes instances of your actual name.
Back to Xcode now, and our topic. In this context, the IBOutlet and IBAction quasi-keywords aren't really defined to be anything. In other words, they don't do anything substantial for the compiler, which is the core of the computer.
Quasi-keywords are flags, though, and they are important in the communication with the Interface Builder. When it sees the IBOutlet and IBAction quasi-keywords, it gets some of its internal code ready to perform specific tasks. It gets itself ready to deal with instance variables and all the hooks and connections that we make in that programming arena.
More About Pointers
It's difficult for many programming students to understand the concept of “pointers”—also sometimes known as the concept of indirection. It's not easy to explain this idea because it's one of the most sophisticated features of the C programming language.
Earlier in this chapter, I presented the analogy of seeing a criminal doing something, and then calling the police and pointing the police to where he is—so they, not you, can arrest the criminal. This analogy works for many students, but now let's go a little deeper.
If you were to ask a Computer Science professor what a “pointer” is, he would probably say something like “Pointers hold the address of a variable or a method.”
“The address?” you ask. Well, consider this new analogy in the way of explanation.
Have you ever seen a movie in which a detective or some frantic couple is traveling all over the place, looking for clues to the treasure map, or the missing painting, or the kidnapped daughter? Sometimes they will spot a fingerprint, or a receipt, or even an envelope with a piece of paper containing a cryptic message—and these take the people one step closer to their goal—of finding the missing objects themselves.
We can call these pointers; they indicate the next place to go—for the solution of the given problem. They don't necessarily give the ultimate address, at which everything is handled and resolved, but they give us intermediate addresses or places to continue our work.
Thus, what the professor of Computer Science means is that pointers do not actually contain the items to which they direct us; they contain the locations within the code—the addresses—of the desired objects or actions or entities. This important feature makes the C-family of languages very powerful.
This simple idea makes it very efficient to turn complex tasks into easy ones. Pointers can pass values to types and arguments to functions, represent huge masses of numbers, and manipulate how we manage memory in a computer. Many of you are perhaps thinking that pointers are similar to variables in the world of algebra. Exactly!
In our first analogy, a pointer enabled an unarmed citizen to arrest a dangerous criminal by using indirection—that is, by calling the police to come and solve the problem. (Yes, the term “indirection” is an odd choice given that we are actually being directed toward the goal.)
Consider the following example where we use a pointer to direct us to the amount you have in your bank balance. To do this, let's define a variable called bankBalance as follows:
int bankBalance = $1,000;
Now, let's throw another variable into the mix and call it int_pointer. Let us also assume that, for argument's sake, we have declared it. This will allow us to use indirection to indirectly connect to the value of bankBalance by the declaration:
int *int_pointer;
The star, or asterisk, tells the family of C-languages that our variable int_pointer is allowed to indirectly access the integer value of the amount of money in our variable (placeholder): bankBalance.
To close, I want to remind you, and to acknowledge, that our digging around here is not an exhaustive or rigorous exploration into these topics… just a fun tangent into some related ideas. At this point, there is no reason for you to be bothered if you don't fully understand pointers. Seeds have been planted and that's what counts for now!
You've Said “Hello!”… but now, INDIO!
We can divide most iPhone and iPad apps into four different functions: Interaction, Navigation, Data, and I/O (Input/Output). We have seen enough apps to know that we can interact with them; we can navigate from one screen to another; we can manipulate and utilize data; and, we can provide input (type, paste, speak) and receive output (images, sounds, text, fun!).
Before we zoom in again to approach a program from any one of these specific areas, we need to first have a better grasp of how these different aspects of iPhone/iPad programming work, look, and behave. We also need to learn about their limitations and the pros and cons in terms of the projected or desired user experience and, because of the differences discussed above, whether the app is for the iPhone or the iPad. In helloWorld_04, unbeknownst to you, we continued to delve deeper into INDIO—Interaction, Navigation, Data, and I/O (input/output). Our code retrieved two images, by different means, which will interact with the user. This exercise took us closer to the I/O aspect of INDIO, which we have not quite wrapped our heads around because, simply put, we're not there yet.
Like a digital warrior, you are striding along a path into the forest of Objective-C, to a place where you will need to be accustomed to vaulting over rivers, hunting tigers, building fires in the rain, and so forth. So far, you've learned to start a fire with flint and steel—in dry weather—and you've gotten pretty good at hopping over streams. This lesson will teach you to vault over wider streams and, once there, to hunt tigers. Soon, you'll be equipped to fight the legendary demons of I/O in the daunting realm of INDIO.
As you gain a working knowledge of where any limitations and barriers exist, your journey through these four domains—all parts of a vast “forest”—will be more powerful and productive. A very important part of my job is to show you how to conduct yourself safely through the Forest of INDIO. Some sections of the forest are more daunting than others, but the good news is that you will be getting a nice, high-level view, as if from a helicopter! After our aerial tour, we will parachute down to the forest floor, open Xcode, and continue to explore the paths, the watering holes, and the shortcuts—to mark off the unnecessary sections and to be on the lookout for wild animals.
Model-View-Controller
As mentioned previously, the programmers who developed Cocoa Touch used a concept known as the Model-View-Controller (MVC) as the foundation for iPhone and iPad app code. Here is the basic idea.
Model: This holds the data and classes that make your application run. It is the part of the program where you might find sections of code I told you to ignore. This code can also hold objects that represent items you may have in your app (e.g., pinballs, cartoon figures, names in databases, appointments in your calendar).
View: This is the combination of all the goodies users see when they use your app. This is where your users interact with buttons, sliders, controls, and other experiences they can sense and appreciate. Here you may have a main view that is made up of a number of other views.
Controller: The controller links the model and the view together while always keeping track of what the user is doing. Think of this as the structural plan—the backbone—of the app. This is how we coordinate what buttons the user presses and, if necessary, how to change one view for another, all in response to the user's input, reactions, data, etc.
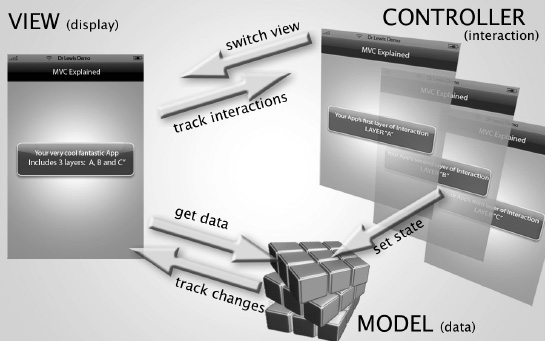
Figure 4–40. The model, the view, and the controller (MVC).
Consider the following example that illustrates how you can use the MVC concept to divide the functionality of your iPhone/iPad app into three distinct categories. Figure 4–40 shows a representation of your app; I've called it “MVC Explained.” You can see that the VIEW displays a representation—a label—of “Your very cool fantastic App Includes 3 layers: A, B and C.”
In the CONTROLLER section of the app, we see the three individual layers separated out, Layer “A,” Layer “B,” and Layer “C.” Depending on which control mechanism the user clicks in the VIEW domain, the display the user sees, the CONTROLLER returns the appropriate response—the next view from the three prepared layers.
Your app will probably utilize data of some type, and this information will be stored in the MODEL section of your program. The data could be phone numbers, players' scores, GPS locations on a map, and so on.
As the user interacts with the VIEW section of the app, it may have to retrieve data from your database. Let's say your data contains the place your user parked her car. When the user hits a particular button in your program, it may retrieve the GPS data from the MODEL. If it's a moving target, it may also track changes in the user's position in relation to a car in the parking lot. Lastly, the CONTROLLER may change the state (or mode) of your data. Maybe one state shows telephone numbers, while another shows GPS positions or the top ten scores in a game. The CONTROLLER is also where animation takes place. What happens in the animation can affect and perhaps change the state in your Model. This could be done by using various tools, such as UIKit objects, to control and animate each layer, state, etc.
If this sounds complicated, bear in mind that you've already done much of this without even knowing it! In Example 1, you had the user press a button and up popped a label saying “Hello World!” This shows how you have already built an interaction with a ViewController. We will be delving further into these possibilities, of course. In Chapter 4, we will venture deeper into the Interaction quadrant of the Forest of INDIO, and allow the user to add and delete table view items.
When we do this, I will do my best to keep you focused on the big picture when it comes to interactions… via Navigation. Our goal will be to have the user move from less specific information to more specific information with each new view.
In the Chapter Ahead
In Chapter 5, we will move into the next level of complexity: switch view applications. We will examine how a team of characters or roles within your code will work together to direct an outcome, or series of outcomes, that will give the user the sense of seamless flow.
You will learn about delegators and switch view controllers, classes and subclasses, and “lazy loads.” We will get into the nitty-gritty of the .xib files, examine the concept of memory deallocation, and learn about imbedded code comments. It's getting curiouser and curiouser…
Onward to the next chapter!