
CHAPTER 7
Get a Job: Interacting with User Data
In nearly every application that you build, you're going to have that moment when you wish you had access to the users' data. Maybe it's contacts or phone numbers, or maybe you want to save a ringtone to their devices. In any case, Windows Phone makes it easy to interact with all sorts of user data, both retrieving and saving back to the phone.
This chapter will cover the Microsoft.Phone.Tasks namespace, which provides the APIs that you will use to access user data. We'll discuss the importance of each available task, and how and when you should use it. We'll also provide sample code to get you started. At the end of this chapter, we'll introduce the Microsoft.Phone.UserData namespace, which is new with Windows phone 7.5. The APIs in this namespace require more work, but they provide more robust access to your user's most valuable data.
Distinguishing Launchers and Choosers
Windows Phone provides two types of task APIs for interacting with user data: launchers and choosers. Both are tasks, but differ in the type of work they perform. Launchers start a task but do not return data to your application, while choosers start a task and allow the user to choose data that is returned to your application.
For example, the PhoneCallTask, a launcher, allows you to prompt the user to dial a specific number. After they confirm the choice, the launcher will start the phone application and your application will end. You are “launching” the phone from your app.
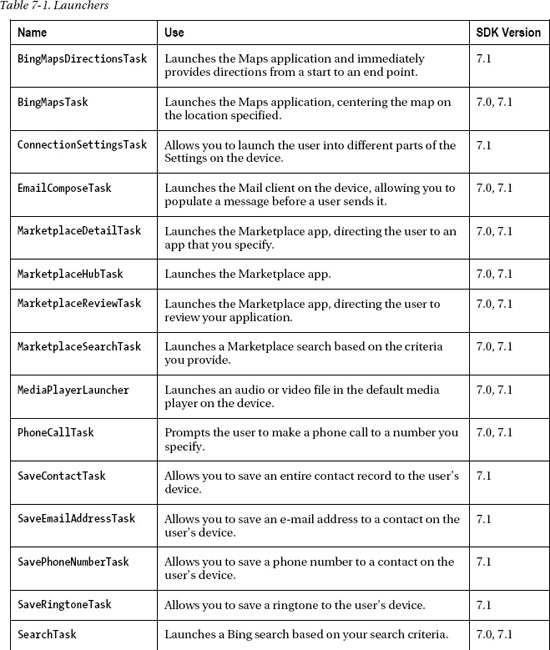
In contrast, the EmailAddressChooserTask, a chooser, as the name implies, allows you to take the user to his list of contacts on the phone, choose one from the list, and the selected contact's e-mail address will be returned to your application as data that you can use. Tables 7-1 and 7-2 list all of the tasks available to us in the Windows Phone 7.1 SDK. We will spend the majority of this chapter walking through each one.
This chapter is not meant to be a reference. There are plenty of online resources for that, including the Microsoft Launchers and Choosers Overview (http://msdn.microsoft.com/en-us/library/ff769542(v=VS.92).aspx). The web will be far more recently updated (that is, until we can figure out how to push updates to this paper book you're holding). Instead, this chapter is an examination of how and when to use each of the Tasks that were available when this book was published, and includes all through the Windows Phone 7.1 SDK.

A complete code project that incorporates all of the Launchers and Choosers (as well as the UserData namespace as discussed later in this chapter) is provided at the end of the chapter, and referenced throughout.
Setting up a Launcher
Launchers, as mentioned earlier, are what we call a “fire and forget” mechanism. We launch a browser, or a text message, but we don't get any data back to our app. In fact, we might not even get our user back to our app! We are sending them away to perform a task, and it will be up to the user to return to our application. As an example of this, let's look briefly at the PhoneCallTask in Listing 7-1.
Listing 7-1. Setting up a Launcher
PhoneCallTask pct = new PhoneCallTask();

pct.DisplayName = "Rick Astley";

pct.PhoneNumber = "(772) 257-4501";

pct.Show();
As the code in Listing 7-1 shows, using a launcher consists of creating a new task object, adding some properties (like DisplayName and PhoneNumber), and finally calling a Show() method that launches the task. Figure 7-1 shows the user interface that your user will see when this task is used:
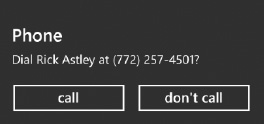
Figure 7-1 An example of the PhoneCallTask user interface
Setting up a Chooser
Choosers, unlike Launchers, are designed to return data to your application. Photos, e-mail addresses, phone numbers—these are all valuable pieces of data that you will want to get from your users. This means that Choosers require a bit more code to be effective, because we need a setup code (like the Launchers), but we also need an event handler that grabs the data when it is returned. Listing 7-2 shows the code necessary to use the AddressChooserTask. You'll see that we initialize the task in our MainPage() constructor method, and then get the AddressResult in our event handler.
Listing 7-2. Setting up a Chooser
public MainPage()

{

    InitializeComponent();


    act = new AddressChooserTask();

    act.Completed += new EventHandler<AddressResult>(act_Completed);

    act.Show();

}


void act_Completed(object sender, AddressResult e)

{

    if (e.TaskResult == TaskResult.OK)

    {

        string address = e.Address;

        string name = e.DisplayName;

    }

}
As we show in the event handler, you can make sure that the user completed the task by checking the TaskResult object. Once we know we have received a result, we can grab the Properties of the AddressResult object, Address and DisplayName.
As we move through the tasks in this chapter, you will find that the tasks follow the model of the Launcher or the Chooser. We have categorized them by the way they are used, Bing Tasks, Camera Tasks, Communication Tasks, Contact Tasks, Marketplace Tasks, and a Miscellaneous Tasks category for those few that don't fit in another group.
Bing Tasks
Each of the tasks in this category uses either Bing Search or Bing Maps to provide its functionality. There is also an entire suite of Bing APIs available on the web at www.bing.com/toolbox/bingdeveloper, but for the purposes of this chapter, we will focus on three tasks: BingMapsDirectionsTask, BingMapsTask, and SearchTask.
BingMapsDirectionsTask
The BingMapsDirectionsTask is a new task in the Windows Phone 7.1 SDK release, and allows you pass a start and end point to the Maps application on the phone, and it will generate directions for the user.
In Listing 7-3, we show the code you need to make this task performs its action.
Listing 7-3. Using the BingMapsDirectionsTask
using System.Device.Location;


BingMapsDirectionsTask bmdt = new BingMapsDirectionsTask();

bmdt.Start = new LabeledMapLocation("8800 Lyra Ave, Columbus, OH  43240", new GeoCoordinate());

bmdt.End = new LabeledMapLocation("Thurman's Cafe, Columbus, OH", new GeoCoordinate());

bmdt.Show();
A great feature about this Task, however, is that almost none of the data is required. In fact, if you don't include a Start location, it will assume you want the user's current location. If you haven't used a GeoCoordinate object before, think a latitude/longitude position. In order to use these objects, we need to make sure that you add a reference to the System.Device assembly to your project. If you don't include actual GeoCoordinate values, it will use the Label attribute as a search term. (Note that we provided empty GeoCoordinate values in our start and end points.) This means you don't have to do any geocoding to an address to get the converted latitude and longitude values, because if you type an address into the Label property, it will use that instead. Figure 7-2 shows the user interface your user will see when the BingMapsDirectionsTask is launched.

Figure 7-2. The BingMapsDirectionsTask user interface
You will definitely want to test the addresses you are using before publishing your app. If you provide a partial address to the task, it will do its best to determine what you are talking about. This is because it's not using the raw values you provide, but using those values to perform a search for the best result. If you want your users to be able to find their way to your offices, you're going to want to be certain that the task understands your commands.
BingMapsTask
This launcher has been around since the beginning, but the first release of Windows Phone required geocoordinates in order to function properly. In the Windows Phone 7.1 SDK, you can now specify a SearchTerm property that allows you to use a location, address, or even a company's name as your criteria. If you are using the SearchTerm property, we recommend that you be very specific. Vague searches might end up giving you a different location than you expected. Listing 7-4 shows how we use the BingMapsTask.
Listing 7-4. Using the BingMapsTask
BingMapsTask bmt = new BingMapsTask();

bmt.SearchTerm = "Progressive Field, Cleveland, OH";

bmt.Show();
If you're already prepared to generate the latitude and longitude for addresses, you can still use those for the best accuracy. Just use the Center property (as shown in Listing 7-5) and pass the coordinates in as a GeoCoordinate object. The challenge with using Center is that you are truly only centering the map on that location. No labels will appear on the map, so unless you're trying to show your user a general area, we'd recommend using the search term with an address every time. Even with the highest ZoomLevel of 20, you're still likely to be looking at a larger area than you intended. Listing 7-5 shows what the Center and ZoomLevel properties look like (you can use this instead of the SearchTerm).
Listing 7-5. Using GeoCoordinates with the BingMapsTask
BingMapsTask bmt = new BingMapsTask();

bmt.Center = new GeoCoordinate(41.42322600, -81.920683);

bmt.ZoomLevel = 20;

bmt.Show();
If you're absolutely determined to use lat/long values (and don't already have a way to determine them), there's an outstanding geocoding service that will convert addresses to lat/long, and will even convert lat/long to potential addresses if you're feeling adventurous; it's found at http://msdn.microsoft.com/en-us/library/cc966793.aspx. Our recommendation is to rely on the SearchTerm property with a specific address or location. This should be a can't-miss option every time, and you should end up with a result that looks like Figure 7-3.
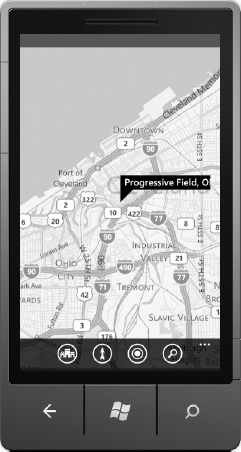
Figure 7-3. The BingMapsTask user interface, using the SearchTerm property
SearchTask
There are plenty of APIs out there to retrieve search engine results from, but for a simpler and easier solution to doing a web search in your application, you should use the SearchTask. As with all Launchers, please remember that this is not something that happens within your app, but is instead handled by the Windows Phone operating system. You're not going to have access to the results of this SearchTask, but if you need to let your user search the web, there's no easier way to do it on Windows Phone. Listing 7-6 shows how to use the SearchTask.
Listing 7-6
SearchTask st = new SearchTask();

st.SearchQuery = "Migrating To Windows Phone";

st.Show();
This will take the user to the default search application on the phone, which now contains tabs for web, local, and images. Figure 7-4 shows the user interface for the Search application this task uses.
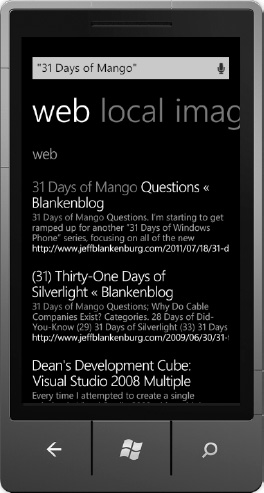
Figure 7-4. The user interface for the SearchTask
Camera Tasks
There are only two tasks in this category, but they serve the two purposes we have for the camera: taking a photo and selecting a previously selected photo. These are the CameraCaptureTask and the PhotoChooserTask.
CameraCaptureTask
There are many similarities between the CameraCaptureTask and the PhotoChooserTask, specifically that both tasks return a PhotoResult object, which we will look at shortly. With the CameraCaptureTask, the expectation is that the user is going to be taking a new photo. With the PhotoChooserTask, the user is taken to the photo library on her phone and she is expected to select an existing photo.
In the CameraCaptureTask, the user will immediately be taken to the camera application. Once she has taken a picture, she will be prompted to “Accept” the image before it is returned to your application. Working with images is obviously a little trickier than working with text, and we'll need another namespace, System.Windows.Media.Imaging. In Listing 7-7, we create a new CameraCaptureTask, as well as a new event handler for the result. In order to capture the result as a BitmapImage, you will need this namespace.
Listing 7-7
CameraCaptureTask cct;


public MainPage()

{

    InitializeComponent();

    cct = new CameraCaptureTask();

    cct.Completed += new EventHandler<PhotoResult>(cct_Completed);

    cct.Show();

}


void cct_Completed(object sender, PhotoResult e)

{

    if (e.TaskResult == TaskResult.OK)

    {

        string imagename = e.OriginalFileName;

        BitmapImage image = new BitmapImage();

    }

}
When you try to use this Chooser in the Windows Phone emulator, you'll find that it doesn't actually have access to a camera. Instead, you'll see a screen similar to the one shown in Figure 7-5.
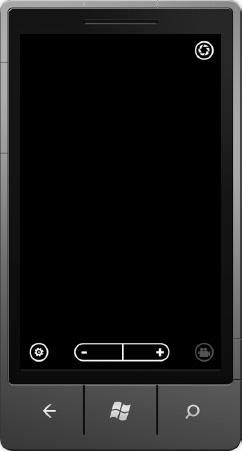
Figure 7-5. The user interface for the CameraCaptureTask in the emulator
Notice that although there's not an image shown, there's a Capture button in the top-right corner. You will only see this button in the emulator, as Windows Phones all have a dedicated camera shutter button as part of the hardware specification. When you click the button, you'll end up with a screen that looks something like Figure 7-6.

Figure 7-6. The “fake” images you see in the Windows Phone emulator
The primary difference between yours and the one in Figure 7-6 will be the location of the small black box in the white field. It rotates clockwise around the outside of the white field, so each picture you “take” on the emulator should result in the box being in a different location. When you get the final image returned to you, the emulator adds a hint of flashy color to the image, making the white box red and the black box green. On an actual device, you'd use the camera just as you normally do, and the image would be the image you took.
PhotoChooserTask
Similar to the CameraCaptureTask, this Chooser allows your user to select an image from their photo library. Unlike the CameraCaptureTask, you can allow your user to select an image or take a new one with the camera. You can enable this feature, as well as a cropping feature, before you launch this task. Ultimately, you will treat the data you receive from the PhotoChooserTask the same way that you did with the CameraCaptureTask.
You'll need the System.Windows.Media.Imaging namespace, and you'll be receiving the image, as well as its location, on the device in the Completed event handler's return data, as shown in Listing 7-8.
Listing 7-8. Using the PhotoChooserTask
PhotoChooserTask pct;


public MainPage()

{

    InitializeComponent();


    pct = new PhotoChooserTask();

    pct.Completed += new EventHandler<PhotoResult>(pct_Completed);

    pct.ShowCamera = true;

    pct.PixelWidth = 100;

    pct.PixelHeight = 100;

    pct.Show();

}


void pct_Completed(object sender, PhotoResult e)

{

    if (e.TaskResult == TaskResult.OK)

    {

        string imagename = e.OriginalFileName;

        BitmapImage image = new BitmapImage();

    }

}
You'll notice that we define a PixelWidth and PixelHeight property before we launch the Chooser. This is actually defining the aspect ratio of the cropping box that your user will be presented. This box allows you, as the developer, to get an image that is the appropriate shape for your purposes. The user gets to decide which part of the image they would like to select, and then the image is returned to you at the dimensions you specified, as shown in Figure 7-7.
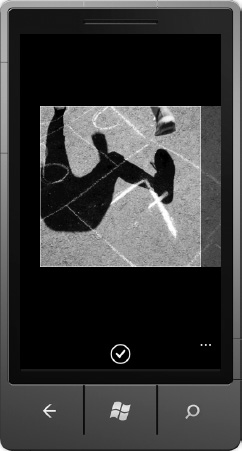
Figure 7-7. The optional cropping box from the PhotoChooserTask
This makes selecting images for headshots, where you need a consistent size for every user, incredibly simple to manage. You don't have to worry about sizing down the images to save file space or that the user is uploading an image that is 5 MB in file size. You get exactly what you want, and nothing more.
You also get to specify whether the user can take a new photo with the ShowCamera property. We can't think of a good reason to ever exclude this, but if you only want your user to be able to select from an existing photo, it's certainly an option. This was enabled by the pct.ShowCamera = true; code in Listing 7-8.
In most cases where you need your user to provide an image, we would recommend using this Chooser rather than the CameraCaptureTask, which requires a new photo to be taken.
Communication Tasks
The tasks covered in this section relate to communicating with someone else via a Windows Phone. This covers sending e-mail and text messages, but also making phone calls and posting information to social networks.
EmailComposeTask
Every single Windows Phone application should be using this Launcher. To clarify, every single Windows Phone application should have a way to contact the developer that created it. There are thousands of applications in the marketplace that don't do this, and they're missing an opportunity to improve their applications and engage with their customers. Figure 7-8 demonstrates how this could be used in an application.

Figure 7-8. Showing a contact e-mail address in your application
When your users tap on the e-mail address shown in Figure 7-8, you can completely fill in the e-mail details for them, so that in many cases, all they need to do is write their message and press the Send button. None of the fields are required, but you can specify Subject, Body, To, Cc, and Bcc. Listing 7-9 shows the syntax for using the ComposeEmailTask.
Listing 7-9. Using the EmailComposeTask
EmailComposeTask ect = new EmailComposeTask();

ect.Subject = "This is a test message";

ect.Body = "I am sending you a message from the Launchers and Choosers app.";

ect.To = "[email protected]";

ect.Cc = "[email protected]";

ect.Bcc = "[email protected]";

ect.Show();
You can see that all of the values are strings. This means that you still need to validate that the values you use are appropriate. Because we are launching a separate application to handle sending an e-mail, any issues or errors in your values will only be visible to the user. For example, if you accidentally have an e-mail address with an invalid character, the user won't even notice until they try to click the Send button (shown in Figure 7-9). It's incredibly important to make sure you have valid values for these properties because all of the issues will have to be handled by your users. You'll also notice that you can't attach files to this message. This is one of the current limitations of the EmailComposeTask, but the interface does allow the user to attach a file, so they still have that ability if they need it.
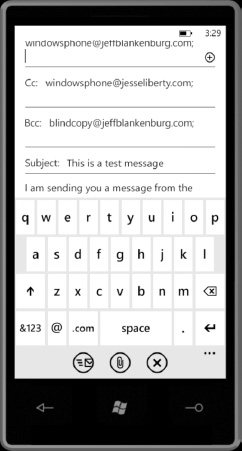
Figure 7-9. The e-mail interface for the EmailComposeTask
Another important note to remember about this Launcher is that the Windows Phone emulator does not have the ability to set up e-mail accounts, and because of this, when you launch the EmailComposeTask in the emulator, you'll get an error that looks like the message shown in Figure 7-10.
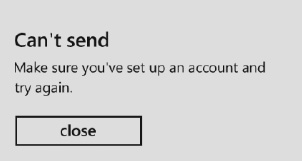
Figure 7-10. An expected error message from the Windows Phone emulator
If you get this error in the emulator, you're doing it right. When you try it on an actual phone, however, you should be taken to a screen that allows you to send the e-mail message. It is very important that you test your entire application on a real phone before pushing it to the Windows Phone Marketplace. You don't want little issues like this to sneak through, because the Marketplace Test Team will definitely find them.
PhoneCallTask
The PhoneCallTask is another great tool for allowing your users to contact you, however, we wouldn't recommend it. If your application gets really popular (as you hope it does), you're not going to want those millions of users to have your direct number. Instead, the PhoneCallTask is an essential tool for letting your user call other people. For example, in combination with the PhoneNumberChooserTask, you can provide a simple mechanism for someone to pick one of their existing contacts and call them from your application. Again, they'll be using the built-in phone dialer on their phone, so your application will be in the background while they make their call.
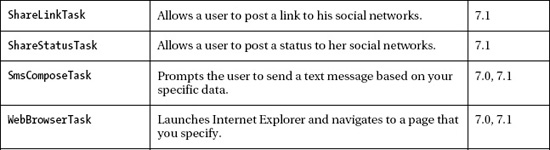
You do have the ability to provide two pieces of data to the dialer: the PhoneNumber and a DisplayName to show along with the number (shown in Listing 7-10). We recommend providing both values every time, because without the context of a display name, dialing a random phone number might be unsettling to your user. Figures 7-11 and 7-12 show the difference in what they'll see.
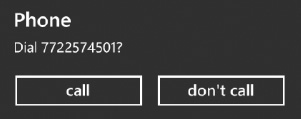
Figure 7-11. Without display name

Figure 7-12. With display name
Another recommendation we suggest is to format the PhoneNumber property. You'll notice in Figures 7-11 and 7-12 that it's just a random string of ten digits. By formatting the PhoneNumber, it will look more familiar to your user, and give them the confidence to press the Call button. Make sure that you are providing a number that is relevant to your user. For example, inside the United States, we don't need to use the +1 international code. But if your user is in Ireland, or Bulgaria, or China, they're absolutely going to need that calling code. You can either choose to include it always, or detect the region of the device and add it when necessary. Figure 7-13 shows the prompt you'll see when you format the number.
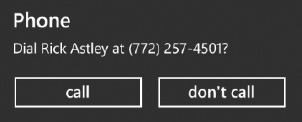
Figure 7-13. The fully-formatted PhoneCallTask user interface
Finally, Listing 7-10 show the actual code you need to make it happen. Nothing surprising here; just a string for PhoneNumber and a string for DisplayName.
Listing 7-10
PhoneCallTask pct = new PhoneCallTask();

pct.DisplayName = "Rick Astley";

pct.PhoneNumber = "(772) 257-4501";

pct.Show();
Ultimately, as with all of our tasks, the user has to press the “call” button. All we can do with these tasks is prompt the user to make the choice, but if they don't want to make the call, they will always have the option to decline.
ShareLinkTask
In short, the ShareLinkTask allows you to help your user share links with their social networks. For example, let's say you that you have created a news app, and when a user finds an article that they want to share with their friends, you would use the ShareLinkTask to do it. Listing 7-11 shows how to use the ShareLinkTask.
Listing 7-11. Using the ShareLinkTask
ShareLinkTask slt = new ShareLinkTask();

slt.LinkUri = new Uri("http://jeffblankenburg.com");

slt.Message = "This is an awesome website.";

slt.Title = "The Blankenblog";


slt.Show();
In this example, we get to specify a LinkURI (this is the actual link we're sharing), as well as a message and a title. These values become a little more apparent when we look at the user interface, as shown in Figure 7-14.
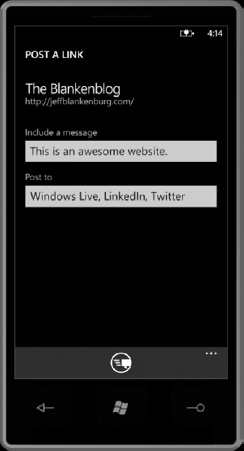
Figure 7-14. The ShareLinkTask user interface
Depending on which social networks the user selects, the link will be used in different ways. Figures 7-15, 7-16, and 7-17 show examples of how the data is used on Twitter, Facebook, and Windows Live, respectively.

Figure 7-15. Twitter using the data from the ShareLinkTask

Figure 7-16. Facebook using the data from the ShareLinkTask

Figure 7-17. Windows Live using the data from the ShareLinkTask
As we show in the Figures 7-15, 7-16, and 7-17, each social network will use the data differently; but the idea is the same: share a link with a community of people. The next task, ShareStatusTask, performs a similar job, but with status messages instead of links.
ShareStatusTask
Similar to the ShareLinkTask that we just discussed, the ShareStatusTask allows you to prompt a user to post a status message to their social networks. This is incredibly handy when you're running a promotion that you want your users to mention. Perhaps you've seen something on Twitter like “RT this message to win a $100 gift card!” The ShareStatusTask would be a way to encourage your users to post those messages (not that we encourage that kind of spammy behavior, mind you).
To use the ShareStatusTask, take a look at the code in Listing 7-12.
Listing 7-12. Using the ShareStatusTask
ShareStatusTask sst = new ShareStatusTask();

sst.Status = "This is my status message.";

sst.Show();
In this example, we only get the Status property (a string) to use, but most social networks will automatically link URLs that you place in the text automatically, so feel free to include them in your text. The interface the user will see is shown in Figure 7-18.
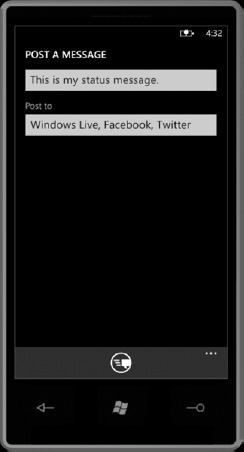
Figure 7-18. The user interface for the ShareStatusTask
SmsComposeTask
At its core, this task makes it simple for your users to send a text message. We've often referred to this Launcher as the “poor man's Twitter API.” For those of you unfamiliar with Twitter, you can execute most of their functionality via text messages (http://support.twitter.com/groups/34-apps-sms-and-mobile/topics/153-twitter-via-sms/articles/14020-twitter-sms-commands). In most cases, however, this will be used as an application promotion tool: “For 500 Mooby points, text your friends to tell them about this application!”
It's also a great tool for fundraising. You may have seen the commercials that say “Send a text to 90999 to donate $10!” If your application can bring up the text message, fully filled out, users are much more likely to press Send. The SmsComposeTask is how you do it, and you can see that in Listing 7-13.
Listing 7-13. Using the SmsComposeTask
SmsComposeTask sct = new SmsComposeTask();

sct.To = "40404";

sct.Body = "Sign me up for Twitter!";

sct.Show();
We get two properties in the SmsComposeTask: To and Body. Much like the EmailComposeTask we used earlier, it is up to you to make sure that the To value is valid; otherwise your user will be stuck trying to determine what is wrong. Figure 7-19 shows the interface your user will see.
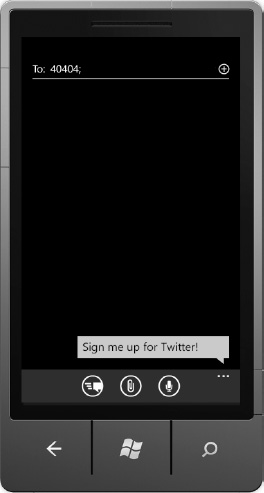
Figure 7-19. The user interface for the SmsComposeTask
SMS messages are sent the same way a user normally does it, through their Messaging application. The SmsComposeTask does not have access to any responses or any future messages that are part of the conversation, but it's a great way to get a user to send that initial text message that so many services are hungry for.
Contacts Tasks
Each of the tasks covered in this section relate to contact data. Getting e-mail addresses, phone numbers, and physical addresses in and out of a user's contact records is what we can accomplish using these six tasks: AddressChooserTask, EmailAddressChooserTask, PhoneNumberChooserTask, SaveContactTask, SaveEmailAddressTask, and SavePhoneNumberTask.
AddressChooserTask
As straightforward as it sounds, the AddressChooserTask allows your user to select the address of one of the contacts on his phone. The downside is that you're on your own to parse the result. You'll get an AddressResult object, which does not separate the individual elements of an address into child properties. Your address data will look like this:
789, 1st Ave
New York, NY  96001
On the plus side, you'll also be given the contact's name with the DisplayName property. This allows you to use both pieces of information when you leverage this data. For example, you could use the BingMapsDirectionTask that we covered in the Launchers section, passing in these two values as the Label and Location. In Listing 7-14, we build a new AddressChooserTask with a Completed event handler.
Listing 7-14
private AddressChooserTask act;


public MainPage()

{

    InitializeComponent();


    act = new AddressChooserTask();

    act.Completed += new EventHandler<AddressResult>(act_Completed);

    act.Show();

}


void act_Completed(object sender, AddressResult e)

{

    if (e.TaskResult == TaskResult.OK)

    {

       string address = e.Address;

       string name = e.DisplayName;

    }

}
As you can see, we have a Completed event handler that handles the result of that Task. Each of the Choosers will operate this way, with an event handler method receiving the results of the task. An AddressChooserTask returns two values to us, the Address and the DisplayName.
The user will be shown a very familiar contact list on their screen, and selecting a contact will be how the data is triggered to return to us. Figure 7-20 shows the interface that the Windows Phone emulator will show.

Figure 7-20. The Choose A Contact dialog that the AddressChooserTask uses
A very important thing to note about this task (as well as the EmailAddressChooserTask and PhoneNumberChooserTask) is that the contact list that is shown (like Figure 7-20) is a filtered list. What this means is that it will only display the contacts that actually have the data you've indicated. In this example, only three of the seven contacts on the Windows Phone emulator have any address data.
We feel that this is a major shortcoming of these tasks because it will likely confuse your users. If I have 100 contacts on my phone, and you launch this task, and my contact list only has three records (I don't usually keep physical addresses in this example), I'm going to freak out. My concern is no longer about selecting a contact to use in this application; it has shifted to “Why isn't my mom in my contacts anymore?”
This is why we generally recommend taking one of two approaches with these tasks, as follows:
- Alert the user that the list will only contain the contacts that have a physical address in their record.
- Use the Contacts API that we will cover at the end of this chapter.
Ultimately, using an AddressChooserTask is going to be much easier to use, but it does present the opportunity to confuse your users.
EmailAddressChooserTask
There are many situations in which you, as the application developer, will want your users to contact their friends. Perhaps you are writing a social networking application. Maybe you want them to share some data with another contact. In any case, e-mail is often the medium of choice.
By combining the EmailAddressChooserTask with the EmailComposeTask we discussed earlier, you can make sending an e-mail a trivial task for the user.
The EmailAddressChooserTask is very similar to the AddressChooserTask, except that we'll be retrieving an EmailResult object this time. Listing 7-15 shows a new EmailAddressChooserTask and the necessary event handler to gather the data it returns.
Listing 7-15
EmailAddressChooserTask eact;


public MainPage()

{

    InitializeComponent();


    eact = new EmailAddressChooserTask();

    eact.Completed += new EventHandler<EmailResult>(eact_Completed);

    eact.Show();

}


void eact_Completed(object sender, EmailResult e)

{

    if (e.TaskResult == TaskResult.OK)

    {

        string emailaddress = e.Email;

        string displayname = e.DisplayName;

    }

}
As with the AddressChooserTask, we have the new DisplayName property. Before this was introduced in Windows Phone 7.5, we only received the e-mail address and nothing else. When collecting contacts in your application, having the contact's name is a big bonus.
PhoneNumberChooserTask
At this point, you've probably noticed that there are several choosers that do practically the same thing (EmailAddressChooserTask, AddressChooserTask), but differ in the type of contact data they expose. This is done to limit the overhead of the request. If you only need a phone number, there's no reason to get the entire contact record. At the end of this chapter, we'll cover UserData, and how you can retrieve the entire contact record, as well as calendar information.
With the PhoneNumberChooserTask we're able to access a contact's phone number, which, in combination with the SmsComposeTask, would allow you to compose a text message for the user's contact. This becomes more important for applications that have invitations or a social aspect, like Foursquare. Creating a text message that users can send to their contacts makes it easy for them to spread the word about your application or the user's accomplishments. Listing 7-16 shows how you grab the phone number of a contact.
Listing 7-16. Using the PhoneNumberChooserTask
PhoneNumberChooserTask pnct;


// Constructor

public MainPage()

{

    InitializeComponent();

    pnct = new PhoneNumberChooserTask();

    pnct.Completed += new EventHandler<PhoneNumberResult>(pnct_Completed);

    pnct.Show();

}


void pnct_Completed(object sender, PhoneNumberResult e)

{

    if (e.TaskResult == TaskResult.OK)

    {

        string phonenumber = e.PhoneNumber;

        string displayname = e.DisplayName;

    }

    else if (e.TaskResult == TaskResult.Cancel)

    {

        //USER CANCELLED THE TASK.

    }

}
As with any of the tasks in this category (and also including the PhotoChooserTask and the CameraCaptureTask), you need to make sure that you are validating that you received a TaskResult of OK before you proceed. Without that check, you may not be receiving the values you expect because the user cancelled the action. If you would like to also detect the cancellation, you can add an else if statement to your event handler, like the one in Listing 7-16.
SaveEmailAddressTask
The SaveEmailAddressTask allows you to prompt your user to save an e-mail address to their contacts. They will be given the option to add it to an existing contact or to create a new contact. Because they are editing a contact profile, they'll actually be able to edit the entire contact record.
This task (and the ones that follow it in this section) doesn't have the feel of the other tasks, primarily because there is an event handler, but there isn't any data returned to you.
In Listing 7-17, you'll also notice that we must specify the e-mail address (as a String) before we call the Show() method. Without it, this Chooser will only prompt the user to add a new e-mail address to their selected contact.
Listing 7-17. Using SaveEmailAddressTask
SaveEmailAddressTask seat;


public MainPage()

{

    InitializeComponent();


    seat = new SaveEmailAddressTask();

    seat.Completed += new EventHandler<TaskEventArgs>(seat_Completed);

    seat.Email = "[email protected]";

    seat.Show();

}


void seat_Completed(object sender, TaskEventArgs e)

{

    if (e.TaskResult == TaskResult.OK)

    {

        //Save was successful!

    }

    else (e.TaskResult == TaskResult.Cancel)

    {

        //Save was cancelled!

    }

}
As you can see, when saving data to a contact record, you'll have the confidence of knowing that the user completed the action, or that they cancelled it.
SavePhoneNumberTask
The SavePhoneNumberTask gives our users the ability to save a specific phone number to their contact list, much like the previous task, the SaveEmailAddressTask. It is up to them where they save it, or if they save it at all, but this tool certainly makes it easy and is particularly convenient when you have a phone number likely to be called in the future (like customer service or technical support).
Figure 7-21 shows the interface your user will see when the SavePhoneNumberTask is launched and after he has selected a specific contact.

Figure 7-21. The user interface for the SaveEmailAddressTask
To make this task work, take a look at the code sample in Listing 7-18.
Listing 7-18. Using the SavePhoneNumberTask
SavePhoneNumberTask spnt;


public MainPage()

{

    InitializeComponent();


    spnt = new SavePhoneNumberTask();

    spnt.Completed += new EventHandler<TaskEventArgs>(spnt_Completed);

    spnt.PhoneNumber = "(772) 257-4501";

    spnt.Show();


}


void spnt_Completed(object sender, TaskEventArgs e)

{
    if (e.TaskResult == TaskResult.OK)

    {

        //Save was successful!

    }

}
As with the SaveEmailAddressTask, the PhoneNumber property is required or the task will simply prompt the user to add a new phone number to his selected contact record.
SaveContactTask
The SaveContactTask is certainly the most robust of the tasks in this category, and perhaps this entire chapter. It allows you to create and save an entire Contact record on the user's device. This is obviously incredibly beneficial for businesses, salesmen, or anyone else that wants to provide an easy way to be contacted. To do this, we'll follow the same patterns we introduced in the previous two tasks, but you'll see in Listing 7-19 that there are significantly more properties that we can provide.
Listing 7-19. Using the SaveContactTask
SaveContactTask spnt;


public MainPage()

{

    InitializeComponent();


       sct = new SaveContactTask();

    sct.Completed += new EventHandler<SaveContactResult>(sct_Completed);

       sct.FirstName = "Jeff"

    sct.LastName = "Blankenburg";

    sct.Company = "Microsoft";

    sct.WorkAddressStreet = "8800 Lyra Ave. #400";

    sct.WorkAddressCity = "Columbus";

    sct.WorkAddressState = "OH";

    sct.WorkAddressZipCode = "43240";

    sct.WorkEmail = "[email protected]";

    sct.WorkPhone = "(614) 719-5900";

    sct.PersonalEmail = "[email protected]";

    sct.Website = "http://jeffblankenburg.com";

    sct.Show();

}


void sct_Completed(object sender, SaveContactResult e)


{

    if (e.TaskResult == TaskResult.OK)

    {

        //Save was successful!

    }

}
There are numerous properties available in SaveContactTask, above and beyond what is shown in Listing 7-19, including JobTitle and MiddleName if you need those values. As before, we have an event handler to determine whether or not your user completed the save.
Marketplace Tasks
Each of the tasks in this section relate specifically to the Windows Phone Marketplace. You'll see how to get your app reviewed, as well as a simple mechanism to show a user your other applications (think cross-selling!). This section will cover the MarketplaceDetailTask, MarketplaceHubTask, MarketplaceReviewTask, and the MarketplaceSearchTask.
MarketplaceDetailTask
The MarketplaceDetailTask allows you to send users to the Marketplace for a specific application. Left to its default values, it will automatically take them to the details of the application they're using. In many cases, however, you have more than one application, and you'd like to let your users know about them. We recommend making this a part of all your applications. It's an incredibly easy way to direct your fans to your other great apps. To do this, you'll need a very specific piece of information about that app: the application ID. You may also see this listed as Product ID in your AppHub account. If you don't already have an application in the Windows Phone Marketplace, you might not be familiar with this ID value. Every application that successfully gets accepted to the Marketplace is assigned a unique GUID value. This is the ID number that we are looking for. Figure 7-22 is an example from one of Jeff's apps.

Figure 7-22. The product ID and deep link for your application in the marketplace.
So, to use this Launcher, all we need to do is create a new MarketplaceDetailTask, and specify this Product ID as the content identifier, as shown in Listing 7-20.
Listing 7-20. Using the MarketplaceDetailTask
MarketplaceDetailTask mdt = new MarketplaceDetailTask();

mdt.ContentIdentifier = "f08521cd-1cff-df11-9264-00237de2db9e";

mdt.Show();
Again, this is another case where you really need to verify that the value you use for ContentIdentifier is an appropriate value, because you will get an error from the Marketplace otherwise. If you are using the MarketplaceDetailTask to take the user to the details for the current app he's using, you do not need to use the ContentIdentifier property. It will use the current app's value by default. Figure 7-23 shows an example of the Marketplace Detail screen and Figure 7-24 shows the error screen you'll see if you're testing an unpublished app.
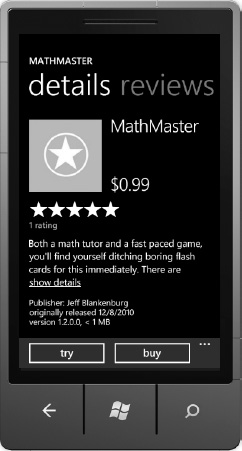
Figure 7-23. The user interface for the MarketplaceDetailTask

Figure 7-24. An expected error from an unpublished application that you are testing
You will primarily use this task to recommend other applications to your user, but it's also a great way to convert a trial user to a full purchase. (We cover Trial Mode in Chapter 10, but in short, Trial Mode enables you to provide your app for free with limited functionality, with the option for the user to buy the full version at a future time.)
MarketplaceHubTask
This might be the simplest of the current Launchers, as all you can do is send the user to the Marketplace app. No search terms, so specific apps, just the Marketplace Hub. We're not exactly clear on why you would want to do this (as opposed to using the next few Launchers), but we suppose it's always good to know that you can. You do have the ability to specify Applications or Music, but that's it. When you search for Applications, you're actually searching for apps and games, so be aware of that as you use this. Listing 7-21 shows how to implement this task.
Listing 7-21. Using the MarketplaceHubTask
MarketplaceHubTask mht = new MarketplaceHubTask();

mht.ContentType = MarketplaceContentType.Applications;

mht.Show();
There's nothing especially fancy about this task, but if you need to direct the user to the Marketplace, there isn't another way to do it.
MarketplaceReviewTask
Of all the marketplace Launchers, this is certainly one you're going to want to use frequently. Once a user has installed your application, it's up to you to drive them to review the app. They won't be prompted to review the app otherwise. By providing a reminder to your users to review your application, you'll get far more reviews, which should translate to more users. Unlike the MarketplaceDetailTask, you can't send your users to any other app but the one they are currently using, so there's no way to specify an Application ID in this Launcher. This takes them directly to the review page for your application.
MarketplaceReviewTask mrt = new MarketplaceReviewTask();

mrt.Show();
While you're building your application, this is another one of the Launchers that doesn't work in the emulator. In fact, it won't work if you deploy it to a phone either. That's because it's looking for an application that doesn't yet exist in the Marketplace. If you're doing it properly, you should see an error that looks like the one displayed in Figure 7-24. The page that the user will see is shown in Figure 7-25.
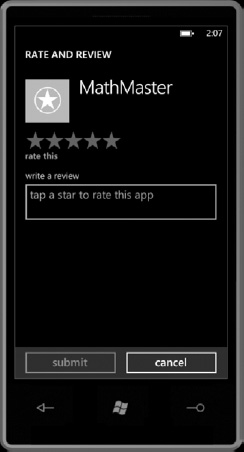
Figure 7-25. The Rate and Review screen the MarketplaceReviewTask uses
MarketplaceSearchTask
Another marketplace Launcher, this allows you to perform a search of the marketplace, and you can even specify applications or music again, like you did with the MarketplaceHubTask. In Listing 7-22, we're searching for the song “Code Monkey” by Jonathan Coulton. You'll also notice in Listing 7-22 that we can just pack all of the search terms into one string, and the Marketplace does an astonishing job of finding what we're looking for.
Listing 7-22. Using the MarketplaceSearchTask
MarketplaceSearchTask mst = new MarketplaceSearchTask();

mst.ContentType = MarketplaceContentType.Music;

mst.SearchTerms = "Code Monkey Coulton";

mst.Show();
There's not significantly more to say about this task, but this is another great way to show a user to your other applications. By searching the name of the app (or in Jeff's case, his name is unique enough), you can present the user with a list of content he might be interested in buying.
Miscellaneous Tasks
As with any collection of things, there's always a few that just don't fit into a specific category. The next four tasks that we'll cover definitely fit that classification. The ConnectionSettings task gives us links to specific parts of the user's phone settings. The MediaPlayerLauncher, aside from being the only task without the word “task” in its name, launches the default media player on the phone. The SaveRingtoneTask allows you to save audio files to the user's ringtone collection. The WebBrowserTask launches Internet Explorer, loading a page you specify.
ConnectionSettingsTask
This task was a late addition to the Windows Phone 7.1 SDK, as it wasn't even available until the final release of the tools. The ConnectionSettingsTask allows you to direct the user to four different sections of her phone's settings: AirplaneMode, Bluetooth, Cellular, and Wi-Fi. To do this, we can use the simple code example shown in Listing 7-23.
Listing 7-23. Using the ConnectionSettingsTask
ConnectionSettingsTask cst = new ConnectionSettingsTask();

cst.ConnectionSettingsType = ConnectionSettingsType.AirplaneMode;

cst.Show();
Using the example in Listing 7-23, the user would automatically be redirected to the Airplane Mode settings screen on her phone, as shown in Figure 7-26.
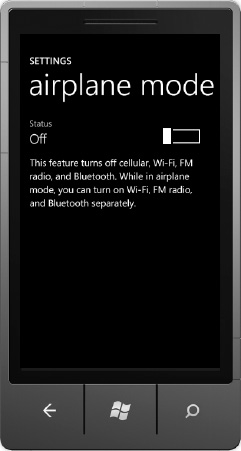
Figure 7-26. The user interface for the ConnectionSettingsTask using AirplaneMode.
You can use the ConnectionSettingsTask inside of your application, but we see this as a significant way to provide Home Screen functionality to your user. By creating secondary tiles for your application (we cover this in Chapter 8), you can provide the ability for the user to access her settings directly from her Home Screen.
MediaPlayerLauncher
This is not like the MediaElement you may have become familiar with. A MediaElement allows you to embed a video on your page in your application. The MediaPlayerLauncher does just what its title describes: it launches the Media Player on the phone and leaves your application. Having said that, this is a simple way to launch a video or song from your application, but it's not an effective way to play that music while the user continues to use your application or game.
You also get the ability to specify the controls that are used on the MediaPlayer using the Controls property, as shown in Listing 7-24. Maybe you only want to offer the ability to pause or stop. You can do that by specifying each control separately by using the MediaPlaybackControls enumeration, as shown in Listing 7-25. The available controls are Pause, Stop, FastForward, Rewind, and Skip. All uses all of the controls and None uses none of them.
Listing 7-24. Using the MediaPlayerLauncher with All Controls Enabled
MediaPlayerLauncher mpl = new MediaPlayerLauncher();

mpl.Controls = MediaPlaybackControls.All;

mpl.Location = MediaLocationType.Install;

mpl.Media = new Uri("video/DramaticChipmunk.mp4", UriKind.Relative);

mpl.Show();
Listing 7-25. Specifying the Controls the MediaPlayerLauncher Will Use
MediaPlayerLauncher mpl = new MediaPlayerLauncher();

mpl.Controls = MediaPlaybackControls.Pause | MediaPlaybackControls.Stop;

mpl.Location = MediaLocationType.Install;

mpl.Media = new Uri("video/DramaticChipmunk.mp4", UriKind.Relative);

mpl.Show();
Notice the Location property in Listing 7-25. This is required to tell the control where the media file resides. If you've included the media file in your XAP, you want to choose the MediaLocationType.Install. If your application stored the media file in IsolatedStorage, you'll want to choose the MediaLocationType.Data.
The MediaPlayer is capable of playing several different formats of media, including WAV, MP3, WMA, MP4, AAC, M4A, and WMV. For a complete and up-to-date listing of available formats, please check out http://msdn.microsoft.com/en-us/library/ff462087(v=VS.92).aspx.
SaveRingtoneTask
The SaveRingtoneTask, as you'll see, is the most code-intensive example in this chapter, but this is for a specific reason: in order to save a ringtone to a user's phone, you must first save it to IsolatedStorage. So, in this section, our code sample will not only show you how to use the SaveRingtoneTask, but also how to save an MP3 file to IsolatedStorage, so that you can use it with this task. Listing 7-26 shows the code that is specific to using the SaveRingtoneTask.
Listing 7-26. Using the SaveRingtoneTask
SaveRingtoneTask srt;


// Constructor

public MainPage()

{

    InitializeComponent();

       srt = new SaveRingtoneTask();

    srt.Completed += new EventHandler<TaskEventArgs>(srt_Completed);

    srt.DisplayName = "Scotch";

    srt.IsShareable = true;

    srt.Source = new Uri("isostore:/Scotch.mp3");

    srt.Show();

}


void srt_Completed(object sender, TaskEventArgs e)

{
    if (e.TaskResult == TaskResult.OK)

    {

        //RINGTONE SAVED SUCCESSFULLY!

    }

    else if (e.TaskResult == TaskResult.Cancel)

    {

        //USER CANCELLED THE SAVE.

    }

}
At this point in the chapter, most of this code should look really familiar. We create a new SaveRingtoneTask and a Completed event handler. The DisplayName property is what the user will see when the ringtone is installed on the user's device, as shown in Figure 7-27. IsShareable indicates whether other applications can use your ringtone file, which you'd want to prevent with DRM'd audio files.

Figure 7-27. The ringtone selection screen with our custom ringtone listed
Finally, if you refer back to Listing 7-26, we have the Source property. This uses a Uri format that may look unfamiliar; this is because it is referring to a file that was previously saved in IsolatedStorage. We covered IsolatedStorage in Chapter 3, but Listing 7-27 shows a simple example of saving an MP3 file from our application into IsolatedStorage. We referred to the saved location of this file in Listing 7-26.
Listing 7-27. Saving an MP3 File to IsolatedStorage
var s = Application.GetResourceStream(new Uri("audio/Scotch.mp3", UriKind.Relative));

{

    using (var f = IsolatedStorageFile.GetUserStoreForApplication().CreateFile("Scotch.mp3"))

    {

        var buffer = new byte[2048];

        int bytesRead = 0;


        do

        {

            bytesRead = s.Stream.Read(buffer, 0, 1024);

            f.Write(buffer, 0, bytesRead);

        }

        while (bytesRead > 0);


        f.Close();

    }

}
This example in Listing 7-27 will save your file to IsolatedStorage, allowing you to then use the code in Listing 7-26 to save the ringtone to your user's device. When the task executes, the user will see the screen shown in Figure 7-28.
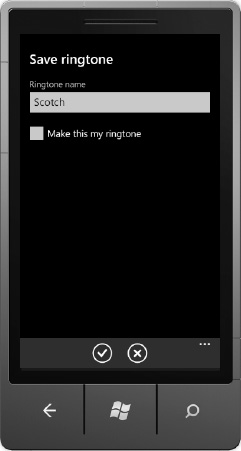
Figure 7-28. The Save Ringtone dialog that the SaveRingtoneTask uses
If the user checks the “Make this my ringtone” box, it will also assign this ringtone to be his default ringtone for the entire device.
WebBrowserTask
The WebBrowserTask is often confused with the WebBrowserControl. The WebBrowserControl is used inside an application, where the WebBrowserTask launches the Internet Explorer application on the user's phone. The primary distinction we like to make is this: if you have a mobile web site that could supplement as part of your application (think the current ESPN application), then you should be using the WebBrowserControl. However, if you are just providing a link to a web site as a reference (or maybe just to your home page), we would recommend using the WebBrowserTask.
The WebBrowserTask gives you some additional pieces of functionality that you would have no access to (like Favorites), or would have to build yourself (like the address bar). You should also pay attention to the fact that in the Windows Phone 7.5 release, the URL property was exchanged for the more common Uri property. It is still there is in the code, but you should definitely avoid using it. Listing 7-28 shows how to use the WebBrowserTask.
WebBrowserTask wbt = new WebBrowserTask();

wbt.Uri = new Uri("http://JesseLiberty.com");

wbt.Show();
Much like the EmailComposeTask that we showed earlier in this chapter, if you have a web site that relates to your applications, you should provide a way for your users to check it out from your applications; allowing them to click a link that launches the WebBrowserTask is the perfect way to accomplish this.
Using the Microsoft.Phone.UserData Namespace
There's a new namespace in Windows Phone 7.5 that provides programmatic access to more of the user data on the phone than we have had previously. We can access all Contacts and Appointments, as well as specific details in each.
Contacts
At first, this API appears to give you the ability to search through the contacts and appointments on the user's device. In reality, you have full access to this data. In the contacts example, we start by creating a new reference to the user's contacts, and then setting up an asynchronous search. We've also set up an event handler to get the data when the search is completed, as shown in Listing 7-29.
Listing 7-29. Setting up an Asynchronous Search of Contacts
Contacts c = new Contacts();

c.SearchCompleted += new EventHandler<ContactsSearchEventArgs>(c_SearchCompleted);

c.SearchAsync("Jeff", FilterKind.DisplayName, null);
In Listing 7-29, you can see that we're searching for any contact that matches the term “Jeff” in the DisplayName property of the Contact record. This will bring you back an IEnumerable list of Contact objects, with the entire contact's record included. This means you have access to multiple e-mail addresses, phone numbers, street addresses, birthdates, companies, and all of the other data available in the People Hub.
However, if you change some of your search criteria, you can get a complete list of the user's entire contact list. This is especially handy when you want to compare their contacts to the members you have on your service (think Twitter, Facebook, Google+, etc.). To do this, just exchange the last line of the Listing 7-29 for the one in Listing 7-30.
Listing 7-30. Using an Empty Search String to Retrieve All Contacts
c.SearchAsync(string.Empty, FilterKind.None, null);
Peter Parker's Uncle Ben reminded him, “with great power comes great responsibility” (a reference from the 2002 film Spider-Man). Just because you have access to a user's contact list does not mean you should exploit that privilege. Getting your app installed on a user's phone requires a high level of trust. If you violate that trust by spamming all of his friends and contacts with e-mail and other junk, not only will you be uninstalled, but your user's frustration will also be reflected in negative reviews in the marketplace.
In our example, we're going to show how to use the EmailAddressChooserTask in combination with this new namespace to allow our user to select an entire contact record without much effort on our part. Since we've done part of this earlier in this chapter, the AddressChooserTask code is in Listing 7-31.
Listing 7-31. Using the EmailAddressChooserTask to Provide a Contact List
EmailAddressChooserTask emailAddressChooserTask = new EmailAddressChooserTask();

emailAddressChooserTask.Completed += new

EventHandler<EmailResult>(emailAddressChooserTask_Completed);

emailAddressChooserTask.Show();
In our Completed event handler, we're going to perform a search on that contact similar to Listing 7-31, except that we're going to use the DisplayName property that was returned to us from our Chooser (shown in Listing 7-32).
Listing 7-32. Using the EmailAddressChooserTask
private void emailAddressChooserTask_Completed(object sender, EmailResult e)

{

    if (e.TaskResult == TaskResult.OK)

    {

        Contacts c = new Contacts();

        c.SearchCompleted += new EventHandler<ContactsSearchEventArgs>(c_SearchCompleted);

        c.SearchAsync(e.DisplayName, FilterKind.DisplayName, null);

    }

}
When the search completes, we are returned a list of matching contacts. Because it's possible we will get more than one record when matching on any of the search criteria, you should always be certain that you're only selecting one record. This applies both to the contact record itself, as well as the data contained inside. You can have multiple phone numbers, e-mail addresses, even birthdates! We will use the FirstOrDefault() option when selecting all of these items, but you should be cautious of two things when working with this data:
- Don't assume that every contact has every piece of data. You will get a
NullReferenceExceptionif data is missing. This means that you should check before just assigning values to your code. While it's frustrating to have to check each value for actual data, it's the only way to prevent your application from crashing with missing data. The only exception to this rule is theDisplayNameproperty, for which there will always be a value. - There are actually
ContactPhoneNumber,ContactEmailAddress,ContactAddressand several other specific classes that contain the data you want, and some additional metadata like “(Mobile)” for a phone number. These are important pieces of additional data that are buried within the Contact class.
Listing 7-33 is an example of how to gather the DisplayName, e-mail address, and phone number of the contact we just retrieved and assign them variables, with an eye on the two lessons we just covered.
Listing 7-33. Working with a Contact List
private void c_SearchCompleted(object sender, ContactsSearchEventArgs e)

{

    Contact c = e.Results.FirstOrDefault();

    if (c.DisplayName != null)

    {

        contactName.Text = c.DisplayName;

    }


    if (c.EmailAddresses != null)

    {

        string contactEmail = c.EmailAddresses.FirstOrDefault().EmailAddress;

    }


    if (c.PhoneNumbers != null)

    {

        string contactPhone = c.PhoneNumbers.FirstOrDefault().PhoneNumber;

    }


    if (c.Addresses  != null)

    {

        string contactAddress = c.Addresses.FirstOrDefault().PhysicalAddress.AddressLine1 +

"
" + c.Addresses.FirstOrDefault().PhysicalAddress.City + ", " +

c.Addresses.FirstOrDefault().PhysicalAddress.StateProvince + "  " +

c.Addresses.FirstOrDefault().PhysicalAddress.PostalCode;

    }

}
As you can see, we combined the street address into one value, but you can retrieve each of these values separately. It would be very interesting, for example, to gather up the zip codes of all of the user's contacts, and place each of them on a map. We will cover something similar to this in Chapter 9 when we discuss the Map control.
Appointments
In many ways, working with the Appointments API is very similar to the Contacts API. We're going to search for a range of appointments (by time), and a collection of Appointment objects will be returned to us. We search for events by time, as shown in Listing 7-34.
Listing 7-34 Searching for Appointments
private void getAppointments()

{

    Appointments a = new Appointments();

    a.SearchCompleted += new EventHandler<AppointmentsSearchEventArgs>(a_SearchCompleted);

    a.SearchAsync(DateTime.Now, DateTime.Now.AddDays(7), null);

}
In our Completed event handler (shown in Listing 7-35), we can start gathering up all of this rich data.
Listing 7-35. SearchCompleted Event Handler
private void a_SearchCompleted(object sender, AppointmentsSearchEventArgs e)

{

    Appointment a = e.Results.Skip(10).FirstOrDefault();

    string startDate = a.StartTime.ToLongDateString();

    string startTime = a.StartTime.ToShortTimeString();

    string subject = a.Subject;

    string details = a.Details;

}
One of the key ways we can see this being used (aside from something simple and obvious like a calendaring application) is calendar replication. As an example, I have all of my work appointments in my corporate Exchange/Outlook account. I don't have an effective way to share those appointments with my wife, however (at least not without breaking the rules and giving her my credentials). So, with two children that have an array of summer activities, we've found a burning need to replicate parts of my work calendar to a Windows Live Calendar that we can share. Right now, it's a manual process. By using this API, we could easily grab my calendar events from my Outlook calendar, and using the Windows Live API, duplicate all of those events to a more public calendar.
Summary
There are many ways to access rich, useful data from your user's device. From calendar data, to contacts and photos, we can make our applications feel customized to the user. The Windows Phone tasks described in this chapter give you an opportunity to provide immersive phone experiences without having to write all of the code yourself. We can make phone calls, take photos, recommend a user review our application, or even provide turn-by-turn directions.
It's also important to note that Section 5.6 of the Windows Phone Technical Certification Requirements states: “An application must include the application name, version information, and technical support contact information that are easily discoverable.”
This means that in nearly every application, there's an opportunity to use the EmailComposeTask (so that the user can send you a support message), the MarketplaceReviewTask (so the user can leave public feedback about your app), the PhoneCallTask (so that the user can call your customer service number), and the WebBrowserTask (so that the user can visit your web site). Your application has a web site, right?
In the next chapter, we're going to discuss how we can make our applications receive updates, even when the app isn't currently running. We'll do this through using push notifications, toast messages, and Live Tile updates. These technologies facilitate a level of interaction with your user that is not possible in any other way.