![]()
Building the User Interface
Chapter 4 introduced the layering and components of Grails, and it showed you how to create a simple application using Grails scaffolding. In this chapter, you’ll use the domain objects from Chapter 4 to start the process of creating an attractive, full-featured application using the Collab-Todo wireframe.
You will learn how to use Groovy Server Pages (GSP), Grails tags, Grails templates, and CSS to create a common look and feel across the application. You will create the login view and the controller actions to support it. Next, you will start to focus on user experience. You will look at validation, errors, and messages, and you’ll learn how to customize them. To support the application, you will create a simple audit logging facility that leverages the Grails log controller property.
Starting with the End in Mind
The goal for this chapter is to create the look and feel for the Collab-Todo application’s layout. Figure 5-1 shows a wireframe to give you an idea of how the application is laid out.

Figure 5-1 . The Collab-Todo wireframe
The wireframe follows a common format: two columns centered on the page, gutters on both sides for spacing, and a header and footer. Table 5-1 describes each component.
Table 5-1. Wireframe Components
| Component | Description |
|---|---|
| gutter | Provides whitespace on the edges of the browser so that the main content area is centered in the browser. |
| topbar | Provides the ability to log in and log out, and displays the user’s first and last name when logged in. |
| header | Displays the application’s title, “Collab-Todo.” |
| content | This is the main content area of the application. The majority of the application data is displayed here. |
| right sidebar | In Chapter 8, we will use the right sidebar to display buddy list information. |
| footer | Displays copyright information. |
Like most modern view technologies, Grails uses a layout and template-based approach to assemble the view/UI. A template is a view fragment that resides in the grails-app/views directory and starts with an underscore. The underscore is Grails’ convention for signifying that GSP is a template. Best practices dictate that you should put templates that are associated with a specific domain, such as User, in the domain’s view directory, such as grails-app/views/user/_someTemplate.gsp. You should put templates that are more generic or shared across views in a common place, such as grails-app/views/common.
A layout assembles the templates and positions them on the page. You create the layout using main.gsp (grails-app/views/layouts/main.gsp) and CSS (web-app/css/main.css). Create a couple of templates (_topbar.gsp and _footer.gsp) that will be common across all views, and then apply some CSS styling and leverage it in main.gsp.
Let’s start with a simple footer to illustrate the point.
Creating the Footer
The goal is to display a simple copyright notice at the bottom of every page in the web site. As you might have guessed, you need to create a GSP fragment named _footer.gsp in the grails-app/views/common directory, and then add the _footer.gsp template to the layout using the <g:render template="/common/footer" />tag. You then need to style the footer by adding a <div> section to the main layout using a style class that you define in the main.css. Listing 5-1 shows what you need to do.
Listing 5-1. The Footer Template (_footer.gsp)
<span class="copyright">© 2012 Beginning Groovy, Grails and Griffon: From Novice to Professional<br />
Vishal Layka, Christopher Judd, Joseph Faisal Nusairat, and James Shingler
</span>
You need to add the copyright to the main layout (main.gsp) so that it’s included on every page. This is where the <g:render> tag comes to your aid. You use the <g:render> tag, which has a template attribute, to insert templates into GSPs. All you have to do is add <g:render template="/common/footer" /> to the bottom of main.gsp
![]() Note By convention, the underscore and .gsp are omitted from the template attribute.
Note By convention, the underscore and .gsp are omitted from the template attribute.
Figure 5-2 shows what happens when you reload the home page.
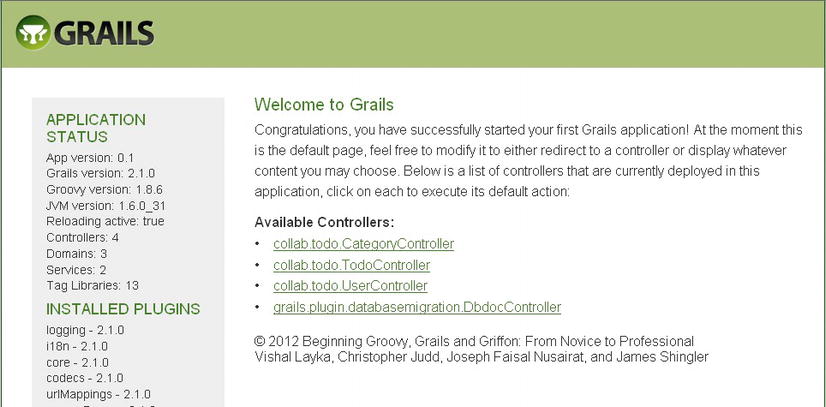
Figure 5-2 . Adding a copyright notice
It would be nice if the copyright was centered and had a separator. You could just put the style information directly in the footer template, but a better solution, and a best practice, is to use CSS. To do so, add a <div> tag with the id attribute set to footer in the main layout, and define the footer style in main.css. Listing 5-2 shows the changes you need to make to main.gsp.
Listing 5-2. The Enhanced Main Layout (main.gsp)
<div id="footer">
      <g:render template="/common/footer" />
</div>
Listing 5-3 shows how to define the footer style.
Listing 5-3. The Footer Style
#footer {
   clear:both;
text-align: center;
   padding: 3px;
border-top: 1px solid #333;
}
Remove the application status block from index.gsp. Figure 5-3 shows the results.

Figure 5-3 . Styling the footer
Let’s review how to add the footer. First, create the _footer.gsp template and locate it in the grails-app/views/common directory. Second, add the _footer.gsp template to the layout using the <g:render template="/common/footer" /> tag. Third, style the footer by adding a <div> section to the main layout using a style class that you defined in the main.css.
Now, let’s take what you learned by creating the footer and start building the login/logout functionality
Creating the Topbar
You create the topbar by adding a topbar (_topbar.gsp) template to the main layout. The topbar template is common and should be located in the grails-app/views/common directory. Listing 5-4 shows the content of the topbar template.
Listing 5-4. The Topbar Template (_topbar.gsp)
1. <div id="menu">
2. <nobr>
3. <g:if test="${session.user}">
4. <b>${session.user?.firstName} ${session.user?.lastName}</b> |
5. <g:link controller="user" action="logout">Logout</g:link>
6. </g:if>
7. <g:else>
8. <g:link controller="user" action="login">Login</g:link>
9. </g:else>
10. </nobr>
11. </div>
Listing 5-4 uses three Grails tags: <g:if>,1 <g:else>,2 and <g:link>.3 The <g:if> and <g:else> tags work together to create if-then-else logic. The <g:link> tag creates a hypertext link (for example, http://localhost:8080/collab-todo/user/logout) . Lines 3-6 check if the session has a User object. If it does, the user’s name followed by a | and a Logout link is printed. Lines 7-9 shows the else condition of the if statement, which displays the Login link. Listing 5-5 shows how to add the topbar to the main layout.
Listing 5-5. Enhancing the Main Layout for the Topbar (main.gsp)
<html>
   . . .
<body>
       . . .
<div id="topbar">
<g:render template="/common/topbar" />
</div>
       . . .
Now add the CSS fragments found in Listing 5-6 to main.css.
Listing 5-6. The Topbar Styles
#topbar {
textalign:left;
width: 778px;
margin: 0px auto;
padding: 5px 0;
}
#topbar #menu {
float: right;
width: 240px;
textalign: right;
font-size: 10px;
}
Figure 5-4 shows the results.

Figure 5-4 . Adding the topbar template
Notice that the Login/Logout link is located in the upper-right corner of the browser.
Adding More Look and Feel
Now you need to finish the transformation so that CollabTodo has its own look and feel instead of appearing as if it came right out of the box. Do this by adding the right sidebar, replacing the Grails header, and setting the default title. Start off with some CSS styling by adding the CSS snippet in Listing 5-7 to the main style sheet (main.css).
Listing 5-7. CSS Styling
#header {
width: 778px;
background: #FFFFFF url(../images/header_background.gif) repeat-x;
height: 70px;
margin: 0px auto;
}
#header h1 {
fontfamily:Arial,sans-serif;
color: white;
padding: 20px 0 0 6px;
font-size:1.6em;
}
body {
margin: 0px;
padding: 0px;
text-align:center;
fontfamily: "Trebuchet MS",Arial,Helvetica,sans-serif;
fontstyle: normal;
fontvariant: normal;
fontweight: normal;
fontsize: 13px;
line-height: normal;
fontsize-adjust: none;
fontstretch: normal;
color: #333333;
}
#page {
width: 778px;
margin: 0px auto;
padding: 4px 0;
text-align:left;
}
#content {
float: left;
width: 560px;
color: #000;
}
#sidebar {
float: right;
width: 200px;
color: #000;
padding: 3px;
}
![]() Note You can find header_background.gif in the project source.
Note You can find header_background.gif in the project source.
Now, take advantage of the CSS styling in the main layout (main.gsp), as shown in Listing 5-8.
Listing 5-8. Finishing the Layout (main.gsp)
.....
1.  <body>
2.  <div id="page">
3.  <div id="spinner" class="spinner" style="display: none;">
4.  <img src="${createLinkTo(dir:'images',   file:'spinner.gif')}"
5.                  alt="Spinner" />
6.  </div>
7.  <div id="topbar">
8.  <g:render template="/common/topbar" />
9.  </div>
10. <div id="header">
11. <h1>Collab-Todo</h1>
12. </div>
13.
14. <div id="content">
15. <g:layoutBody />
16. </div>
17.
18. <div id="sidebar">
19. <g:render template="/common/buddies" />
20. </div>
21.
22. <div id="footer">
23. <g:render template="/common/footer" />
24. </div>
25. </div>
26. </body>
Add the following snippet to the /common/_buddies.gsp template:
<div id="buddies">
<div class="title">Buddies</div>
</div>
Let’s talk about the changes you made to the layout. Line 2 adds a <div> that uses the page style. Together with the body style, the page style creates a container that’s 778 pixels wide and centered on the page. Lines 10-12 replace the Grails header with the Collab-Todo header. If you look carefully at the CSS header style, you’ll see that it defines a header image (header_background.gif). Lines 14 and 16 wrap the view’s body with the content style. This means that pages decorated by main.gsp are inserted here. The content style creates a container 560 pixels wide and left-aligns it within the page container. Lines 18-20 wrap the buddies template with the sidebar style, which creates a container 200 pixels wide and right-aligns it within the page container.
You can see the results of your work in Figure 5-5. Now you have just one more thing to do. You won’t use the default index page for long, but let’s change “Welcome to Grails” and the body. You can find the HTML for this in web-app/index.gsp. Replace the contents of index.gsp with the contents found in Listing 5-9.

Figure 5-5 . The completed layout
Listing 5-9. A New Index Page (index.gsp)
1. <html>
2. <head>
3. <title>Welcome to Collab-Todo</title>
4. <meta name="layout" content="main" />
5. </head>
6. <body>
7. <h1 style="margin-left:20px;">Welcome to CollabTodo</h1>
8. <p style="margin-left:20px;width:80%">
9. Welcome to the CollabTodo application. This application was built
10. as part of the Apress Book, "Beginning Groovy, Grails and Griffon."
11. Functionally, the application is a collaborative "To-Do"
12. list that allows users and their buddies to jointly
13. manage "To-Do" tasks.</p><br />
14. <p style="margin-left:20px;width:80%">Building the Collab-Todo
15. application is used to walk the user through using Grails 2 to
16. build an application. Below is a list of controllers that are
17. currently deployed in this application. Click on each to execute
18. its default action:</p>
19. <br />
20. <div class="dialog" style="margin-left:20px;width:60%;">
21. <ul>
22. <g:each var="c" in="${grailsApplication.controllerClasses}">
23. <li class="controller"><a href="${c.logicalPropertyName}">
24. ${c.fullName}</a></li>
25. </g:each>
26. </ul>
27. </div>
28. </body>
29. </html>
A couple of items in the file deserve explanation. Lines 22-25 illustrate the usage of <g:each>, an iteration tag. In this case, it is iterating over a collection of all controller classes that are a part of the application to display the name of the controller class in a list.
Line 4 is an example of using layouts by convention. In this case, the layout metatag causes the “main” layout (main.gsp) to be applied to the page. You might recall that all layouts reside within the grails-app/views/layouts directory.
You have created the layout, and it’s looking good. You can see the results of your work in Figure 5-5.
Setting up the wireframe exposes layouts, templates, CSS, and a couple of Grails tags to you. Grails, like all modern web frameworks, supports tag libraries. The Grails tag library is similar to the JavaServer Pages Standard Tag Library (JSTL) and Struts tags. It contains tags for everything from conditional logic to rendering and layouts. The following section provides a quick overview of the Grails tags. You can find a detailed reference of Grails tags here: http://www.grails.org/GSP+Tag+Reference.
Part of Grails’ strength in the view layer is its tag library. Grails has tags to address everything from conditional logic and iterating collections to displaying errors. This section provides an overview of the Grails tags.
Logical tags allow you to build conditional “if-elseif-else” logic. Listing 5-5 demonstrated the use of the <g:if> and <else> tags in topbar.gsp. Table 5-2 contains an overview of the logical tags.
Table 5-2. Grails Logical Tags
| Tag Name | Tag Description |
|---|---|
| <g:if> | Logical switch based upon a test expression |
| <g:else> | The else portion of an if statement |
| <g:elseif> | The elseif portion of an if statement |
Iteration Tags
Iteration tags are used to iterate over collections or loop until a condition is false. The <g:each> tag was used in index.gsp in Listing 5-10. Table 5-3 contains an overview of the iteration tags.
Table 5-3. Grails Iteration Tags
| Tag Name | Tag Description |
|---|---|
| <g:while> | Executes a loop while a test condition is true |
| <g:each> | Iterates over a collection |
| <g:collect> | Iterates over a collection and transforms the results as defined in the expr parameter |
| <g:findAll> | Iterates over a collection where the elements match the GPath defined in the expr parameter |
| <g:grep> | Iterates over a collection where the elements match the filter defined in the expr parameter |
Assignment Tags
You use assignment tags to create and assign a value to a variable. Table 5-4 contains an overview of assignment tags.
Table 5-4. Grails Assignment Tags
| Tag Name | Tag Description |
|---|---|
| <def> (deprecated) | Defines a variable to be used within the GSP page; use <set> instead |
| <set> | Sets the value of a variable used within the GSP page |
Linking Tags
Linking tags are used to create URLs. The <g:link> tag was used in topbar.gsp (shown in Listing 5-5 ), and <g:createLinkTo> was used as an expression in main.gsp (shown in Listing 5-9 ). Table 5-5 contains an overview of the linking tags.
Table 5-5. Grails Linking Tags
| Tag Name | Tag Description |
|---|---|
| <g:link> | Creates an HTML link using supplied parameters |
| <g:createLink> | Creates a link that you can use within other tags |
| <g:createLinkTo> | Creates a link to a directory or file |
Ajax Tags
You can use Ajax tags to build an Ajax-aware application. Chapter 8 uses some of these tags to enhance the user interface. Table 5-6 contains an overview of the Ajax tags.
Table 5-6. Grails Ajax Tags
| Tag Name | Tag Description |
|---|---|
| <g:remoteField> | Creates a text field that invokes a link when changed |
| <g:remoteFunction> | Creates a remote function that is called on a DOM event |
| <g:remoteLink> | Creates a link that calls a remote function |
| <g:formRemote> | Creates a form tag that executes an Ajax call to serialize the form elements |
| <g:javascript> | Includes JavaScript libraries and scripts |
| <g:submitToRemote> | Creates a button that executes an Ajax call to serialize the form elements |
Form tags are used to create HTML forms. Table 5-7 contains an overview of form tags.
Table 5-7. Grails Form Tags
| Tag Name | Tag Description |
|---|---|
| <g:actionSubmit> | Creates a submit button |
| <g:actionSubmitImage> | Creates a submit button using an image |
| <g:checkBox> | Creates a check box |
| <g:currencySelect> | Creates a select field containing currencies |
| <g:datePicker> | Creates a configurable date picker for the day, month, year, hour, minute, and second |
| <g:form> | Creates a form |
| <g:hiddenField> | Creates a hidden field |
| <g:localeSelect> | Creates a select field containing locales |
| <g:radio> | Creates a radio button |
| <g:radioGroup> | Creates a radio button group |
| <g:select> | Creates a select/combo box field |
| <g:textField> | Creates a text field |
| <g:textArea> | Creates a text area field |
| <g:timeZoneSelect> | Creates a select field containing time zones |
UI Tags
You use UI tags to enhance the user interface. The only official UI Grails tag is the rich text editor, but several UI tags built by the Grails community are available as plug-ins. Table 5-8 contains an overview of the UI tag.
Table 5-8. Grails UI Tag
| Tag Name | Tag Description |
|---|---|
| <g:richTextEditor> | Creates a rich text editor, which defaults to fckeditor |
Render and Layout Tags
Render and layout tags are used to create the layouts and render templates. As you might expect, several render and layout tags were used in main.gsp. Table 5-9 contains an overview of the render and layout tags.
Table 5-9. Grails Render and Layout Tags
| Tag Name | Tag Description |
|---|---|
| <g:applyLayout> | Applies a layout to a body or template |
| <g:encodeAs> | Applies dynamic encoding to a block of HTML to bulk-encode the content |
| <g:formatDate> | Applies a SimpleDateFormat to a date |
| <g:formatNumber> | Applies a DecimalFormat to number |
| <g:layoutHead> | Displays a decorated page’s header, which is used in layouts |
| <g:layoutBody> | Displays a decorated page’s body, which is used in layouts |
| <g:layoutTitle> | Displays a decorated page’s title, which is used in layouts |
| <g:meta> | Displays application metadata properties |
| <g:render> | Displays a model using a template |
| <g:renderErrors> | Displays errors |
| <g:pageProperty> | Displays a property from a decorated page |
| <g:paginate> | Displays Next/Previous buttons and breadcrumbs for large results |
| <g:sortableColumn> | Displays a sortable table column |
Validation Tags
Validation tags are used to display errors and messages. Table 5-10 contains an overview of the validation tags.
Table 5-10. Grails Validation Tags
| Tag Name | Tag Description |
|---|---|
| <g:eachError> | Iterates through errors |
| <g:hasErrors> | Checks if errors exist within the bean, model, or request |
| <g:message> | Displays a message |
| <g:fieldValue> | Displays the value of a field for a bean that has data binding |
Static Resources
Grails 2.0 integrates with the Resources plugin to provide sophisticated static resource management. This plugin is installed by default in new Grails applications. The basic way to include a link to a static resource in your application is to use the resource tag. This simple approach, as shown below, creates a URI pointing to the file.
<g:resource dir="css" file="main.css" />
However, for modern applications with dependencies on multiple JavaScript and CSS libraries and frameworks (as well as dependencies on multiple Grails plugins), Grails provides r:require and r:layoutResources to enable you to easily create highly optimized web applications that run the same in development and in production. Next we illustrate the usage of r:require and r:layoutResources.
r:require
To use resources, your GSP page must indicate which resource modules it requires. For example, to use jQuery in any page on your site with the jQuery plugin, which exposes a jquery resource module, simply add:
<html>
<head>
<r:require module="jquery"/>
<r:layoutResources/>
</head>
<body>
      ...
<r:layoutResources/>
</body>
</html>
This will automatically include all resources needed for jQuery, including them at the correct locations in the page. However, you cannot use r:require in isolation: as per the examples, you must have the <r:layoutResources/> tag to actually perform the render.
r:layoutResources
When you have declared the resource modules that your GSP page requires, the framework needs to render the links to those resources at the correct time. To achieve this correctly, you must include the r:layoutResources tag twice in your page, or more commonly, in your GSP layout:
<html>
<head>
<g:layoutTitle/>
<r:layoutResources/>
</head>
<body>
<g:layoutBody/>
<r:layoutResources/>
</body>
</html>
Now that you have the layout, let’s make the topbar functional. You want the topbar to provide the user the ability to log in. Once the user has logged in, the topbar should display the username and provide the ability for the user to log out. When the user selects the Login link, he should be presented with a Login form.
![]() Note The login functionality you are building initially is simply to identify who is using the system. It’s not meant to provide a full, robust security system.
Note The login functionality you are building initially is simply to identify who is using the system. It’s not meant to provide a full, robust security system.
Creating the login view requires you to create a GSP in the appropriate directory. The GSP contains a form that has a single selection field of usernames and a submit button. When the user submits the selection, the form invokes the handleLogin action on the UserController. Figure 5-6 illustrates the login view.

Figure 5-6 . The login view
Let’s take a look at the Login link, <g:link controller="user" action="login">Login</g:link>. When the user selects the Login link, the login action on the UserController is invoked. We’ll explain the login action in the next section.
Based upon convention, login.gsp should go in the grails-app/views/user directory. Listing 5-10 shows the contents of login.gsp.
Listing 5-10. The Login View (login.gsp)
1.  <html>
2.     <head>
3.        <title>Login Page</title>
4.        <meta name="layout" content="main" />
5.     </head>
6.     <body>
7.        <div class="body">
8.           <g:if test="${flash.message}">
9.              <div class="message">
10.                ${flash.message}
11.             </div>
12.          </g:if>
13.          <p>
14.             Welcome to Your ToDo List. Login below
15.          </p>
16.          <g:form action="handleLogin" method="post" >
17.
18.             <span class='nameClear'><label for="login">
19.                   Sign In:
20.                </label>
21.             </span>
22.             <g:textField name="userName" value="${user?.userName}" />
23.
24.             <br />
25.             <div class="buttons">
26.                <span class="button">
27.                    <g:actionSubmit value="Login" action="handleLogin"/>
28.                </span>
29.             </div>
30.          </g:form>
31.       </div>
32.    </body>
33. </html>
Let’s review the form. Lines 1-5 define the title and determine that the page is decorated by the main layout. This means that main.gsp acts as a container for login.gsp. Take a look at line 14 in Listing 5-8. In this case, the body of login.gsp is inserted at the <g:layoutBody> tag. Remember that the main layout contains a default title, <g:layoutTitle default="CollabTodo" />. When login.gsp is decorated with the main layout, the title in login.gsp is used instead of the default that was defined in the layout.
Lines 6-31 define the body of the page. Lines 9-12 display flash messages, which we’ll cover shortly in the “Flash and Flash Messages” section. Lines 16-29 create the form with a selection field. Line 16 specifies that when the form is submitted, the handleLogin action of the UserController is invoked. In lines 22-23, the Grails select tag creates an HTML selection element. The name attribute sets the selection name to userName (which in turn is passed to the login action). When evaluated, the form attribute results in a collection that Grails uses to create the options. optionKey and optionValue are special attributes used to create the HTML <option> element ID and the text display in the selection field. Lines 25-28 use the Grails <g:actionSubmit> tag to create a form submission button.
If you run the application and access the view right now, you’ll get a 404 error. This is because the topbar links to the login view via the UserControllerlogin action, which hasn’t been created yet.
Currently, the UserController is set up with dynamic scaffolding. You will continue to use the dynamic scaffolding and add the login action to it. Listing 5-11 shows the updated version of the UserController class.
Listing 5-11. The login Action
class UserController {
static scaffold = User
def login() {}
}
A common best practice on the Web is to use actions as a redirection mechanism. By convention, Grails uses the name of the action to look up a GSP of the same name.
If you click on the Login link now, the login view is displayed, and the User Name selection field is blank. Test the functionality of the form by creating two users. From the home page, select UserController ![]() New User. Now when you select Login, the User Name selection field is populated (see Figure 5-7 ).
New User. Now when you select Login, the User Name selection field is populated (see Figure 5-7 ).

Figure 5-7 . A logged-in user
Next, you need to implement the login logic through the UserControllerhandleLogin action.
Handling the Login and Logout Actions
You call the handleLogin action to log in a user. When you call the action, the Login form is passed the userName of the user to be signed in. Logging in is accomplished by adding the user object associated with the userName to the session. If the user cannot be found, an error message is created, and the user is redirected to the login view. In this particular example, there shouldn’t be any way for the login to fail, but it is still good practice to code defensively. You use the logout action to remove the user from the session, so she can log out.
Listing 5-12 shows how you enhance the UserController.
Listing 5-12. Enhanced UserController
class UserController {
static  scaffold = User
   def login() {}
defhandleLogin() {
def user = User.findByUserName(params.userName)
if (!user) {
flash.message = "User not found for userName: ${params.userName}"
redirect(action:'login')
return
} else {
session.user = user
redirect(controller:'todo')
 }
}

def logout() {
if(session.user) {
session.user = null
redirect(action:'login')
 }
 }
}
Now, when the user logs in, she is taken to the Todo List and the topbar shows the user’s first name, last name, and a Logout link.
Externalizing Strings
Like all modern Java web frameworks, Grails supports the concept of message bundles. It uses the <g:message> tag to look up a properties file for the text to display. For example, say you’re having a difficult time deciding if the topbar should say “Login” or “Sign In.” You could externalize the string and simply change the messages.properties file whenever you change your mind. Grails uses the message bundles to display errors. So, if you don’t like the error message you’re getting back, you can make it friendlier by modifying the message in the message bundle. The messages.properties file is located in the grails-app/i18n directory. Listing 5-13 shows the default contents of the messages.properties file.
Listing 5-13. messages.properties
default.doesnt.match.message=Property [{0}] of class [{1}] with value [{2}] does
not match the required pattern [{3}]
default.invalid.url.message=Property [{0}] of class [{1}] with value [{2}] is not
a valid URL
default.invalid.creditCard.message=Property [{0}] of class [{1}] with value [{2}]
is not a valid credit card number
default.invalid.email.message=Property [{0}] of class [{1}] with value [{2}] is
not a valid e-mail address
default.invalid.range.message=Property [{0}] of class [{1}] with value [{2}]
does not fall within the valid range from [{3}] to [{4}]
default.invalid.size.message=Property [{0}] of class [{1}] with value [{2}] does
not fall within the valid size range from [{3}] to [{4}]
default.invalid.max.message=Property [{0}] of class [{1}] with value [{2}]
exceeds maximum value [{3}]
default.invalid.min.message=Property [{0}] of class [{1}] with value [{2}] is
less than minimum value [{3}]
default.invalid.max.size.message=Property [{0}] of class [{1}] with value
[{2}] exceeds the maximum size of [{3}]
default.invalid.min.size.message=Property [{0}] of class [{1}] with value
[{2}] is less than the minimum size of [{3}]
default.invalid.validator.message=Property [{0}] of class [{1}] with value
[{2}] does not pass custom validation
default.not.inlist.message=Property [{0}] of class [{1}] with value [{2}] is
not contained within the list [{3}]
default.blank.message=Property [{0}] of class [{1}] cannot be blank
default.not.equal.message=Property [{0}] of class [{1}] with value [{2}]
cannot equal [{3}]
default.null.message=Property [{0}] of class [{1}] cannot be null
default.not.unique.message=Property [{0}] of class [{1}] with value [{2}]
must be unique
default.paginate.prev=Previous
default.paginate.next=Next
Now we’ll demonstrate how to externalize strings. Take a look at Listing 5-4 to see the current topbar template. Change lines 5 and 8 to use the <g:message> tags. When completed, the topbar template should look something like what’s shown in Listing 5-14.
Listing 5-14. Topbar Template with Messages
<div id="menu">
<nobr>
<g:if test="${session.user}">
<b>${session.user?.firstName} ${session.user?.lastName}</b> |
<g:link controller="logout"><g:message code="topbar.logout" /></g:link>
</g:if>
<g:else>
<g:link controller="login" action="auth">
<g:message code="topbar.login" /></g:link>
</g:else>
</nobr>
</div>
Now just add topbar.logout and topbar.login to the messages bundle:
topbar.login=Login
topbar.logout=Logout
You can easily change the text to display whatever you want without modifying the GSP. You still have to be careful, though. Depending upon how you modify the text associated with the message code, you may have to adjust the WebTest if it is looking for specific text. In a sophisticated application, you will have to make some decisions about functional testing. You need to ask yourself, “Should the functional test be run against a single locale or multiple locales?” If you decide on multiple locales, you will have to write a more robust functional test and pay particular attention to the usage of verifyText.
If you’re an experienced web developer, you won’t be surprised to find out that using the <g:message> tag also starts you on the path of internationalizing the application. The <g:message> tag is locale-aware; the i18n directory’s name is a giveaway (and that is where the messages.properties file lives). By default, the tag uses the browser’s locale to determine which message bundle to use.
Now that you understand message bundles, you can change the default messages that are displayed when errors occur to something more user friendly.
Errors and Validation
In this section, you’ll learn the difference between errors and flash messages, and how to customize the messages.
If you try to submit a user form without entering a username, you can see error messages in action. When you violate a domain object’s constraints, the red text that you see is an example of an error message. Figure 5-8 shows an example.

Figure 5-8 . Error message
This screen shows the default error messages. As you saw previously in Listing 5-13, you can customize the message using the messages.properties file located in the grails-app/i18n directory. To get a better understanding of how this works, you need to switch the views and the controller from dynamic scaffolding to static scaffolding. Grails generates dynamic scaffolding on the fly when the application starts. If Grails can generate the code at runtime, it makes sense that it can generate the code at development time so you can see it. Take a precaution against losing the existing implementation of the UserController by making a backup copy before proceeding.
You can create the views for the User domain object by executing the command:
> grails generate-views User
The command uses Grails templates to generate four new GSP pages in the grails-app/views/user directory: create.gsp, edit.gsp, list.gsp, and show.gsp. Now you need to create static scaffolding for the controller. You can create the controller for the User domain object by executing the command:
> grails generate-controller User
Grails will detect that you already have an implementation of the controller and ask for permission to overwrite it. Give it permission; this is why you made a backup copy. After the UserController is generated, copy the login, handleLogin, and logout actions from the backup to the newly generated controller. Listing 5-15 contains the contents of the save action.
Listing 5-15. The UserController.save Action
1.  def save() {
2.      def user = new User()
3.      user.properties = params
4.      if(user.save()) {
5.          flash.message = "User ${user.id} created."
6.          redirect(action:show,id:user.id)
7.      }
8.      else {
9.          render(view:'create',model:[user:user])
10.     }
11. }
The save action is called when the user clicks the Create button from the New User view. When line 4 is executed, Grails validates the user constraints before attempting to persist the user in the database. If validation succeeds, the user is redirected to the Show User view with the message “User ${user.id} created.” If the save fails, the Create User view is rendered so that you can correct the validation errors without losing the previous input. When validation fails, Grails inserts an error message in the user object’s metadata, and the user object is passed as a model object to the view. When the Create User view is rendered, it checks to see if there are any errors and displays them if appropriate. Listing 5-16 contains a short snippet that shows how to display the errors.
Listing 5-16. Display Errors
<g:hasErrors bean="${user}">
<div class="errors">
<g:renderErrors bean="${user}" as="list" />
</div>
</g:hasErrors>
As you can see, the generated GSP uses the <g:hasErrors> and <g:renderErrors> tags to detect and display the errors. The <g:hasErrors> tag uses the bean attribute to detect errors in the user object. If errors are detected, the body of the tag is evaluated, which results in the error being displayed by the <g:renderErrors> tag. The <g:renderErrors> tag iterates through the errors in the user object and displays them as a list. The display process knows that it is receiving an error code and error attributes. The tag looks up the error code in the message bundle, and the attributes are substituted in the message before it is displayed.
This technique works because the page is rendered from the controller. Take another look at line 6 in Listing 5-15. In the case of a redirect, the controller instructs the browser to go to the Show User view. The browser does this by calling the show action on the UserController. The controller then executes the show action and renders show.gsp. With all of this back and forth between the controller and the browser, can you imagine what it would take to make sure that all of the message information stays intact so it can be displayed by show.gsp? Well, this is where flash messages come to your rescue.
Flash and Flash Messages
What is flash scope and why do you need it? The short answer is that it is a technique implemented by Grails to make passing objects across redirects much easier. In other words, it addresses the problem described at the end of the previous section. Table 5-11 illustrates various scopes associated with controllers in Grails.
Table 5-11. Scopes Associated with Controllers
| Scope | Description |
|---|---|
| flash | Flash only allows the storage of objects for the current and next request. |
| params | Mutable map of incoming request query string or POST parameters. |
| request | The request object allows the storage of objects for the current request only. |
| servletcontext | This scope lets you share state across the entire web application. |
| session | The session allows associating state with a given user and typically uses cookies to associate a session with a client. |
The flash object is a Map (a hash) that you can use to store key value pairs. These values are transparently stored inside the session and then cleared at the end of the next request. This pattern lets you use HTTP redirects (which is useful for redirect after post) and retain values that can be retrieved from the flash object. Figure 5-9 illustrates the problems associated with normal techniques of passing information from the controller to the view when a redirect is involved.

Figure 5-9 . Redirect problem
On a redirect, if you try to use the request to carry the message to the Show view, the message gets lost when the browser receives the redirect. Another option is to stick the message in the session and have the Show view pick it up from the session. However, in the Show view, you have to remember to delete the message from the session once it has been displayed; otherwise, the same message might be displayed on multiple views. The problem with this approach is that it depends upon you doing the right thing, and it’s tedious.
This is where Grails comes to the rescue: it takes the last option and implements it for you and makes it part of the Grails framework. This is the flash scope. The flash scope works just like the other scopes (application, session, request, and page) by operating off a map of key/value pairs. It stores the information in the session and then removes it on the next request. Now you don’t have to remember to delete the object in the flash scope. Figure 5-10 illustrates the concept of the flash scope.

Figure 5-10 . Flash scope
The Show view can access the flash scope objects—a message, in this case—and display them using the tags and techniques illustrated in Listing 5-17.
Listing 5-17. Access and Display a Flash Message
<g:if test="${flash.message}">
<div class="message">${flash.message}</div>
</g:if>
Grails isn’t the only modern web framework that implements this technique. Ruby on Rails (RoR) developers should find this familiar.
Accessing a message from a flash scope looks pretty easy, but how do you put a message in flash? Listing 5-18 illustrates how the save action on the UserController puts a message into the flash scope.
Listing 5-18. Putting a Message in the Flash Scope
...
if(user.save()) {
    flash.message = "User ${user.id} created."
    redirect(action:show,id:user.id)
}
...
Grails implements a flash scope using a map. In this case, message is the key, and "User ${user.id} created." is the value.
What if you need to internationalize the code or want to change the message without editing the GSP? (Currently, the message is essentially hard-coded.) You can set it up to use message bundles just like errors do. Earlier in the chapter, you used the <g:message>tag to pull error messages from message bundles. You can do the same thing for flash messages using a couple of attributes. Listing 5-19 illustrates how to use the <g:message> tag to display flash messages.
Listing 5-19. Using the <g:message> Tag to Display a Flash Message
<g:message code="${flash.message}" args="${flash.args}"
    default="${flash.defaultMsg}"/>
Listing 5-20 illustrates the enhancements to the save action to set the values that the message tag will use.
Listing 5-20. Setting Values in a Flash Scope for Use by the <g:message> Tag
...
        if(user.save()) {
 flash.message = "user.saved.message"
 flash.args = [user.firstName, user.lastName]
 flash.defaultMsg = "User Saved"
            redirect(action:show,id:user.id)
        }
...
The flash.message property is the message code to look up in the message bundle, flash.args are the arguments to substitute into the message, and flash.defaultMsg is a default message to display in the event of a problem.
Only one thing left to do: create an entry in the message bundle with the user.saved.message code and whatever you would like the text to be. See Listing 5-21 for an example.
Listing 5-21. Flash Message Code Example
user.saved.message=User: {0} {1} was saved
The results should look something like what’s shown in Figure 5-11.

Figure 5-11 . Using Flash scope
![]() Note Any action can call or redirect to the Show view. At this point, you may be wondering what happens if flash.args and flash.defaultMsg aren’t set. The <g:message> tag is pretty smart; it does the logical thing. It displays the contents of flash.message. To see it in action, update an existing user and take a look at the message displayed.
Note Any action can call or redirect to the Show view. At this point, you may be wondering what happens if flash.args and flash.defaultMsg aren’t set. The <g:message> tag is pretty smart; it does the logical thing. It displays the contents of flash.message. To see it in action, update an existing user and take a look at the message displayed.
Now that you know about the flash scope and messages, you can create customized and internationalized application messages with a minimal investment.
You have learned quite a bit about Grails user interfaces and have established the basic look and feel. Now it’s time to start implementing some logic and control.
Creating an Audit Log Using Action Interceptors
Occasionally, you’ll have problems with the application. When this happens, it is useful to know the input and results of the actions being executed. This entails displaying the inputs to the action before the action is executed and the results before control is passed to the next step in the process. You could modify every action to print the inputs before executing the body of the action and then again at the end of the action. However, that’s way too much work and difficult to maintain.
Grails provides a mechanism called action interceptors that you can use to provide the desired functionality. Experienced developers will see that this is similar to aspect-oriented programming (AOP). If you aren’t familiar with AOP, you might be familiar with servlet filter interceptors for servlets, which are similar. The good news is that Grails makes it easier than either one of these.
![]() Note Ruby on Rails developers will recognize this as a Rails filter.
Note Ruby on Rails developers will recognize this as a Rails filter.
Grails provides before and after interceptors. You will use both to provide the audit log functionality. You will use a before interceptor to log the userName, controller, action, and input parameters. To accomplish this, add the beforeInterceptor closure to the TodoController. Listing 5-22 is an example of the beforeInterceptor for you to add to the controller.
Listing 5-22. beforeInterceptor
def beforeInterceptor = {
    log.trace("${session?.user?.userName} Start action ${controllerName}
        Controller.${actionName}() : parameters $params")
}
If defined and unless otherwise instructed, the beforeInterceptor is called just before the action is invoked. Since it is a closure, it has full access to all of the controller properties as well as to the request parameters. It uses logging (see the “Logging” sidebar) to output the audit information. Notice that it’s using the ?. safe dereference operator. The safe dereference operator checks to see if the current expression so far is null before evaluating the next portion of the expression. So, if the session or user is null, userName will never be accessed. This helps you avoid the infamous NullPointerException.
beforeInterceptor allows you to perform logic before an action is invoked, while afterInterceptor allows you to perform logic after the action has executed. Listing 5-23 is an example of the afterInterceptor for you to add to the controller.
Listing 5-23. afterInterceptor
def afterInterceptor = { model ->
   log.trace("${session?.user?.userName} End action
   ${controllerName}Controller.${actionName}() : returns $model")
 }
As you would expect, the afterInterceptor looks similar to the beforeInterceptor. The one additional piece is the passing of the model object to the interceptor; this allows you to output it to the audit log.
![]() Caution This implementation of audit logging is a potential security hole for sensitive data. If the parameters or model contain sensitive data, take extra care to filter it out before logging any audit information.
Caution This implementation of audit logging is a potential security hole for sensitive data. If the parameters or model contain sensitive data, take extra care to filter it out before logging any audit information.
beforeInterceptor and afterInterceptor are invoked for every action in the controller. Suppose you didn’t want to invoke the audit log for every action. What if you didn’t want to collect audit log information for the list action? You could write an if statement around the log statement. That would work, and it would work well. Grails provides an additional mechanism, called interceptor conditions, which allow interceptors to be applied conditionally. Listing 5-24 is an example of the before and after interceptors using conditions to exclude the list action from the audit log.
Listing 5-24. Before and After Interceptors with Conditions
def beforeInterceptor = [action:this.&beforeAudit,except:['list']]
def afterInterceptor = [action:{model ->this.&afterAudit(model)},
  except:['list']]
def beforeAudit = {
    log.trace("${session?.user?.userName} Start action
        ${controllerName}Controller.${actionName}() : parameters $params")
}
def afterAudit = { model ->
    log.trace("${session?.user?.userName} End action
        ${controllerName}Controller.${actionName}() : returns $model")
}
![]() Note The Definitive Guide to Grails 2 from Apress shows you how to use action interceptors to build a simple security framework.
Note The Definitive Guide to Grails 2 from Apress shows you how to use action interceptors to build a simple security framework.
Using Filters
Filters are similar to action interceptors in that they give you the ability to execute logic before and after an action. They differ from action interceptors in that they are more flexible and can be used in situations other than actions. For example, you can define a filter that applies across multiple controllers. Filters can be applied across a whole group of controllers, a URI space, or to a specific action. Filters are far easier to plugin and maintain, and are useful for all sorts of cross-cutting concerns such as security, logging, and so on.
To create a filter, create a class that ends with the convention Filters in the grails-app/conf directory. Within this class, define a code block called filters that contains the filter definitions:
class SampleFilters {
   def filters = {
        // your filters here
   }
}
Each filter you define within the filters block has a name and a scope. The name is the method name and the scope is defined using named arguments.
Let’s see how you can use filters to simplify the UserController. The UserController’s edit, delete, and update actions all contain guard logic that allows users to edit only their own user data. The actions contain logic similar to Listing 5-25.
Listing 5-25. User Modification Guard
. . .
     if (session.user.id != params.id) {
       flash.message = "You can only edit yourself"
       redirect(action:list)
       return
     }
. . .
While the logic in Listing 5-35 isn’t complex, it would be repeated for each action that requires a guard. You can use filters to extract and centralize the logic to a single location. This may sound familiar to those of you who have worked with AOP. The basic idea is to extract the logic to a central location and then configure when to apply that logic.
In Grails, you extract the logic into a class ending with the name Filters.groovy and place it in the grails-app/conf directory. Each filter is contained within a method that takes parameters to define the scope of the filter, when it is applied. Listing 5-26 shows how to centralize the user modification logic.
Listing 5-26. Filter Scope
class UserFilters {
    def filters = {
        userModificationCheck(controller: 'user', action: '*') {

           . . .
        }
        someOtherFilter(uri: '/user/*') { }
    }
}
The userModificationCheck filter is scoped and applied to the UserController on all actions. Another way of scoping the filter is to use a URL. You can see an example of this option on the someOtherFilter filter.
Next, you need to determine if the filter should be applied before the action, after the action, and/or afterView rendering. In this case, the goal is to determine if the person using the system should be allowed to modify the user. This means the guard logic should be applied before the edit, update, and delete actions. Listing 5-27 illustrates how to specify the before condition.
Listing 5-27. before Filter
class UserFilters {
    def filters = {
        userModificationCheck(controller: 'user', action: '*') {
before = {
 . . .
 }
        }
     }
}
Finally, you need to limit the guard logic to the edit, update, and delete actions. Listing 5-28 shows the complete userModificationFilter.
Listing 5-28. User Modification Filter
1.  class UserFilters {
2.      def filters = {
3.         userModificationCheck(controller: 'user', action: '*') {
4.             before = {
5.  defcurrActionName = actionName
6.  if (currActionName == 'edit' ||
7.  currActionName == 'update' ||
8.  currActionName == 'delete') {
9.  String userId = session?.user?.id
10. String paramsUserId = params?.id
11.     if (userId != paramsUserId) {
12. flash.message = "You can only modify yourself"
13. redirect(action: 'list')
14. return false
15. }
16. }
17.            }
18.        }
19.    }
20. }
Let’s review the new lines. Line 5 gets the current action. Remember, you should apply the filter to the edit, update, and delete actions, as shown in lines 6-8.
Line 11 determines if the person attempting the modification—the logged-in user—is modifying his own user record. If not, an appropriate flash message is created, and the user is redirected to the UserController list action. Line 14 returns false to tell Grails that it shouldn’t execute any other filters.
Now that you have the userModificationCheck filter, you can remove the redundant guard code from the edit, update, and delete actions.
LOGGING
While everyone uses println from time to time, a more mature approach is to use logging. Grails controllers are preconfigured with a log property. Each controller receives its own instance of org.apache.commons.logging.log. Apache Commons Logging component (http://commons.apache.org/logging ) is an abstraction that allows you to plug in different logging packages. Grails comes prepackaged with log4j (http://logging.apache.org/log4j ). TheApache Commons Logging abstraction provides the interface seen in the following code.
public interface log {
    void debug(java.lang.Object message)
    void debug(java.lang.Object message, java.lang.Throwable t)
    void error(java.lang.Object message)
    void error(java.lang.Object message, java.lang.Throwable t)
    void fatal(java.lang.Object message
    void fatal(java.lang.Object message, java.lang.Throwable t
    void info(java.lang.Object message)
 void info(java.lang.Object message, java.lang.Throwable t)
 void trace(java.lang.Object message)
    void trace(java.lang.Object message, java.lang.Throwable t)
 void warn(java.lang.Object message)
    void warn(java.lang.Object message, java.lang.Throwable t)
    boolean isDebugEnabled()
    boolean isErrorEnabled()
    boolean isFatalEnabled()
    boolean isInfoEnabled()
    boolean isTraceEnabled()
    boolean isWarnEnabled()
}
Messages have a severity level. The possible severity levels (from least severe to most severe) are:
- Trace
- Debug
- Info
- Warning
- Error
- Fatal
Grails uses its common configuration mechanism to provide the settings for the underlying log4j log system, so all you have to do is add a log4j setting to the file grails-app/conf/Config.groovy.
log4j = {
    error  'org.codehaus.groovy.grails.web.servlet',  //  controllers
           'org.codehaus.groovy.grails.web.pages' //  GSP    warn   'org.apache.catalina'
}
This says that for loggers whose name starts with org.codehaus.groovy.grails.web.servlet or org.codehaus.groovy.grails.web.pages, only messages logged at error level and above will be shown. Loggers with names starting with org.apache.catalina only show messages at the warn level and above.
For more information on logging configuration, see the online log configuration documentation at http://www.grails.org/Logging.
Summary
Views and controllers are broad and deep topics. We used the construction of the Collab-Todo wireframe and customization of the views and controllers to help you learn about some of the more important aspects to these topics. In the process of building the Collab-Todo application, you learned how to use layouts, templates, and CSS to build the wireframe. The wireframe was composed of topbar, header, content, sidebar, and footer components. Building the wireframe also exposed you to some of the Grails tag libraries.
Once you built the wireframe, you learned how to build a temporary login facility that allowed you to exercise the topbar login/logout functionality. Building the login facility involved creating a customized view and customized actions on the UserController.
You also learned about errors, validation, and flash messages. This gave you insights into how Grails renders errors and messages, and how you can control them. You also learned about the redirect message problem and how using flash-scoped messages solves the problem.
You learned how to use interceptors for things like auditing. Finally, you created a simple audit log using action interceptors and logging.
It’s important to remember that even though we covered a lot, there are even more advanced things you can do with views and controllers. We’ll cover more of the advanced topics in the coming chapters. The next step on your journey is to learn more about domain models and services.
1 http://www.grails.org/GSP+Tag+−+if