
![]()
Deploying and Upgrading Grails Applications
The previous chapters were related to developing Grails applications. One of the strengths of Grails is that it comes bundled with everything you need to begin developing and testing your application. Grails embeds a web container (Tomcat) and a relational database (H2). All you have to do is execute the Grails run-app target, and you have your entire runtime environment. However, at some point in time, you will want to expose your application to your users. The embedded runtime environment is for development and testing only, and it is not intended to scale or support the load necessary in a production environment.
This chapter focuses on deploying Grails applications to Java EE application servers and more robust database servers. It also covers some other miscellaneous, operational aspects, such as upgrading a Grails application when a new version of the Grails framework is released and automating tasks using Gant.
Deploying Grails Applications
Deploying a Grails application involves three steps:
- Configure the application. This typically involves environmentspecific configurations.
- Package the application. For Grails applications, this means bundling all the code and related artifacts into a Web Application Archive (WAR) file.
- Deploy the application to an application server or web container.
Using Environments
Many organizations have multiple environments or gates that an application must pass through before reaching production and users. At a minimum, each application should have to pass through development, test, and production environments. The development environment is the developer’s machine. In the test environment, which mimics production, somebody other than the developer completes quality assurance by validating that the application meets requirements and generally works. The production environment is where real users use the application. In each of these environments, you’re likely to have environment-specific configurations and, rarer, behavioral differences. For example, in development, you may want to point to a local H2 in-memory database, but in the test and production environments, you may need to point at a remote server database such as MySQL.1
As you might expect, Grails follows these best practices and is aware of these three environments. You can use these environments when calling the grails command line as the second parameter or in configuration files such as DataSource.groovy, BootStrap.groovy, and Config.groovy, which you’ll see in the next section. Table 12-1 shows the mapping per environment.
Table 12-1. Environment Mappings
| Environment | Command Line | Configuration File Reference |
|---|---|---|
| Development | dev | development |
| Test | test | test |
| Production | prod | production |
Depending on the size of the organization and the criticalness of the application or the system, you may have additional environments such as integration testing (IT), user acceptance testing (UAT), and performance testing (PT). You can use custom environments as well. The only requirement is that the grails.env system property must be passed to the Grails command line. For example, the following specifies the performance environment:
> grails -Dgrails.env=PT run-app
Grails supports the concept of per-environment configuration. The Config.groovy, DataSource.groovy, and BootStrap.groovy files in the grails-app/conf directory can use per-environment configuration, as illustrated in the default dataSource definition provided by Grails and shown in Listing 12-1.
Listing 12-1. Using Per-Environment Configuration
dataSource {
    pooled = false
    driverClassName = "org.h2.Driver"
    username = "sa"
    password = ""
}
environments {
    development {
        dataSource {
            dbCreate = "create-drop"
            url = "jdbc:h2:mem:devDb"
        }
    }
    test {
        dataSource {
            dbCreate = "update"
            url = "jdbc:h2:mem:testDb"
        }
    }
    production {
        dataSource {
            dbCreate = "update"
            url = "jdbc:h2:prodDb"
        }
    }
}
In Listing 12-1, notice how the common configuration is provided at the top level and then an environments block specifies per-environment settings for the dbCreate and url properties of the dataSource. We will revisit this code in the dataSource section of this chapter.
Within a Gant script or a bootstrap class, explained later in this chapter, you can detect the environment using the Environment class, as illustrated in the Listing 12-2.
Listing 12-2. Detecting the Environment
import grails.util.Environment
......
switch (Environment.current) {
    case Environment.DEVELOPMENT:
        configureForDevelopment()
        break
    case Environment.PRODUCTION:
        configureForProduction()
        break
}
Understanding Grails Configurations
With Grails’ default settings, you can actually develop an application without doing any configuration whatsoever, but it’s important to learn where and how to override the conventions when you need to.
For general configuration, Grails provides two files:
- grails-app/conf/BuildConfig.groovy
- grails-app/conf/Config.groovy
TheBuildConfig.groovy file is for settings that are used when running Grails commands and the Config.groovy file is for settings that are used when your application is running. This means that Config.groovy is packaged with your application, but BuildConfig.groovy is not. Grails contains four primary configuration categories. The first is URL mapping, which we explained in earlier chapters, so we won’t revisit it here. The second is behavior when the application starts up and shuts down. The third and fourth are data source and logging configurations. You can find all these configurations in the grails-app/config directory.
Startup and Shutdown Behavior
Sometimes when an application starts up and/or shuts down, you need to do things such as acquire and release resources, respectively, or cache data. Grails makes this possible in the grails-app/config/BootStrap.groovy file.
Listing 12-3 is an example of a BootStrap.groovy file. It includes comments where startup and shutdown code should go.
Listing 12-3. Using BootStrap.groovy to Perform Startup and Shutdown Activities
classBootStrap {
       definit = { servletContext ->
       // perform startup activities here
       }
       def destroy = {
       // perform shutdown activities here
       }
}
In Listing 12-3, the init action is invoked when the application starts up or is redeployed. The javax.servlet.ServletContext2 is passed in, providing access to the application attributes, initialization parameters configured in web.xml, the context path, and more. The destroy action is invoked when the application is shut down, but it is not guaranteed to be called. For example, it is not likely the destroy method will be called when the application server is shut down, but it is likely to be called when the application is redeployed or undeployed.
Data Source Configurations
By default, Grails is configured out of the box to use an embedded, in-memory H2 database. This is not likely to be the database used in the test and production environments and possibly not even in most development environments. This is because, as you’ve seen, each time the application restarts, the database gets re-created in memory and is therefore empty. It’s more likely that an application will use a server database such as MySQL, Oracle,3 DB2,4 Microsoft SQL Server,5 or maybe even Apache Derby.6
You can set database and Hibernate configurations in the grails-app/config/DataSource.groovy file. Listing 12-4 shows an example of a DataSource.groovy file that was customized to include a production database configuration for a local MySQL database.
Listing 12-4. DataSource.groovy Containing a MySQL Production Configuration
1.  dataSource {
2.      pooled = true
3.      driverClassName = "org.h2.Driver"
4.      username = "sa"
5.      password = ""
6.  }
7.  hibernate {
8.      cache.use_second_level_cache=true
9.      cache.use_query_cache=false
10.      cache.region.factory_class = 'net.sf.ehcache.hibernate.EhCacheRegionFactory'
11. }
12. // environment specific settings
13. environments {
14.     development {
15.         dataSource {
16.             dbCreate = "create-drop" // one of 'create', 'create-drop','update', 'validate', "
17.             url = "jdbc:h2:mem:devDb;MVCC=TRUE;LOCK_TIMEOUT=10000"
18.         }
19.     }
20.     test {
21.         dataSource {
22.             dbCreate = "update"
23.             url = "jdbc:h2:mem:testDb;MVCC=TRUE;LOCK_TIMEOUT=10000"
24.         }
25.     }
26.     production {
27.         dataSource {
28. pooled = true
29. driverClassName = "com.mysql.jdbc.Driver"
30. username = "root"
31. password = "<password>"
32. dbCreate = "update"
33. url = "jdbc:mysql://localhost:3306/collab_todo"
34.                               dialect = org.hibernate.dialect.MySQL5InnoDBDialect
35.                              properties {
                                         maxActive = −1
                                 minEvictableIdleTimeMillis=1800000
                                 timeBetweenEvictionRunsMillis=1800000
                                 numTestsPerEvictionRun=3
                                 testOnBorrow=true
                                 testWhileIdle=true
                                 testOnReturn=true
                                 validationQuery="SELECT 1"
                                         . . .
     }
36.         }
37.     }
38. }
The configuration file in Listing 12-2 is separated into three main parts: dataSource (lines 1–6), hibernate (lines 7–11), and environment-specific settings (lines 12–38). The dataSource section provides default database settings that environmentspecific settings may override or append to. Other than the pooled property, these default settings all relate to standard JDBC configuration information, such as the JDBC driver class name, the username, and the password for the database.
The hibernate section relates to Hibernate-specific settings. By default, it configures Hibernate caching settings. See the Hibernate documentation7 for more configuration options.
The environment-specific settings can provide specific data source or Hibernate configurations for a particular named environment. Notice in lines 28–33 that the productiondataSource is configured to use a MySQL database by setting the driverClassName and url to be MySQL-specific. It also overrides the pooled property by setting it to true, since most production environments have more concurrent needs than a developer’s workstation.
Finally, note that the dbCreate property is configured only for update. This means that at deployment time, Hibernate will update any of the tables it is able to, but it will leave the existing data intact. On the other hand, the default development configuration will create the table at startup and destroy the tables and data when the application is shut down. In line 35, properties set extra properties on the dataSource bean.
The dbCreate property of the dataSource definition in line 32 is important, as it dictates what Grails should do at runtime with regard to automatically generating the database tables from GORM classes. The options are described in the dataSource section:
- create
- create-drop
- update
- validate
- no value
In development mode, dbCreate is by default set to create-drop, but at some point in development (and certainly once you go to production), you’ll need to stop dropping and re-creating the database every time you start up your server.
Logging is an important part of gathering feedback about the state of an application. As you learned earlier, Grails provides logging support using the Apache Commons Logging component8 and Apache log4j.9 You can create the log4j configurations, as well as a couple other configurations, in grails-app/config/Config.groovy. Listing 12-5 shows the default version of Config.groovy.
Listing 12-5. Config.groovy File Containing Logging Configurations
1.  // log4j configuration
2.  log4j {
3.    appender.stdout = "org.apache.log4j.ConsoleAppender"
4.    appender.'stdout.layout'=""org.apache.log4j.PatternLayout"
5.    appender.'stdout.layout.ConversionPattern'='[%r] %c{2} %m%n'
6.    rootLogger="error,stdout"
7.    logger {
8.      grails="info,stdout"
9.      org {
10.       codehaus.groovy.grails.web.servlet="off,stdout"  //  controllers
11.       codehaus.groovy.grails.web.pages="off,stdout" //  GSP
12.       codehaus.groovy.grails.web.sitemesh="off,stdout" //  layouts
13.       codehaus.groovy.grails."web.mapping.filter"="off,stdout" // URL mapping
14.       codehaus.groovy.grails."web.mapping"="off,stdout" // URL mapping
15.       codehaus.groovy.grails.commons="off,stdout" // core / classloading
16.       codehaus.groovy.grails.plugins="off,stdout" // plugins
17.       codehaus.groovy.grails.orm.hibernate="info,stdout" // hibernate integration
18.       springframework="off,stdout"
19.       hibernate="off,stdout"
20.     }
21.   }
22.   additivity.'default' = false
23.   additivity {
24.     grails=false
25.     org {
26.       codehaus.groovy.grails=false
27.       springframework=false
28.       hibernate=false
29.     }
30.   }
31. }
32.
33. // The following properties have been added by the Upgrade process. . .
34. grails.views.default.codec="none" // none, html, base64
35. grails.views.gsp.encoding="UTF-8"
Listing 12-3 does the following:
- Lines 2–31 configure log4j, while the remaining lines set some default configurations for views. When the application logs a message, something has to be done with the message.
- Lines 3–5 configure a ConsoleAppender, which takes the message and writes it to standard out, with the format defined by the pattern in line 5.
- Line 6 instructs log4j to send only messages with severities of error or greater to the appender unless explicitly overwritten.
- Lines 7–20 show examples of overriding some logging. For example, on line 8, the grails logger says to include anything with a log level of info or above, while line 10 turns off org.codehaus.groovy.grails.web.servlet completely.
![]() Note There are a lot of options for log4j. Check out “Short Introduction to log4j.”10
Note There are a lot of options for log4j. Check out “Short Introduction to log4j.”10
Grails provides some special loggers for the different types of artifacts that it already understands by conventions. Table 12-2 documents the special loggers you will find helpful for seeing your log messages.
Table 12-2 . Special Grails Artifact Loggers
| Logger | Description |
|---|---|
| grails.app.controller | Configures logging for all your controllers |
| grails.app.domain | Configures logging for all your domains |
| grails.app.service | Configures logging for all your services |
| grails.app.tagLib | Configures logging for all your tag libraries |
The most likely log configuration you will want to make is adding environment-specific logging for your artifacts; you can use the loggers described in Table 12-2. For example, in your development environment, you may want to log messages at a debug level (as shown in Listing 12-6), but in your production environment, you may want to log fewer messages for performance reasons and to ensure that the log file doesn’t consume all your disk space.
Listing 12-6. Example of Adding Logging Specific to Your Development Environment
environments {
  development {
    log4j {
      logger {
        grails {
          app.controller="debug"
        }
      }
    }
  }
}
Listing 12-6 shows an example of logging all controllers at a debug level. You can simply add this configuration to the end of the Config.groovy file and then restart the application for the new development-specific logging configuration to take effect.
Packaging the Application for Deployment
The run-app command is thus best suited for development only. For deployment onto a production system, use a packaged WAR file. Deploy your application by setting up Grails on your production environment and simply type:
grails> run-war
This command packages up Grails as a WAR file and then runs Tomcat using the packaged WAR.
The run-war command shown above is convenient, but you might want more control over your deployment environment, or you might want to deploy onto another container, such as BEA WebLogic, instead of Tomcat. What you need in these cases is a WAR file. To create a WAR archive, use Grails’ war command:
grails> war
After you complete the application functionality for an iteration or a release, you or your build master need to package your application so it can be deployed on a machine other than your computer. At the most basic level, all you have to do is run the Grails war target to create a deployable WAR file. In reality, though, you should follow a more disciplined process to make it easier to identify the version of your application as it goes through environments. We recommended you follow this procedure for milestone releases:
- Update the code from your version control repository to make sure it’s in sync with the head/trunk.
- Run unit and smoke tests to verify that the release is ready.
- Increment the app.version property in application.properties either manually or by using the grails set-version target to identify a milestone release number, such as X.X.X.
- Clean the project using the grails clean target to make sure there are no leftover artifacts.
- Package the application into a WAR file using the Grails war target and an environment designation—for example, grails prod war. This creates a WAR file in the root of the project with a name containing the project name and version number.
- Increment the app.version property and append a -SNAPSHOT in application.properties either manually or by using the grailsset-version target to indicate this version is a work in progress and not a milestone release.
- Commit the application.properties file back into your version control repository.
Now you have a WAR file ready for deployment. We’ll discuss how to deploy it in the next section.
Deploying to an Application Server
A Grails application packaged as a WAR file can be deployed to Java EE application servers such as JBoss, GlassFish, Apache Geronimo, BEA WebLogic, or IBM WebSphere, or to a web container such as Apache Tomcat or Jetty. Deployment between containers varies greatly, so consult your application server or web container documentation for details. However, standard mechanisms include special deployment directories where the WAR can be copied, a web-based administrator console, a command-line client, and/or Apache Ant tasks. Grails does not provide anything for simplifying deployments, so now we’ll discuss how you can write your own script to automate the process.
![]() Note The Grails FAQ (http://www.grails.org/FAQ ) has specific configurations and tips for deploying Grails applications to some common application servers.
Note The Grails FAQ (http://www.grails.org/FAQ ) has specific configurations and tips for deploying Grails applications to some common application servers.
HTTPS
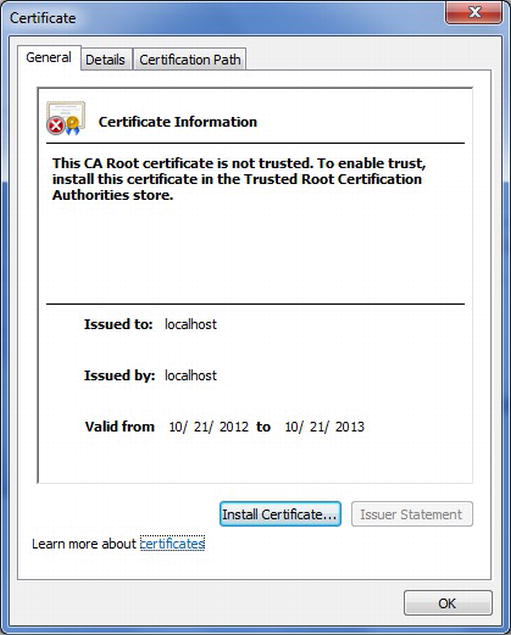
Many applications require that the information passed from the browser to the server be encrypted to ensure the data is not intercepted along the way. This is usually done using a secure HTTP connection, otherwise known as HTTP over Secure Socket Layer (SSL), or HTTPS. Configuring HTTPS is an application server–specific configuration, so you should check your application server documentation to learn how to configure it. However, it can be critical to test your application within an HTTPS context, so Grails provides the ability to start your Grails application using HTTPS instead of HTTP. Instead of executing grails run-app, you use run-app -https. This starts your server so it is available under port 8080 as well as port 8443 using an HTTPS protocol—for example, https://localhost:8443/collab-todo/ . Running the server in this mode causes a temporary certificate to be generated, as shown in the following figure. You’ll be prompted with an unknown certifying authority error, which makes this method unsuitable for production use but fine for testing.
Development is full of cycles and repetitive tasks, such as compiling, packaging, and deploying. Performing such tasks manually can be boring and error prone. It is considered a best practice to automate such tasks. Many books have been written to this effect, and many frameworks were developed to solve the problem. In fact, one of the primary conventions for Grails is the Grails command line, which is used to automate common tasks in Grails development. The Grails command line utilizes Gant,11 a build system that uses the Groovy language to script Apache Ant tasks rather than Ant’s XML format. Ant, and therefore Gant, are primarily made up of name collections of tasks referred to as targets, which you can execute to complete a unit of work.
As you have seen throughout this book, the Grails command line provides a lot of functionality. However, it may not automate every task you perform during your development. For example, there is no task for deploying, and yet it is common to deploy your application to infrastructure that matches the application server and database you use in a production environment. So from time to time, you may want to simplify your development efforts by creating your own Gant scripts or modifying existing ones.
Grails makes it easy to incorporate your scripts into your development process. After all, every Grails command-line task is itself a Gant script already. The Grails command line uses the following directories to locate scripts for execution and incorporate them into the help system:
- USER_HOME/.grails/scripts
- PROJECT_HOME/scripts
- PROJECT_HOME/plugins/*/scripts
- GRAILS_HOME/scripts
After writing your Gant script, you can place it in one of these directories, and it will automatically be available from the Grails command line and in the Grails help list.
Grails does not include a deployment script, because there are too many application servers and configuration options to keep up. Listing 12-7 shows an example of a simple script you can use to deploy a WAR file to an application server that supports automatic deployments via a deployment directory like JBoss has.
Listing 12-7. Basic Deployment Script Deploy.groovy
1.  /**
2.  * Gant script that copies a WAR file to an application
3.  * server deployment directory.
4.  */
5.
6.
7.
8.
9.  includeTargets <<grailsScript("War")
10.
11. target ('default':'"Copies a WAR archive to a Java EE app server's deploy
12. directory.
13.
14. Example:
15. grails deploy
16. grails prod deploy
17. "") {
18.   deploy()
19. }
20.
21. target (deploy: "The implementation target") {
22.   depends( war )
23.
24.   def deployDir = ant.antProject.properties.'deploy.dir'
25.
26.   ant.copy(todir:"${deployDir}", overwrite:true) {
27.     fileset(dir:"${basedir}", includes:"*.war")
28.   }
29.
30.  event("StatusFinal", ["Done copying WAR to ${deployDir}"])
31. }
In the Deploy.groovy script shown in Listing 12-7, line 9 imports another Gant script—specifically, the War.groovy script. The deploy script is dependent on the War.groovy script to build the WAR file, so it has something to deploy.
Lines 11–19 represent the first of two targets in this script. The first target is the default target, which means if no other target is specified, this will be the one executed. Since Grails calls the default target, it will definitely be the one executed. Notice that the default name is in single quotes; this is because the word default is a reserved word in Groovy. Quotes are not normally needed for target names. Following the name is the target description, which the Grails help system uses. The only behavior the default target has is to call the deploy target.
The deploy target, shown on lines 21–31, does all the real work. It begins by calling the war target from the War.groovy script. After the WAR file is created, it looks up the deploy.dir property. It then copies the WAR file to the location of this property. You can put the destination of the WAR file in the application.properties file, since the Grails command line automatically loads it. Lines 26–28 use the Ant copy task to copy all WAR files to the deployment directory. Finally, a message is printed to the system out to indicate to the user that the script is complete and in which directory the WAR file was copied.
Running the following target performs the deployment by copying the WAR file to your application server:
> grails deploy
Early in the development of the Grails framework, it must have become obvious that the framework would go through many iterations and that some mechanism was needed to ensure that applications could migrate easily to new releases of the Grails framework. As with many of the Grails conventions, this is accomplished through a Grails target, upgrade. This section gives a brief summary of what you might encounter when upgrading to Grails 2. The detailed description can be found in Grails documentation.12
Grails 2.0 contains updated dependencies including Servlet 3.0, Tomcat 7, Spring 3.1, Hibernate 3.6, and Groovy 1.8. This means that certain plugins and applications that depend on earlier versions of these APIs may no longer work. For example, the Servlet 3.0 HttpServletRequest interface includes new methods, so if a plugin implements this interface for Servlet 2.5 but not for Servlet 3.0, then said plugin will break. The same can be said of any Spring interface. Grails 2 does not work on JDK 1.4, so if you wish to continue using Grails, use Grails 1.0.x until you are able to upgrade your JDK.
The following settings have been moved from grails-app/conf/Config.groovygrails to app/conf/BuildConfig.groovy:
- grails.config.base.webXml
- grails.project.war.file (renamed from grails.war.destFile)
- grails.war.dependencies
- grails.war.copyToWebApp
- grails.war.resources
The run-app-https and run-war-https commands no longer exist and have been replaced by an argument to run-app:
> grails run-app -https
HSQLDB was replaced with H2 as default in-memory database, but it is still bundled with Grails. Upgrade options include replacing HSQLDB references in DataSource.groovy with H2 references or adding HSQLDB as a runtime dependency for the application.
If you want to run an application with different versions of Grails, add HSQLDB as a runtime dependency, which you can do in BuildConfig.groovy, as illustrated in Listing 12-8.
Listing 12-8. Adding HSQLDB as a Runtime Dependency
grails.project.dependency.resolution = {
    inherits("global") {
    }
    repositories {
        grailsPlugins()
        grailsHome()
        grailsCentral()
    }    dependencies {
        // Add HSQLDB as a runtime dependency
        runtime 'hsqldb:hsqldb:1.8.0.10'
    }
}
jQuery Replaces Prototype. The Prototype JavaScript library was removed from Grails core and now new Grails applications have the jQuery plugin configured by default. This will only impact you if you are using Prototype with the adaptive Ajax tags in your application (for example, <g:remoteLink/>) because those tags will break as soon as you upgrade. To resolve this issue, simply install the Prototype plugin in your application. If you want you can also remove the prototype files from your web-app/js/prototype directory.
As of Grails 2.0, public methods of controllers are now treated as actions in addition to actions defined as traditional closures. If you were relying on the use of methods for privacy controls or as helper methods, then this could result in unexpected behavior. To resolve this issue, mark all methods of your application that you do not want to expose as actions as private methods.
Grails 2 introduces a new unit testing framework that is simpler and behaves more consistently than the old one. The old framework based on the GrailsUnitTestCase class hierarchy is still available for backward compatibility, but it does not work with the new annotations. Migrating unit tests to the new approach is non-trivial, but recommended. Here are a set of mappings from the old style to the new:
- Remove extends *UnitTestCase and add a @TestFor annotation to the class if you’re testing a core artifact (controller, tag lib, domain class, and so on) or @TestMixin(GrailsUnitTestMixin) for non-core artifacts and non-artifact classes.
- Add @Mock annotation for domain classes that must be mocked and use new MyDomain().save() in place of mockDomain().
- Replace references to mockRequest, mockResponse, and mockParams with request, response, and params.
- Remove references to renderArgs and use the view and model properties for view rendering, or response.text for all others.
- Replace references to redirectArgs with response.redirectedUrl. The latter takes into account the URL mappings as it is a string URL rather than a map of redirect() arguments.
- The mockCommandObject() method is no longer needed, as Grails automatically detects whether an action requires a command object or not.
Summary
This chapter covered a lot of the operational aspects of developing Grails applications. Many of the topics related to things that happen after the code is written or described ways to facilitate the development process. The topics included packaging and deploying the application, as well as configuring environmental data sources and logging. It also covered how to automate your daily development processes and upgrade your applications to work with new versions of Grails. This chapter also ends the server-side discussion of Grails.
2 http://www.oracle.com/technetwork/java/javaee/servlet/index.html
5 http://www.microsoft.com/sql/
7 http://www.hibernate.org/docs
8 http://commons.apache.org/logging/
9 http://logging.apache.org/log4j/2.x/
10 http://logging.apache.org/log4j/2.x/manual/
12 http://grails.org/doc/latest/guide/upgradingFromPreviousVersionsOfGrails.html