

You’ve already read about how the video files coming out of HDSLR cameras are generally in a finish format that isn’t suitable for editing purposes unless you’re using Adobe CS5 Premiere and have the latest 64-bit processor desktop machines with optimized video cards. Before you can work on these files, you need to transcode them into an editing friendly format. There are many ways to accomplish this file change, including Compressor (comes with Final Cut Studio), Adobe Media Encoder (part of Adobe Creative Suite), Canon EOS Movie plug-in (for Final Cut), NeoScene Cineform, 3CP Software (a digital intermediary tool used on many projects in Hollywood), Magic Bullet Grinder, and MPEG Streamclip. The selection grows almost daily.
Early on, before Canon released its ingestion plug-in, a lot of people recommended MPEG Streamclip, which is a free encoder from Squared 5 (http://www.squared5.com/svideo/mpegstreamclip-mac.html). The first problem you will encounter with MPEG Streamclip is the fact that, because it’s a free tool, it doesn’t ship with the Apple codecs like ProRes does. You must have FCP installed in order to use the Apple codecs.
At this point, you might as well be using Compressor, which comes with FCP Studio. The speed of MPEG Streamclip is often cited as the reason for using it over Compressor, but keep in mind the old adage about fast, cheap, and good—you can usually only have two of the three. In the case of MPEG Streamclip, you get fast and cheap but not always good. Every time I do a comparison test, MPEG Streamclip loses. The quality is easily differentiated in side-by-side tests, and I’m not sure why so many people online insist on recommending it. I guess you get what you pay for when you use free software and take free advice from the Internet.
When Canon released its EOS Movie plug-in, everyone thought the industry’s transcoding problems were solved. Not only does it transcode into ProRes and other high quality codecs, it takes the date and time from the camera EXIF data and creates a rough timecode. This is helpful, since before this, there was no way to get a timecode from the Canon files. In addition to adding rough timecode capability, it’s a really fast transcoder that’s also free. Uh oh, what did I say about fast and free? Actually, the quality isn’t any worse than compressor or any other transcode that uses the QuickTime engine. It turns out that QuickTime was designed for real-time playback of video, not as a robust conversion tool. There have been a lot of people experiencing consistency issues when making conversions using the QuickTime engine. There has also been some buzz on the Internet about buggy behavior with the Canon EOS plug-in.
Tip
Remember that best practices apply to all digital media disciplines. The rule about backing up and keeping bit perfect master copies of your files applies to video footage the same as it does with still image files.
EOS Movie plug-in has the Log and Transfer capability discussed in the last chapter, which adds a rough timecode to your footage. Just be sure that when you’re using EOS Movie, you import directly from the card media or clone the card with the folder structure intact to the drive for later import. If you just copy video files to your drive, you won’t be able to come back later and use the EOS plug-in to import. You’ll end up having to rebuild the entire folder structure of the card in order for the EOS Movie plug-in to access the files.
Tip
Before shooting, tether all your Canon cameras to your computer via USB and open EOS Capture to sync the camera time to the computer time. If you do this to all the cameras you are shooting with, you will have a more accurate timecode.
Hardware-encoding devices take the processing outboard (away from your computer) using chips that are designed to number-crunch the video files. After all, video encoding is just number crunching as it changes the state of 1s and 0s. This process speeds up the conversion (encoding) while freeing up your computer to perform other tasks. Hardware encoding can help you shave an hour or more off of your shoot day, and can also allow you to quickly upload HDSLR video files to Vimeo or YouTube for client approval. Video clients are used to seeing dailies of the footage shot at the end of the shoot day or the next day. If the client is physically present, you can give him a hard drive with the camera-generated QuickTime files for him to watch at his leisure.
Most of the time though, you will also need to deliver dailies to people not on-set, and encoding video for the web usually takes longer than real time. This means that if you have 10 minutes of footage, it will take longer than 10 minutes to encode it for the web. Actually, it could take hours without using a hardware encoder. The same footage encoded using a hardware encoder could take as little time as one to five minutes, depending on the settings and the hardware being used.
An inexpensive option for hardware H.264 encoding is the turbo.264 from Elgato (http://www.elgato.com/). For $99, you get accelerated hardware H.264 encoding via a USB stick about the size of a thumb drive. The turbo.264 can be used with the accompanying software or in conjunction with Final Cut Pro/Compressor or Adobe CS5 Premiere.

The turbo.264 from Elgato is an inexpensive option for hardware H.264 encoding
Another great hardware option is the Matrox MX02 Mini from Matrox (http://www.matrox.com/). According to its website, Matrox Max is 500% faster than Compressor running without hardware acceleration. This unit is a small break-out box that adds multiple I/O (input/output) ports, including HDMI out with controls for hue, chroma, contrast, brightness, and blue-only. You can use these adjustment tools to calibrate your HDMI monitor with 10-bit 4:2:2 color precision for professional color grading. The MX02 Mini is feature-packed with a price tag to match at around $850. This is a bargain if you consider the time saved during export for one multi-day shoot. This little device will pay for itself in no time, and the added features make it a no-brainer for a professional HDSLR videographer.

The Matrox MX02 Mini is well worth the price tag
Almost every client on-set and/or back at production will want to see the dailies (rough takes from the shoot day). One of the fastest and easiest workflows for getting dailies out is to put them on YouTube as a private page. Private pages are visible only to the people you invite (up to 50) and can be assigned to a dedicated contact list. Just set the viewing option to private instead of public. You send the link to the appropriate people, and it can be viewed on almost any computer, mobile phone, or iPad.
Even though your Canon DSLR video files are in the H.264 format, YouTube videos should be transcoded for size and efficiency to work best with the internal compression algorithms that aid in web delivery and distribution to multiple devices. For dailies, I recommend using the Elgato turbo.264 hardware USB dongle with the accompanying software. As covered earlier, the turbo.264 USB dongle contains a specialized chip dedicated to transcoding video into H.264 files of various flavors. This chip takes the workload away from the computer, which speeds things up and frees up your computer for other processes. The software doesn’t give you the same level of control as when using Compressor or Adobe Media Encoder, but it does provide a fast, integrated way to batch-transcode videos for YouTube HD and automatically upload them to your account.
You simply plug in the turbo.264 dongle and launch the software.

The turbo.264 interface is easy to use
The next step after adding your video(s) is to choose the format for transcoding. In this example, you would select YouTube HD. Note in the image, however, how many formats you can choose from.

You can choose from many different formats for transcoding
Once YouTube HD is selected, the next window asks for your YouTube account information. You can provide a video description, use tagging, and set whether you want the video to be private. For dailies, I recommend making the video private.

The YouTube Publish process; make your movie private in this case
Once you successfully link your YouTube account and add the video metadata, the transcoding process will begin. When the transcode is finished, the window changes to an upload window where a status bar shows the progress of your upload to YouTube.
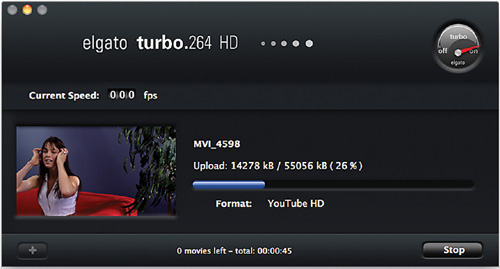
The Elgato Upload window
Tip
It will take YouTube a little while to process the HD video once it’s uploaded, so don’t panic if the video isn’t active right away.
It’s as simple as that. It gets even better when you select all the shots for the day and put them into the Elgato cue as a batch. You can walk away and have your videos automatically transcoded and uploaded for private viewing on YouTube. I find the $100 price tag for this level of speed and convenience a bargain!
