stitching basics: know before you sew
Learning to sew can be very exciting for a young artist as the possibilities of what can be created are endless. What might prove frustrating are the little things, like threading a needle, tying a knot, and untangling a mess of thread. Learning these basics make for a pleasant and successful sewing experience. For that reason, all those techniques are explained in this section. Come back to this information frequently as it is referenced often in the labs to come.
threading a needle
Threading a needle is how all sewing starts! It is the act of putting thread, yarn, or embroidery floss into the eye or the opening of the needle. If the eye is big, this can be accomplished by simply sliding the thread into the needle. Sometimes it is a bit harder to thread a needle if the eye is small. In this case, needle threaders, which can be purchased at craft stores, work wonderfully as well. However, if threading a needle is proving to be difficult and no needle threader is to be found, try making a needle threader of your own.
making a needle threader
A homemade needle threader is free and easy to use. Here’s how to make one:
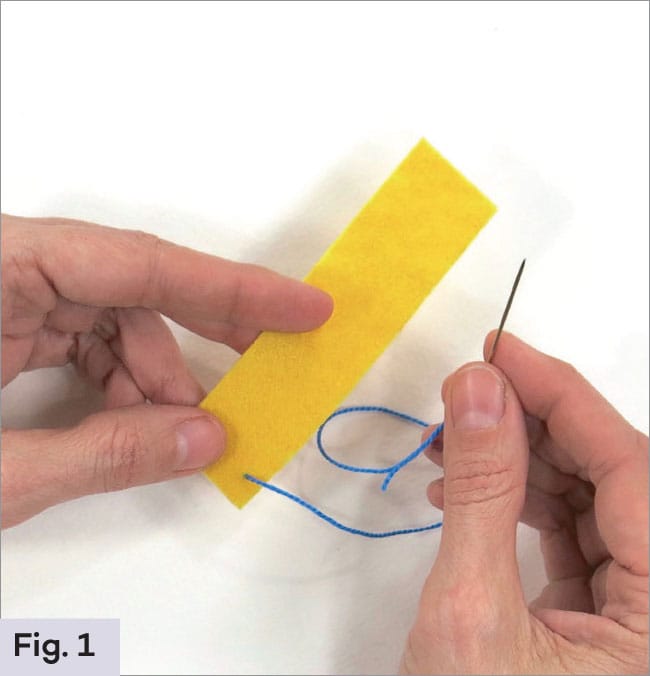
1. Cut a small rectangle of paper. Fold it in half lengthwise. Make sure it is small enough to slide through the eye, or opening, of the needle. (Fig. 1)

2. Open the rectangle of paper. Place the end of the cut thread inside the rectangle and fold it closed. (Fig. 2)

3. Slide the folded rectangle with the thread inside through the eye of the needle. Take the paper off the thread and the needle is threaded. (Fig. 3)

tying a knot
Tying a knot at the end of the thread anchors the thread in place while stitching. Without a knot, the needle and thread simply goes through the fabric and right out!
Tie a knot at one end of the thread every time the needle is threaded. Tying a knot at the top of the needle is not a good idea because the knot will keep the needle from going through the fabric.
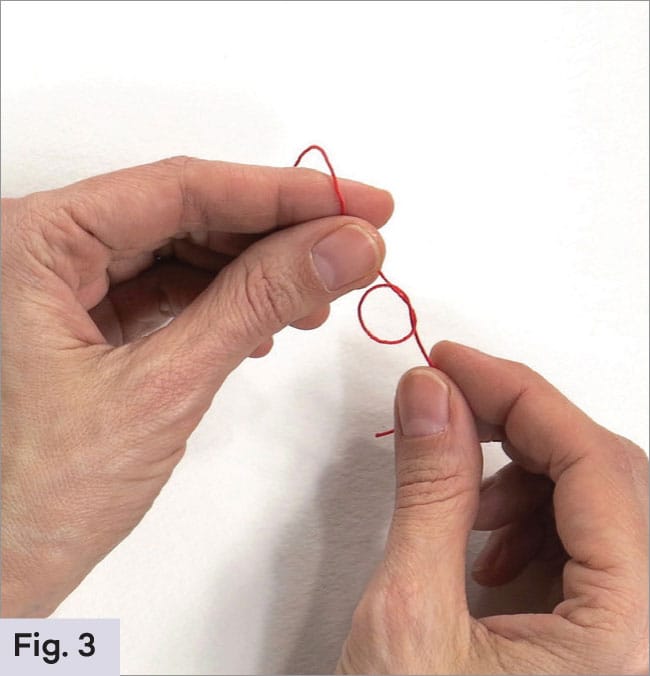
1. Once the needle is threaded, make a U shape with the one end of the thread. (Fig. 1)

2. Create an O with the thread by bringing the bottom of the thread over the top of the U. (Fig. 2)

3. Wrap the end of the thread around and into the O and pull. Pull slowly and try to slide the knot down to the bottom of the thread. (Fig. 3)
forming the three basic stitches
When doing any kind of sewing or embroidery, always begin on the back of the fabric. Thread the needle, knot the thread, place the needle behind the fabric, poke the needle through the fabric, and pull until the knot stops the thread from going any further. This keeps all the knots are on the backside of the project so they are not visible.
For sewing and embroidery, there are three basic stitches, the running stitch, the whipstitch, and the blanket stitch, that are used the most in this book. Each is different and each serves a purpose. Lab 6, Needlework Sampler, demonstrates several additional stitches and is a perfect lab for learning more about decorative stitching.
running stitch
The running stitch is the most commonly used stitch. It is a stitch created by moving the needle up-and-down, and in-and-out of the fabric. The result should look like a dashed line.
1. Thread the needle and knot the thread end. Start on the back of the fabric. Push the needle through the fabric and pull it until the knot stops the needle from going any further. (Fig. 1)
2. The needle is now above the fabric. Bring it back down into the fabric about a finger’s width away from where it came up. Pull until the knot stops the needle. This is the first running stitch. (Fig. 2)

3. Continue bringing the needle up and down, creating a dashed line of running stitches. Try to keep the stitches even and straight. (Fig. 3)


whipstitch
Whipstitches encase the fabric edge. The needle goes around the fabric edge, not up and down like the running stitch. It is a great stitch for sewing pillows and stuffed objects as the small and close stitches keep the stuffing fiber from falling out.
1. Like the running stitch, start by threading the needle and knotting the thread end. Begin on the back of the fabric and push the needle through until the knot stops it. (Fig. 1)

2. Once the needle has been pulled up, bring the needle around to the back of the fabric, around the fabric edge, and pull the needle through to the top of the fabric again. (Fig. 2)

3. Continue bringing the needle around the fabric and up to create the stitches. (Fig. 3)

blanket stitch
A blanket stitch is another common stitch. It is often used to finish the edge of a piece and create a pretty look.
1. As with all stitching, begin in the back and pull the needle up until the knot stops the thread. (Fig. 1)

2. Bring the needle to the back of the fabric again, about a finger’s width away from the last stitch. (Fig. 2)

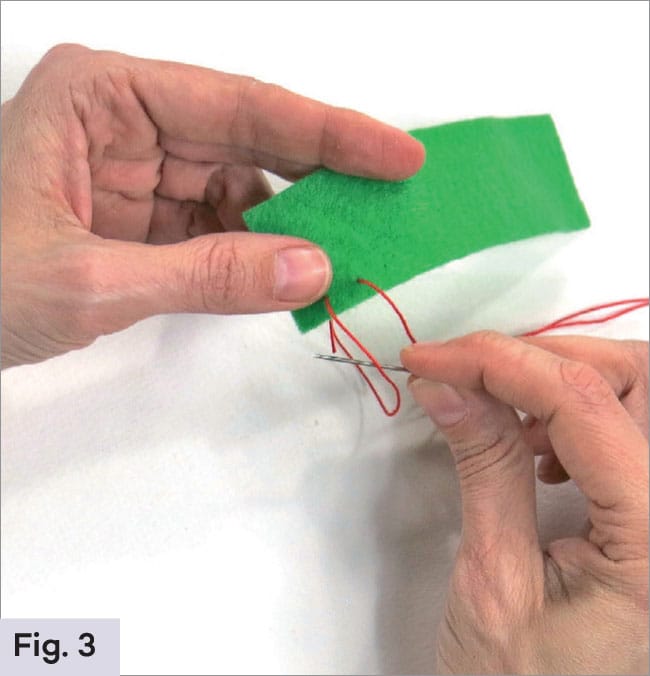
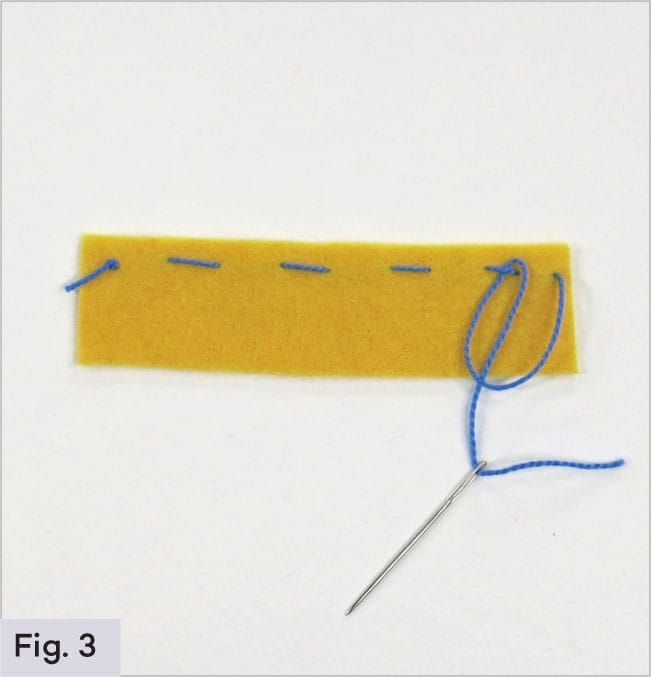
3. Pull the needle slowly. A small loop of thread should appear. Slide the needle though the loop. (Fig. 3)
4. Continue by bringing the needle up from behind the fabric and sliding it into the loop of thread to create the blanket stitch. (Fig. 4)

finishing stitching
A knot must always be tied to end stitching. If the thread is simply cut, then the stitches will pull out and the piece will come unsewn. This could ruin a stitched project.
A good rule of thumb, to know when it’s time to knot the thread and stop stitching, is when the remaining thread is as long as your hand. Even if the line of stitching isn’t finished, it’s time to knot the thread. You’ll then have to cut another length of thread, rethread the needle, and continue stitching.
1. All knots are on the back of the piece. To tie a knot, turn the piece to the wrong side. Slide the needle underneath the last stitch. (Fig. 1)

2. Stop pulling the needle when a small loop of thread appears. (Fig. 2)

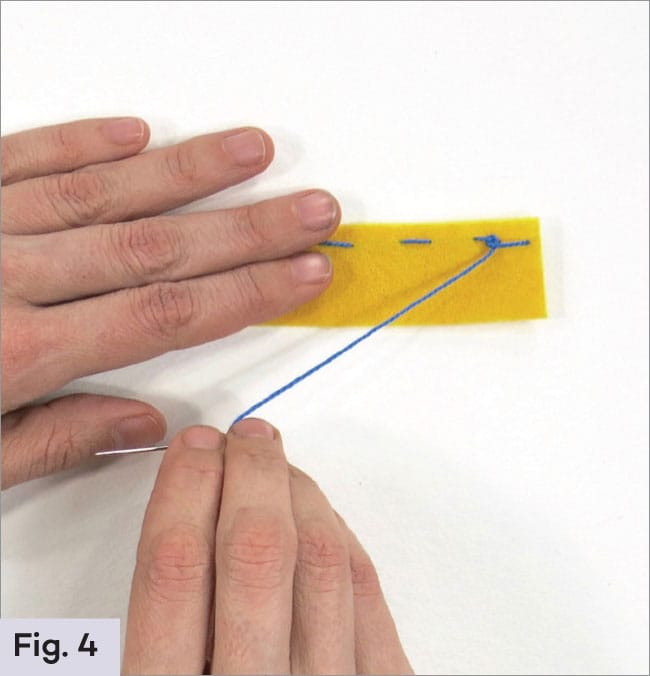
3. Turn the needle around and slide it though the loop of thread. (Fig. 3)
4. Pull the thread tightly and repeat the steps once more to double knot the thread. (Fig. 4)
sewing on a button
Buttons are added to many of the projects throughout this book. Sometimes the buttons are functional and other times they are for decoration. Either way, sewing a button on is the same, each time. If there is a needlehole, make sure the needle is the correct size by sliding the needle thought the needlehole before sewing it in place.

1. Thread the needle and tie a knot to the thread end. Hold the button on the location where it will be sewn. Bring the needle up from the back of the fabric so the knot is on the back. Either slide the button down the needle or poke the needle up through one of the buttonholes. (Fig. 1)

2. Bring needle all the way up until the knot in the back of the fabric stops the needle. Now have the needle dive down into the opposite buttonhole. If the button has four holes, pick the hole that is diagonal to form an X with thread on the right side of the button. (Fig. 2)

3. Repeat this process for the two remaining holes in the button, if the button has four holes. If two holes, simply repeat the same sewing steps. This process can be repeated twice to really anchor the button.
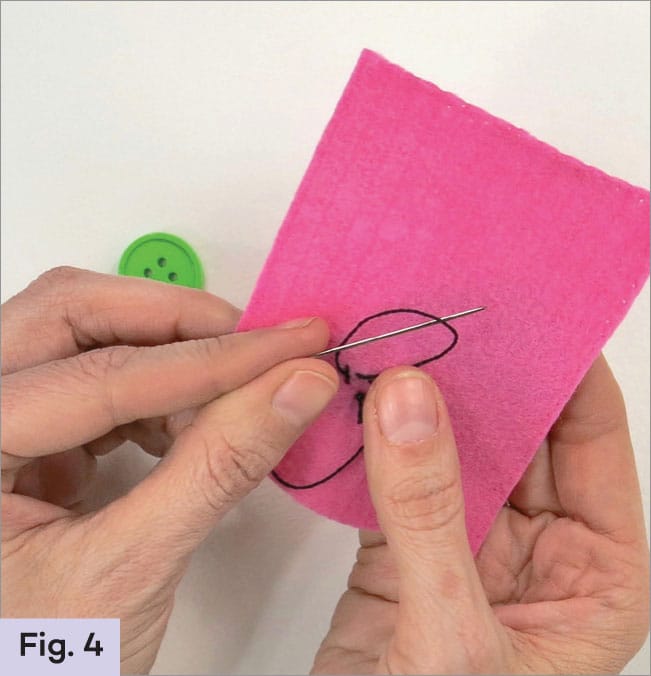
4. To secure the button, turn the fabric over and knot the thread on the wrong side. To make a sewn knot, slide the needle under a stitch. (Fig. 3)

5. Pull the needle slowly until there is a small loop of thread remaining. Slide needle through the loop and pull. Repeat process again and then trim the extra thread. (Fig. 4)
fixing a mistake
In sewing, there are going to be mistakes. The easiest way to fix a mistake is to remove the thread from the needle and then, gently, use the needle to help pull the mistake stitches from the fabric.