As mentioned previously, we will use the BeagleBone Black embedded board for our experiments. It is assumed that you will have completed the following:
- After visiting the Getting Started page (http://beagleboard.org/getting-started) and executing all the mentioned steps, the board will be just started and you will be connected to it. All through the book, the PuTTY program was used for this.
- The board is using the current official
bone-debian-7.5-2014-05-14-2gb, which is related to a 2 GB SD card (as shown in the next screenshot). Nevertheless, it's strongly advised that you use cards with a larger size and we'll soon see why. - Your board is identified in your local network; when required, we'll use the address
192.168.0.15, which you will need to adapt according to your local network. Most of the rooters provide a web interface for this purpose. - The default credentials are
debianas the username andtemppwdas the password.
BeagleBone Black has the advantage of booting either from an SD card or on-board flash (eMMC). The pros and cons of each of these is beyond the scope of this chapter. Generally, for this book, you should rely on the SD card support for the following reasons:
- You can use all the space you want without sacrificing any other partition: On flash, you are limited to the provided space, which is again limited by design.
- You can change your mind whenever you want: If you want to install all the applications described in this book, you can either use different SD cards or buy a bigger one.
- It is an error-proof solution: If you have never burnt any electronic device or broken the code, you should. Of course, not intentionally but because you pushed the limits. Many inventions have been found by accident, such as Penicillin, Teflon, and even Brownies and Tatin tart. So, if sometimes you are not able to boot the system, you will always have the possibility to get back to the situation you started with, using the SD card, by writing a new image to it.
The SD card induces small additional latencies that you won't even notice, so it is better to use it as a sandbox. So feel free to explore and try crazy things so that you can learn without limitations and worry.
If you update or install anything right away after a boot, you will encounter problems related to disk space.
Indeed, if you use PuTTY (www.putty.org) or any other SSH software to connect yourself to the board (such as, 192.168.0.15) and look at the rootfs space information, you can guess that the available size will be quickly saturated.

The SD card has little space left the first time
So, as the server administrator, it is up to you to resolve the size constraints.
The next topic will describe how you can achieve this task easily.
The default free space is really small; for example, you can fill it completely with just one upgrade. As a result, the very first thing to do at boot is to resize the /root partition.
Resizing a partition is not recommended for first timers. The good news is that you won't have to enter many commands; you can make your life easy by relying on a dedicated script provided with the board, which will do all that for you.
Enter the following two commands:
debian@beaglebone:~$ cd /opt/scripts/tools/
debian@beaglebone:/opt/scripts/tools/$ git pull
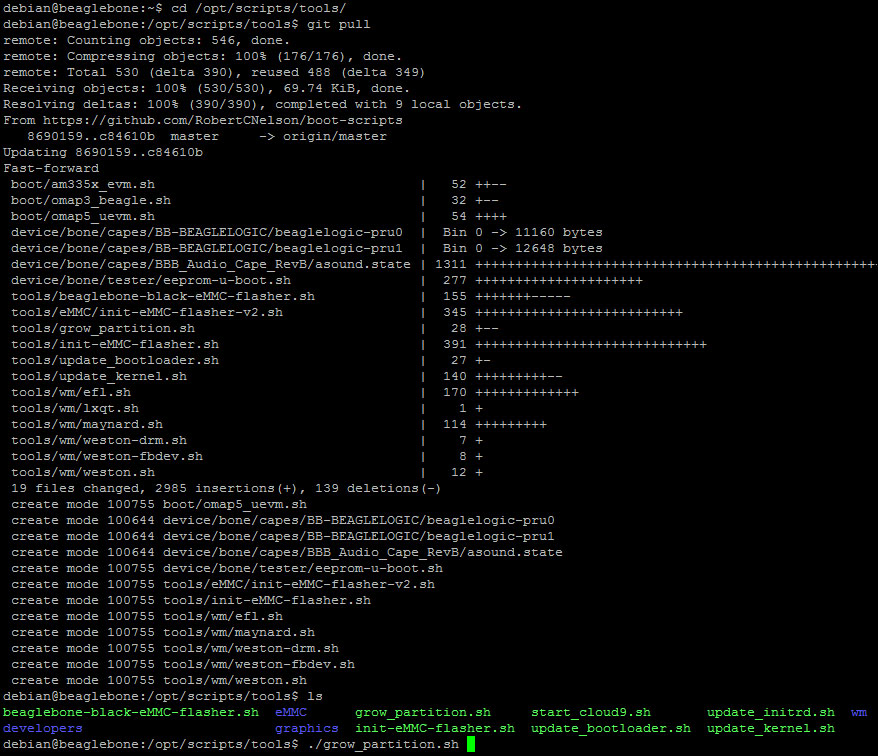
In this directory, we have downloaded the last code from the official repository, so we can start the script thereafter:
debian@beaglebone:/opt/scripts/tools/$ sudo ./grow_partition.sh
While running, this script will display a lot of details, which, thanks to the author, you don't have to care about.
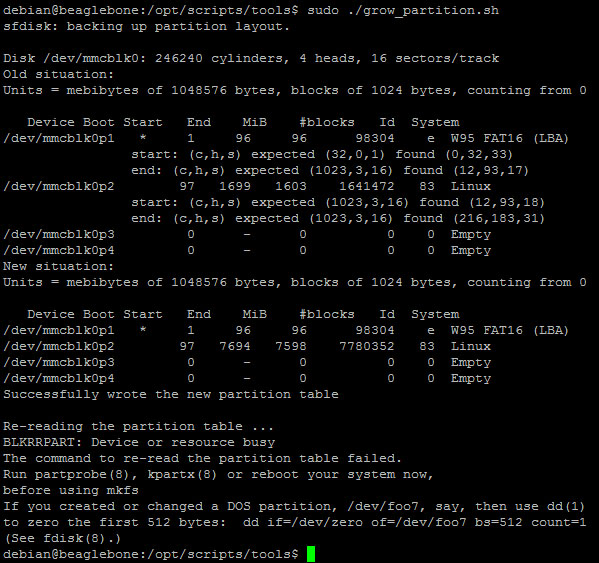
These are the commands that you won't have to learn
You can now go on to reboot your board (don't forget to press the user's button), as follows:
debian@beaglebone:/opt/scripts/tools/$ sudo reboot
Now, if you check, you'll see that the free space has been resized to the SD card's capabilities.
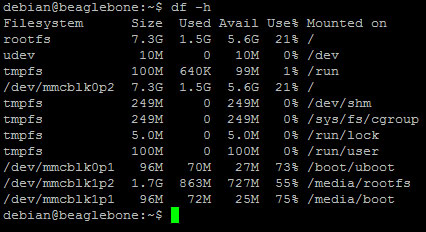
An 8-GB resized SD card
Now, you can continue with the update and upgrade…
Tip
The local /root partition from the SD card is fast to implement and easy to use. Nevertheless, thinking about how you will organize your server is a good habit. Linux can handle multiple remote filesystems that you can write to. For instance, for all your media contents, you can use an NFS partition from a distant drive or a device that supports uPnP.