
Now that we have checked the chain from the hardware level up to the driver, we can install the software that will make use of Video4Linux for video streaming. Here comes MJPG -Streamer.
This application aims to provide you with a JPEG stream on the network available for browsers and all video applications.
Besides this, we are also interested in this solution as it's made for systems with less advanced CPU, so we can start MJPG-Streamer as a service. With this streamer, you can also use the built-hardware compression and even control webcams such as pan, tilt, rotations, zoom capabilities, and so on.
Before installing MJPG-Streamer, we will install all the necessary dependencies:
debian@arm:~$ install subversion libjpeg8-dev imagemagick
Next, we will retrieve the code from the project:
debian@arm:~$ svn checkout http://svn.code.sf.net/p/mjpg-streamer/code/ mjpg-streamer-code
You can now build the executable from the sources you just downloaded by performing the following steps:
- Enter the following into the local directory you have downloaded:
debian@arm:~$ cd mjpg-streamer-code/mjpg-streamer - Then enter the following command:
debian@beaglebone:~/mjpg-streamer-code/mjpg-streamer$ make
When the compilation is complete, we end up with some new files. From this picture the new green files are produced from the compilation: there are the executables and some plugins as well.

That's all that is needed, so the application is now considered ready. We can now try it out. Not so much to do after all, don't you think?
This section aims at getting you started quickly with MJPG-Streamer. At the end, we'll see how to start it as a service on boot.
Before getting started, the server requires some plugins to be copied into the dedicated lib directory for this purpose:
debian@beaglebone:~/mjpg-streamer-code/mjpg-streamer$ sudo cp input_uvc.so output_http.so /usr/lib
The MJPG-Streamer application has to know the path where these files can be found, so we define the following environment variable:
debian@beaglebone:~/mjpg-streamer-code/mjpg-streamer$ export LD_LIBRARY_PATH=/usr/lib;$LD_LIBRARY_PATH
Enough preparation! Time to start streaming:
debian@beaglebone:~/mjpg-streamer-code/mjpg-streamer$./mjpg_streamer -i "input_uvc.so" -o "output_http.so -w www"

As the script starts, the input parameters that will be taken into consideration are displayed. You can now identify this information, as they have been explained previously:
- The detected device from V4L2
- The resolution that will be displayed, according to your settings
- Which port will be opened
- Some controls that depend on your camera capabilities (tilt, pan, and so on)
If you want to add some security, then you should set the credentials:
debian@beaglebone:~/mjpg-streamer-code/mjpg-streamer$ ./mjpg-streamer -o "output_http.so -w ./www -c debian:temppwd"
That's it. The webcam is made accessible to everyone across the network from BeagleBone; you can access the video from your browser and connect to http://192.168.0.15:8080/.
You will then see the default welcome screen, bravo!:
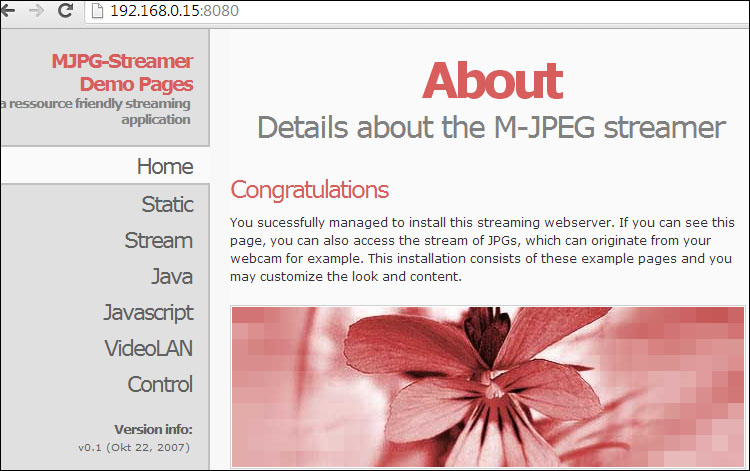
Your first contact with the MJPG-Server
Note
You might wonder how you would get informed about which port to use among those already assigned. Then teleport yourself to Appendix A.
Now that the webcam is available across the network, you have several options to handle this:
- You can use the direct flow available from the home page. On the left-hand side menu, just click on the stream tab.
- Using VLC, you can open the stream with the direct link available at
http://192.168.0.15:8080/?action=stream.The VideoLAN menu tab is a M3U-playlist link generator that you can click on. This will generate a playlist file you can open thereafter.
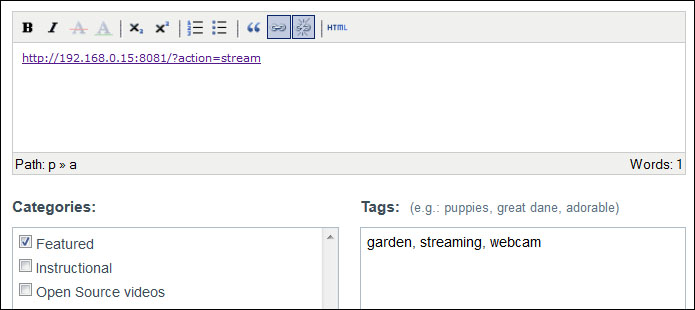
- Using MediaDrop, we can integrate this new stream in our shiny MediaDrop server, knowing that currently MediaDrop doesn't support direct local streams. You can create a new post with the related URL link in the message body, as shown in the following screenshot:
In the beginning, we saw that MJPG-Streamer needs only one command line to be started. We can put it in a bash script, but servicing on boot is far better. For this, use a console text editor – nano or vim – and create a file dedicated to this service. Let's call it start_mjpgstreamer and add the following commands:
#! /bin/sh
# /etc/init.d/start_mjpgstreamer

export LD_LIBRARY_PATH="/home/debian/mjpg-streamer/mjpg-streamer-code/mjpg-streamer;$LD_LIBRARY_PATH"
EXEC_PATH="/home/debian/mjpg-streamer/mjpg-streamer-code/mjpg-streamer"

$EXEC_PATH/mjpg_streamer -i "input_uvc.so" -o "output_http.so -w EXEC_PATH /www"
You can then use administrator rights to add it to the services:
debian@arm:~$ sudo /etc/init.d/start_mjpgstreamer start
On the next reboot, MJPG-Streamer will be started automatically.
For those about to explore, we salute you!
As the book is not just about installation and configuration, I thought that it would be useful to play around with what we just installed in the previous chapters, such as getting into the plugins in more depth or, why not, a different service with the webcam.
Remember that at the beginning of this chapter, we began the demonstration with two plugins:
debian@beaglebone:~/mjpg-streamer-code/mjpg-streamer$ ./mjpg_streamer -i "input_uvc.so" -o "output_http.so -w www"
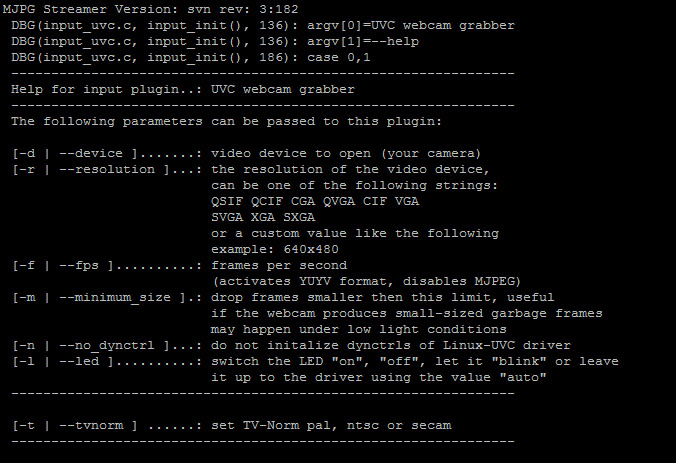
If we take a moment to look at these plugins, we will understand that the first plugin is responsible for handling the webcam directly from the driver.
Simply ask for help and options as follows:
debian@beaglebone:~/mjpg-streamer-code/mjpg-streamer$ ./mjpg_streamer --input "input_uvc.so --help"
The second plugin is about the web server settings:
- The path to the directory contains the final web server HTML pages. This implies that you can modify the existing pages with a little effort or create new ones based on those provided.
- Force a special port to be used. Like I said previously, port use is dedicated for a server. You define here which will be the one for this service.
- You can discover many others by asking:
debian@arm:~$ ./mjpg_streamer --output "output_http.so --help"
The Mjpg_streamer project is dedicated for streaming over network, but it is not the only one. For instance, do you have any specific needs such as monitoring your house/son/cat/Jon Snow figurine?
Well, in that case the Motion project is for you; just install the
motion package and start it with the default motion.conf configuration. You will then record videos and pictures of any moving object/person that will be detected. As MJPG-Streamer motion aims to be a low CPU consumer, it works very well on BeagleBone Black.