
This part of the chapter deals with how you can build a media player for yourself using the concept of capes, which you've just been introduced to. From the long list of available capes, we'll use the BeagleBone Black Expansion board from Chipsee.

From the two versions of this expansion board—resistive and capacitive—we will use the capacitive version, which has a five-point multitouch.

If you take a look at the functionalities that this expansion board proposes, it will give you an idea of why this is more than a display:
- A 7-inch screen with a resolution of 1024 x 600 pixels
- Capable of 5-point detection
- One audio out and one mic in
- Two RS232 ports
- One RS485 port
- Two analog channels
- 1 CAN port
- 1 integrated buzzer
- Five user keys
- Two user LEDs (green and blue)
- One embedded 3-axis accelerometer
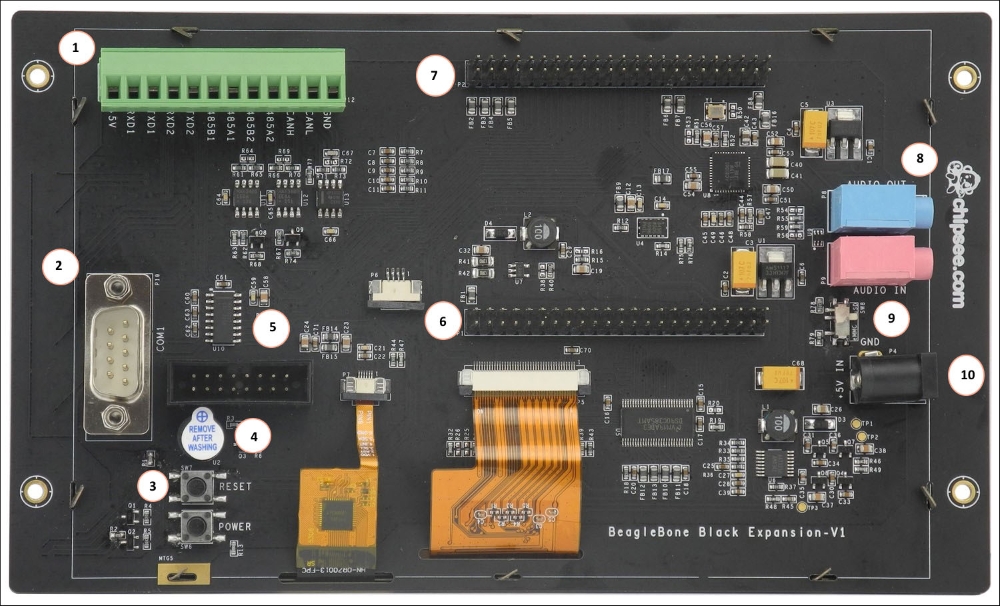
On the reverse side of the board, you can see the following components (also shown in the following screenshot):
- A multifunction connector with communication, acquisition, and power connections. You'll find the same signals from COM1 (Tx, Rx) and an additional COM port UART2 that is shared with RS485 #1, an additional port RS482 #2, and finally a Control Area Network (CAN), which is a network designed to be used in industrial conditions.
- The COM1 serial port, which has been changed from its original implementation. The provided systems are configured to debug to UART1 instead of UART0 on the BeagleBone, including a hardware driver. This implies that you can directly connect a serial terminal to the DB9 connector.
- Power and reset buttons (coming from BeagleBone for accessibility).
- Buzzer.
- JTAG connector.
- P8 header.
- P9 header.
- Audio output/microphone input (blue- and rose-colored, respectively).
- The boot switch, which allows you to choose between the SD card (up) or eMMC boot (down).
- Power: 5V/2A DC input is used for BeagleBone as for all the expansion board's needs. You don't need any additional adapters.
On the front side (from up to down), the board consists of the following:
- 5 programmable user's keys: With Android, they are associated with the home screen and the back, menu, volume up, and volume down buttons
- Blue LED: This denotes CPU activity in the Android OS
- Green LED: This denotes power in the Android OS
..................Content has been hidden....................
You can't read the all page of ebook, please click here login for view all page.