Chipsee provides different operating systems that you can install to start and manage the display. Having a look at these different OSes will help you to choose the one that will fit your project best.
Chipsee proposes a wide range of operating systems, which are provided in the following table:
We will now look at how to install Android, Debian, and EZSDK and finally see how Android can be used for some multimedia experiences.
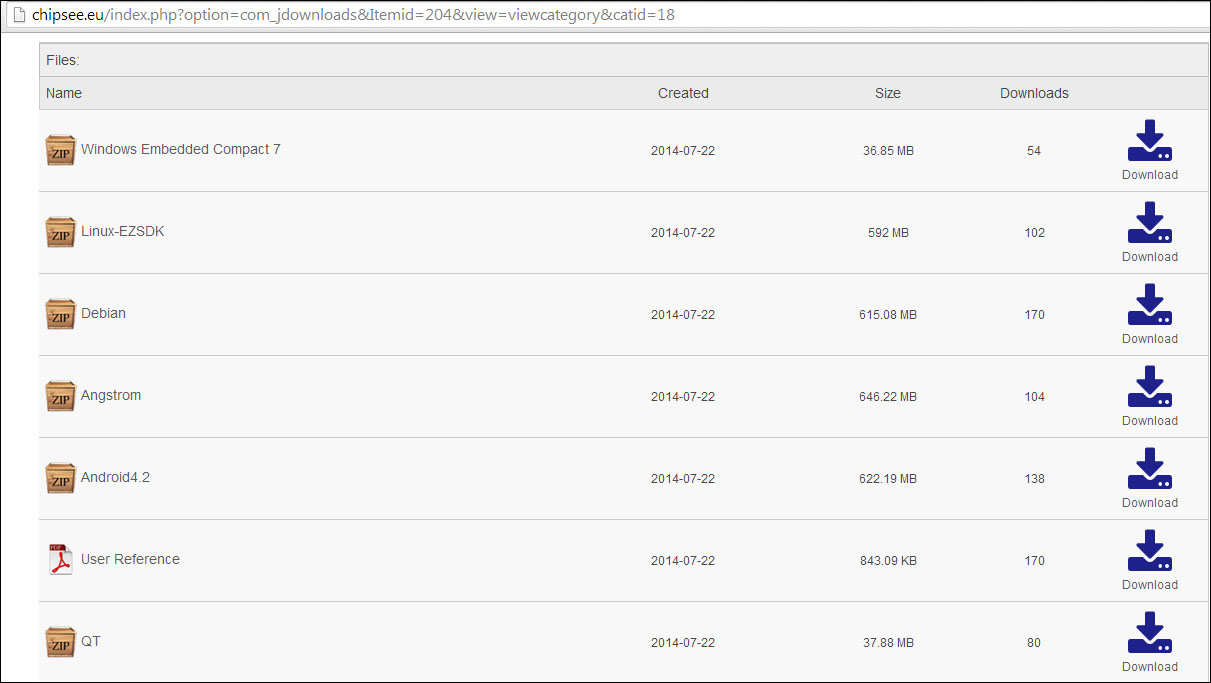
Even if you are provided with two CD-ROMs that include the documentation, user manual, and software, it's better to download the latest versions delivered by the manufacturer at http://chipsee.eu/index.php?option=com_jdownloads&Itemid=204&view=viewcategory&catid=18.
You can install Android USB drivers for the Windows platform. These drivers are located at YourRoot:ChipseeAndroid4.2Android4.2SoftWareToolsusb_driver.
The installation is straightforward for any driver. You will end up with a new Android phone device. This way, you are able to use it as a disk.
Before going into the OS installation, we have to check some things, such as the SD card naming, and we have to set the local language.
All the following explanations are for installation from Linux as a native operating system. You can install directly on your computer or you can use a virtual machine as well. If you want to make some developments or try some different projects, a VM is the best solution. Similar to a Python virtual environment, which we have seen in Chapter 4, Getting Your Own Video and Feeds, virtual machines give you the freedom to experiment with everything you want without losing your system.
There are many free virtualization managers that you can install; these are the most famous ones:
- VirtualBox (https://www.virtualbox.org/): This is easy and fast to configure.
- VMware (player) (http://www.vmware.com): This is as easy as VirtualBox but has some limitations in the free version.
- QEMU (www.qemu.org): This is harder to configure than the two previous ones, but the only one that comes close to hardware emulation. This solution is recommended when you don't have your ARM board with you but still need to use it.
In addition, VirtualBox and QEMU are open source applications, so you will have additional tools proposed by their respective communities.
All the scripts provided are simple enough to require a single parameter: the SD card device's name. Let's see two ways to check the SD card device's name.
For example, after inserting an 8-GB SD card, we can use lsblk, a useful tool that is provided with our Linux distributions (http://linux.die.net/man/8/lsblk). The name stands for list block devices, so you have a tree of all the block devices that Linux is able to manage.
Just start lsblk from the command line, as shown here:

Depending on the size we are looking for and the device type, we can deduce that our SD card is currently sdf.
Remember in Chapter 4, Getting Your Own Video and Feeds, we looked into the system messages to find how our USB webcam was named. Here, we use the same recipe:
dmesg | grep 'sd.'

While being verbose, dmesg ensures that you format the correct device.
If you execute the provided installation scripts from a non-English speaking system, you will end up with a nonbootable BeagleBone. This is because the installation scripts rely on text searches and matches. For example, in French, instead of the term "disk" and "cylinders," the results will be "disque" and "cylindres," respectively. These are results that the script doesn't understand, and in the end no system will be properly installed.
A simple workaround for Debian systems is to edit your locale file, as follows:
/etc/default/locale :
LANG="en_US"
LANGUAGE="en_US:en"
If, however, you'd like to keep the original language, then comment it with # at the beginning, use the script, and uncomment it thereafter.
Save the file and reboot to have the settings applied.
Now, it's time to prepare the expansion board and to install an operating system. We'll go through the three main OSes; the processes for each one are similar. However, for beginners, we will describe which file to install.
After you have downloaded the compressed Android file on your, you need to copy it to a dedicated directory. This is can be handy, so you can install all the three OSes beside each other in a separate space. So, if you are not really happy with Android, you can try Debian and get back to Android by a simple installation command.
Here's the procedure to do this, which is quite simple:
tar vzxf prebuilt-jb42-bbb-exp-20140321.tar.gz
cd prebuilt-jb42-bbb-exp-20140321
sudo fdisk -l /dev/sdf
sudo ./mksdcard.sh --device /dev/sdf
The 3rd part is just a check for you to be sure that you don't format your computer.
When installing Android, you need to validate the installation by pressing the Y key so that the installation process starts:
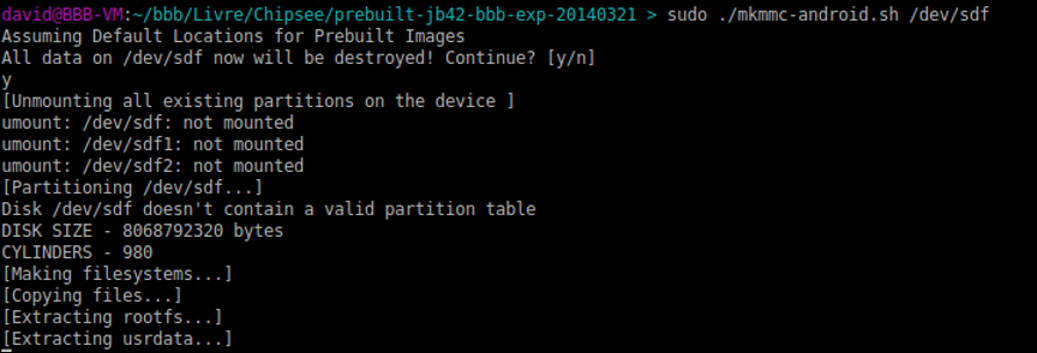
Wait for the Done message, which notifies the end of the installation process. Plug your SD card into the BeagleBone board and power it on.
You will have to wait for a while for the boot to be achieved, which is particularly long for Android compared with the others. However, our comfort comes at this price, doesn't it?
If you want, go directly to a walkthrough with Android; skip the next parts until the Using the expansion board with Android section.
As we did for Android, you can define your boot disk with some easy steps (please remember that sdf is an example; you need to check your own SD card device's name):
tar vzxf prebuilt-debian-bbb-exp-20140322.tar.gz
cd Prebuilt/prebuilt-debian-bbb-exp-20140322
sudo fdisk -l /dev/sdf
sudo ./mksdcard.sh --device /dev/sdf
As for Android, when installing Debian, you are asked to validate your choice before you start the installation process, as shown in the following screenshot:
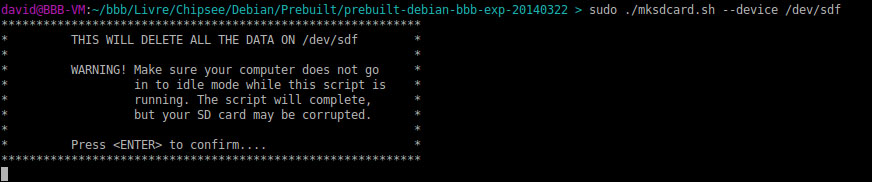
This will take a while; wait until the Done message appears.
The connection and usage is pretty straightforward; we find the system that we had in the previous chapters with MediaDrop. With Debian, you will have fewer things to learn and you can install it finally. When you think about which system to install, this is something for you to consider.
From SSH, the credentials to connect to the Debian OS are as follows:
- User:
debian - Password:
chipsee
Texas Instruments is the manufacturer of the BeagleBone Black controller. Actually, they did a great job of giving exhaustive documentation and even their own version of Linux dedicated to this board. TI's version is for those who want to learn the hardware parts. Execute the following commands:
tar vzxf prebuilt-chipsee-bbb-exp-ezsdk-20131210.tar.gz
cd Linux-EZSDK/prebuilt
sudo fdisk -l /dev/sdf
sudo ./mksdcard.sh --device /dev/sdf
After the board is powered on with the user button, a nice Linux and TI's logo will make you wait for a bit to load the special environment called a matrix.
Here's a compilation of the main application spaces you will find in Matrix:

After starting, you'll find the app launcher, a kind of desktop that centralizes all the available applications:
- Profiling (up left): Examples for process, reports, and kernel profiling.
- Benchmarking (up right): NBench (from the Byte magazine), linpack (single precision tests), Dhrystone, DDR, pipe communication's bandwidth, memory latency, Whetstone, latencies (fork, signals, TCP servicing, and so on).
- Qt4/QML (down left): Qt Quick Playground which is great for the QML developers. In this group are many examples to test in this script language.
- Qt4: There are 3 demos Animated Tiles, Thermostat Demo (down right), and Deform.
- Cryptos: Examples for everything concerning cryptography from secure, server, to AES, SHA1, and OpenSSL benchmarking.
- Multimedia: Audio, MPEG4, and H264 decoding applications.
- Power: Set your CPU frequencies: 275 to 720 MHz, suspend/resume.
- There are more applications to explore, paying particular attention to settings/system Shutdown, which is handy to power off the system.
For the complete documentation and explanations about the SDK and information on the AM335x microcontroller, a good source will be http://software-dl.ti.com/sitara_linux/esd/AM335xSDK/latest/index_FDS.html.
I think http://processors.wiki.ti.com/index.php/Sitara_AM335x_Portal will be a good place to visit if you need to do the following:
- Get into the controllers' details
- Develop applications, as follows:
- Bare metal look for the composer studio, which is a complete development environment
- Linux
- Android
- Yocto
- Training lab materials
- Training slides

TI' SDK is provided with a good amount of Qt sources and documentations.
If you take a look at the Qt archive, you'll see three documents, as shown here:
- Start with the user program: This is, in fact, a bash script that is worth taking a look at for GPIO usage
- User Guide For Embedded Qt: This shows you how to prepare, install, cross-compile, and get your application in the Matrix environment
- Recalibrate the resistive touch: This is the whole procedure for screen calibration
Aside is the Example-applications.zip file, which includes all the application sources you found in Matrix. These examples are for developers who already have a good technical background:

The examples.tar.gz file includes demos and examples that you find with all Qt installations, so they are all well-documented.
For more details about coding, these sources are strongly recommended.