
Carry out the following steps to create a formula field for opportunity records to derive the week number for the Opportunity Close Date field:
- Click on the Setup gear icon in the top right-hand corner of the main Home page, as shown in the following screenshot:
- Click on Setup, as shown in the following screenshot:

- Navigate to the Opportunity customization setup page as follows:
Objects and Fields | Object Manager | Opportunity | Fields & Relationships.
Locate the Fields & Relationships section on the right of the page.
- Click on New.
We will be presented with the Step 1. Choose the field type page.
- Select the Formula option.
- Click on Next.
We will be presented with the Step 2. Choose output type page.
- Enter Close Date Week Number in the Field Label textbox (as shown in the upcoming screenshot).
- Click on the Field Name. When clicking out of the Field Label textbox, the Field Name is automatically filled with the value Close_Date_Week_Number.
- Set the Formula Return Type as Number.
- Set Decimal Places to 0 in the Options section, as shown in the following screenshot:

- Click on Next.
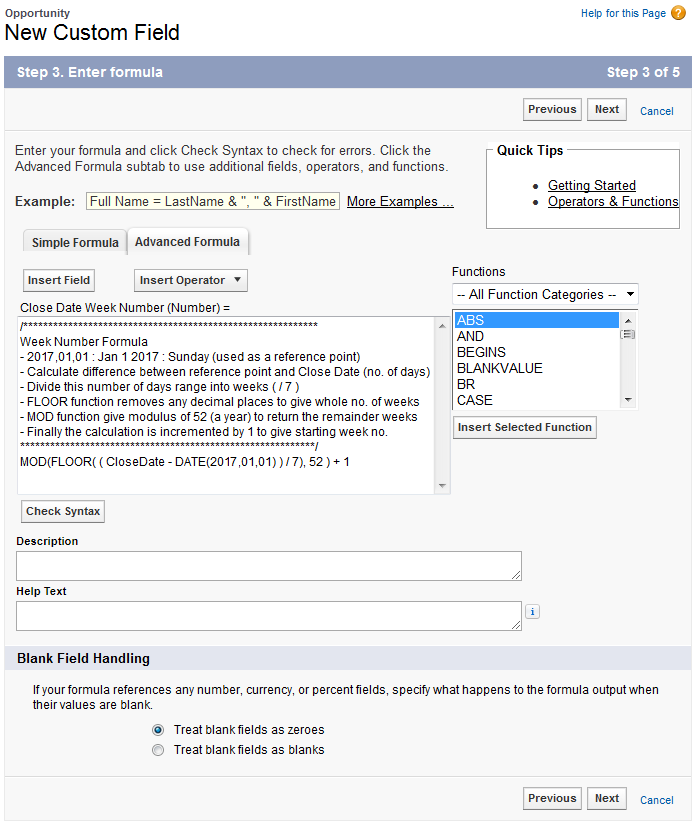
We will be presented with the Step 3. Enter formula page.
- Paste or enter the following code in the formula editor box:
/***********************************************************

Week Number Formula

- 2017,01,01 : Jan 1 2017 : Sunday (used as a reference point)

- Calculate difference between reference point and Close Date (no. of days)

- Divide this number of days range into weeks ( / 7 )

- FLOOR function removes any decimal places to give whole no. of weeks
- MOD function give modulus of 52 (a year) to return the remainder weeks
- Finally the calculation is incremented by 1 to give starting week no.
***********************************************************/
MOD(FLOOR( ( CloseDate - DATE(2017,01,01) ) / 7), 52 ) + 1
- Optionally, enter details in the Description field.
- Optionally, enter details in the Help Text field.
- In the Blank Field Handling section, leave the setting as the default option Treat blank fields as zeroes.
- Click on Next, as shown in the following screenshot:
We will be presented with the Step 4. Establish field-level security page.
- Select the profiles to which you want to grant read access to this field via field-level security. The field will be hidden from all profiles if you do not add it to field-level security.
- Click on Next.
We will be presented with the Step 5. Add to page layouts page.
- Select the page layouts that should include this field. The field will be added as the last field in the first two-column section of these page layouts. The field will not appear on any pages if you do not select a layout.
- Finally, click on Save.