Microsoft Windows XP is a piece of software called an operating system. An operating system does what its name implies it operates your computer system, working in the background every time you turn on your PC.
Equally important, Windows is what you see when you first turn on your computer, after everything turns on and boots up. The desktop that fills your screen is part of Windows, as is the taskbar at the bottom of the screen and the big menu that pops up when you click the Start button.

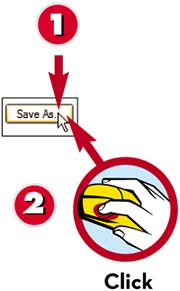
To use Windows efficiently, you must master a few simple operations, all of which you perform with your mouse. The most common mouse operation is pointing and clicking. Simply move the mouse so the cursor is pointing to the object you want to select, and then click the left mouse button once.
If you're using Windows XP's default operating mode, you'll need to double-click an item to activate an operation. This involves pointing at something onscreen with the cursor and then clicking the left mouse button twice in rapid succession. For example, to open a program, simply double-click a specific icon.

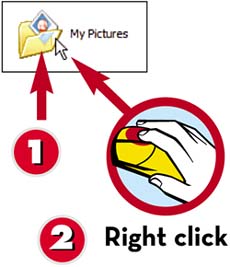
When you select an item and then click the right mouse button, you'll often see a pop-up menu. This menu, when available, contains commands that directly relate to the selected object. Refer to your individual programs to see whether and how they use the right mouse button.
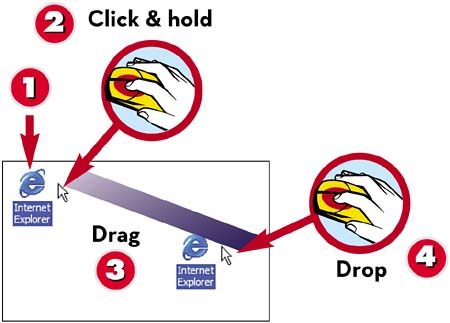
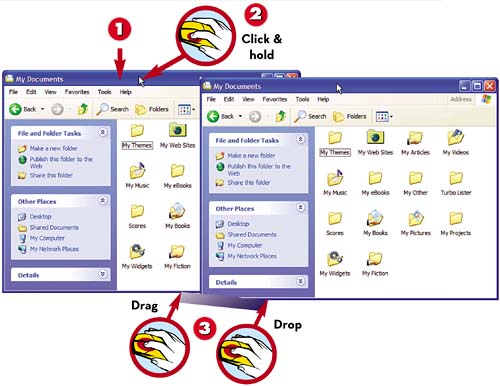
Dragging is a variation of clicking. To drag an object, point at it with the cursor and then press and hold down the left mouse button. Move the mouse without releasing the mouse button, and drag the object to a new location. When you're done moving the object, release the mouse button to drop the object onto the new location.
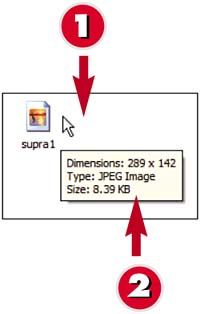
When you position the cursor over an item without clicking, you're hovering over that item. Many operations require you to hover your cursor and then perform some other action.
Every software program you launch (as explained later in this chapter in the task “Opening a Program”) is displayed in a separate onscreen window. To move a window, click the window's title bar and drag the window anywhere on the desktop. When you release the mouse button, the window stays where you put it.
Many windows contain more information than can be displayed at once. When you have a long document or web page, only the first part of the document or page is displayed in the window. To view the rest of the document or page, you have to scroll down through the window, using the various parts of the scrollbar.

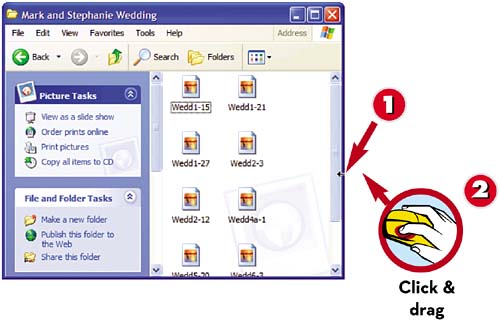
You can change the size of most windows by dragging any edge of the window with your mouse. If you drag either side of the window, you resize the width. If you drag the top or bottom edge, you resize the height. And if you drag a corner, you resize the width and height at the same time.
After you ve opened a window, you can maximize it to display full-screen. You can also minimize it so that it disappears from the desktop and resides as a button on the Windows Taskbar, and you can close it completely.

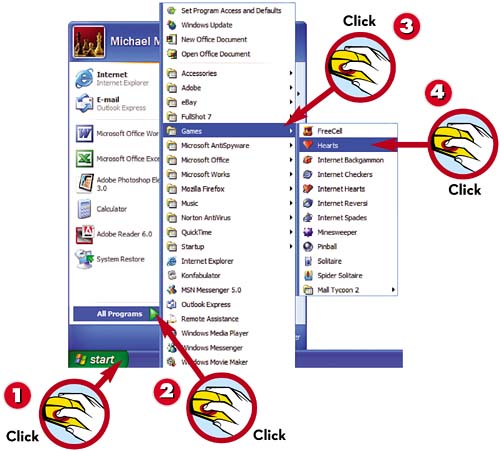
All the software programs and utilities on your computer are accessed via Windows's Start menu, which consists of two columns of icons. Your most frequently used programs are listed in the left column; basic Windows utilities and folders are listed in the right column. To open a specific program or folder, just click the menu icon.
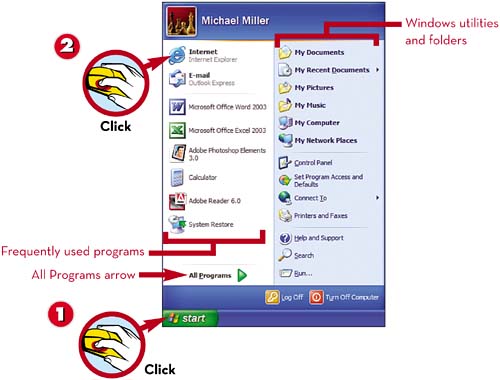
To view all the programs installed on your PC, open the Start menu and click the All Programs arrow. This displays a new menu called the Programs menu. From here, you can access various programs, sorted by type and title or manufacturer.
Desktop icons those little pictures on your desktop function as shortcuts for opening programs and documents. Placing a shortcut on your desktop is an alternative to launching items from the Start menu.

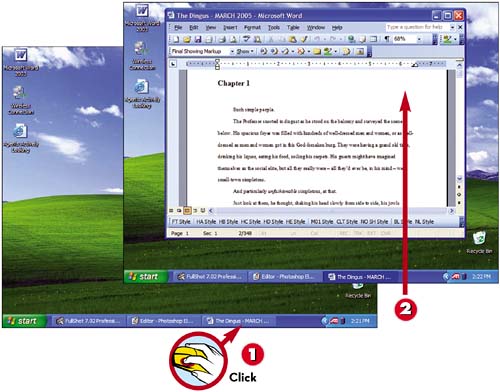
After you ve launched a few programs, you can easily switch between one open program and another by clicking the buttons located at the bottom of the Windows desktop.
Most windows use a set of pull-down menus to store all the commands and operations you can perform. The menus are aligned across the top of the window, just below the title bar, in what is called a menu bar. You open (or pull down) a menu by clicking the menu's name; you select a menu item by clicking it with your mouse.

Some Windows programs put the most frequently used operations on one or more toolbars, typically located just below the menu bar. A toolbar looks like a row of buttons, each with a small picture (called an icon) and maybe a bit of text. You activate the associated command or operation by clicking the button with your mouse.

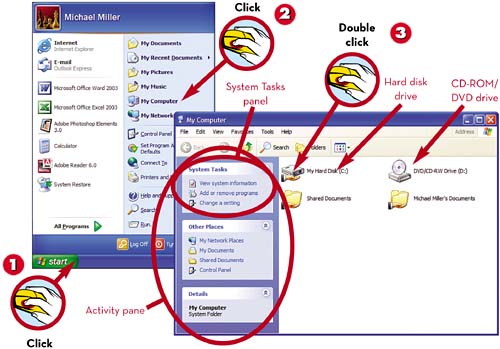
Windows's My Computer utility lets you access each major component of your system and perform basic maintenance functions. For example, you can use My Computer to “open” the contents of your hard disk and then copy, move, and delete individual files.
The Windows Control Panel is used to manage most (but not all) of Windows's configuration settings. The Control Panel is actually a system folder (like My Computer and My Documents) that contains several individual utilities that let you adjust and configure various system properties.
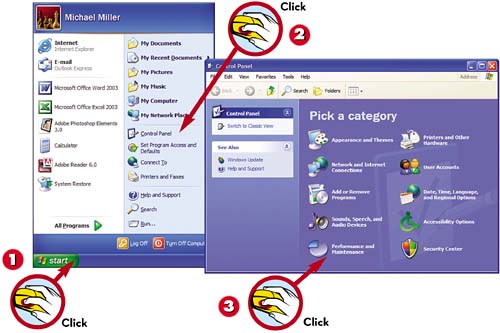
 Click the Start button to display the Start menu.
 Click the Control Panel icon to open the Control Panel.
 Click the icon for the category you want to configure.
TIP

Control Panel Categories
Individual settings within the Control Panel are organized by category. You first have to select a specific category to access all its related settings.


 Click the task you want to perform.
 Configure the settings for that task using the selected utility's dialog box.
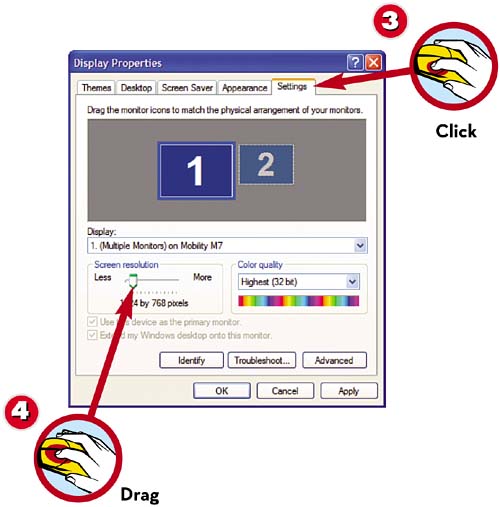
You can configure your computer's display so that the desktop is larger or smaller than normal, by changing Windows's screen resolution. A larger desktop lets you view more things onscreen at the same time even though each item is smaller than before. A smaller desktop displays fewer items, but they're larger.

Desktop themes are specific combinations of background wallpaper, colors, fonts, cursors, sounds, and screensavers all arranged around a specific look or topic. When you choose a new theme, the look and feel of your entire desktop changes. Windows's default theme is called Windows XP.


- Right-click anywhere on the desktop to display a pop-up menu.
- Select Properties from the pop-up menu; this opens the Display Properties dialog box.
- Click the Themes tab.
- Select a new theme from the Theme drop-down list; click OK when you're done.
TIP
More Themes
You can find additional themes in the Microsoft Plus! SuperPack add-on pack. Learn more at the Microsoft Plus! website (www.microsoft.com/windows/plus/).
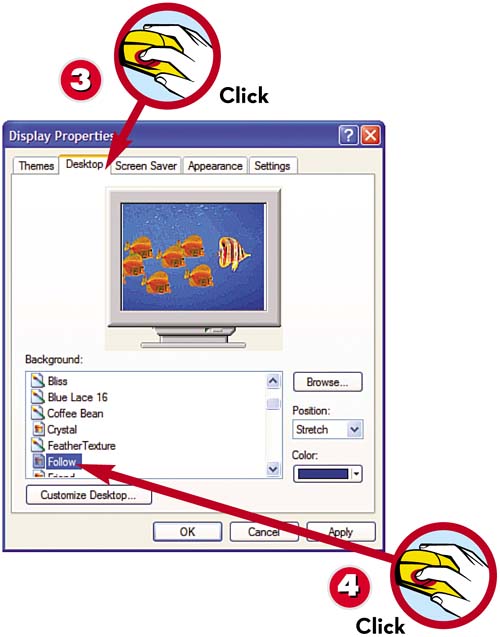
Although changing themes is the fastest way to change the look of all your desktop elements, you can also change each element separately. For example, you can easily change your desktop's background pattern or wallpaper. You can choose from the many patterns and wallpapers included with Windows or select a graphic of your own choosing.
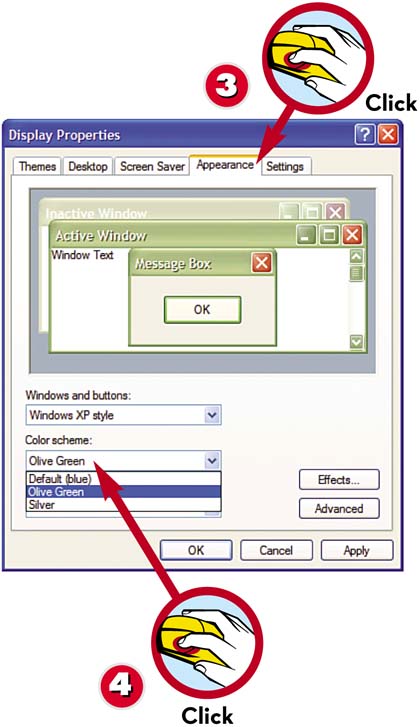
The default Windows XP desktop uses a predefined combination of colors and fonts. If you don't like this combination, you can choose from several other predefined schemes.

- Right-click anywhere on the desktop to display a pop-up menu.
- Select Properties from the pop-up menu; this opens the Display Properties dialog box.
- Click the Appearance tab.
- Pull down the Color Scheme list, and select a new theme. Click OK when done. Default (Blue) is the standard Windows XP color scheme.
If you have multiple people using your PC, you should assign each user in your household his or her own password-protected user account. Anyone trying to access another user's account and files without the password will then be denied access.

- From the Control Panel, click User Accounts.
- Click Create a New Account.
TIP
Different Users
You can create three types of user accounts computer administrator, limited, and guest. You should set yourself up as an administrator because only this account can make systemwide changes to your PC.
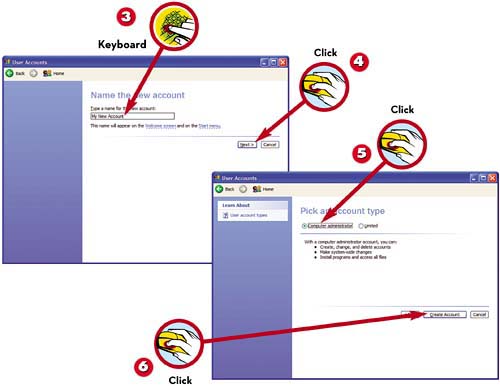
- When the User Accounts screen appears, enter a name for the account.
- Click Next.
- On the Pick an Account Type screen, check either the Computer Administrator or Limited option.
 Click the Create Account button. Windows XP now creates the new account and randomly assigns a picture that will appear next to the username.
Screensavers display moving designs on your computer screen when you haven't typed or moved the mouse for a while. This prevents static images from burning into your screen and provides some small degree of entertainment if you're bored at your desk.

- Right-click anywhere on the desktop to display a pop-up menu.
- Select Properties from the pop-up menu; this opens the Display Properties dialog box.
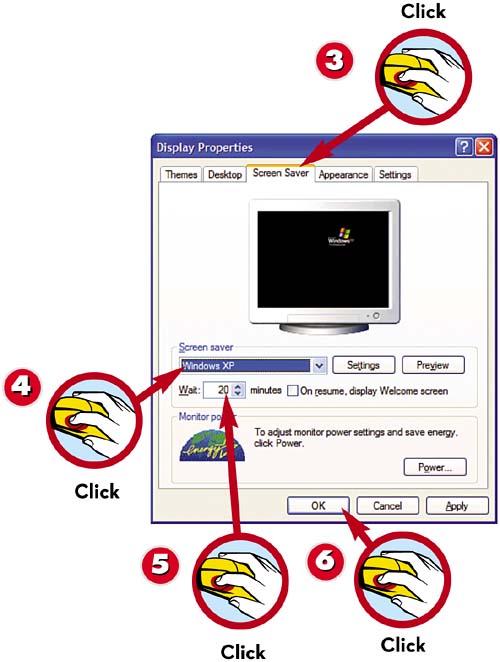
- Click the Screen Saver tab.
- Select a screensaver from the Screen Saver drop-down list.
- Select the number of minutes you want the screen to be idle before the screensaver activates.

