Introducing color basics
Working with Flash color
Organizing the Swatches panel
Creating and importing custom color sets
Using the Color panel to modify colors
Adding transparency to strokes and fills
Making and applying gradient fills
Selecting bitmap fills
Before I get into the specifics of applying color with Flash, I want to discuss some of the fundamental theory behind working with color that's destined to appear on the Web. Limited color displays are not as common as they were in the early days of Web graphics, but it is useful to have a basic understanding of the various contexts and limitations of digital color. This chapter introduces some resources that may be helpful to you for Flash work and as references for color issues that may come up in other productions. Whether you're designing corporate graphics or creating a photo album to share online, consistent and accurate color is a key factor in the quality of your projects. I explore the options available in Flash for choosing and modifying your color palette by using the Color panel and discuss how colors can be accessed from the Tools panel. I also show you how to work with the Properties panel menus, Swatches panel, and Color panel to select, change, mix, and apply solid colors, gradients, and even bitmap fills.
Note
I cover filters and blend modes in Chapter 11, "Applying Filters, Blends, Guides, and Masks." You can use these features to modify the color and appearance of symbols, but they do not replace the basic color tools (described in this chapter) used to modify text, shapes, and Graphic symbols.
Computer monitors display color by using a method called RGB color. A monitor screen is a tightly packed array of pixels arranged in a grid, where each pixel has an address. For example, a pixel that's located 16 rows down from the top and 70 columns over from the left might have an address of 70,16. The computer uses these addresses to send a specific color to each pixel. Because each pixel is composed of a single red, green, and blue dot, the colors that the monitor displays can be "mixed" at each pixel by varying the individual intensities of the red, green, and blue color dots. Each individual dot can vary in intensity over a range of 256 values, starting with 0 (which is off) to a maximum value of 255 (which is on). Thus, if red is half-on (a value of 127), while green is off (a value of 0), and blue is fully on (a value of 255), the pixel appears reddish blue or purple.
The preceding paragraph describes unlimited, full color, which is sometimes referred to as 24-bit color. Most computers now use 24-bit color to deliver cleanly rendered graphics without a hitch. In the early days of Web graphics, computer systems were incapable of displaying full color; these limited color displays were either 8-bit or 16-bit. Although a full discussion of bit depth is beyond the scope of this book, it is important to note several points:
Using 24-bit color is required to accurately reproduce photographic images and smooth color transitions in gradients.
Because 8-bit and 16-bit systems are color challenged, they can display only a limited number of colors, and they must dither-down anything that exceeds their gamut, which is their expanse of possible colors. Dithering means that, in order to approximate colors that are missing from the palette, the closest colors available are placed in proximity to each other to fool the eye into seeing a blended intermediate color. This can result in unwanted pixel patterns.
Some image formats, such as GIF, use a color palette that limits them to 256 colors. This is called indexed color. Indexed color is ideally suited for reproducing vector graphics that have solid fills and strokes but often creates noticeable banding (uneven color) when applied to photographic images.
Bitmap (or photographic) images do not accurately translate an indexed color palette, so matching color between GIF images and JPEG images can be unpredictable, because the JPEG expands the original indexed palette of a GIF file to include colors that may not be within the Web-safe color palette.
Calibration of your monitor is essential for accurate color work. For more information, check out the Datacolor learning page at
http://spyder.datacolor.com/learn_whyandwhen.php.
By default, the Swatches panel (Ctrl+F9 or
Note
The Mac and Windows platforms handle their color palettes differently, so browsers don't always have the same colors available to them across platforms. For designers, these differences led to inconsistent, unreliable color — unless they were careful to choose colors from the Web-safe palette. The Web-safe palette is a selection of 216 colors that's consistent on both the Mac and Windows platforms for Firefox (Mozilla), Internet Explorer (PC only), and Safari and Chrome (WebKit). The Web-safe palette contains only 216 of 256 possible indexed colors, because 40 colors can vary between Mac and Windows displays.
When there are more than 16 million possible colors, why would you settle for a mere 216? Consider your audience. Choose a color strategy that enables the majority of your viewers to see your designs as you intend them to appear. Web-safe color is not a concern for most people these days, but there may be a few exceptions. For example, if you're designing an e-commerce site for a very broad audience on a mix of platforms with the potential for some users to be on very old monitors, then you might consider limiting your work to the Web-safe palette. On the other hand, if you're designing an interface for a stock photography firm whose clients are most likely using newer computers, then color limitations are probably not an issue. In either case, keep in mind that no one will see the exact same colors that you see. The variables of hardware, calibration, ambient light, and environmental influences are unavoidable. If you do settle for 216 colors, remember that the value of color in Web design (or any design or art for that matter) has to do with color perception and design issues, and numbers have little to do with that.
Any RGB color can be described in hexadecimal (hex) notation. This notation is called hexadecimal because it describes color in base-16 values, rather than in base-10 values like standard RGB color. This color value notation is used because it describes colors in an efficient manner that HTML and scripting languages can digest. Hex notation is limited to defining flat color, which is a continuous area of undifferentiated color. In HTML, hexadecimal notation is used to specify colored text, lines, backgrounds, image borders, frame cells, and frame borders.
A hexadecimal color number has six places. It allocates two places for each of the three color channels: R, G, and B. So in the hexadecimal example 00FFCC, 00 signifies the red channel, FF signifies the green channel, and CC signifies the blue channel. The corresponding values between hexadecimal and customary integer values are as follows:
16 integer values:
0 1 2 3 4 5 6 7 8 9 10 11 12 13 14 1516 hex values:
0 1 2 3 4 5 6 7 8 9 A B C D E F
The Web-safe values in hexadecimal notation are limited to those colors that can be described by using combinations of the pairs 00, 33, 66, 99, and FF. White is described by the combination FFFFFF, or all colors on 100 percent. At the other end of the spectrum, black is described by the combination 000000, all colors on 0 percent, or off. A medium gray would be described by the combination 666666, or all colors on 40 percent.
According to some designers, the issue of color on the Web has been seriously confused by the misperception that people can set numbers to give them Web-safe colors, and that, if they do this, they will have good color. When designers get caught up in the excitement of layered patterns and multicolored text, they sometimes overlook the fact that the end result isn't very legible or "easy on the eyes." A little restraint can go a long way toward making your designs both appealing and legible. Although I all want to be creative and unique, certain color rules can actually be more liberating than restricting.
Although unconventional design choices can add an element of surprise, a touch of humor, or just a visual punch that helps your layout stand out from the rest, it is vital that you don't compromise your end goal. When you get noticed, you want to deliver your message successfully — whether that message is "Buy this product" or just "Hey, this is a cool site." If you start to carefully deconstruct the layouts that grab your attention, you will probably find that there are consistencies to the choices that were made in the design, regardless of the content. You'll begin to notice that even the most bizarre or cutting-edge designs share certain features that make them eye catching and memorable.
Much of the underlying strategy in a design may be transparent, or not consciously perceived by the viewer. But don't make the mistake of thinking that individual preference is completely unpredictable. The secret to successful design is leveraging the unconscious visual language that your audience is physically and culturally conditioned to respond to. Individual viewers may have specific preferences for certain colors or styles, but they all recognize and understand many of the same visual conventions.
Although learning to apply all these conventions and to integrate them into your own design style can take years of study and practice, there are some fundamental "truths" that will serve you well, no matter how long you've been designing:
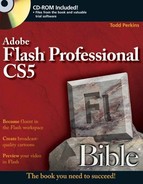
Color is relative: Humans perceive color relative to the context of other colors in which the color is set. Most art schools offer at least one course about color. They often start with color experiments that are conducted with pieces of colored paper. An early assignment is to make three colors look like more than three colors — by placing small scraps of the same color on larger pieces of different colors. Students are always amazed to learn how much a person's perception of a single color is influenced when it's placed on different-colored backgrounds. Figure 7.1 shows how the same shade of gray can appear lighter or darker depending on the background color. The lesson is that color is not an absolute — it never was before computers, and it never will be to the human eye.
Contrast is king: Only one thing is more important than color: contrast. Contrast is the relative difference in lightness or darkness of items in a composition. Here's a good test: Take a colorful design that you admire and reduce it to grayscale. Does it still work? Contrast is a major factor in good color composition. Figure 7.2 shows different amounts of contrast created by relative differences in value.
To ensure a strong design, it can be helpful to work on your initial layouts in grayscale. When you have contrast working for you, you can start to add color with the confidence that the design will not be visually muddy — or hard to read — because of poor contrast. Often, the same color scheme can be a disaster or a huge success, all depending on the contrast you create in the design. The concept of contrast also applies to other characteristics of your design — size, texture, even mood. Try to use contrast wherever you want to create emphasis or add drama. But remember: If you make everything huge and flashing red, or extra-small and pale gray, you will no longer have any contrast. The strength of contrast is in variety. Figure 7.3 shows how contrast can be achieved by varying the size and style of your text — even if the font stays the same. Create even more contrast by mixing fonts with different visual character: A sans-serif with thick strokes contrasts nicely with a script font with calligraphy-style strokes.
Less is more: Don't be afraid of empty space; the impact of individual elements is often dependent on having a little room to breathe. One element in a striking color is much more effective than a whole page filled with competing colors.
Start at the beginning: Visual hierarchy is the best secret weapon in any designer's arsenal. Although you may not be sure what the most important element is in your design, if you don't give readers a place to start, chances are you'll lose their attention. By deciding on the order of importance for elements in your design and then using contrast, size, and color to guide readers through your layout, you'll create motivation for them to actually stick around long enough to absorb your message. Think of your content as the elements of a good story: In order to make the narrative compelling, you have to have a catchy intro, a juicy middle, and a rewarding ending or payoff. You might argue that you want to let readers make their own choice about where to start (like starting at the back of a novel), but if you don't create a visual structure, readers won't feel empowered to make any choices. Presented with a big muddle of uncertain order, they will most likely move on to a design where they can find the beginning, middle, and end at a glance, before deciding what they want to read first. Figure 7.4 shows a layout with poorly defined visual hierarchy compared to an example with stronger contrast and clearer hierarchy. The page with the more clearly defined hierarchy gives the reader more clues about the order of importance of each element on the page. Of course, these examples don't even use color, but as I mention earlier, it can be best to plan the structure of your layout before adding color to support it.


Here's the bottom line: Color can help a good design look great, and when used with strategy, it can help engage the viewer and sell your message. But no amount of color can save a poorly planned design, so consider the underlying structure, contrast, and visual hierarchy of your layout before adding color.
Innumerable books on color theory and many different software solutions that can provide inspiration and take the guesswork out of choosing color schemes are out there. These are just three sources that can help you create harmonious color families for your designs:
Kuler from Adobe Labs: This color-focused site offers ready-made themes submitted by designers, a color forum, and a Flash-based Web tool that you can use to create your own color themes. Themes are available for download if you are signed in to the Adobe site and can be used with any of your Adobe CS applications. Explore themes or contribute your own at
http://kuler.adobe.com.
Tip
You can access the Kuler application directly from Flash by selecting Window
Color Schemer: A handy utility that generates a palette of harmonious colors for any key color that you want to start with. The full version of the software is available in a Windows version and an OS X version. The online version is helpful regardless of what platform you use. Try it out at
www.colorschemer.com/online.html.You can generate lists of RGB or hexadecimal colors from the Web-safe palette and choose to darken or lighten all colors in the palette until you find the exact color set you like. Color Schemer also offers a basic color tutorial that will help you understand how to generate harmonious palettes. You can find it at
www.colorschemer.com/tutorial.html.Pantone Guide to Communicating with Color: A wonderful reference book by color guru Leatrice Eiseman (published by North Light Books in 2000). This colorful book includes a wealth of information about the science and psychology of color, as well as a guide to a whole range of color families, grouped according to mood. Get inspired to add meaningful color to your projects.
Tip
The Pantone system for specifying ink color is the industry standard for communication between designers and printers. Pantone swatch books are indispensable and well worth the investment if you do any print work. Visit www.pantone.com to learn more. Pantone has also developed systems to help designers and retailers who need to specify and display color consistently in a digital environment. Visit www.therightcolor.com to learn more if you are developing online catalogs or other projects that require precise color matching. Pantone also offers swatch books with both CMYK and hex color values printed on them to make color matching between screen graphics and printed graphics easier. If you are a designer who "thinks in Pantone," you might find it worthwhile to invest in Pantone's Colorist software. Available for Windows and for Mac, Colorist makes Pantone swatches available from programs that do not have built-in Pantone color libraries (including Flash and Fireworks).
The Swatches panel (Ctrl+F9 or
Tip
For a quick way to change the transparency of a selected color, go to the Swatches popup menu and try out the handy Alpha field. You can also adjust Alpha levels on fill colors by using the Color panel.
Tools that create fields of color, or fills, include the Brush, the Paint Bucket, and the various Shape tools. Each of these tools is accompanied by the Fill color button, which appears in the Tools panel and in the Properties panel. Although the Fill Swatches popup menu is similar to the Stroke popup menu, it has one significant difference: It includes another row of swatches at the bottom, which are gradient swatches — click one to fill with a prebuilt gradient style.
Tools that create lines, or strokes, include the Line, Pencil, Ink Bottle, Pen, and — because they create outlines around fills — any of the Shape tools. These tools rely on the Stroke color button, which appears in both the Tools panel and the Properties panel.
For all drawing tools, basic color selection is accomplished by clicking either the Stroke or Fill color buttons and then choosing a color from the Swatches popup. This popup displays the same swatch set that is currently loaded in the Swatches panel. It also includes a hexadecimal color-entry box — which facilitates keyboard entry, as well as cut-and-paste of hex values. Depending upon the tool you select, the Swatch menu available from the Tools panel may display a No Color button above the solid swatches as well as a button that launches the Color Picker.
Tip
You can remove a fill or stroke from a selected shape or Drawing Object by using the None (or No Color) button in any of the Swatches menus. If the line or stroke shows the selection grid, you can also use Edit
Tip
If you decide after you invoke the Swatches popup that you don't want to change your selected color after all, hit the Escape key or make sure that your mouse is over the original color swatch when you click to close the popup.
The color chips appearing on the Tools panel always display the most recently selected Stroke and Fill colors, and the Properties panel displays the color chips relevant to the active tool or the currently selected item.

Figure 7.5. The default color palette as it appears in the Tools panel popup (A), the Swatches panel (B), and the Properties panel popup (C)
Note
Drawing Objects behave like grouped shapes, but the fill and stroke colors applied to Drawing Objects can be modified without opening them in Edit mode. When a Drawing Object is selected (by single-clicking) with the Selection tool, the selection grid isn't visible (as it would be on a raw shape), but you can apply a new fill or stroke color by using any of the Swatches menus. To open a Drawing Object in Edit mode, double-click with the Selection tool.
If the color you want is not available in the current Swatches menu, you may opt to invoke the Color Picker by clicking the Color Picker button. Alternatively, you may also open the Color panel to create a new color and add it to the currently loaded selection of swatches. The Swatches panel enables you to load, add, delete, and modify various color sets for individual documents. Whatever changes are made to the Swatches panel are saved with the document (.fla) that is currently active.
Tip
With any of the Swatch popups active, your cursor icon turns into an Eyedropper. If you roll over colors outside of the swatches area while continuing to hold down the mouse, you will notice that you can "sample" colors from anywhere on your desktop. When you find a color you like, release your mouse and the color loads into Flash as your currently selected color. Don't forget to add the color to the Swatches panel if you want to save it in the color library of your current file. I describe the steps for adding and saving swatches later in this chapter.
Think of the Swatches panel (see Figure 7.6) as a paint box or a way to organize your existing swatches and to manipulate the display of colors that are available in the other panels. Use the Swatches panel to save color sets, import color sets, and reorder or change selected colors. The options menu of the Swatches panel provides the controls used to sort or modify individual swatches as well as various color sets:
Duplicate Swatch: Use this to duplicate a selected swatch. It can be useful when you want to make a range of related color swatches by duplicating and then editing a series of swatches with the Color panel.
Tip
You can duplicate a selected swatch with just two clicks. First, select a swatch with the Selection tool or use the Dropper tool to pick a color from any item on the Stage. As you move the cursor into the space below the current solid swatches set (above the gradient swatches), the cursor icon changes from a dropper into a paint bucket. Just click, and a new swatch is added to the color set. Changed your mind? Hold down Ctrl or
Warning
Be careful about creating huge color sets! In some cases, the Swatch color popups may extend beyond the visible screen and you'll have to use the Swatches panel to scroll to choose colors that are hidden off-screen. This can happen if you add colors from a complex GIF image to the default Web 216 set.
Replace Colors: Also opens the Import Color Swatch menu. However, Replace Colors replaces the current color set when it loads the selected color set. With the exception of the gradient swatches, if the current set has not been saved, it will be lost.
Load Default Colors: Clears the current color set and replaces it with the default Web 216 swatch palette. Again, if the current set has not been saved, it will be lost. Flash allows you to change the specification for your default color palette if you prefer not to use Web 216. (See Save as Default, below in this list.)
Save Colors: Opens the Export Color Swatch menu, which is used to name and save color sets to a specific location on your hard drive. Color sets may be saved in either the Flash Color Set (.clr) or Color Table (.act) format, which can be used with Fireworks and Photoshop. Gradients can only be imported and exported from Flash by using the .clr format.
Save as Default: Saves the current swatch set as the default set to be loaded in the Swatches panel for all new Flash documents.
Clear Colors: Removes all colors currently loaded in the Swatches panel, leaving only the black-and-white swatches and a grayscale gradient.
Web 216: Loads the Web-safe palette. This option makes it safe to mess with the swatches in Flash because no matter what you do, you can always just reload this original default color set.
Tip
You can override the default Web 216 color set by switching the Color panel to either the RGB or HSB (hue, saturation, brightness) color spaces. You can then mix your own fresh colors, add them to the Swatches panel, and save that palette as the default. Another alternative is to locate the Photoshop Color Tables on your hard drive (or download a specialty color table from the Web) and replace the default set with a broader gamut.
Sort by Color: This organizes the swatches by hue instead of by mathematical number and can visually be a more logical way to find colors in your current set. Note, however, that after you apply this sort, you have no way to toggle back to your original swatch order (other than reloading the default Web 216 swatch set). So it is best to save any custom palette first before sorting so that you have the option of going back to the other display if you prefer it. Figure 7.6 shows the Web 216 palette as it appears by default sorted numerically (left) and as it appears sorted by color (right).

The option of loading custom swatches is helpful if you're developing a Flash project that you want to match with a predefined palette — whether this is out of necessity or just for inspiration. For example, you can match your Flash elements to a corporate logo or to the range of hues in a photo that you love. In addition to loading the colors in a specific GIF file, Flash allows you to load RGB color palettes from other graphics applications that have been saved as Color Tables (in the .act or .clr format).
Flash CS5 includes a panel to access Kuler, a fun color tool from Adobe that organizes color into a series of five selected swatches called a theme. This Web-based extension includes a ratings system and live comments on themes created and uploaded by a growing community of Kuler users. You can browse themes to use as is or modify, or create your own theme from scratch by using an interactive color wheel and a menu of color modes. Figure 7.7 shows the browse mode (left) and the create mode (right) of the simplified Kuler application included with Flash CS5 (Window
After you've chosen or created a theme (series of swatches) in Kuler, you can use the handy one-click Add to Swatches button at the bottom of the Kuler panel (see Figure 7.7) to automatically add the swatches in your selected theme to the main Flash Swatches panel. If you create a Kuler account, you can also use the online MyKuler page to save and sort your favorite themes.
Tip
If you would prefer to have only the swatches that you are moving from Kuler show up in the Swatches panel, use the Clear Colors command in the Swatches panel Options menu before you add the theme from the Kuler panel. By default, a black swatch and a white swatch remain in the Swatches panel even after you apply the Clear Colors command, but otherwise, you will have a clean slate for your Kuler theme swatches.
Five colors may be all you need to create a perfect design, but if you need more, don't hesitate to add a few more themes to your Swatches panel or modify the colors in the Color panel to create additional variations.

Figure 7.7. The Kuler panel in Flash CS5 can be used to browse color themes made by other people (left) or to create your own custom theme with Adobe's user-friendly color tool (right).
Tip
Don't forget to upload the themes you are especially proud of to the Kuler site to share with other people too. Choose a descriptive name and check back to see what people have to say about your color savvy!
To simplify your Flash Swatches to match the colors in a company logo or other GIF image, follow these steps:
Choose Replace Colors from the Swatches panel options menu, and in the Import Color Swatch dialog box, specify a GIF file to define the imported color set.
After Flash loads the colors from the GIF image into the Swatches panel, save the document (.fla) to keep these colors as the loaded set.
To organize the loaded color set in the Swatches panel by hue, choose the Sort by Color option. You can always add or delete swatches from this new set.
If you want to use your custom color set in other files, use the Save Colors command in the Swatches panel options menu to save a Color Table (.act) or Flash Color Set (.clr).
A sample source GIF image and the resulting imported Swatches palette are shown in Figure 7.8.

Figure 7.8. The simple logo GIF (left) that I specified as the source for the Replace Colors command. The resulting colors loaded in the Swatches panel (right) match the colors in the logo.
Tip
The color settings defined in the original authoring environment (such as Adobe Illustrator or Photoshop) for saved GIF files affect the colors available for loading to the Flash Swatches panel. For the widest range of colors, use 256 colors and an adaptive palette. To get only the exact colors used in a graphic, manually restrict the number of colors that can be included by typing a number that matches the number of colors in the original graphic. For example, if a logo that you plan to use as a source file for your swatches is red, blue, yellow, black, and white, restrict the GIF to five colors when you export it from the original authoring application.
If you want to save a color palette that matches the hues in a photograph that is not already in GIF format, you can also generate a color table in Photoshop.
To create a color table in Photoshop (or Illustrator), follow these steps:
Open a source bitmap image (.jpeg, .tif, .psd, or .png).
Use the Save for Web and Devices command to access the settings that allow you to choose the file type and color space that you want to export. To create a color table, set the file type to GIF, choose Adaptive (or Restrictive if you want your swatches to be Web safe) color, and set the number of colors you want to include in the color table. Although you can include anywhere from 2 to 256 colors in your color table, you will not likely need more than 16. Preview the swatches in the Color Table (on the right side of the Save for Web dialog box).
Note
Although Photoshop includes a menu option for creating a color table (Image

When you have a set of swatches that you are happy with, choose Save Color Table from the Color Palette menu (accessed from the icon in the top-right corner of the Color Table preview). The settings used for the sample file are shown in Figure 7.9.
Give the color table a name that you will remember (such as tulip_field) and save the ACT file to a folder where you can find it again. Creating a Custom Palettes folder on your system, where you can store and organize any of the color tables or source GIFs that you may want to use again, is a good idea.
Open a Flash document (.fla), and from the Swatches panel options menu choose Add Colors if you want new colors added to the currently loaded set (or Replace Colors if you want to use only your new colors).
From the Import Color Swatch dialog box, browse to your color table (.act) file and select it. Flash loads the new colors into the Swatches panel, and you can then sort and save this set with your document.

Figure 7.9. Use the Save for Web command and the Color Table settings in Adobe Photoshop to create a custom color palette from a photograph.
The sample source bitmap image and the resulting color table loaded into the Swatches panel are shown in Figure 7.10.

Figure 7.10. A photo (in GIF format) used to generate a color table (.act), and the resulting color set loaded into the Flash Swatches panel
Note
In the previous example, I created a color table from an image of a tulip field. You can find the source bitmap (tulip_bitmap.tif) and the color table (tulip_field.act) files, along with a Flash document (tulipColors_loaded.fla) that has a GIF imported and the color palette loaded, in the colorTable folder in the ch07 folder on the CD-ROM.
Think of the Color panel as the "boss" of the Swatches panel. The Swatches panel handles the color inventory and serves up the available colors, but the Color panel has the power to modify those colors and add variations to the current set. The Color style menu available on the Color panel allows you to choose the type of color pattern that you want to work with — including solid colors, linear and radial gradients, and bitmap fills.
Tip
Gradient styles can be used with strokes as well as with fills. This option has potential for creating custom line styles for borders and other decorative lines.
As shown in Figure 7.11 and Figure 7.12, the Color panel enables you to create new colors, with settings in any of three color spaces — RGB, HSB, or hex — using either manually entered values or the "rainbow" color picker field. All colors are handled with four channels, which are RGBA (red, green, blue, alpha); these values can be individually adjusted by using the Color value fields and slider controls. The Tint slider control enables you to dynamically shift your current color darker or lighter. A Fill or Stroke color selected in any of the Swatch menus appears in the Color panel where it can be modified.

As shown in Figure 7.12, colors modified in the Color panel can be added to the palette loaded in the Swatches panel — just select Add Swatch from the Color panel options menu and the color is added below the colors currently loaded in the Swatches panel.

Any color swatch selected in the Swatches panel is loaded into the Color panel as a starting point only — modifications made in the Color panel do not change the original color in the Swatches panel. The new color or gradient that you create by using the controls in the Color panel (shown in Figure 7.13) are added as a new swatch only when you select Add Swatch from the options menu. You can always edit your custom color by selecting the new (saved) swatch, but the modified version is treated as a new color and also has to be added to the Swatches panel separately.
Tip
Unlike swatches selected from the Swatches panel, a fill or stroke selected in the Document window can be edited "live" in the Color panel. You can see the changes you make applied to the original fill or stroke if it remains selected.
Warning
The colors you create and add to the Swatches panel are saved with the document (.fla) as long as you do not reload the default set or overwrite the loaded swatch set. If you want to save your custom mixed colors, remember to save the Flash color set (.clr) to a folder by using the Save Colors command in the Swatches panel before you reload the default Web 216 color set or Replace Colors with a new palette.

Figure 7.13. The Color panel preview swatch splits to compare colors as you use the Color Picker or the Tint slider to make adjustments.
When you select a color from the Swatches popup palette, the cursor converts to a Dropper tool that enables you to sample color from anywhere in the interface just by clicking the color you want to pick up. You can pluck colors from icons in the Flash application, from any element that you have in the Document window, and even from elements on your desktop or in other application windows that are currently open.
Tip
The same Dropper feature is available from any of the Swatches popups, but the colors you select this way are not stored in the Swatches panel unless you use the Color panel's Add Swatch option.
Note
The mouse cursor does not always display as a Dropper but if you have a popup Swatches palette active, you will notice that the color chip at the top of the palette will update to match the color that your cursor is over and if you click to select it, the color loads into the currently active color chip (fill or stroke).
The Alpha control in the Color panel (and in the Swatches popups) is used to adjust the transparency of stroke and fill colors, either to modify a selected graphic (shape or Drawing Object) or to create a new color that can be added to the Swatches panel.
There are two ways to change the alpha value for a selected color: Either drag the Alpha slider until the preview display looks right, or enter a numeric value directly in the Alpha value box. Numeric entry is useful when you already know what level of transparency is required, and the slider is useful for tweaking the transparency by eye to get it just right — as indicated in either the stroke or fill color chip or the color preview in the Color panel. In Figure 7.14, a stroke color and a fill color have both been adjusted to 50 percent alpha and then added to the Swatches panel. While the Alpha slider is being dragged to a new setting, the preview displays the original 75 percent alpha value (at the bottom) as well as the current 50 percent alpha value (at the top). The rectangle below the panels shows the 50 percent alpha stroke and fill applied to a shape. The Flash grid has been turned on (View
Warning
Alpha transparency results in more of a performance hit than a color tint, especially if there are a lot of overlapping animated transparencies. If you can achieve the effect that you want by using a tint instead (fading to a solid color), then save the alpha effect for graphics that you need to layer on top of other elements or textured backgrounds.
Note
You can apply blend modes to symbols to create different types of layered effects. I describe this feature in Chapter 9, "Modifying Graphics."

Gradients are composed by blending two or more colors together in bands across a plane (a linear gradient) or from the center to the edge of an object in concentric circles (a radial gradient). You can modify these two basic styles of gradient fill to create virtually unlimited variations.
Figure 7.15 shows the gradient-editing controls in the Color panel, with the preview display for a linear gradient on the top, and for a radial gradient on the bottom. When working with linear gradients, the position of the color pointers on the Edit bar correspond to control points on the blend from left to right. When used in conjunction with radial gradients, the Gradient Edit bar corresponds to the radius, or a slice from the center out to the edge, of the circular gradient. Color pointers at the left end of the Gradient Edit bar represent the center — or inside — of the radial gradient, and color pointers at the right end represent the outside border. The active color pointer is identified by a black fill in the pointer, and unselected color pointers have a white fill in the pointer.

Figure 7.15. The Color panel displaying edit controls and preview for a linear gradient (on the top) and for a radial gradient (on the bottom)
The main Swatches panel and any of the fill Swatches popups display the prebuilt linear and radial gradients that are included in the default palette. To edit an existing gradient swatch, just select it from any of the fill Swatches popups or select it from the main Swatches panel, and it loads into the Color panel where the relevant controls appear automatically. The other option is to start by choosing a gradient style from the central fill Type menu on the Color panel to load a basic linear or radial gradient. After you create a custom gradient in a document, your settings appear when you go back to the Color panel menu. To start with an unmodified default gradient, just select one from the fill Swatches palette. Figure 7.16 shows the two methods of selecting a gradient style to work with.

The colors in a gradient and the distribution of blending are adjusted by sliding the color pointers along the Gradient Edit bar in the Color panel. These pointers are the access points to the key colors that define the gradient. After you click a pointer to make it active, you can assign the color that will be blended in its range, either by double-clicking to invoke the Swatches popups or by picking a color in the color selection field. You can also use the value fields and the color slider controls to modify an assigned color in a gradient the same way as any solid color. Although you may never need more than two or three points to create your gradients, Flash CS5 supports up to 15 control points in a single gradient.
Warning
When you are editing a gradient fill, selecting a solid color swatch from the Swatches panel does not have the same effect as selecting a solid color swatch from the Swatches popup for each color pointer in the Color panel. Clicking a solid color swatch in the Swatches panel replaces your entire gradient in the Color panel with a solid fill style. Clicking a swatch from a Swatches popup on one of the gradient color pointers replaces only the color on the currently selected pointer — leaving the rest of your gradient intact.
You can adjust the pattern of the blend by clicking and dragging any of the color pointers to slide them to new positions along the Gradient Edit bar. You can add additional color pointers to the gradient range by clicking anywhere along the Gradient Edit bar. These additional pointers create new control points in the gradient that can be dragged to new positions or assigned new colors to define the gradient pattern. To remove color pointers, simply drag them downward away from the Gradient Edit bar; they detach and disappear, taking their assigned color and control point with them. Figure 7.17 shows a basic radial gradient modified with the addition of a new control point and changes to the control point colors. To save a custom gradient to your Swatches panel, choose Add Swatch from the Color panel options menu.
By selecting an element on the Stage, you can also apply or modify an existing gradient fill or stroke by using the Color panel. When an item is selected in the Document window, you see the current fill and stroke displayed in the Color panel. Any changes you make in the Color panel while the item is selected updates on the item dynamically. Remember to select Add Swatch from the options menu if you want to store the new gradient in the Swatches panel.
Note
The current fill (and/or stroke) of an item selected in the Document window is automatically loaded in the Color panel.

Figure 7.17. A two-point radial gradient from white to black (on the left), modified by setting the left pointer to gray and adding a central color pointer set to white (on the right)
Tip
To make it easier to see how a gradient looks in a selected shape, you can toggle off the display of the selection mesh by using Shift+Ctrl+E (Shift+
If you need some new ideas for gradient styles, Illustrator or Fireworks would be a great addition to your toolkit. Flash supports the import of Fireworks PNG files, and most filters and gradient styles added in Fireworks are preserved and editable when the file is imported to Flash. Fireworks ships with a huge library of ready-made gradient styles, including simple but handy Rectangle and Contour styles and fancier ones such as Satin, Starburst, and Ripple. Some of these gradient styles are too complex for the Flash authoring environment to support, but you can import them as bitmaps and jump out to Fireworks to edit them if you need to. You can add Fireworks or Illustrator gradient styles that Flash supports to your Swatches panel and reuse or modify them. Now those same old shaded buttons you have to keep making might just be more fun!
As I mention previously, all the normal Color sliders and value fields apply to control points on a gradient. You may have noticed already that this means you can add alpha to the blend range of any gradient. To create a soft transition between a bitmap or a patterned background and a solid color, you can create a gradient from a 0 percent alpha to a 100 percent alpha of the same solid color. To demonstrate just one application of this feature, I will walk through the steps of adding the appearance of a vignette (or softened edge) to a photograph imported into Flash:
Import a bitmap into Flash and place it on the Stage; then lock the bitmap layer.
Create a new layer above the bitmap layer and name it gradient (see Figure 7.18).
Open the Color panel and set the fill Type to radial, or select the default grayscale radial gradient from the fill Swatches panel. Leave the Overflow menu on the default (Extend) setting.
Note
The Overflow style menu for gradient and bitmap fills in the Color panel provides more control over fill rendering. Three Overflow settings determine how the edges of a gradient or bitmap image are rendered if they need to extend beyond the bounding box of the original applied fill. I include more detailed coverage of these settings in Chapter 9.
Select the Rectangle tool and use the Properties panel to set the stroke color to black, with a stroke height of 2.
Select the gradient layer and then use the Rectangle tool to drag out a rectangle on the Stage that is the same size as the photograph on the layer below (see Figure 7.19).
Select the fill of the rectangle and then select the left (white) color pointer on the Gradient Edit bar and assign it a color of black (see Figure 7.20). Set the Alpha value on the left color pointer to 0 percent.
Press Shift+Ctrl+E (Shift+


Tip
If you applied the Drawing Object option when you drew the original gradient rectangle, you won't have to worry about turning off the selection mesh. The thin, blue outline that shows up on a selected Drawing Object doesn't interfere with the live gradient preview like the dotted mesh that appears on a selected raw shape does.
Note
Select any gradient item (fill or stroke) with the Gradient Transform tool (nested in the Tools panel with the Free Transform tool) and you see the edit handles that you can use to modify the center point, scale, and rotation of your gradient within the selected item. I describe the Gradient Transform tool in more detail in Chapter 9, "Modifying Graphics."

Figure 7.21. You can preview the final gradient as you move the color pointer to adjust the edges of the alpha blend.
Tip
As you read through the steps in this example, you might have wondered why I assigned the same color to both color pointers; because one of the pointers is set to an alpha value of 0 percent, perhaps it doesn't matter which color is used? The answer is that you can create a "fade" effect with a radial gradient made from two different colors, but the blend is not clean unless you use only one color. Although the endpoint of the gradient assigned an alpha value of 0 percent is "clear," the interstitial bands of the gradient are tinted by whatever color you have assigned to the color pointer before changing the alpha value.
Another handy feature available in the Color panel is the Bitmap fill option. This option enables you to choose any bitmap, in the Library or elsewhere on your system, to use as a fill for shapes drawn in Flash. When the image loads into a selected shape, it tiles to fill the shape.
To apply a bitmap fill directly to an existing shape, perform the following steps:
Select the fill of a shape (or select a Drawing Object) with the Selection tool.
Open the Color panel and choose Bitmap from the fill Type menu.
If you have bitmaps stored in your current document Library, they will be available from the Bitmap Preview area of the Color panel. Simply click the thumbnail of the bitmap that you want to apply and it automatically fills the selected shape.
If you do not have any bitmaps available in the current document, selecting Bitmap from the fill Type menu in the Color panel launches the Import to Library dialog box, where you can browse your system and specify a bitmap to be imported and applied as a fill.
Figure 7.22 shows a selected shape with a bitmap fill applied from the available thumbnails in the Color panel Preview area.

Figure 7.22. A bitmap fill applied to a selected shape. The bitmap is chosen from images stored in the Library, which appear as thumbnails in the Color panel Preview area.
Note
The appearance of a Bitmap fill varies depending on how it is loaded (or assigned) to a specific item. I cover the various ways of loading Bitmap fills and the results you can expect in more detail in Chapter 9, "Modifying Graphics."
So far in this chapter, I've introduced the various ways of controlling your palette and setting stroke and fill colors on items selected with the Selection tool. There is one other set of tools used for applying colors and fills that makes modifying existing artwork even easier. You have already seen the Dropper tool in action when you select a color from the Swatches popups — the mouse pointer automatically converts to a dropper and allows you to pick up a color from any visible element to be loaded into the active fill or stroke color chip.
This same tool can be summoned at any time by clicking the Eyedropper tool (I) icon in the Tools panel. Notice that when the Eyedropper tool is used to pick up a fill color or bitmap, it immediately converts into the Paint Bucket tool (K) if you roll outside the area of the item you've sampled. The Paint Bucket enables you to dump the selected fill into any other shape just by clicking inside its fill area. If you have a fill or stroke selected when you invoke the Eyedropper tool, any other fill or stroke (color or style) that you pick up with the Dropper tool is applied instantly to the selected item.
When you sample a stroke with the Eyedropper tool, it converts into an Ink Bottle tool (S), which you can use to apply the stroke to any other item. If the item already has a stroke, it will be modified, and if the item did not previously have a stroke, the Ink Bottle tool adds one.
The science of color on the computer is far from accurate. Many variables are involved in the presentation of color over the Web.
Web-safe color does not ensure "good color" — many strategies go into applying color skillfully, but contrast can be the defining factor that makes or breaks your design.
Although Flash doesn't directly support color scheme plug-ins, colors can be loaded into the Swatches panel from source GIF files or custom color table (.act) files, or they can be sampled with the Dropper tool to load them into the active color chip.
Adobe's online color theme tool, Kuler, is now built into Flash in a handy panel that includes a one-click button for loading themes into the Swatches panel.
The Swatches popup available from any of the color previews or color pointers in the Color panel gives immediate, intuitive access to the currently loaded swatches and all custom colors that have been added to the main Swatches panel. It also permits direct insertion of hexadecimal values.
The Color panel is used to create and modify gradients and select bitmaps to be used as fills, in addition to adjusting the alpha and tint of new or existing colors. Custom colors added to the current swatches are available in any of the Swatches popups.
Flash supports 15-point gradients and many editable gradients imported from Fireworks, Illustrator, or Photoshop.
The Eyedropper, Paint Bucket, and Ink Bottle tools work together to select and apply fill and stroke colors. I discuss the options for these tools, along with the Gradient Transform and Free Transform tools, in Chapter 9, "Modifying Graphics."
Advanced color capabilities of Flash include color tweening, blend modes, scriptable color, and negative alpha. I discuss these topics in more detail in subsequent chapters.