
Chapter 13: Infrastructure as Code with Terraform
Infrastructure as Code (IaC) is the practice of provisioning computing infrastructure using machine-readable, declarative specifications or imperative code, rather than using an interactive configuration tool. IaC became increasingly popular with the rise of cloud computing. Infrastructure administrators who were previously maintaining long-lived infrastructure found themselves needing to scale in both agility and capacity as companies adopted cloud infrastructure.
Remember that at this time, software teams and infrastructure teams were unlikely to work closely together until a software project needed to be deployed. IaC created a bridge between infrastructure administrators and software developers by establishing a shared set of documents that described the desired infrastructure for the software project. The IaC specifications or code often live within or alongside the project. By establishing this shared context between software developers and infrastructure administrators, these two teams were able to work together earlier in the software development life cycle and establish a shared vision for infrastructure.
In this chapter, we'll start off by learning about how Terraform approaches IaC and the basics of its usage. After we have a handle on how Terraform works, we'll discuss Terraform providers and see how the vast ecosystem of providers can empower us to describe and provision a wide variety of resources, not just compute infrastructure such as virtual machines. Finally, we'll learn how to extend Terraform by building our own pet store Terraform provider.
We will cover the following topics in this chapter:
- An introduction to IaC
- Understanding the basics of Terraform
- Understanding the basics of Terraform providers
- Building a pet store Terraform provider
Technical requirements
In this chapter, you will need to have the following:
- Docker
- Git
- Go
- The Terraform CLI: https://learn.hashicorp.com/tutorials/terraform/install-cli
- The Azure CLI: https://docs.microsoft.com/en-us/cli/azure/install-azure-cli
- The code for this chapter: https://github.com/PacktPublishing/Go-for-DevOps/tree/main/chapter/13/petstore-provider
Let's get started by learning some Terraform basics.
The code files for this chapter can be downloaded from https://github.com/PacktPublishing/Go-for-DevOps/tree/rev0/chapter/13/petstore-provider
An introduction to IaC
IaC had a significant impact beyond bringing infrastructure and software development teams together; the practice also made it much easier and safer to deploy infrastructure for projects. By defining the infrastructure and storing the specifications in a software project, the infrastructure code could be tested in the same way that the software project was tested. As with testing code, consistently testing infrastructure code reduces bugs, surfaces inefficiencies, and increases confidence in the infrastructure deployment process.
We take it for granted today, but in many organizations, working with infrastructure administrators to build a cluster for a non-trivial application could take weeks. Taking that same experience, condensing it into a handful of files, and then being able to deploy a cluster in minutes was a game changer.
There are many IaC tools available. Each has its own flavor for how the tool approaches the problem of describing and provisioning infrastructure. Though they are all a bit different, each tool can be categorized using a couple of facets, by how the code is specified by the author, and by how it deals with changes to code. The foremost category is how the infrastructure code is specified. Specifically, the code is a declarative specification describing the desired state (what to provision), or the code is a set of imperative steps described in a programming language (how to provision). The second category is how the tool applies the infrastructure, push or pull. Pull IaC tools watch for changes to code in a centralized repository. Push IaC tools apply their changes to the destination system.
IaC is a critical practice in bridging the gap between writing, delivering, and operating software. It is one of the key areas where development overlaps with operations. Mastering the practice will better enable your team to deliver software faster with greater agility and reliability.
Understanding the basics of Terraform
Terraform (https://www.terraform.io/) is an open source IaC tool written in Go and created by HashiCorp that provides a consistent command-line experience for managing a wide variety of resources. With Terraform, infrastructure engineers define the desired state of a set of hierarchical resources using declarative Terraform configuration files or with imperative code (https://www.terraform.io/cdktf), which results in Terraform configurations files. These configuration files are the code in IaC. They can be used to manage the full life cycle of creating, mutating, and destroying resources, plan and predict changes to resources, provide a graph of dependencies in complex resource topologies, and store the last observed state of a system.
Terraform is simple to get started and has a fairly linear learning curve. There are many features of Terraform we will not cover in this chapter that will be useful as you deepen your adoption of the tool. The goal of this chapter is not to become an expert with Terraform but rather to show you how to get started and be effective quickly.
In this section, you will learn the basics of how Terraform operates, and how to use the Terraform CLI. We'll start off with a simple example and discuss what happens at execution time. By the end of the section, you should feel comfortable defining resources, initializing, and applying using the Terraform CLI.
Initializing and applying infrastructure specs using Terraform
In the first part of this section, we will discuss resources rather than infrastructure components. Discussing resources and components is rather abstract. Let's use a concrete example to explain the normal flow of actions with Terraform.
For our first example, we will use a directory structured like the following:
.
├── main.tf
In the preceding block, we have a directory with a single main.tf file. In that file, we will add the following content:
resource "local_file" "foo" {
content = "foo!"
filename = "${path.module}/foo.txt"
}
In the preceding Terraform main.tf configuration file, we define a local_file resource named foo with the foo! content located at ${path.module}/foo.txt. ${path.module} is the filesystem path of the module, in this case, ./foo.txt.
We can simply run the following to initialize Terraform in the directory and apply the desired state:
$ terraform init && terraform apply
The preceding terraform init command will check the validity of main.tf, pull down the providers needed, and initialize the local state of the project. After the init command is executed, the apply command will be executed. We'll break these down into two parts, init and then apply. The init command should output the following:
$ terraform init && terraform apply
Initializing the backend...
Initializing provider plugins...
- Finding latest version of hashicorp/local...
- Installing hashicorp/local v2.2.2...
- Installed hashicorp/local v2.2.2 (signed by HashiCorp)
Terraform has created a lock file .terraform.lock.hcl to record the provider
selections it made preceding. Include this file in your version control repository
so that Terraform can guarantee to make the same selections by default when
you run "terraform init" in the future.
Terraform has been successfully initialized!
You may now begin working with Terraform. Try running "terraform plan" to see
any changes that are required for your infrastructure. All Terraform commands
should now work.
If you ever set or change modules or backend configuration for Terraform,
rerun this command to reinitialize your working directory. If you forget, other
commands will detect it and remind you to do so if necessary.
As you can see from the preceding output, Terraform installed the hashicorp/local provider at a specific version. Terraform then saved the version to a local lock file, .terraform.lock.hcl, to ensure that the same version is used in the future, establishing the information needed to have a reproducible build. Finally, Terraform provides instructions for using terraform plan to see what Terraform will do to reach the desired state described in main.tf.
After initialization, running terraform apply will trigger Terraform to determine the current desired state and compare it to the known state of the resources in main.tf. terraform apply presents the operator with a plan of the operations that will be executed. Upon operator approval of the plan, Terraform executes the plan and stores the updated state of the resources. Let's see the output from terraform apply:
Terraform used the selected providers to generate the following execution plan. Resource actions are indicated with the following symbols:
+ create
Terraform will perform the following actions:
# local_file.foo will be created
+ resource "local_file" "foo" {
+ content = "foo!"
+ directory_permission = "0777"
+ file_permission = "0777"
+ filename = "./foo.txt"
+ id = (known after apply)
}
Plan: 1 to add, 0 to change, 0 to destroy.
Do you want to perform these actions?
Terraform will perform the actions described preceding.
Only 'yes' will be accepted to approve.
Enter a value: yes
local_file.foo: Creating...
local_file.foo: Creation complete after 0s [id=4bf3e335199107182c6f7638efaad377acc7f452]
Apply complete! Resources: 1 added, 0 changed, 0 destroyed.
After confirming the plan by entering yes, Terraform has applied the desired state and created the resource, a local file. The directory should look like the following:
.
├── .terraform
│ └── providers
│ └── registry.terraform.io
│ └── hashicorp
│ └── local
│ └── 2.2.2
│ └── darwin_arm64
│ └── terraform-provider-local_v2.2.2_x5
├── .terraform.lock.hcl
├── foo.txt
├── main.tf
└── terraform.tfstate
In the preceding directory structure, we can see the local provider that Terraform used to provision the file, the Terraform lock file, the foo.txt file, and a terraform.tfstate file. Let's explore foo.txt and the terraform.tfstate files:
$ cat foo.txt
foo!
As we described in main.tf, Terraform has created foo.txt with the foo! content. Next, let's look at terraform.tfstate:
$ cat terraform.tfstate
{
"version": 4,
"terraform_version": "1.1.7",
"serial": 1,
"lineage": "384e96a1-5878-ed22-5368-9795a3231a00",
"outputs": {},
"resources": [
{
"mode": "managed",
"type": "local_file",
"name": "foo",
"provider": "provider["registry.terraform.io/hashicorp/local"]",
"instances": [
{
"schema_version": 0,
"attributes": {
"content": "foo!",
"content_base64": null,
"directory_permission": "0777",
"file_permission": "0777",
"filename": "./foo.txt",
"id": "4bf3e335199107182c6f7638efaad377acc7f452",
"sensitive_content": null,
"source": null
},
"sensitive_attributes": [],
"private": "bnVsbA=="
}
]
}
]
}
The terraform.tfstate file is a bit more interesting than foo.txt. The tfstate file is where Terraform stores its last known state for the resources applied in the plan. This enables Terraform to inspect the differences with the last known state and build a plan for updating the resource if the desired state changes in the future.
Next, let's change the desired state in main.tf and see what happens when we apply the configuration again. Let's update main.tf to the following:
resource "local_file" "foo" {
content = "foo changed!"
filename = "${path.module}/foo.txt"
file_permissions = "0644"
}
Note that we've changed the content of foo.txt and added file permissions to the resource. Now, let's apply the desired state and see what happens:
$ terraform apply -auto-approve
local_file.foo: Refreshing state... [id=4bf3e335199107182c6f7638efaad377acc7f452]
Terraform used the selected providers to generate the following execution plan. Resource actions are indicated with the following symbols:
-/+ destroy and then create replacement
Terraform will perform the following actions:
# local_file.foo must be replaced
-/+ resource "local_file" "foo" {
~ content = "foo!" -> "foo changed!" # forces replacement
~ file_permission = "0777" -> "0644" # forces replacement
~ id = "4bf3e335199107182c6f7638efaad377acc7f452" -> (known after apply)
# (2 unchanged attributes hidden)
}
Plan: 1 to add, 0 to change, 1 to destroy.
local_file.foo: Destroying... [id=4bf3e335199107182c6f7638efaad377acc7f452]
local_file.foo: Destruction complete after 0s
local_file.foo: Creating...
local_file.foo: Creation complete after 0s [id=5d6b2d23a15b5391d798c9c6a6b69f9a57c41aa5]
Apply complete! Resources: 1 added, 0 changed, 1 destroyed.
Terraform was able to determine the attributes of the resource that have changed and create a plan for reaching the desired state. As the plan output states with 1 to add, 0 to change, 1 to destroy, the local foo.txt file will be deleted and then recreated, since a change to the file permissions forces the replacement of the file. This example illustrates that a single attribute change can, but does not always, cause the deletion and recreation of a resource. Note that we added the -auto-approve flag to the apply command. As the name implies, this will not prompt approval of the plan before it is applied. You may want to use caution when using that flag, as it's good practice to check the plan to ensure that the actions you expect are the actions described in the plan.
Let's see the new contents of foo.txt:
$ cat foo.txt
foo changed!
As you can see, the content of foo.txt has been updated to reflect the desired state. Now, let's examine the directory:
.
├── foo.txt
├── main.tf
├── terraform.tfstate
└── terraform.tfstate.backup
Note that a new file was created, terraform.tfstate.backup. This is a copy of the previous tfstate file in case the new tfstate file is corrupted or lost.
By default, the tfstate files are stored locally. When working individually, this is perfectly fine; however, when working with a team, it would become difficult to share the most recent state with others. This is where remote state (https://www.terraform.io/language/state/remote) becomes extremely useful. We will not cover this feature here, but you should be aware of it.
Finally, we will destroy the resource we have created:
$ terraform destroy
local_file.foo: Refreshing state... [id=5d6b2d23a15b5391d798c9c6a6b69f9a57c41aa5]
Terraform used the selected providers to generate the following execution plan. Resource actions are indicated with the following symbols:
- destroy
Terraform will perform the following actions:
# local_file.foo will be destroyed
- resource "local_file" "foo" {
- content = "foo changed!" -> null
- directory_permission = "0777" -> null
- file_permission = "0644" -> null
- filename = "./foo.txt" -> null
- id = "5d6b2d23a15b5391d798c9c6a6b69f9a57c41aa5" -> null
}
Plan: 0 to add, 0 to change, 1 to destroy.
Do you really want to destroy all resources?
Terraform will destroy all your managed infrastructure, as shown above.
There is no undo. Only 'yes' will be accepted to confirm.
Enter a value: yes
local_file.foo: Destroying... [id=5d6b2d23a15b5391d798c9c6a6b69f9a57c41aa5]
local_file.foo: Destruction complete after 0s
Destroy complete! Resources: 1 destroyed.
Running terraform destroy will clean up all of the resources described in the desired state. If you examine your directory, you will see that the foo.txt file has been deleted.
Congratulations! You have covered the absolute basics of Terraform. We have learned at a high level how Terraform operates and how to use the Terraform CLI. We created a simple local file resource, mutated it, and destroyed it. In the next section, we'll discuss Terraform providers and explore the world that opens up when we take advantage of the vast ecosystem of them.
Understanding the basics of Terraform providers
At its heart, Terraform is a platform for reconciling an expressed desired state with an external system. The way Terraform interacts with external APIs is through plugins called providers. A provider is responsible for describing the schema for its exposed resources, and implementing Create, Read, Update, and Delete (CRUD) interactions with external APIs. Providers enable Terraform to express nearly any external API's resources as Terraform resources.
Through its thousands of community and verified providers, Terraform is able to manage resources including databases such as Redis, Cassandra, and MongoDB, cloud infrastructure for all major cloud service providers, communication and messaging services such as Discord and SendGrid, and a vast number of other providers. If you are interested, you can explore a listing of them in the Terraform Registry (https://registry.terraform.io/). You can simply write, plan, and apply your way to your desired infrastructure.
In this section, we will build on our experience of using a local provider and extend what we learned to use a provider that interacts with an external API. We will define the desired state for a set of cloud resources and provision them.
Defining and provisioning cloud resources
Imagine that we want to deploy infrastructure to our cloud service provider. In this case, we're going to use Microsoft Azure via the hashicorp/azurerm provider. In an empty directory, let's start by authoring a simple main.tf file like the following:
# Configure the Azure provider
terraform {
required_providers {
azurerm = {
source = "hashicorp/azurerm"
version = "~> 3.0"
}
}
}
provider "azurerm" {
features {}
}
resource "azurerm_resource_group" "mygroup" {
name = "mygroup"
location = "southcentralus"
}
The preceding Terraform configuration file requires the hashicorp/azurerm provider and defines a resource group named mygroup in the southcentralus region (a resource group is an Azure concept that groups infrastructure resources together).
To run the rest of the examples in this section, you will need an Azure account. If you do not have an Azure account, you can sign up for a free account with $200 of Azure credits: https://azure.microsoft.com/en-us/free/.
Once you have an account, log in with the Azure CLI:
$ az login
The preceding command will log you into your Azure account and set the default context to your primary Azure subscription. To see what subscription is active, run the following:
$ az account show
{
"environmentName": "AzureCloud",
"isDefault": true,
"managedByTenants": [],
"name": "mysubscription",
"state": "Enabled",
"tenantId": "888bf....db93",
"user": {
...
}
}
The preceding command output shows the name of the subscription and other details about the current context of the Azure CLI. The azurerm provider will use the authentication context of the Azure CLI to interact with the Azure APIs.
Now that we have an authenticated Azure session on the Azure CLI, let's use init and apply to create our desired state. Within the directory containing the main.tf file, run the following:
$ terraform init && terraform apply
terraform init will initialize the directory, pulling down the latest azurerm provider. By specifying the ~> 3.0 version constraint, Terraform is directed to install the latest version of the provider in the 3.0.x series. You should see something like the following output from init:
Initializing the backend...
Initializing provider plugins...
- Finding hashicorp/azurerm versions matching "~> 3.0"...
- Installing hashicorp/azurerm v3.0.2...
- Installed hashicorp/azurerm v3.0.2 (signed by HashiCorp)
Terraform has created a lock file .terraform.lock.hcl to record the provider
selections it made above. Include this file in your version control repository
so that Terraform can guarantee to make the same selections by default when
you run "terraform init" in the future.
Terraform has been successfully initialized!
You may now begin working with Terraform. Try running "terraform plan" to see
any changes that are required for your infrastructure. All Terraform commands
should now work.
If you ever set or change modules or backend configuration for Terraform,
rerun this command to reinitialize your working directory. If you forget, other
commands will detect it and remind you to do so if necessary.
This output should look familiar from the Initializing and applying infrastructure specs using Terraform section. After initialization, you will again be greeted with the plan for creating the desired resources. Once the plan is approved, the desired resources are created. The output should look like the following:
Terraform used the selected providers to generate the following execution plan. Resource actions are indicated with the following symbols:
+ create
Terraform will perform the following actions:
# azurerm_resource_group.rg will be created
+ resource "azurerm_resource_group" "mygroup" {
+ id = (known after apply)
+ location = "southcentralus"
+ name = "mygroup"
}
Plan: 1 to add, 0 to change, 0 to destroy.
Do you want to perform these actions?
Terraform will perform the actions described above.
Only 'yes' will be accepted to approve.
Enter a value: yes
azurerm_resource_group.mygroup: Creating...
azurerm_resource_group.mygroup: Creation complete after 2s [id=/subscriptions/8ec-...-24a/resourceGroups/mygroup]
As you can see from the preceding output, the resource group is created.
Note
If you are using a free Azure account, you may not have regional capacity in the southcentralus location. You may need to use a different region such as centralus or northeurope. To find out more information on what region would be best for you, view the Azure geography guidance here: https://azure.microsoft.com/en-us/global-infrastructure/geographies/#geographies.
Opening the Azure portal and navigating to the Resource groups view, you should see the following:

Figure 13.1 – The created resource group in Azure
In the preceding screenshot, we can see our newly created Azure resource group, mygroup.
Let's see what new files have been added to our local directory after running init and apply:
.
├── .terraform
│ └── providers
│ └── registry.terraform.io
│ └── hashicorp
│ └── azurerm
│ └── 3.0.2
│ └── darwin_arm64
│ └── terraform-provider-azurerm_v3.0.2_x5
├── .terraform.lock.hcl
├── main.tf
└── terraform.tfstate
Similar to the previous section, we can see the Terraform lock and state files. However, in the providers directory, we now see that the azurerm provider was installed.
Let's add some more resources and apply them. You can find a listing of all of the supported resources in the Azure provider documentation (https://registry.terraform.io/providers/hashicorp/azurerm/latest/docs). We'll update the main.tf file to contain the following resources:
resource "azurerm_resource_group" "mygroup" {
name = "mygroup"
location = "southcentralus"
}
resource "azurerm_service_plan" "myplan" {
name = "myplan"
resource_group_name = azurerm_resource_group.mygroup.name
location = azurerm_resource_group.mygroup.location
os_type = "Linux"
sku_name = "S1"
}
resource "random_integer" "ri" {
min = 10000
max = 99999
}
resource "azurerm_linux_web_app" "myapp" {
name = "myapp-${random_integer.ri.result}"
resource_group_name = azurerm_resource_group.mygroup.name
location = azurerm_service_plan.myplan.location
service_plan_id = azurerm_service_plan.myplan.id
site_config {
application_stack {
docker_image = "nginxdemos/hello"
docker_image_tag = "latest"
}
}
}
output "host_name" {
value = azurerm_linux_web_app.myapp.default_hostname
}
The resources added to the preceding main.tf file include two Azure resources, an App Service plan, a Linux web app, and one random_integer resource. The Azure App Service plan defines a regional deployment of compute infrastructure for running a Linux-based web application. The Azure Linux web app is associated with the Azure App Service plan and is configured to run a hello world NGINX demo container image. The random_integer resource is needed to provide some random input for the Fully Qualified Domain Name (FQDN) for the Linux web app.
Note the use of variables. For example, we use azurerm_resource_group.mygroup.name to provide the value for resource_group_name in the azure_service_plan resource. Variable usage helps to minimize the number of string literals in the configuration files. This is helpful when making a change because you can make it in one place, rather than each occurrence of the string.
Also, note the use of an output variable, host_name. This instructs Terraform to output the host_name key with the value of azurerm_linux_web_app.myapp.default_hostname after the completion of terraform apply. We'll use this output to make it easier to open the website after it is provisioned.
Let's run terraform apply again and see what happens:
$ terraform apply
│
│ Error: Inconsistent dependency lock file
│
│ The following dependency selections recorded in the lock file are inconsistent with the current configuration:
│ - provider registry.terraform.io/hashicorp/random: required by this configuration but no version is selected
│
│ To update the locked dependency selections to match a changed configuration, run:
│ terraform init -upgrade
│
Oh no! terraform apply responds with an error, informing us that we have a new provider added to the configuration that we didn't have last time. Run terraform init -upgrade, and the random module will be added:
$ terraform init -upgrade
Initializing the backend...
Initializing provider plugins...
- Finding latest version of hashicorp/random...
- Finding hashicorp/azurerm versions matching "~> 3.0"...
- Installing hashicorp/random v3.1.2...
- Installed hashicorp/random v3.1.2 (signed by HashiCorp)
- Using previously-installed hashicorp/azurerm v3.0.2
You should see some output like the preceding that shows Terraform installing the latest version of the hashicorp/random provider. Let's see what our directory looks like now that we've added the provider:
.
├── .terraform
│ └── providers
│ └── registry.terraform.io
│ └── hashicorp
│ ├── azurerm
│ │ └── 3.0.2
│ │ └── darwin_arm64
│ │ └── terraform-provider-azurerm_v3.0.2_x5
│ └── random
│ └── 3.1.2
│ └── darwin_arm64
│ └── terraform-provider-random_v3.1.2_x5
As you can see, the random provider is now installed. We should be ready to use apply again:
$ terraform apply -auto-approve
azurerm_resource_group.mygroup: Refreshing state...
...
Plan: 3 to add, 0 to change, 0 to destroy.
Changes to Outputs:
+ host_name = (known after apply)
random_integer.ri: Creating...
random_integer.ri: Creation complete after 0s [id=18515]
azurerm_service_plan.myplan: Creating...
azurerm_service_plan.myplan: Still creating... [10s elapsed]
azurerm_service_plan.myplan: Creation complete after 12s [id=/subscriptions/8ec-...-24a/resourceGroups/mygroup/providers/Microsoft.Web/serverfarms/myplan]
azurerm_linux_web_app.myapp: Creating...
azurerm_linux_web_app.myapp: Still creating... [10s elapsed]
azurerm_linux_web_app.myapp: Still creating... [20s elapsed]
azurerm_linux_web_app.myapp: Creation complete after 28s [id=/subscriptions/8ec-...-24a/resourceGroups/mygroup/providers/Microsoft.Web/sites/myapp-18515]
Apply complete! Resources: 3 added, 0 changed, 0 destroyed.
Outputs:
host_name = "myapp-18515.azurewebsites.net"
We've omitted some of the output of terraform apply. The things to note here are that we are creating each of the resources we described in main.tf, they have provisioned successfully, and host_name contains a Universal Resource Identifier (URI) for accessing the newly deployed web application.
Take the host_name URI and open it in a browser. You should see the following:
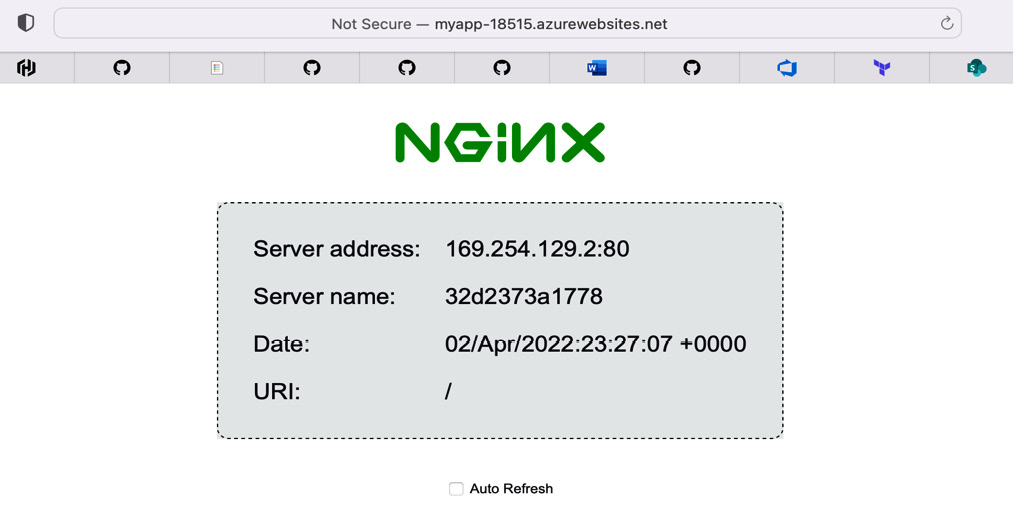
Figure 13.2 – NGINX running in Azure App Service
If you go back to the Azure portal, you will also see the resources created within your resource group.
I hope you will take some time to experiment by defining and applying other resources. Once you get the hang of using providers and some basic syntax, Terraform is a joy to work with. When you are done with your resources, just run terraform destroy, and they will be deleted.
In this section, we learned some basics about using providers to manipulate cloud resources. We only need to use a couple of providers, but as discussed in the opening of the section, there are thousands of providers out there. It's very likely that you will be able to find a provider to solve your problem. However, there may be APIs and resources you would like to manage with Terraform without an existing provider. In the next section, we will build a Terraform provider for a fictional pet store.
Building a pet store Terraform provider
Even though the Terraform provider registry (https://registry.terraform.io/) has almost every provider you can think of, there is a chance that a provider you need does not yet exist. Perhaps you want to use Terraform to interact with resources of a proprietary API internal to your company. If you want to manage resources that don't yet exist in the Terraform provider ecosystem, you will need to write a provider for that API. The good news is that writing a Terraform provider is relatively simple. The thoughtful folks at HashiCorp provide great documentation, SDKs, and tools to make building a provider a breeze.
In the previous sections, we learned the basics of Terraform and how to use providers to interact with resources in both local and external systems. We were able to build cloud resources to deploy a Linux web application running in a container.
In this section, we will build upon the previous sections and learn how to build our own provider. The Terraform provider we are building in this section will expose pet resources and will interact with a local docker-compose-hosted pet store service to simulate an external API.
You will learn how to define custom resources with a strong schema and validations, create data sources, and implement CRUD interactions for our pet resources. Finally, we'll discuss publishing a module for the world to use via the Terraform provider registry.
Resources for building custom providers
HashiCorp provides an extensive set of tutorials for building custom providers (https://learn.hashicorp.com/collections/terraform/providers). I highly recommend reviewing the content if you intend on building your own custom provider.
The code for this section is located in https://github.com/PacktPublishing/Go-for-DevOps/tree/main/chapter/13/petstore-provider. We will not cover all of the code, but we will dive into the most interesting parts. I've done my best to keep to only the most simple implementation; however, simple is not always elegant.
Additionally, our pet store custom provider uses the Terraform plugin SDK v2 (https://www.terraform.io/plugin/sdkv2/sdkv2-intro) rather than the new (at the time of writing) Terraform plugin framework. I chose this path as the majority of existing providers use the SDK v2, and the Terraform plugin framework (https://www.terraform.io/plugin/framework) has not reached stability yet. If you are interested in weighing the benefits, read the Which SDK Should I Use? article from HashiCorp (https://www.terraform.io/plugin/which-sdk).
Now that we have established a foundation of content and learning, let's proceed to the code.
The pet store provider
Our pet store Terraform provider is just another Go application. Most of the interactions between Terraform and the provider are handled at the Terraform SDK level, and very little gets in the way of the provider developer. Let's start off by taking a look at the directory structure of the provider:
.
├── Makefile
├── docker-compose.yml
├── examples
│ └── main.tf
├── go.mod
├── go.sum
├── internal
│ ├── client # contains the grpc pet store API client
│ │ └── ...
│ ├── data_source_pet.go
│ ├── provider.go
│ ├── resource_pets.go
│ └── schema.go
└── main.go
As I said, it's a standard Go application with an entry point in main.go. Let's start at the top and work our way down the files. The first on the list is the Makefile:
HOSTNAME=example.com
NAMESPACE=gofordevops
NAME=petstore
BINARY=terraform-provider-${NAME}
VERSION=0.1.0
GOARCH := $(shell go env GOARCH)
GOOS := $(shell go env GOOS)
default: install
build:
go build -o ${BINARY}
install: build
mkdir -p ~/.terraform.d/plugins/${HOSTNAME}/${NAMESPACE}/${NAME}/${VERSION}/${GOOS}_${GOARCH}
mv ${BINARY} ~/.terraform.d/plugins/${HOSTNAME}/${NAMESPACE}/${NAME}/${VERSION}/${GOOS}_${GOARCH}
test:
go test ./... -v
testacc:
TF_ACC=1 go test ./... -v $(TESTARGS) -timeout 120m
The preceding Makefile offers some helpful build tasks and environmental configuration. For example, make or make install will build the provider for the current architecture and place it in the ~/.terraform.d/plugins directory tree, which will enable us to use the provider locally without publishing it to the registry.
Next, we have the docker-compose.yml file. Let's take a look:
version: '3.7'
services:
petstore:
build:
context: ../../10/petstore/.
command:
- /go/bin/petstore
- --localDebug
ports:
- "6742:6742"
The docker-compose.yml file runs the pet store service from Chapter 10, Automating Workflows with GitHub Actions, and exposes the gRPC service on port 6742. The pet store service stores pets in an in-memory store, so to wipe out the pets currently stored, just restart the service. We'll talk more about starting and stopping the service later in the section.
Next up, we have examples/main.tf. Let's see what an example of defining our pet resources will look like:
terraform {
required_providers {
petstore = {
version = "0.1.0"
source = "example.com/gofordevops/petstore"
}
}
}
...
resource "petstore_pet" "thor" {
name = "Thor"
type = "dog"
birthday = "2021-04-01T00:00:00Z"
}
resource "petstore_pet" "tron" {
name = "Tron"
type = "cat"
birthday = "2020-06-25T00:00:00Z"
}
data "petstore_pet" "all" {
depends_on = [petstore_pet.thor, petstore_pet.tron]
}
In the preceding main.tf file, we can see the provider registered and configured to use the local pet store service. We can also see the definition for two petstore_pet resources, Thor and Tron. After the resources, we define a petstore_pet data source. We will walk through bits of this file in more detail later in the section.
The main reason I'd like you to see main.tf before we get into the code is that it will give you an idea of the interface we want to achieve in the provider implementation. I believe seeing the usage of the provider will help you to better understand the provider implementation.
The rest of the source code is all in Go, so rather than going from top to bottom, I'm going to move to the entry point in main.go and dive into the actual implementation:
package main
import (
"github.com/hashicorp/terraform-plugin-sdk/v2/helper/schema"
"github.com/hashicorp/terraform-plugin-sdk/v2/plugin"
petstore "github.com/PacktPublishing/Go-for-DevOps/chapter/13/petstore-provider/internal"
)
func main() {
plugin.Serve(&plugin.ServeOpts{
ProviderFunc: func() *schema.Provider {
return petstore.Provider()
},
})
}
Well, main.go is simple enough. All we are doing in main is starting a plugin server via the Terraform plugin SDK v2 and providing it with an implementation of our pet store provider. Let's next look at the petstore.Provider implementation in internal/provider.go:
// Provider is the entry point for defining the Terraform provider, and will create a new Pet Store provider.
func Provider() *schema.Provider {
return &schema.Provider{
Schema: map[string]*schema.Schema{
"host": {
Type: schema.TypeString,
Optional: true,
DefaultFunc: schema.EnvDefaultFunc("PETSTORE_HOST", nil),
},
},
ResourcesMap: map[string]*schema.Resource{
"petstore_pet": resourcePet(),
},
DataSourcesMap: map[string]*schema.Resource{
"petstore_pet": dataSourcePet(),
},
ConfigureContextFunc: configure,
}
}
There are only two funcs in provider.go. The Provider func creates an *schema.Provider that describes the schema for configuring the provider, the resources of the provider, the data sources of the provider, and the configure func for initializing the provider. The resource map for the provider contains resources by a string name and their schemas. The schemas for each of the structures describe the domain-specific language to Terraform for interacting with their fields and resource hierarchies. We will examine the schemas for these structures in more detail soon.
Next, let's look at the configure func in provider.go:
// configure builds a new Pet Store client the provider will use to interact with the Pet Store service
func configure(_ context.Context, data *schema.ResourceData) (interface{}, diag.Diagnostics) {
// Warning or errors can be collected in a slice type
var diags diag.Diagnostics
host, ok := data.Get("host").(string)
if !ok {
return nil, diag.Errorf("the host (127.0.0.1:443) must be provided explicitly or via env var PETSTORE_HOST")
}
c, err := client.New(host)
if err != nil {
return nil, append(diags, diag.Diagnostic{
Severity: diag.Error,
Summary: "Unable to create Pet Store client",
Detail: "Unable to connect to the Pet Store service",
})
}
return c, diags
}
The configure func is responsible for handling provider configuration. Note how the host data described in the preceding Provider schema is available via the data argument. This is a common pattern you will see throughout the provider. We use the host configuration data to construct the client for the pet store service. If we are unable to construct a pet store client, we append a diag.Diagnostic structure to the slice of diag.Diagnostics. These diagnostic structures inform Terraform of an event of varying severity occurring in the provider. In this case, it is an error if we are unable to build the client, which should be communicated back to the user. If all goes well, we return the client instance and an empty slice of diag.Diagnostics.
Next, let's examine the pet store data source.
Implementing the pet store data source
The pet store data source is a bit simpler than the resource implementation, given that a data source is intended as a way for Terraform to pull in data from an external API and is read-only in this case. The pet store data source is defined in internal/data_source_pet.go.
There are three functions of primary interest in the pet store data source. We will approach them one at a time. Let's start with the dataSourcePet func:
func dataSourcePet() *schema.Resource {
return &schema.Resource{
ReadContext: dataSourcePetRead,
Schema: getPetDataSchema(),
}
}
The preceding function creates the *schema.Resource data source by providing a schema for the data being provided via getPetDataSchema. ReadContext expects a function that is responsible for translating the input schema, querying the external API, and returning data to Terraform that matches the structure defined in the schema.
The definition of getPetDataSchema is located in internal/schema.go, and it is helpful to review it prior to examining the code in dataSourcePetRead. We will break down the function into two parts, the input and the computed output:
func getPetDataSchema() map[string]*schema.Schema {
return map[string]*schema.Schema{
"pet_id": {
Type: schema.TypeString,
Optional: true,
},
"name": {
Type: schema.TypeString,
Optional: true,
ValidateDiagFunc: validateName(),
},
"type": {
Type: schema.TypeString,
Optional: true,
ValidateDiagFunc: validateType(),
},
"birthday": {
Type: schema.TypeString,
Optional: true,
ValidateDiagFunc: validateBirthday(),
},
The preceding schema describes the data structure for the pet store pet data source. Each of the top-level keys is marked as optional and will be used to filter the data source. For example, the name key specifies that it is optional, is of type string, and should be validated with the validateName func. We will examine validations in more detail later in the section.
The following is the schema for the output of the data source:
"pets": {
Type: schema.TypeList,
Computed: true,
Elem: &schema.Resource{
Schema: map[string]*schema.Schema{
"id": {
Type: schema.TypeString,
Computed: true,
},
"name": {
Type: schema.TypeString,
Computed: true,
},
"type": {
Type: schema.TypeString,
Computed: true,
},
"birthday": {
Type: schema.TypeString,
Computed: true,
},
},
},
},
}
}
The pets key contains all the Computed values, which means each of the values is read-only. These represent the list result of the query.
Now that we have a better understanding of the data schema we are working with, let's continue with the implementation of dataSourcePetRead:
// dataSourcePetRead finds pets in the pet store given an ID
func dataSourcePetRead(ctx context.Context, data *schema.ResourceData, meta interface{}) diag.Diagnostics {
psClient, err := clientFromMeta(meta)
if err != nil {
return diag.FromErr(err)
}
pets, err := findPetsInStore(ctx, psClient, findPetsRequest{
Name: data.Get("name").(string),
Birthday: data.Get("birthday").(string),
Type: PetType(data.Get("type").(string)),
ID: data.Get("pet_id").(string),
})
if err != nil {
return diag.FromErr(err)
}
// always run
data.SetId(strconv.FormatInt(time.Now().Unix(), 10))
if err := data.Set("pets", flattenPets(pets)); err != nil {
return diag.FromErr(err)
}
return nil
}
In dataSourcePetRead, we instantiate a client for the pet store service, populate the filter criteria from the data schema supplied, and then set the pets key in the data argument with the pets returned from the pet store service in the key value format specified by the schema. The flattenPets function is responsible for transforming the protobuf structures we receive from the pet store service into the format expected by the schema. If you are interested in the implementation, it is not terribly elegant, but it is simple.
I purposely didn't mention the data.SetId function. We are setting the value of that to a value that will cause the data to be fetched from the pet store service each time. Terraform identifies that data has changed if the ID for that data has changed. This ensures that the ID changes each time the function is executed.
In the configure func, we created the pet store client, so how did we gain access to that client in the data source? We can find the answer to that in the clientFromMeta func:
// clientFromMeta casts meta into a Pet Store client or returns an error
func clientFromMeta(meta interface{}) (*client.Client, error) {
psClient, ok := meta.(*client.Client)
if !ok {
return nil, errors.New("meta does not contain a Pet Store client")
}
return psClient, nil
}
The clientFromMeta func takes the meta interface{} argument passed into the ReadContext func and casts it as the pet store client. The meta variable contains the variable returned in the configure func. This is not as intuitive as we would like, but it is effective.
With the code described previously and some helpers from internal/data_source_pet.go, we have implemented a filtered data source to the pet store API that we can use in Terraform configuration files.
Next, let's take a look at how we handle CRUD interactions for pet resources.
Implementing the Pet resource
The implementation for the Pet resource follows many of the same patterns as the pet store data source, but with the pet resources, we also need to implement create, update, and delete interactions in addition to read. Unless otherwise stated, the code we cover for the pet resource implementation is in internal/resource_pet.go.
Let's start by examining the resourcePet func, which is the func called when we created the provider schema:
func resourcePet() *schema.Resource {
return &schema.Resource{
CreateContext: resourcePetCreate,
ReadContext: resourcePetRead,
UpdateContext: resourcePetUpdate,
DeleteContext: resourcePetDelete,
Schema: getPetResourceSchema(),
Importer: &schema.ResourceImporter{
StateContext: schema.ImportStatePassthroughContext,
},
}
}
Just like the pet store data source, the pet resource defines handlers for each CRUD operation as well as a schema. Before we get into the CRUD operations, let's first look at the schema, which is in internal/schema.go:
func getPetResourceSchema() map[string]*schema.Schema {
return map[string]*schema.Schema{
"id": {
Type: schema.TypeString,
Optional: true,
Computed: true,
},
"name": {
Type: schema.TypeString,
Required: true,
ValidateDiagFunc: validateName(),
},
"type": {
Type: schema.TypeString,
Required: true,
ValidateDiagFunc: validateType(),
},
"birthday": {
Type: schema.TypeString,
Required: true,
ValidateDiagFunc: validateBirthday(),
},
}
}
The schema defined here is simpler than the data source schema, since we are not defining query filters. Note that the id key is computed, but all the others are not. The id value is generated by the pet store service and is not to be specified by the user.
Since these values are specified by the user as a string, validation becomes more significant. For a better user experience, we want to provide feedback to a user when a value is invalid. Let's take a look at how we validate the type field with the validateType func:
func validateType() schema.SchemaValidateDiagFunc {
return validateDiagFunc(validation.StringInSlice([]string{
string(DogPetType),
string(CatPetType),
string(ReptilePetType),
string(BirdPetType),
}, true))
}
The validateType func returns a validation constructed with each valid value of the enumeration. This prevents a user from entering a string value for a pet type that is not supported in the pet store. The rest of the validations take a similar approach to validating the range of input values.
Now that we have explored the schema, we are prepared to explore the CRUD operations. Let's start with the read operation:
// resourcePetRead finds a pet in the pet store by ID and populate the resource data
func resourcePetRead(ctx context.Context, data *schema.ResourceData, meta interface{}) diag.Diagnostics {
psClient, err := clientFromMeta(meta)
if err != nil {
return diag.FromErr(err)
}
pets, err := findPetsInStore(ctx, psClient, findPetsRequest{ID: data.Id()})
if err != nil {
return diag.FromErr(err)
}
if len(pets) == 0 {
return nil
}
return setDataFromPet(pets[0], data)
}
The resourcePetRead func fetches the pet store client from the meta argument and then finds the pet by ID in the store. If the pet is found, the data argument is updated with data from the pet.
That's simple enough. Next, let's look at create:
// resourcePetCreate creates a pet in the pet store
func resourcePetCreate(ctx context.Context, data *schema.ResourceData, meta interface{}) diag.Diagnostics {
psClient, err := clientFromMeta(meta)
if err != nil {
return diag.FromErr(err)
}
pet := &client.Pet{Pet: &pb.Pet{}}
diags := fillPetFromData(pet, data)
ids, err := psClient.AddPets(ctx, []*pb.Pet{pet.Pet})
if err != nil {
return append(diags, diag.FromErr(err)...)
}
data.SetId(ids[0])
return diags
}
The resourcePetCreate func follows a similar pattern. The difference is that the pet is constructed from fields in the data argument, and then the pet store API is called to add the pet to the store. In the end, the ID for the new pet is set.
Next, let's look at update:
// resourcePetUpdate updates a pet in the pet store by ID
func resourcePetUpdate(ctx context.Context, data *schema.ResourceData, meta interface{}) diag.Diagnostics {
psClient, err := clientFromMeta(meta)
if err != nil {
return diag.FromErr(err)
}
pets, err := findPetsInStore(ctx, psClient, findPetsRequest{ID: data.Id()})
if err != nil {
return diag.FromErr(err)
}
if len(pets) == 0 {
return diag.Diagnostics{
{
Severity: diag.Error,
Summary: "no pet was found",
Detail: "no pet was found when trying to update the pet by ID",
},
}
}
pet := pets[0]
diags := fillPetFromData(pet, data)
if diags.HasError() {
return diags
}
if err := psClient.UpdatePets(ctx, []*pb.Pet{pet.Pet}); err != nil {
return append(diags, diag.FromErr(err)...)
}
return diags
}
The resourcePetUpdate func combines parts of read and create. Initially, we need to check to see whether the pet is in the store and fetch the pet data. If we don't find the pet, we return an error. If we do find the pet, we update the fields of the pet and call UpdatePets on the pet store client.
The delete operation is relatively trivial, so I will not dive into it here. If you want, you can take a look at resourcePetDelete to see for yourself.
At this point, we have now implemented the pet resource and are ready to see our Terraform provider in action.
Running the pet store provider
Now that we have a fully implemented pet store provider, the fun part is running it. From the root of the pet store provider, run the following commands. Be sure to have Docker running:
$ docker-compose up -d
$ make
$ cd examples
$ terraform init && terraform apply
The preceding commands will start the pet store service using docker-compose, build and install the provider, move it into the example directory, and finally, use init and apply to create our desired state containing our pets.
When init executes, you should see something like the following:
Initializing the backend...
Initializing provider plugins...
- Finding example.com/gofordevops/petstore versions matching "0.1.0"...
- Installing example.com/gofordevops/petstore v0.1.0...
- Installed example.com/gofordevops/petstore v0.1.0 (unauthenticated)
Yay! The provider is installed and Terraform is ready to apply our resources.
After Terraform has applied the resources, you should see the following output:
Apply complete! Resources: 2 added, 0 changed, 0 destroyed.
Outputs:
all_pets = {
"birthday" = tostring(null)
"id" = "1648955761"
"name" = tostring(null)
"pet_id" = tostring(null)
"pets" = tolist([
{
"birthday" = "2020-06-25T00:00:00Z"
"id" = "495b1c94-6f67-46f2-9d4d-e84cc182d523"
"name" = "Tron"
"type" = "cat"
},
{
"birthday" = "2021-04-01T00:00:00Z"
"id" = "36e65cb2-18ea-4aec-a410-7bad64d7b00d"
"name" = "Thor"
"type" = "dog"
},
])
"type" = tostring(null)
}
thor = {
"36e65cb2-18ea-4aec-a410-7bad64d7b00d" = {
"birthday" = "2021-04-01T00:00:00Z"
"id" = "36e65cb2-18ea-4aec-a410-7bad64d7b00d"
"name" = "Thor"
"type" = "dog"
}
}
We can see from the preceding output that both of our resources, Tron and Thor, have been added, and our data source when queried with no filters returned each of the pets. Lastly, we can see the thor output was returned, containing the data for Thor.
Let's review examples/main.tf again and see where the thor output came from:
variable "pet_name" {
type = string
default = "Thor"
}
data "petstore_pet" "all" {
depends_on = [petstore_pet.thor, petstore_pet.tron]
}
# Only returns Thor by name
output "thor" {
value = {
for pet in data.petstore_pet.all.pets :
pet.id => pet
if pet.name == var.pet_name
}
}
In the preceding main.tf file, we defined a pet_name variable with the value of Thor. We then queried the pet store data source, providing no filters but depending on the completion of both of the resources in the file. Lastly, we output a key of thor, with the value being a query that matches only when pet.name equals var.pet_name. This filtered the data source for only pets named Thor.
You can now use any of the Terraform skills you've learned thus far to manipulate pet store resources. There really wasn't all that much code to implement.
Publishing custom providers
Anyone can publish a provider to the Terraform Registry by logging into it using a GitHub account. Again, HashiCorp has excellent documentation on how to publish a provider. We will not walk through the process in this book, as the documentation for Release and Publish a Provider to the Terraform Registry (https://learn.hashicorp.com/tutorials/terraform/provider-release-publish) is likely sufficient if you have reached this far in your journey building your own Terraform provider.
Summary
In this chapter, we learned about the history of IaC and the advantages of leveraging the practice to bring software development and operations together by setting a shared context for expressing and continuously testing infrastructure. We learned where Terraform lies in the ecosystem of IaC tooling and how to use it to describe desired infrastructure states, mutate existing infrastructure, deploy a cloud infrastructure, and finally, create our own resources for automating external APIs. You should now be prepared with the tools needed to improve your own software projects.
In the next chapter, we will learn how to use Go to deploy applications to Kubernetes and build upon that knowledge to understand how to extend it with Go. We'll enable our Kubernetes users to reconcile pets as custom Kubernetes resources.