The Material Palette is what we call the digital library of assets that are available through Clip Studio Paint. Clip Studio comes with a huge library of brushes, images, screentones, 3D poses, and objects and more are already available inside. More assets can be easily downloaded through the Clip Studio App, which we will cover in Chapter 19, What is the Clip Studio App And Getting Animated. You can also save your own artwork to the Material palette, which will be covered in Chapter 8, Vector Layers and the Materials Palette.
For now, we will just concentrate on the 3D categories of the materials palette.
To access the Material Palette, locate the appropriate palette location in your interface. If you cannot locate the Materials Palette, you can click on Window in the File Menu and then navigate down to Material. From the menu under the Material option, click on Material [3D] to open the 3D Material Library, as shown in the following screenshot:

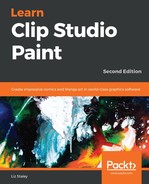
Now, we can take a look at the Material Palette to see the contents of the 3D category. The Materials Palette is shown in the following screenshot:

On the left-hand side of the Material Palette is a list of the different categories of materials and their sub-categories. These categories organize our library of material assets and allow us to quickly find a specific material. The currently selected category will show up from the list with a blue highlight around the name. Any category name with a triangle symbol next to it means that that category can be expanded to show the sub-categories beneath it. Sometimes, even sub-categories have more sub-categories, as can be seen next to the Pose sub-category in the preceding screenshot!
The right-hand side of the Material window shows a list of the materials in the library. The currently selected material will have a blue highlight around it. Details about the current selection are shown in the bottom section of the Materials Palette.
Follow these steps to add a 3D element to a canvas:
- Open a new canvas, if one is not already open. Material assets can only be added to a currently open document.
- In the 3D Material Palette, click on the 3D asset to be added to the canvas. In this example, we are using the 3D drawing figure-Ver.2 (Male) asset.
- Once the material is selected, click on the Paste selected material to canvas icon at the bottom of the Material Palette window. This icon looks like a small clipboard.
- The material will be pasted to the canvas. Note that depending on your computer's specifications and the 3D material, this may take a few minutes to complete.
The 3D figure we chose in the preceding steps is shown in the following screenshot:

As you can see, this is a decent 3D drawing doll that makes for a pretty good reference! But this pose is static, and we need to move the limbs around to get some personality and life into this pose reference. Let's move this 3D figure and the camera around.