
PROJECTS: Wireless LED Kaleidoscope
⁄"-thick wood or acrylic that has a nice finish on
both sides. Kaleidoscopes are often displayed
as art pieces, and an appealing construction
material will result in a build with visual interest
on the outside as well as on the inside. I used
⁄" black acrylic for my frame, but many other
materials can work as well.
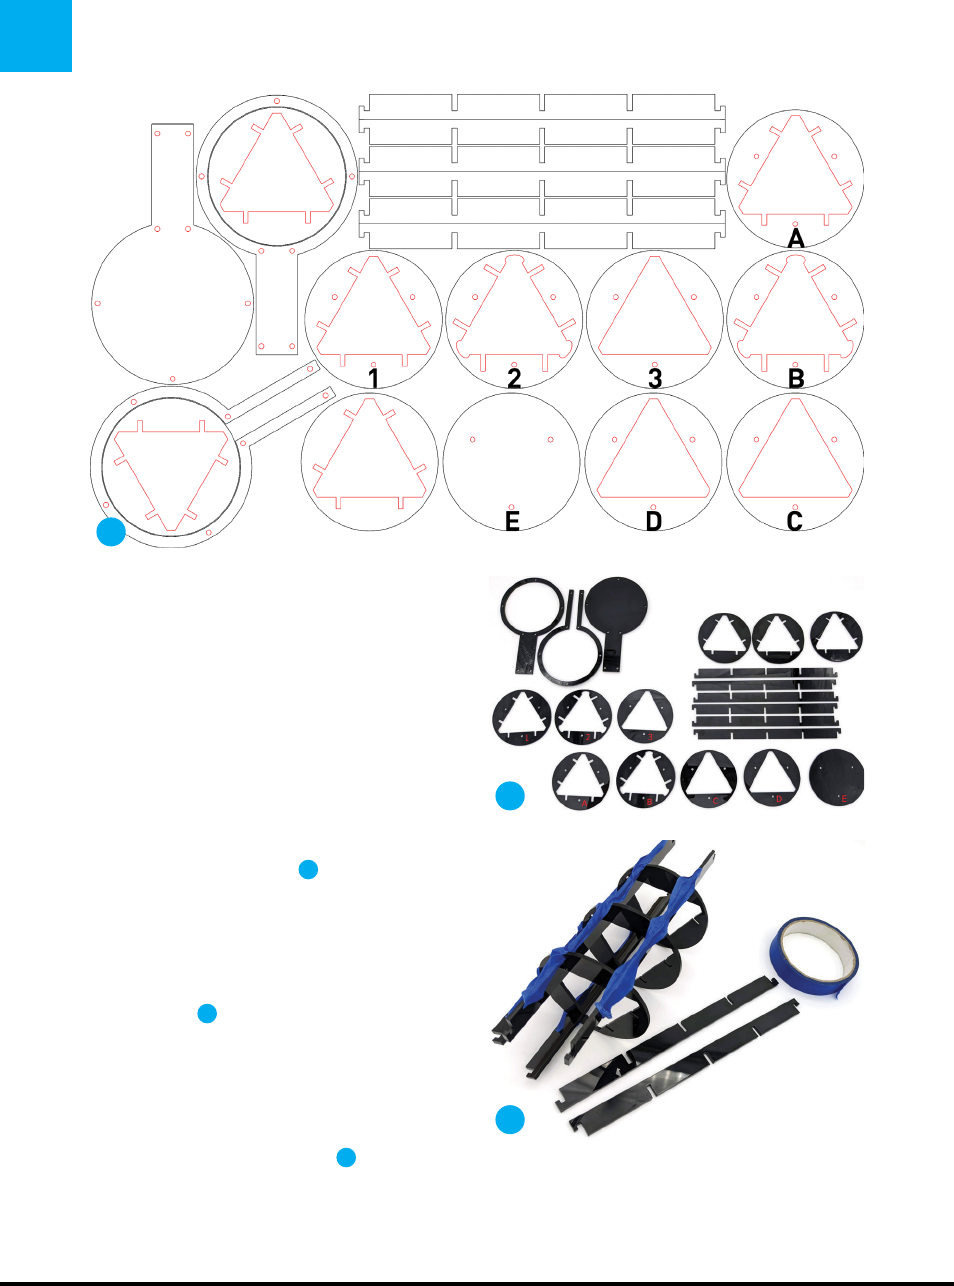
When laser-cutting shapes from the design
files, cut along all blue, black, and red lines.
Any green letters or numbers are intended to
differentiate similar looking pieces from each
other and should be etched or scored on the
surface of the piece (Figure
A
). After you’ve cut
the parts, remove the protective paper from every
piece except the three mirrors.
2. ASSEMBLE THE FRAME AND EYEPIECE
To start the assembly, gather the parts of the
frame (Figure
B
). Select the six identical notched
brace pieces and the three circular pieces without
screw holes. Connect the three center notches in
each brace piece to a notch in each of the three
circles. After slotting each brace piece into all
three rings, tape it in position with painters’ tape
to prevent it slipping out. (Figure
C
). Be sure the
brace pieces are seated as close to the outside
edge of the circles as possible.
After all six notched brace pieces are taped into
place, select the circular pieces numbered 1, 2,
A
B
C
62 makezine.com
M82_060-67_Kaleidoscope_F1.indd 62M82_060-67_Kaleidoscope_F1.indd 62 7/11/22 3:07 PM7/11/22 3:07 PM
..................Content has been hidden....................
You can't read the all page of ebook, please click here login for view all page.