
We have set up the development environment and installed the Atlassian SDK. You also learned how to create a skeleton plugin; apart from showing up in the Universal Plugin Manager, this plugin did not perform any other function. We will add a few functionalities in our plugin, but before that, let's configure the popular Eclipse IDE, which really assists in developing JIRA add-ons.
The Eclipse IDE is used for development purposes in various programming languages. However, we will install the Eclipse IDE for Java EE Developers (Indigo). Perform the following steps:
Download the Eclipse IDE for Java EE developers from http://www.eclipse.org/downloads/packages/eclipse-ide-java-ee-developers/indigosr2.
Extract the content of the downloaded file in the C:eclipse directory.
We need to tell our Eclipse IDE to start and use the JDK that we have already installed on our machine:
- Open the
C:eclipseeclipse.inifile. - Add a
-vmentry before the-vmargsentry. We should define the JDK path here; the finaleclipse.inifile should look similar to the following code:-startup plugins/org.eclipse.equinox.launcher_1.3.0.v20140415-2008.jar --launcher.library plugins/org.eclipse.equinox.launcher.win32.win32.x86_64_1.1.200.v20140603-1326 -product org.eclipse.epp.package.jee.product --launcher.defaultAction openFile --launcher.XXMaxPermSize 256M -showsplash org.eclipse.platform --launcher.XXMaxPermSize 256m --launcher.defaultAction openFile --launcher.appendVmargs -vm c:/java/bin -vmargs -Dosgi.requiredJavaVersion=1.6 -Xms40m -Xmx512m
- Save and close the file.
The Eclipse JREs need to be updated with the ones that are currently installed in our JDK version. Perform the following steps if you are not sure whether you have the updated JREs or not:
- Double-click on the
C:eclipseeclipse.exeapplication and it will start the Eclipse IDE. - In the menu bar, click on Windows | Preferences.
On the left-hand side, enter
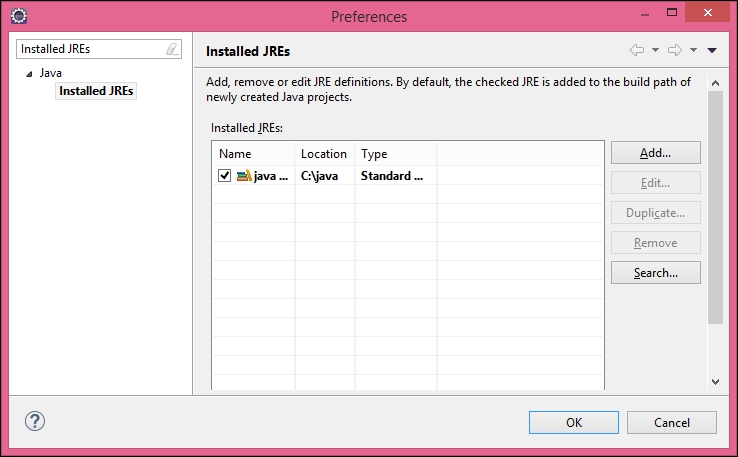
Installed JREs; this will filter down the list; after that, double-click on Installed JREs. - On the right-hand side, click on the Add button and select Standard VM.
- In JRE home, enter
C:javaas the location of the directory and click on the Finish button:
- Finally, the JREs will be updated and it should look similar to the following screenshot:
The JIRA add-ons development is based on Maven and there is an Eclipse plugin for Maven that needs to be installed. Perform the following steps:
- In the Menu bar, click on Help | Install New Software....
- In the Available Software window, click on the Add button.
- Enter Name as
Sonatype M2Eclipse. Enter http://download.eclipse.org/technology/m2e/releases as Location and click on the OK button.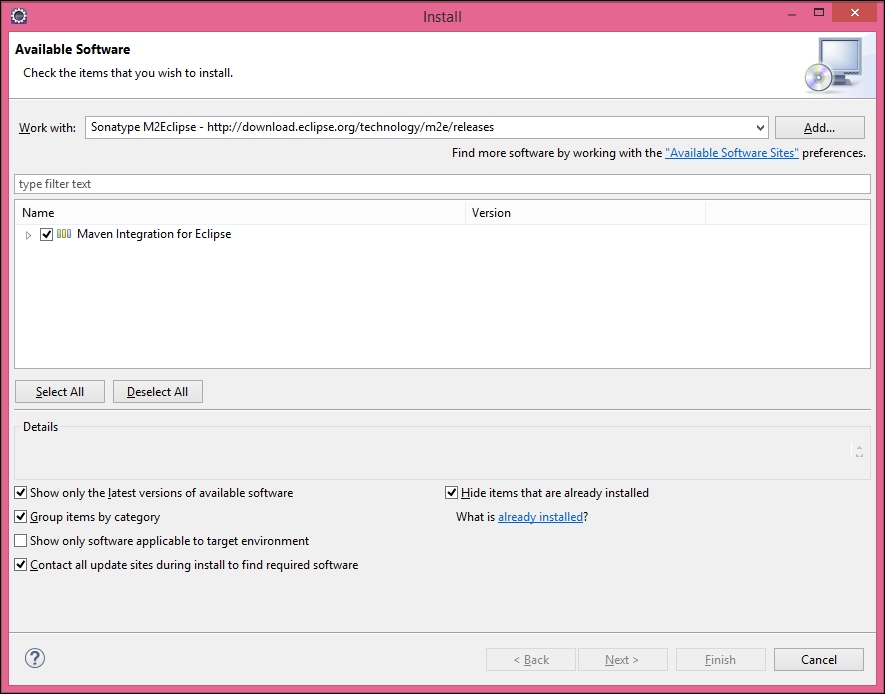
- Select Maven Integration for Eclipse and click on the Finish button.
- Finally, restart Eclipse for these changes to take effect.
Finally, we need to tell the Maven Eclipse plugin the location of Maven that is installed on our machine. The Maven directory is placed in the ATLAS Home directory. You can run the atlas-version command on your machine to find out the exact location of ATLAS Maven Home. Just copy this location and perform the following steps:
- In the menu bar, click on Windows | Preferences.
- On the left-hand side, enter
Maven;it will filter down the options available for Maven. - Click on Installation and then click on the Add button.
- The Installation type should be External, copy the
ATLAS Maven Homedirectory, and click on the Finish button.
Now, we are all set to start developing our JIRA add-ons using Eclipse.
The helloworld plugin (which we created earlier) lacks any functionality; we loaded the plugin in JIRA but it did not do anything apart from just showing up in the Universal Plugin Manager. Now that we have also configured the Eclipse IDE, let's add a few functionalities to our helloworld plugin.
As an example, we will add a custom link in the JIRA Main navigation bar using this plugin.
We can use the Eclipse IDE and import our plugin, but before we do that, there are Eclipse configuration files that need to be generated in the helloworld plugin project. Perform the following steps:
- In Command Prompt, navigate to the
C:atlastutorialhelloworlddirectory. - Enter the following command and click on ENTER:
atlas-mvn eclipse:eclipse - This command will return the following message:
[INFO] -----------------------------------------------------------[INFO] BUILD SUCCESS
[INFO] -----------------------------------------------------------[INFO] Total time: 56.519 s
[INFO] Finished at: 2014-11-28T11:15:35+05:30
[INFO] Final Memory: 21M/102M
[INFO] -------------------------------------------------------
- Now, we are ready to import the plugin in Eclipse. In the menu bar, click on File | Import....
- Select Existing Projects into Workspace under General and click on the Next button.
- Enter
C:atlastutorialhelloworldin the Select root directory and click on the Finish button.
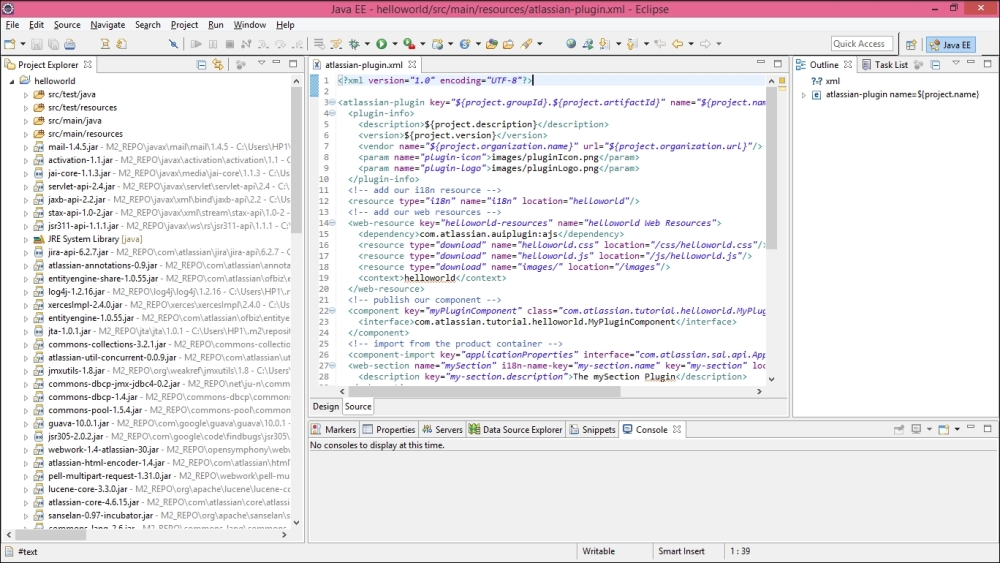
Now, you should see the helloworld plugin project loaded on the left-hand side under Project Explorer, as shown in the following screenshot. If you notice the welcome screen in your SDK, then close it.
We will take a very simple example to understand how to add new functionalities in JIRA. You are already familiar with JIRA's top navigation bar. From the JIRA frontend, it's not possible to add a new menu item in it; however, we will modify our helloworld plugin to add this menu item.
The JIRA functionality and the behavior of its various sections are controlled by various modules. If we want to do any modification to JIRA's top navigation bar, then we need to add two modules called Web Section and Web Item. Perform the following steps:
- In Command Prompt, navigate to the
c:atlastutorialhelloworlddirectory. - Enter the following command and click on ENTER:
atlas-create-jira-plugin-module - The command will respond and prompt you to enter a specific number for various modules. Type
30for Web Section. - The command will again respond and ask you to provide certain inputs. Use the values as mentioned in this table:
Enter Plugin Module Name
mySectionEnter Location
contact-us-linksShow Advanced Setup?
N - The command will ask you, Add Another Plugin Module? Click on Y.
- The command will respond and prompt you to enter a specific number for various modules. Type
25forWeb Item. - The command will again respond and ask you to provide certain inputs. Use the values as mentioned in this table:
Enter Plugin Module Name
Contact UsEnter Section
system.top.navigation.barEnter Link URL
Show Advanced Setup?
N - The command will ask you to
Add Another Plugin Module?Click on N. - Run the
atlas-runcommand from within your plugin project directory and once JIRA starts running, open it in the browser: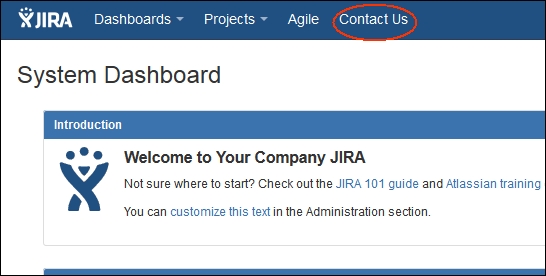
You should now see a new menu item called Contact Us, which we have added from our helloworld plugin.
We have just started to add the functionality in the skeleton plugin project. Although we just added a link in the JIRA navigation bar, there is a lot more that can be done.
If you are starting the JIRA add-ons development, then start by going through the tutorials mentioned on the Atlassian website at https://developer.atlassian.com/display/JIRADEV/Tutorials.
So far in this chapter, we have discussed creating add-ons that extend JIRA's functionalities, but it's also possible to interact with JIRA from other applications as well. JIRA comes with the REST API, which allows you to manipulate JIRA's data and configurations from external applications. The JIRA API that adheres to the principles of REST does not require the client to know anything about the structure of the API. Rather, the server needs to provide whatever information the client needs to interact with the service.
Various programming languages are capable of making REST calls. In the following section, we will discuss how to interact with JIRA REST APIs along with some examples in detail.