
Out of the box, SCCM 2012 contains four hundred and twenty-three pre-built reports. Unfortunately, only six of them pertain to Endpoint Protection. The good news is that with SCCM 2012 comes the release of SQL Report Builder 3.0, which makes it easier than ever for almost anybody to quickly create a customized report based on any of the Endpoint Protection data that SCCM collects and stores in its database. And believe me, you'll be amazed when you peek under the hood and see the wealth of data just waiting there for you to groom and shape as you see it.
For this recipe,we will keep it simple and build a report that shows the count of PCs that have the Network Inspection Service(NIS) enabled as well as a count of those that do not have the service enabled. NIS usage is a valuable piece of security data that is not reflected in any of the built-in reports.
For this recipe, you will need to utilize an account that has administrator privileges for the SQL Reporting Services instance that hosts your SCCM reports.
If you have not used Custom Report Builder 3.0 on this server yet, you may need to modify a registry key on the CAS server to ensure it opens the Version 3.0 and not the Version 2.0 of Report Builder. This procedure is outlined at the end of this section.
Follow these steps:
- Log in to you CAS server and open the SCCM management console.
- Navigate to
MonitoringOverviewReportingReports. In the ribbon on the left-hand side, right-click on reports and select Create Report. - The Create Report Wizard window should pop up. In the Type section, choose SQL-based Report. In the information section, enter a name for the report and a description if wish to do so. Next, click on the Browse button and choose Endpoint Protection and the desired path for this report. Click on the Next button to proceed.

- On the Summary page, review the options you've selected, if everything checks out, click on Next to proceed.

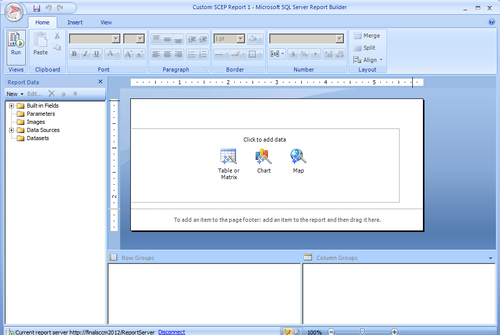
- Once you click on Next on the completion page, the custom report window will disappear and a few moments later, Microsoft SQL Report Builder 3.0 will open. The report we just created in the Create Report Wizard should display automatically.
- To begin, click on the object titled Table or Matrix in the center of the window.
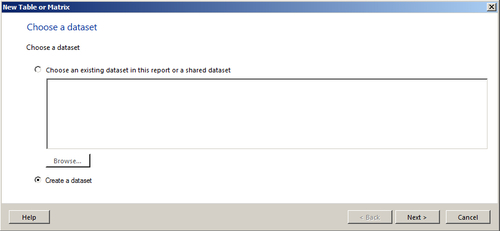
- A new window titled New Table or Matrix should pop up. Choose the option Create a dataset at the bottom of the page, as shown in the following screenshot:
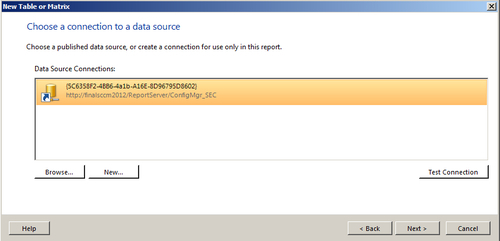
- On the next page, you'll be choosing a connection to a data source, typically the connection to your SCCM database will already be present and selected. If it's not there, you may have to browse for it. Once you are ready, click on Next to proceed.
- You will now be prompted for user credentials, which are needed to access the SCCM database. You have the option of using the credentials with which you are currently logged in with or entering another set of user credentials. Click on Next to proceed.

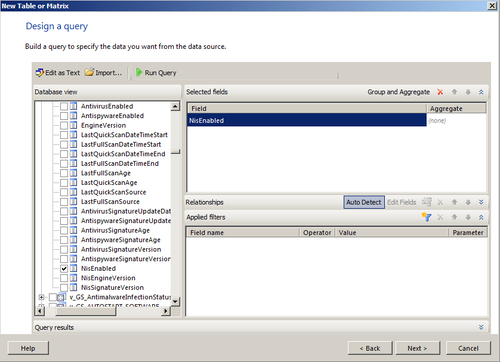
- Next, select the database view that your report will be tapping into to extract the information about your client's NIS status. To do this, locate v_GS_AntimalwareHealthStatus within the column titled Database view and expand it. Scroll down and locate the NISEnabled object and check the box next to it. NISEnabled should now appear in the Selectedfields window. Click on Next to move on. Refer to the following screenshot:
- On the Arrange fields page of the wizard, you will need to drag the NISEnabled object to both the Row Groups and Values window. Once you have NISEnabled in the Values window, right-click on it and select Count from the list. Click on Next to proceed.

- On the Choose the layout page, select Show subtotals and grand totals. You'll also need to enable the option for Stepped, subtotal above. Lastly, make sure that you've enabled the option Expand/collapse groups. Click on Next to proceed. Refer to the following screenshot:

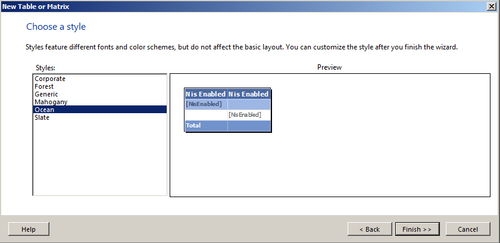
- On the Choose a Style page, you can select a color palate to match your personality or mood. I prefer the calm, relaxing vibe of "ocean". Once you've chosen a style, click on Finish and you'll be returned to Report Builder.
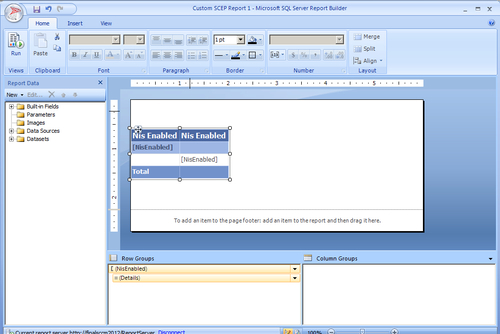
- Once you are back in Report Builder, you'll have an opportunity to tweak the look of the report. When you are happy with the layout, click on the Run button in the upper left-hand corner to test the report out for the first time. Refer to the following screenshot:
- If everything works correctly, you'll be presented with a report that lists the total counts of your clients that are running NIS and a count of those that have NIS disabled.

- Close out of the report preview, save your work in Report Builder and exit out of it as well. You can now run the report whenever you need to do so by browsing to
MonitoringOverviewReportingReportsEndpoint Protection.
Although the report we've built in this recipe is rather on the simple side, I hope it's allowed you to get your feet wet with custom reporting. Once you understand the basic mechanics of Report Builder and how to tap into SQL views, there's really no limit to the ways you can piece information together and build something that makes your job a little easier.
Setting up SQL Report Builder 3.0 as your default:
Although SQL Report Builder 3.0 comes bundled with SCCM 2012, it is not the default Report Builder on your CAS server until you make a small change to the registry. Until you make this change, your server will automatically try to open in the previous version that was installed on your server when you installed SQL 2008. To make this change, log in as local administrator and complete the following steps:
- Click on Start |Run, type
Regedit, and hit enter. The registry editor should open. - Navigate to:
HKEY_LOCAL_MACHINESOFTWAREWow6432NodeMicrosoftConfigMgr10AdminUIReporting. - Open the ReportBuilderApplicationManifestName key and change the string to
ReportBuilder_3_0_0_0.application. Click on OK to close Regedit.