11. Viewing Video Content
In this chapter, you explore some of the video offerings and related playback functionality the Vita offers.
• Understanding the Videos App
• Examining the Videos LiveArea Screen
• Playing Video via the Videos App
Your Vita is a great way to enjoy different types of video content on the go, including movies, TV shows, and user-generated videos. As long as you have a decent Wi-Fi connection, you can enjoy high-quality video streams from a growing selection of apps that look fantastic on the Vita’s OLED touchscreen. You can also purchase and rent selections from a huge content library, as well as transfer and play your own video files.
Understanding the Videos App
The only function of the Videos app is to play videos, but before you can use it in the way it was intended, it needs content. You can either rent or purchase video content from the PlayStation Store, which is covered in Chapter 5, “Shopping in the PlayStation Store,” or transfer it from a computer or PlayStation 3 using the Content Manager app, which is covered in Chapter 8, “Managing Media with Content Manager.” Videos taken with the Photos app can only be played from the Photos app, which is discussed in Chapter 10, “Snapping Pictures and Video with the Cameras.”
Content from the PlayStation Store is automatically formatted for use with the Vita, whereas transferred content must already be in a specific format to work. The formats compatible with the Vita are MPEG-1, MPEG-2, and MP4, using the following two main profiles:
• MPEG-4 Simple Profile Level 3, Maximum 320 × 240 pixels, AAC
• H.264/MPEG-4 AVC Baseline/High/Main Profile Level 3.1, Maximum 720p, AAC
It might be simpler to note that, in general, if you see any of the following filename extensions attached to a video that doesn’t exceed the Vita’s resolution restrictions, the video file has a good chance of playing: .mpg, .mpeg, .mp1, .mp2, .mp3, .m1v, .m1a, .m2s, .mpa, .mpv, and .m2v. Further, when using the Content Manager app, you typically receive a “This file is not compatible with the PS Vita system” message when attempting to select an incompatible file for transfer.
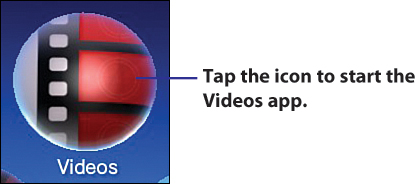
Examining the Videos LiveArea Screen
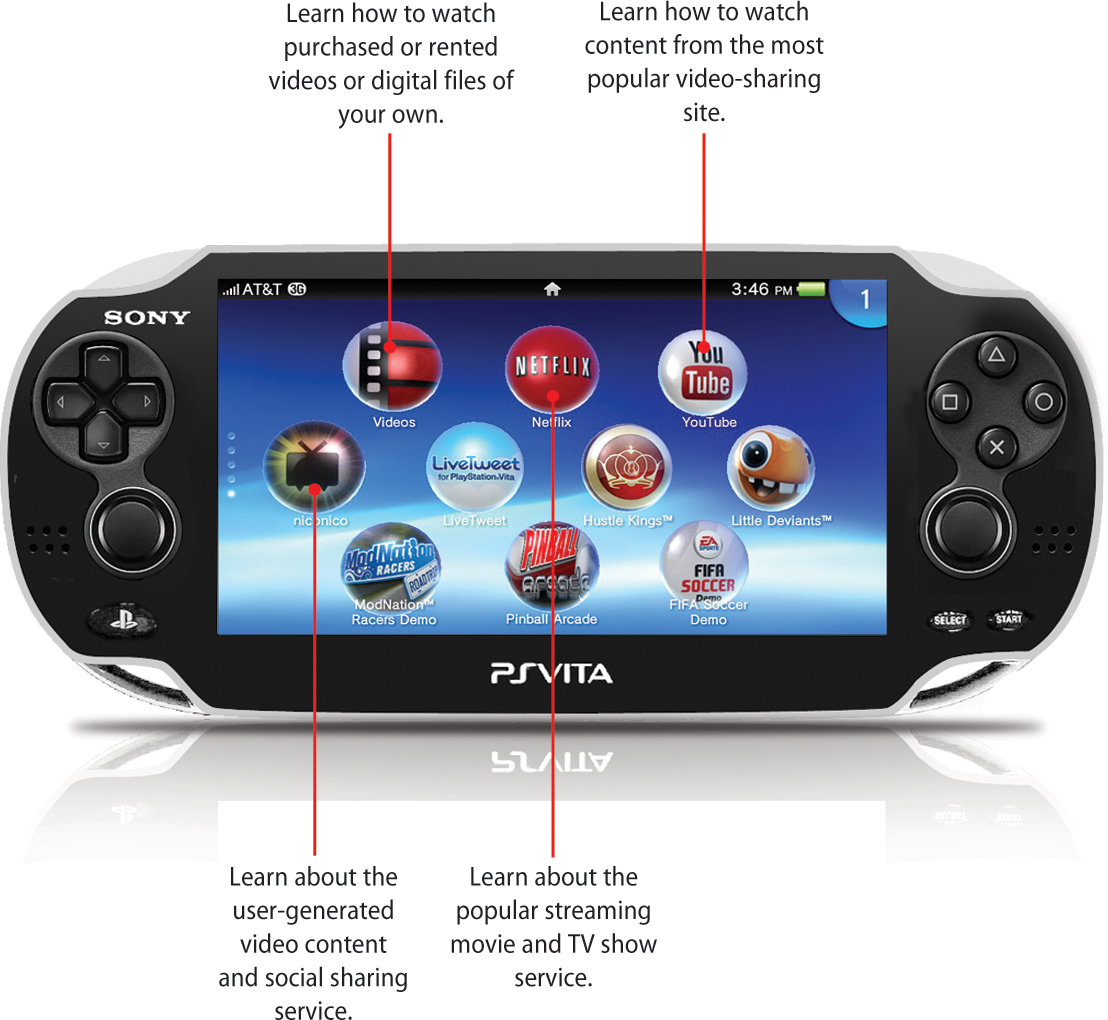
To get to the LiveArea screen for Videos, tap the Videos app icon. There’s not much that’s unique to this screen, though it does highlight new releases and special offers from the PlayStation Store. Tapping the Start Gate brings you to the Applications screen, where the folders with your transferred, downloaded, and rented video content are displayed. Tapping one of the advertisements brings you to the advertised material’s entry on the PlayStation Store. When you’re at the entry, you can review additional information about the content item, including available purchase or rental options.
Playing Video via the Videos App
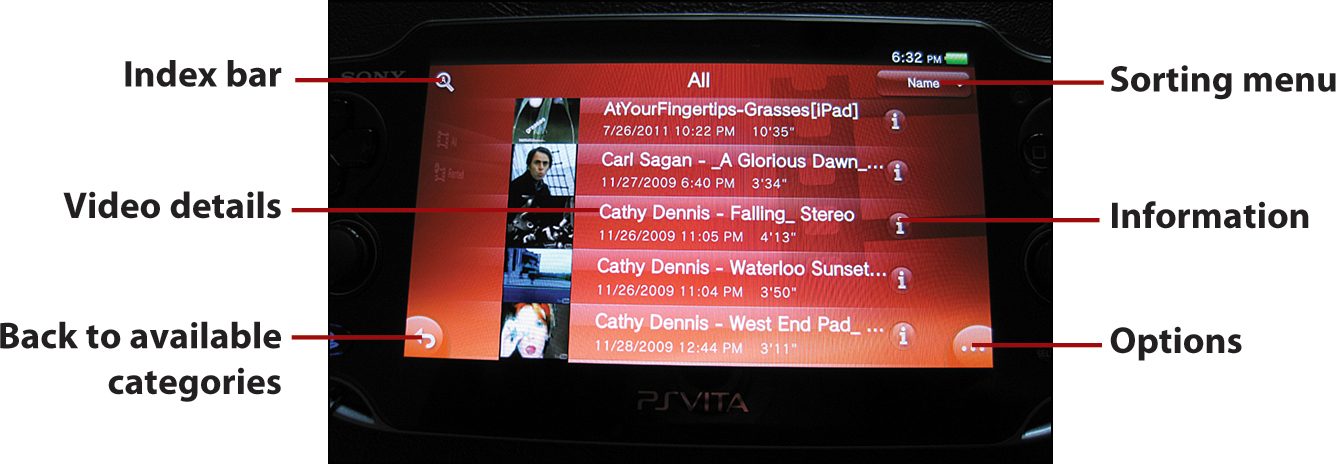
When you have purchased or rented video content from the PlayStation Store, or transferred videos from your computer or PlayStation 3 using Content Manager, you’re ready to watch that content. After starting the Videos app, tap to select your video from one of the available categories, such as All or Rented. The following options are available:
• Index Bar—Tap to display the index bar, then drag the alphabetical index bar to find the video you want to watch.
• Sorting menu—Tap the menu and then select the sorting you want to use, either by Name or by Date.
• Information—Tap icon to display the video’s last time updated, file size, playing time, and resolution.
• Options—Tap this button to Copy or Delete videos. If you want to copy a video, you must first connect your Vita to a computer or PlayStation 3. When the Vita is connected, the PC or PS3 System category is added to the list of categories, depending on which of these you’re connected to.
If a padlock, representing Restricted Content, appears next to a video, then the parental controls are set to restrict viewing. For more on parental controls, refer to the “Security” section of Chapter 3, “Settings and Networking on Your Vita.”
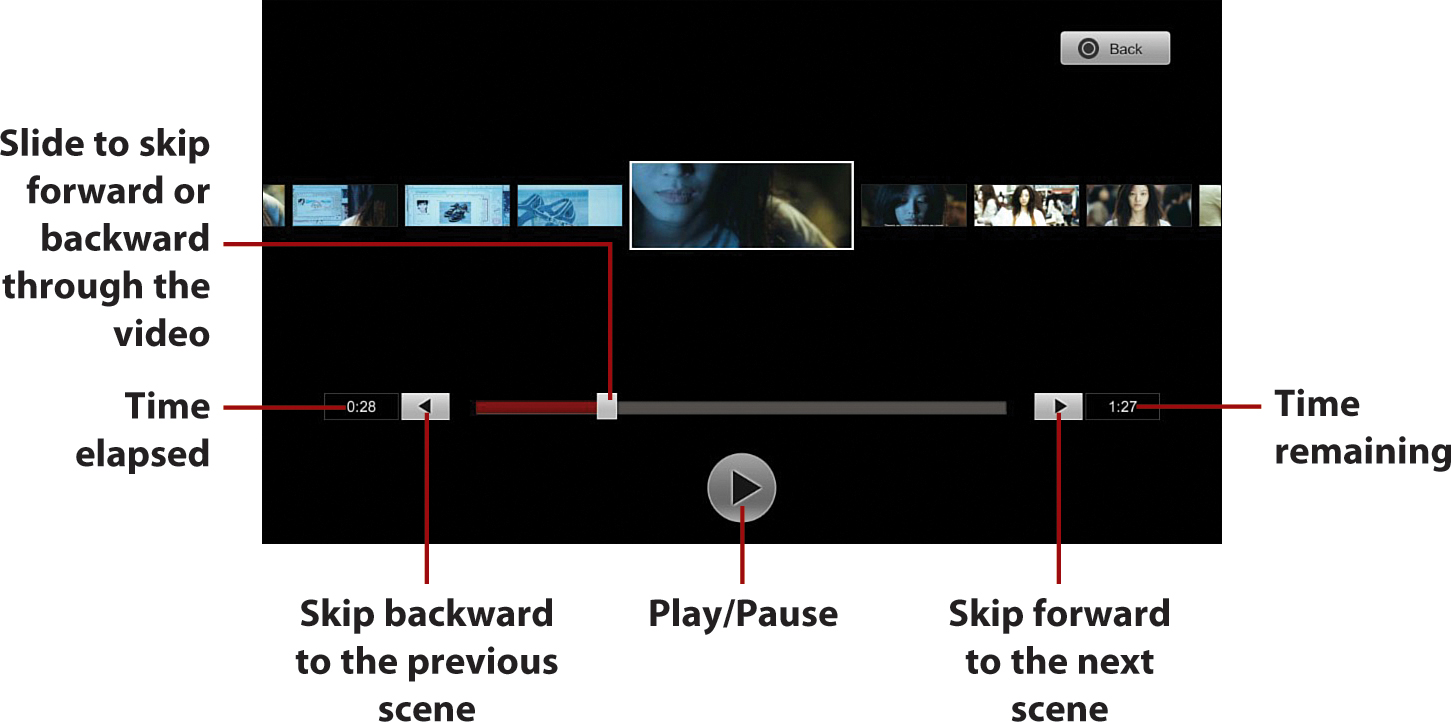
When you tap on a video to watch it, the operation controls appear, which disappear after a few seconds of inactivity. To display them again, tap the touchscreen while the video is playing. The play controls are broken down as follows:
• Scene search—Use scene search to find a specific scene in a video. Tap the icon to display the thumbnails for chapters and time intervals. Flick the thumbnails to find the scene you want to watch and then tap the thumbnail to play the scene. Tap the left or right arrow icons to change the scene-search interval.
• Progress bar—Tap the desired location on the timeline or drag the knob to that location.
• Controls—Tap the appropriate icon to return to the beginning, change the playback speed from 1.0x to 1.5x normal, play or pause, use instant replay, or use instant advance. Instant replay and instant advance moves 15 seconds back or 15 seconds forward, respectively, in the video.
• Options—Tap this button to adjust language, audio, and playback settings, which are described in the next section.

The creator of a particular video might disable certain features, so not every control on the control panel will function at all times.
Like all video apps, Videos disables screen dimming and other power-saving functionality so your video can play without interruption. As such, outside of non-stop gaming, playing videos is the quickest way to drain your battery. If you plan on playing lots of video content, either invest in a good dock (see “Accessorizing Your Vita,” in Chapter 1, “Getting Started”) or plan on keeping the AC adapter handy.
You can switch between Normal display, which fits the image to the height of the screen, and Zoom display, which fits the image to the width of the screen, by double-tapping the touchscreen while the video is playing. This setting is saved separately for each video.
Controlling Playback with Buttons
In addition to the standard touch screen interface, the Vita allows use of its buttons to control video playback if the option is enabled in your system’s settings. Refer to “System” in Chapter 3 for information on enabling your Vita’s operation with buttons. Once enabled, the following control options become available:
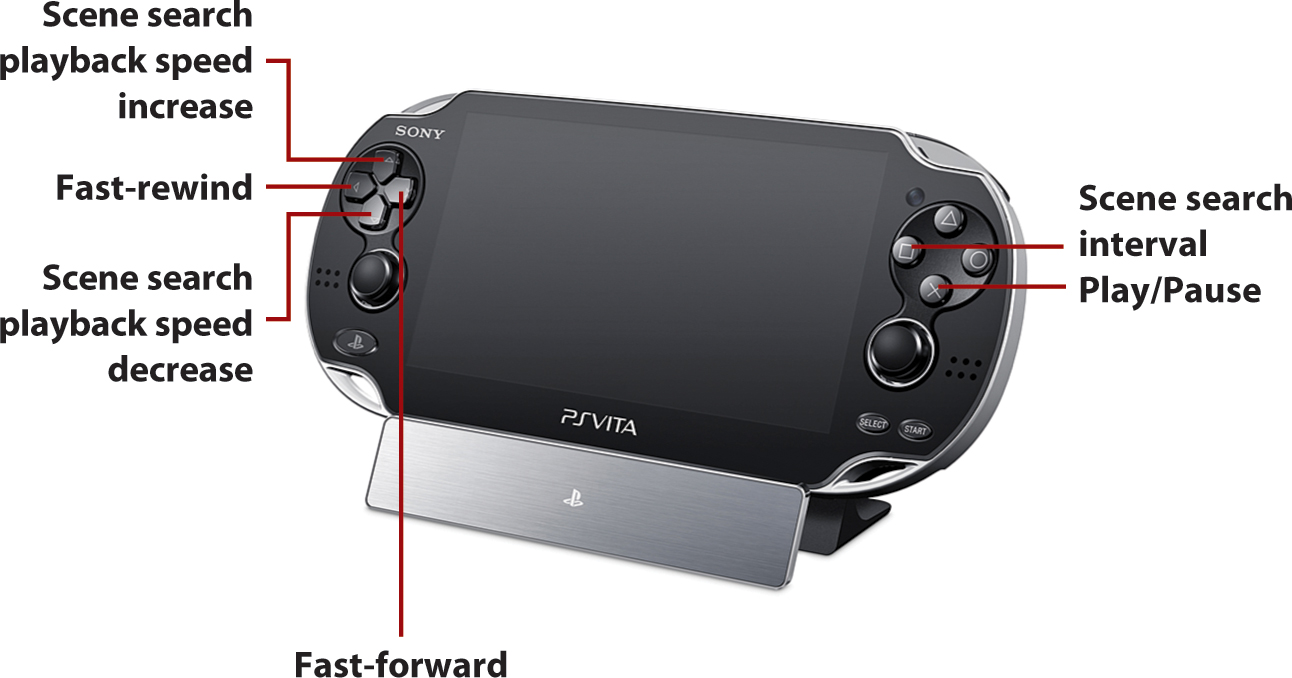
• Play/Pause—Press the X button to play or pause content.
• Fast-rewind/Fast-forward—Press left on the directional pad or left stick to fast-rewind. Press right on the directional pad or left stick to fast-forward. You can switch between three levels of speed every time you press a direction. If you hold a direction down, you can fast-rewind or fast-forward until the direction is released.
• Scene search playback speed—Press up on the directional pad or left stick to increase playback speed. Press down on the directional pad or left stick to decrease playback speed. The playback speed range is between 0.5x to 2.0x, with each press increasing or decreasing the speed by 0.1x.
• Scene search interval—Press the square button. On the screen where you select a scene, you can change the scene-search interval where thumbnails are displayed by pressing up or down on the directional pad or left stick. Select the scene you want to watch by pressing left or right on the directional pad or left stick.
Adjusting Video Settings
When a video is playing, tap Options, and then tap Settings to adjust language, audio, and playback settings. The settings displayed vary based on video content. The standard options include the following:
• Audio Language—Tap this option to select an available audio language, which is saved separately for each video.
• Audio options—Tap this option to select the audio output setting to use when watching the video. This setting is reset to the default of Left + Right the next time you watch the video.
• Subtitle Language—Tap this option to select an available subtitle language when subtitles are turned on, which is saved separately for each video.
• Continuous Playback—Use this option to play the video in a continuous loop.
• Repeat—This specifies whether or not to repeat playback. When Continuous Playback is turned on, playback will return to the first content item after all content has been played in order.
• My Language Preference—Use this option to select your default Audio and Subtitle languages for watching videos, which is used when an Audio or Subtitle language option is not individually set for a specific video.
Watching Netflix
Netflix is a popular video rental service that offers a streaming option for a range of computers, set-top boxes, consoles, and portable devices. When you sign up and pay for an account, which presently runs $7.99 per month, you can watch Netflix from any or all of these devices, including the Vita, after you download the Netflix app from the Apps section of the PlayStation Store.
Netflix for the Vita only supports playback at 480p, rather than in a high-definition resolution, but it still looks amazing on the Vita’s vibrant OLED screen. Because all Netflix content is streamed and is dependent upon a good Internet connection, the app is only designed to work over Wi-Fi at present.
Getting Started with the Netflix App
Whether you’re a member already or want to sign up for 30 free days of service before deciding, getting started follows the same process.
1. Tap the Netflix app icon.
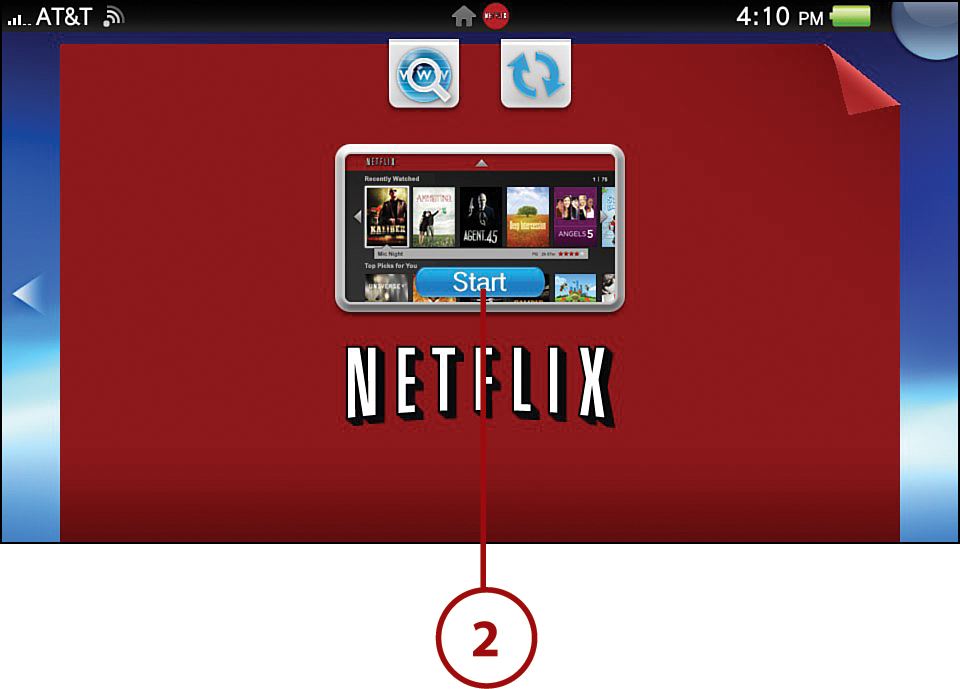
2. Tap Start in the center of the LiveArea.
3. Select whether you are an existing or new member. Existing members enter their Netflix login info, whereas new users can sign up for 30 days of free service.

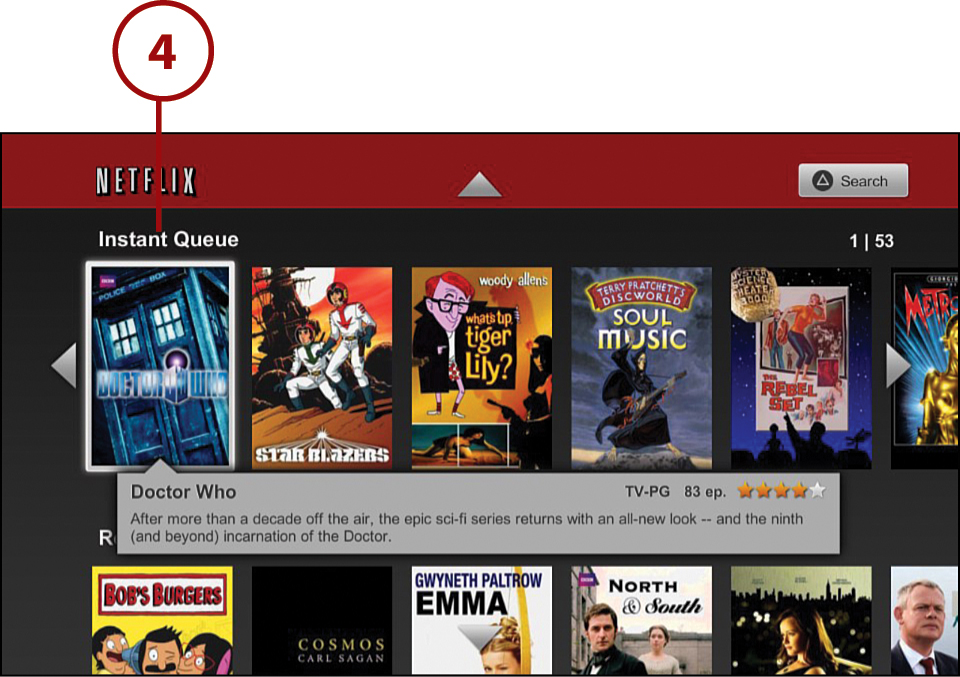
4. The main navigation page opens, from which you can browse new content, see recently watched content, and, if one exists, view your Instant Queue of saved videos, which is your personal list of the videos you want to watch instantly at a later time.
Navigating the Netflix App
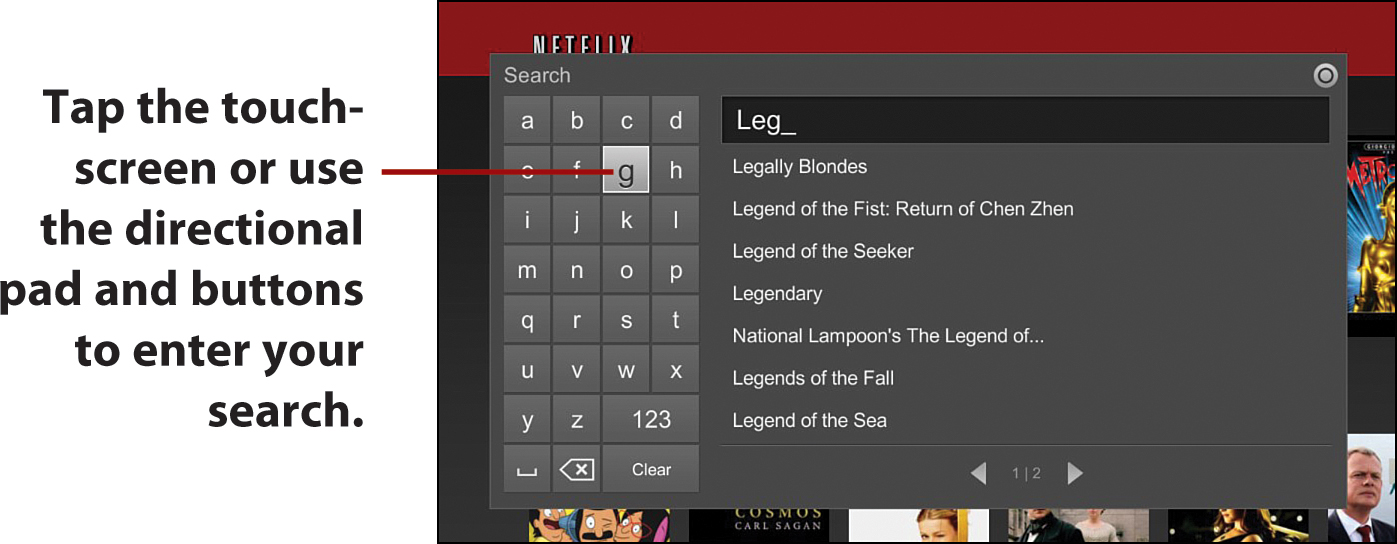
From the Netflix app’s main screen, you can scroll up and down to browse through genres and other categories that are tailored to your viewing habits. Although you perform most navigation from the touchscreen, occasionally you have to use the directional pad and buttons. Typically, an onscreen prompt lets you know when physical controls are necessary. For example, to search for a video, you can tap the search box in the top right of the touchscreen, or press the triangle button. This opens the search screen, in which you can input text either from the touchscreen or using the directional pad and buttons.
To play a video, just tap a selection and then tap Play. You can also add it to your Instant Queue or select from the available audio language and subtitle options.

When a video is playing, tap anywhere on the screen to open the playback controls. Slide your finger along the Progress bar to skip backward and forward through the title. Press the Back icon or the Circle button on your Vita to exit playback.
The Highs and Lows of Star Ratings
The red stars on a video’s selection page shows the overall Netflix member rating for a particular video. You can add your own rating, which is indicated with yellow stars, by tapping on the stars. One star means you “hated” it, the second star means you “didn’t like it,” the third star means you “liked it,” the fourth star means you “really liked it,” and the fifth star means you “loved it.” If your opinion changes, you can even go back and put in a different rating at any time.
Watching YouTube with the YouTube App
YouTube features a mass of original videos on nearly every subject imaginable uploaded by both amateurs and professionals. Although a YouTube account is not a requirement to start watching these videos with the Vita’s YouTube app, doing so offers additional features, like adding to and retrieving your Favorites.
The Vita’s YouTube app, which you can download from the Apps section of the PlayStation Store, offers playback over both 3G and Wi-Fi connections. Resolution support goes all the way up to an HD-friendly 720p, taking full advantage of the Vita’s display.
After you download YouTube from the PlayStation Store, tap the YouTube app icon to begin.
Tap the Start Gate in the center of the LiveArea to go straight to the app’s Recommended screen. You can select one of the menu options at the bottom of the screen, or tap a video to enter Full Screen mode, which is one of the two available playback options along with Small Screen mode. The menu options are as follows:
• Recommended Videos—This area displays videos recommended by YouTube. This is also the app’s default screen.
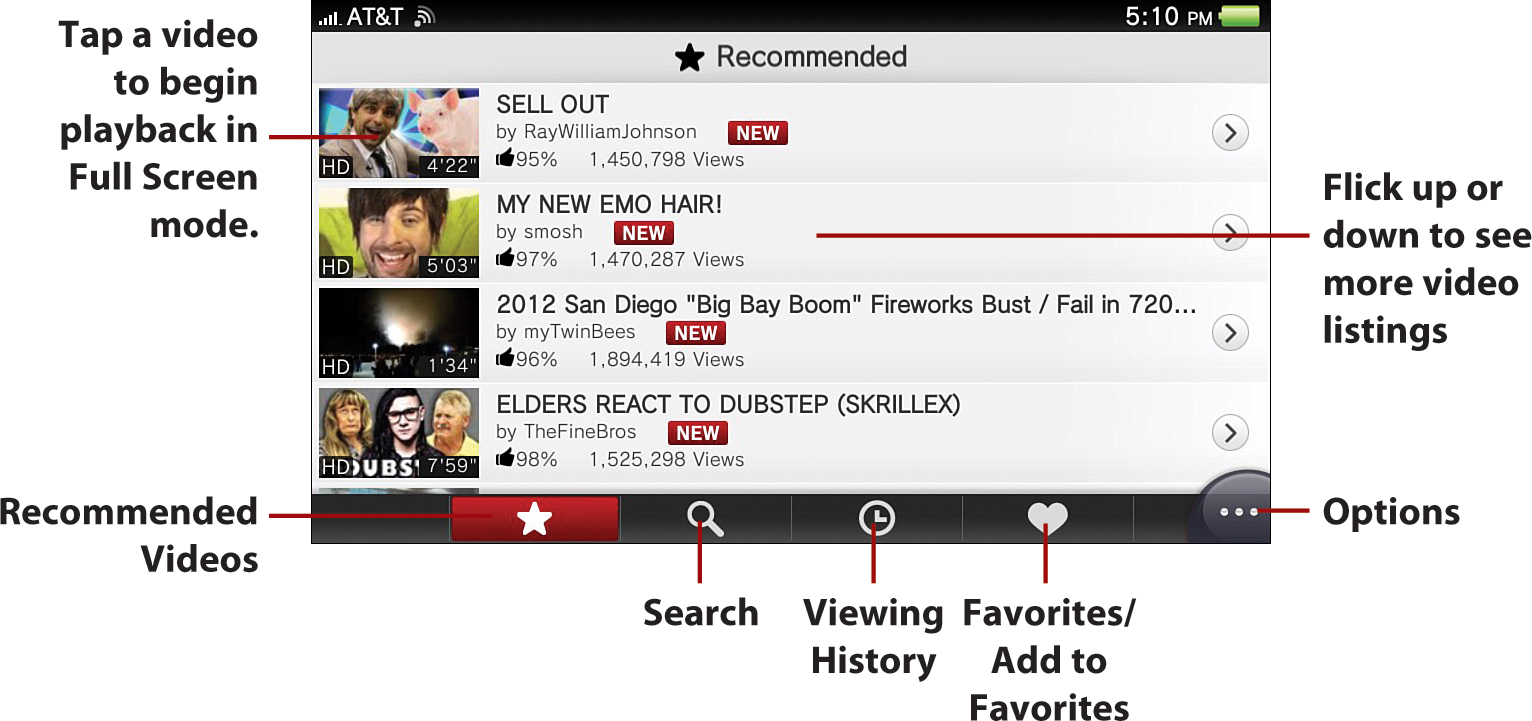
• Search—Tap the magnifier icon to search for videos by keyword.
• Viewing History—Tap the clock icon to display a listing of your most recently viewed videos.
• Favorites/Add to Favorites—Tap the heart icon to display a list of videos you’ve added to your Favorites list. You must be signed in to your YouTube account to add a video to your Favorites.
• Options—Tap the Options bubble to yield the Settings option. Tap Settings to sign into your YouTube account or create a new account. You can also set your Safe Search Filter settings to one of three options: Don’t Filter, Moderate, or Strict. The default is Moderate, which provides a nice balance between aggressive filtering of potentially objectionable content and no filtering at all. Finally, if you’re into that sort of thing, you can also read both the Intellectual Property Notices and the Terms and Privacy Policy.
In Full Screen playback mode, a control panel, which disappears after a few seconds, is displayed onscreen. Tap the video to show the control panel again. The control panel features the following options:
• HD—Tap the HD button to switch from HD (high definition) to SD (standard definition), which is useful if your 3G or Wi-Fi connection is causing playback performance issues with the higher quality stream. HD is enabled when the HD logo is red. Keep in mind that HD may not be available for every video.
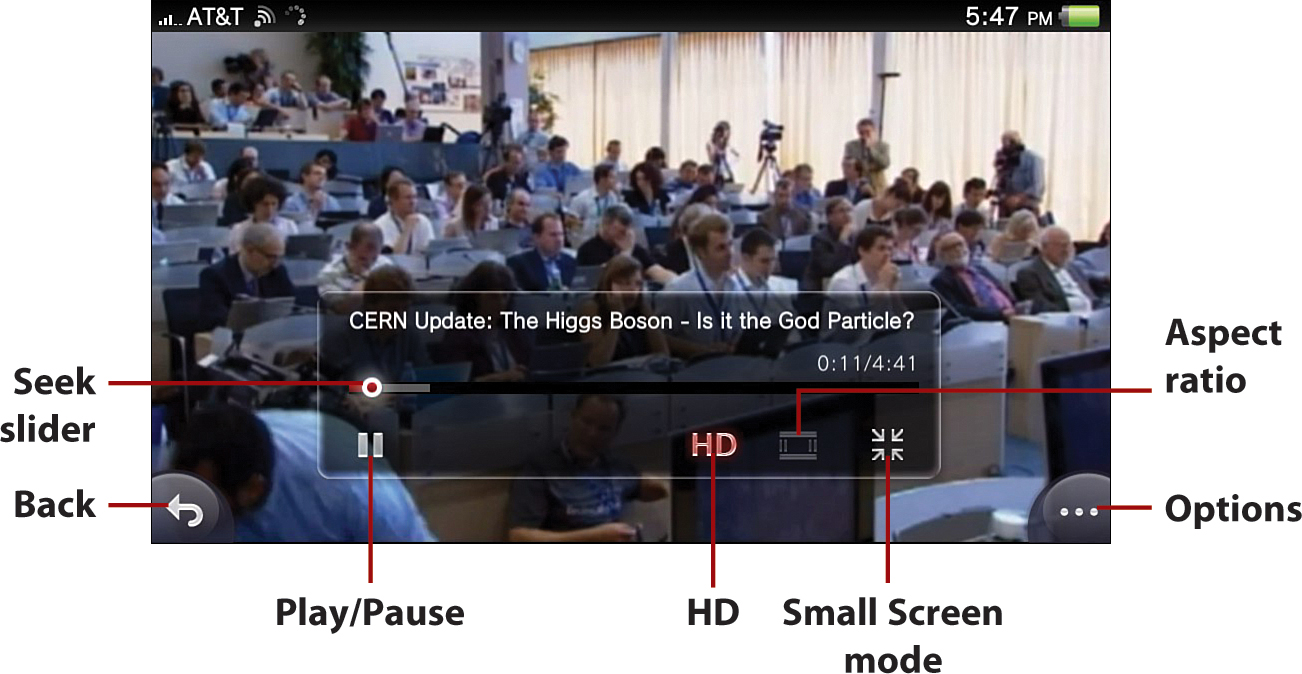
• Aspect ratio—If available, tap this icon to change the aspect ratio of the video on the Vita’s touchscreen.
• Small Screen mode—Tap this icon to switch to Small Screen mode.
• Options—Tap the Options bubble to add the video to Favorites or to flag the video as inappropriate for your present Safe Search Filter settings. The app’s standard Settings options are also accessible from here. Add to Favorites will only work if you’re signed in, otherwise you will be prompted to sign in.
In Small Screen mode, you can view the video while still having access to the Like or Dislike buttons, Suggested Videos, Comments, and Information options.

Video Sharing with Niconico
Niconico, known as Nico Nico Douga (“Smile Videos”) in its home country of Japan, is an up-and-coming social video networking service that enables users to overlay comments directly on live video events. As of this writing, you can use the application to view only live broadcasts and recordings of live events, but functionality to stream videos direct from the Vita is promised for a future update.
Due to the high performance requirements associated with live streaming, only Wi-Fi connections are supported. Like the other third-party applications in this chapter, you can download Niconico from the Apps section of the PlayStation Store.
Getting Started with Niconico
After you download Niconico from the PlayStation Store, tap on the Niconico app icon to begin.
Future app updates will expand Niconico’s functionality, but as of this writing, outside of various information links, only the Start Gate is functional in the LiveArea.
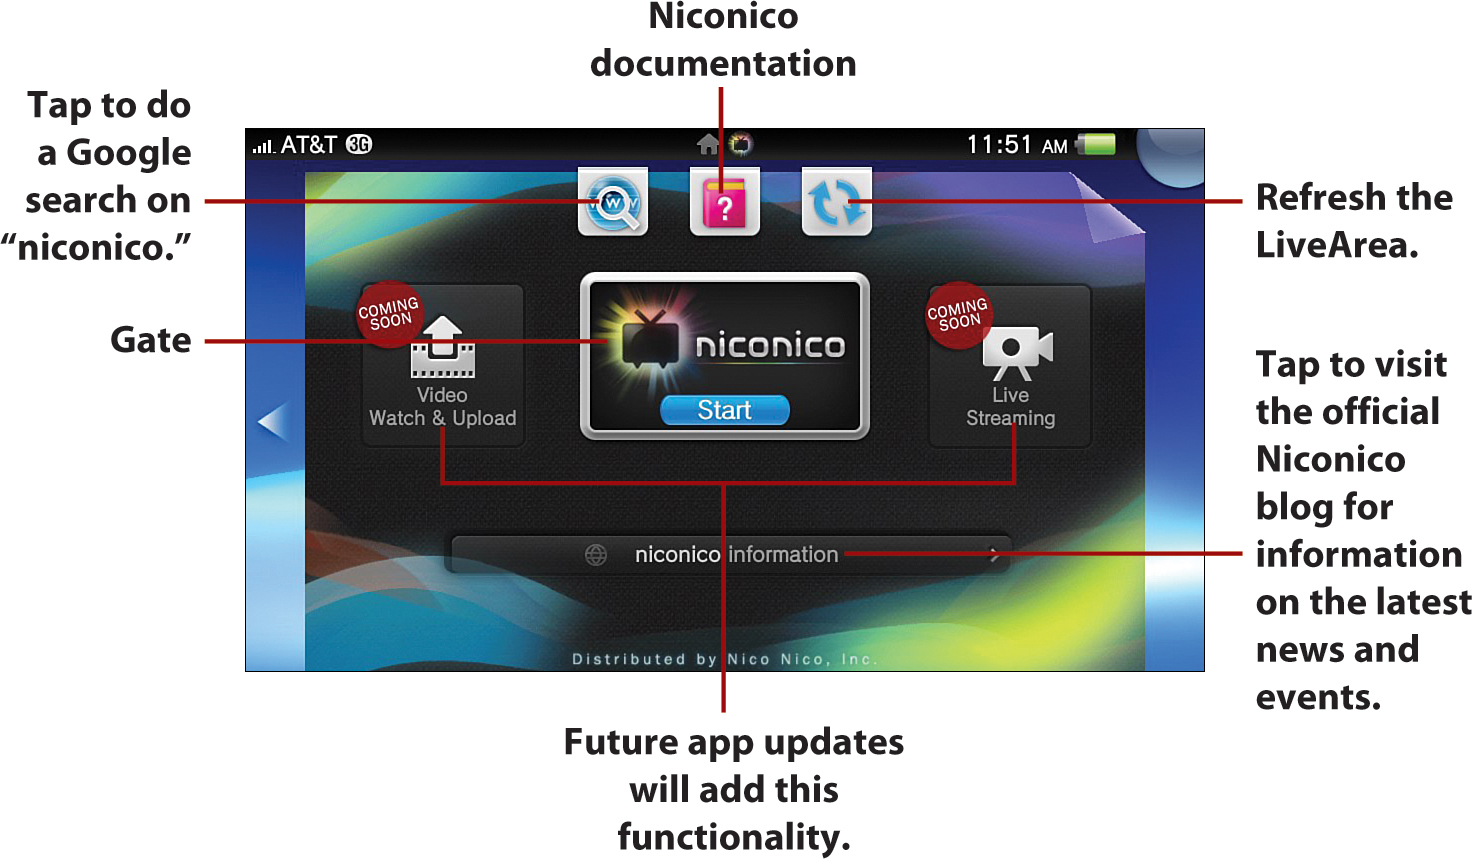
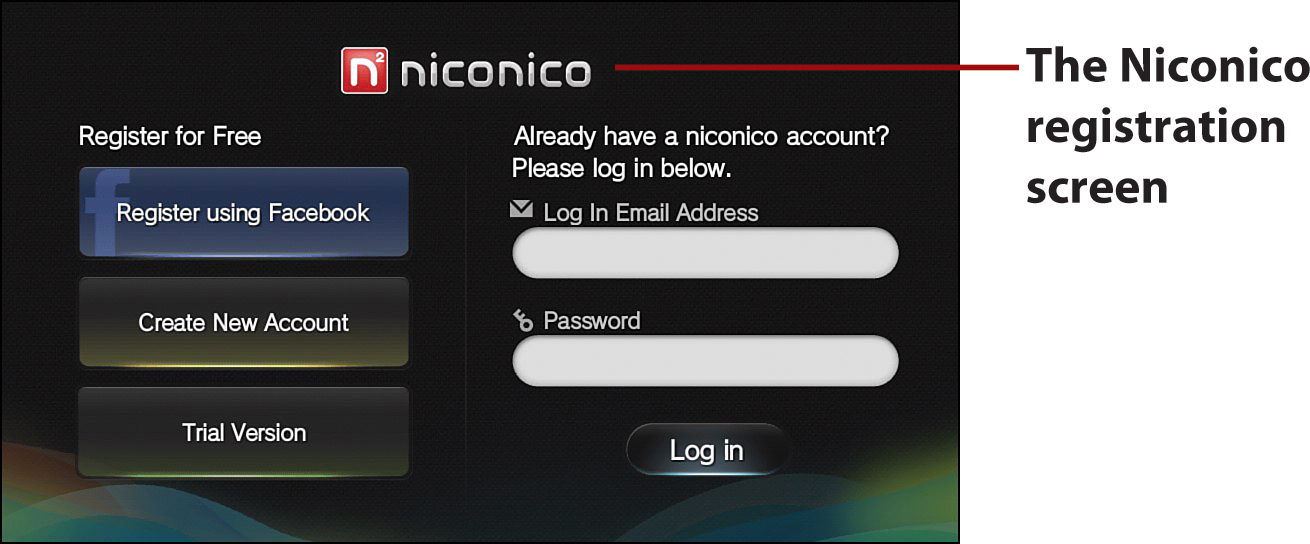
Tap the Gate in the center of the LiveArea to go straight to the app’s registration screen, where you can register for free with an existing Facebook account, a new account not tied to Facebook, or through a trial version. If you plan on using the application in the future, it is recommended that you utilize one of the first two options so you can take better advantage of the commenting and other social features that make the service what it is.
After you’re signed in, you’ll be presented with the same Niconico documentation available from the LiveArea, before being placed at the Niconico Home screen.
Navigating the Niconico App
Inside the Niconico app’s Home screen, you have several options:

• Home—This displays new and recent live broadcasts.
• Mypage—Tap this icon to display your account and profile information, including the option for a Premium Membership, as well as currently scheduled and live broadcasts from the clubs you have joined.
• Settings—Tap this icon to display the app version and turn the menu’s sound effects on or off.
• Categories—Three options are available under categories: Official Broadcast, User Broadcast, and Japan Broadcast. Official Broadcast features live events from major organizations; User Broadcast features member broadcasts; and Japan Broadcast features member broadcasts from Japan, which are further broken into specific subcategories.
Tap an event to start streaming it. When streaming an event, tap to reveal the menu options. Specific to the event, you can post a comment, display, or close the comments overlay, join the live broadcast’s club when applicable so you can easily access it again from the Mypage, and display the broadcast’s information and statistics, including number of visitors, number of comments, show title and description, and search tags.
