
Chapter 10
Using Advanced Camera Features
IN THIS CHAPTER
![]() Using the virtual horizon
Using the virtual horizon
![]() Understanding autofocus
Understanding autofocus
![]() Setting the ISO sensitivity
Setting the ISO sensitivity
![]() Using the camera’s Wi-Fi option
Using the camera’s Wi-Fi option
![]() Using Bluetooth to control the camera
Using Bluetooth to control the camera
Your camera has lots of features that enable you to take great pictures. When you shoot in a mode other than Auto, you can modify lots of things. If the light is a bit dim and you don’t feel like flashing your subject, you can increase the ISO sensitivity. You can also change the autofocus system to suit your taste and the type of photography you do. In short, the sky’s the limit when you employ the advanced features of your camera.
To bring you up to speed on all the advanced features you can use, read the sections in this chapter in which I show you how to harness lots of the cool features. If you don’t find what you need in this chapter, I cover more cool stuff in Chapter 11.
Leveling Your Images with the Viewfinder Virtual Horizon
The virtual horizon enables you to take pictures with your camera level and plumb. This ensures that the camera isn’t tilted right, left, up, or down. The end result is images that look correct and not like a drunken sailor photographed them. The virtual horizon is available whenever you need it when shooting live view (see Chapter 7).
Enabling the virtual horizon in the viewfinder
The virtual horizon isn’t available in the viewfinder by default, but you can display it there. Some photographers prefer doing their composing and shooting through the viewfinder, especially if they’re old school like your friendly author.
If you want the virtual horizon in your viewfinder, you have to change the function of a programmable button. Here’s how to do it:
-
Decide which customizable button you rarely use.
You can assign the virtual horizon to the following buttons:
- Pv: The default use of this button is to stop down the camera to the chosen f-stop to display depth of field.
- Fn: The default use of this button is to choose the image area.
-
Press the MENU button.
The camera menus appear on the tilting monitor.
-
Press the down arrow on the multi selector to highlight the Custom Settings menu, and then press the left arrow on the multi selector.
The Custom Settings menu icon is highlighted.
-
Press the right arrow on the multi selector to place the cursor inside the menu, press the down arrow on the multi selector to highlight f3: Custom Controls, and press the right arrow on the multi selector.
An illustration of the camera appears on the tilting monitor (see Figure 10-1).
- Use the multi selector to highlight the button to which you want to assign the virtual horizon.

FIGURE 10-1: Assigning the virtual horizon to a button.
-
Press the right arrow on the multi selector.
The options for the button appear.
- Press the down arrow on the multi selector to highlight Virtual Horizon (see Figure 10-2) and then press OK.
-
Press the shutter-release button halfway to return to shooting mode.
When you press the Fn button, the virtual horizon appears in the viewfinder (see Figure 10-3).

FIGURE 10-2: Assigning the virtual horizon to a button.
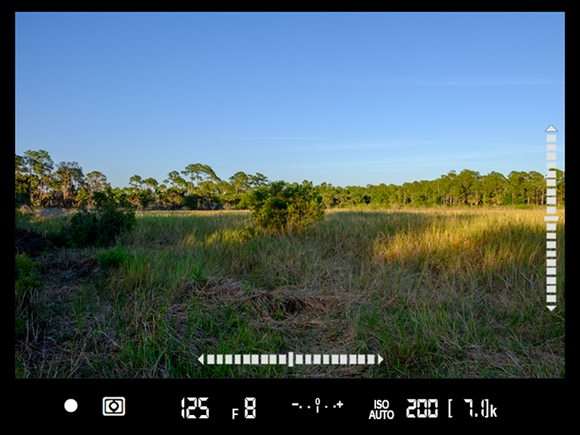
FIGURE 10-3: The virtual horizon in the viewfinder.
When you assign the virtual horizon to the viewfinder, pitch and roll indicators appear. The roll indicator is the horizontal line with hash marks in the bottom of the viewfinder. The pitch indicator is the vertical line with hash marks on the right side of the viewfinder. Notice there is a slightly longer hash mark on each indicator. The camera is level when the longer marks align with the center of each indicator.
 If you decide not to display the virtual horizon in the viewfinder, open the camera menus, and from the setup menu, choose Virtual Horizon. This displays the virtual horizon on a black background on the tilting monitor. You can then adjust the camera until the virtual horizon shows that the camera is level and take a picture.
Using the virtual horizon when shooting in live view
If you shoot in live view and you want to make sure your images are on the level, you can do so with the virtual horizon. Follow these steps:
-
Mount your camera on a tripod.
You can also use the electronic level when handholding the camera. However, it’s more difficult to get accurate results, and you can’t hold the camera as steady because it’s away from your body.
-
Press the Info button until the virtual horizon appears in the center of the tilting monitor.
The image on the left in Figure 10-4 illustrates what the level looks like when the camera isn’t level.
-
Adjust the legs and head of your tripod until a solid yellow line appears in the center of the virtual horizon.
This tells you the camera is level (see the right image shown in Figure 10-4).
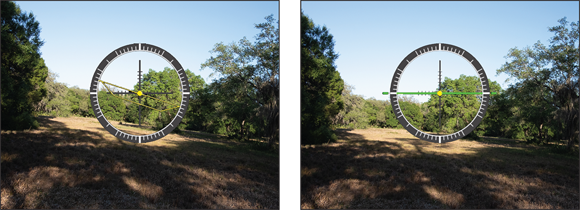
FIGURE 10-4: Aligning your camera with the virtual horizon.
Using the Fn Button
The default use of the Fn button is to choose the image area. Press the button and rotate the main command dial to choose one of the image areas discussed in Chapter 4.
The Fn button is customizable. If you don’t use the image area option frequently, you can assign a different setting to the button. As shown earlier, you can use the button to display the virtual horizon in the viewfinder. The button is conveniently placed so that you can assign a setting you use frequently to the button. For example, if you frequently use Active D-Lighting, you can assign that function to the Fn button. (I show you how to customize camera controls in Chapter 14.)
Tailoring Autofocus to Your Shooting Style
Your camera has a truly advanced autofocus system that is highly customizable. You can choose the autofocus mode, choose how autofocus points are displayed in the viewfinder, choose the type of autofocus, and much more. In the following sections, I show you how to tailor the camera’s autofocus system to shoot the types of subjects you photograph and your shooting style.
Choosing an autofocus mode
Your camera focuses automatically on objects that intersect autofocus points. You have three autofocus modes on your camera. One is ideally suited for still objects and another is ideally suited for objects that are moving. You have yet a third autofocus mode that’s a chameleon: You use it for still objects that may move.
To choose an autofocus mode, follow these steps:
- Press and hold the AF-mode button (see Figure 10-5).
- Rotate the main command dial and choose one of the following options:
- AF-A (autofocus auto): This option works well for a variety of subjects. The camera uses AF-S (single AF) when photographing stationary objects, but switches to AF-C (continuous AF) when the camera detects a moving subject. This option is only available for still photography.
- AF-S (single AF): This option works best when you’re photographing stationary subjects. Focus locks when the shutter-release button is pressed halfway.
- AF-C (continuous AF): This option works best when you photograph subjects like kids playing, athletes, and moving vehicles. The camera continuously focuses as the subject moves through the frame, toward the camera or away from the camera.
- AF-F (full-time AF): This option is only available when recording movies. The camera adjusts focus continuously as a subject moves, or you move the camera to change composition. When using this mode, press the shutter-release button halfway to focus on your subject, and then press the shutter-release button fully to begin recording your movie. As your subject moves, or you move the camera, focus is automatically updated.
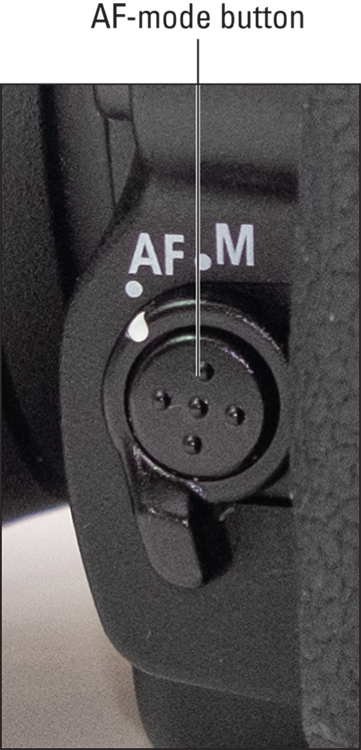
FIGURE 10-5: The AF-mode button.
If your camera can’t automatically achieve focus, you’ll have to manually focus the camera, a task I show you in Chapter 4.
Choosing an AF-area mode
You can choose the autofocus area the camera uses to achieve focus. The mode you choose depends on your subject matter and whether your subject is moving.
To choose an AF-area mode, follow these steps:
- Press and hold the AF-mode button (refer to Figure 10-5).
-
Rotate the sub-command dial, and choose the desired option.
As you rotate the sub-command dial, keep your eye on the control panel to see each option appear. Stop rotating the dial when you see the desired option.
You can choose from the following AF-area modes:
-
Single-point AF: Use this option when photographing stationary subjects. Move the AF point over your subject, and then press the shutter-release button halfway to achieve focus.
 If the AF point doesn’t move, make sure the focus selector lock is not in the L position.
 -
Dynamic-area AF: You have three options with dynamic-area AF — 9 points, 21 points, or 51 points. The different options appear as you rotate the sub-command dial. Dynamic-area AF 9 points is a useful option when photographing a subject with predictable movement, such as a runner on a track. Dynamic-area AF 21 points is used when you’re photographing subjects that move unpredictably, such as soccer players. Dynamic-area AF 51 points is the option to choose when photographing subject matter such as birds that move quickly and can’t be framed. With this option, you use the multi selector to place the autofocus group over your subject. The camera uses the middle point to track the subject, and switches to an adjacent point if the camera can’t hold focus on the middle point.
When shooting with dynamic-area AF, start with the fewest number of points, and increase to the next option only if the camera has difficulty tracking your subject as it moves. -
3D-tracking: Use this option when you use the AF-A or AF-C modes. With this option, the camera uses 51 autofocus points. The camera locks focus on the subject, and then when the subject moves, it uses adjacent points to refocus. This option works well when photographing tennis players or other subjects that move unpredictably from side to side. With this option, you place the AF point over the subject. As your subject moves across the frame, the camera uses adjacent autofocus points to track your subject.
With the 3D-tracking mode, your camera relies on color differences to track your subject. This is not the ideal AF-area mode to use when photographing subjects that are similar in color to the background (for example, a deer in a field of dry grass). - Group-area AF: Use this option when photographing subjects that are difficult to photograph using the AF-S mode. In this mode, the camera takes a group of autofocus points and treats them as a single autofocus point. Group-area AF differs from dynamic-area AF in the fact that the camera gives equal priority to all points in the group, whereas dynamic-area AF gives priority to the center autofocus point. With this option, face detection is enabled and the camera gives priority to any faces it detects. This option is also useful when photographing subjects that are dimly lit, subjects that don’t contrast well with the background, or subjects that are difficult to track with other AF-area modes.
-
After choosing an AF-area mode, take several shots of your subject, and then examine the images closely to make sure your subject is in focus. If you program the OK button to zoom to 1:1 when reviewing images (see Chapter 4), you can quickly see if the focal point is in sharp focus. If it isn’t, choose another AF-area mode.
The AF-area modes for live view photography are slightly different (see Chapter 7).
Using the AF-ON button for back-button focus
By default, the camera achieves focus when you press the shutter-release button halfway. But photographers who photograph sporting events and wildlife use what is known as back-button focus. This has two advantages:
- You can use it to continuously track a moving object.
- You can press and release the button to lock focus on your subject.
Some photographers, including me, think you get sharper images when using the AF-ON button for focus. By default, you press the shutter-release button halfway to achieve focus, and can also use the AF-ON button to achieve focus. When you program the AF-ON button to achieve focus, the shutter-release button can no longer be used to achieve focus.
Use this option when shooting with a single autofocus point. The beauty of using the AF-ON button for back focus is that as long as you have your finger on the AF-ON button, the camera continues to focus. If your subject stops, you can move the autofocus point over the area you want to be in sharp focus (for example, your dog’s eye), and then press the AF-ON button to lock focus. You can also use this to lock focus on a subject, and then move the camera to compose the image.
To enable back-button focus, follow these steps:
-
Press the MENU button.
The menus appear on your tilting monitor.
-
Press the down arrow on the multi selector to navigate to the Custom Settings menu and then press the left arrow on the multi selector.
The Custom Settings menu icon is highlighted.
-
Press the right arrow on the multi selector.
The cursor is in the Custom Settings menu.
-
Press the down arrow on the multi selector to navigate to the f3: Custom Controls option, and then press the right arrow on the multi selector.
A graphic illustration of the camera appears on your tilting monitor.
- Use the multi selector to navigate to the AF-ON button (see Figure 10-6).
-
Press the right arrow on the multi selector.
The AF-ON options are displayed on your tilting monitor (see Figure 10-7).

FIGURE 10-6: Programming the AF-ON button for back-button focus.

FIGURE 10-7: Choose AF-ON for back-button focus.
-
Press the down arrow on the multi selector to highlight AF-ON and press OK.
Your AF-ON button is now programmed for back-button focus.
Shooting with a single autofocus point
If you prefer shooting through the viewfinder, and you enable back-button focus as outlined in the preceding section, your next step is to choose single-point AF (see the “Choosing an AF-area mode” section, earlier in this chapter) for your autofocus area mode. When combined with back-button focus, shooting with a single autofocus point enables you to create wonderful images of stationary objects and moving objects.
This enables you to shoot stationary objects such as buildings, statues, and other landmarks. Simply place the autofocus point over the focal point in the scene, press and release the AF-ON button, and recompose your image. Focus is locked where you placed the autofocus point. Now all you need to do is press the shutter-release button to capture the image.
If you’re creating a portrait, place the autofocus point over your subject’s eye that’s closest to the camera (see Figure 10-8), press the AF-ON button, release it, recompose your image, and press the shutter-release button. Wunderbar, you have a beautiful portrait, unless of course your subject was blinking. One of these days, they’ll invent a blink detector for cameras that prevents the shutter from releasing when your subject is blinking.
Shooting with a single autofocus point and back-button focusing is also an ideal way to photograph moving subjects. Simply place the autofocus point over your subject, and press and hold the AF-ON button while tracking your subject. Press the shutter-release button when the action is peak, or as Henri Cartier-Bresson called it, at “the decisive moment,” and you have a compelling action shot.
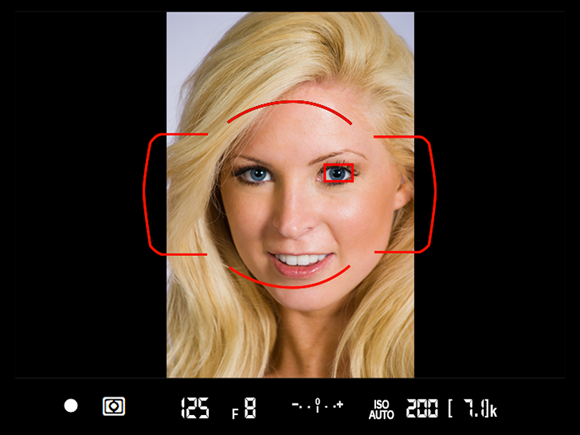
FIGURE 10-8: Create a portrait using a single autofocus point and back-button focusing.
If your subject is a race car, and the camera can’t focus on the subject, find a spot on the track, such as an expansion joint, place the autofocus point over the expansion joint, and then press the AF-ON button. Focus is now locked on that point. Wait until the car is close to the expansion joint, and press the shutter-release button. With practice, you’ll be able to anticipate the right time to press the shutter-release button, and the car will be where you focused when the shutter releases (see Figure 10-9).

FIGURE 10-9: Create images of moving objects using a single autofocus point and back-button focusing.
Setting the ISO Sensitivity
The ISO speed determines how sensitive your camera’s sensor is to light. When you specify a high ISO speed, you can capture images in dark conditions and extend the range of a flash unit mounted on the camera’s accessory shoe. However, when you specify a high ISO speed, you also run the risk of adding digital noise to your images.
Here’s how to set the ISO:
-
Press the ISO button (see Figure 10-10).
The button is conveniently placed behind the shutter-release button so you can find it by feel.
-
Rotate the main command dial to specify the ISO setting while viewing the control panel to see the settings as you rotate the dial.
You can choose an ISO setting from 100 to 51,200 or use the extended ISO range (see “Extending the ISO range,” later in this chapter, for more details). Figure 10-11 shows the control panel after setting the ISO to 200. Note that auto ISO is also enabled. I discuss auto ISO in the next section.

FIGURE 10-10: Press this button to set the ISO.

FIGURE 10-11: Manually setting the ISO sensitivity.
Enabling auto ISO sensitivity control
Let’s face it, when you photograph a person, place, or thing that you love, the less you have to fiddle with the camera, the better. I mean after all, you can miss a shot when you’re pressing buttons and turning dials. You’ll be happy to know that your Nikon D780 was designed by some knowledgeable photo folks who have a menu command that will override your manual setting if the exposure settings you choose can’t be achieved. Yup, you guessed it, auto ISO sensitivity control. Your camera has auto ISO by default, but if you’ve changed that option, here’s how to enable it:
- Press the ISO button (refer to Figure 10-10).
-
Rotate the sub-command dial until you see ISO AUTO on the control panel.
Your camera is now locked and loaded to automatically choose the proper ISO sensitivity for the available light.
You can select the minimum shutter speed before auto ISO sensitivity overrides the ISO you choose from the camera menu. To do this, follow these steps:
- Go to the ISO sensitivity settings section of the Photo Shooting menu.
- Choose Auto ISO Sensitivity Control.
- Choose Minimum Shutter Speed.
-
Choose the lowest allowable shutter speed before the camera bumps the ISO to prevent camera blur.
When you choose the shutter speed, consider the longest lens you shoot with and the slowest shutter speed you can shoot at with this lens and still get a sharp image. For example, if you purchased your D780 with the kit 24–120mm lens, do not choose a shutter speed less than 1/125 of a second when you zoom to 120mm.
You can use the ISO button to manually set the ISO sensitivity as outlined in the previous section. If you also enable auto ISO, the camera will automatically increase the ISO setting if the desired exposure can’t be achieved using the ISO setting you manually choose.
Extending the ISO range
Your camera can capture images in some very dismal lighting conditions. The maximum ISO sensitivity available is 51,200. But you can extend the range, which enables you to take pictures in extremely low-light situations.
To extend the ISO range of your camera, follow these steps:
-
Press the MENU button.
The camera menus appear on your tilting monitor.
-
Press the down arrow on the multi selector to highlight the Photo Shooting menu and then press the left arrow on the multi selector.
The Photo Shooting menu icon is highlighted.
- Press the right arrow on the multi selector to place the cursor inside the menu, and then press the right arrow on the multi selector to scroll to ISO Sensitivity Settings (see Figure 10-12).
- Press the right arrow on the multi selector to display the ISO sensitivity settings options, and the press the down arrow on the multi selector to highlight Maximum Sensitivity (see Figure 10-13).
-
Press the right arrow on the multi selector.
The maximum sensitivity options are displayed on your tilting monitor (see Figure 10-14).

FIGURE 10-12: Your first step to extend the ISO range of your camera.

FIGURE 10-13: Choose this option to increase the ISO sensitivity of your camera.
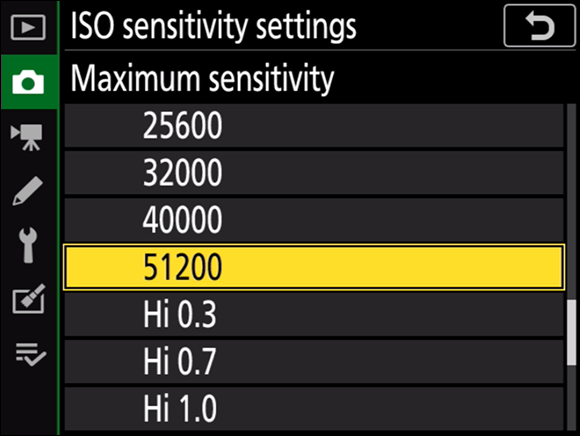
FIGURE 10-14: Choose the maximum ISO sensitivity for your camera.
-
Choose an option.
If desired, you can decrease the maximum ISO sensitivity. Your other options are Hi 0.3 (ISO 64000), Hi .07 (ISO 80000), Hi 1 (ISO 12800), and Hi 2 (25600).
-
Press OK.
The ISO range is now extended to your desired setting.
When you extend the ISO range above 51,200, the camera uses internal software to process the image. You may notice details are not sharp when one of the extended ISO settings is used to compensate for low-light conditions.
Extending the ISO sensitivity enables you to shoot in dim lighting conditions. However, if you frequently shoot in low-light conditions, leave the ISO range at its default and carry a tripod with you. The result will be sharper images.
Enabling high ISO noise reduction
When you shoot in dim lighting conditions and increase the ISO sensitivity to capture images, digital noise occurs. Digital noise is most prevalent in the shadow areas of your image. Some people compare digital noise to film grain, but it’s actually just ugly clumps of noise and not the lovely pattern you see with film grain. You can minimize the noise by enabling high ISO noise reduction. Follow these steps:
-
Press the MENU button.
The camera menus appear on your tilting monitor.
-
Press the down arrow on the multi selector to highlight the Photo Shooting menu, and then press the left arrow on the multi selector.
The Photo Shooting menu icon is highlighted.
- Press the right arrow on the multi selector to place the cursor inside the menu, and then press the down arrow on the multi selector to scroll to High ISO NR (see Figure 10-15).
-
Press the right arrow on the multi selector.
The High ISO NR options are displayed (see Figure 10-16).

FIGURE 10-15: The High ISO NR command.
-
Choose the desired option.
The default option of Normal works well in most instances, but you can increase or decrease high ISO noise reduction. Your other option is to disable it. Choose the latter option only if you have a super-duper noise reduction plug-in with your image-editing program.
-
Press OK.
The new setting takes affect the next time you shoot with a high ISO setting.
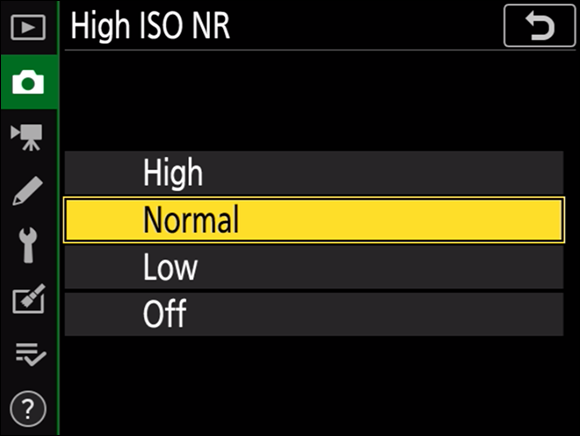
FIGURE 10-16: Choosing a High ISO NR option.
Using Auto Distortion Control
If you shoot with a Nikon type G, D, or E wide-angle lens, you may experience barrel distortion (in which the picture looks like it’s bulging in the middle. If you shoot with a Nikon type G, D, or E telephoto lens, you may notice pincushion distortion (in which the center of the image looks like it’s bowing inward). You can solve both of these problems by enabling auto distortion control. Follow these steps:
-
Press the MENU button.
The camera menus appear on your tilting monitor.
-
Press the down arrow on the multi selector to highlight the Photo Shooting menu, and then press the left arrow on the multi selector.
The Photo Shooting menu icon is highlighted.
- Press the right arrow on the multi selector to place the cursor inside the menu, and then press the down arrow on the multi selector to scroll to Auto Distortion Control (see Figure 10-17).
-
Press the right arrow on the multi selector.
The Auto Distortion Control options are displayed on your tilting monitor (see Figure 10-18).
-
Press the up arrow on the multi selector to highlight On and press OK.
Auto distortion control is now enabled.

FIGURE 10-17: The Auto Distortion Control command.

FIGURE 10-18: Enabling auto distortion control.
Using Wi-Fi
Your D780 has Wi-Fi capabilities. If you have a Wi-Fi network at home or at work, you can connect the camera to the network and upload images directly from your camera to a computer connected to the network. In the following sections, I show you how to enable Wi-Fi and how to upload images. So, if you’re ready to fly wirelessly, read on.
Enabling Wi-Fi
You can connect your camera wirelessly to a Wi-Fi network, just like you can connect your laptop to a Wi-Fi network. Before you begin, you’ll need to know the password for the Wi-Fi network and be somewhat proficient at using the camera keyboard (see Chapter 4).
To connect your camera to a Wi-Fi network, follow these steps:
-
Download and install the Wireless Transmitter Utility.
You can find the Mac and PC versions at
https://downloadcenter.nikonimglib.com/en/products/363/SnapBridge.html. -
Press the MENU button.
The camera menus appear on your tilting monitor.
-
Press the down arrow on the multi selector to highlight the setup menu, and press the left arrow on the multi selector.
The setup menu icon is highlighted.
- Press the right arrow on the multi selector to place the cursor in the menu, and then press the down arrow on the multi selector to scroll to the Connect to PC option (see Figure 10-19).
-
Press the right arrow on the multi selector.
Your option is to create a profile (see Figure 10-20).
-
Press the right arrow on the multi selector.
The connection wizard appears (see Figure 10-21).
-
Choose an option.
For the purpose of this tutorial, I show you how to connect to a network, which enables you to connect to any computer on the network. The following steps are for the Search for Wi-Fi Network option.
-
Press OK.
Networks within range are displayed on the tilting monitor.
-
Press the down arrow on the multi selector to highlight your network and then press OK.
If your network is encrypted, you’re prompted to enter the password.
-
Enter the password on the camera keyboard and press the zoom in/QUAL button.
The connection wizard appears on your tilting monitor (see Figure 10-22). You can obtain the IP address automatically (recommended) or if you’re a card-carrying geek, enter it manually.
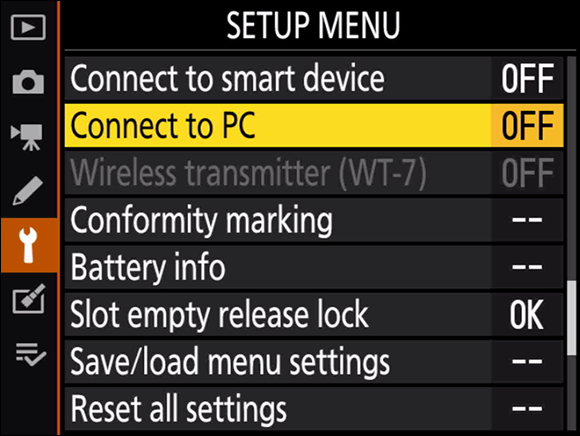
FIGURE 10-19: Your first step to connect to your local network.
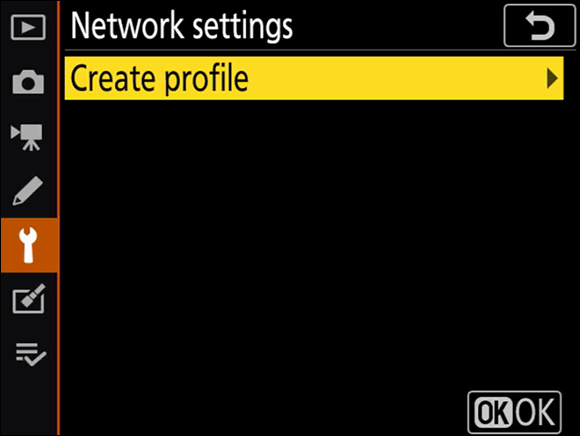
FIGURE 10-20: Creating a profile for the network.
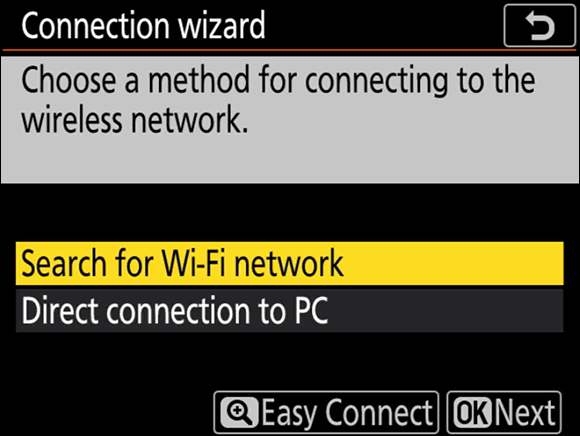
FIGURE 10-21: Searching for a network.
-
Choose the manner in which you obtain the IP address for the network.
In most cases, you can obtain the address automatically. After getting the IP address, it appears on the tilting monitor (see Figure 10-23).
-
Press OK.
The camera name appears in the connection wizard, and you’re prompted to launch the Wireless Transmitter Utility (see Figure 10-24).
-
Launch the Wireless Transmitter Utility.
Figure 10-25 shows the utility on a Mac. When you launch the utility after following the previous steps, the camera name appears in the text box.
-
Click Next.
An authorization code appears on your camera and the Wireless Transmitter Utility refreshes.
- Enter the authorization code into the text box on the Wireless Transmitter Utility.
-
Click Next.
A message appears on the tilting monitor informing you that the pairing is complete. You’re prompted for a folder in which to store images uploaded from the camera.
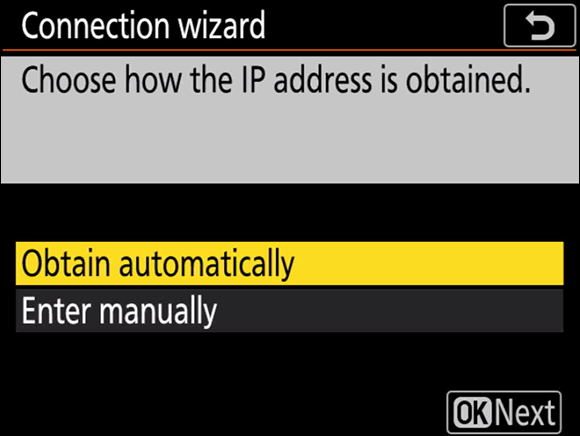
FIGURE 10-22: Obtaining the IP address for the network.

FIGURE 10-23: Getting the IP address.
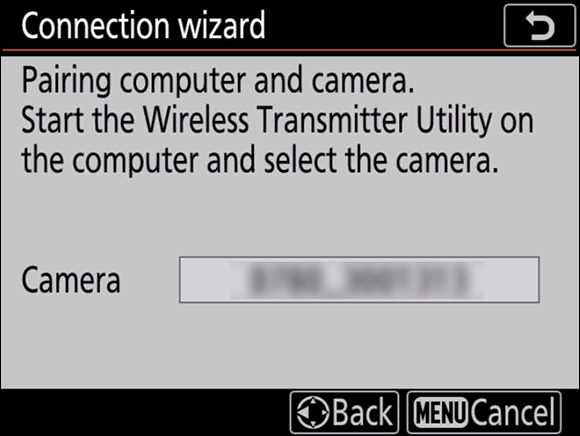
FIGURE 10-24: Time to launch the Wireless Transmitter Utility.
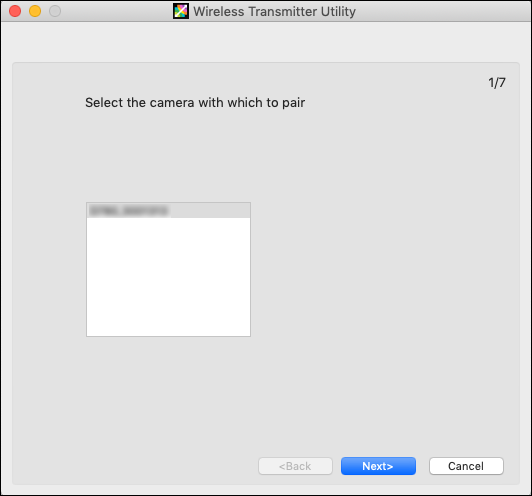
FIGURE 10-25: Connecting the camera to the network.
-
Choose the folder, and then click Next.
A wireless connection is created between the camera and the network.
-
Check the connection on the camera.
When the connection is successful, the network information is displayed on the camera (see Figure 10-26).
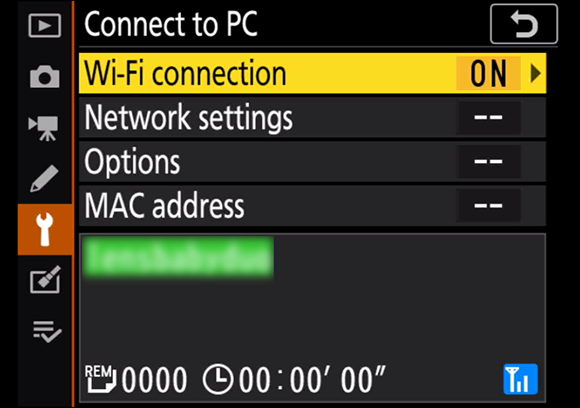
FIGURE 10-26: Success!
Uploading images via Wi-Fi
After you create a connection to the network, you can upload images from your camera to the folder you specified when you created the connection. You can upload individual images or automatically upload all images. To upload images, follow these steps:
-
Connect to the network.
If you powered the camera off after connecting to the network, you may have to reconnect. To do so, open the menu, go to the setup menu, and then choose Connect to PC ⇒ Wi-Fi Connection ⇒ On.
-
Press the play button.
An image is displayed on the tilting monitor.
- Review the images.
-
When you see an image you want to upload, press the i button.
The playback i menu appears (see Figure 10-27).
-
Highlight Send/Deselect (PC) and press OK.
The image begins to upload to your PC. The transfer icon above the image turns green during upload.
- Repeat Steps 3 through 5 to upload additional images.

FIGURE 10-27: The playback i menu.
You can perform the previous steps when the camera is not connected to the network. Images will be marked for upload with an icon that looks like a lightning bolt. After making your initial selection, review the images again. If you find images that you don’t want to upload, open the i menu again and choose Send/Deselect (PC) to remove the upload tag from the image. After reviewing all images, connect the camera to the network to upload the tagged images.
You can also upload all images automatically whenever the camera is connected to the network. To upload images automatically, open the camera setup menu, select the Connect to PC command, choose On ⇒ Options ⇒ Auto Send. Photos will now be uploaded to the specified folder. The only exceptions are movies and images captured while recording movies. These must be uploaded using the i menu as outlined earlier.
Using airplane mode
You can disable any Wi-Fi or Bluetooth connection to your camera. This option is useful if the connection is poor or you want to conserve the battery. To disable connections to your camera, follow these steps:
-
Press the MENU button.
The menus appear on the tilting monitor.
-
Press the down arrow on the multi selector to highlight the setup menu, and then press the left arrow on the multi selector.
The setup menu icon is highlighted.
- Press the right arrow on the multi selector to place the cursor inside the setup menu, and the press the down arrow on the multi selector to highlight airplane mode (see Figure 10-28).
-
Press the right arrow on the multi selector.
The airplane mode options are displayed (see Figure 10-29).
-
Press the up arrow on the multi selector to highlight Enable, and press OK.
Airplane mode is now enabled.
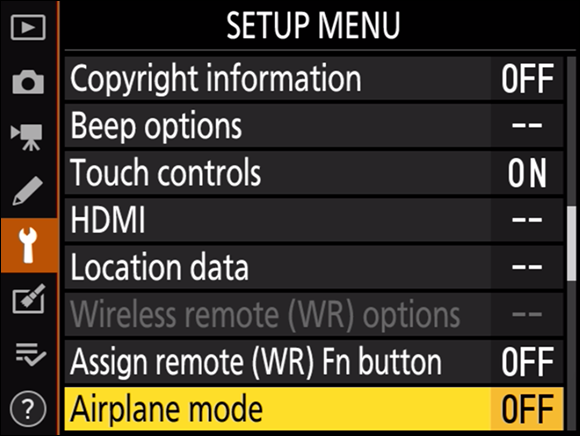
FIGURE 10-28: The Airplane Mode command.

FIGURE 10-29: Select On to enable airplane mode.
Using Bluetooth
Your camera also has Bluetooth capabilities. An interesting little tidbit is that Bluetooth was named after King Harald Bluetooth, who is credited with uniting Norway and Denmark. Bluetooth unites devices. Make good sense, methinks. But I digress.
With Bluetooth, you can connect your camera to a remote device, such as a smartphone or a tablet. After you pair the camera, you can upload images to the connected device and use the device to control the camera. Slicker than freshly spilled olive oil on waxed linoleum.
In the following sections, I show you how to pair your camera with a device, and then use the device to control the camera.
Pairing with a remote device
Nikon makes a spiffy app called SnapBridge that is used to bridge the gap between your camera and device. The app is available for Apple iOS and Android devices. To pair your camera with a remote device, follow these steps:
-
Download the SnapBridge app and install it on your device.
You download the iOS version of SnapBridge from the Apple App Store and the Android version from Google Play. Both apps are free. The following steps are for the iOS version. The Android version is similar.
-
Press the MENU button.
The menus are displayed on the tilting monitor.
-
Press the down arrow on the multi selector to highlight the setup menu, and then press the left arrow on the multi selector.
The setup menu icon is highlighted.
- Press the right arrow on the multi selector to place the cursor inside the menu, and then press the down arrow on the multi selector to highlight Connect to Smart Device (see Figure 10-30).
-
Press the right arrow on the multi selector.
The Connect to Smart Device options appear on your tilting monitor (see Figure 10-31).
-
If Pairing (Bluetooth) is not selected, select it and then press the right arrow on the multi selector.
If you’re currently connected to the network, a dialog appears warning you that the connection to the PC will be lost if you continue. If this dialog appears, highlight Yes and press the right arrow on the multi selector.
The Start Pairing option appears on your tilting monitor (see Figure 10-32).

FIGURE 10-30: The Connect to Smart Device command.

FIGURE 10-31: Pairing to Bluetooth.
-
Press OK.
The dialog refreshes and displays your camera name (see Figure 10-33).
- Open the SnapBridge app on your smart device (your phone or tablet).
-
Accept the Application License Agreement and click Start.
A Welcome dialog appears with a Connect to Camera button.
-
Tap Connect to Camera.
The screen refreshes and a dialog appears with a picture of the back of the camera and instructions.
-
Click Understood.
The name of the camera appears on the SnapBridge app (see Figure 10-34). A pairing number appears on the phone or table and on your camera.
The pairing number may not appear immediately after you click Understood. If so, be patient and wait for the number to appear. - If the numbers are the same, press OK on the camera.
-
Tap Pair on the app to pair the camera with the smart device.
Your options may vary depending on whether you connected to a PC or to a network. The prompts are pretty much self-explanatory. After you pair the device with the camera, you’re ready to start using SnapBridge (see Figure 10-35).
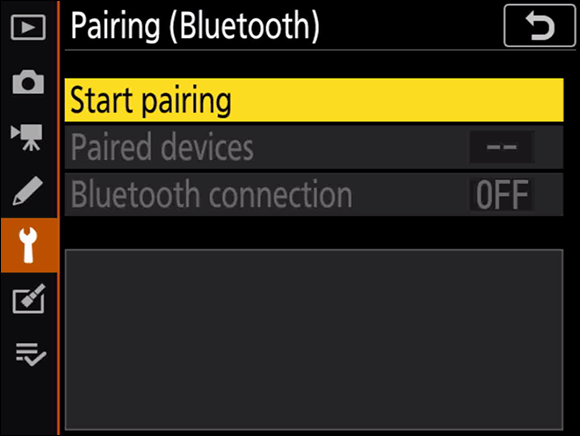
FIGURE 10-32: The pairing is afoot, Watson.

FIGURE 10-33: This will be a peach of a pairing.
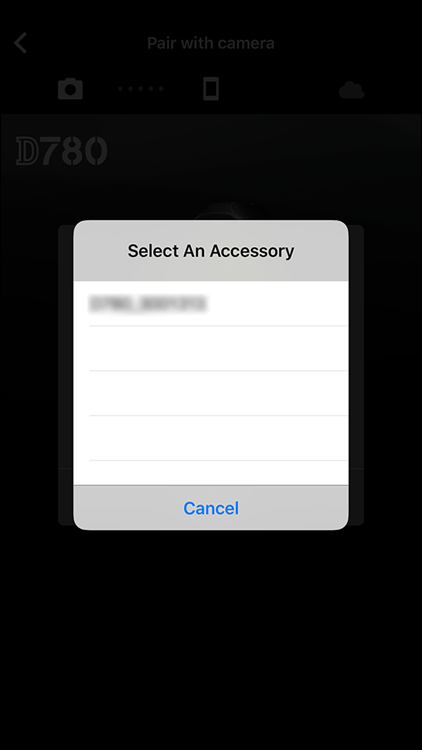
FIGURE 10-34: Pairing your smart device with your camera.
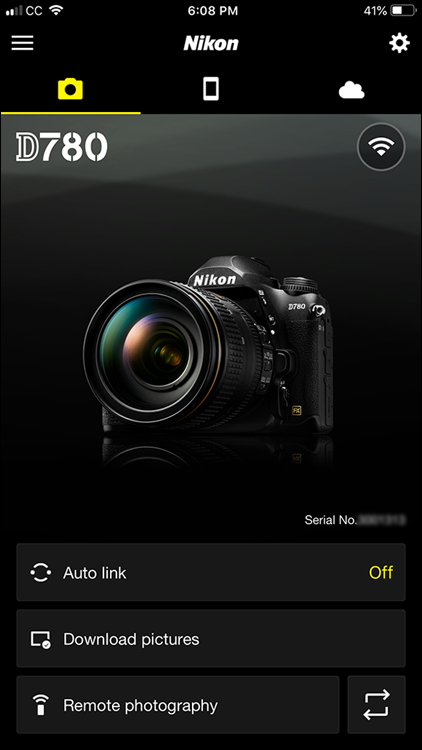
FIGURE 10-35: The Nikon SnapBridge app.
Controlling your camera remotely with SnapBridge
After you pair your camera with SnapBridge, you’re ready to rock and roll. With SnapBridge you can control the camera remotely. You can also view images and download them from the camera’s memory card to your device.
Controlling the camera remotely is useful when you’re creating images of products, photographing in a studio setup with the camera on a tripod, or photographing stuff to sell on eBay. Controlling the camera remotely frees you to set up the shot.
To control your camera with SnapBridge, follow these steps:
- Start the smart device and open SnapBridge.
-
Press the MENU button on your Nikon, and from the setup menu, choose Connect to Smart Device ⇒ Pairing (Bluetooth) ⇒ Bluetooth Connection, highlight Enable, and press OK.
The camera is paired with the device.
-
On SnapBridge, tap the Camera tab and then tap Remote Photography.
The smart device’s monitor refreshes, displaying what is captured by the lens (see Figure 10-36).
-
Tap the screen on the smart device to focus the camera.
You can tap anywhere on the screen. Be sure to tap the area you want to be in sharp focus.
-
Press the shutter-release button on the smart device to take the picture.
It’s the big white button below the screen that shows the camera view. After you tap the button, the camera processes the image and writes it to the memory card.
-
Continue taking pictures.
The images you create are saved to the camera memory card.
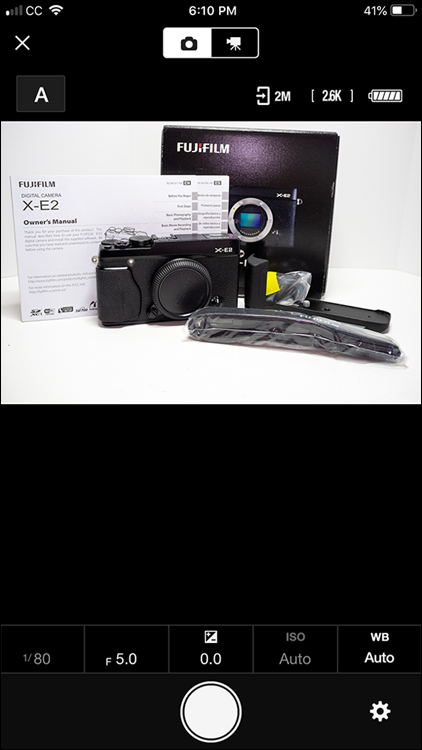
FIGURE 10-36: Remote photography with the SnapBridge app.
To automatically download pictures to your smart device as you create them, tap the Auto Link icon in the photo section of the SnapBridge app. Images downloaded to your phone when you shoot NEF (RAW) will be 2MB JPEG files.
You can also download individual images as long as your camera is connected to SnapBridge. To download one or more pictures currently on the camera’s memory card, tap Download Pictures in the SnapBridge app, and thumbnails of the images on the card are displayed on the smart device. When you see an image you like, tap it to display it full screen, and then tap Download Picture to send it to your device. Images will be 2MB JPEG files if you shoot NEF (RAW). If you shoot JPEG, you have the option to upload images at their original size or 2MB files.
If you shoot JPEG, you have the option to download a file to the device at its original size. I advise against this, especially if you shoot JPEG images with the large size and fine quality specified. These images are huge and will quickly gobble up the available space on your smart device.
This is just the tip of the iceberg when it comes to using SnapBridge. If you’re into remote photography and you’ve got SnapBridge installed on your smart device, visit this web page for more information: https://nikonimglib.com/snbr/onlinehelp/en/.