
Improve Your Security with Passkeys
I’ve written three different books about passwords and password managers, and several others that address passwords in smaller ways. I’ve given many presentations about dealing with passwords, too. And they’ve all boiled down to this: passwords are a pain in the neck, but we’re stuck with them forever, so here are some ways you can make them less painful. I’ve spent more than 15 years rolling my eyes at claims in the media that this or that company’s plan to “kill” the password was finally going to put us out of our collective misery. I’ve insisted for a long time that, lousy as they are, passwords are so deeply baked into the infrastructure of modern digital life that it’s almost unthinkable that we’ll ever get away from them.
Well.
To test this feature, I registered for an account on a new website. I picked a username but was never asked for a password at all. And I don’t mean I used an app like 1Password to create and fill in a password—I mean there literally wasn’t one. All I did was rest my fingertip on my MacBook Air’s Touch ID sensor, and the account was created. I signed out, signed back in, and again, all I had to do was touch a sensor. No typing, no menus, no keyboard shortcuts, and no additional software—just Safari. I’ve tasted the passwordless future, and it is amazing.
This new technology, which Apple refers to as passkeys, is in fact an implementation of an industry standard called WebAuthn, and it’s not just about convenience. Even more importantly, it provides significantly greater security than passwords, with less effort. (I’ll come back to the security benefits in a moment.) Easier and safer: what’s not to like?
Now, I know this sounds exciting—and it is—but let me temper your enthusiasm right up front. WebAuthn in general and Apple’s passkeys in particular have tremendous potential, and I explain both how this all works and how to use it just ahead. But as of mid-2022, support for this technology is in its infancy. If you’re using a Mac running Ventura, an iPhone running iOS 16, or an iPad running iPadOS 16—and if you go to just the right site, using Safari—then yes, you can have this right now. But that’s a lot of qualifications. (Some other devices and operating systems also support this method, but given the topic of this book, I’m confining my comments to the Apple world for now.)
If you’re using Chrome or Firefox or some other browser on your Ventura Mac, you can’t take advantage of this capability (though I hope that one day you will). If you have an older Mac that can’t run Ventura, you probably will never be able to use it there. If you have an app (as opposed to a website) that asks for a password, this method won’t work there yet. And again, to be clear, for any website, implementing this change is a nontrivial undertaking. A lot of coding and testing will have to happen on every single site that eventually supports this standard, and that will take time.
How Passkeys Work
Take Control author Glenn Fleishman wrote a lengthy article for TidBITS: Why Passkeys Will Be Simpler and More Secure Than Passwords. If you want the complete story, with all the technical details, read Glenn’s article. Here, I offer just a quick summary.
As I said earlier, the technology in question is called WebAuthn, while Apple’s particular implementation of it is called passkeys. WebAuthn was first created in 2016, and has been available to the public in various forms for quite some time. But until recently, most people needed a special third-party hardware device to take advantage of WebAuthn. What Apple is doing now is eliminating the need for a separate device and building support right into its operating systems.
WebAuthn relies on public-key cryptography, in which a user has a pair of cryptographic strings (picture them as long, random passwords) called keys. One is private, meaning it stays on the user’s device(s) and is never shared, while the other is public, meaning it can be shared freely with no adverse security implications. (And don’t worry, you don’t have to create these keys manually; your Mac does this for you, automatically and instantly, when needed. You never have to see or directly interact with the keys.) This pair of keys is what Apple refers to as a passkey.
The interesting twist is that if someone encrypts data with the freely available public key, it can be decrypted only by the secret private key. In addition, your private key can be used to “sign” a message you send in such a way that anyone with your matching public key can confirm that you are the one who sent the message. This clever arrangement is what enables different forms of public-key cryptography to be used for secure email (using PGP, GnuPG, and S/MIME), iMessage, secure websites (using HTTPS), and more.
WebAuthn applies the same concept to authentication for websites. When you create an account at a site that uses WebAuthn, you don’t send them a password; instead, your device creates a new key pair associated uniquely with that particular site, and sends the site the public key. That’s the only thing stored on their server, and remember, it’s public. So it doesn’t matter if that key is leaked or stolen, because it was never supposed to be private in the first place! That means your credentials can’t be compromised by someone hacking a website. And a malicious party can’t use a stolen private key from one site to log you in on a different site, either, because each site has a different key pair and your private key for the second site wouldn’t match.
When it comes time to log in, the site sends you some data encrypted with your public key. Your device uses your private key to decrypt it and then returns a signed reply that the server can validate with your public key. If that process succeeds, you’re logged in. If not, not. Simple as that.
The security of this scheme depends on whatever’s on your device remaining private. And we wouldn’t want someone who stole (or borrowed) your device to be able to log in anywhere with no proof that they’re actually you! So, the system has an additional layer. Before your device can use your private key to answer the message from the server, you have to prove to the device that you’re you, which can be done via a fingerprint scan (on a Mac with a Touch ID sensor), or by typing your Mac’s login password, or (on an iOS/iPadOS device with Face ID) by scanning your face. Behind the scenes, your private key is itself encrypted—and it’s unlocked only when you authenticate in whichever way your device supports. So, even if someone stole all the data from your device, they’d be unable to decrypt it (and thus log into passkey-protected sites) without your fingerprint, face, login password, or passcode.
And that makes passkeys safe from phishing, in which someone tricks you into revealing your password, perhaps by typing into a fake website. You don’t actually know what your passkey is—you never see it—and even if you did, it wouldn’t help anyone else because it’s encrypted.
But wait, there’s more!
Because passkeys inherently involve at least two factors—namely, a thing you have (your device) and either a thing you are (a fingerprint or facial scan) or a thing you know (your login password or device passcode), the use of passkeys eliminates the need for those irritating extra two-factor codes that are either generated by apps such as Authy or Google Authenticator, or (much less securely) sent to you via SMS.
Apple automatically syncs your passkeys across your compatible Macs, iPhones, iPads, and Apple Watches, with end-to-end encryption, via iCloud Keychain. So even if you lose one of your devices, you can still log in everywhere. If you lose all your devices, you can use Apple’s recovery key, account recovery contact, or manual account recovery.
Finally, most sites will continue offering old-fashioned passwords as an option, so you can still use passwords with older devices that won’t support passkeys—and those passwords can also be another fallback option if you lose a device.
How to Create and Use a Passkey
Now that you know a bit of the background, you’re probably wondering how you actually go about creating and using passkeys. The truest answer I can give right now is: if and when a website offers you the opportunity to create one, follow whatever prompts it presents. The exact steps will vary from site to site, once more than a small handful of sites start supporting passkeys in the first place.
It’s also worth mentioning that when sites you already have accounts with begin offering passkey support, it could be anywhere from trivially easy to impossible to add that on to an existing username and password; similarly, once you have a passkey, it may be simple, complex, or impossible to add a password as a backup authentication method.
Those disclaimers aside, let’s walk through creating a passkey at a site that was created for the express purpose of demonstrating this feature:
Open Safari and go to https://www.passkeys.io.
Under “Sign in or sign up,” type in your email address and click Continue.
Click “Sign up” when prompted.
Click “Save a passkey.”
Follow the prompt (Figure 35) to authenticate with Touch ID or your Mac’s login password.
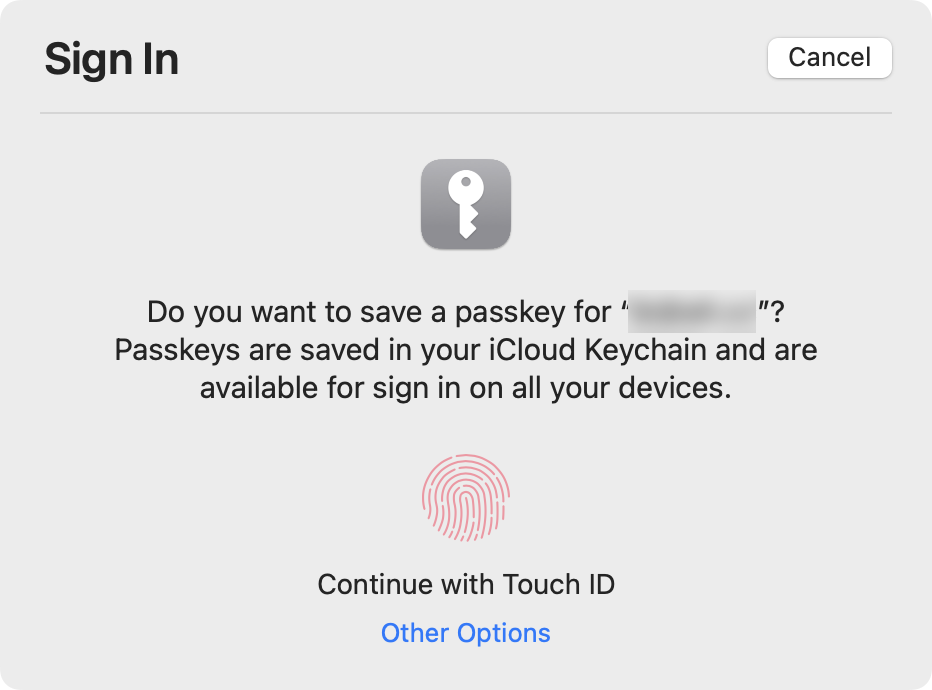
A message then informs you that you’ve successfully created a demo account. That also means you’ve created your passkey!
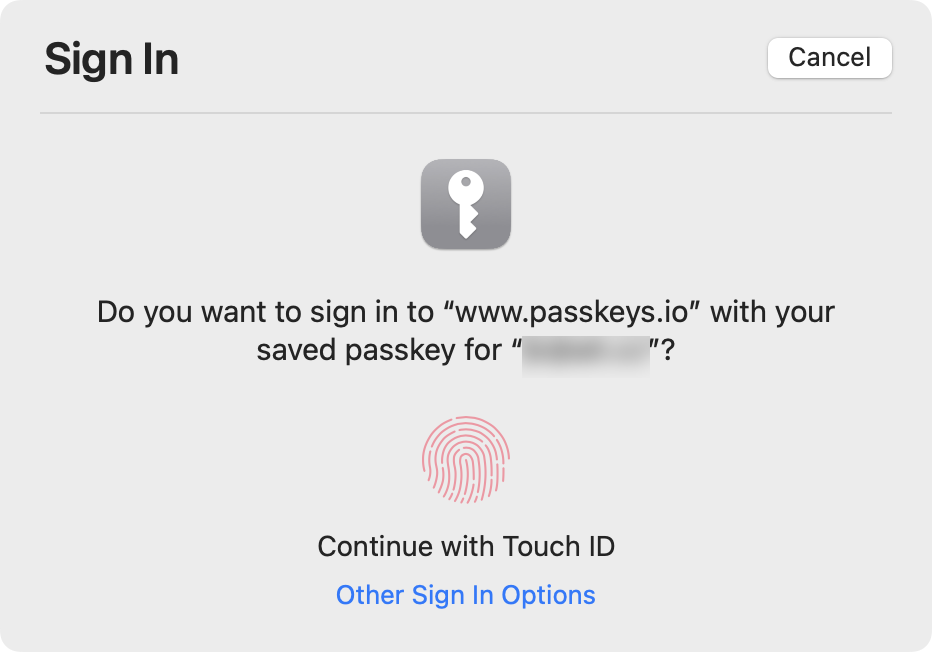
To try logging in from scratch, click “Sign out,” then click “Sign in with a passkey.” A dialog (Figure 36) should prompt you to authenticate again, and as soon as you do so, the site logs you in.
There are three other things you might want to do with passkeys:
Sync them: As I mentioned earlier, passkeys sync across your devices automatically as part of iCloud Keychain. So, as long as you have Keychain turned on in System Settings > Apple ID > iCloud, you’re good to go.
View or edit them: Go to Safari > Settings > Passwords or System Settings > Passwords and enter your login password. Then search for your passkey by site name or URL (Figure 37) You can click Edit to change your username, add a note, add a password, or delete the passkey. However, you can’t view the contents of your private or public key.
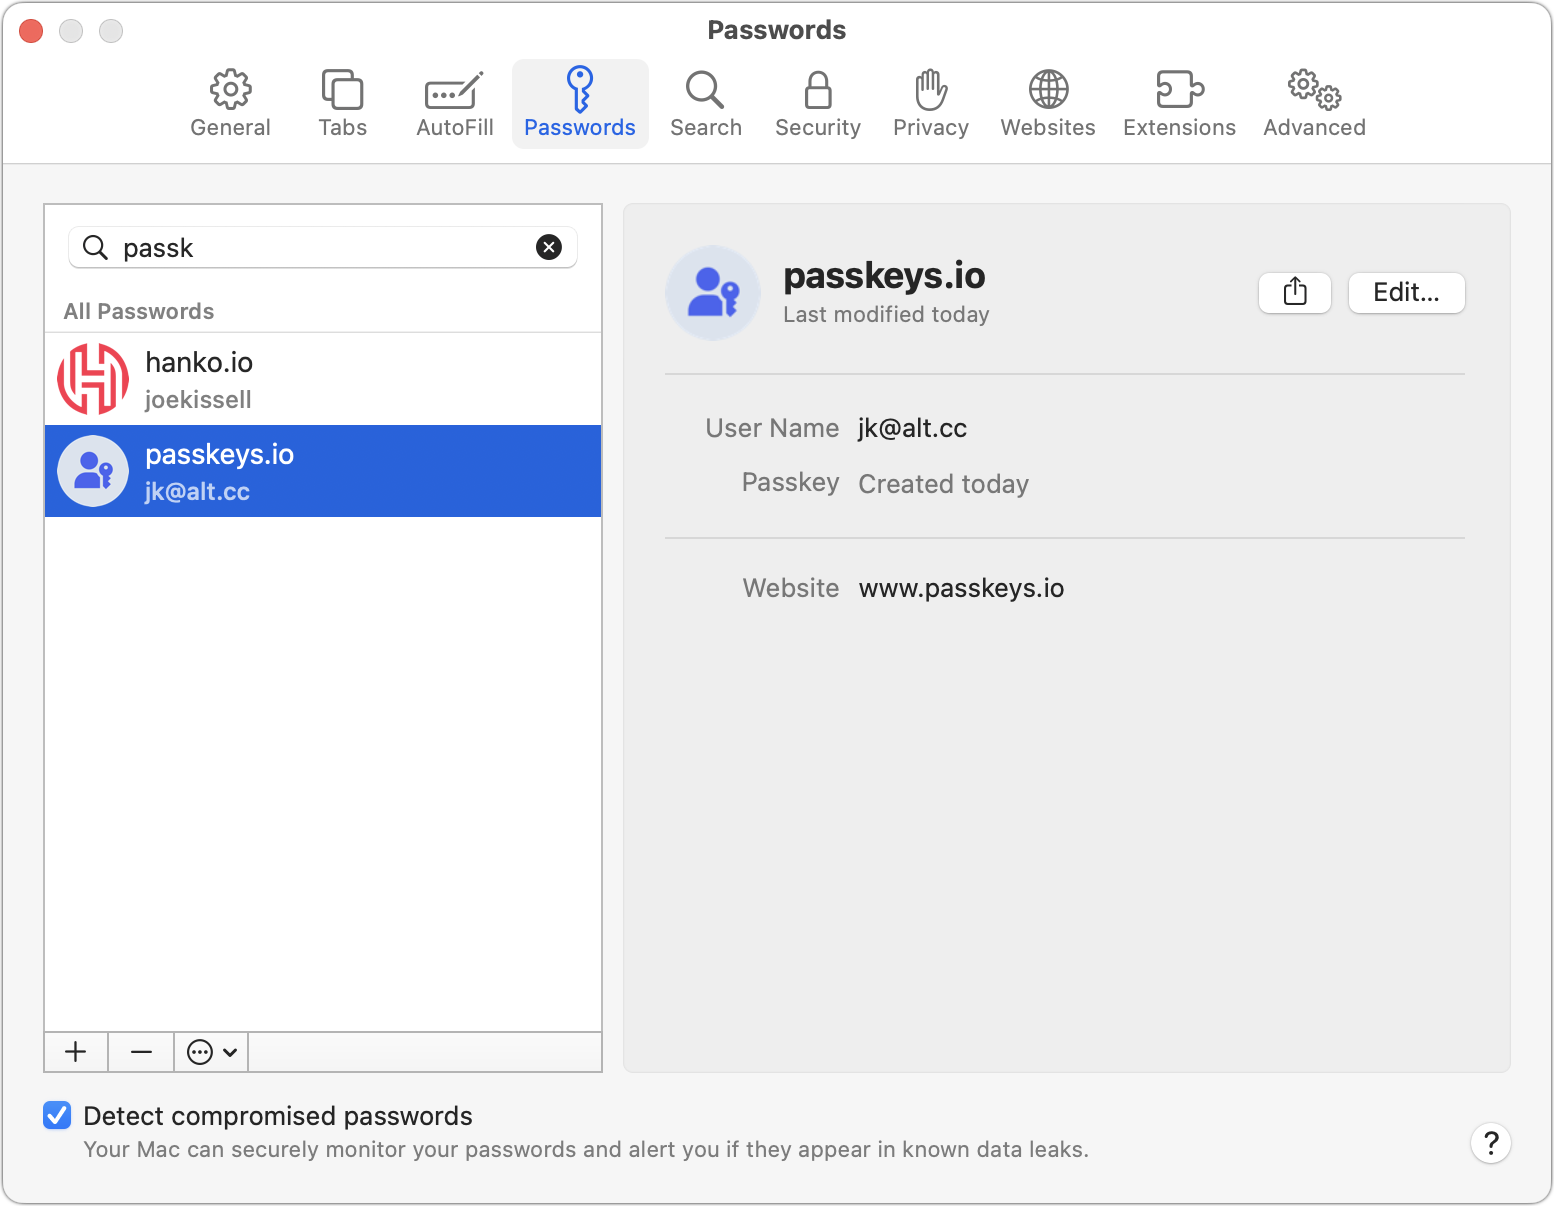
Figure 37: View your passkeys within Safari’s Settings window. Share them: Although you should exercise caution and discretion when sharing passkeys, it’s possible to do so using AirDrop. Select your passkey as in the previous bullet, click the Share
 button, authenticate (with Touch ID or a password), and click an AirDrop recipient. If the recipient accepts the passkey, it’s added to their iCloud Keychain, where they can use it just as you do.