Stream a Meeting
Zoom lets you stream video from an active session to services designed for real-time video, like Facebook Live, Twitch, Vimeo, and YouTube Live. Zoom relies on industry standards, so you can livestream to any service provider that supports widely adopted technologies.
Livestreaming exploded in popularity during the pandemic, as would seem natural when people couldn’t go to in-person events. Zoom is ideally suited for it: it lets you create a solo meeting or one with many other participants; allows a host many controls for managing what’s seen on screen; and lets you share material within a session, whether images, videos, a presentation, or webpages.
Despite these advantages, Zoom hasn’t made it easy to figure out all the moving pieces required to livestream. I’ve sorted it all out for you in this chapter.
Because YouTube Live is free to use and a popular livestreaming service, my general examples in this chapter draw from it. However, I’ll also show you how to set up to use Twitch, a service initially designed around gamers, and other streaming services compatible with Zoom.
Prepare for Livestreaming
Livestreaming requires a similar but distinct set of skills from hosting a regular meeting. You have more elements to prepare and stay on top of during the broadcast.
First, make sure all participants understand that an upcoming meeting will be broadcast live. Talk to them about setting up their video and audio correctly, and explain how to use features to blur or substitute their video background. (See Upgrade Your Video, Upgrade Your Audio, and Let Zoom Drop In a Background.)
Next, gather all the materials you might want to present or have on hand during the livestream. This might include background images, presentations, video clips, and more.
Third, I highly suggest a “pre-game” meeting test a day or more in advance in which you look at and listen to everyone’s setup and offer suggestions if it’s not working as expected. You can run through any material you or other people mean to show via screen sharing or using virtual-camera presentation apps.
If at all possible, grab a second person you set up as a co-host to help out with the meeting. There can be so much to manage that another set of hands acting as a producer will improve the session.
During that meeting or in another test, experiment with switching among video views as you would on the livestream. Livestreaming supports four kinds of views with a couple of twists:
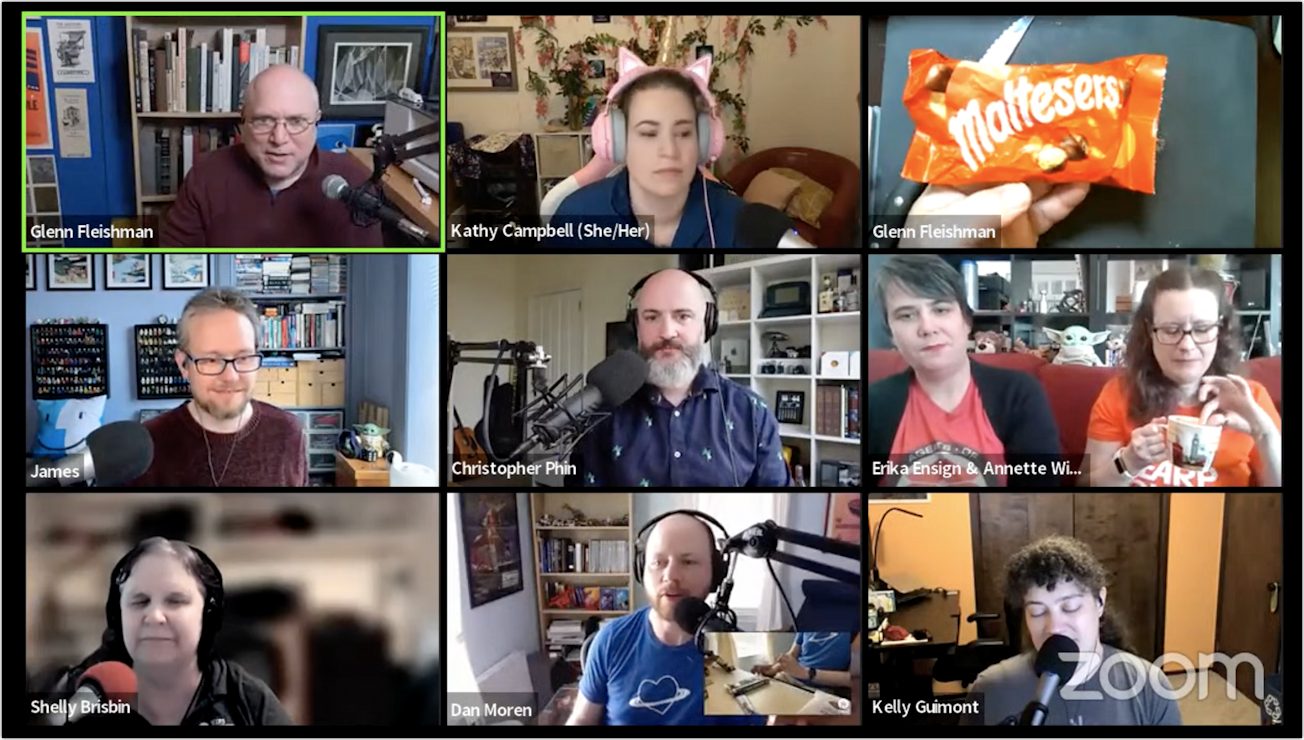
Gallery: Choose the Gallery view and the livestream sees the view as you see it on your computer (Figure 118).
Speaker: When you select Speaker view, the livestream sees only the active speakers; the strip of other participants is absent.
Screen Share: The shared screen occupies the livestream.
Spotlight: Use Spotlight for All and that video panel appears as the entire livestream, just as with Speaker view. (See Use Spotlight to Highlight Speakers.) You can add up to nine panels.
Finally, check the service you plan to use for streaming. Permissions and details change all the time. You may need to accept an agreement, set up a streaming profile, or create an event as a template.
Add Livestreaming to a Meeting
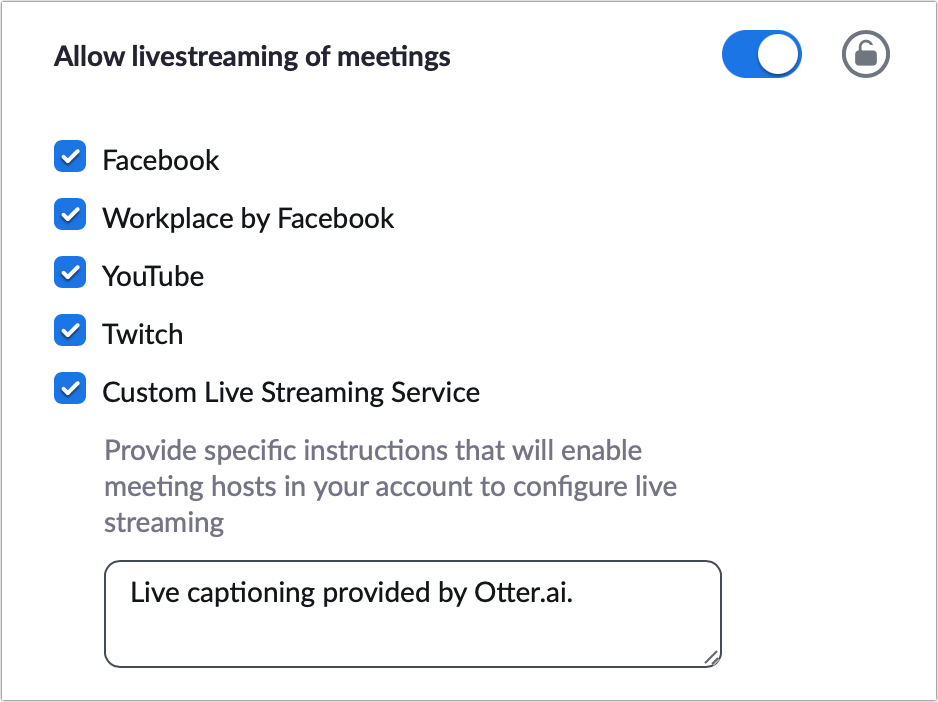
The livestreaming feature has to be enabled and configured in your account at Personal > Settings (Figure 119). If you’re in a company account, you may have to ask the admin to allow it for your user account. Once it’s turned on, you can select which services to allow by default. For a custom service, you can provide information about it that appears for all hosts in an account.
Although you can starting streaming with several services by selecting them within an active meeting, that method—described later—doesn’t let you create an event with a fixed URL on a streaming site. Without a fixed URL, you can’t publicize the event ahead of time for many sites.
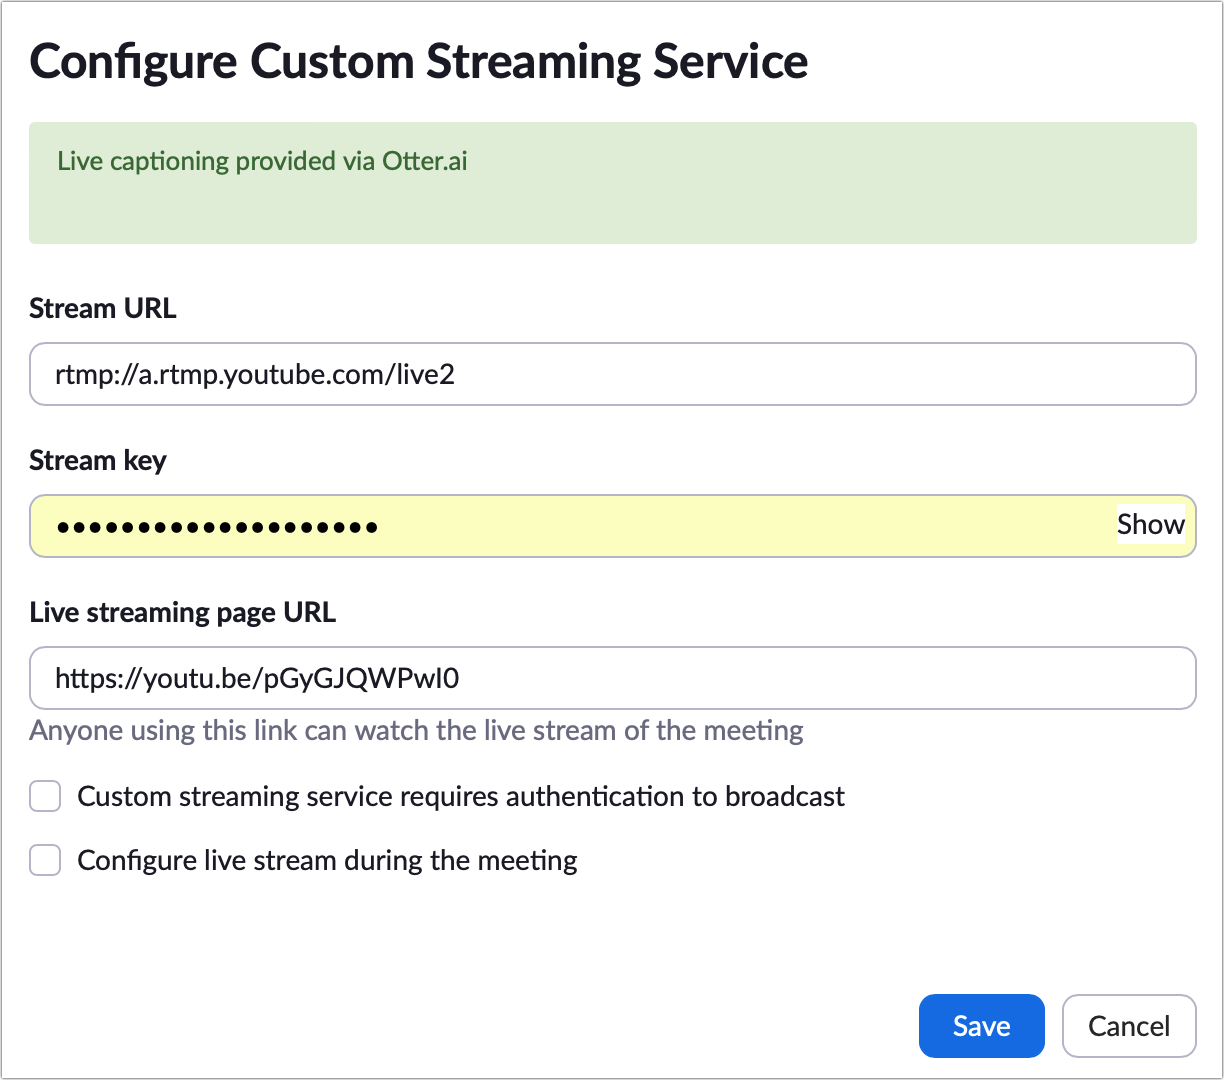
To add livestreaming to a scheduled meeting, after creating a meeting as described in Schedule via the Website, Zoom shows a second screen with a Live Streaming link at the bottom (Figure 120). click Configure Custom Stream Service to reveal the setup (Figure 121).

You can also add a custom configuration while a meeting is active: click the More ![]() icon and then choose Live on Custom Live Streaming Service. This opens a substantially similar webpage that omits just the “Configure live stream during the meeting” checkbox—since that’s what you’re doing.
icon and then choose Live on Custom Live Streaming Service. This opens a substantially similar webpage that omits just the “Configure live stream during the meeting” checkbox—since that’s what you’re doing.
The custom configuration offers three fields and one or two options:
Stream URL and Stream key are required values that let you authenticate to the streaming server. These are absolutely standard items that any compatible service provides.
The “Live streaming page URL” is optional, but it’s vital if you want to invite people in advance to a specific URL that they can bookmark or store as a link. Many services let you create a live event that generates a unique, fixed URL as part of it.
Check “Configure live stream during the meeting” if the service requires a round trip through its website using a browser to let you login separately before you can stream.
If you want to configure the live stream during a meeting, check that box to ensure that you can.
You can find the configuration details needed above via these links for major services: Facebook Live, Vimeo, and YouTube Live (under Schedule a Live Stream).
Start Your Livestream
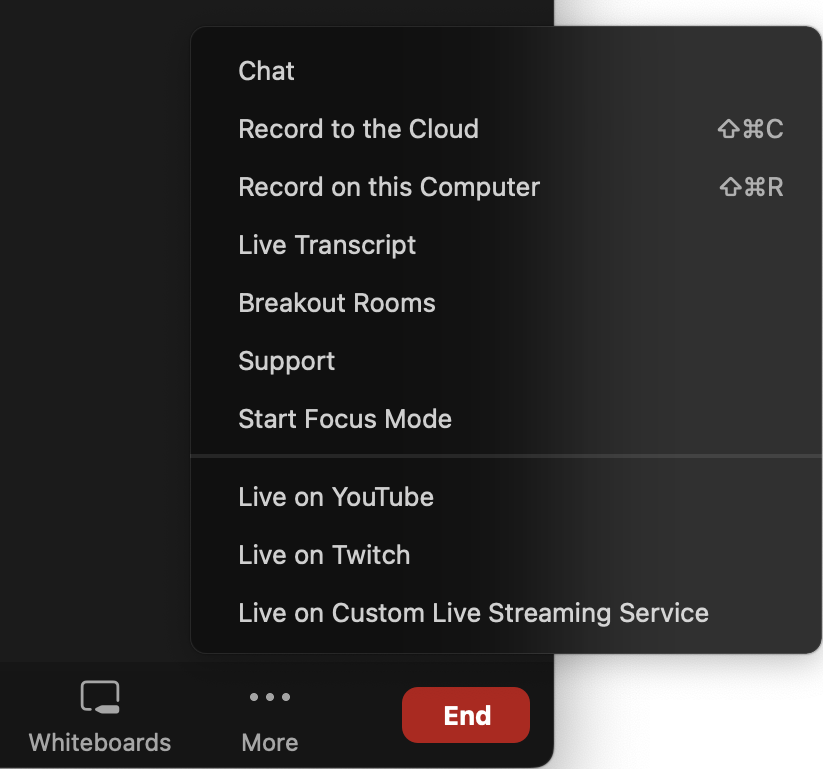
After starting a meeting, the host or a co-host must use a desktop Zoom app to manage livestreaming. You start the session by clicking the More ![]() icon and choosing a direct option, like Live on YouTube or Live on Twitch (options will vary based on your account), or Live on Custom Live Streaming Service (Figure 122).
icon and choosing a direct option, like Live on YouTube or Live on Twitch (options will vary based on your account), or Live on Custom Live Streaming Service (Figure 122).
For direct options or if you’re using a custom service that requires authentication, Zoom opens a link in your default web browser for the authentication page. After logging in or providing other credentials, and making any offered choices (like Public, Private, or Unlisted video for YouTube Live), the browser redirects back to Zoom.
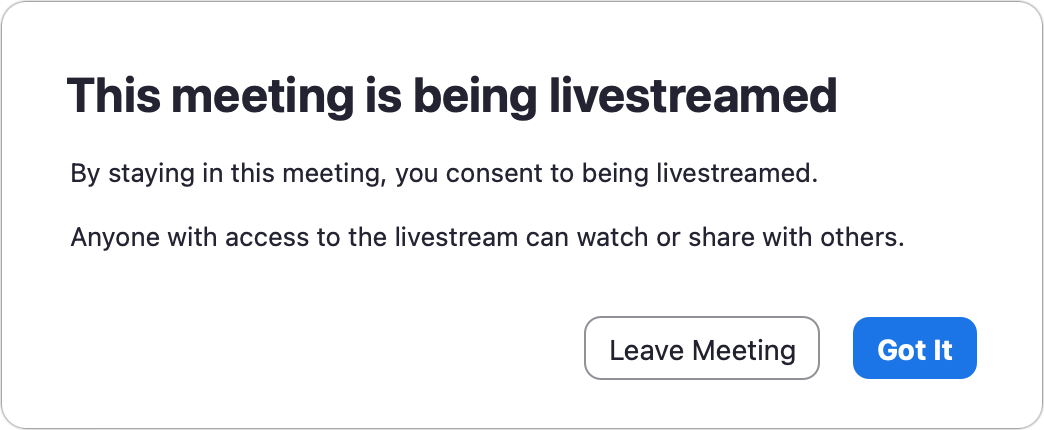
As livestreaming begins, participants receive a warning and must click or tap the informal Got It button (Figure 123).
Participants and the host and any co-hosts also see a red “LIVE” lozenge in the top of all Zoom apps. Anyone in the meeting can click or tap that and choose View Stream on Service or Copy Streaming Link to open the URL or copy it. For direct livestreaming, copying the link avoids having to go to the website to find it, but it’s useful for any participant.
A host or co-host may want to have the livestream open to monitor what’s happening. The livestream is often delayed by several seconds or longer, which can be disconcerting.
For services that allow comments or chat, it can be useful to be on the livestream or producer page to see responses and answer questions. This is another reason to have additional help on a livestream.
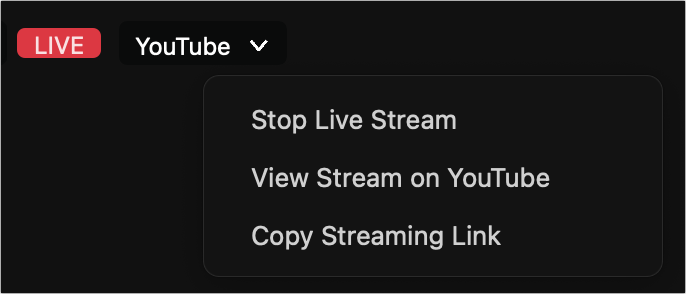
When you’re ready to stop the livestream, click the service name at the top and choose Stop Live Stream (Figure 124).