
10
Continuous Delivery
We’ve built a software solution complete with automated tests and have set up a continuous integration pipeline to run those automated tests. Now, if a developer in your team pushes some code that changes the expected behavior of the solution, our automated tests and continuous integration solution will catch those issues and will help you and your team stop releasing detrimental code. But what if all the tests have passed after pushing all the new code to the repository? Wouldn’t it be great if we had a solution to help us prepare and deploy the application into a development, staging, or production server?
In this chapter, we will add the last missing piece to our development process. We will prepare a remote server in AWS, and we will automatically deploy our application into that server using continuous delivery (CD).
Figure 10.1 shows the steps we are going to take to deploy our solution code to a public-facing web server. We will go through the process of pushing new code to the repository, which, in turn, will trigger the CI pipeline we configured in the previous chapter. The CI pipeline will run the automated tests we’ve built and, when successful, the CD process will upload our solution code into AWS S3. Then, we will use AWS CodeDeploy to deploy our application into an AWS EC2 instance that will serve as our example production server:
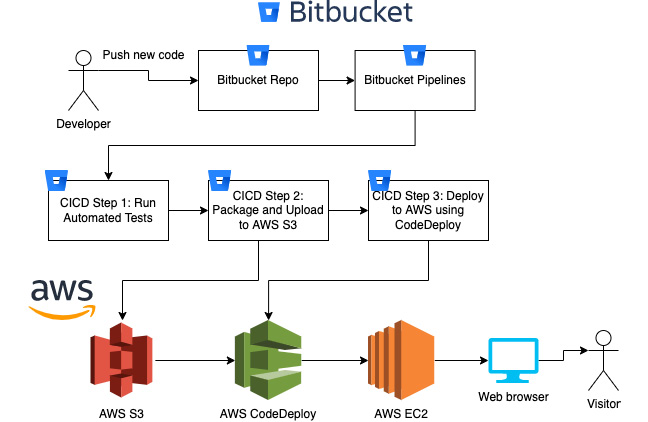
Figure 10.1 – Entire flow
From a developer pushing new code and running all automated tests in the cloud to automatically deploying the solution code into a Linux server, we will be covering all of that!
In this chapter, we will go through the following topics:
- Setting up an AWS EC2 instance
- Creating an AWS CodeDeploy application
- Installing Docker and other dependencies inside the AWS EC2 instance
- Continuous delivery with Bitbucket Pipelines and AWS CodeDeploy
Technical requirements
In this chapter, you should follow the instructions provided in the previous chapter and configure a Bitbucket Pipelines pipeline. You are also expected to have basic knowledge of AWS and should use the code in this book’s code base at https://github.com/PacktPublishing/Test-Driven-Development-with-PHP-8/tree/main/Chapter%2010.
To see all the tests running properly, you can run the following command to download the complete code of this chapter, and run the Docker containers:
curl -Lo phptdd.zip "https://github.com/PacktPublishing/Test-Driven-Development-with-PHP-8/raw/main/Chapter%2010/complete.zip" && unzip -o phptdd.zip && cd complete && ./demoSetup.sh
To run the containers and execute the commands in this chapter, you should be inside the docker-server-web-1 container.
Run the following command to confirm the container name for our web server:
docker ps
To run the containers, run the following command from the /phptdd/docker directory from the repository in your host machine:
docker-compose build && docker-compose up -d
docker exec -it docker_server-web_1 /bin/bash
Once inside the container, run the following command to install the libraries required through Composer:
/var/www/html/symfony# ./setup.sh
Within the /var/www/html/symfony directory, run the following command to see all the tests passing:
/var/www/html/symfony# ./runCoverage.sh
After running the runCoverage.sh command, it should execute all our Symfony tests, and you can make sure that they all pass.
Setting up an AWS EC2 instance
If you don’t already have an AWS account, you can follow the instructions at https://aws.amazon.com/premiumsupport/knowledge-center/create-and-activate-aws-account/ to create one.You will also have to create an AWS IAM User group. The instructions can be found on https://docs.aws.amazon.com/IAM/latest/UserGuide/id_groups_create.html. You will need an AWS IAM User, and follow the official documentation from AWS to create an IAM user in your AWS account at https://docs.aws.amazon.com/IAM/latest/UserGuide/id_users_create.html.
We will also need the following AWS resources to complete the EC2 setup:
- AWS EC2 key pair
- IAM instance profile
Why do we need an EC2 instance? Well, this will serve as our remote server. You can think of it as your host computer running in the cloud. We will use this server to host our Docker containers to run and serve our application:
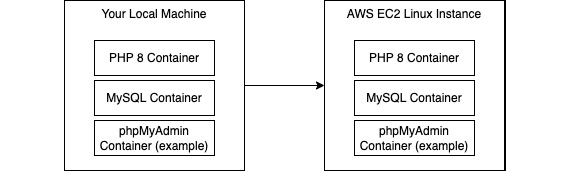
Figure 10.1 – EC2 instance
As you can see from the diagram, it’s going to serve as almost a replica of your local development environment. That’s the big benefit of using containers, as we discussed in Chapter 3, Setting Up Our Development Environment Using Docker Containers.
Follow these steps to create an EC2 instance:
- Sign in to the AWS console and search for EC2 in the Services search bar to go to the EC2 dashboard.
- In the EC2 dashboard, click on the Launch instance button:
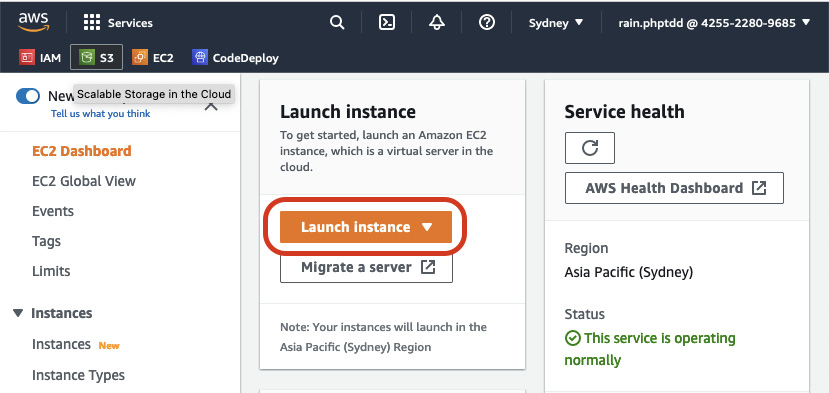
Figure 10.2 – The Launch instance button
You will be shown the Launch an instance wizard.
- In the Name field, enter tddphp-instance1. This name tag is going to be very important. We will use this tag for our CodeDeploy application later in this chapter:
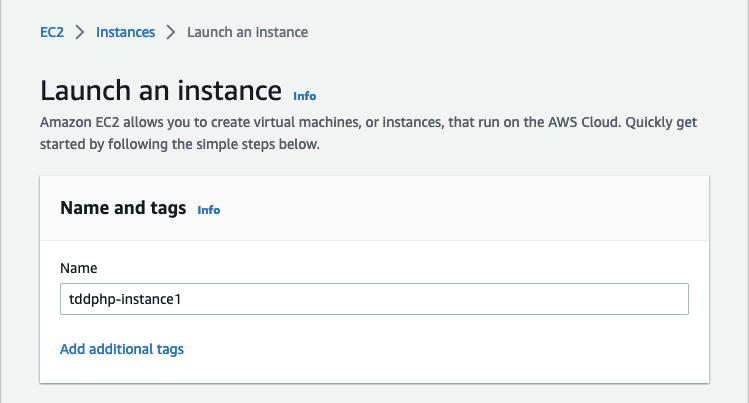
Figure 10.3 – Instance name tag
- Next, in the Application and OS Images (Amazon Machine Image) area, select Amazon Linux 2 AMI:
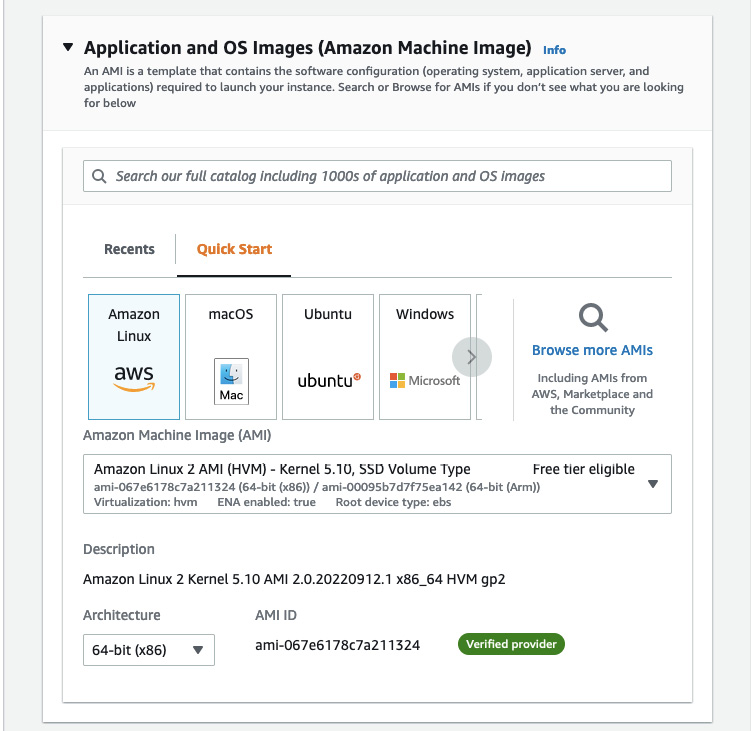
Figure 10.4 – Amazon Linux 2 AMI
- Next, you can select the EC2 instance type. For this example, you can stick to the t2.micro instance as this type is free tier eligible. You can also select a more powerful instance configuration – that’s entirely up to you:
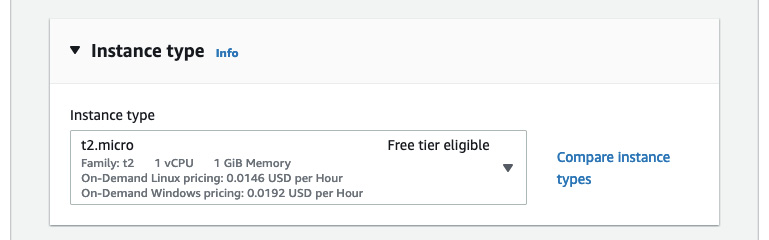
Figure 10.5 – t2.micro instance type
- You will need a key pair to be able to SSH into this machine instance. If you don’t already have one set up, just click on the Create new key pair link; a popup will appear for you to create a new key pair:
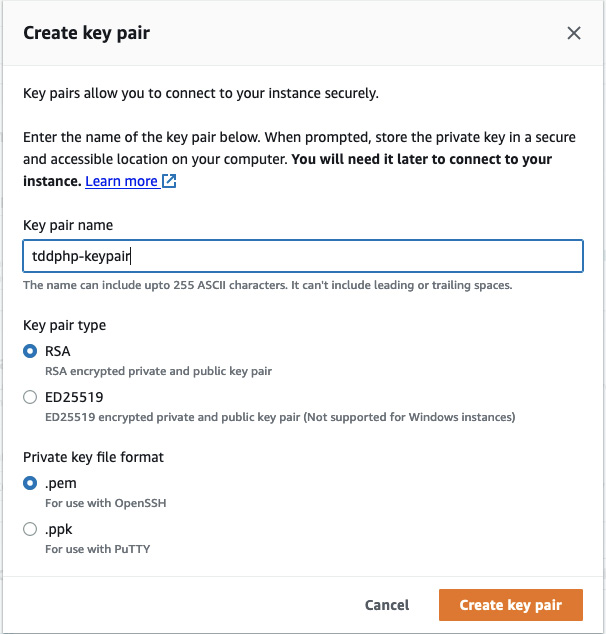
Figure 10.6 – Creating a new key pair
- After creating the key pair, you can assign it to the key pair field in the EC2 instance wizard.
- Next, in the Network settings section, allow all HTTP and HTTPs traffic. This is so that we can easily access the web application from a browser:
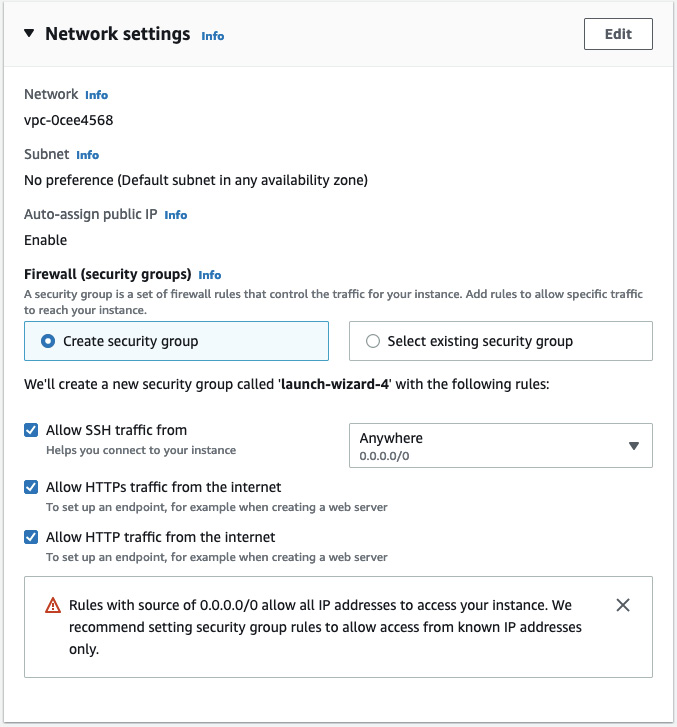
Figure 10.7 – Network settings; allow HTTP and HTTPS
- Next, in the Advanced details section, if you don’t already have an IAM instance profile, you can easily create one by clicking on the Create new IAM profile link:
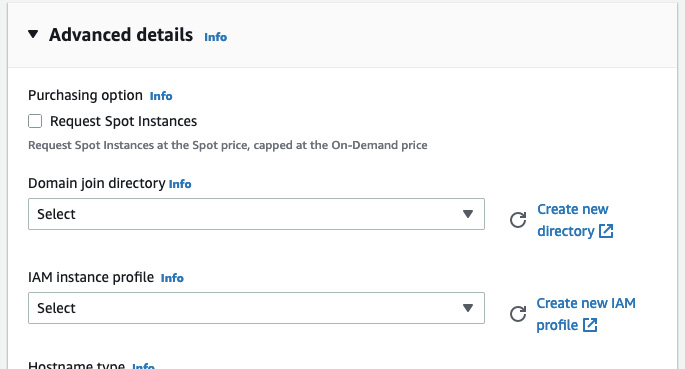
Figure 10.8 – Creating a new IAM profile link
- You will be redirected to the IAM wizard. Enter any IAM role name you want to use; then, select the Custom trust policy option in the Trusted entity type section:
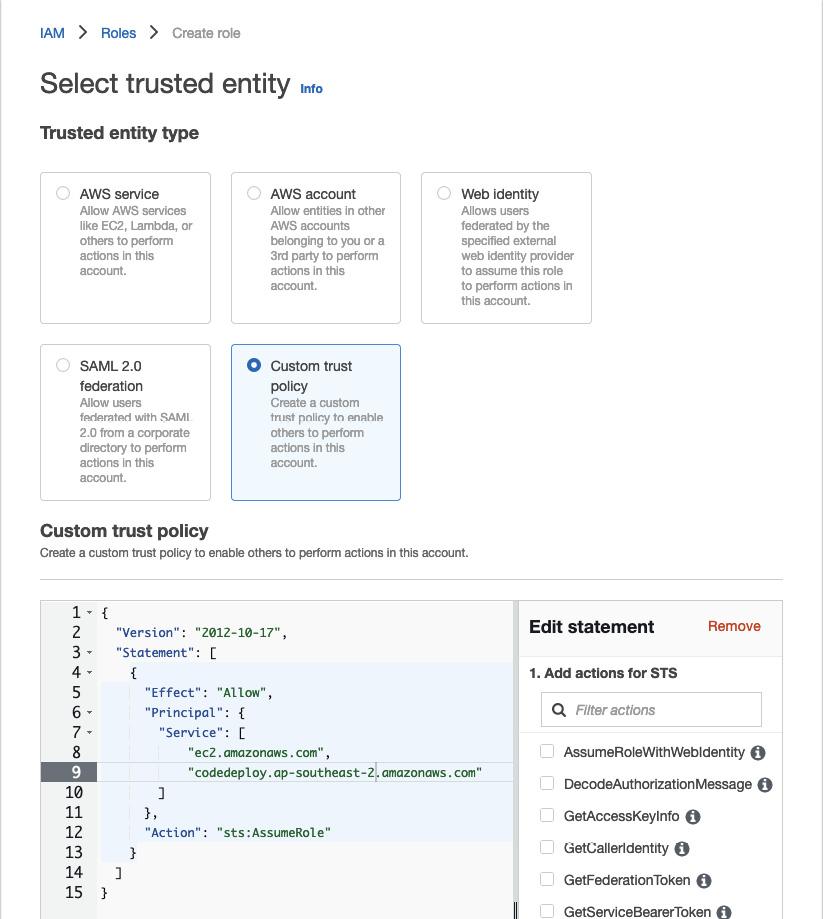
Figure 10.9 – Custom trust policy text area
- In the text area, use the following policy:
{“Version”: “2012-10-17”,“Statement”: [{“Effect”: “Allow”,“Principal”: {“Service”: [“ec2.amazonaws.com”,“codedeploy.ap-southeast-2.amazonaws.com”]},“Action”: “sts:AssumeRole”}]}
Since I am in Australia, I usually use the Sydney ap-southeast-2 region. You can replace this with any region you prefer.
- Click the Next button to proceed.
- In the Add permissions section, search for the following policies, and tick the checkbox before the policy name:
- AmazonEC2FullAccess
- AmazonS3FullAccess
- AWSCodeDeployFullAccess
- After selecting these policies, click Next.
Make sure these policies are displayed in the IAM wizard review screen before creating the role:

Figure 10.10 – Access policies
- Next, click on the Create role button, then go back to the EC2 instance wizard. You can now select the IAM role you just created from the Advanced details section:
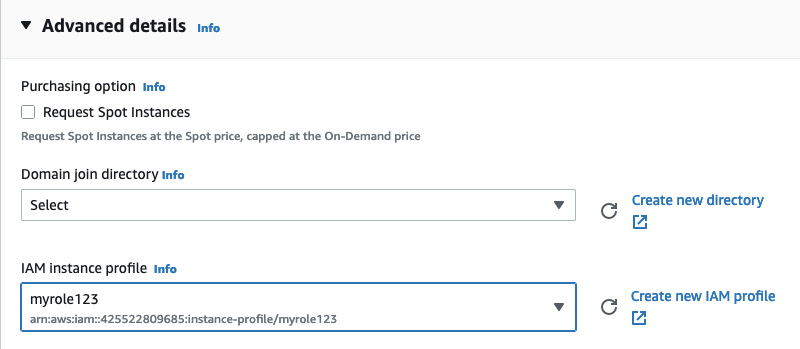
Figure 10.11 – Newly created IAM instance profile
- And that’s it – scroll to the very bottom of the page and click on the Launch instance button. It will take a few minutes for AWS to launch your new EC2 instance. After a few minutes, go back to the dashboard; you should now see your EC2 instance running:
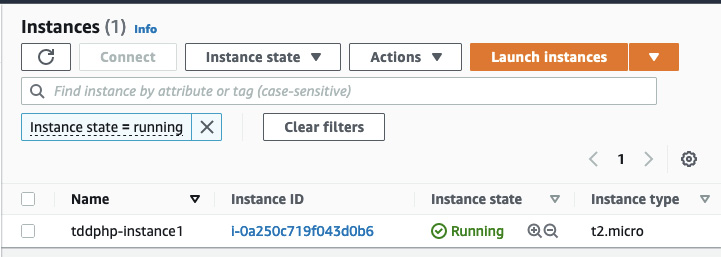
Figure 10.12 – Amazon Linux 2 instance running
We now have a running Amazon Linux 2 instance; we will use this instance to run our containers.
Before proceeding with the CodeDeploy setup, we need to create an S3 bucket. This bucket will be used both by our Bitbucket Pipelines and the CodeDeploy application:
- While in the AWS console, search for S3 and click the S3 service item:
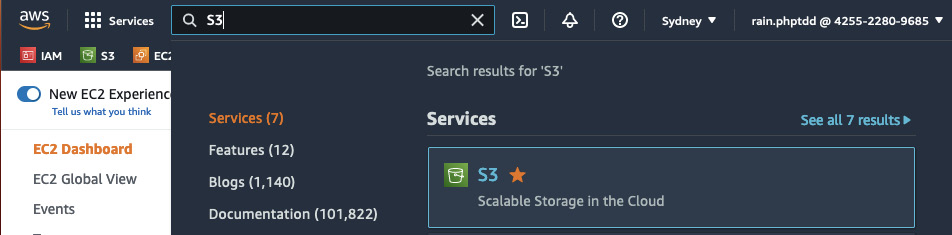
Figure 10.13 – S3 service
You will be redirected to the Amazon S3 dashboard.
- Click on the Create bucket button:
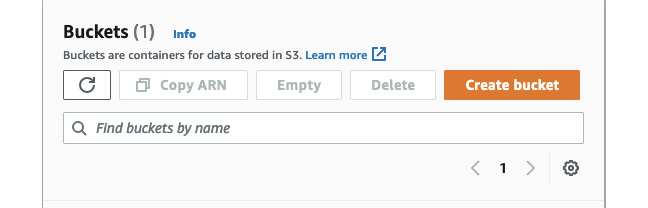
Figure 10.14 – The Create bucket button
- Use any unique name you want for the bucket and select the same region you used for your EC2 instance. For me, it’s ap-southeast-2:
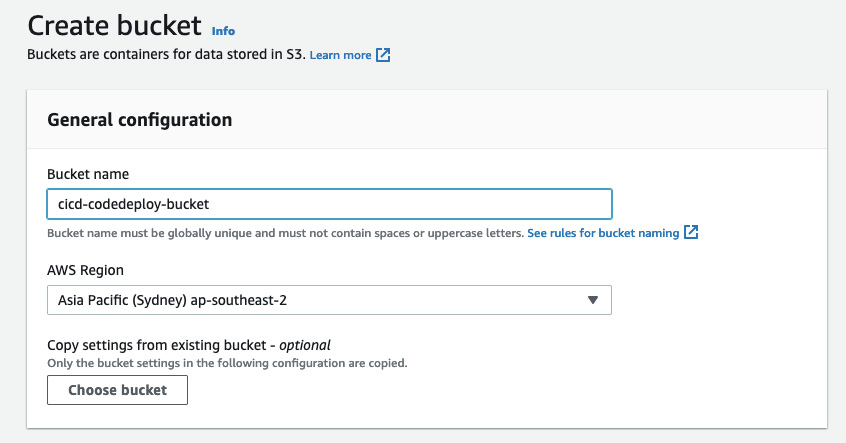
Figure 10.15 – Creating an S3 bucket
And that’s it. We can now proceed with creating the CodeDeploy application. The CodeDeploy application will use the EC2 instance and S3 bucket we just created.
Creating an AWS CodeDeploy application
We will be using AWS CodeDeploy to automate the deployment of our PHP application into an EC2 server. But where will CodeDeploy get the files to deploy? It will get them from an S3 bucket. But how will our solution code end up in S3 in the first place? Well, we will tell Bitbucket Pipelines to upload it there! We will cover that later in this chapter:

Figure 10.16 – CodeDeploy flow
Follow these steps to set up AWS CodeDeploy, which will be triggered by our Bitbucket CI pipeline once all of our automated tests have passed:
- In the AWS console, search for the CodeDeploy service and click on the Create application button:

Figure 10.17 – Creating the CodeDeploy application
- In the CodeDeploy wizard, use any name you want in the Application configuration section. Then, in the Compute platform field, select the EC2/On-premises option and click on the Create application button:
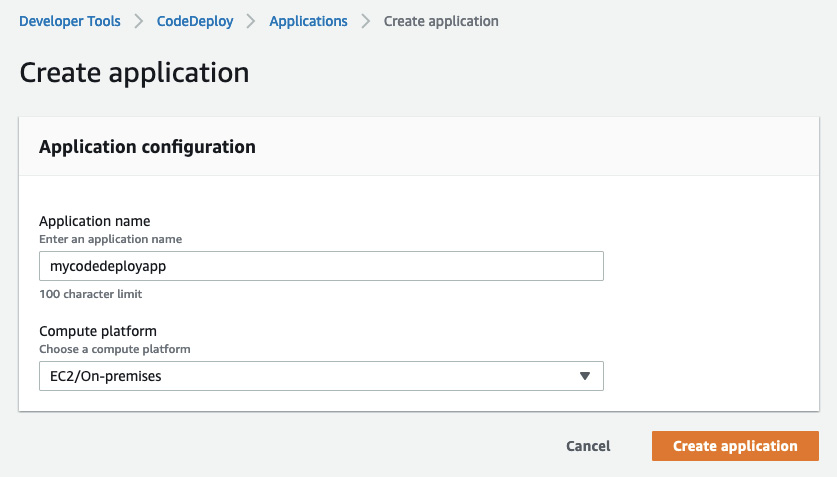
Figure 10.18 – Application configuration section
You will be redirected to the CodeDeploy Applications page.
- Next, click on the Create deployment group button:
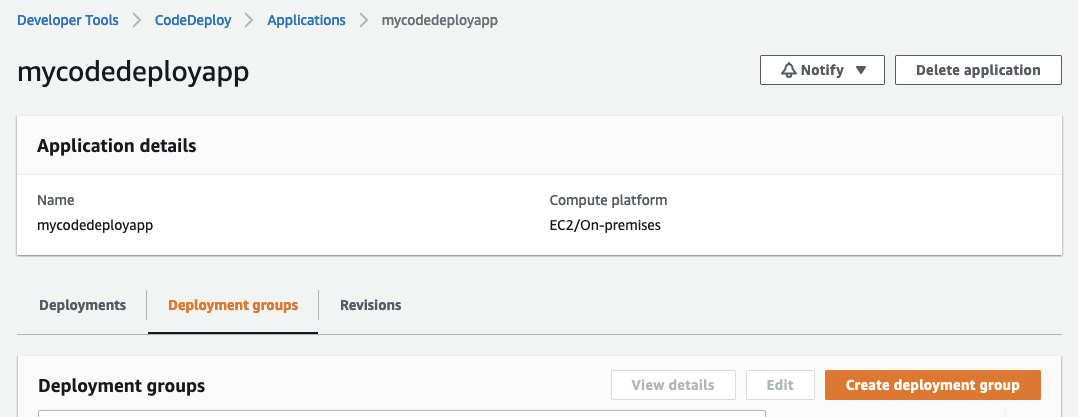
Figure 10.19 – The Create deployment group button
- In the Deployment group name section, use any name you want. In this example, I will use codedeploy_group1:
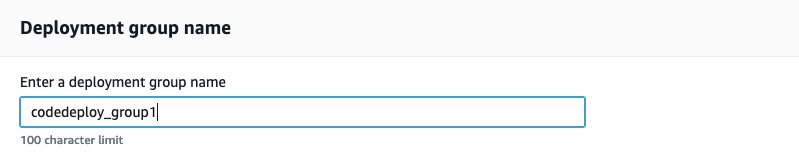
Figure 10.20 – Deployment group wizard – group name
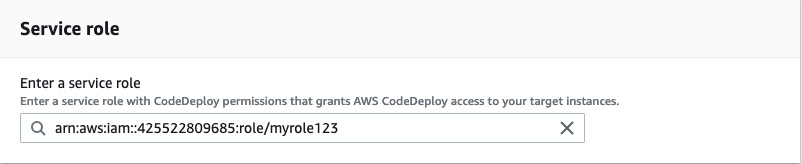
Figure 10.21 – Deployment group wizard – IAM role
- Next, in the Environment configuration section, check the Amazon EC2 instances checkbox. Then, in the Tag group section, add the EC2 instance name we created earlier, which is tddphp-instance1. This is very important. This is how we tell CodeDeploy that we want to deploy the application in this specific instance. You can add more tags here if you want to deploy to other instances as well:

Figure 10.22 – Deployment group wizard – EC2 instance details
- Next, in the Load balancer section, uncheck the Enable load balancing checkbox, then click on the Create deployment group button:
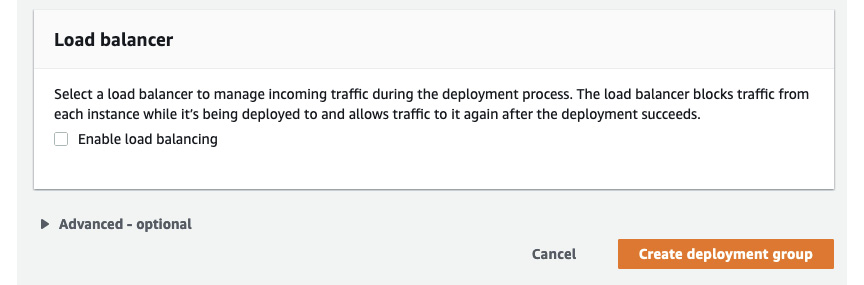
Figure 10.23 – Deployment group wizard – Load balancer
Great! That’s it for the CodeDeploy configuration from the AWS console.
Next, we will need to get inside the EC2 instance we just created and install some applications we need for it to be able to connect to CodeDeploy, and for us to be able to run Docker containers.
Installing Docker and other dependencies inside the AWS EC2 instance
We will need three very important applications inside the EC2 instance. First, we will need the AWS CodeDeploy agent, after which we’ll need to install Docker and docker-compose so that we can build and run the Docker containers we need for our application.
Connecting to the EC2 instance
We need to get inside the instance before we can install anything. Thankfully, we can do this by using the AWS console from a browser:
- In the EC2 dashboard, select the running instance we created earlier and click on the Connect button at the top of the table:
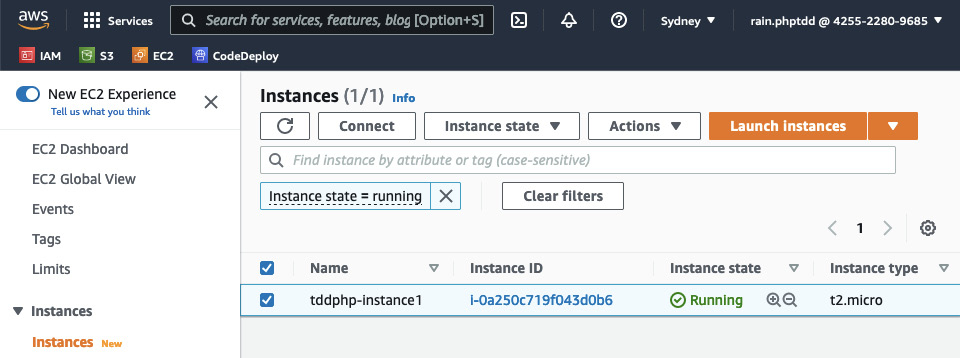
Figure 10.24 – EC2 table – the Connect button
You will be redirected to the Connect to instance page.
- Click on the Connect button on that page. Finally, you will be redirected to the browser’s terminal window:
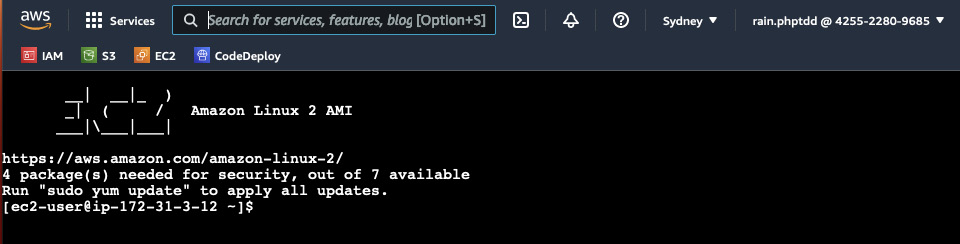
Figure 10.25 – EC2 terminal window
Great! Now, we can install the applications we need for CD and our PHP solution.
Installing CodeDeploy Agent
The CodeDeploy application we created earlier in the chapter will need additional software installed inside our EC2 instance so that it can communicate with it. This is why we need CodeDeploy Agent. You can read more about it on the official AWS documentation page for CodeDeploy Agent: https://docs.aws.amazon.com/codedeploy/latest/userguide/codedeploy-agent.html.
Follow these steps to install CodeDeploy Agent:
- In the terminal, enter the following commands to install the agent:
sudo yum update -y
sudo yum install -y ruby
sudo yum install -y wget
wget https://aws-codedeploy-ap-southeast-2.s3.ap-
southeast-2.amazonaws.com/latest/installchmod +x ./install
sudo ./install auto
- After running those commands, verify that the agent is running by running the following command:
sudo service codedeploy-agent status
You should now get the following result:
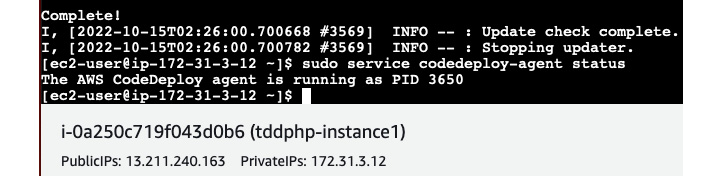
Figure 10.26 – CodeDeploy Agent is running
Awesome! Our EC2 instance can now be used by our CodeDeploy application. Next, we can proceed with installing Docker.
Installing Docker
We’ve been using Docker containers to run our PHP solution. Now, CodeDeploy will try to deploy our code in the EC2 instance we just created, but our solution code depends on Docker and docker-compose being installed.
Follow these steps to install Docker:
- Run the following commands in the AWS terminal window:
sudo amazon-linux-extras install -y docker
sudo service docker start
sudo usermod -aG docker ec2-user
sudo chkconfig docker on
- After running the installation commands, check whether Docker is installed correctly by running the following command:
docker --version
You should see the following result:

Figure 10.27 – Docker installed
- Next, we will need to reboot the instance to make sure that we can execute Docker with the correct permissions. Run the following command:
sudo reboot
- After running the command, the terminal window will hang up. Give it a few minutes, then connect to the EC2 portal again, as we did earlier:
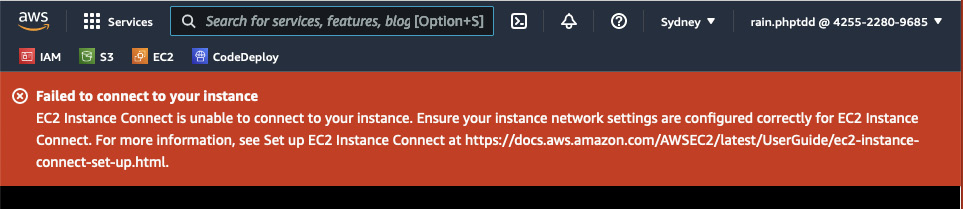
Figure 10.28 – Terminal error while rebooting
If you see the preceding error message, don’t fret. Just wait a few minutes and then try connecting again.
Lastly, we’ll need to install docker-compose.
Installing docker-compose
We’ve been using the docker-compose tool to run and configure our multi-container setup in our local development environment. We will also need to install it in the EC2 instance. Follow these steps:
- Back in the AWS terminal window, run the following commands:
sudo curl -L “https://github.com/docker/compose/releases/download/v2.11.2/docker-compose-$(uname -s)-$(uname -m)” -o /usr/local/bin/docker-compose
sudo chmod +x /usr/local/bin/docker-compose
- After running those two commands, to make sure that docker-compose has been installed properly, run the following command:
docker-compose --version
You should see the version that is installed. Great! At this stage, we have installed everything we need for CodeDeploy to be able to deploy our PHP application in this EC2 instance.
Next, we will add an Elastic IP to our EC2 instance.
Attaching Elastic IP to the EC2 instance
To make our EC2 instance easily accessible through a web browser, we will add an AWS Elastic IP to the EC2 instance. We can also easily attach this Elastic IP to a different EC2 instance when we need to.
To create an Elastic IP, follow these steps:
- Go back to the EC2 dashboard in the AWS console, then click on the Elastic IPs button:
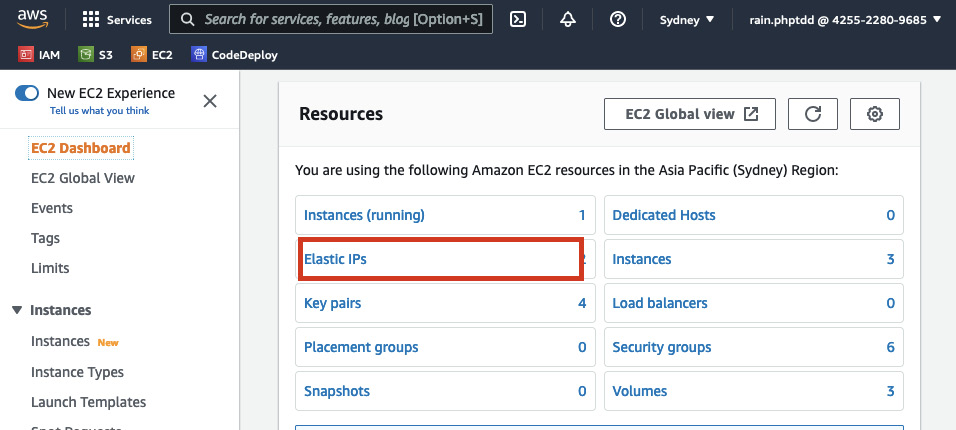
Figure 10.29 – The Elastic IPs button
- On the next screen, select the Amazon’s pool of Ipv4 addresses radio button in the Public Ipv4 address pool section. Then, click on the Allocate button:
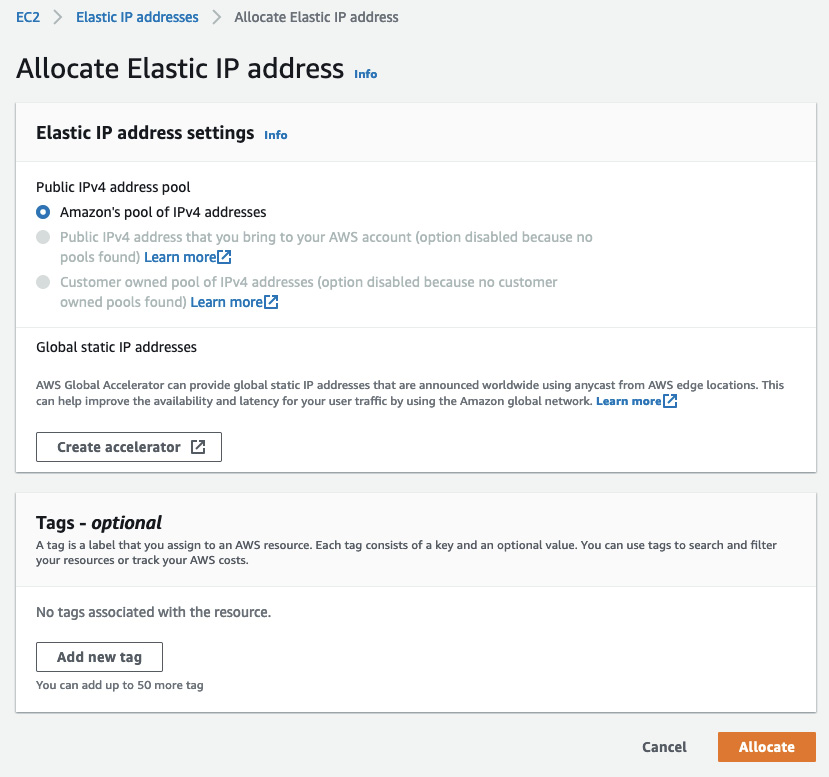
Figure 10.30 – Allocate Elastic IP address
- Next, click on the newly created Elastic IP address, then click on the Associate Elastic IP address button:
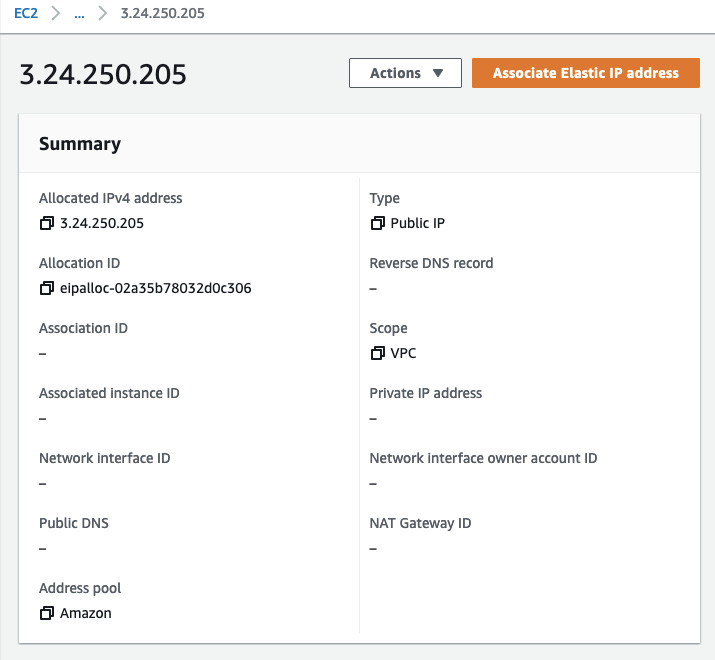
Figure 10.31 – The Associate Elastic IP address button
- On the next screen, in the Instance field, select the EC2 instance we created earlier. Then, click on the Associate button:
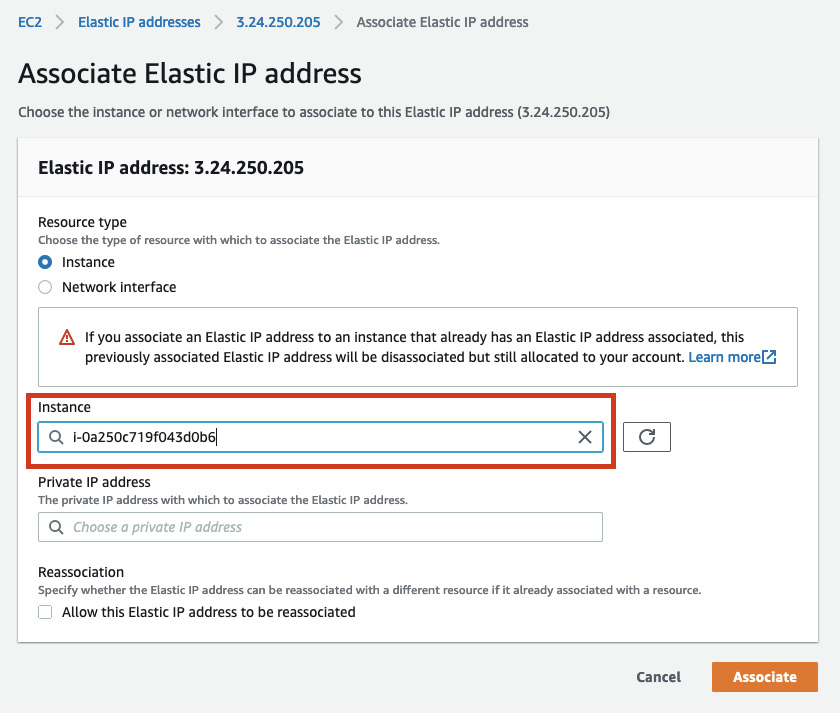
Figure 10.32 – Associating the Elastic IP address with the EC2 instance
At this stage, we will have a permanent IP address pointed to our EC2 instance. Once we deploy the PHP application into the EC2 instance, we will use this IP to access the web application.
Next, we will need to configure Bitbucket Pipelines to tell it that we want to automatically deploy our code using AWS CodeDeploy.
Continuous delivery with Bitbucket Pipelines and AWS CodeDeploy
In the previous section, we prepared an AWS EC2 instance for our PHP application. Now, we will need a way to get our solution code from Bitbucket into the EC2 instance itself. For this, we will need to configure Bitbucket Pipelines to use AWS CodeDeploy. You can read more about Bitbucket Pipelines to AWS CodeDeploy deployments at https://support.atlassian.com/bitbucket-cloud/docs/deploy-to-aws-with-codedeploy/.
Bitbucket Pipelines settings
We will need to add some AWS-specific information into Bitbucket as we will be using this information to connect to our AWS CodeDeploy application. To add this information, follow these steps:
- In the Bitbucket repository dashboard, click on the Repository settings option:
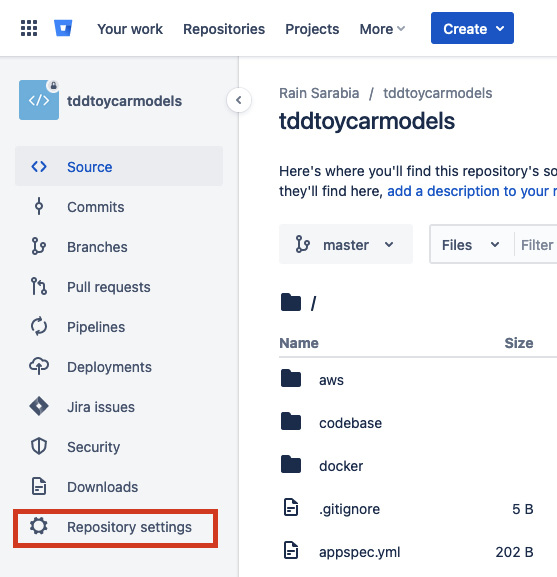
Figure 10.32 – Repository settings
- Then, select the Repository variables link from the left menu. You should be redirected to the Repository variables page. In the Name and Value fields, add the following names and values:
- AWS_ACCESS_KEY_ID: Use the value from the key pair file
- AWS_SECRET_ACCESS_KEY: Use the value from the key pair file
- AWS_DEFAULT_REGION: ap-southeast-2
- S3_BUCKET: <your unique S3 bucket name>
- DEPLOYMENT_GROUP: codedeploy_group1
- APPLICATION_NAME: mycodedeployapp:
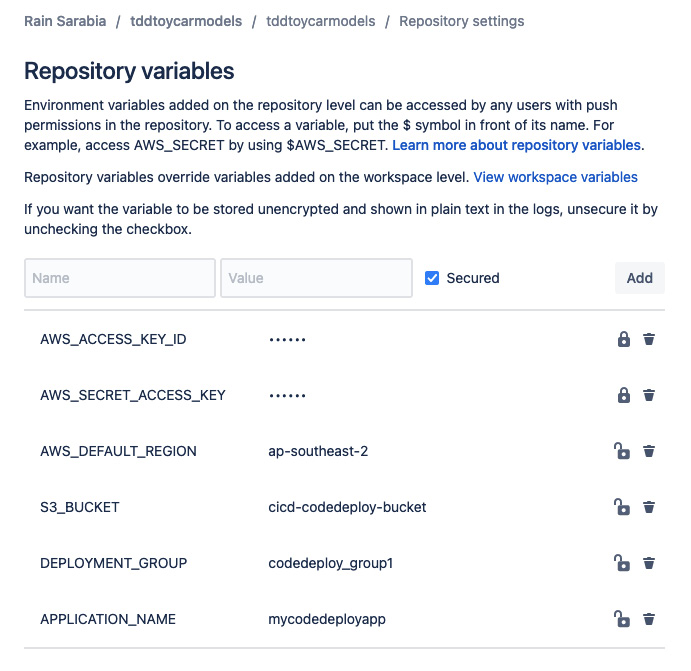
Figure 10.33 – Repository variables; AWS values
Next, we will need to tell Bitbucket Pipelines that we want to zip and upload our application to AWS S3. Then, we will deploy it to our EC2 instance using AWS CodeDeploy.
- Back to our code base, in the root directory, you will find the bitbucket-pipelines.yml file we created in the previous chapter. Add the following lines to the file:
/bitbucket-pipelines.yml
- step:
    name: Package and Upload
    script:
      - apk add zip
      - zip -r phptddapp.zip .
      - pipe: atlassian/aws-code-deploy:0.2.10
        variables:
          AWS_DEFAULT_REGION: $AWS_DEFAULT_REGION
          AWS_ACCESS_KEY_ID: $AWS_ACCESS_KEY_ID
          AWS_SECRET_ACCESS_KEY:
              $AWS_SECRET_ACCESS_KEY
          COMMAND: ‘upload’
          APPLICATION_NAME: ‘mycodedeployapp’
          ZIP_FILE: ‘phptddapp.zip’
          S3_BUCKET: $S3_BUCKET
          VERSION_LABEL: ‘phptdd-app-1.0.0’
- step:
    name: Deploy to AWS
    script:
      - pipe: atlassian/aws-code-deploy:0.2.5
        variables:
          AWS_DEFAULT_REGION: $AWS_DEFAULT_REGION
          AWS_ACCESS_KEY_ID: $AWS_ACCESS_KEY_ID
          AWS_SECRET_ACCESS_KEY:
              $AWS_SECRET_ACCESS_KEY
          APPLICATION_NAME: $APPLICATION_NAME
          DEPLOYMENT_GROUP: $DEPLOYMENT_GROUP
          S3_BUCKET: $S3_BUCKET
          COMMAND: ‘deploy’
          VERSION_LABEL: ‘phptdd-app-1.0.0’
          IGNORE_APPLICATION_STOP_FAILURES: ‘true’
          FILE_EXISTS_BEHAVIOR: ‘OVERWRITE’
          WAIT: ‘true’
Here, we will be using the AWS values we entered in the repository variables page in the previous section.
Next, we need to tell CodeDeploy what scripts to run when deploying our application.
Creating a CodeDeploy configuration file
CodeDeploy will need a base configuration file called appspec.yml. Here, we can tell CodeDeploy to run scripts for us, such as running docker-compose and running our Symfony application’s setup.sh script.
Create the /appspec.yml file and add the following content to it:
version: 0.0
os: linux
files:
  - source: /
    destination: /home/ec2-user/phptdd
hooks:
  AfterInstall:
    - location: aws/codedeploy/containers_setup_php.sh
      timeout: 3600
      runas: ec2-user
In this file, we are telling CodeDeploy that we want our code to be copied into /home/ec2-user/phptdd directory. Then, after the installation process, we want to run the containers_setup_php.sh file, which we will create next. Create this file with the following content:
aws/codedeploy/containers_setup_php.sh
#!/bin/bash
# Build and run containers (PHP, MySQL)
docker-compose -f ~/phptdd/docker/docker-compose-production.yml down
docker-compose -f ~/phptdd/docker/docker-compose-production.yml build
docker-compose -f ~/phptdd/docker/docker-compose-production.yml up -d
# Setup the PHP Applications inside the containers (install composer packages, setup db, etc).
docker-compose -f ~/phptdd/docker/docker-compose-production.yml exec server-web php --version
docker-compose -f ~/phptdd/docker/docker-compose-production.yml exec server-web /var/www/html/symfony/setup.sh
docker-compose -f ~/phptdd/docker/docker-compose-production.yml exec server-web /var/www/html/behat/setup.sh
You will notice that we are running docker-compose. After that, we are running the custom setup.sh files we created for the Symfony and Behat applications.
Next, we need to run the entire CI/CD process using Bitbucket Pipelines.
Running Bitbucket Pipelines
Now that we have everything we need, just commit and push the files to your repository to trigger a Bitbucket pipeline to run, or just manually run a pipeline.
Our pipeline is now divided into three steps:
- Run automated tests: These will run our Symfony and Behat tests
- Package and upload: This will zip and upload our code to AWS S3
- Deploy to AWS: This will use CodeDeploy to deploy our solution inside the EC2 instance we configured
It will take a few minutes to run everything, but imagine replacing the manual process of testing tens, hundreds, or thousands of features and server deployment manually:
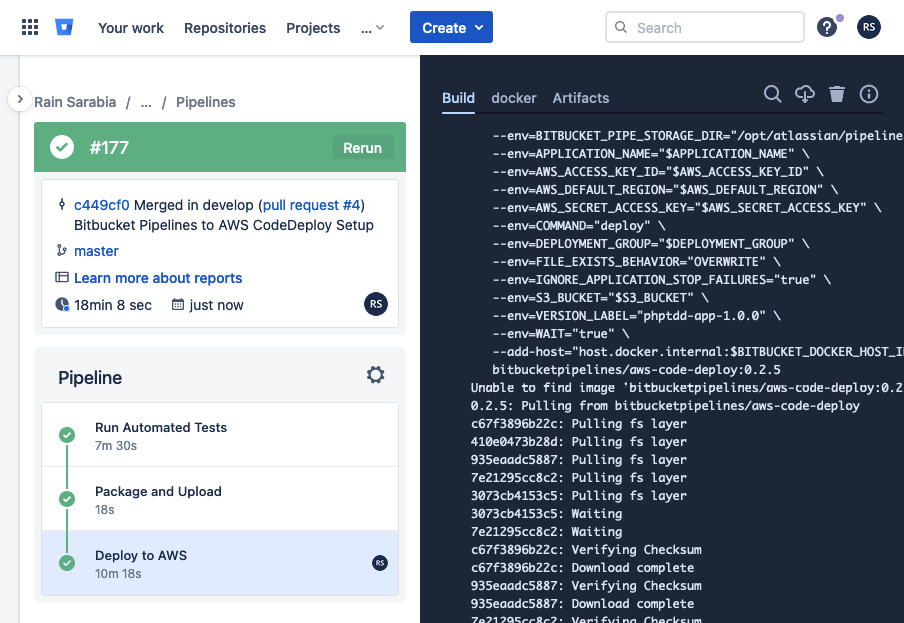
Figure 10.34 – CI/CD result
Great – after 18 minutes, we have completed the entire process! This setup and process can still be tweaked and optimized, but in just a few minutes, we were able to automatically run all our test scenarios, and automatically deploy them into a remote server!
But did the deployment work? Let’s find out.
Go back to the AWS console and connect to the EC2 instance again:
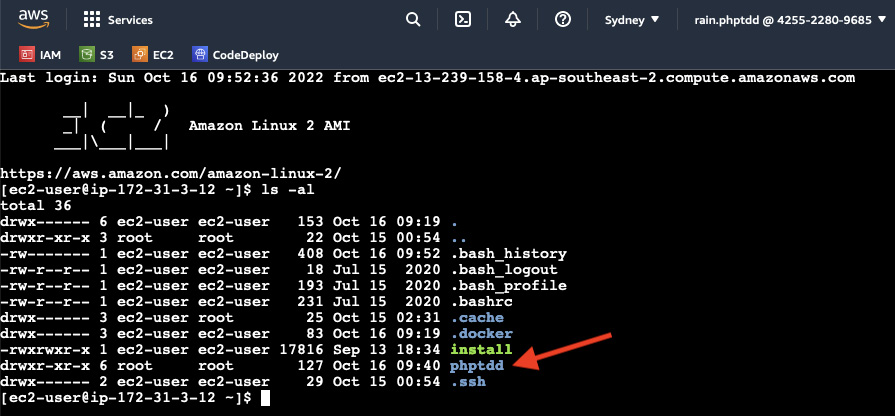
Figure 10.35 – New phptdd directory
The first thing you’ll notice if the code deployment worked is that there should be a new /phptdd directory. Let’s see whether it’s got something in it:

Figure 10.36 – /phptdd content
As you can see, we have all the files we pushed into our Bitbucket repository! But what about our Docker containers? Let’s see whether they are running.
Run the following command:
docker ps
If everything got installed properly by CodeDeploy, we should see our containers running:

Figure 10.37 – Docker containers running
That’s good – all our containers are running! Now, what if we run our automated tests? Let’s see how it goes. Run the following command:
docker-compose -f -/phptdd/docker/docker-compose-production.yml
You should see the following:
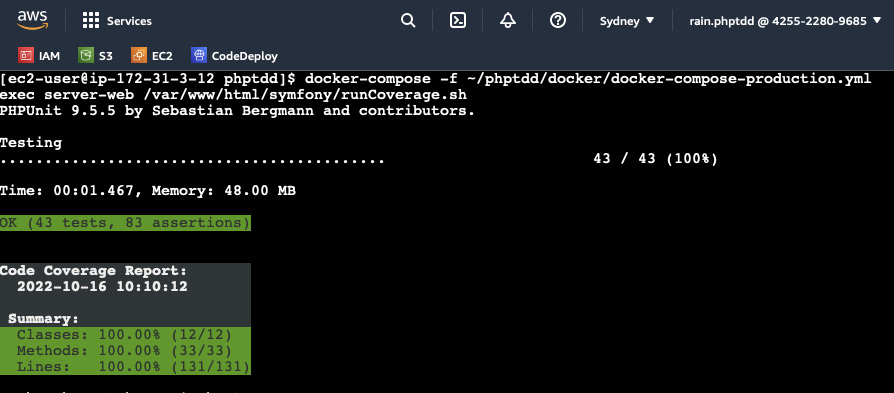
Figure 10.38 – Running a Symfony coverage test in EC2
Great! All our Symfony PHP tests are passing! But what about the actual web application? The automated tests won’t make sense to our visitors.
Go back to the EC2 dashboard and click on the EC2 instance we created. Then, click on the Elastic IP addresses link:
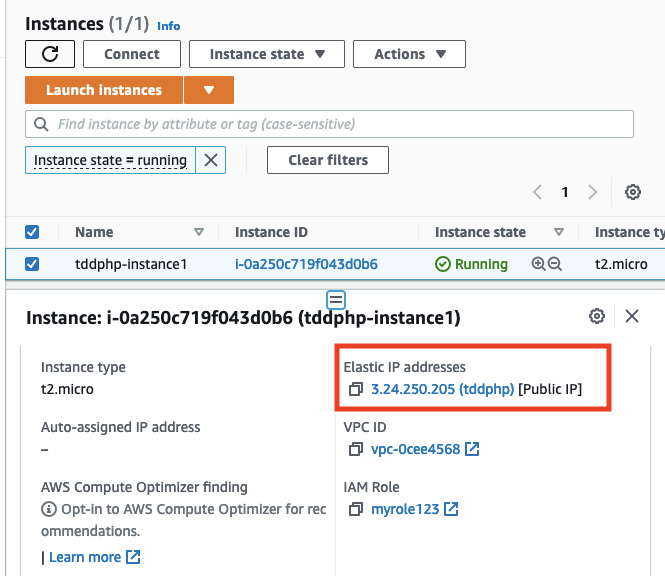
Figure 10.39 – Elastic IP addresses link
The Elastic IP address details will be loaded. Then, copy the Public DNS value:
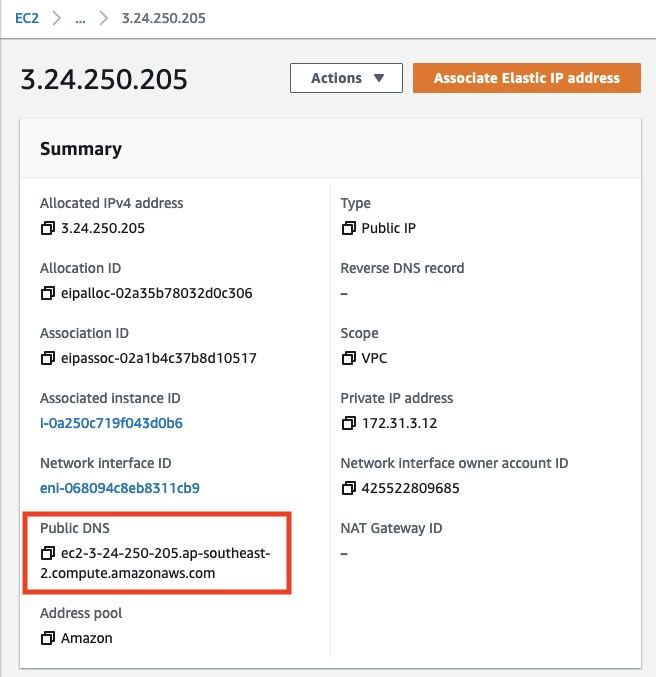
Figure 10.40 – Elastic IP – Public DNS
After copying the public DNS, just simply paste it into your web browser and see whether it loads:
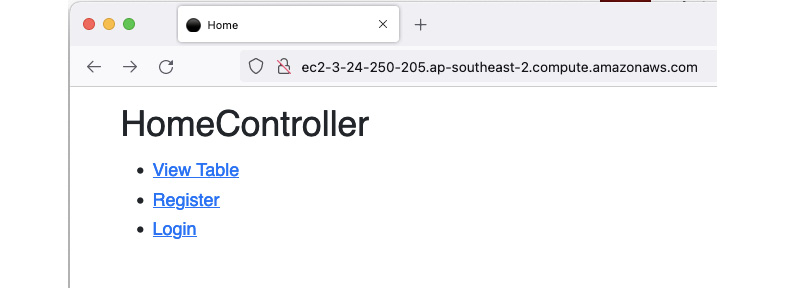
Figure 10.41 – HomeController
As you can see, we can now access our web application from a web browser. You can try to register an account, log in, and add new toy car entries.
Let’s try the registration feature first:
- Click on the Register link and enter an email address and a password:
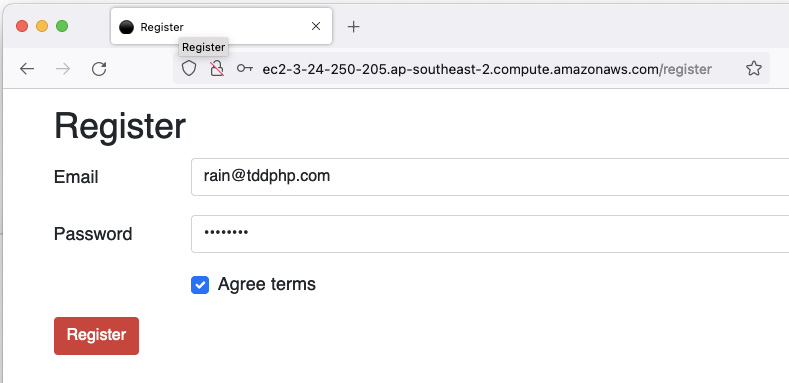
Figure 10.42 – Register
- Click Register. Next, click on the login button:
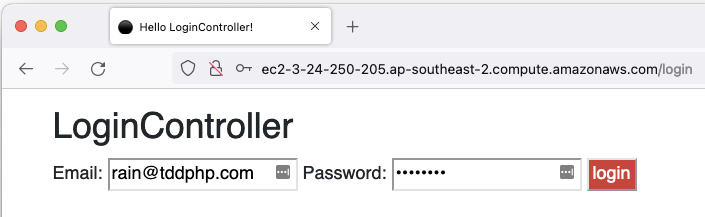
Figure 10.40 – Login
If it works properly, it will redirect you to the Add Toy Car page.
- On the Add Toy Car page, add some values in the fields:
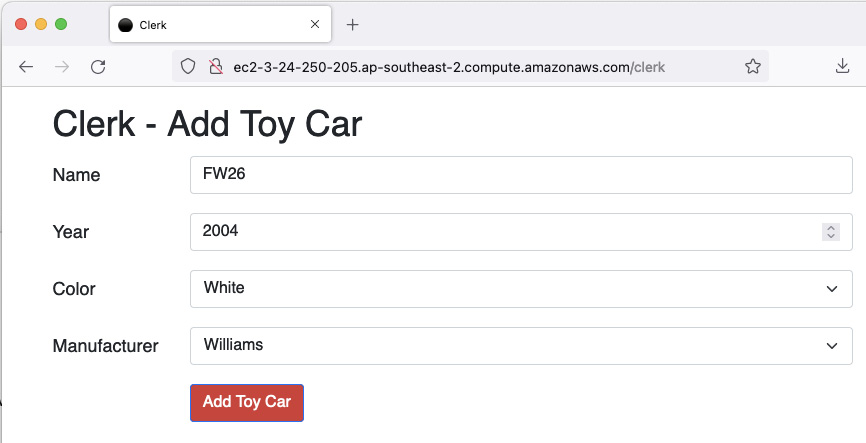
Figure 10.41 – Add Toy Car
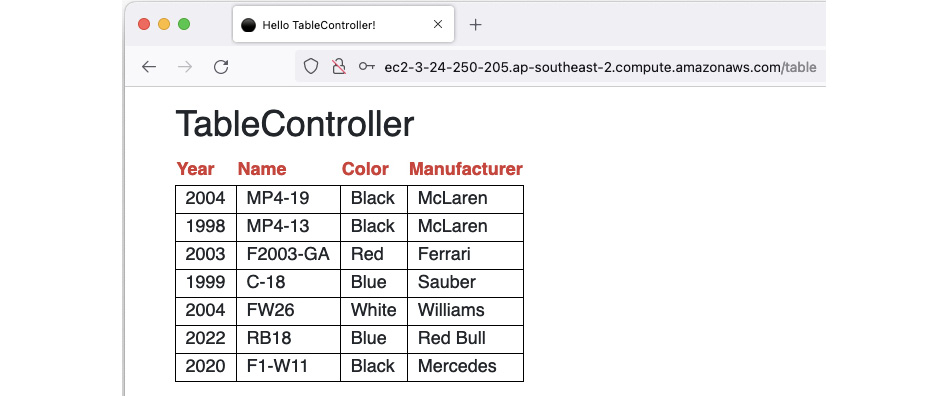
Figure 10.42 – Table controller
In the table controller, the toy car entries we have created will all be displayed. If we want to add more features to the application, we can simply start with a Jira ticket, create a new branch, write some code, commit it, and push the code – that’s it. The CI/CD process will take care of the rest!
Summary
In this chapter, we covered the process of setting up an AWS EC2 instance, AWS CodeDeploy, and all the other AWS resources we need to host our PHP application. We integrated Bitbucket Pipelines with our AWS CodeDeploy application, and we used custom scripts to automatically configure our Docker containers inside the AWS EC2 instance whenever CodeDeploy runs.
We covered this process from a developer pushing new code changes to the application, running all the automated tests, and deploying the entire solution to a Linux server through AWS. We are also able to manually test our web application using a web browser to make sure consumers can use the application.
In the next chapter, we will investigate some tools to help us monitor our application. This will be very helpful when working on large applications as this will help us, as developers, analyze our application’s performance and health.