
3
Setting Up Our Development Environment Using Docker Containers
“It works on my machine” is a phrase you’ve probably heard as a software developer; you might even have said it yourself as well. I’m sure I did! And to be fair, my colleague Ben Hansen, who was our test automation engineer at that time, also pointed out that he’s also allowed to say, “It doesn’t work on my machine” in response to us developers. As a developer myself, I’ve had my fair share of frustrating experiences caused by running the same PHP application across different environments with inconsistent server setups. There were times in my career when I struggled to replicate some production environment bugs from my local development machine. We would find out that the PHP application we were developing would be deployed in staging or production on a different operating system with various libraries installed, which were out of sync with the developers’ development environment setups. It was a nightmare!
When we develop PHP applications, we need to ensure that the applications we develop behave consistently across different deployment environments such as staging or production. Also, when a new developer joins your team, it’s great if they can set up their local development environments on their development machines easily and quickly. Containers can help solve these challenges.
In our example project, we will need a development environment to run our PHP application consistently wherever we deploy it. If our PHP tests and applications pass and run properly from our local machines, they should also pass and run correctly when we deploy them.
We will go through the concept of containers and define what they are. We will learn how to create a Docker image and run Docker containers. Docker containers will help us easily package our application, making it easy to run our application in other server environments more consistently.
In this chapter, we will define and cover the following:
- What is a container?
- Setting up our PHP development container
- Running Docker containers
Technical requirements
This chapter requires you to have access to Bash. If you are using a Mac or Linux OS, you can just use terminal. If you’re on a Windows OS, you will need to install a third-party Bash program.
For the instructions defined in this chapter, you can experiment with the complete Docker setup found in Chapter 3 Git repository at https://github.com/PacktPublishing/Test-Driven-Development-with-PHP-8/tree/main/Chapter%203.
Quick Setup
To run the complete development setup with Docker containers for this chapter, in a macOS development machine, follow the instructions in this chapter to install Docker Desktop, and then simply run the following command from your terminal:
curl -Lo phptdd.zip "https://github.com/PacktPublishing/Test-Driven-Development-with-PHP-8/tree/main/Chapter%203.zip" && unzip -o phptdd.zip && cd complete && ./demoSetup.sh
What is a container?
A container is a packaging solution that will contain all the software dependencies that your application needs to run correctly. Different container platforms are available, but we will be using Docker in this book. We will be using Docker to build and run our containers for our example project.
Docker is an open source containerization solution that will enable us to package our PHP solution and run it on different development machines and deployment environments, including our continuous integration (CI) solution, which will be discussed more in Chapter 9, Continuous Integration.
Now that we have defined what containers are and the containerization solution we will be using for our project, let’s start setting up our development containers.
Setting up our PHP development container
We will need a development environment for our PHP application. We will be separating our development environment structure into two main parts: the Docker container (server) and the PHP application.
The docker directory will contain the following:
- Dockerfile
- docker-compose.yml
- Server configurations
The codebase directory will serve as the following:
- The root directory for our PHP application
- Vendor directory for composer packages
Now, let us set up our PHP development container:

Figure 3.1 – Base tree
- Run the following commands:
$ mkdir -p ~/phptdd/docker
$ mkdir -p ~/phptdd/codebase
- Install Docker Desktop. Before we create the required Docker files, we will need to download and install Docker Desktop.
For macOS users, Docker can be downloaded from https://docs.docker.com/desktop/mac/install/.
For Windows users, the download link is https://docs.docker.com/desktop/windows/install/.
Once Docker Desktop has been installed on your macOS machine, we can now organize our development directories.
- We will need to create a Dockerfile within the phptdd/docker/ directory. Create a phptdd/docker/Dockerfile file, like so:
FROM php:8.1.3RC1-apache-buster
RUN docker-php-ext-install mysqli pdo pdo_mysql
We declare the base Docker image in the first line using the FROM keyword. Every Dockerfile must start with this keyword. The second line is an instruction to run a command on top of the current image. Since we will also need a database for our project, we can install the MySQL extensions we need.
We will need more than just PHP for our example project: we will need a database, a web server, and other tools. Therefore, we need a way to run and organize multiple containers. Let’s see how to do that next.
Creating multiple containers
To run multiple containers, let’s use the Compose tool that is pre-installed when you install Docker Desktop.
Create a phptdd/docker/docker-compose.yml file, like so:
version: "3.7"
services:
  # Web Server
  server-web:
    build:
      dockerfile: ./Dockerfile
      context: .
    restart: always
    volumes:
      - "../codebase/:/var/www/html/"
    ports:
      - "8081:80"
  # MySQL Database
  server-mysql:
    image: mysql:8.0.19
    restart: always
    environment:
      MYSQL_ROOT_PASSWORD: mypassword
    volumes:
      - mysql-data:/var/lib/mysql
  # Optional MySQL Management Tool
  phpmyadmin:
    image: phpmyadmin/phpmyadmin:5.0.1
    restart: always
    environment:
      PMA_HOST: server-mysql
      PMA_USER: root
      PMA_PASSWORD: mypassword
    ports:
      - "3333:80"
volumes:
  mysql-data:
In our docker-compose.yml file, we have declared and configured three main containers, which are all accessible through different ports:
- Web server: server-web
- MySQL DB server: server-mysql
- phpMyAdmin: app-phpmyadmin
We were able to install Docker Desktop and create the required Dockerfile and docker-compose.yml files that contain the template to build our containers. Let’s try running all the containers and make sure that they are configured correctly and can communicate with each other.
Running Docker containers
Now that we have the two base Docker files that we need, let’s create an example PHP program that we can use to make sure that our containers are working as expected.
Create a phptdd/codebase/index.php PHP file, like so:
<?php
$dbHost         = "server-mysql";
$dbUsername     = "root";
$dbPassword     = "mypassword";
$dbName         = "mysql";
try {
    $conn = new PDO("mysql:host=$dbHost;dbname=$dbName",
        $dbUsername, $dbPassword);
    $conn->setAttribute(PDO::ATTR_ERRMODE, PDO::
        ERRMODE_EXCEPTION);
    echo "MySQL: Connected successfully";
} catch(PDOException $e) {
    echo "Connection failed: " . $e->getMessage();
}
// Show PHP info:
phpinfo();
?>
At this stage, we have created three files and have the following directory structure:

Figure 3.2 – Base files
Let’s go through this directory structure:
- Dockerfile: The file where we declared which base Docker image to use and added instructions to install MySQL extensions
- docker-compose.yml: The file where we added configurations for the three base containers we want to run to serve as our Linux Apache MySQL PHP (LAMP) stack
- index.php: The test PHP file we created to test if the PHP application was able to connect to the MySQL container and show some details about the PHP server
Before being able to run our containers, we need to build the main image that we need to run the containers first.
Building a Docker image and running containers
Run the following command to download the base image and build our Docker image:
$ cd ~/phptdd/docker
$ docker-compose build
It will take a few minutes to run on the first try. The command will pull the base image that we have declared inside the Dockerfile from the Docker repository, and it will also execute the RUN command we added in the second line of the Dockerfile.
Once the build is done, we can run the three containers we have configured by using the docker-compose.yml file:
$ docker-compose up -d
After running the command, you should see all three containers being created:
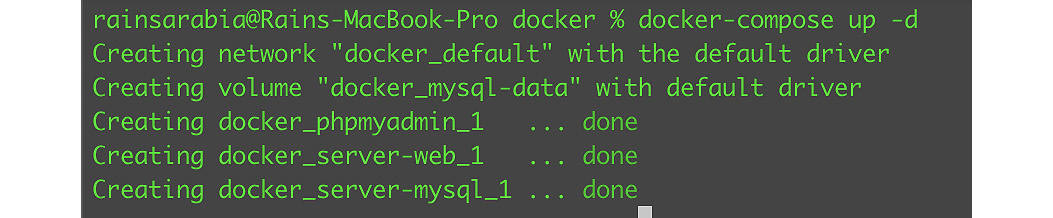
Figure 3.3 – Containers created
Now, let’s see if the containers are running properly; run the following command:
$ docker ps -a
You should see the three containers we have created, and the status should indicate that they are running:

Figure 3.4 – Containers are running
We can see from the list in Figure 3.4 that the containers are running.
Now, let’s try to run the PHP test program we wrote: open a web browser and try to access http://127.0.0.1:8081. If you check the docker-compose.yml file, you will see we have declared that we want to route port 8081 from your host machine to port 80 of the container. You will also be able to see the port routing for running containers using the docker ps -a command.
You should see a MySQL: Connected Successfully message and a standard PHP info output. This shows that our PHP application running inside the server-web container is connected to the server-mysql container:

Figure 3.5 – Test script: successful PHP to MySQL connection and PHP info
We have also configured the third container to serve our phpMyAdmin application; this is entirely optional. Using your web browser, go to http://127.0.0.1:3333:

Figure 3.6 – phpMyAdmin screen
You should now see the phpMyAdmin main dashboard, with the default databases listed in the left column.
This is all looking good. The three containers we have configured are running correctly and are able to communicate and link to each other. We now have a basic development environment for our PHP application. Next, let’s try to stop the containers.
Stopping containers
There are times when you need to stop containers, such as when you want to reload new configurations, or if you just want to stop containers that you no longer need.
To stop running containers, as well as remove their configurations, run the following command:
$ docker-compose down
Now, if you try to check the status of the containers by running docker ps, you will see that our three containers are gone from the list. You can also use docker kill <container_name> to stop a specific container.
Summary
In this chapter, we introduced Docker and used it to create and run containers. Containers are instances of packaged applications. Although we have seen that containers are packages and isolated, they can also communicate with each other. For instance, our example PHP program is running inside the server-web container and then connects to the server-mysql container that runs our MySQL server.
We’ve seen how simple it is to launch containers. We have two PHP containers running (server-web and app-phpmyadmin) and one database container (server-mysql), and we can run more containers if we need to. We will be using the base containers we have created to build our PHP project; we will continue modifying our containers and will install more libraries and tools as we go along.
In the next chapter, we will start building our base PHP application. We will try to go through the features and reasons why we decided to use PHP in the first place. We will be installing the Laravel framework to simplify the process of writing our solution so that we can focus more on test-driven development (TDD) itself and not on writing tons of bootstrap code.