
This book will teach you how to write Python programs that run on the command line. If you have never used the command line before, don’t worry! You can use programs like PyCharm (see figure 0.1) or Microsoft’s VS Code to help you write and run these programs. If you are completely new to programming or to the Python language, I will try to cover everything I think you’ll need to know, although you might find it useful to read another book first if you’ve never heard of things like variables and functions.
In this introduction, we’ll discuss
Writing command-line programs
Why do I want you to write command-line programs? For one, I think they strip a program down to its most bare essentials. We’re not going to try to write complicated programs like an interactive 3D game that requires lots of other software to work. The programs in this book will all work with the barest of inputs and create only text output. We’re going to focus on learning the core Python language and how to write and test programs.
Another reason for focusing on command-line programs is that I want to show you how to write programs that can run on any computer that has Python installed. I’m writing this book on my Mac laptop, but I can run all the programs on any of the Linux machines I use in my work or on a friend’s Windows machine. Any computer with the same version of Python can run any of these programs, and that is pretty cool.

Figure 0.1 This is the PyCharm tool being used to edit and run the hello.py program from chapter 1. “Hello, World!”
The biggest reason I want to show you how to write command-line programs, though, is because I want to show you how to test programs to make sure they work. While I don’t think anyone will die if I make a mistake in one of my programs, I still really, really want to be sure that my code is as perfect as possible.
What does it mean to test a program? Well, if my program is supposed to add two numbers together, I’ll need to run it with many pairs of numbers and check that it prints the correct sum. I might also give it a number and a word, to make sure that it doesn’t try to add “3” plus “seahorse” but instead complains that I didn’t give it two numbers. Testing gives me some measure of confidence in my code, and I hope you will come to see how testing can help you understand programming more deeply.
The exercises in this book are meant to be silly enough to pique your interest, but they each contain lessons that can be applied to all sorts of real-world problems. Almost every program I’ve ever written needs to accept some input data, whether from the user or from a file, and produce some output--sometimes text on the screen or maybe a new file. These are the kinds of skills you’ll learn by writing these programs.
In each chapter, I’ll describe some program that I want you to write and the tests you’ll use to check if your program is working correctly. Then I’ll show you a solution and discuss how it works. As the problems get harder, I’ll start suggesting ways you might write your own tests to explore and verify your code.
When you’re done with this book, you should be able to
-
Use Python data structures like strings, lists, and dictionaries
-
Use and control randomness to make your programs behave unpredictably
“Codes are a puzzle. A game, just like any other game.”
Alan Turing is perhaps most famous for cracking the Enigma code that the Nazis used to encrypt messages during World War II. The fact that the Allies could read enemy messages is credited with shortening the war by years and saving millions of lives. The Imitation Game is a fun movie that shows how Turing published puzzles in newspapers to find people who could help him break what was supposed to be an unbreakable code.
I think we can learn tons from writing fun programs that generate random insults or produce verses to “The Twelve Days of Christmas” or play Tic-Tac-Toe. Some of the programs in this book even dabble a bit in cryptography, like in chapter 4 where we encode all the numbers in a piece of text or in chapter 18 where we create signatures for words by summing the numeric representations of their letters. I hope you’ll find the programs both amusing and challenging.
The programming techniques in each exercise are not specific to Python. Most every language has variables, loops, functions, strings, lists, and dictionaries, as well as ways to parameterize and test programs. After you write your solutions in Python, I encourage you to write solutions in another language you know and compare what parts of the different languages make it easier or harder to write your programs. If your programs support the same command-line options, you can even use the included tests to verify those programs.
Using test-driven development
Test-driven development is described by Kent Beck in his 2002 book by that title as a method for creating more reliable programs. The basic idea is that we write tests even before we write code. The tests define what it means to say that our program works “correctly.” First we write and run our tests to verify that our code fails. Then we write the code to make each test pass. We always run all of the tests so that, as we fix new tests, we ensure we don’t break tests that were passing before. When all the tests pass, we have at least some assurance that the code we’ve written conforms to some manner of specification.
Each program you are asked to write in this book comes with tests that will tell you when the code is working acceptably. The first test in every exercise checks whether the expected program exists. The second test checks that the program will print a help message if we ask for help. After that, your program will be run with various inputs and options.
Since I’ve written around 250 tests for the programs in this book, and you have not yet written one of the programs, you’re going to encounter many failed tests. That’s OK! In fact, it’s a really good thing, because when you pass all the tests, you’ll know that your programs are correct. You’ll learn to read the failed tests carefully to figure out what needs fixing. Then you’ll correct the program and run the tests again. You may get another failed test, in which case you’ll repeat the process until finally all the tests pass. Then you’ll be done.

It doesn’t matter if you solve the problems the same way as in the solution I provide. All that matters is that you figure out a way to pass the tests.
Setting up your environment
If you want to write these programs on your computer, you will need Python version 3.6 or later. It’s quite possible that it’s already installed on your computer.
You’ll also need some way to execute the python3 command--something we often call a command line. If you use a Windows computer, you may want to install Windows Subsystem for Linux (WSL). On a Mac, the default Terminal app is sufficient. You can also use a tool like VS Code (in figure 0.2) or PyCharm, which have terminals built into them.

Figure 0.2 An IDE like VS Code combines a text editor for writing your code along with a terminal (lower-right window) for running your programs, and many other tools.
I wrote and tested the programs for this book with Python version 3.8, but they should work with version 3.6 or newer. Python 2 reached its end of life at the end of 2019 and should no longer be used. To see what version of Python you have installed, open a terminal window and type python3 --version. If it says something like “command "python3" not found,” then you need to install Python. You can download the latest version from the Python site (www.python.org/downloads).
If you are using a computer that doesn’t have Python, and you don’t have any way to install Python, you can do everything in this book using the Repl.it website (http://repl.it).
Code examples
Throughout the book, I will show commands and code using a fixed-width font. When the text is preceded with a dollar sign ($), that means it’s something you can type on the command line. For instance, there is a program called cat (short for “concatenate”) that will print the contents of a file to the screen. Here is how I can run it to print the contents of the spiders.txt file that lives in the inputs directory:
$ cat inputs/spiders.txt
Don't worry, spiders,
I keep house
casually.
If you want to run that command, do not copy the leading $, only the text that follows. Otherwise you’ll probably get an error like “$: command not found.”
Python has a really excellent tool called IDLE that allows you to interact directly with the language to try out ideas. You can start it with the command idle3. That should open a new window with a prompt that looks like >>> (see figure 0.3).

Figure 0.3 The IDLE application allows you to interact directly with the Python language. Each statement you type is evaluated when you press Enter, and the results are shown in the window.
You can type Python statements there, and they will be immediately evaluated and printed. For example, type 3 + 5 and press Enter, and you should see 8:
>>> 3 + 5
8
This interface is called a REPL because it’s a Read-Evaluate-Print-Loop. (I pronounce this like “repple” in a way that sort of rhymes with “pebble.”) You can get a similar tool by typing python3 on the command line (see figure 0.4).

Figure 0.4 Typing the command python3 in the terminal will give you a REPL similar to the IDLE interface.
The IPython program is yet another “interactive Python” REPL that has many enhancements over IDLE and python3. Figure 0.5 shows what it looks like on my system.
I also recommend you look into using Jupyter Notebooks, as they allow you to interactively run code with the added bonus that you can save a Notebook as a file and share all your code with other people.
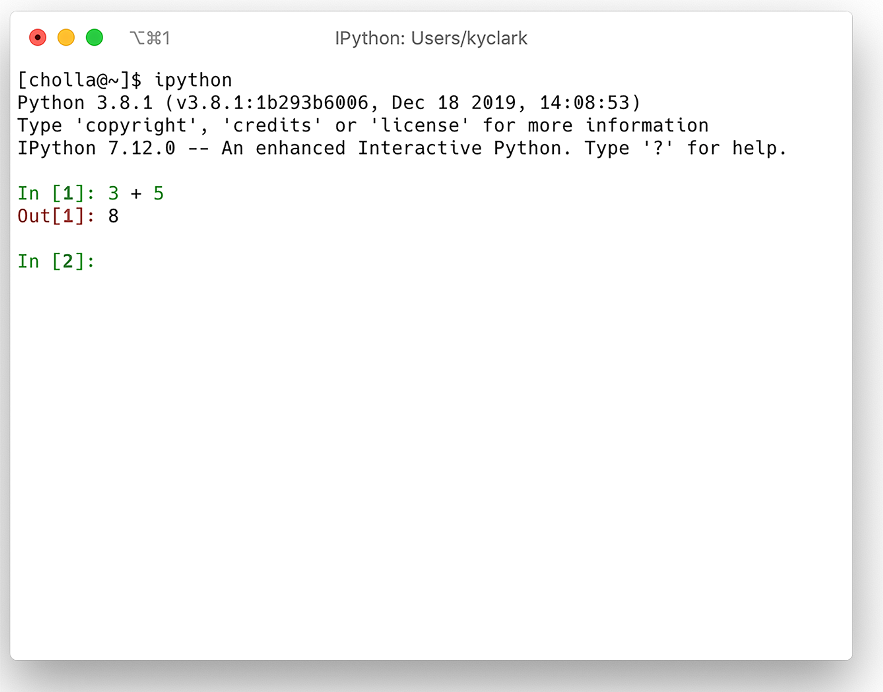
Figure 0.5 The IPython application is another REPL interface you can use to try out your ideas with Python.
Whichever REPL interface you use, you can type Python statements like x = 10 and press Enter to assign the value 10 to the variable x:
>>> x = 10
As with the command-line prompt, $, do not copy the leading >>> or Python will complain:
>>> >>> x = 10
  File "<stdin>", line 1
    >>> x = 10
     ^
SyntaxError: invalid syntax
The IPython REPL has a magical %paste mode that removes the leading >>> prompts so that you can copy and paste all the code examples:
In [1]: >>> x = 10

In [2]: x
Out[2]: 10
Whichever way you choose to interact with Python, I suggest you manually type all the code yourself in this book, as this builds muscle memory and forces you to interact with the syntax of the language.
Getting the code
All the tests and solutions are available at https://github.com/kyclark/tiny_python_ projects. You can use the program Git (which you may need to install) to copy that code to your computer with the following command:
$ git clone https://github.com/kyclark/tiny_python_projects
Now you should have a new directory called tiny_python_projects on your computer.
You may prefer to make a copy of the code into your own repository, so that you can track your changes and share your solutions with others. This is called “forking” because you’re breaking off from my code and adding your own programs to the repository. If you plan to use Repl.it to write the exercises, I recommend you do fork my repo into your own account so that you can configure Repl.it to interact with your own GitHub repositories.

Figure 0.6 The Fork button on my GitHub repository will make a copy of the code into your account.
Now you have a copy of my all code in your own repository. You can use Git to copy that code to your computer. Be sure to replace “YOUR_GITHUB_ID” with your actual GitHub ID:
$ git clone https://github.com/YOUR_GITHUB_ID/tiny_python_projects
I may update the repo after you make your copy. If you would like to be able to get those updates, you will need to configure Git to set my repository as an “upstream” source. To do so, after you have cloned your repository to your computer, go into your tiny_python_projects directory:
$ cd tiny_python_projects
$ git remote add upstream https://github.com/kyclark/tiny_python_projects.git
Whenever you would like to update your repository from mine, you can execute this command:
$ git pull upstream master
Installing modules
I recommend using a few tools that may not be installed on your system. You can use the pip module to install them like so:
$ python3 -m pip install black flake8 ipython mypy pylint pytest yapf
I’ve also included a requirements.txt file in the top level of the repository. You can use it to install all the modules and tools with this command:
$ python3 -m pip install -r requirements.txt
If, for example, you wish to write the exercises on Repl.it, you will need to run this command to set up your environment, as the modules are not already installed.
Code formatters
Most IDEs and text editors will have tools to help you format your code so that it’s easier to read and find problems. In addition, the Python community has created a standard for writing code so that other Python programmers can readily understand it. The PEP 8 (Python Enhancement Proposal) document at www.python.org/dev/peps/ pep-0008/ describes best practices for formatting code, and most editors will automatically apply formatting for you. For instance, the Repl.it interface has an autoformat button (see figure 0.7), VS Code has a Format Document command, and PyCharm has a Reformat Code command.

Figure 0.7 The Repl.it tool has an autoformat button to reformat your code according to community standards. The interface also includes a command line for running and testing your program.
There are also command-line tools that integrate with your editor. I used YAPF (Yet Another Python Formatter, https://github.com/google/yapf) to format every program in the book, but another popular formatter is Black (https://github.com/psf/ black). Whatever you use, I encourage you to use it often. For instance, I can tell YAPF to format the hello.py program that we will write in chapter 1 by running the following command. Note that the -i tells YAPF to format the code “in place,” so that the original file will be overwritten with the newly formatted code.
$ yapf -i hello.py
Code linters
A code linter is a tool that will report problems in your code, such as declaring a variable but never using it. Two that I like are Pylint (www.pylint.org/) and Flake8 (http://flake8.pycqa.org/en/latest/), and both can find errors in your code that the Python interpreter itself will not complain about.
In the final chapter, I will show you how to incorporate type hints into your code that the Mypy tool (http://mypy-lang.org/) can use to find problems, such as using text when you should be using a number.
How to start writing new programs
I think it’s much easier to start writing code with a standard template, so I wrote a program called new.py that will help you create new Python programs with boilerplate code that will be expected of every program. It’s located in the bin directory, so if you are in the top directory of the repository, you can run it like this:
$ bin/new.py
usage: new.py [-h] [-s] [-n NAME] [-e EMAIL] [-p PURPOSE] [-f] program
new.py: error: the following arguments are required: program
Here you can see that new.py is asking you to provide the name of the “program” to create. For each chapter, the program you write needs to live in the directory that has the test.py file for that program.
For example, you can use new.py to start off chapter 2’s crowsnest.py program in the 02_crowsnest directory like so:
$ bin/new.py 02_crowsnest/crowsnest.py
Done, see new script "02_crowsnest/crowsnest.py."
If you open that file now, you’ll see that it has written a lot of code for you that I’ll explain later. For now, just realize that the resulting crowsnest.py program is one that can be run like so:
$ 02_crowsnest/crowsnest.py
usage: crowsnest.py [-h] [-a str] [-i int] [-f FILE] [-o] str
crowsnest.py: error: the following arguments are required: str
Later you’ll learn how to modify the program to do what the tests expect.
An alternative to running new.py is to copy the file template.py from the template directory to the directory and program name you need to write. You could create the crowsnest.py program file like so:
$ cp template/template.py 02_crowsnest/crowsnest.py
You do not have to use either new.py or copy the template.py file to start your programs. These are provided to save you time and provide your programs with an initial structure, but you are welcome to write your programs however you please.
Why not Notebooks?
Many people are familiar with Jupyter Notebooks, as they provide a way to integrate Python code and text and images into a document that other people can execute like a program. I really love Notebooks, especially for interactively exploring data, but I find them difficult to use in teaching for the following reasons:
-
A Notebook is stored in JavaScript Object Notation (JSON), not as line-oriented text. This makes it really difficult to compare Notebooks to each other to find out how they differ.
-
Code and text and images can live mixed together in separate cells. These cells can be interactively run in any order, which can lead to very subtle problems in the logic of a program. The programs we write in this book will always be run from top to bottom in entirety every time, which I think makes them easier to understand.
-
There is no way for Notebooks to accept different values when they are run. That is, if you test a program with one input file and then want to change to a different file, you have to change the program itself. You will learn how to pass in a file as an argument to the program, so that you can change the value without changing the code.
-
It’s difficult to automatically run tests on a Notebook or on the functions they contain. We will use the
pytestmodule to run our programs over and over with different input values and verify that the programs create the correct output.
The scope of topics we’ll cover
The purpose of this book is to show you how amazingly useful all the built-in features of the Python language are. The exercises will push you to practice manipulating strings, lists, dictionaries, and files. We’ll spend several chapters focusing on regular expressions, and every exercise except for the last requires you to accept and validate command-line arguments of varying types and numbers.
Every author is biased toward some subjects, and I’m no different. I’ve chosen these topics because they reflect ideas that are fundamental to the work I’ve done over the last 20 years. For instance, I have spent many more hours than I would care to admit parsing really messy data from countless Excel spreadsheets and XML files. The world of genomics that has consumed most of my career is based primarily on efficiently parsing text files, and much of my web development work is predicated on understanding how text is encoded and transferred to and from the web browser. For that reason, you’ll find many exercises that entail processing text and files, and that will challenge you to think about how to transform inputs into outputs. If you work through every exercise, I believe you’ll be a much improved programmer who understands the basic ideas that are common across many languages.
Why not object-oriented programming?
One topic that you’ll notice is missing from this book is writing object-oriented code in Python. If you are not familiar with object-oriented programming (OOP), you can skip this section.
I think OOP is a somewhat advanced topic that is beyond the scope of this book. I prefer to focus on how to write small functions and their accompanying tests. I think this leads to more transparent code, because the functions should be short, should only use the values explicitly passed as arguments, and should have enough tests that you can completely understand how they will behave under both favorable and unfavorable circumstances.
The Python language is itself inherently object-oriented. Almost everything from strings to the lists and dictionaries that we’ll use are actually objects, so you’ll get plenty of practice using objects. But I don’t think it’s necessary to create objects to solve any of the problems I present. In fact, even though I spent many years writing object-oriented code, I haven’t written in this style for the last few years. I tend to draw my inspiration from the world of purely functional programming, and I hope I can convince you by the end of this book that you can do anything you want by combining functions.
Although I personally avoid OOP, I would recommend you learn about it. There have been several seismic paradigm shifts in the world of programming from procedural to object-oriented and now functional. You can find dozens of books on OOP in general and on programming objects in Python specifically. This is a deep and fascinating topic, and I encourage you to try writing object-oriented solutions and compare them to my solutions.
A note about the lingo
Often in programming books you will see foobar used in examples. The word has no real meaning, but its origin probably comes from the military acronym “FUBAR” (Fouled Up Beyond All Recognition). If I use “foobar” in an example, it’s because I don’t want to talk about any specific thing in the universe, just the idea of a string of characters. If I need a list of items, usually the first item will be “foo” and the next will be “bar.” After that, convention uses “baz” and “quux,” again because they mean nothing at all. Don’t get hung up on “foobar.” It’s just a placeholder for something that could be more interesting later.
