
The HelloWorldService is a class library. It has to be hosted in an environment so that client applications may access it. In this section, we will explain how to host it using the ASP.NET Development Server. Later, in the next chapter, we will discuss more hosting options for a WCF service.
There are several built-in host applications for WCF services within Visual Studio 2008. However, in this section, we will manually create the host application so that you can have a better understanding of what a hosting application is really like under the hood. In subsequent chapters, we will explain and use the built-in hosting applications.
To host the library using the ASP.NET Development Server, we need to add a new web site to the solution. Follow these steps to create this web site:
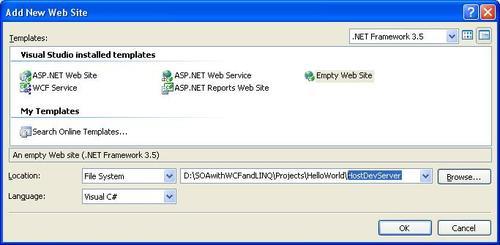
- In the Solution Explorer, right-click on the solution file, and select Add | New Web Site from the context menu. The Add New Web Site dialog window should pop up.
- Select Empty Web Site as the template, and leave the Location set as File System, and language as Visual C#. Change the web site name from WebSite1 to HostDevServer, and click OK.
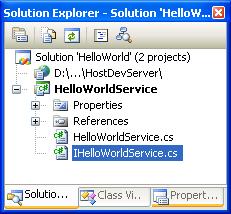
- Now in the Solution Explorer, you have one more item (HostDevServer) within the solution. It will look like the following:
- Next, we need to set the website as the startup project. In the Solution Explorer, right-click on the web site
D:...HostDevServer, select Set as StartUp Project from the context menu (or you can first select the web site from the Solution Explorer, and then select menu item Website | Set as StartUp Project). The web siteD:...HostDevServershould be highlighted in the Solution Explorer indicating that it is now the startup project. - Because we will host the
HelloWorldServicefrom this web site, we need to add aHelloWorldServicereference to the web site. In the Solution Explorer, right-click on the web siteD:...HostDevServer, and select Add Reference from the context menu. The following Add Reference dialog box should appear: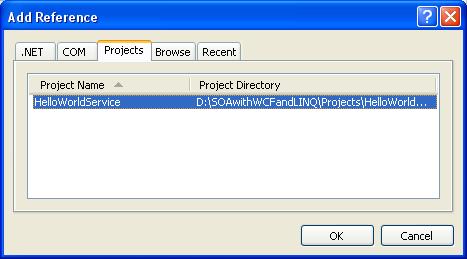
- In the Add Reference dialog box, click on the Projects tab, select HelloWorldService project, and then click OK. You will see that a new directory (bin) has been created under the
HostDevServerweb site, and two files fromHelloWorldServiceproject have been copied to this new directory. Later on, when this web site is accessed, the web server (either ASP.NET Development Server or IIS) will look for executable code in thisbindirectory.
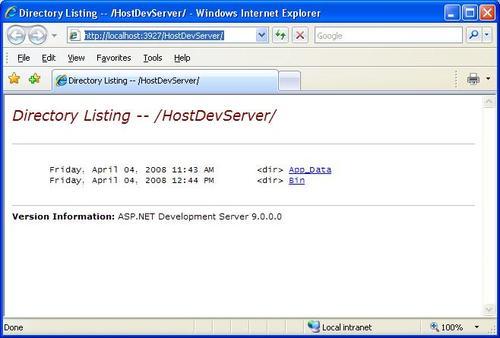
- Now we can run the website inside the ASP.NET Development Server. If you start the web site
HostDevServer, by pressing Ctrl+F5, or select the Debug | Start Without Debugging menu, you will see an empty web site in your browser. Because we have set this website as the startup project, but haven't set any start page, it lists all of the files and directories inside theHostDevServerdirectory (Directory Browsing is always enabled for a website within the ASP.NET Development Server).
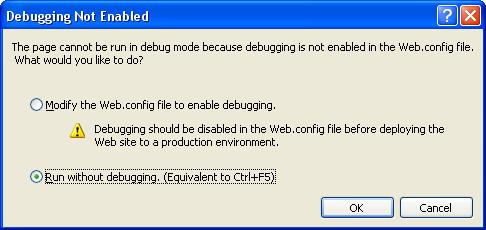
If you pressed F5 (or selected Debug | Start Debugging from the menu), you may see a dialog saying Debugging Not Enabled (as shown below). Choose the option Run without debugging. (Equivalent to Ctrl+F5) and click the OK button to continue. We will explore the debugging options of a WCF service later. Until then, we will continue to use Ctrl+F5 to start the website without debugging.
At this point, you should have the HostDevServer site up and running. This site is actually running inside the built-in ASP.NET Development Server. It is a new feature that was introduced in Visual Studio 2005. This web server is intended to be used by developers only, and has functionality similar to that of the Internet Information Services (IIS) server. It also has some limitations; for example, you can run ASP.NET applications only locally. You can't use it as a real IIS server to publish a web site.
By default, the ASP.NET Development Server uses a dynamic port for the web server each time it is started. You can change it to use a static port via the Properties page of the web site. Just change the Use dynamic ports setting to false, and specify a static port, such as 8080, from the Properties window of the HostDevServer web site. You can't set the port to 80, because IIS is already using this port. However, if you stop your local IIS, you can set your ASP.NET Development Server to use port 80.
Note
Even you set its port to 80 it is still a local web server. It can't be accessed from outside your local PC.
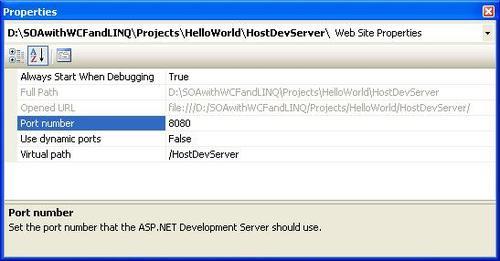
It is recommended that you use a static port so that client applications know in advance where to connect to the service. From now on, we will always use port 8080 in all of our examples.
The ASP.NET Development Server is normally started from within Visual Studio when you need to debug or unit test a web project. If you really need to start it from outside Visual Studio, you can use a command line statement in the following format:
start /B WebDev.WebServer [/port:<port number>] /path:<physical path> [/vpath:<virtual path>]
For our web site, the statement should be like this:
start /B webdev.webserver.exe /port:8080 /path:"D:SOAwithWCFandLINQProjectsHelloWorldHostDevServer" /vpath:/HostDevServer
The webdev.webserver.exe is located under your .NET framework installation directory (C:WINDOWSMicrosoft.NETFrameworkv2.0.50727).
Although we can start the web site now, it is only an empty site. Currently, it does not host our HelloWorldService. This is because we haven't specified which service this web site should host, or an entry point for this web site. Just as an asmx file is the entry point for a non-WCF web service, a .svc file is the entry point for a WCF service, if it is hosted on a web server. We will now add such a file to our web site.
From the Solution Explorer, right-click on the web site D:...HostDevServer, and select Add New Item… from the context menu. The Add New Item dialog window should appear, as shown below. Select Text File as the template, and change the Name from TextFile.txt to HelloWorldService.svc in this dialog window.
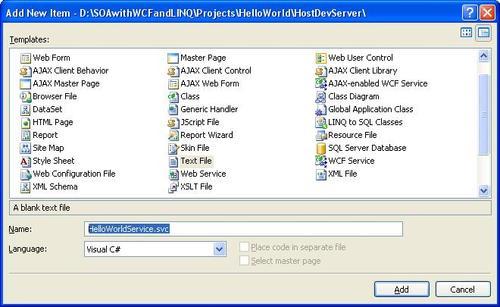
You may have noticed that there is a template, WCF Service, in the list. We won't use it now as it will create a new WCF service within this web site for you (we will use this template later).
After you click the Add button in the Add New Item dialog box, an empty svc file will be created and added to the web site. Now enter the following line in this file:
<%@ServiceHost Service="MyWCFServices.HelloWorldService"%>
The final step is to add a web.config file to the web site. As in the previous step, add a text file named web.config to the web site and enter the following code in this file:
<?xml version="1.0" encoding="utf-8" ?>
<configuration>
<appSettings>
<add key="HTTPBaseAddress" value=""/>
</appSettings>
<system.serviceModel>
<services>
<service
name="MyWCFServices.HelloWorldService"
behaviorConfiguration="MyServiceTypeBehaviors">
<endpoint
address=""
binding="wsHttpBinding"
contract="MyWCFServices.IHelloWorldService"/>
<endpoint
contract="IMetadataExchange"
binding="mexHttpBinding"
address="mex" />
</service>
</services>
<behaviors>
<serviceBehaviors>
<behavior name="MyServiceTypeBehaviors" >
<serviceMetadata httpGetEnabled="true" />
</behavior>
</serviceBehaviors>
</behaviors>
</system.serviceModel>
</configuration>
Within this file, we set HTTPBaseAddress to empty, because this WCF service is hosted inside a web server and we will use the web server default address as the service address.
The behavior httpGetEnabled is essential, because we want other applications to be able to locate the metadata of this service. Without the metadata, client applications can't generate the proxy and thus won't be able to use the service.
We use wsHttpBinding for this hosting, which means that it is secure (messages are encrypted while being transmitted), and transaction-aware (we will discuss this in a later chapter). However, because this is a WS-* standard, some existing applications (for example: a QA tool) may not be able to consume this service. In this case, you can change the service to use the basicHttpBinding, which uses plain unencrypted texts when transmitting messages, and is backward compatible with traditional ASP.NET web services (asmx web services).
The following is a brief explanation of the other elements in this configuration file:
Configurationis the root node of the file.- Within the
appSettingsnode, you can add application-specific configurations. In this file, we have added one setting for the base address of the web site. In a later chapter, we will add a connection strings key to this node. system.serviceModelis the top node for all WCF service specific settings.- Within the
servicesnode, you can specify WCF services that are hosted on this web site. In our example, we have only one WCF serviceHelloWorldServicehosted in this web site. - Each
serviceelement defines one WCF service, including its name, behavior, and endpoint. - Two endpoints have been defined for the
HelloWorldService, one for the service itself (an application endpoint), and another for the metadata exchange (an infrastructure endpoint). - Within the
serviceBehaviorsnode, you can define specific behaviors for a service. In our example, we have specified one behavior, which enables the service meta data exchange for the service.
Now, if you start the web site by pressing Ctrl+F5 (again, don't use F5 or menu option Debug | Start Debugging until we discuss these, later), you will now find the file HelloWorldService.svc listed on the web page. Clicking on this file will give the description of this service, that is, how to get the wsdl file of this service, and how to create a client to consume this service. You should see a page similar to the following one. You can also set this file as the start page file so that every time you start this web site, you will go to this page directly. You can do this by right-clicking on this file in the Solution Explorer and selecting Set as Start Page from the context menu.
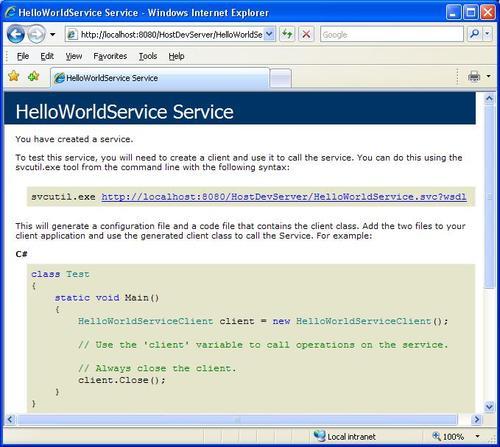
Now, click on the wsdl link on this page, and you will get the wsdl xml file for this service. The wsdl file gives all of the contract information for this service. In the next section, we will use this wsdl to generate a proxy for our client application.
Close the browser. Then, from the Windows system tray (systray), find the little icon labeled ASP.NET Development Server Port 8080 (it is on the lower-right of your screen, just next to the clock), right-click on it, and select Stop to stop ther service.