
Chapter 5
Targeting Your Communication with Slack Channels
IN THIS CHAPTER
![]() Introducing the concept of a Slack channel
Introducing the concept of a Slack channel
![]() Describing the different types of Slack channels
Describing the different types of Slack channels
![]() Creating, joining, and naming channels
Creating, joining, and naming channels
![]() Performing additional channel actions
Performing additional channel actions
![]() Posting messages in channels
Posting messages in channels
Your relationship with email is likely complicated. You may lament the fact that you’re always playing whack-a-mole with your inbox. At the same time, how else would you exchange messages with your colleagues, partners, customers, and vendors? Maybe you’ve wondered if there’s a legitimate alternative to email.
If so, you’re in luck, because Slack turns the traditional inbox model on its head. It offers superior options for communicating that leave email in the dust.
Slack does not portend the death of email. If used properly, however, Slack will reduce the size of your inbox and reduce the rate at which it grows. You may even break your email addiction!
This chapter introduces one of Slack’s pillars for promoting effective business communication and collaboration: channels.
Introducing Slack Channels
Think of Slack channels as individual buckets that promote discussion about a particular topic or set of topics. (Workspaces are covered in Chapter 4.) Channels are big containers of information that you can make as specific or general as you like. Slack lets you customize channels to your heart’s content.
At a high level, Slack users send and receive messages in two places:
- Within individual channels (the topic of this chapter)
- Outside channels via individual and group direct messages or DMs (see Chapter 6)
Forget Slack for a moment. When employees join a company, the IT department creates email inboxes for them to send and receive messages. If Derrick leaves for greener pastures, his inbox effectively dies.
Slack channels differ from email in this regard. They existed before Derrick arrived. Crucially, they continue to exist after Derrick leaves the company. Figure 5-1 shows how workspaces, channels, and direct messages all tie together.

FIGURE 5-1: The basic Slack workspace communication structure.
Discussions take place inside of channels — the topic of this chapter. However, you don’t need to debate everything in a channel. You can exchange thoughts and ideas with your colleagues via DMs. Slack calls a string of DMs outside of channels conversations. Figure 5-1 intentionally omits shared and multi-workspace channels for the sake of simplicity.
 Slack channels allow you to keep discussions relevant to a particular topic. As such, you can accomplish a number of critical goals:
- Staying focused and organized: Channels allow people to subscribe only to their areas of personal and professional interest. In other words, you can safely ignore topics that don’t matter to you.
- Saving time: Because Slack channels provide valuable context, you reduce the amount of time that you need to process each message. (Given how many emails people receive every day, even a few seconds per message helps.)
- Finding information: By using channels, you make finding information much easier. Slack users can restrict their searches to specific channels, if they want.
When you create a new workspace, Slack automatically adds two public channels to it: #general and #random. By default, any member can post in #general. After that, as long as your role permits, you can set up and join as many or as few channels as you like. Slack roles restrict what users can do (see Chapter 4). You can also view the other members of public channels, and they can view you.
Exploring the Different Types of Slack Channels
As of this writing, Slack allows for four different types of channels, depending on your plan:
- Public
- Private
- Multi-workspace channels (Enterprise Grid only)
- Shared
Conceptually, each type of channel serves the same general purpose. In its simplest form, a channel represents a customizable container for discussions with others in the Slack universe. The differences are subtle but important. For example, the primary differences between public and private channels lie in privacy settings and the ability for others to discover and join it.
Regardless of the type of channel, only workspace members can access the information inside a channel. Put differently, even public Slack channels aren't available to the general public.
Public channels
Here’s a simple introduction to the idea of a public channel:
- They generally exist within a specific Slack workspace. Exceptions to this rule occur when you share a channel with another organization (see “Shared channels,” later in this chapter).
- Other than single-channel guests, by default, anyone in a workspace can join public channels. Of course, someone in an administrative role can disable this setting.
- Other than guests, anyone in a workspace can create public channels.
How can you use public channels? The applications are limitless. Figure 5-2 shows some channels for a fictitious company.
The key point is this: Each channel serves a different purpose.

FIGURE 5-2: A workplace with channels.
Private channels
Like public channels, private channels also exist under a specific workspace. Public and private channels fundamentally serve the same purpose: to share context-specific information with a group of people. Any member in a Slack workspace can join — and contribute to — a public channel. The only exception to the latter is if the Workspace Owner or Admin has limited channel posting rights.
For example, an organization may create public channels for #company_news or #system:issues. The rationale here is simple: All employees should be able to view this critical company information. For confidential discussions in #payroll_issues, #research, and #hr_staffing_plans, however, discussions probably aren't fit for public consumption.
Unlike public channels, private channels appear only in a user’s channel directory if she’s already a member of that private channel. Put differently, if you’re not a member, in theory, you wouldn’t know that a private channel even existed.
Unlike public channels, private ones require invitations to join. You can’t browse private channels and join them.
 You can leave a public channel at any time and rejoin at your leisure. However, if you leave a private channel, an existing member will need to invite you back.
How do you know if a particular channel to which you belong is public or private? If you see a lock icon to the left of the channel name, it’s private. Returning to Figure 5-2, notice how the #announcements channel is private, but the #supplies and #tips_slack channels are public.
When you add users to private channels, they can see the entire history of all previous communications.
Multi-workspace channels
What if your organization uses Slack but different departments set up separate workspaces? Employees want to be able to send messages, share files, and collaborate within the same channel. Slack makes such scenarios possible though multi-workspace channels (MWCs).
 You can skip this section if you're not using or considering Enterprise Grid.
Say that you work in your company’s finance department. You want to share a channel with your peers in accounting, even though the two groups use different workspaces. Follow these steps:
- Click the channel name in the sidebar of the finance workspace.
-
Click the information (i) icon in the upper-right corner.
Slack displays a four-pane tab with the word Details above it.
-
Click the More icon on the far right.
Slack displays a panel underneath the icon.
- Click Additional Options.
-
Select Add to Other [organization name] Workspaces.
Here you locate the accounting workspace.
Slack presents a search box with default text that reads Type a Team Name.
- Type a few letters of the workspace name with which you want to share this channel; when the workspace pops up, select it.
-
Click the green Review Changes button.
Slack warns you if the same workspace name already exists in the “target” workspace. If that’s the case, rename the channel. You can add an underscore when this happens. For example, @announcementsbecomes@announcements_.Slack confirms that all members of both workspaces will be able to join this channel. What's more, they’ll be able to see the channel’s history and files.
-
Click the green Save Changes button.
Members of the finance workspace now may join the MWC, view its content, and contribute on their own.
Expect Slack to take a few minutes to make the channel available in the other workspace. The process isn’t instantaneous. When Slack completes this process, you see an overlapping circles icon to the right of the channel. Everyone will know that the channel now effectively exists in both workspaces.
MWCs work really well for organizations that meet two conditions: They’ve purchased Slack’s Enterprise Grid, and they rely upon multiple workspaces.
With Enterprise Grid, others can add you to an MWC without your consent at any point. If the MWC is public, you can leave it if you want and rejoin it later. If the MWC is private, you can leave, but you’ll need another invite to rejoin.
Shared channels
At some point, you may want to use Slack to work with people from other organizations and third parties that also use Slack. Examples here include vendors, clients, and partners. What if you want to share a specific channel with them? Wouldn’t doing so allow you to seamlessly collaborate?
Customers of premium plans can choose to share channels with external organizations. Slack now allows up to ten different organizations to share the same channel. Of course, all organizations need to belong to a premium Slack plan. To share a channel with an external organization, follow these steps:
- In the sidebar, click the name of the channel that you want to share with another organization.
-
Click the information (i) icon in the upper-right corner.
Slack displays a four-pane tab with the word Details above it.
- Click the More icon on the far right.
- From the drop-down menu, click Additional Options.
- Click Share with Another Organization.
- Copy the link that Slack generates so you can share it with the person in the external organization.
-
Click the green Done button.
You can email that link to the contact at the other organization. Alternatively, you can share the channel with another workspace that you own.
- Paste the link into your web browser’s address bar and press Enter.
-
Select the workspace with which you want to share that channel.
Slack asks you to review and accept the channel’s invitation.
If the “receiving” workspace is on the Slack Free plan, Slack will prompt you to start a trial to a premium plan. You’ll have 14 days to kick the tires on this paid feature.
-
Click the green Accept Invitation box.
Slack has now successfully shared your channel with another organization’s workspace. Slack now places two overlapping diamonds to the right of the channel to indicate that it’s shared. Also, Slackbot notifies all invitees that they now belong to the channel. Note that if the invitee doesn’t belong to a premium plan, Slackbot will post a message with upgrade instructions.
If your organization is using Enterprise Grid, one of its Org Owners or Admins may need to approve your request to share a channel with an external organization.
Creating Public and Private Channels
You create as many channels as you like. Each channel requires a unique name. That is, you can’t create two #development channels within the same workspace. Also, you’ll want to give your channels descriptive names. For example, you don’t want to christen your company’s marketing channel #payroll. Put differently, there's a big difference between can and should. When naming channels, common sense goes a long way.
Next, understand that Slack bans certain words in channel names. Table 5-1 lists Slack’s current reserved words by language.
TABLE 5-1 Reserved Slack Words as of April 1, 2020
|
Language |
Forbidden Words |
|
Brazilian Portuguese |
aquí, canais, canal, eu, general, geral, grupo, mí, todos |
|
English |
archive, archived, archives, all, channel, channels, create, delete, deleted-channel, edit, everyone, general, group, groups, here, me, ms, slack, slackbot, today, you |
|
French |
chaîne/chaine, général/general, groupe, ici, moi, tous |
|
Spanish |
aquí, canal, general, grupo, mí, todos |
If you try to create a channel using one or more of the terms in Table 5-1, you see the following message:
That name is already taken by a channel, username, or user group.
If you create a Slack channel and carefully avoid the terms referenced in Table 5-1, and you still receive a similar message, chances are that Slack has added the word after this book’s publication. You can view the most updated list of reserved terms, as well as banned Japanese symbols, by going to https://bit.ly/sl-ch-nm.
Creating your first public channel
When you know more about the concept of a channel and some restrictions on names, it’s time to create a simple one. The following steps walk you through creating a public channel in your Slack workspace.
This section shows you how to create a basic channel. In reality, though, you’ll want to put some thought into how you and others name and describe the channels in your workspace. (For more on this subject, see the later section “Building an intelligent channel structure.”)
-
Click the plus icon next to Channels in the Slack sidebar.
Slack displays the window in Figure 5-3.

FIGURE 5-3: The Slack prompt for creating a new channel.
-
Enter a name for your channel.
Keep the following rules and suggestions in mind: - The current character minimum is 1; the maximum is 80.
- Consider using underscores to separate words. For example,
#marketing_teamis a better channel name than#marketingteam. - You can't use blank spaces and capital letters.
- Slack will gently suggest adding an existing prefix to your channel to help organize it. (For more on this subject, see the later section “Adding channel prefixes.”)
- Remember that Slack restricts certain words (refer to Table 5-1).
As long as you adhere to Slack’s naming conventions, you can proceed to the next step.
-
(Optional) Add a description of your channel.
Ideally, the description illustrates the conversations that should take place here. In addition, the clearer the channel’s purpose, the less likely people are to post inappropriate messages in it. For more information on this topic, see the later section “Defining each channel’s purpose.”
-
Ignore the Make Private toggle.
After all, you’re creating a public channel in this example.
If Slack restricts you from creating a public channel, then it’s because someone with higher privileges has restricted people in your role from doing so. -
Click the Create button.
Slack displays a screen that allows you to send channel invitations to current workspace members and user groups (see Figure 5-4).

FIGURE 5-4: The Slack prompt for adding members to a new channel.
-
(Optional) If you want to invite others, do so and click the green Done button when you’re finished.
Otherwise, click the white Skip for Now button. You can always add new members later (see the later section “Adding Members to Existing Channels”).
After creating the new channel, Slack assigns a hashtag (#) to precede it. What’s more, Slack automatically adds you to the channel (although you can easily leave it).
To create a private channel, simply follow the preceding steps with the exception of Step 4: You’ll want to move the Make Private toggle to the right. It will then turn green. Beyond this, private channels operate in much the same way as their public brethren. Note, however, that Slack assigns private channels a special icon. Table 5-2 shows the icons associated with different types of channels.
TABLE 5-2 Slack Channel Icons and Descriptions
|
Type of Channel |
Icon Position |
Icon Description |
|
Public (regular) |
Left |
Hashtag or number sign |
|
Private (regular) |
Left |
Padlock |
|
Multi-workspace |
Right |
Overlapping rings or circles |
|
Shared |
Right |
Overlapping diamonds |
Note that, depending on your type of channel, you may see more than one icon. That is, if you create a private shared channel, you see two icons: a padlock icon on the left and overlapping diamonds on the right.
 If you’re familiar with the programming language Python, you can write scripts that automatically create as many channels as you like. You don’t need to create a bunch of channels individually. If you routinely need to create the same set of channels, this method can save you a great deal of time.
Building an intelligent channel structure
Slack won’t prevent you from misnaming channels or entering inaccurate descriptions of the purposes that you want them to serve. As a result, you’ll want to put some thought into how you structure channels in your workspace — and coach others to do the same.
Regardless of the type of channel that you create, each one should serve a different purpose. That’s the whole point of channels. Trying to shoehorn every type of workplace message, question, poll, or announcement into a single channel or two just doesn’t make sense. And forget cost, if that’s what you’re thinking; Slack charges by the user, not by the channel.
Defining each channel’s purpose
The way you structure your channels hinges upon many factors. Perhaps most important are the types of communication that take place within your organization. Think about what each channel’s purpose will be.
Large organizations typically create channels for #hr, #finance, #it, #development, and #marketing — and maybe multiple channels for each function. Others have created an #ask_the_ceo channel that apes Reddit's famous Ask Me Anything (AMA) feature, but an Italian restaurant won’t need this structure. Unless you work in education, you probably won’t create many #homework channels. Again, your channels will depend on your organization’s and employees’ specific communication and collaboration needs.
A little forethought about how to structure the channels in your organization’s Slack workspace(s) will save you a good bit of time down the road. Beyond that, smart naming is less apt to confuse users — some of whom may not share your zeal for Slack. Constantly changing channel names and purposes is bound to wreak havoc throughout your organization.
Be wary of channel overload, especially for new users. They may become confused, post information in incorrect channels, and/or eventually stop using Slack altogether.
Workspace Owners or Admins may want to create and promote a channel dedicated to gathering all users’ requests for new channels. Think of it as a meta-channel.
Adding channel prefixes
If you’re thinking that dozens or even hundreds of channels can become hard to manage, you’re absolutely right. What’s more, if your colleagues create new channels willy-nilly, your workspace’s channel structure will start to become confusing. It’s only a matter of time.
Fortunately, Slack channel prefixes can help in this regard. At a high level, they serve as internal guidelines for naming channels and help organize workspaces — especially large ones.
Slack provides a number of predefined prefixes, but you can create your own. By adding a set of standard prefixes such as help, team, news, tips, or class, workspace members can keep channel names descriptive and consistent throughout the organization.
The number of available prefixes hinges on your Slack plan. Workspaces on the Free plan create a maximum of six. For organizations on premium plans, that number is 99.
To add a new channel prefix, follow these steps:
- Click the main menu.
-
From the drop-down menu, select Settings & Administration and then Workspace Settings.
Slack displays a submenu on the immediate right.
-
Select Customize [Workspace Name].
Slack launches a new window or tab in your default web browser.
-
Click the Channel Prefixes tab on the far right.
You see Slack's predefined prefixes along with descriptions of them. If you want to delete an existing prefix, just click the X icon to its right.
-
Click the Add Prefix button at the bottom of the page.
Slack launches a new window.
- Enter a prefix with a maximum of ten characters.
- Enter a description that informs workspace members of how to use it.
-
Click the green Save button.
Slack now lists your new channel prefix with the rest of them.
You may be chomping at the bit to invite others to your channels. If so, jump to the later section “Adding Members to Existing Channels.” However, you probably want to take the time to understand some of the specific features of Slack channels before blasting out invitations.
Viewing basic channel information
To see an overview of a particular channel, follow these steps:
- Click the channel in the bottom half of the sidebar.
-
Click the information (i) icon in the upper-right corner.
Slack displays the channel’s Detail view, which are four icons in a new pane on the right-hand side:
- Add: Invite others to a channel.
- Find: Search for information in the channel. (You won’t find much material in a new channel, but that will change over time.)
- Call: Hold a call with channel members.
- More: Provides additional options to manage the channel.
Underneath the set of icons are collapsible elements:
- About: Provides the channel’s current topic, description, creation date, and the name of the person who created it.
- Members: View existing members and easily invite more.
- Shortcuts: Create a channel-specific automation through Workflow Builder.
- Pinned Items: Pin a specific message to the top of the channel to maximize its visibility.
- Shared files: Displays files that channel members have uploaded for others to view. You don’t need to scroll through dozens or hundreds of messages trying to find a file.
Note that Slack displays a number to the right of each item. As a result, you can quickly begin the process of absorbing information about the channel. Put all these items together, and you get something similar to Figure 5-5.

FIGURE 5-5: Channel icons and containers.
New channel members should review this information to get a sense of what to expect from it. You don’t want to appear foolish in front of your new channel mates.
Adding Members to Existing Channels
A channel with only one member serves no purpose. Slack is a group tool, not an individual one. To this end, Slack provides two ways to add members to channels: manually and automatically via default channels.
Manual additions
Channels are living, breathing things. Unlike email inboxes, they don’t die when employees leave the company. At some point, you’ll want to add workplace members to an existing channel. You don’t want to wait for people to join specific channels on their own.
Here’s how to add members individually:
- In the lower half of the sidebar, click the channel to which you want to add new members.
-
Click the information (i) icon in the upper-right corner.
Slack displays additional information in a new pane. Underneath About, you see Members.
- Click Members.
-
Click the white Add People button.
If you’re adding a member to a private channel, Slack will display the following message:
Anyone you add will be able to see all the channel’s contents.
- (Optional) Click the green Continue button.
-
In the new pane, type a few letters of that person’s name.
Repeat this process if you want to add more than one person to the channel.
-
Click the green Add button.
Those members now belong to the Slack channel.
That’s great, but what if you want to add hundreds or thousands of users to an existing channel? Selecting them individually would take far too long. In November 2019, Slack made it much easier to add users to channels en masse. Just follow these steps:
- Create a spreadsheet with the email addresses of each person you want to add to a channel.
- Copy those email addresses.
- In the lower half of the sidebar, click the channel to which you want to add new members.
-
Click the information (i) icon in the upper-right corner.
Slack displays additional information in a new pane. Underneath About, you see Members.
- Click Members.
- Click the white Add People button.
-
In the window, paste those email addresses.
The current limit is 1,000 at one time. Slack verifies that those email addresses are valid and that they correspond to members in the existing workspace. If any issues crop up, you can simply delete the email addresses in question and proceed with the rest.
Say that you change your mind and no longer want to invite someone from your pasted list. Just click the X to the right of the person’s name. Slack removes that member from the mass add. In other words, you won’t have to start from scratch. -
Click the green Add button.
Those members are now part of the Slack channel.
Default workplace channels
You can always add new members to existing public channels, either via pasting email addresses or selecting them one by one.
What if you have public channels that you want all new workspace members to join? Slack makes these “auto-adds” simple. Owners and Admins can define default public channels that new workspace members will automatically join. This method represents the easiest way to add users to public channels en masse. Follow these steps:
- Click the workspace name in the upper-left corner.
-
From the drop-down menu, select Settings & Administration and then Workspace Settings.
Slack takes you to the first tab on the page, labeled Settings.
- Click the Expand button to the right of Default Channels.
- Click the box that appears and select the public channels that all new workspace members will automatically join.
-
Press Tab and click the Save button.
Voilà! New Slack members now automatically join the channels that you just selected (see Figure 5-6).

FIGURE 5-6: Setting default Slack channels for workspace members.
Exploring Existing Public Channels
If your organization has just started experimenting with Slack, your colleagues may not have created many public channels. Over time, however, that will change. People will create public channels devoted to different topics.
Say you’re curious about what others in your organization are discussing. To browse existing public channels, follow these steps:
-
Click the Channels view in the top of the sidebar.
You can now browse all available public channels, as well as the private channels to which you already belong (see Figure 5-7).
The sheer number of channels may overwhelm you. Fortunately, Slack provides two useful ways to let users easily discover channels of interest:
- Sort: Slack lets you filter by channel date, number of members, and alphabetical order.
- Filter: Slack lets you restrict channel types: private and archived. You can also hide the channels to which you already belong (see Figure 5-8).
Note that Slack won’t let you browse and join others’ private channels. By filtering on private channels, you can only view those to which you already belong.

FIGURE 5-7: Viewing existing channels in a Slack workspace.

FIGURE 5-8: Browsing a filtered list of public Slack channels to which you don’t belong.
-
(Optional) Click the channel that you want to preview before joining.
Slack displays four new icons in a pane on the right side:
- Preview
- Join
- Find
- More
When you click the Preview button, Slack displays the messages in the channel. You haven’t joined yet; you just want to kick the tires. Previewing a channel helps you get a feel for the types of discussions already taking place there. Click Find to search the channel for specific keywords.
-
If you decide that you want to be a member of this channel, click the Join button.
You’re now a member of this public channel. Access it in your sidebar.
Say that you already know the name of the channel you want to join. Go to any existing channel or send yourself a DM. (Chapter 6 covers DMs in much more depth.) Type /join followed by the channel’s name and press Enter. For example, if you type /join #marketing, Slack skips the channel preview and automatically adds you to this channel. You can then read members’ previous messages and post your own.
If you’re joining an existing channel, take a few minutes to read its purpose, as well as a few topics. Also, if it’s a relatively small or targeted channel, briefly introduce yourself to others in the channel.
Communicating via Slack Channels
Although a channel is a powerful tool, it’s really only a means to an end — it allows you to disseminate information and interact with others. After you know more about channels, it’s time to discuss sending messages in them. (Chapter 6 covers messages in more detail.)
You’ll likely spend far more time interacting with people in channels than creating and maintaining them.
Posting simple channel messages
To post a simple message in a Slack channel, simply go to the bottom of a channel and type whatever you like in the message prompt. Press Enter and you’re done.
Figure 5-9 shows a simple message that I posted in the #tips_technology channel, along with Walter White’s response.
Messages and responses in Slack channels aren’t private. Everyone in the channel can view the interaction. If you want to send private messages, you’ll have to use direct messages (see Chapter 6).
You can mention your fellow workspace channel members by using the @ symbol. All other channel members can respond to any message that you post in a channel. They can include emojis, URLs, and even animated GIFs in their responses.
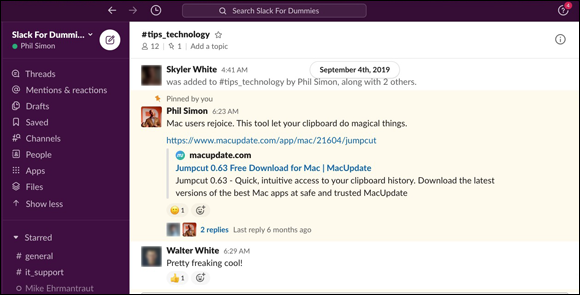
FIGURE 5-9: A simple Slack channel message with a response.
Here are a few more tips:
- If you want to alert every member in a channel that you've sent or responded to a message, simply type @channel.
- Workspace Owners and Admins can delete others’ messages in public channels. If you want to delete someone else’s message, follow up with the offender and explain why his message was inappropriate. Ideally, this intervention will prevent a recurrence.
- To guide the channel’s discussion, set a topic. Find out more at
https://bit.ly/sl-topic.
Understanding channel etiquette
In the rest of this chapter, you discover a great deal about how to create Slack channels and post messages and snippets in them. It’s time to discuss Slack etiquette.
If you grab a drink or six with a group of long-time friends or go golfing, odds are that you’re going to act in a certain way. Consider a different situation, though. Assume that you’re out to lunch during a day-long job interview. You want to make a good impression with people you don’t know — your potential future colleagues and bosses. As a result, you should overdress and behave in a more formal manner. Context matters.
The same holds true with Slack channels: Not all of them are created equal. What passes for acceptable behavior in one channel may be entirely inappropriate in another. For example, some good-natured banter or ribbing in the #humor channel isn't likely to ruffle your colleagues’ feathers — especially if you’ve known them for a while. Routinely being a wiseacre and trolling others in #product_ideas, though, isn’t likely to fly.
Here are some other tips to keep in mind:
- Read the room. Err on the side of formality at first, especially if you’re new to the company and/or channel.
- The more members in a channel, the less frequently you should post in it.
- Think before posting in a channel. Think about the channel’s purpose.