Chapter 17. Using Media in XNA Game Studio
Using and playing media can be a great way to personalize games for the player. There are a few games completely built around using the player’s media to drive game play! In this chapter, you learn everything you need to know about dealing with media, including:
• How to play songs
• How to enumerate the users media
• How to play a video
• How to use visualization data
What Is Media?
You might wonder what exactly media is, because you’ve spent the majority of this book working on media. You’ve played sounds, drawn images, what else could it be? When “media” is discussed in the context of XNA Game Studio, it means video, songs, or enumeration of items in your media library, including pictures, album art, songs, and so on.
Although the media APIs exist on every platform, they were originally designed and intended to be used on small devices. The first implementation of these APIs was in Game Studio 3.0 for the Zune device, and the full set of features are now available on Windows Phone 7, while support for these features is more limited on Xbox 360 and Windows.
Playing a Song
Playing a song is just as easy as playing other sound effects, although it does have some special characteristics. Songs are considered music, and on some platforms can be overridden by the user. For example, on Xbox 360, if a user picks a playlist and plays it via the guide in your game, regardless of what music the game plays, the music the user chooses in the guide is what he hears.
To see how easy it is to play a song, create a new game project and add the samplemusic.mp3 file to your content project. Then, declare a new Song variable to your game:
Song song;
In your LoadContent method, load the song:
song = Content.Load<Song>("samplemusic");
You’re now ready to play the song. Notice that the song object doesn’t have a Play method on it like you have seen on the sound effect classes. This is because there can be only one song playing, where you can have multiple sound effects playing simultaneously. To play the music directly after it is created in your LoadContent method, add the following:
MediaPlayer.Stop();
MediaPlayer.Play(song);
Use the MediaPlayer class to control the music. Strictly speaking, the Stop call isn’t required, but just in case something else plays in this sample code, it is inserted directly before the Play method. Before you look at all the information and data you can get from the Song objects, let’s take a quick look at the MediaPlayer class.
MediaPlayer
There are a few properties on the class you can use to see the current state of what is playing and how. The first one GameHasControl returns true if the songs you play in your game are actually played, and false if the system is currently controlling the playback of music (because the player has requested it as in the previous example). You don’t have to do anything in response to this, and don’t even need to check; the system does the right thing, but if you needed to know, you have that data available.
You can also detect whether the system plays audio via the IsMuted property. Setting this property to true mutes audio currently playing, and setting it to false unmutes it. The IsShuffled property has an effect only if you’re playing a song list rather than a single song. When this property is true and it is time to go to the next song in the list, it randomly picks the next song from the full list of available songs in the collection rather than simply going to the next one in the list.
Use the IsRepeating property to detect or set whether or not the player should repeat playing from the beginning after it has finished playing its current set of music. If this is true and you play more than one song, it starts repeating only after every song in the collection has played.
If the IsVisualizationEnabled property returns true, calls to GetVisualizationData return data about the currently playing song. Visualization data can be retrieved during each frame and return a collection of frequencies and a collection of samples. A common usage of this data is to write visualizers, which are common in media players that have fancy graphics seemingly moving with the music. We discuss this more in depth later in this chapter.
You can use the PlayPosition property to see how far into a given piece of music you are. It returns a TimeSpan of the duration you heard of the song so far. To find the total length of a song, use the Duration property of the song itself.
The Queue property is the current set of songs that is played by the player. It returns a MediaQueue object, which has three pertinent pieces of information on it: the currently active song returned from the ActiveSong property; the index of this song returned from the ActiveSongIndex property; and the total number of songs in this list, naturally returned in the Count property.
You can also get the State of the currently playing media, which returns a MediaState enumeration. The only values of this enumeration (and the only states available) are Playing, Paused, and Stopped.
The last property on the MediaPlayer is Volume, which is the volume of the music, relative to the current system volume for music. Volume is defined by decibels, where a value of 0.0f subtracts 96 decibels from the current volume, and a value of 1.0f does not modify the volume.
You’ve already seen the Play and Stop method, which are pretty self-explanatory. There are also Pause and Resume methods. Pause and Stop are remarkably similar, in that each of these methods stop the music. Stop, however, resets the current position of the music to the start, and Pause keeps the current position at the moment Pause happened. Resume restarts the music from the current position.
As mentioned, you can have more than one song in a queue. There are two methods to control which song you’re playing, namely MoveNext and MovePrevious. Depending on the state of the IsShuffled property, these methods move to the next or previous song in your list, where the concept of “next” and “previous” are random.
There are also two events you can hook to be notified of status changes of the media played. You can hook the ActiveSongChanged event to see when the current song has changed. This can be from the MoveNext or MovePrevious methods or by the current song ending, and the system automatically moves to a new song.
You can also use the MediaStateChanged event to be notified when the state has changed. As mentioned, these state changes are pause, play, and stop.
Songs and Metadata
You created the song object at the beginning of this chapter, so let’s take a few moments to look at what that object contains. At a high level, it is a description of a song, along with audio data necessary for the media player to play it. Most of the data is somewhat circular in nature because there are multiple ways to get to the same data.
The most direct properties for your song are the Name and Duration of the song. You can also get the TrackNumber and PlayCount if these properties exist (they are zero, otherwise). If the IsRated property is true, the Rating property includes the current rating of the song. You can also see whether the song is DRM (Digital Rights Management) protected by looking at the IsProtected property.
You can find out more information about the Artist of the song via the property of the same name, including the Name of the artist, a collection of Songs that the artist has created (including the one you got the artist object from), and a list of Albums the artist has created.
Of course, you can get the Album the song is on, and naturally that object has plenty of information, including the same Artist you got from the original song object (as mentioned, the references here can get quite circular). You can also get the collection of Songs that are on the album and the Name and Duration of the album. You can check whether the album has cover art by looking at the HasArt property. If this returns true, you can get the image from the GetAlbumArt method, which returns a Stream that you can use in the Texture2D.FromStream method to create a texture. You can also use the GetThumbnail method to get the art as a thumbnail.
Both the song and the album have a Genre property, which like the album and artist properties also includes a Songs property that is the collection of songs that belong to this genre. It also includes the collection of Albums that belong to the genre, and the Name of the genre itself.
For any given song, you can reference it four different ways: namely the song itself, through the album, through the artist, or through the genre. You can also get any piece of metadata that exists about the song from any of the types.
Note
Use the Song.FromUri to create a Song object from a Web address. This functionality doesn’t work on Xbox 360 and always throws a NotSupportedException.
Media Enumeration
Shipping music with your game is great, but what if you want to use the media library that already exists on the user’s machine? There are quite a few games out there that let the user pick music from his or her own library while playing. Naturally, this functionality is included in XNA Game Studio.
Media Library
The starting point for this functionality is the MediaLibrary class. Create a new Windows Phone Game project and add the following variable:
MediaLibrary media;
Initialize this object inside the Initialize method:
media = new MediaLibrary();
This initializes a new media library with the default source, although you can also use the overload that expects a MediaSource object. Using that overload forces you to create a new MediaSource object stating the sources type (either local or via Windows Media Connect) and the name. You can also get the media source from the just initialized media library. Alternatively, use the MediaSource.GetAvailableMediaSources method to return a collection of all available media sources on your current device.
Much like the multiple ways to get to songs, the media library class is an extension of that. Start with the entire library rather than a small portion of the library (one song). It has the Albums property, which is the collection of albums in the library and contains everything you learned earlier. It also has the Artists property, the Genres property, and the Songs properties, which are the collections of these things. Just like before, you can enumerate through all of your music through any of these properties (or any combination of them). You can also use the PlayLists in your library, which are a collection of Songs that can be played. Each playlist includes a Name and Duration much like the Albums collection, along with the Songs. Genres property does not exist because it is a user-specified collection that includes many different genres.
The media library has a few extra things, including pictures and music. The RootPictureAlbum property returns a PictureAlbum class. Each PictureAlbum includes a list of PictureAlbums (think folders). The Name property is also included as in all the other objects. The Parent property exists, too, which is the picture album that it is a member of (except for the RootPictureAlbum, which has no parent). There is a Pictures collection on each album, too.
The Pictures collection on the media library returns the entire list of pictures, in all albums. Each picture in the collection has a few properties, such as Name, Width, and Height. It also includes Date, which is when the picture was taken or saved, and the Album the picture belongs to. Much like the music, there are multiple ways to get to each picture.
Of course, enumerating the pictures isn’t exciting by itself. Instead let’s find a picture, modify it slightly, and then save it out. You need a device to do this, and you have two choices of how to get the picture to modify.
First, add references to Microsoft.Phone.Tasks.dll and Microsoft.Phone.dll to your project, which is where the camera task comes from (and the camera is one of the ways you get a picture). Use #ifdef to use the camera or a saved picture as the starting point. Assuming you want to use the camera, add the following at the top of your game1.cs code file:
#define USE_CAMERA
#if USE_CAMERA
using Microsoft.Phone.Tasks;
#endif
You need to know when you have a picture to modify, along with ways to modify them, so add a few new variables to your class:
bool havePicture;
SpriteFont font;
Texture2D texture;
RenderTarget2D renderTarget;
To add a new sprite font to your content project, call it Photo. You can keep the default values (or modify them, if you like). Now, start the task to take a picture so you can modify it. In your LoadContent method, add the following code:
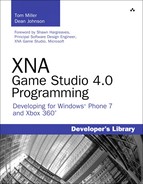
As long as the USE_CAMERA define is set, it shows the camera capture task (enabling you to take a picture), and when that has completed, you save the picture to your photo library, and then load that into the texture. Set the boolean to true to signify you’re ready to modify and save it.
The other way you can get your picture is directly from your photo library. This code assumes you have pictures in the library, but does not crash if you do not. Update the LoadContent method to include the following in between the #else and the #endif:
if (media.Pictures[0] != null)
{
texture = Texture2D.FromStream(GraphicsDevice,
media.Pictures[0].GetImage());
}
havePicture = true;
Assuming you have a picture in your photo library, it now sets to the first one in the list. If you want to use this instead of the camera, simply comment out the top line (the #define). With a picture now set (regardless of which method you choose), you can update the code to modify it slightly and save it out. First, declare a few new variables.
You need to update the LoadContent method again to instantiate the other variables (you can do so after the #endif):
font = Content.Load<SpriteFont>("Photo");
renderTarget = new RenderTarget2D(GraphicsDevice,
GraphicsDevice.Viewport.Width, GraphicsDevice.Viewport.Height);
This loads the font used to write across the image, creates a texture out of the picture if it exists, and creates a render target to render the modified picture to. Now, replace your Draw method with the following:

This code should be familiar to you by now. Switch to your created render target, draw your original picture full screen, and write some text over it. With that out of the way, you can exit the game. Now that you have modified the image, use the following code to save the picture:
private void SavePicture(string name, Texture2D texture)
{
System.IO.
MemoryStream stream = new System.IO.MemoryStream();
texture.SaveAsJpeg(stream, texture.Width, texture.Height);
media.SavePicture(name, stream);
}
Of course, you need to call this method. Right before your call to Exit in Draw, add the following:
SavePicture("ModifiedPicture" + DateTime.Now.ToString(),
renderTarget);
This is easy photo manipulation! There is also a special picture collection on the media library called SavedPictures, which is the collection of saved pictures. This is where the pictures from SavePicture end up.
Video
There are times when you might want to play a video in your game. Perhaps you have a “cut scene” in your game, or the introduction video. This functionality is easy to use and can be done in just a few lines of code.
Rendering a Video
Create a new Windows Game project and add the samplevideo.wmv file from the downloadable examples to the content project. Add a couple variables to your project to hold and control the video:
Video video;
VideoPlayer player;
Of course, you have to instantiate them in your LoadContent method:
video = Content.Load<Video>("SampleVideo");
player = new VideoPlayer();
Before getting into the details of these classes, let’s get your video rendering. Add the following lines directly after creating the player in the LoadContent method:
player.IsLooped = true;
player.Play(video);
Finally, replace the Draw method with the following:
protected override void Draw(GameTime gameTime)
{
GraphicsDevice.Clear(Color.Black);
spriteBatch.Begin();
spriteBatch.Draw(player.GetTexture(), GraphicsDevice.Viewport.Bounds, Color.White);
spriteBatch.End();
base.Draw(gameTime);
}
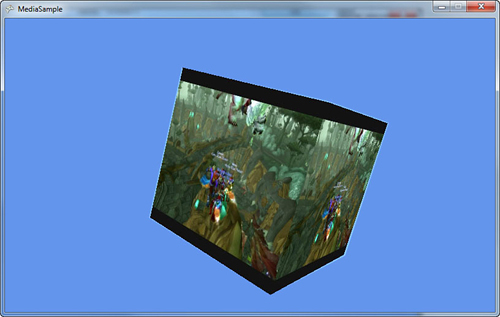
That’s it. Running the project now renders your video to the full window and repeats the video until the project is closed as in Figure 17.1.
Figure 17.1. Rendered video

The Video object is a repository for the data about a video. It includes the Duration of the video and the FramesPerSecond (the number of frames of video in each second, if the name wasn’t obvious). The native Width and Height of the video are stored here, too, along with the VideoSoundtrackType. The sound track type can be Dialog, Music, or MusicAndDialog, and these are used to determine how the system should interact with the audio from the video. If the sound track type is Music, and the system controls the music, the audio from your video does not play. If the setting is Dialog, and the system controls the music (and music is playing), the audio from the video mixes with this music. If the setting is MusicAndDialog, system sounds stop and the video’s audio plays.
The VideoPlayer object is similar to the MediaPlayer object from earlier. It has IsMuted and IsLooped properties (where looped is similar to repeating, except it loops only the current video). It has the Play, Pause, Stop, and Resume methods, along with the State property, which mirrors what you saw earlier. It also has the PlayPosition property you saw previously. The last method, which you used in the Draw method previously, is GetTexture. This method returns the current frame of video as a texture. So long as the video is playing (via the Play method), you don’t need to do anything special to make it continue to update.
Because this is a Texture2D, it can be used in any place a texture is used. You can use it to render in a sprite batch, but you could just as easily use it to render onto a 3D model. Add a new model variable to your content project:
Model model;
To get the content, add the box.fbx model to your content project and then update LoadContent:
model = Content.Load<Model>("Box");
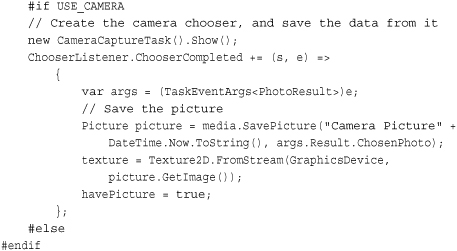
Finally, replace your Draw method with the following and notice your video rendering onto each face of the cube spinning around as in Figure 17.2:
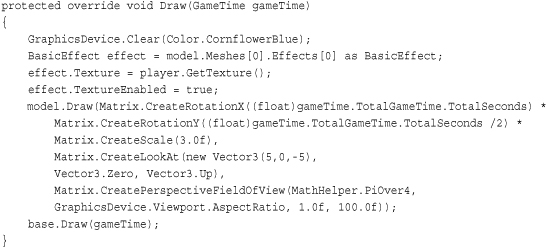
Figure 17.2. Rendered video onto a 3d cube
There shouldn’t be anything surprising in this section of code. All you do is render a model with a slight rotation and scale, and update its texture every frame. Even though the most common use of videos is for cut scenes where they are rendered over the entire viewable area, this snippet shows it is possible to render them onto 3D objects, too.
Note
The Video and VideoPlayer classes are not available on Windows Phone 7. To render video here, you must use the MediaPlayerLauncher task. By using that task though, you cannot get the texture from the video to use in your game as you’ve done here.
Visualizations
As mentioned earlier, while you are playing a song, you can get visualization data. This data is an array of frequencies and samples based on the current audio played. Although a common usage of this data is to render visualizers (and is what this code does), you can also use this data to drive your game. Frequencies are normalized between 0.0f and 1.0f, and each value represents a frequency band between 20Hz and 20KHz and can be perceived as pitch. The samples are from –1.0f to 1.0f and approximate the wave form of the sound. They can be perceived as volume.
Rendering Visualization Data
For this example though, you simply modify a texture every frame and render that to help visualize the audio played. Create a new Windows Game project, and add the samplemusic.mp3 file from the downloadable examples to your content project. Then add the following variables to your game:
Song song;
Texture2D texture;
VisualizationData data;
Color[] colorData;
Obviously, the song is the music that you play, and the texture is what you render to the screen. The visualization data is used to store the frequency and sample data, and the array of colors is used to update the texture with data from the audio. Modify your LoadContent method to instantiate these values:
song = Content.Load<Song>("SampleMusic");
data = new VisualizationData();
MediaPlayer.IsVisualizationEnabled = true;
texture = new Texture2D(GraphicsDevice,
data.Frequencies.Count, data.Samples.Count);
colorData = new Color[texture.Width * texture.Height];
Loading the song should be familiar. Create the VisualizationData object because it creates two arrays for the data to be returned, and this is not something you want to do every frame. The color data is the same way. You also need to create the texture (and do so using the same size of data from the visualization data) and turn on the visualization data.
To update the color data every frame to see how it changes, add the following code to your Update method:

You don’t start playing the music until you press the A button (feel free to modify this to some other input mechanism). This gives you the chance to restart it at any time. Then, check the state of the current media, and if it is playing you get the visualization data. If the state is stopped, or if visualization data is unsupported or unavailable on this platform, the data returned is all zeros. Next, loop through all of the available data, and set each pixel in the color array to a particular color based on the sample and frequency. Finally, update the texture, and now all you need to do is render this on the screen. Replace your Draw method with the following:
The only thing new you might notice is resetting the texture back to null after the sprite batch is finished. This is done because you cannot modify a texture that is set on a device, and using it in the sprite batch sets it to the device. Running your project now shows a colorful pattern on the screen when music is playing (by pressing the A button on your controller, or whatever input mechanism you specified) as seen in Figure 17.3.
Figure 17.3. Rendered visualization data

Summary
Whew. It has been a long time coming, but we’re finally done with all the features of the framework. In this chapter, you learned about the features in the Media namespace of the XNA Framework. You learned how to play music and videos, as well as enumerating through your audio and media library. You also learned how to get visualization data from your audio.
The next chapter puts it all together and takes lessons you learned throughout the rest of the book to make something awesome.