
Chapter 2. Introduction to Swift playgrounds
- Exploring Xcode playgrounds
- Using type safety in Swift
- Understanding simple Swift data types
- Working with collections and tuples in Swift
- Working with optionals
Swift isn’t JavaScript without the semicolons or Objective-C without the square brackets. Swift is inspired by new philosophies and approaches to programming that have driven its design and evolution.
Even the most experienced programmers will encounter new concepts and syntax in Swift. In this chapter and the next, I assume that you have experience in programming and are mainly interested in what’s new, different, and exciting about Swift. I’ll also discuss how concepts in Swift relate to shifts in programming philosophy.
After looking at data types and collection types in Swift, we’ll look at a type that may be new to many: the optional. The optional, tied closely to the idea of type safety in Swift, can be unfamiliar at first, but do stick with it—the optional is essential to understanding programming in Swift.
There’s much to look at in Swift, but don’t worry; as you progress in the book, or for those of you who may already have some experience with Swift, you can always refer to the cheat sheets in appendix B. This chapter is summarized in the first two pages of the cheat sheets.
2.1. Xcode playground
When Apple introduced Swift, they also introduced a special environment in Xcode called the Swift Playground. In a playground, you can experiment and play with Swift concepts and syntax, without the distractions of peripheral concerns such as the architecture of your project, storyboards, or the simulator.
A programmer new to Swift has new syntax and concepts to discover and explore. In addition to the current body of Swift concepts, updates to the language occur reasonably frequently, with more to learn and discover.
An Xcode project can be an unwieldy environment if all you want to do is explore a new Swift concept. As you’ve seen, a project comes by default with all sorts of additional files, and if you want to see the result of a short code block, you first need to build your project and run it on either a simulator or a device. If, for example, all you want to do is explore how dictionaries work in Swift, this process is overkill. Playgrounds solve this problem by simplifying the environment.
Create a playground now by selecting either Get Started With a Playground on the Xcode welcome screen, or by selecting File > New > Playground.
You should see a playground appear with default code (see figure 2.1).
Figure 2.1. Playground

You’ll notice the value of your str variable, "Hello, playground", appears in the area on the right side of the playground. This area shows the result of each line of code, and is called the results sidebar.
2.1.1. Results sidebar
The results sidebar is a feature playgrounds have that Xcode projects don’t—use it to view the result of every line of your code. In the default playground, you can see the result of initializing the “Hello, playground” string in the sidebar. If you aim your mouse pointer at the line containing the result, you’ll see two additional buttons that give you two additional techniques for viewing the result.
Quick Look
If you tap the eye button, the result appears in a bubble pop-up called a Quick Look. This obviously isn’t necessary for the default string, but could in other circumstances give you additional information that isn’t available or doesn’t fit in the limited space in the sidebar (see figure 2.2).
Figure 2.2. Quick Look

Show Result
If you tap the filled, rounded, rectangle button a result view is anchored directly below the line of code. Tap the same button to remove the Show Result view again.
Quick Look and Show Result go beyond text information that you see in the sidebar, giving you useful visual representations of the result. You can display UI views and controls, visualize images and colors, and graph numeric calculations in for loops.
See figure 2.3 for examples of visual result views.
Figure 2.3. Examples of visual result views

Result views of URL variables even give you a preview of the web page at that URL! Add a URL variable to your playground, with your own URL:
var url = NSURL(string: "http://www.craiggrummitt.com")
Note how the string of the URL appears in the results sidebar.
Tap the Quick Look and Show Result buttons and note how your actual website is rendered in the Show Result view.
2.1.2. Automatic compiling
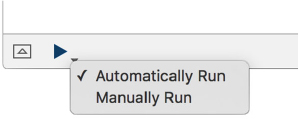
Note how the results automatically appeared in the results sidebar, and you didn’t have to request the playground to run. By default, playgrounds automatically compile and run after every change you make, meaning you don’t need to do anything to see the results of your code immediately. Occasionally, in a large or complex playground, these constant compilations can cause your playground to slow down or even crash Xcode. If you prefer to manually request your playground to run, hold your mouse button down over the Play button, and choose Manually Run. The Play button toggles to an outline, and the playground switches to run only when you press Play (see figure 2.4).
Figure 2.4. Automatically Run and Manually Run
2.1.3. Console
As with Xcode projects, playgrounds have access to a console. If you’d like to go old-school when visualizing the results of your code, you can use the console, for example, to display results of the print function. Use the print function to display the str variable:
print(str)
Tap the arrow in a rectangle at the bottom left of the playground to open (or close) the console. You should see the value of the string in the console (see figure 2.5).
Figure 2.5. Playground console

Occasionally, a runtime error can occur that isn’t anticipated by the compiler and leaves your playground unresponsive or not working as expected. In these cases, it pays to check the console to see if an error was reported there.
Now that you’re more familiar with playgrounds, you’re ready to use them to begin exploring Swift concepts.
Where we explore Swift concepts in this book, you’ll find links to playgrounds to follow along with the text. You can also experiment in your own playground. No need to worry about saving playgrounds, Xcode keeps them saved automatically!
Let’s get started!
2.2. Type safety and type inference
One of the key philosophies of Swift is safety, and one of the key components of safety in Swift is type safety. Type safety ensures that all variables are defined with a specific type. After a variable is defined as a specific data type, it can’t later store values of a different data type. A String variable, for example, can never contain an Int value.
Checkpoint
You might prefer to examine the code listings in this section in the TypeInference.playground. You can download all the code for this chapter by selecting Source Code > Clone and entering the repository location: https://github.com/iOSAppDevelopmentwithSwiftinAction/Chapter2.
But wait—when you create a playground, by default you have a variable str containing a string value, but the data type isn’t mentioned in the definition. How could this be?
If you leave the data type out of the definition, Swift determines the data type of the variable using a process called type inference. If Swift has enough information to infer the correct type, this is as safe as specifically defining the data type. You can confirm the type that has been inferred for your variable by holding down the Alt key and clicking on the variable (see figure 2.6).
Figure 2.6. Press Alt and click on the variable to see an inferred variable’s data type.

Usually you can leave out the data type when you define a variable and let Swift infer the data type for you—in fact, it’s good practice. There are cases, however, where you’ll need to define a variable’s data type.
- Sometimes, you want to declare a variable without passing a value to it yet. Xcode doesn’t have a value to infer the variable’s
data type, so it needs to be specified in the definition:
var feedback:String 1 if soupPaymentSuccessful { feedback = "Soup payment processed" 2 } else { feedback = "No soup for you!" 2 }- 1 Declares variable’s data type
- 2 Passes it a value
- Sometimes, the data type that Xcode infers isn’t the data type you intended. For example, if you define a number without a
decimal component, it will be inferred to be of data type Int. You may prefer it to be defined as a number with a decimal component, known as Double, so that you can easily perform calculations with other decimal numbers.
If you declare the data type, Xcode will better understand your intention:
var quantitySoup:Double = 2                      1
var priceSoup = 2.99                             2
var total = quantitySoup * priceSoup
This example explicitly specifies that you want the data type of quantity to be inferred as a Double. If you don’t do this, quantity is automatically inferred to be an Int, and calculations between an Int and a Double aren’t permitted without converting the data type of one of the variables.
Tip
An alternative to clarifying the data type in the declaration is giving extra hints in the value as to the data type to be inferred. In the code snippet, you could have declared the quantity as 3.0, and it would have been inferred as a Double.
2.2.1. Converting numeric types
Because performing calculations between numbers of different types isn’t permitted, sometimes data type conversion is necessary. To divide an Int from a Double, for example, you first need to convert the Int to a Double, as shown in the following listing.
Listing 2.1. Convert Int to a Double
var restaurantRent = 809.10                                 1
var daysInMonth = 31                                        2
var dailyRent = restaurantRent / daysInMonth                3
var dailyRent = restaurantRent / Double(daysInMonth)        4
- 1 Inferred as Double
- 2 Inferred as Int
- 3 Error. Double can’t be divided by Int.
- 4 Converts Int to Double to divide it
Here’s a question for you: in the following listing, what’s the value of slicesPer-Person?
Listing 2.2. How many pizza slices per person?
var totalPizzaSlices = 8
var numberOfPeople = 3
var slicesPerPerson = totalPizzaSlices / numberOfPeople
Try it out in the playground. You’ll find that slicesPerPerson is equal to 2. All I can say is that I hope I’m third in line for pizza slices, and I get whatever’s left!
Be aware of this common pitfall. The result of an equation will be the same data type as the data types in the equation. If you divide one Int from another Int, your answer is an Int. If you want the answer to be a Double, you need to ensure you first convert your Int variables to Doubles:
var slicesPerPerson = Double(totalPizzaSlices) / Double(numberOfPeople)
Note
Several other number data types are available. For example, you’ll also find an unsigned integer data type called UInt, and a data type called Float that has a decimal component, but with much smaller precision than Double. Unless you have a good reason to do otherwise, it’s best to use an Int and Double for compatibility and to minimize data type conversion.
2.2.2. Concatenating strings
You may be used to using the addition symbol to generate a String from two values.
var name = "Jerry"
var message = "Welcome " + name
As Swift is type safe, concatenating Strings in this way only works if every element being concatenated is a String. A String and a Double, for example, by default don’t concatenate. In the following example, cost is inferred to be a Double, so concatenating it with a String produces an error:
var cost = 3.50
var message = "Your meal costs $" + cost         1
- 1 Error
You have two options to generate a String with mixed types:
- Convert a data type— In any situation where you want two different data types to interact, you can convert one of them to be the same data type
as the other. In the following code, you can add the cost variable by converting it to a String:
var message = "Your meal costs $" + String(cost)
- String interpolation— A much cleaner and easier-to-read approach is a technique called string interpolation. Using string interpolation, you can
integrate variables or expressions into the body of your String, surrounding it with a back-slash and a pair of parentheses:
var message = "Your meal costs $(cost)"
2.3. Collections
Swift has three main data types for storing different types of collections: arrays, sets, and dictionaries. In keeping with Swift’s type-safe philosophy, collections are only permitted to store values of a specific data type. You can either specify the type when you declare the collection, or let Swift infer the type by analyzing all its elements when you instantiate it.
Open
Follow along in the Collections.playground.
2.3.1. Arrays
An Array stores values of the same data type in an ordered list. The following listing shows common Array syntax in Swift.
Note
Constants are declared with the let keyword.
Listing 2.3. Using arrays
var friedChickenRecipe:[String] = []                                  1
friedChickenRecipe = ["Mix spices with flour, sugar and salt.",       2
                     "Dip chicken in egg white and flour.",           2
                     "Deep fry chicken.",                             2
                     "Drain on paper towels."]                        2
friedChickenRecipe.insert("Check chicken temp.", at: 3)               3
friedChickenRecipe.append("Serve!")                                   3
for step in friedChickenRecipe {                                      4
    print(step)                                                       4
}                                                                     4
for (index, step) in friedChickenRecipe.enumerated() {                5
    print("Step (index + 1):(step)")                                5
}                                                                     5
let firstStep = friedChickenRecipe.first                              6
let secondStep = friedChickenRecipe[1]                                6
let firstTwoSteps = friedChickenRecipe[0...1]                         7
let preRecipeSteps = ["Preheat oven to 350°F"]
friedChickenRecipe = preRecipeSteps + friedChickenRecipe              8
- 1 Declaring empty array
- 2 Instantiating array
- 3 Add elements to array
- 4 Iterate over array
- 5 Iterate over array with index
- 6 Extract element from array
- 7 Extract range of elements from array
- 8 Concatenating arrays
2.3.2. Sets
A Set stores values of the same data type in an unordered list. As the items in a Set have no order, Array concepts such as subscripts, indices, and duplicate values are meaningless. After instantiating a Set of values, take note in the results sidebar that the elements are probably not displaying in the order they were defined, further illustrating that Sets don’t maintain a defined order. The following listing shows common Set syntax.
Listing 2.4. Using sets
var herbsNSpices:Set<String>                                          1
herbsNSpices = ["Salt","Thyme","Oregano",                             2
                "Celery Salt","Black Pepper",                         2
                "Dried Mustard","Paprika","Garlic Salt",              2
                "Ground Ginger", "White Pepper","MSG"]                2
herbsNSpices.insert("Basil")                                          3
herbsNSpices.remove("MSG")                                            4
for herbOrSpice in herbsNSpices {                                     5
    print(herbOrSpice)                                                5
}                                                                     5
var otherIngredients:Set = ["Chicken","Egg white","Brown Sugar"]
var allIngredients = herbsNSpices.union(otherIngredients)             6
- 1 Declares a set
- 2 Initializes a set
- 3 Adds element to a set
- 4 Removes element from a set
- 5 Iterates over set
- 6 Combining sets
In addition to union, Sets can be combined in creative ways, with the inter-section, symmetricDifference, and subtracting methods.
2.3.3. Dictionaries
Like sets and arrays, a Dictionary stores a series of values. Where the values in an Array are referenced by an index, the values in a Dictionary are referenced by a key. For example, a series of language names could be referenced by a three-letter language code. Like a Set, a Dictionary is unordered.
Listing 2.5. Using dictionaries
var abbreviations:[String:String] = [:]                      1
abbreviations = ["tsp":"teaspoon",                           2
                 "tbs":"tablespoon",                         2
                 "qt":"quarts"]                              2
let teaspoon = abbreviations["tsp"]                          3
abbreviations.isEmpty                                        4
abbreviations["qt"] = nil                                    5
for (abbreviation,measurement) in abbreviations {            6
    print("(abbreviation) is (measurement)")               6
}                                                            6
let abbreviationCodes = Array(abbreviations.keys)            7
let measurements = Array(abbreviations.values)               7
- 1 Declares empty dictionary
- 2 Initializes dictionary
- 3 Extracts element from dictionary
- 4 Checks if dictionary contains data
- 5 Removes element from dictionary
- 6 Iterates over dictionary
- 7 Extracts keys and values
Concatenating two dictionaries is, strangely, not available in Swift. In the next chapter, you’ll add this functionality to Swift by extending the Dictionary type.
2.4. Control Flow
As you’d expect, Swift has several standard approaches for controlling the flow of a program. Several, such as the if statement, or while, should be familiar enough, as you can see in the following code listing.
Open
Follow along in the ControlFlow.playground.
Listing 2.6. if, else, and while statements
var bottles = 99
while bottles >= 0 {                                           1
   if (bottles == 0) {
        print("No more bottles of beer on the wall.")
    } else if bottles==1 {
        print("1 bottle of beer on the wall.")
    } else {
        print("(bottles) bottles of beer on the wall.")
    }
    bottles -= 1
}
- 1 Tests condition at start of each loop
Note
You can also test a condition at the end of each loop with the repeat-while loop. Note also that parentheses around the condition of an if statement are optional. Braces around an if statement’s block of code, on the other hand, are never optional in Swift.
Other control-flow approaches, such as for-in and switch, may be worth taking a closer look to familiarize yourself with any differences in Swift.
2.4.1. for-in
Swift has two main for-in loop approaches. You’ve already seen that you can use a for-in loop to iterate over the elements of a collection. A second type of for-in loop can loop over a range, using the range operator, as shown in the following listing.
Listing 2.7. for-in loop with range
for index in 1...3 {
    print("(index) banana")
}
You saw the range operator earlier, when you used it to extract a range of elements from an Array. You’ll explore another use of range in a switch statement in a moment.
There are two main types of ranges, as explained in table 2.1.
Table 2.1. Ranges
|
Type |
Example |
Description |
|---|---|---|
| Closed | 1...3 (1,2,3) | A range of values, including the second number |
| Half-open | 1..<3 (1,2) | A range of values, excluding the second number |
The easiest way to remember the difference is that the half-open range ends when it’s less than (<) the second number.
To reverse a range, you need to call its reversed method. For example, (0..<100).reversed()creates a range from 99 down to 0.
You can also omit one side of the range to make a one-sided range that will continue as far as possible on the side with the omitted value. This can be useful for iterating over elements of a collection, for example, until the final element in the collection.
var numbers = [0,1,2,3,4]
for i in numbers[3...] {                  1
  print(i)                                2
}
- 1 Iterates until final element
- 2 Prints 3 and 4
In addition to what’s in Swift, you might be interested to know what’s not in Swift that you may be accustomed to in other languages.
Two missing operators that might surprise you are the increment (++) and decrement (--) operators. Swift is an evolving language, and these operators weren’t forgotten; they were intentionally removed from Swift in Swift 3. You can read the arguments for their removal in the Swift evolution document at https://github.com/apple/swift--evolution/blob/master/proposals/0004-remove-pre-post-inc-decrement.md.
Similarly, you may be accustomed to the C-style for loop in other languages. For simplicity, this type of for loop was deprecated in Swift 3:
for(var i=0;i<10;i++) 1
- 1 RIP C-style for loop
Again, if you’re interested, you can read the evolution proposal for this change at https://github.com/apple/swift-evolution/blob/master/proposals/0007-remove-c-style-for-loops.md.
2.4.2. switch statement
Most likely, you’re also familiar with the switch statement, which is used for comparing one value against multiple values. Note the several points of difference, though, between switch statements in Swift and in many other languages:
- Swift by default does not drop down to the next case. This means that the break statement after every case isn’t necessary in Swift.
- Every case must contain executable statements. If you want two cases to share the same executable statements, you can make a compound case by separating the cases with a comma.
- You can compare a value in a case to a range; this is called interval matching.
- Switches must be exhaustive. If you want a case to signify “the rest” to make the case exhaustive, use the default keyword, as shown in the following listing.
Listing 2.8. switch statement
for bottle in (0..<100).reversed() {
    switch bottle {
    case 0:
        print("No more bottles of beer on the wall.")             1
    case 1:
        print("1 bottle of beer on the wall.")
    case 2...100:                                                 2
        print("(bottle) bottles of beer on the wall.")
    default:
        print("Something went wrong! ")                           3
    }
}
- 1 No break necessary
- 2 Interval matching
- 3 Default makes the switch exhaustive
2.5. Functions
Functions in Swift are defined with the func keyword, followed by a list of parameters in parentheses, and an optional return value indicated by an arrow (hyphen and right angle bracket), as shown in the following listing.
Open
Follow along in the Functions.playground
Listing 2.9. Function syntax
func serve(drink: String, customer: String) -> String {
    return("(customer), your (drink) is served")
}
Now that you have a serve function, you can call it by passing it a drink and a customer:
print( serve(drink: "beer", customer: "Billy") )
Note that by default you need to pass in the names of the parameters when calling the function. It’s possible, however, to modify these names.
2.5.1. Modifying external parameter names
Sometimes, you might want your parameter names when calling the function to be different from the parameter names within the function. Swift makes this possible by distinguishing between local and external parameter names.
In listing 2.9, for example, you could make it extra clear to someone calling the function that they’re serving the drink to the customer by renaming the external parameter name to. In addition to reasons of clarity, this has the added benefit of satisfying the Swift API design guidelines that method and parameter names should preferably use “grammatical English phrases.”
Local and external parameter names are the same by default. To split the parameter name into two, specify the external parameter name followed by the local parameter name, as in the following listing.
Listing 2.10. Modify external parameter name
func serve(drink: String, to customer: String) -> String {
    return("(customer), your (drink) is served")
}
While the customer parameter within the function would continue to be referred to as customer, the call to the function is now much closer to grammatical English:
print( serve(drink: "beer", to: "Billy") )
But wait—you wouldn’t say “Serve drink beer to Billy,” would you? This function call could sound even closer to grammatical English by omitting the drink parameter name.
2.5.2. Omitting external parameter names
If you prefer a function to be called without specifying a parameter name, you can replace the external parameter name with an underscore: _.
An explicit external parameter name for the drink parameter is probably not necessary. Remove it with an underscore before the parameter, as follows.
Listing 2.11. Omit external parameter name
func serve(_ drink: String, to customer: String) -> String {
    return("(customer), your (drink) is served")
}
Your call to your function now sounds much cleaner:
print( serve("beer", to: "Billy") )
If you read it back, it now sounds close enough to grammatical English: “Serve beer to Billy.” Nice!
2.5.3. Default parameter names
Billy is such a regular at your restaurant that you could save time and make him the default. In fact, he always drinks beer, so let’s make that the default too.
Function parameters can define default values, as in the following listing.
Listing 2.12. Default parameter name
func serve(_ drink: String = "Beer",
       to customer:String = "Billy") -> String {
    return("(customer), your (drink) is served")
}
A parameter with a default value can be left out of the function call, and the default value will be assumed:
print( serve() )
We’ll look more closely at types of functions in the next chapter. For now, we’ve had a bit too much to drink with Billy, so we should be ready to discuss metaphysical philosophy! Let’s enter the realm of optionals.
2.6. Optionals
It sounds like a Seinfeld routine, but imagine being well known as the inventor of nothing.
Open
Follow along in the Optionals.playground.
That’s the plight of Sir C. A. R. Hoare (Tony Hoare), who implemented the null reference into a language called ALGOL W in 1965. In 2009, he called it his “billion-dollar mistake”:
My goal was to ensure that all use of references should be absolutely safe, with checking performed automatically by the compiler. But I couldn’t resist the temptation to put in a null reference, because it was so easy to implement. This has led to innumerable errors, vulnerabilities, and system crashes, which have probably caused a billion dollars of pain and damage in the last forty years.
As mentioned earlier, a key component of Swift is type safety. A variable defined as a String, for example, can never contain a value that isn’t a String.
If you have experience in other languages, you’re probably familiar with the absence of value—this concept is known in Swift as nil.
But wait, I said “a variable defined as a String can never contain a value that isn’t a String.” nil isn’t a String. Therefore, a variable defined as a String can never contain nil! Figure 2.7 illustrates what happens if you try to assign nil to a String.
Figure 2.7. Strings can’t be nil.

The question is this: what sort of variable can be equal to nil? Swift introduces the optional type to address this question—and the billion-dollar mistake.
Imagine you have a box with the word “CAT?” written on it (see figure 2.8). You’re 100% certain that this box contains either a cat or no cat. You can’t know which without unwrapping the box.
Figure 2.8. A cat optional

What you’ve imagined is a cat optional!
An optional contains either
- A thing of a certain type (for example, a cat)
- nil (that is, no cat)
So, a String optional, for example, contains either
- A String
- nil
Using an optional to represent a variable that may or may not be equal to nil is how Swift stays type safe while allowing the concept of nil.
When would you declare a variable as an optional? You should declare a variable as an optional if it may be equal to nil at some point in its lifetime. Perhaps the variable is declared before it can be defined; perhaps a function can fail and needs to be able to return nil; or perhaps a property of an object may or may not exist, and this needs to be expressed in code.
2.6.1. Declaring an optional
Declaring an optional is straightforward. You’re unlikely to pass a value to your optional when declaring it, so type inference won’t be possible. Explicitly declare its type, followed by a question mark to indicate it’s an optional. Here’s a String optional:
var main:String?
Initializing an optional later is no different from initializing a non-optional.
main = "Steak"
Let’s say you want to print your main meal in uppercase. Where an optional is different is in how to retrieve its value. You can’t access an optional like any other variable:
print("Your (main.uppercased()) is served!") 1
- 1 Error
As with the cat in the box, you need to unwrap your main optional to access its contents.
2.6.2. Unwrapping an optional
Unwrapping an optional refers to extracting its contents. There are two main techniques available for unwrapping an optional: forced unwrapping assumes the optional can’t contain nil, while optional binding (combined with an if or guard statement) performs a check.
Forced unwrapping
I’m a little reluctant to go into forced unwrapping. It’s a powerful feature, but used incorrectly, we’re right back at the billion-dollar mistake that Tony Hoare bemoaned.
Okay, you’ve twisted my arm—here’s the secret. Add an exclamation mark after the optional, and the optional will be unwrapped with the expectation that it will be the appropriate data type (that is, not nil).
print("Your (main!.uppercased()) is served!")
Use forced unwrapping with caution—you must be 100% certain that the variable can’t equal nil or you’ll cause a runtime error. How can you be certain that your variable isn’t equal to nil? Well, one way is to surround your forced unwrapping of an optional with an if statement verifying first that your optional contains a value:
if main != nil {
    print("Your (main!.uppercased()) is served!")
}
This structure is so common that an alternative syntax has been developed to unwrap your optionals called optional binding.
Optional binding
Use optional binding with an if statement to bind the value in an optional to a variable, if it exists. The previous if statement could be rewritten as
if let mainValue = main {
    print("Your (mainValue.uppercased()) is served!")
}
I’ve used two names to indicate which is which. The if statement checks if the main optional contains a value. If it does, its value is extracted to the mainValue variable and execution continues inside the if block.
Commonly, the same name is used for the bound variable and the optional. The extracted value will override the optional inside the if block:
if let main = main {
    print("Your (main.uppercased()) is served!")
}
Sometimes, you may want to perform optional binding on several optionals. Prior to Swift 1.2, this situation grew in infamy, as the nested if let statements could go on and on, forming a triangular shape. This became known as the optional pyramid of doom (see the following listing).
Listing 2.13. Pyramid of doom
var drink:String? = "Malbec"                                   1
if let main = main {
    if let drink = drink {
        print("Your ( main.uppercased() ) pairs well with
        ( drink.uppercased() )")
    }
}
( drink.uppercased() )")
}
}
- 1 Declares another optional for drink
This scenario was resolved with Swift 1.2. Finally, multiple variables could be optionally bound in the same line, as shown in the following listing.
Listing 2.14. Multiple optional binding
if let main = main, let drink = drink {
        print("Your ( main.uppercased() ) pairs well with
        ( drink.uppercased() )")
}
One drawback of optional binding is that the variable that contains the extracted value is only available inside the if block. If you need to use your optional later in the code, you need to unwrap it again. The guard statement resolves this problem.
guard statement
While an if statement performs a block of code if a condition is met, a guard else statement performs a block of code if a condition is not met.
The serve function in the following listing serves a drink based on the drink argument. It ensures that the drink argument is not Kool-Aid before continuing.
Listing 2.15. The guard statement
func serve(drink: String) -> String {
    guard drink != "Kool-Aid" else {
        return("Don't drink the Kool-Aid!")
    }
    return("Your (drink) is served")
}
There’s another key difference between the guard and if statements. After if or if else blocks, program execution can continue in the current scope. If a program enters a guard else block, when it exits the block it must exit the current scope. For example, it could return out of a function, continue to the next cycle of a loop, break out of a block of code, or throw an error.
You can use this knowledge to combine the guard statement with optional binding to ensure a variable stays valid for the remainder of the current scope. With the guard statement, what gets bound in the scope, stays in the scope, so to speak.
Let’s say your serve function can accept an optional drink parameter that defaults to nil, making this parameter truly optional (see listing 2.16).
You can then extract the drink value through the process of optional binding. If no drink parameter is passed into the function, this is trapped by a guard statement, and a message is returned. If a drink parameter is passed in, the function continues to the original guard statement checking that the drink isn’t Kool-Aid.
Listing 2.16. The guard let statement
func serve(drink: String? = nil) -> String {                      1
    guard let drink = drink else {
        return("No drink for you!")
    }
    guard drink != "Kool-Aid" else {
        return("Don't drink the Kool-Aid!")
    }
    return("Your (drink) is served")
}
- 1 Optional function paramete
If you like, you can merge these two guard statements together, as shown in the following listing.
Listing 2.17. Merge guard statements
func serve(drink: String? = nil) -> String {
    guard let drink = drink, drink != "Kool-Aid" else {
        return("No drink for you!")
    }
    return("Your (drink) is served")
}
Unwrapping with operators
You’re probably familiar with the ternary conditional operator that gives you shortcuts where if or guard statements would be used:
- condition ? if true do this : if false do this
You could use the ternary conditional operator to unwrap an optional, by doing the following:
- optional != nil ? optional! : alternative value
If an optional doesn’t contain nil, the optional is force unwrapped. If the optional does contain nil, an alternative value appropriate to the data type is suggested.
Let’s say that unless there’s been a special request, martini cocktails are generally mixed by stirring. In the following listing, you’ll use the ternary conditional operator to determine how the martini should be prepared. (The ternary conditional operator is in bold.)
Listing 2.18. The ternary conditional operator
var defaultMix = "Stirred"
var specialMix:String?                                                   1
specialMix = "Shaken"                                                    2
let prepareMartini = specialMix != nil ? specialMix! : defaultMix
- 1 Defines string optional
- 2 Sets optional
When setting the prepareMartini constant, we first check if the specialMix optional contains nil. If specialMix doesn’t contain nil, the ternary conditional operator force-unwraps specialMix. If specialMix does contain nil, it uses the defaultMix.
This approach is so common that an alternative operator syntax is available within Swift that makes the above syntax even more succinct, called the nil coalescing operator. That’s quite a mouthful, but don’t worry, the concept is simple. The syntax is the following:
- optional if not nil ?? alternative value
If the optional doesn’t contain nil, it’s automatically unwrapped. If it does, the alternative value is used.
Let’s prepare another martini, but this time using the nil coalescing operator, as shown in the following listing. (The nil coalescing operator is in bold.)
Listing 2.19. The nil coalescing operator
let prepareMartini = specialMix ?? defaultMix
Implicitly unwrapped optionals
Occasionally, you may need to make a variable an optional because you don’t have access to all the necessary information to initialize it when it’s defined. But you may have 100% confidence that the variable will be initialized by the time it’s needed.
In these cases, unwrapping the optional whenever you need to access it can seem unnecessary. Instead, you can indicate to the compiler that an optional should be implicitly unwrapped by using an exclamation mark instead of a question mark when defining it.
Let’s make your first optional example implicitly unwrapped, as shown in the following listing.
Listing 2.20. Implicitly unwrapped optional
var main:String!                                    1
main = "Steak"
print("Your (main.uppercased()) is served!")       2
- 1 Implicitly unwrapped optional
- 2 No error now!
As with forced unwrapping, be extra careful with your use of implicitly unwrapped optionals. Accessing one before it has been initialized will cause a runtime error.
2.6.3. Optional chaining
Any object or data type could have optional properties or methods that return optionals. Arrays, for example, have an optional first property, which will return the first value in the array. If the array is empty, the first property returns nil.
Imagine you have nine tables in your restaurant in a 3-by-3 grid. You have a two-dimensional array (for those who came in late, that’s fancy talk for an array of arrays) of Bools that represent whether each table is reserved for tonight’s dinner:
var reserved = [[true,  true,  false],
                [false, false, false],
                [true,  true,  false]
]
Imagine now that you’d like to display a message if your favorite table (first row, first table) is available. You could extract this info using Array’s first property and multiple optional binding, as you saw earlier:
if let firstRow = reserved.first, let firstTable = firstRow.first {
    let reservedText = firstTable ? "reserved" : "vacant"
    print("Best table in the house is (reservedText)!")
}
But you have a more succinct and legible alternative when traversing multiple optionals in a chain, called optional chaining. You can chain together multiple optionals into one optional binding statement.
if let firstTable = reserved.first?.first {
    let reservedText = firstTable ? "reserved" : "vacant"
    print("Best table in the house is (reservedText)!")
}
Your chain could keep going! You just need to append optionals with a question mark that you traverse en route to the optional you’re binding.
2.6.4. Final comments on optionals
At first, optionals may appear strict, and the syntax may seem new and unfamiliar. They represent a new approach to ensuring the safety of your variables that can take some getting used to. But many who have worked with Swift do find that going back to languages without optionals can feel strangely unsafe.
Optionals are an integral part of the Swift language, and it’s worth investing time in becoming comfortable working with them. They’re trying to solve a billion-dollar problem, after all!
2.7. Tuples
A tuple is a strange beast—it’s a group of related data, but it is not a collection. Sounds a bit like an array or a dictionary on the surface, but a tuple differs from other collections in three important ways:
Open
Follow along in the Tuples.playground.
- The number of items in a tuple is defined when it’s instantiated. While the number of elements in an array can grow or shrink, if a tuple is defined as a group of three items, it will never contain more or fewer items.
- Elements in a tuple are related, but aren’t necessarily of the same data type. A tuple could contain an Int and a String, for example, and that’s fine.
- Though a tuple maintains a group of related data, it isn’t a Collection, and therefore doesn’t have access to the higher-order functions mentioned in the last section.
The types of data you might use tuples for are different as well. Tuples are a good fit for finite related data. Examples of tuples:
- A geolocation with two Doubles representing latitude and longitude
- A dice-roll of two dice, with two Ints representing the top face of each individual die
- A playing card, with an Int representing the number and a String representing the suit
Declare a variable as a tuple with parentheses, with the data type of every element specified. The following listing demonstrates standard syntax for initializing a tuple and setting and retrieving tuple values.
Listing 2.21. Using tuples
var meal1:(String,Double)                                1
var meal2 = ("Turkey chili soup",2.99)                   2
print("(meal2.0) costs (meal2.1)")                     3
var meal3:(name:String,price:Double)                     4
var meal4 = (name:"Bread",price:2)                       5
meal4.price = 3                                          6
- 1 Declares a tuple. Specifies data types of elements.
- 2 Initializes a tuple. Infers data types.
- 3 Set/Get tuple elements with index numbers
- 4 Optionally gives elements of tuple a name
- 5 You can also initialize tuple with names.
- 6 Set/Get tuple elements with names if available
2.7.1. Tuples as return values
Tuples can be useful when you have small pieces of data that you need to return from a function. You could, for example, return a tuple of the number and suit of a card from a function:
func chefSpecial() -> (name: String, price: Double) {
    return (name:"Crab bisque",price:3.99)
}
var meal = chefSpecial()
If you plan to use a tuple frequently, it can be a good idea to set up a type alias. A type alias lets you define an alias for a type. A type alias for the meal tuple we’ve been working with would look like this:
typealias Meal = (name: String, price: Double)
You could then rewrite the chefSpecial method definition as
func chefSpecial() -> Meal {
2.7.2. Tuple magic
If you’re not yet impressed with tuples, here are several magic tricks tuples can perform that could convince you that tuples are worth looking into.
Initializing variables based on a tuple
You can initialize variables inside a tuple, retrieving values from another tuple. The following initializes a soupName and a soupPrice variable based on the elements of a tuple variable called soup:
var soup = (name:"Jambalaya",price:2.99)
var (soupName,soupPrice) = soup
Defining two values at once using a tuple
Similarly, you could define two values at once using a tuple structure:
var (soupName,soupPrice) = ("Tomato soup",1.99)
This effectively becomes shorthand for
var soupName = "Tomato soup"
var soupPrice = 1.99
Swapping two values using tuples
Using this knowledge, you can easily swap two values. Say you have a variable representing a meal in your left hand and another variable representing a meal in your right hand:
var mealLeftHand = "Fish and chips"
var mealRightHand = "Burger and fries"
Believe it or not, swapping the variables is as easy as
(mealLeftHand, mealRightHand) = (mealRightHand, mealLeftHand)
Shazam! The meals have switched. Now go and impress your friends!
2.8. Higher-order functions
Higher-order functions are functions that can receive functions as parameters. This can result in more succinct and highly optimized code, and can be a powerful weapon for your programming arsenal. Because every Array, Set, and Dictionary is a Collection, they have support for a number of shared higher-order functions. Let’s look at one now, the map function.
Open
Follow along in the Higher-OrderFunctions.playground.
2.8.1. map
Say you have an Array of all the prices of the soup in your restaurant:
var prices = [3, 1.99, 2, 1.99, 1.70]
One day, you realize that you’ve been undercharging for soup and need to add 10% to all your prices. One solution could be to set up a for-in loop to generate the second array:
var updatedPrices:[Double]=[]
for price in prices {
    updatedPrices.append(price * 1.1)
}
Not bad, but a little verbose. Let’s look at an alternative solution, using the map higher-order function. The map function is a powerful tool that allows you to perform an action on every element of a collection and return a new collection.
First, create a function that returns one updated price. The following function receives a price argument, calculates the updated price, and returns the value:
func updatePrice(price: Double) -> Double {
    return price * 1.1
}
Now that you’ve created this function, you can pass it into the map higher-order function.
var updatedPrices = prices.map(updatePrice)
The map function uses the updatePrice method to calculate a new price on every element of your prices Array and return a new Array with updated prices.
Great! That works fine, but it isn’t any more succinct. An alternative approach is to pass a closure into the map function.
2.8.2. Closures
A closure is a block of functionality. You can think of a closure as a function without a name. In reality, it’s the other way around—a function is a type of closure with a name! Like functions, closures can accept arguments and return values.
Converting a function to a closure
The syntax for closures is a little different from functions, and it can be difficult to remember initially. There are ways to make the syntax of a closure more succinct (we’ll get into that in a moment), but converting a function to a basic closure isn’t bad if you follow two simple steps.
Let’s explore the two steps now while you convert the updatePrice function to a closure.
- Remove the keyword func and the function name:
(price:Double)->Double { return price * 1.1 } - Move the brace to the beginning and replace where it was with the keyword in:
{ (price:Double)->Double in
    return price * 1.1
}
That’s it! As I mentioned, in certain cases you can make your closure more concise, but you’ve arrived at the base structure of a closure.
Simplifying a closure
The updatePrice closure can now be passed directly into the map function:
var updatedPrices = prices.map(
    { ( price:Double ) -> Double in
            return price * 1.1
    }
)
This still doesn’t look too succinct. Fortunately, there are several improvements you can make:
- As the type of the price parameter and the closure return value can be inferred by the type of the prices Array, these types don’t need to be specified. After shedding the data type, you can also remove the parentheses around the parameter:
var updatedPrices = prices.map( { price in return price * 1.1 } ) - If you leave out argument names in a closure, you’re provided with default argument names. The first argument is $0, the second is $1, and so on. With this knowledge, you can make your code even more concise.
var updatedPrices = prices.map( { return $0 * 1.1 } ) - Believe it or not, you can go further! If the closure contains only one line of code, Swift can infer that you want to return
the result of this line, so you can remove the return keyword.
var updatedPrices = prices.map( { $0 * 1.1 } )
That’s it! Compare that line of code with the for-in loop we began with:
var updatedPrices:[Int] = []
for price in prices {
    updatedPrices.append(price * 1.1)
}
Note the difference in conciseness without sacrificing clarity. The line still clearly returns a version of the updatedPrices array that has been doubled.
The map function is a powerful tool. All the higher-order functions are great examples of Swift’s expressiveness and performance. In addition to the map higher-order function, Collections have access to many more, including filter, reduce, and sorted.
2.8.3. filter
The filter function extracts the elements of a collection that satisfy a condition. It accepts a closure that receives an element to check, and returns a Bool.
Perhaps you might want to filter only meal prices that are greater than $5, to put on the specials board:
var filteredPrices = prices.filter( { $0 >= 5 })
2.8.4. reduce
Use the reduce function to generate a single value by performing an operation on every value of a collection.
Maybe you’re interested to know how much you would make if someone came into your restaurant and ordered everything on the menu:
var totalPrice = prices.reduce(0, {$0 + $1})
2.8.5. sorted
The sorted method accepts a closure that determines which of two elements should come first in the order. The closure receives two elements to compare and returns a Bool.
Say you’re interested in seeing the prices of meals in your restaurant by sorting them from largest to smallest:
var sortedPrices = prices.sorted(by: { $0 > $1 } )
2.9. Summary
In this chapter, you learned the following:
- Xcode playground is a useful environment for experimenting with new Swift concepts and syntax.
- Variables in Swift are type safe, but their type can be inferred.
- Variables of different types need to be converted to the same type to interact.
- Use for-in loops to loop through the elements of a collection.
- Use higher-order functions on your collections for succinct and optimized code.
- Use closures to pass functionality to a function.
- Use tuples to pass multiple values around.
- Use optionals to store variables that may equal nil.
- Unwrap optionals with optional binding (if let or guard let else) or the nil coalescing operator.
- Only unwrap optionals with forced unwrapping or implicit unwrapping if you are 100% sure an optional contains a value.