]>


XMP is short for Extensible Metadata Platform which is a metadata standard that Adobe built to house the information that relates to your picture files.
Information such as author, camera, resolution, color space and keywords are all stored in this format and for the most part the details are saved within the picture file itself, but when this is not possible the data is included in a separated sidecar file.
The presence of this information makes searching, sorting and managing of your pictures much easier as XMP is a key technology used in many features in Bridge and other applications in Adobe’s Creative Suite 2.
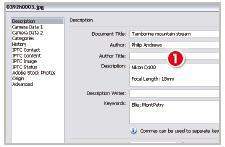
The XMP detail that is linked to your files can be viewed in Photoshop via the File > File Info dialog (1) or by displaying the Metadata panel (2) in Bridge (View > Metadata Panel).
XMP is not the only metadata that can be stored with your files. Details may also be attached in EXIF, GPS and IPTC formats. When this occurs Adobe applications such as Photoshop and Bridge synchronize and describe this metadata in XMP in order to ensure better integration with applications features.
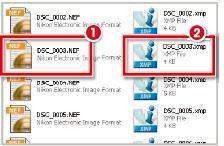
In some situations a portion of the XMP-based metadata that is stored with a picture is not saved in the file itself. Instead the information is stored in an XMP file that is saved with the original photograph (1). This extra file is called an XMP sidecar file (2).
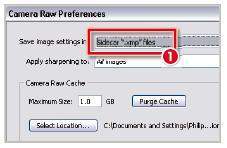
One example of the use of sidecar files is the settings changes made when processing a file in the Camera Raw feature. The user can elect to save these changes settings in the original file or with the file in a sidecar format.
Where the detail is stored can be set in the preferences for the feature, which can be selected via the Preferences entry in the pop-up menu displayed by pressing the side-arrow next to the Settings menu in the Camera Raw dialog.
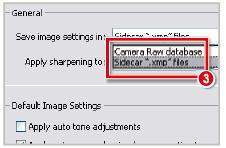
The Edit > Camera Raw Preferences dialog in Bridge 2.0 provides a clearer choice for setting up sidecar files. The ‘Save image settings in’ menu provides the options of using the Camera Raw database or Sidecar files for storing the development settings (3).
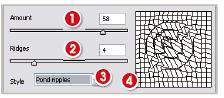

The ZigZag filter, as one of the group of Distort filters, simulates up and down waves such as pond ripples.
The dialog contains controls that adjust the style and intensity of the effect. The Amount slider (1) alters the strength of the ripple effect, which basically translates to the depth and height of the resultant waves. Low values create shallower, more subtle effects; higher numbers produce more dramatic results.
The Ridges slider (2) increases or decreases the number of ridges used in the effect.
Three different types of ZigZag filtration are available from the drop-down Style menu (3) - Pond ripples, Out from the center and Around the center.
Also included is a simulated preview window, where the filter is applied to a wire frame representation of your picture (4).
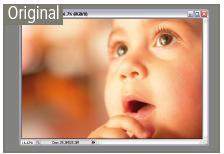

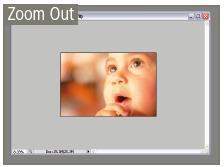
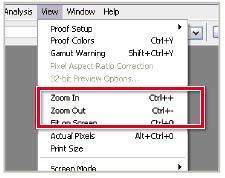
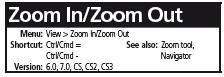
The View > Zoom In/Zoom out menu options magnify and reduce the size of the onscreen image in a way that is similar to the Zoom tool.
Each selection of the menu item (or keystroke combination) changes the magnification of the image by set increments between a minimum of 1 pixel (usually less than 1%) and a maximum of 3200%.


New for Photoshop CS3 is the ability to zoom in to a magnification of 3200%. At this level the pixels that make up even a high resolution image like the example are clearly visible.
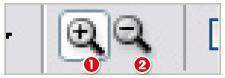

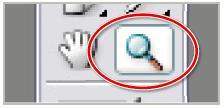

The Zoom tool is used to adjust the magnification of your picture on screen.
After selecting the tool from the toolbar, choose a mode, Zoom In (1) or Zoom Out (2), from the settings in the options bar. Next click onto the picture part that you want to magnify, or make smaller. The onscreen image will increase, or decrease, in size and the magnification value will be displayed in the title bar of the document window (3).
Sections of a picture can be zoomed to fit the width of the program’s workspace by click-dragging a zoom marquee around the area to be enlarged. Automatically the selected area is enlarged to fit the workspace.
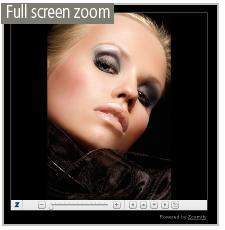
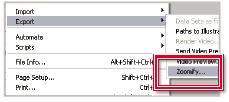
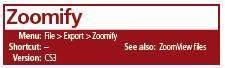
In CS3 the Export > ZoomView option has been replaced with the Export > Zoomify feature. The feature works in a similar way to its predecessor in that it allows photographers to display high quality versions of their high resolution images on the internet.
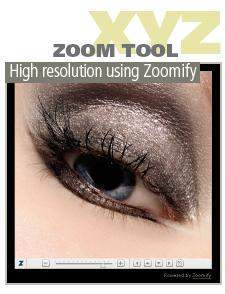
Unlike ZoomV iew, though, Zoomify doesn’t require an additional viewer to be installed to view the resultant web pages. The image tiles that are combined to make it possible to zoom and pan across the high resolution image are created in industry standard JPEG format and the containing page and navigation controls are built with HTML and Flash.
The functionality and look of the viewer can be customized by editing the Flash source code file (FLA file).
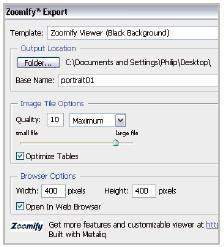
After opening the picture that you want to convert to a high resolution web format, select File > Export > Zoomify. Adjust the settings in the Zoomify Export such as the Output location, Image Tile Options, and Browser Options.
To complete the process click the OK button at the top of the dialog. This will start the process of creating the tiled image files, web page and navigational components of the zoomify site.
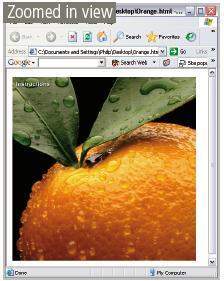
The Export to ZoomView feature allows image makers to save their pictures in an innovative high resolution web deliverable format that allows both panning and zooming from within the browser window.
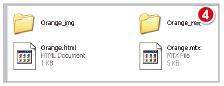
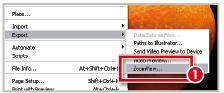
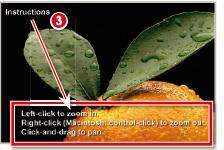
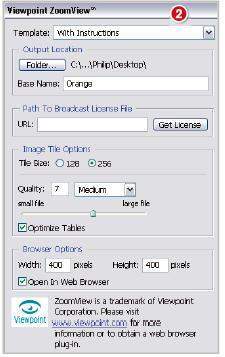
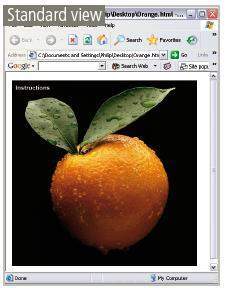
To convert your pictures to the viewpoint format open the file in Photoshop and then select File > Export > ZoomView (1). The Viewpoint ZoomView Save dialog is then displayed (2). Choose to include instructions with the web page (3), select the location where the ZoomView files will be saved, input the base filename, allocate a tile size and level of quality, and the dimensions that the picture window will be when displayed in a browser, and click OK.
The feature creates two folders and two associated files including the main page or HTML file (4).
The Export to ZoomView option has been replaced with the Export to Zomify command in Photoshop CS3.
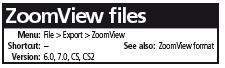
The ZoomView file format is designed for delivering high resolution images over the internet.
Photoshop users can convert their pictures into this format by selecting the File > Export > ZoomView feature.
Pictures in this format can only be displayed when the free Viewpoint media player (" http://www.viewpoint.com"www.viewpoint.com ) is installed. Once installed the user can then zoom and pan high resolution photographs that have been saved in the ZoomView format.