
So far in this chapter we have discussed various topics on D3 transition. At this point you might be asking the question, What is powering D3 transition that is generating the animated frames?
In this recipe, we will explore a low-level D3 timer function that you can leverage to create your own custom animation from scratch.
Open your local copy of the following file in your web browser:
https://github.com/NickQiZhu/d3-cookbook/blob/master/src/chapter6/timer.html
In this recipe, we will create a custom animation that does not rely on D3 transition or interpolation at all; essentially a custom animation created from scratch. Let's look at the following code:
<script type="text/javascript">
    var body = d3.select("body");

    var countdown = body.append("div").append("input");

    countdown.attr("type", "button")
        .attr("class", "countdown")
        .attr("value", "0");

    function countup(target){ // <-A
        d3.timer(function(){ // <-B
            var value = countdown.attr("value");
            if(value == target) return true;  // <-C
            countdown.attr("value", ++value); // <-D
        });
    }

    function reset(){
        countdown.attr("value", 0);
    }
</script>

<div class="control-group">
    <button onclick="countup(100)">
        Start
    </button>
    <button onclick="reset()">
        Clear
    </button>
</div>
The preceding code generates a box where a timer is set to 0, and by clicking on Start the timer increases until it reaches 100 and stops, as shown in the following:
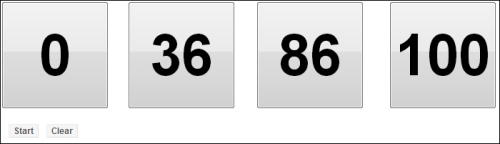
Custom timer-based animation
In this example, we have constructed a custom animation that moves integer from 0 to 100. For such a simple animation, of course we could have accomplished it using D3 transition and tweening. However, a simple example like this avoids any distraction from the technique itself. Additionally, even in this simple example, the timer-based solution is arguably simpler and more flexible than a typical transition-based solution. The power house of this animation lies in the countup function (see line A):
function countup(target){ // <-A
        d3.timer(function(){ // <-B
            var value = countdown.attr("value");
            if(value == target) return true;  // <-C
            countdown.attr("value", ++value); // <-D
        });
    }
As we have shown in this example, the key to understanding this recipe lies in the d3.timer function.
This d3.timer(function, [delay], [mark]) starts a custom timer function and invokes the given function repeatedly, until the function returns true. There is no way to stop the timer once it is started, so the programmer must make sure the function eventually returns true. Optionally, you can also specify a delay
as well as a
mark. The delay starts from the mark and when the mark is not specified, Date.now will be used as the mark. The following illustration shows the temporal relationship we discussed here:

In our implementation, the custom timer function increases button caption by one, every time it is called (see line D) and returns true when the value reaches 100, and therefore the the timer is terminated (see line C).
Internally, D3 transition uses the same timer function to generate its animation. At this point, you might be asking what is the difference between using d3.timer and using animation frame directly. The answer is that the d3.timer actually uses animation frame if the browser supports it, otherwise, it is smart enough to fall back to use the setTimeout function, thus freeing you from worrying about browser's support.
- For more information on
d3.timer, please visit its API at the following link:https://github.com/mbostock/d3/wiki/Transitions#wiki-d3_timer